RSS Feed

Tag Archives: recipe

Velvet Banana Bread – my blue ribbon winner!


It all started in 2009 when I entered the foods competitions at the Kansas State Fair for the first time, and met a wonderful & talented woman named Colleen Woker.  We met while watching the pie judging and I asked her if she’d won any ribbons in the other competitions. She listed off approximately 241 things she’d placed in, including getting “Best in Show” for her banana bread, which as far as I understand means that her banana bread was so good, that the judges deemed it better than anything else submitted for judging in the foods competitions. I mean, it beat cakes!  CAKES! I was so impressed by her and in that moment, knew that some day I had to get myself a blue ribbon in the banana bread competition.  Little did I know it would become nearly an obsession.

In my quest to win a blue ribbon, I’ve made over fifty different banana bread recipes, and no matter how hard I tried to find the best, most perfect banana bread, the highest I ever placed was 3rd.  I really thought I was doomed to never get my blue ribbon, or even a red one.  This year I had no idea what recipe I was going to make until the day before the competition.  In fact, I had even forgotten to buy bananas in advance to let them get super duper ripe, and all I had was bananas that were still green at the stems.  Not acceptable!

I posted a last minute plea on Facebook for rotten bananas and was given some by two wonderful women (thank you Lacey & Lisa!), enough to make a practice loaf or two if I could find the time.  I decided to take my best good friend, Jackie‘s, advice and replace the pumpkin in my most favoritest pumpkin bread recipe with bananas, which she has been doing for a year.  That recipe has 1/2 cup of water in it, which I’d never ever seen in all the banana bread recipes I’ve read in my search for the perfect one, and I was so scared to try it.  I asked her probably five times, “Do you really put the water in it when you make it? REALLY?” She assured me she did, and that it wasn’t wet or gummy, but really similar in texture to the pumpkin bread.  That sold me, because that soft texture is the ultimate for me in a quick bread.

Despite my deep fears of including the water, and the temptation to replace it with something more exciting like milk or pineapple juice, I gave her idea a go, adding a touch of cardamom, and was absolutely floored by the result.  I had never in my life had such tender, soft banana bread.  And so delicious, sweet & perfectly banana-y with a the perfect balance of spices to set it off.  Unfortunately, it was one of the uglier loaves I’d ever made, and since 25% of the judging score was based on appearance, I lost all hope right there.  Because I knew it was too good not to submit, but also knew it was too ugly to win a blue ribbon. I just hoped it was good enough to win a red.

So many things went wrong in making the official loaf and my spirits sunk deeper and deeper with each obstacle. I kept questioning why I was even bothering.  This wasn’t the regular little banana bread competition, this one was sponsored by King Arthur Flour and the first place prize was a $150 gift card to their catalog, which is much bigger than the usual $9 prize.  This was a big deal, and more people would be entering than usual.  I didn’t have a chance! I was exhausted, would have loved to sleep in the next morning, didn’t want to waste the gas or the effort when I knew it was hopeless, but I’d been in the paper about the being the Banana Bread Queen Wannabe, and everyone on Facebook knew about it.  I had to go.

When I arrived to submit my bread, I noticed that everyone around me had loaves that were the same dark shiny brown, which I found unattractive.  That made me feel a little better, until I looked to see if any of my other three baked goods I’d already turned in had placed, and they hadn’t.  I knew it was going to be my very first no-ribbon year, and I went home defeated, knowing my quest might never end.

But when we returned to the fair as a family two days later, there it was. My ugly brown banana bread sitting front and center.  Next to a blue ribbon.

I squealed. I hopped around.  I squealed and hopped some more.  I think there was a lot of, “I can’t believe it!!”  I gushed my entire banana bread story to the poor couple standing nearby when my freak out started.  They were so happy for me, but everyone else looked pretty perturbed & disturbed by my antics.  I stopped myself several times from running up to random people to tell them I won.  Joshua was grinning and giggling, clearly trying to figure out what had Mom so excited.  I took his hands and we did a little celebration dance together.  When Dennis approached us (he’d been in the bathroom), I wanted to let him discover it on his own but I just couldn’t contain myself and as soon as I saw him I beamed and jumped up and down and waved him over, pointing wildly at the display case where my winning bread resided. He knew instantly of course what that meant, and he hopped up and down with me a little in celebration.  Joshua was so happy to see all the happiness and I was so happy, and Dennis was so happy, I thought all our heads might explode.

It took six years and countless loaves of banana bread, but I did it. The blue ribbon is MINE! Thanks be to God, to Jackie, Lisa, Lacey, and to Colleen for not entering the banana bread competition this year and giving me a chance.  And to everyone who has rooted for me all these years, thank you!!  My quest is complete and I couldn’t be happier to have found my very favorite recipe for banana bread and gotten the blue for it so that I never have to try another recipe again.  I’m so DONE with new banana bread recipes.  This one is definitely my new favorite, and I truly may never make another recipe again.

Velvet Banana Bread

Printable recipe
Printable recipe with picture

1 cup (8 oz) mashed overripe banana
1 1/2 cups (10 1/2 oz) granulated sugar
1/2 cup (4 1/8 oz) vegetable oil
1/2 cup (4 oz) water
2 large eggs
1 3/4 cups (7 1/2 oz) King Arthur Unbleached All-Purpose Flour
1 teaspoon baking soda
1 teaspoon cinnamon
1/2 teaspoon salt
1/2 teaspoon baking powder
1/4 teaspoon nutmeg
1/4 teaspoon ground cloves
1/4 teaspoon cardamom

Preheat oven to 350F. In a large mixing bowl, combine banana, sugar, vegetable oil, water, and eggs. Whisk until well mixed. Measure the flour, baking soda, cinnamon, salt, baking powder, nutmeg, and cloves into a separate bowl and stir until combined. Slowly add the dry ingredients to the banana mixture, beating until smooth. Mixture will be very very thin and it’s OK to mix until no flour streaks remain, but if you see little lumps of flour that won’t mix out, don’t sweat it, they will dissolve while baking and overmixing will make this tender loaf tough and dry.

Spray the bottom of a 9×5 loaf pan and pour batter in (if your pan sticks, go ahead and grease the whole thing). Bake for 60-70 minutes or until a toothpick inserted in center comes out clean. Immediately remove from pan, and cool at least 15 minutes before slicing. Remove from pan immediately and allow to cool at least 15 minutes on a wire rack before slicing. Cool completely before wrapping leftovers in plastic wrap.

Veronica’s notes: If you aren’t measuring your ingredients on a scale, please use a very light hand when measuring the flour, spooning it gently into the cup and not packing it at all before leveling it.

Also, I only left the sides of my pan ungreased because the state fair judges have disqualified me in the past for greasing the whole pan. According to them, this is a baking sin and the sides of your bread will be much more tender if you grease only the bottom. This works fine with my new nifty galifty USA Loaf Pan because it’s crazy nonstick, but if you have any other not fabulously non-stick pan, you’d better go ahead and grease the sides. I honestly can’t tell a difference in the finished loaf whether the sides have been greased or not, the judges need to chill.

Speaking of loaf pans, be sure to use a large 9×5 as this is too much batter for an 8×4 loaf pan.  If you only have a small loaf pan, make some muffins with the extra batter, but don’t fill your pan more than 3/4 full.

Lastly, if you overbake your loaf a bit (I did on the one photographed, by a couple minutes because I was busy when the timer went off), don’t forget my water trick. It works on quick breads as well as cakes! Spray the sides and bottom well with water, don’t be shy with it, and it will all absorb while cooling and soften those hardened edges right up.

Triple Coconut Doughnuts (or Muffins)

Posted on

I’m not much of a doughnut girl, but when I get a hankering for one, it’s usually on a Saturday. I had one such a hankering this last Saturday, and decided to see if I could throw some together with the ingredients I had on hand. I found some coconut in the pantry and threw these together real quick, amplifying the coconut flavor with coconut milk and coconut oil, topping with a coconut glaze and a sprinkle of toasted coconut. And…perfection! Dense and moist, the perfect doughnut or muffin texture, and they keep well to enjoy leftovers the next day.

Triple Coconut Doughnuts or Muffins

Printable recipe
Printable recipe with picture

¼ cup virgin coconut oil, room temperature
1 cup granulated sugar
1 large egg
½ teaspoon vanilla extract
½ teaspoon almond extract
2 cups all-purpose flour
1 tablespoon baking powder
¼ teaspoon salt
1 cup coconut milk, or whole milk
¾ cup sweetened, shredded coconut

Glaze
2 tablespoons virgin coconut oil, melted
1 cup powdered sugar
Coconut milk or heavy cream, for thinning

½ cup sweetened, shredded coconut

Preheat oven to 350F. Grease doughnut pan(s) and/or line muffin pans with paper or foil liners; set aside.

In a large bowl, cream coconut oil and sugar for two minutes. Add egg and extracts and beat another minute. Sift together the flour, baking powder, and salt into a separate bowl. Add it alternately to the creamed mixture with the milk, starting and ending with the flour. Fold in the coconut.

Spoon into doughnut or muffin pans, filling ¾ full. Bake doughnuts 10 minutes, muffins 20 minutes, or until a toothpick inserted in center comes out clean.

While they are baking, toast the coconut and make the glaze. Place the 1/2 cup coconut in a skillet and toast over medium heat, stirring frequently until golden. Remove from heat and prepare the glaze by mixing the oil and powdered sugar together as well as possible with a fork in a small bowl. Add coconut milk or cream a little at a time until glaze consistency.

Once doughnuts and/or muffins are done, turn out onto wire rack and spoon glaze over the top. If they are cool enough to handle, you can also turn them upside down to dip into the glaze while they are warm. After glazing each, sprinkle with coconut while the glaze is still wet. Enjoy warm or allow to cool. For storing leftovers, allow to cool completely before storing in a Ziploc bag with the air pressed out.

Veronica’s notes: while the doughnuts came out of the pan with ease, perhaps due to the shorter bake time (sugar hadn’t had time to caramelize onto the pan), this batter tends to stick to even the most nonstick muffin pans and I highly recommend using liners if baking in a muffin pan. Also, the almond extract in this tends to flavor it as much as, or a little more than, the coconut. It is a nice compliment, but if you’d like the coconut flavor to come through more, especially if using cow’s milk instead of coconut, use 1/4 teaspoon or replace with more vanilla. Last, please do NOT substitute coconut milk beverage (found in the refrigerated non-dairy section) for coconut milk. Use the full-fat canned stuff.

Zucchini-Beef Enchiladas

Posted on

Enchiladas are one of my favorite foods, but they are a bit filling and heavy for summer fare.  I had a few zucchini to use up, and decided to try adding one to enchiladas.  Worked great, added some low-calorie nutrition & a little extra texture without detracting from the yummy flavor.  These were a hit, and we all liked them so much, I know I will never make my Mom’s Beef and Cheese Enchiladas without zucchini added in again.  And pssst: you can totally “bake” these in the microwave – doesn’t take long, just until the cheese is melted.

Zucchini-Beef Enchiladas

Printable recipe
Printable recipe with picture

1 tablespoon olive oil
1 medium zucchini, quartered & chopped
1 lb lean ground beef
2 1/2 tablespoons homemade taco seasoning (or 1 packet store-bought)
2 tablespoons water
15 corn tortillas
1 (8 oz) package cheddar cheese, finely shredded
1 (19 oz) can red enchilada sauce

Preheat oven to 350F. Spray a 9×13 dish with cooking spray and set aside.

Heat skillet over medium-high heat and add olive oil, swirling to coat bottom of pan.  Add the zucchini and cook about ten minutes, stirring often, or until soft.  Remove to a plate, then add the ground beef and cook until browned.  Drain and add taco seasoning, water, and the cooked zucchini.  Stir well and cook a few minutes longer. Remove from heat.

Wrap four tortillas in a damp paper towel and microwave for 30 seconds. Set aside a cup of the cheese to use for the top. Take tortillas one at a time, keeping the others wrapped, and put a little cheese in a line down the middle, then some of the beef mixture, about 2-3 tablespoons. Roll up tight and place in prepared dish. Repeat, warming additional tortillas as necessary, until all the filling is used. Pour enchilada sauce over the top, then sprinkle the remaining cheese over. Cover with foil and bake about 30 minutes, or until cheese is melted.

Veronica’s note: I know it’s so much easier to buy pre-shredded cheese, but you just will never get the same glorious melt that you get with cheese you’ve shredded yourself. It’s worth the few minutes and extra clean up. Also, if you’d like to “bake” these in the microwave, it’s best to divide the recipe between two smaller microwave-safe dishes. Keep an eye on it and just let it go until the cheese is melted – should take five minutes or less. I prefer to do a few at a time on a plate.

Low Country Boil {Northern Stovetop Version}

Posted on

I got this recipe from my friend, Suzie, who ironically lives up North, so I don’t know how authentic this is to the “low country” but it’s really good!  I actually ate this whole recipe by myself over the course of several days while pregnant because Den hates shrimp. Usually I avoid shrimp dishes because I don’t like to prepare myself a separate dish, but this is so worth the minimal effort.  So flavorful! The second best part is, this is an indoor version you can make on your stovetop any time of year.

Low Country Boil

Printable recipe
Printable recipe with picture

4 cups red potatoes, quartered
4 ears corn on the cob, cut in half
1 (14-16 oz) package polish sausage or kielbasa, cut into bite-size pieces
2 lbs. of uncooked large shrimp

For the stock:

12 cups water
1 package Zatarain’s crab boil
1/4 cup Old Bay Seasoning
1 lemon, quartered
1 large onion, quartered
9 whole cloves of garlic (or to taste)
3 tablespoons kosher salt (or 1 1/2 tablespoons table salt)

Add all stock ingredients to a large stock pot or Dutch oven and bring to a boil. Once boiling, add potatoes and corn and boil for 15 minutes. Add kielbasa or polish sausage and cook for 5 more minutes. Turn down heat to medium and add the uncooked shrimp. Cook for 3-5 minutes, until shrimp turns orange, and drain into a serving dish. Serve with butter and old bay seasoning mixed together and/or cocktail sauce. Enjoy and have plenty of napkins ready!

Veronica’s note: you can use frozen “mini” corn on the cob, and add along with the shrimp at the end.

Strawberry Cream Cheese Pie

Posted on

I was challenged by a former co-worker years ago (five years ago, to be exact), to reproduce the Strawberry Cream Cheese Pie you could get at Long John Silvers.  He was slightly obsessed.

Although I didn’t duplicate it exactly, the crust is almost spot-on (it’s an unbaked graham cracker crust, unusual but so good), and it’s fairly close.  It has taken me this long to share the recipe because I couldn’t share the first one with you – I used wild strawberry essence in it, and not many people would have that on hand to use in a humble pie, such as this.  But I remembered how good it was and wanted to see if I could recreate my recreation of Mrs. Smith’s pie by concentrating the strawberry flavor in another way.  Then I made jam a few weeks ago, inspiration hit.  Jam, to me, is the essence of the fruit used to create it.

So I tried it, replacing the gelatin and fresh strawberries in my original recipe with the homemade jam, and it was perfect. It’s not as light as the original*, but so good in it’s own right. So thick and creamy, so cream cheese-y, so strawberry-y. And so perfect for summer because, unlike most of my recipes this summer, no part of it requires an oven. You’re welcome.

Strawberry Cream Cheese Pie

Printable recipe
Printable recipe with picture

Crust
1 ½ envelopes graham crackers (13 1/2 sheets)
6 tablespoons butter, melted
2 tablespoons sweetened condensed milk
2 tablespoons brown sugar
1 tablespoon water

Filling
1 (8 oz) package cream cheese
1 heaping cup (13 oz jar) good quality strawberry jam
1 (14 oz) can (minus 2 tablespoons for the crust) sweetened condensed milk
2 cups whipped topping or homemade (sweetened) whipped cream

Garnish
Leftover whipped topping or 1-1 1/2 cups homemade sweetened whipped cream
Leftover crust crumbs

While still in the package, smash up the graham crackers a little bit, then empty into the bowl of a food processor fitted with the blade attachment. Pulse & process until fine crumbs. Add the butter, sweetened condensed milk, brown sugar & water and process until thoroughly combined. Set aside 1/2 cup of the crumbs and press the remaining crumbs into a 9” pie plate. Place in fridge.

Wipe out the food processor. Add the cream cheese, jam, and sweetened condensed milk, and process until smooth. Add the whipped topping or whipped cream and pulse until mixed. Pour into prepared pie plate, cover with plastic wrap, and refrigerate overnight. Pipe whipped cream around the edge in stars or rosettes using Wilton tip 2110 (1M). Garnish with whipped cream & the remaining crumbs before serving.

Veronica’s notes: If you’d like a lighter pie, you could use 3 cups of whipped cream, or the entire carton of whipped topping, and use another cup or two for garnish. You will have too much pie filling, but I doubt you’ll complain about eating the extra. ;) Also, it’s important to use the best jam possible, as this is what gives the pie its strawberry flavor. If you buy cheap Walmart jam, it will taste like you bought a Great Value frozen pie, not made it yourself. I’ve actually tried this using Walmart strawberry jam, so I unfortunately speak from experience (it was bad).  Homemade is ideal, and Bonne Maman is the only brand I can put my own stamp of approval on if you go with store-bought.

Simple Strawberry Jam {No Pectin}

Posted on

Strawberries were $1.25/lb a couple weeks ago, so I got more than I usually would to make some jam.  Ever since I made raspberry jam and realized how good homemade is, I don’t tolerate store bought very well.  Bonne Maman is the only thing I’ve found that even comes close, and why pay $4 for a jar of delicious jam when you can make your own for less than $1 a jar?

So I made a simple jam, and it’s just amazing how boiling few ingredients can make something so delicious.  It is the concentrated flavor of perfect, sweetened & ripe strawberries, and pretty much makes everything you put it on taste like heaven.

The second best part is it’s so easy to make! The butter in it keeps it from foaming, so you don’t need to skim it, and you don’t have to boil the jars after filling them.  Perfect for a lazy (or first time) canner like me.

Simple Strawberry Jam

Printable recipe
Printable recipe with picture

2 lbs strawberries, stemmed & hulled
2 cups sugar
1/4 cup lemon juice
1 tablespoon butter

Combine all ingredients in a large saucepan and heat over medium-high heat while mashing with a potato masher. Mash it as smooth or chunky as you like, and continue to stir the mixture while boiling it. Boil until the jam reaches 220 degrees, or until it gels up when you put a spoonful on a frozen plate and stick it in the freezer for a minute. You’ll know it’s getting there when it turns from watery to starting to get thick and coating your spoon. Using a funnel (this is my favorite for canning), pour into sterilized jars, then screw on the lids and allow to sit until sealed. Jars may be stored in refrigerator for up to a month. For instructions on how to can the jam to keep it at room temperature for up to a year, click the recipe link below.

Recipe source: adapted from Sweet & Savory by Shinee

Oh, and if you’re interested, the bread I used for my photos is non-alcoholic honey beer bread. Made the Buttery Soft Beer Bread with a bottle of non-alcoholic beer (Beck’s) and used local raw honey in place of sugar. So good!

Cake Batter Lovins

Posted on

Remember the “Cake Batter Everything” craze that swept over the food blog world in 2011? Yeah, I hopped on that and enjoyed it to the fullest.  I shared only one of my cake batter explorations with you, the Cake Batter Crispy Treats, which were my favorite cake batter flavored treat, but do you think I let the remainder of my bag of yellow cake mix go to waste? No way, Jose.

Here’s a few ideas if you need some ways to use up extra cake mix.

Cake Batter Oats. This is actually a pretty healthy recipe, considering there’s cake mix in it. And tasty too!

Cake Batter French Toast. What can I say, cake batter is such a great way to start the day. And sprinkles just make everything so happy.  This one would be fun for a birthday breakfast! I made a simple icing glaze by mixing like 1/4 cup powdered sugar with just enough milk to get it a drizzling consistency.

Cake Batter Candies. For these, I just melted some vanilla almond bark and added enough yellow cake mix to make it taste like cake batter, but not so much it got too thick.  I poured most of it in a chocolate bar mold (like the one I used for this Vegan White Chocolate), but I didn’t get a picture of that before I gave it to a friend as part of a thank you gift for turning a stain on my jeans into a work of art. The rest of it I poured into peanut butter cup molds and put sprinkles over the tops while it was still setting up.  Kids went crazy for these at a get together, even more so than my Cupcake Bites!

Have you made any cake batter flavored yums?

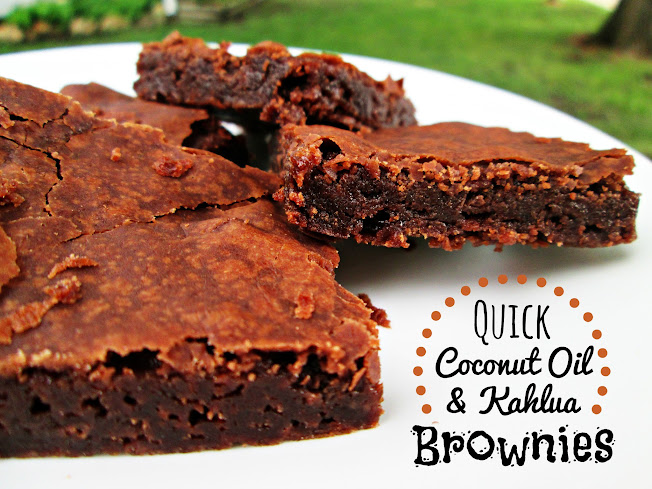
Quick Coconut Oil & Kahlua Brownies

Posted on

In looking over all the food photos I have in my “future blog” folder, I’m noticing a trend. Everything is baked in the oven! In the past, I’ve tried to save most of my baked recipes to share in cooler weather, but I just bake so much in summer, that’s really all I’ve got for you. Even the main dishes I’ve been making have come from the oven.  Am I the only one? Maybe I’ve got some Australian readers eager for baked treats & casseroles? haha!

So these are a box mix recipe which I know, is probably a food crime combining wonderful virgin coconut oil in conjunction with a box mix, but it’s really good! If you’re wanting a good from-scratch coconut oil brownie you might be able to just sub coconut oil in my favorite Fudge Brownies recipe.  But if you’re in a hurry, this one will do you.

My usual trick to make box mix brownies taste homemade is to sub melted butter for the oil, but I was out, so I used coconut oil. The slight coconut oil flavor mixed with the Kahlua (I used my homemade stuff) is pretty out of this world. Using the coconut oil changes the finish on the top and although it’s got that flaky crispy layer, it’s dull, not shiny. I also noticed they were harder to remove from the pan, but nice and fudgy and the flavor is much better than just following the instructions on the back. Enjoy!

Quick Coconut Oil & Kahlua Brownies

Printable recipe
Printable recipe with picture

1 fudge brownie mix
2/3 cup virgin coconut oil, melted
2 eggs, room temperature
1/4 cup Kahlua, room temperature

Mix all ingredients and bake according to package directions.

Veronica’s note: You want the ingredients at room temperature to keep the coconut oil from hardening during the mixing. If it hardens, it will not mix evenly. Also, if your box calls for 1/2 cup oil, use 1/2 cup coconut oil, not 2/3 cup. Mine turned out pretty thin in a 9×13 pan so if you like thicker brownies, go with a smaller pan.

You can’t see in this photo, but he’s already holding a half-eaten brownie while reaching for another. These are definitely Joshua-approved. I served these to five other children and three adults besides myself, they were a hit all-around.

Potato, Onion & Spinach Hash

Posted on

This is something I threw together to use up a few things before they went bad, and ended up with a plate of magics. Weeks later, we are still eating this once or twice a week and is one of Joshua’s favorite meals.  I’ve never been very much of a potato person, but man, you can’t hardly beat crispy seasoned potatoes dipped in runny egg yolk.

Potato, Onion & Spinach Hash

Printable recipe
Printable recipe with picture

1 medium potato
2 thick slices of sweet onion
1/2 cup fresh spinach
Extra-virgin olive oil
Garlic salt & pepper to taste

Pierce the potato through the middle with a knife and microwave for 3 minutes, or until tender all the way through. Meanwhile, dice the onion. Once the potato is cooked, put a skillet on medium-high heat, and cut the potato into small cubes, removing the peel if you wish. Once the skillet is hot, add a generous swirl of olive oil to the pan, along with the potato and onion. Stir to coat with the oil, then sprinkle with garlic salt and pepper to taste. Allow to cook without stirring until golden brown on one side, then stir, trying to turn over as many of the pieces as possible. Allow to sit again until golden brown, then add the fresh spinach and cook for a few more minutes, until wilted and soft. Serve hot with eggs, or as a side dish.

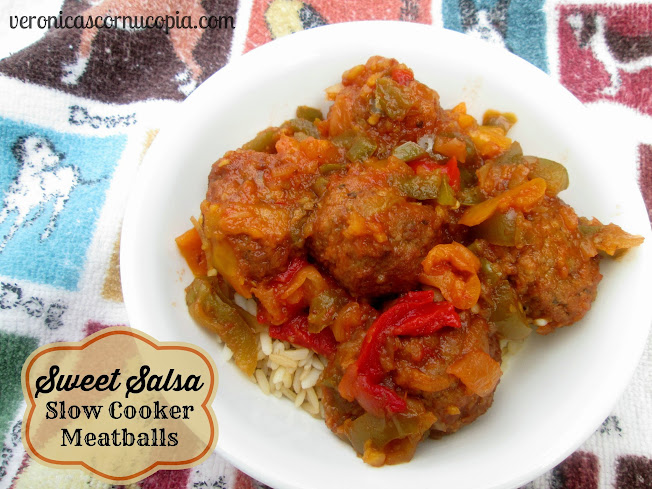
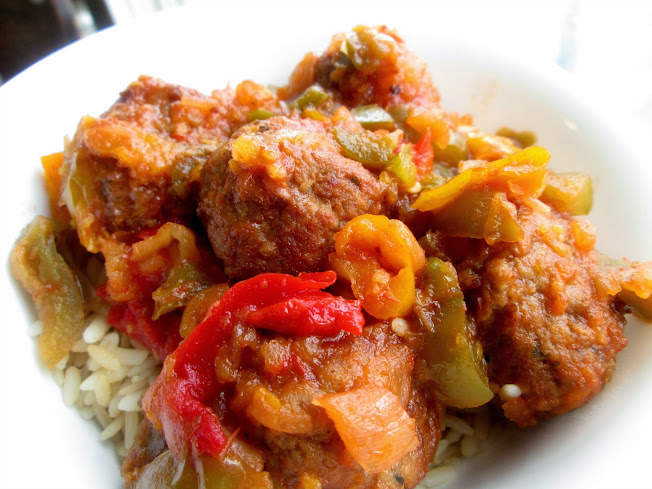
Sweet Salsa Slow Cooker Meatballs

Posted on

I hope everyone had a wonderful and safe Independence Day!  It was the best 4th of July of my whole life, and hands-down the best day Joshua’s ever had period. I want to share some photos but will be doing that tomorrow.

Today I have a simple crockpot meal that is great any time of year, because in summer, it doesn’t heat the kitchen, and in winter, it’s just nice to have something hot and ready at the end of a cold day.  I got this recipe from my friend, Holly, who actually had posted it in response to a mutual friend’s request for crockpot recipes on Facebook. I nabbed it and made it soon after because I’d just made my own apricot jam.  These were very satisfying and tasty.  Hope you enjoy, and stay cool!

Sweet Salsa Slow Cooker Meatballs

Printable recipe
Printable recipe with picture

1 (26 oz) bag frozen meatballs
3 bell peppers in different colors, sliced (optional)
1 (24 oz) jar salsa
1 (18 oz) jar apricot preserves

Place the meatballs in the bottom of your slow cooker and layer the bell peppers over, if you’re using them.  Whisk the salsa and apricot preserves together in a bowl, and pour over the top.  Cover and cook on low until heated through, 6-8 hours. Holly suggests serving over rice or with mashed potatoes and green beans.

Recipe source: adapted from Holly W.