RSS Feed

Tag Archives: Breakfast

Cake Batter Lovins

Posted on

Remember the “Cake Batter Everything” craze that swept over the food blog world in 2011? Yeah, I hopped on that and enjoyed it to the fullest.  I shared only one of my cake batter explorations with you, the Cake Batter Crispy Treats, which were my favorite cake batter flavored treat, but do you think I let the remainder of my bag of yellow cake mix go to waste? No way, Jose.

Here’s a few ideas if you need some ways to use up extra cake mix.

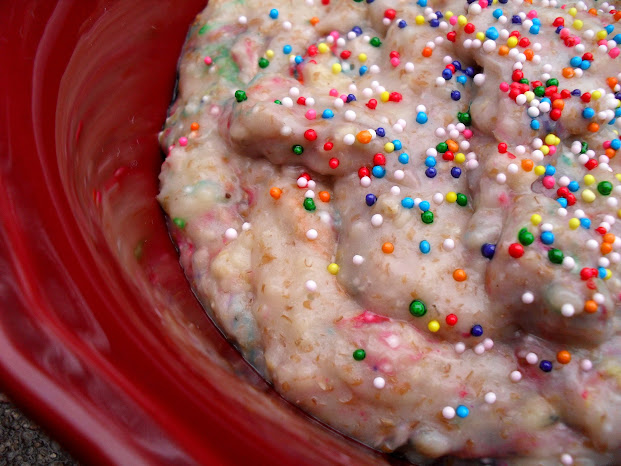
Cake Batter Oats. This is actually a pretty healthy recipe, considering there’s cake mix in it. And tasty too!

Cake Batter French Toast. What can I say, cake batter is such a great way to start the day. And sprinkles just make everything so happy.  This one would be fun for a birthday breakfast! I made a simple icing glaze by mixing like 1/4 cup powdered sugar with just enough milk to get it a drizzling consistency.

Cake Batter Candies. For these, I just melted some vanilla almond bark and added enough yellow cake mix to make it taste like cake batter, but not so much it got too thick.  I poured most of it in a chocolate bar mold (like the one I used for this Vegan White Chocolate), but I didn’t get a picture of that before I gave it to a friend as part of a thank you gift for turning a stain on my jeans into a work of art. The rest of it I poured into peanut butter cup molds and put sprinkles over the tops while it was still setting up.  Kids went crazy for these at a get together, even more so than my Cupcake Bites!

Have you made any cake batter flavored yums?

Potato, Onion & Spinach Hash

Posted on

This is something I threw together to use up a few things before they went bad, and ended up with a plate of magics. Weeks later, we are still eating this once or twice a week and is one of Joshua’s favorite meals.  I’ve never been very much of a potato person, but man, you can’t hardly beat crispy seasoned potatoes dipped in runny egg yolk.

Potato, Onion & Spinach Hash

Printable recipe
Printable recipe with picture

1 medium potato
2 thick slices of sweet onion
1/2 cup fresh spinach
Extra-virgin olive oil
Garlic salt & pepper to taste

Pierce the potato through the middle with a knife and microwave for 3 minutes, or until tender all the way through. Meanwhile, dice the onion. Once the potato is cooked, put a skillet on medium-high heat, and cut the potato into small cubes, removing the peel if you wish. Once the skillet is hot, add a generous swirl of olive oil to the pan, along with the potato and onion. Stir to coat with the oil, then sprinkle with garlic salt and pepper to taste. Allow to cook without stirring until golden brown on one side, then stir, trying to turn over as many of the pieces as possible. Allow to sit again until golden brown, then add the fresh spinach and cook for a few more minutes, until wilted and soft. Serve hot with eggs, or as a side dish.

Peanut Butter Cookie Dough Baked Oatmeal

Posted on

I like keeping things simple and easy at meal time, especially breakfast, so when I discovered how much Joshua enjoys baked oatmeal, I decided to make more of it.  A pan lasts several days and it’s so nice to be able to just take out a square and heat it in the microwave. Bam. Breakfast is done. He takes care of the rest.

I made this in an attempt to make a baked oatmeal that really would be reminiscent of cookie dough, since the pumpkin didn’t really have that feel to me (granted, I may have over baked it a tad, as I tend to do a lot these days). And wow, you guys, I nailed it.  *pats self on shoulder* ;) This stuff is warm and gooey and melty and soft and creamy and really, a lot like a thick, warm cookie dough. Dennis even ate it for dessert after dinner one day, with some whipped cream on top. It’s that good. And low in sugar, or sugar-free if you want to leave the chocolate chips out. You would never guess, it’s just so good, but feel free to use sugar if you prefer. This one is definitely worth a try.

Peanut Butter Cookie Dough Oatmeal

Printable recipe
Printable recipe with picture

2 cups quick-cooking oats
4 packets stevia*
½ teaspoon salt
1/3 cup peanut butter
2/3 cup milk
1 (4 oz) snack cup of unsweetened applesauce (heaping 1/3 cup)
1 egg
2 tablespoons oil or melted butter
2 teaspoons vanilla
½ cup chocolate chips, plus more for top if desired

Mix all ingredients together well until blended. Pour batter into an 8×8 pan sprayed with oil. Bake at 350F for 30 minutes.

*If you want to use sugar, I’d recommend brown sugar for a more cookie dough-like flavor. I’m not certain on the amount, but I’d try 1/3 cup and add more to your taste if needed.

***

I have to show you guys what this looks like with the flash – the photo is cheaper-looking but this really shows off how cookie dough-like it is. It’s soooo soft and I just couldn’t capture that gooey softness as well with natural light. Honestly, sometimes the flash is the only way to show the true colors & textures. Amateur photographer problems. :)

Fluffy Whole Wheat Pancakes


I like pancakes.  But for some reason, I can let years go by without making them.  I’m even worse with waffles.  It’s been probably four years since I made waffles.  I don’t know why!  They are so good and so simple.

Last week I woke up with a hankering for pancakes.  I consider buttermilk pancakes made with white flour the best, but I had no buttermilk and I wanted them to be a little more on the healthy side, so I whipped up a whole wheat batch instead, using coconut sugar (a Christmas gift from Emma H., a sweet reader) in place of regular and raw coconut nectar instead of maple syrup.  I didn’t plan to blog them, figuring they’d be nothing all that special, so I took a bite without taking any pictures first.  And then I died.  Or at least I thought I did, because as soon as I dug in, I was transported to heaven. Pictures ensued.

The pancakes are surprisingly fluffy and light for being whole wheat.  The whole wheat aspect gives them more substance, but doesn’t seem to weigh them down.  I definitely love the flavor whole wheat adds to pancakes.  Slathered with butter and syrup, they are a delicious and wholesome breakfast treat!

Warning: tangent ahead.  If you have no interest in coconut sweeteners, just skip to the recipe and use whatever kind of sweetener in and out of the pancakes you like. :)

If you’ve never tried coconut sweeteners and are curious about them, here’s the deal.  They are low-glycemic sweeteners (35 on the glycemic index, which is comparable to most fruits and veggies) that won’t spike your blood sugar like regular sugar, or even good-for-you honey and maple syrup.  This is good news not only for diabetics, but for everyone, since eating sugary foods can cause a crash that makes you crave more sugar – the vicious sugar cycle.  Coconut sweeteners are unrefined as well, meaning a lot healthier for you than regular sugar!  They both are an abundant source of minerals, amino acids, vitamin-C, broad spectrum B vitamins, and have a nearly neutral PH.

As for the taste, you might be surprised to know that neither come from the coconut fruit itself, or taste anything like coconut!  The sugar is produced from the flower buds of the coconut tree, and the syrup/nectar comes from the tree sap, just like maple syrup is taken from the sap of maple trees.  I think the sugar is similar to brown sugar, and looks like it too, except it doesn’t stick/clump together.  The syrup is similar to molasses, especially when tasted straight, but much milder in flavor.  I didn’t think I’d like it on pancakes because I’m not a huge fan of molasses, but the flavor changed when added to them.  Not molasses at all, just a nice mildly sweet flavor that compliments the pancakes – absolutely fantastic!

Fluffy Whole Wheat Pancakes

Printable recipe
Printable recipe with picture

1 cup (4 oz) whole wheat flour
1 ½ tablespoons sugar (I used coconut sugar)
¾ teaspoon baking powder
½ teaspoon salt
1 egg
1 cup (8 oz) milk
2 tablespoons butter or oil, plus more for skillet (I used coconut oil)

Combine flour, sugar, baking powder, and salt in a small bowl. In a separate small bowl, whisk egg and then mix in milk and oil. Add the wet ingredients to the dry and stir until mixed, but not smooth. Let batter rest for five minutes while you preheat the skillet or griddle to 350F. Test if it’s ready by scattering drops of water over it. If they sizzle and dance, it’s ready.

Grease the skillet with a tablespoon of butter or coconut oil, then pour batter onto skillet to make pancakes the size of your choice. Once bubbles are over the surface and the edges are turning dry, flip over and cook until done. Serve warm with butter and syrup (I use raw coconut nectar).

Makes two giant pancakes, or four regular-sized ones.

Recipe source: adapted from Alton Brown’s recipe

You may also enjoy…

Fluffy Buttermilk Pancakes (my favorite!)

Brown Sugar Bacon Waffles

Cornmeal Griddle Cakes

Favorite Blueberry Muffins

Posted on

These are currently my favorite blueberry muffins.  For me, the best blueberry muffins are stark white (no brown sugar or cinnamon, please) to contrast the pretty purplish blue of the bursting berries, a little dense, and quite sweet.  My perfect blueberry muffin is also leavened with baking powder, as baking soda tends to give the blueberry juice a greenish tinge and the color appeal is very important to me in a blueberry muffin.  In essence, my ideal blueberry muffins are blueberry cupcakes disguised as breakfast by the heaviness of the crumb and a lack of frosting.  Though a nice crumb topping is certainly not out of the question. :)

Thanks to Carolyn of Inner Chef for introducing me to this fabulous recipe!  It’s now my go-to, though I desperately need to make a batch with the crumb topping, as I’m sure I’ll love it even more.  Thanks for helping me using up some of my Grandpa’s blueberries, Carolyn!  (I inherited 16 pints back in March in a very strange way–I really need to share the story!)  Thankfully, between several batches of these muffins, eating the blueberries straight, and this pound cake, not a single pint had to go to waste. :)

Favorite Blueberry Muffins

Printable recipe
Printable recipe with picture

1½ cups all-purpose flour
¾ cup granulated sugar
½ teaspoon salt
2 teaspoons baking powder
⅓ cup vegetable oil
1 egg
⅓ cup milk
1 cup fresh blueberries*

Crumb Topping (optional)
½ cup granulated sugar
⅓ cup all-purpose flour
¼ cup butter, cubed
1 ½ teaspoons ground cinnamon

*I used 1 1/2 cups fresh blueberries, which made each muffin bursting with berries (we loved this). 1 cup will give you a more typical blueberry muffin.

Preheat oven to 400 degrees F (200 degrees C). Grease muffin cups or line with paper liners.

Combine 1 ½ cups flour, ¾ cup sugar, salt and baking powder. Place vegetable oil into a 1 cup measuring cup; add the egg and enough milk to fill the cup. Mix this with flour mixture. Fold in blueberries. Fill muffin cups right to the top, and sprinkle with crumb topping mixture.

To Make Crumb Topping: Mix together ½ cup sugar, ⅓ cup flour, ¼ cup butter, and 1 ½ tsp. cinnamon. Mix with a fork, and sprinkle over muffins before baking.

Bake for 20 to 25 minutes in the preheated oven, or until a toothpick inserted in center (not into a blueberry) comes out clean.

Recipe source: Inner Chef

Note: I photographed my muffins the day after I baked them, so the blueberries had withered up a little as the juices absorbed into the muffins, making them crazy moist. Although we enjoyed them more after storing 8 hours in an airtight container (I baked them the night before), rest assured they will be beautiful and not withered when you take them out of the oven.

Savory Oatmeal

Posted on

I’ve seen this newfangled idea of savory oats around on several blogs, but it was Faith’s gorgeous pictures that finally convinced me I had to try it.

If you’re like me, you’re thinking, “For all that is good and holy, why would you ruin the opportunity to have a SWEET breakfast?!  Oats are perfect for sweet-ification!”

It totally went against every sweet-tooth instinct I have to make them this way, but I have to tell you it was really a delicious breakfast and so much more filling and satisfying than my usual additions (most often a mashed banana with peanut butter and some honey, or sometimes applesauce with cinnamon and brown sugar).  Faith compared oats to grits, and that’s what made it click for me.  If you can eat shrimp and cheese grits (drool), why not bacon and eggs with your oatmeal?

See what I’m saying?  Same dealio, yo.  Except now I feel bad for tempting you with that that picture of the shrimp and grits without a recipe.  Guess I should finally get that one posted too…three years late. **UPDATE: you can find the recipe for Southern Shrimp ‘n Cheese Grits here.**

In the meantime, please enjoy some savory oats!  This will definitely stick to your ribs and keep you satisfied until lunchtime.

Savory Oatmeal

Printable recipe
Printable recipe with picture

1 tablespoon olive oil
4 slices turkey bacon, diced
1 small-medium onion, diced
1/2 cup rolled oats
1 cup water
1 pinch sea salt
1 pinch black pepper
2 oz sharp cheddar, diced or shredded
2 fried eggs (for topping)

Heat the oil in a small saucepan over medium heat; add the bacon and cook until crisp, about 2 to 3 minutes, stirring occasionally. Transfer the bacon to a small bowl and set aside. Add the onion to the oil, adding more oil if needed, and cook until softened and just starting to turn brown, about 3 minutes, stirring occasionally. Stir in the oats, water, salt, and pepper; bring to a boil then turn heat down to low and simmer until the oats are tender, about 5 minutes. Turn off heat and stir in the bacon and cheese. Transfer to a bowl and top with a fried egg and more black pepper.

Recipe source: slightly adapted from An Edible Mosaic

Hashbrown Casserole

Posted on

There is a restaurant here called Cracker Barrel that I’d never gone to until my little sister, who had gone with a friend, told me about their uber-fabulous hashbrown casserole and convinced me if I died without trying it, it would have been a life not worth living.  Seems her older sister’s penchant for drama & exaggeration might have rubbed off on her a bit!  Anyway, I don’t know I’d go so far as to say that you absolutely positively must eat this before you die, but I did think it was very delicious when I finally tried it.

I think it has been ten years since I last had their hashbrown casserole, but when I saw a copycat recipe for it on Big Bear’s Wife, I knew I just HAD to have it again, and added it to my birthday brinner menu.  It was the hit of the evening, and my personal favorite of everything I made!  I seriously could have eaten it alone for my meal.

I don’t know how close it is to the original since it’s been so long since I had it, but without comparing the two I can tell you this is delicious in its own right.  Creamy, cheesy, starchy goodness.  It’s a perfect addition to an old-fashioned country or holiday breakfast.  The bonus is that it’s so simple & quick to throw together!

Hashbrown Casserole

Printable recipe
Printable recipe with picture

1 (1 lb. 14 oz) bag frozen hash browns, thawed
1 (8 oz) tub sour cream
1 (10.75 oz) can cream of chicken soup
1/2 cup (1 stick) butter, melted
1/3 cup diced onion
1/2 teaspoon salt
1/4 teaspoon pepper
1 (8 oz) package cheddar cheese, shredded

Preheat oven to 350 degrees. Spray a 9×13 dish with oil and set aside. In a large bowl, mix together all the ingredients, using only half the cheese, until well-combined. Spread into the prepared dish and sprinkle the remaining cheese over the top. Bake for 45 minutes. Serve hot.

Veronica’s notes: Angie’s recipe called for 1/2 tablespoon onion powder, but I was making the recipe at my parents’ house and they were out so I made do with fresh onion.  We all loved the flavor, but the powder would certainly make the recipe a bit easier to prepare (no chopping). Her recipe only called for a pound of hashbrowns and 4 oz of sour cream, so if using the powder, you may need to increase it since my recipe is larger. Also, please shred your own cheese. There is a world of difference between the gooey melt you get from cheese you shredded yourself and the packaged pre-shredded kind that has been coated with powder to keep it from sticking together. You will thank me. :)

Recipe source: adapted from Big Bear’s Wife

Banana & Orange French Toast

Posted on

I love food blogging because I love food and love sharing good recipes with good people.  But there are some things about this chosen hobby that sometimes drive me crazy!

It’s mostly the photographs.  Such as the two featured on this post.  To take them, I first had to find a spot that was had a lot of natural indirect sunlight, had to pick out a background and strangely went with this neon green poster board.  I figured I could maybe turn it a different color with editing but since I’m using a really cheap editing program, that didn’t work out.

Anyway, I picked the front porch (my neighbors probably think I’m crazy but I photograph food on my porch without batting an eyelash!), plopped down the poster board and the plate on top of it, drizzled on the syrup and immediately turned on my camera, hoping to catch the slide of the syrup onto the plate for optimal salivating effect.  As soon as I selected the macro setting on my uber-cheapo camera (cheap is how I roll if you haven’t  already gathered that by now), my camera informed me it was out of memory.  Doh!  Forgot to put in the memory card.  I go stalking into the house and snap it up and run back out to hopefully catch the last of the syrup dripping from the toast onto the plate.  I turn on the camera, and it informs me the battery is low before it dies.  Doh!  I go tearing through the house, lamenting that my toast will now be stone cold by the time I eat it and the syrup will be in a lazy puddle surrounding it on the plate instead of dripping gorgeously down onto it, to find an extension cord so I can plug in my camera and drag it out the front door with me.

I scream at Dennis to help me find an extension cord while I try to locate my charger.  Where is it? Arg!!!  Cold French toast!  I finally find it, and get my own extension cord because Dennis is still elbow deep in dish water (bless him, my studly dishwasher!), plug the sucker in and drag it to the front porch.  I finally get the pics, now hating the crazy neon green color of the background but not wanting to take any more time to switch to a white or black one, and then start eating the French toast in desperation while still crouched in front of it on the front porch.  Just a normal pre-meal ritual for this scatter-brained food blogger!

So about this French toast.  Usually I keep it simple when it comes to making French toast.  Beat the eggs, add in some milk, soak the bread, sprinkle on cinnamon while it cooks, and drown it in syrup on my plate.  I wanted to try something different and I have to say this turned out fantastic!  (It was still warm when I ate it, thankfully, but I think I still would have loved it cold!)  The orange and banana are really highlighted by the rum and freshly grated nutmeg.  I had mine with sugar-free syrup (I know, the horror!), and I actually liked it better than the taste I had of my husbands with pure maple syrup because it overwhelmed the flavor of the French Toast itself, which I found a travesty.  This might be the one case where I recommend using pancake syrup, instead of the real stuff.  Forgive me!

Banana & Orange French Toast

Printable recipe
Printable recipe with picture

1 fresh mandarin orange (also called clementines or Cuties)
3 large eggs
1/4 cup fat free milk
2 teaspoons rum or 1 teaspoon rum extract
1 1/2 teaspoons freshly grated nutmeg, divided
4 slices bread
2 small bananas
Syrup for serving

Heat a skillet over medium while you prepare the egg batter.  Grate the zest from the orange into a bowl.  Slice the orange in half and squeeze juice into bowl.  Add the eggs and whisk until smooth, then beat in the milk, rum, and 1 teaspoon of the nutmeg.  Spray skillet with cooking oil, then soak bread thoroughly in egg mixture before placing on hot skillet.  Cook two minutes per side or until cooked through.  Unless you use a griddle, you will most likely have to cook the French toast in batches of two.  Place two pieces of French toast on two plates, slice one banana on top of each plate, sprinkle remaining nutmeg over each and top with syrup.  Serve hot.

Serves 2

Per serving (calculated without syrup, and using Nature’s Own WhiteWheat bread at 50 calories a slice): 317 calories; 10 g fat; 47 carbohydrates; 7 g fiber; 17 g protein; 9 Points Plus.

Recipe by Veronica Miller

Cornmeal Griddle Cakes


I recently checked out Baked Explorations from the library and immediately honed in on the Cornmeal Griddle Cakes recipe because I’ve been wanting to try them for a long time.  I think it took me all of two days to get to it.  It was urgent!  And I’m so glad I finally got to try some.

I don’t know if all cornmeal pancakes are this good, but if so, I was really missing out!  Both my husband and I are awfully tempted to call them not just great pancakes but the best. ever.  The best pancakes of all types that we’ve ever had.  But, alas, we can not.  The glorious fluffy buttermilk pancake will always hold the #1 spot, but these are just as good in a different way.

First of all, I was surprised by the texture.  I expected that the cornmeal would make the cakes dry and more dense.  Not so.  They were extremely fluffy, moist and light.  I don’t get it, but I won’t question it.  The corn flavor comes through and just tastes so good with butter, maple syrup and pecans on top.  Seriously.  You must try this!

Cornmeal Griddle Cakes

Printable recipe
Printable recipe with picture

1 1/4 cups all-purpose flour
1/2 teaspoon salt
1 tablespoon baking powder
1/2 teaspoon baking soda
1 cup yellow cornmeal
1/4 cup firmly packed light brown sugar
2 large eggs
1 cup buttermilk

Sift together flour, salt, baking powder, and baking soda in medium bowl. Bring 1 1/2 cups water to a boil. Place cornmeal in a large metal or glass bowl. Stirring continuously, slowly pour the boiling water over the cornmeal. Keep stirring until the mixture has cooled to lukewarm, almost room temperature. Add the brown sugar and stir until combined. Whisk eggs until pale yellow in separate bowl. Add buttermilk and whisk until blended. Add flour mixture, alternating with buttermilk mixture, to the cornmeal in three parts (beginning and ending with the flour mixture), stirring after each addition until just combined. Heat a skillet or griddle pan over medium-low heat. Spray with cooking spray and drop batter in 1/4 cup batches onto skillet. Cook until medium-brown, about 3 minutes, and the tops are bubbly, then flip the griddle cakes over and cook the other side for about 2 minutes and serve immediately. Serve with butter, pecans and maple syrup.

Makes 20 small pancakes. Per pancake: 85 calories; 2 g fat; 15.3 g carb; 1 g fiber; 2 g protein

Recipe source: slightly tweaked from Baked Explorations


Apple Cake Mabel

Posted on

Before we get to the cake, please remember to head on over to Steph’s Bite by Bite to check out all the wonderful goodies up for auction in the online bake sale, which started at 7 AM today and goes until 9 PM EST.  She’s raising money for the Leukemia and Lymphoma Society and I can’t wait to mail a batch of my Mocha Toffee Brownies to the winning bidder!  Good luck!

OK, now let’s get down to business.  I begged this recipe off my friend, Judy, when she mentioned she had made a sugar-free apple cake that turned out well.  I’m intrigued by anything that is sugar-free that also tastes good, as I have not had a lot of personal success with this.  I discovered that the cake was made with Splenda and shortening and this repelled me on many levels, but also awakened a creative desire to make it healthier with a natural sweetener and not only non-hydrogenated fat, but less of it.  As I mentioned in my post on chocolate chip banana bread, I’ve been experimenting with Truvia, a natural calorie-free sweetener made from the stevia plant’s leaves, so I used that in addition to brown sugar to give a better, more natural flavor.  I didn’t mess with the diet soda in the recipe, but it could easily be switched out for any variety of Zevia (a calorie-free soda made with stevia), or with club soda and additional Truvia.

Now, I’m not sure who Mabel is, or if she was even the one to come up with the original recipe, but I hope that she would be as pleased as I am with my adaptation.  It isn’t as light and tender as a traditional cake, but a little more dense like coffee cake, moist, perfectly sweet & spiced, with tender chunks of apple in every bite.  It is best served the day you bake it as it gets a little dry a couple days later, but it can be returned to it’s former glory with a few seconds in the microwave.

Apple Cake Mabel

Printable recipe
Printable recipe with picture

2 eggs
½ cup brown sugar
4 oz cup (1/2 cup) unsweetened applesauce
1 cup diet Dr. Pepper or cream soda
2 tablespoons canola oil
1 teaspoon vanilla
2 ½ cups all-purpose flour
1/4 cup Truvia
1 teaspoon Vietnamese cinnamon
1 t freshly grated nutmeg
1/4 teaspoon cloves
1 teaspoon baking powder
1 teaspoon baking soda
1 teaspoon salt

1 large apple, peeled & chopped

Toppping
¼ chopped pecans
2 tablespoons brown sugar
2 tablespoons shredded, sweetened coconut

Preheat oven to 350. Grease and flour a 9×13 pan.  Beat eggs until smooth & uniform in color, then add in brown sugar and beat until sugar is incorporated and mixture is slightly thickened. Add applesauce, diet Dr. Pepper, canola oil, and vanilla and mix until incorporated. Add in the remaining ingredients, except for the apples, and beat until smooth, 1-2 minutes. Fold in apples and pour into prepared pan. Sprinkle the toppings over the top in the order listed and bake for 40 minutes, or until a toothpick inserted in the center comes out clean. Cool on a wire rack at least 15 minutes before serving. Serve with whipped cream if desired.

*Veronica’s note: I recommend using a sweet baking apple, such as Braeburn, Rome, or Gala.

Makes 15 servings. Per piece: 139 calories; 2.6 g fat; 28 g carb; 1.4 fiber; 3.2 protein

Recipe source: adapted from Judy L.