RSS Feed

Category Archives: How-To & DIY

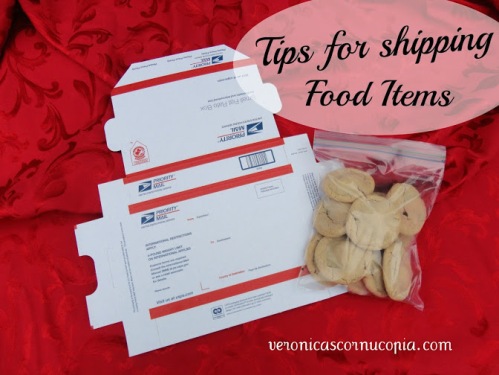
Tips for Shipping Food Items

Posted on

Many participants in the online bake sale have asked me for tips on shipping baked goods, and since there will also be many needing this information for the cookie swap, and probably others reading who would like to ship food items at some point in their life, I figured it behooved everyone for me to share my tips.  I’ve shipped a lot of food items, and have always had success getting my goodies from one place to another, fresh and (mostly) unbroken.  You may find a way that suits you better, but this is how I do it.

1.  Wrap/package the baked goods very well so that they are air tight.  For soft/chewy cookies, I put them together in a Ziploc bag and press the air out before sealing. For more fragile cookies, wrap individually in plastic wrap before putting in a tub or tin.  If you are shipping something that will smash or break easily (delicate cookies, marzipan, etc), it is best to place it inside a sturdy container, within the box you are shipping it in.

2. If you put your cookies or other goodies in a tub or tin, fill it to the top or so there’s no room for the goodies to move around in.  If you don’t have enough to fill up the tub or tin, fill the empty space with wadded up waxed paper, parchment paper, or plastic wrap.  The goal is to be able to shake the tin and not hear or feel anything moving around.  No movement equals no breakage.

Notice I filled this tin all the way to the top with cookies (Chocolate Chip Coconut Macaroons).  I did have to rearrange them to make sure I could close the lid without smashing them, but when I closed it, there was no room for the cookies to move around when shaken.  I shipped this all the way to Afghanistan with no problems.  If you need to ship to a very far away place, coconut macaroons are a great cookie to choose as they get better with age, stay moist, and are sturdy.

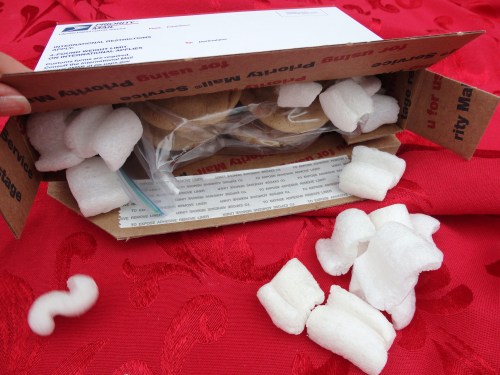
3.  Once the baked goods are in the shipping box, pack well around the them so that they will not shake inside the box.  Use packing peanuts, wadded up newspaper, bubble wrap, etc.  Fold the box flaps down and shake it to test and make sure that the goodie package within the box does not move around.  I find it best to use a box closest to the size of the baked goods possible, so there isn’t much packing necessary.  A dozen cookies fits perfectly in a small Flat-Rate Priority box (offered for free at Post Offices everywhere) and you will only need a few peanuts to fill in the open space between your bag of cookies and the box. I have shipped many cookies this way and have seen photos of them after arrival, and they look just as good as the day I baked them.  Packing them tight so that they don’t move around during shipping is key.

After taking this photo, I made sure to fill in every gap with peanuts, closed the flaps, shook the box, and put in more peanuts if anything shifted.  By the time I sealed the box, those cookies were completely stable inside their box.   And as you can see, below, they arrived in the same condition they left in (minus the eaten part, lol). Julie described the cookies favorably as chewy, salty, and sweet (they were Sneaky Snickers Cookies, peanut butter cookies with mini Snickers hiding inside), so they also arrived tasting the same as they left.


4. For bread, wrap well in plastic wrap, making sure it is air tight.  You can then place it inside a plastic tub if you can find one that fits, or just put it right inside the box you are mailing it in, preferably one not much larger than the bread.  Pack with bubble wrap or peanuts to ensure the bread does not jostle during shipping.  Have the postal clerk mark “This Side Up” if you don’t want your box being turned upside down.

5. For glass jars, wrap each jar in bubble wrap before placing in box, secure the bubble wrap with tape, and fill in the empty space in the box very well with wadded newspaper, peanuts, or more bubble wrap.  Have the postal clerk mark “Fragile” on your box.

6.  Use Priority Mail (2-3 days delivery) or Express Mail (overnight) service.  Parcel Post is used a lot by companies shipping heavier items and if you choose this service, which will only be a little cheaper than Priority Mail, not only will it take longer to arrive, it may be placed beneath a heavier package and crushed.

7.  Request delivery confirmation.  (You will have to fill out a little slip that you can find usually while you are in the Post Office line and fill out the address while you wait.)  This allows you to track the progress of your package online and make sure it gets delivered.  This really helps when someone wants to know where their package is, then you can just provide a tracking number if need be.  It does cost 75 cents extra (free when you ship online with Priority Mail) but it is worth the peace of mind.

There are also a lot of tips here that I did not mention, but are very important to know, such as waiting for your baked goods to cool completely before wrapping/packing, and much more.

What NOT to do…

I once received a package of cookies in a Tyvec bag with no padding.  Notice the price she paid to ship it was more than it would have cost to use a small flat rate priority mail box, and the cookies would have been in better condition if she had mailed them that way.

She also would not have had to buy a container if she’d used a flat rate box, just a Ziploc bag.  The container had cracked during shipping because of the lack of padding, so it wasn’t air tight.  You can see that the cookies got beat up because the tub had a lot of extra room for them to move around in during shipping.  Despite all this, the cookies weren’t completely dried out yet and were still very good.  But they could have been wonderful if more carefully packaged.

Also, please do not try to ship a frosted cake.

whites_bakery_cake-10

So sad.  :(  I got this photo here, and you can read the lovely story of how a mother shipped her daughter a birthday cake.  Unless you don’t mind your cake arriving in a heap of crumbles like the thankful daughter who received this cake, please leave it to the professionals. (How DO they get them delivered in one piece?! I really wish I could figure that out.  But I don’t want to pay the price of delivery to find out for myself-lol.)

I hope this helped you with any concerns you might have had and if you have any questions, just leave me a comment below.
Soap for Soldiers {a casual soap-making tutorial}

Posted on

Several weeks ago, this appeared near the entrance of my work facility:

I donated some requested items, but I got to thinking about what I would crave most if I were away from home, fighting every day to survive.  Besides a good, home cooked meal, my second biggest comfort and indulgence is a luxurious bath with lovely scented soaps, body scrubs, etc.  But what I’d want most of all is love and appreciation.

The military can’t accept homemade food from people they don’t know personally, but I really wanted to make something to make the gift more personal, so that the soldiers that received it would know that love was poured into it, not just money.

Soap wasn’t listed as a requested item, but I got the idea in my head to donate some homemade soap, and I called my sister, who is an old hand at making it by now (she has been making it for six years and selling it in her own shop for the last four), to see if she’d be game to help me do it.  I knew she would love the idea, and I was right!  She agreed to help me make it for only the cost of the supplies, and we met in the back room of her shop to get our soap-making party started.

Dennis came along to photograph the process so you can learn how to make soap along with me.  Thank you, honey! <3

This is Danielle’s basic soap recipe, which we tripled to fill two log soap molds.  All measurements are in ounces and all but the last two ingredients are oils & butters.  To make goat’s milk soap, she just subs goat’s milk for the water, but we went with water this time.

You can click here for a printable recipe with step-by-step instructions, or click here for one that includes a photo of the finished product.

Danielle ate her dinner while I measured the oils using an electronic kitchen scale.

Coconut oil

“I only use the best Mountain Rose Herb organic cocoa butter in my homemade soap!”

Castor oil.  Apparently soap-making has already driven me to drink.

Safflower Oil

Sunflower oil.  Allow me to deflect the attention away from my sister’s hilarious expression and onto my shirt with the flipped hem.  It is this way in every. single. photo.  And Dennis didn’t tell me.  He also lets me go shopping with chocolate on my forehead.  But I love him anyway.  :)

Palm kernel oil. This stuff is firm like cocoa butter and has to be hacked out with a knife or spoon.

Once all the oils are measured, it’s time to melt them together.  Some people do this on the stove, but Danielle just does it in her microwave.

“I LOVE MAKING SOAP SO MUCH I COULD DIIIIIE!!!!!”

While the microwave was doing its thing, Danielle measured her water into a glass bowl in preparation for making her lye-water mixture.

It is very important to add lye to water, meaning putting the water in your bowl first and adding the lye second, and not the other way around, or it will explode and burn your skin.  I know that sounds like something I’d usually say as a joke, since I like to exaggerate, but I’m not exaggerating here. Please be careful with lye!

You can find lye at any hardware store by the other drain cleaners in the plumbing section.  Make sure it says “100% lye” on the label.  And don’t’ be scared that you are putting it in something that will be used on your skin.  The process of making soap, combining the lye with water and fat and then curing the mixture, makes it completely safe for your skin.  All soap you’ve ever used contains lye–it is a necessary ingredient.

Danielle microwaved her oil mixture in bursts, stirring in between to help it melt evenly without heating it too much.  Here she’s preparing to put it in for about the third time before she adds lye to the water.

“And now, Pinky, we add the lye to the water and TAKE OVER THE WORLD!”

Combining the lye with water causes a chemical reaction which heats the water and puts off fumes that will make you choke and can burn your skin, so as soon as your lye is measured, take the bowl outside and start stirring to keep the mixture from solidifying.  You should wear a glove on the hand you stir with, as the vapors could burn you if you have sensitive skin.  Danielle has been doing this long enough to know she doesn’t need a glove, but she recommends you use one to be on the safe side.  Danielle also says to make sure you’re situated so that the wind is blowing the fumes away from you.

Stir for about a minute or so to allow the fumes to dissipate.  The mixture will be quite cloudy when you first start stirring, and will get more clear as you stir.  Danielle held the bowl up so I could feel how hot it got.

It reaches 200F, so be careful when handling the bowl not to burn yourself, either from the heat or the corrosive mixture inside it.  Again, gloves are a good idea.

Once inside, Danielle set the lye mixture aside to cool a bit while she finished melting the oil.  At this point it was melted except for a few cocoa butter and palm kernel oil chunks, so she removed them to a separate container to melt completely so that she wouldn’t have to heat the whole batch too much to get them melted.  You want both your oil and lye mixtures to be about 110F when you combine them.

Once the oil was ready, we combined them because the lye mixture had time to cool off and the oil wasn’t too hot either.  Danielle doesn’t use a thermometer, but you probably should until you get comfortable with the process.

Danielle likes to stir while pouring the lye water into the oil, but she says it’s not necessary.  You can just dump it in and then start your stirring.

You’re going to stir, stir, stir, until the mixture is thickened.  This can take a very long time, but an immersion blender makes the process much faster and it will be ready in a matter of a minute or two.

You will know it’s ready when it starts to trace.  To test it, lift a spoonful and drizzle it over the surface.  If you can see a line for a second or two before it disappears (leaves a trace), your soap is ready to pour into molds.  Here it was just barely tracing, but we stopped at this point because we were going to be adding more stuff and stirring a lot more.

Now’s the time to add the scent and extras you desire.  I chose lemongrass because it is a nice unisex smell.

For a batch this big, we needed two (1 ounce) bottles of lemongrass oil.

I wanted to do sort of a camouflage swirl so we divided the batch into thirds to turn each a different color with natural additions.

We added chamomile powder to the large bowl to give it a golden color, French green clay powder to the bottom bowl for a green color, and vanilla bean seeds and black clay powder to the top bowl for a brown color.  You can also put in herbs or oats into your soap at this point–all additions like this will make your soap more firm and it will last longer.  We just poured our additions in until we liked the colors.  Then we mixed, mixed, and mixed some more.

We made sure the soap traced before we stopped mixing.  This isn’t a great photo, but you can see the lines of soap that fell from the spoon.  It’s ready!

We poured the smaller batches of soap into the large bowl in random patterns to help the swirl effect.

Danielle gave the whole batch one swoop of the spoon for a swirl effect.  Don’t do more than this or your soap will become one color–it’s very easy to over mix.  One circular swoop from top to bottom is plenty.

Pour the soap into molds.  She uses silicone molds, which you do not have to line.

You can texturize the top with a spoon or spatula.

Allow the soap to set up in the molds overnight before removing.  Danielle took the soap out of the molds and cut them when I wasn’t there so I don’t have any photographs of that part, but I’m sure you can figure it out. :)

You can use the soap after a week, but it is generally recommended to let it cure for 4-6 weeks before using it, especially if you have sensitive skin.  The longer you let it cure, the harder it gets and the longer it lasts because it won’t “melt” so easily in the shower.

We got 19 bars out of this batch.  Pack it up…

…and share the love!

Hope you guys enjoyed this.  I know I enjoyed making soap for the first time and giving it to the soldiers, and I hope it helps boost 19 spirits.  If you’d like to send a letter or goodies to a soldier, you can get the name and address of an actual soldier serving now at this website.

Thank you, Danielle, for helping a sister and some soldiers out!  You’re the bomb-diggity!  And thank you to the Haus (that’s what I call Dennis if I never told you before-pronounced Hoss, like “boss”), who not only provided most of the photos here, but helped me with some of the captions.  You’re also the bomb-diggity.  And thank you to my readers for reading and (hopefully) enjoying my antics.  You’re all sorts of bomb-diggitiness. <3

And for those of you still recoiling from the mess in Danielle’s supply room, her excuse is the same as mine…

Creativity is Messy and I am Very Creative!-

Cake for Dummies, part 4: “Decorating”

Posted on

All right, since this is a cake for “dummies” series, I’m going to show you how to decorate a cake using natural embellishments that don’t require decorating skills.  Truth be told, I really dislike traditional decorating (not the look, the process) and “decorate” my cakes in this manner whenever possible.

In this video, you’ll see me have issues as I proceed with my “decorating,” and I kept the footage in the video to give you an idea of how to overcome issues you might run into with your cakes as well.

Don’t let your cake intimidate you.  You are the master of the cake, and I can tell you from experience that no matter how bad you mess the cake up, there’s almost always something you can do to fix  it.  Namely, by covering up the mistake!

Also, for those new to cake making, I want to reassure you because it will take some practice before you start turning out really attractive cakes.  Don’t be discouraged if your first cakes aren’t as pretty as you would like.  Just do your best and you will get better and better with each cake you make. And I promise that no matter what you think of your cake, your family and friends will always be impressed that you made it.  You will be adored whether you’re a beginner with crumbs in your frosting, or have advanced to fondant and tiered cakes.  Cakes that come out of your own kitchen are more special and when you give a cake made with your own two hands and your love, the recipient will be that much more grateful and impressed.

This is the first cake I ever decorated, for a friend who was moving to another city.  If I hadn’t watched my mother make cakes for several year’s prior to this attempt, I assure you it would have been much worse.  As it was, even with the imperfections, Brooke appreciated the cake very much.  She knew it came from my heart.

And now, many years later, I’m making cakes like this Dark Chocolate Raspberry Cake that actually require less decorating skills but are, IMHO, much prettier.

I hope I’ve encouraged you and helped you in your future cake-making adventures!

Much love, and happy caking!

For the previous videos in this series and other cake-related posts, check out this page: Cake for Dummies

Cake for Dummies, part 3: frosting and stacking

Posted on

I’ve made a “Cake For Dummies” page where I’ve linked to all the cake tips and resources on my blog, including those on tiered cakes and general baking tips.  You can find the past videos from this series there if you have missed anything and would like to catch up.  The first video includes my “water bottle trick” for ensuring a moist cake every time, and the second covers levelling.  Now we’re up to frosting and stacking (which also includes a water bottle trick-I tell you that water bottle is my secret weapon!)–3/4ths of the way to a finished cake!  Tomorrow is the final video and will cover “decorating.”  I put that in quotations because my decorations are more like embellishments, but it still makes for a pretty cake, and is much more manageable for those without decorating experience.

OK, I’m a big dork.  While frosting the cake, I got caught up in telling a story about my childhood when I should have been explaining what I was doing. I think by this time, I had lost my focus and forgot I was doing a tutorial.  Oops.

Allow me to explain in writing. :)  When you spread on your frosting, you want to make sure you don’t get any crumbs in it.  If you do get crumbs in it, it’s not the end of the world, it will still taste great, but it won’t look as nice.

Just say no to crumbs in your frosting!

{Photo source}

To keep them out, you have three options:

1) Apply a thin coat of frosting over the whole cake to trap the crumbs before you apply a thicker layer.  This is not my method of choice because it seems too time consuming to have to apply the frosting twice, but it works.  Just be sure to refrigerate the cake for an hour or up to overnight after applying the crumb coat before you frost it again.

2) Pipe the frosting on using a large pastry bag fitted with a wide, flat tip, such as Wilton’s #789. This gives you an even thickness of frosting over the entire cake, and there is no risk at all of getting crumbs in your frosting because the cake is covered already when you start using your spatula to smooth it out.

3) Be careful and just go for it.  On the rare occasion that I don’t use a pastry bag & frosting tip to pipe the frosting on, this is what I do.  I just put a lot of frosting on each spot before I start spreading it and don’t spread it very thin, adding more before I get to the point when the crumbs start lifting up as I move the spatula.  I make sure that my spatula never comes into contact with the cake itself, and I avoid lifting my spatula in a way that pulls the frosting (and crumbs) off the cake.  This is the method you’ll see me demonstrate in the video.

Links that accompany the video:

The turntables: older versions of Wilton’s Trim ‘n Turn PLUS Cake Turntable and Trim ‘n Turn ULTRA Cake Turntable

The frosting tip: Wilton #789

The cake I’m making: Dark Chocolate Raspberry Cake

Check out this recipe using the leftovers from this cake: Dark Chocolate Raspberry Cupcake Bites

OK, that’s it for today-class dismissed!

Cake for Dummies: How to Create an Attractive Layer Cake

Posted on

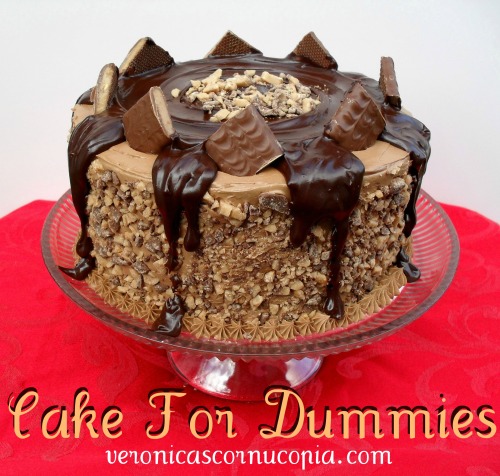
Photographed: THE Mocha Crunch Cake

A layer cake is just about the prettiest dessert there is, don’t you think?  Stacked high and impressive with a smooth buttercream finish and a few embellishments, a layer cake, properly done, is almost enough to take one’s breath away.

I am passionate about cake and I believe there should be at least one person in every family who can create an attractive cake, with or without decorating skills.  Cake is used to celebrate so many special occasions, and unfortunately many of those celebratory cakes come from Walmart or other sub-par bakeries. Making your own cake is not only more economical than purchasing one, but it tastes better, and is more special.  The cake you create will be remembered (not to mention crazy delicious), whereas that nasty Walmart cake will be forgotten within five minutes, even if it did have your child’s favorite cartoon character on it.

Therefore, I’m embarking upon a quest to give anyone interested the tools they need to create an attractive layer cake at home.  My husband recorded me while I constructed a cake for a friend last month, and I used the footage to create a four-part video tutorial series which I will share every day through Friday.  (Thankful Thursdays will be cancelled this week so I can get this series done, but will resume next week.)

You don’t need any sort of decorating skills to create a gorgeous layer cake, you only need a little know-how.  I promise.  You can do this.  Let’s get started!

Click here to find out more about Magi-Cake Strips.

Click here for the Miracle Pan Release recipe.

Cake shown at the beginning: Dark Chocolate Raspberry Cake

I hope you enjoyed this and maybe learned a trick or two.  I’ll see you back tomorrow with the next video in the series: levelling!

How To Make a Splatter-Proof Recipe Binder

Posted on

A couple years ago I got sick of the huge collection of recipes I had in different locations throughout my house.  A file in the filing cabinet marked “recipes.”  A couple binders with uncategorized hole-punched recipes that were falling out and splattered with batter and grease because I used the recipes so often.  A stack of them on my computer desk.  Fed up, I finally made a binder to keep my favorite tried-and-true recipes in.  The ones I make over and over again and want easy access to.

My friend, Teri, has a binder very similar and I just copied her idea to create my own.  I recently made a starter binder for a friend’s housewarming and took some pictures of the creation process so I could share this idea with you.

Supplies:

1 Presentation View Binder
Transparent Page Protector Sheets
Adhesive Index Tabs
Recipes printed on 8 1/2″ x 11″ paper

For this project, I like to use a binder that has a transparent sheet over the top so you can put a “Title Page” inside of it, of your own design. Using page protector sheets to hold the recipes works well for recipes you use often, because the clear plastic protects the recipe. If you splatter it, you can just wipe it clean before returning the recipe to the binder.  It is also more durable and the holes won’t tear as easily as a paper with holes punched in it.

First, write your recipe categories on the paper tabs that come in the index tabs box. Most everyone will use different categories, depending on the type of recipes they use.  For instance, I not only have a “Desserts” category in my own, but also divided desserts into three subcategories: cake, pie, and cookies.  These are the basic categories you might want to include, adding more if you need to:

Breads
Breakfast
Appetizers & Snacks
Soups & Salads
Main Dishes
Side Dishes
Desserts
Etc. (for beverages, condiments, etc.)

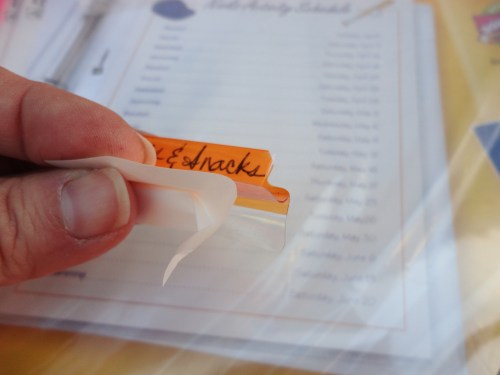
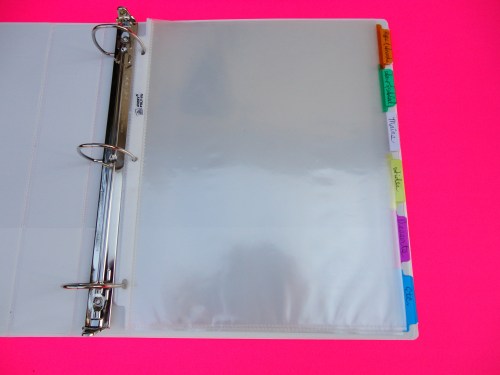
Slip the papers into your tabs and then arrange them in the order you want them to appear in your binder. Put enough page protector sheets in the binder for all the tabs. Remove the backing from the first category you want to use and slip it over the side of the first plastic sheet at the very top, then squeeze so it sticks.

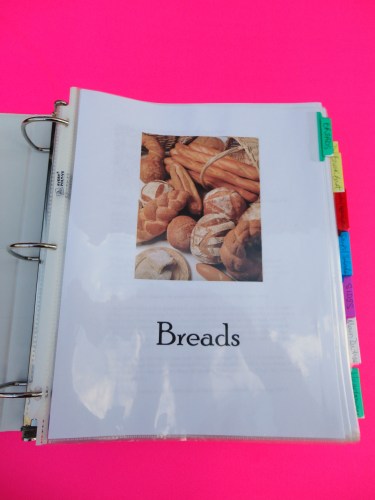
These are quite easy to remove if you mess up or want to change how high or low the tab is positioned, so don’t fret if it’s not exactly how you want it. Gently pry it off and adjust it. Repeat the process with the remaining tabs, placing each one on the sheet below the last and a bit lower on the side so it shows beneath the tab before it. Soon you will have a binder that looks like this:

If you like, you can create title pages for each recipe category, as I did. I searched for images using Google, then copied the ones I liked into a Word document and used the same font that I used on the front of my binder to type the category title below the photo.

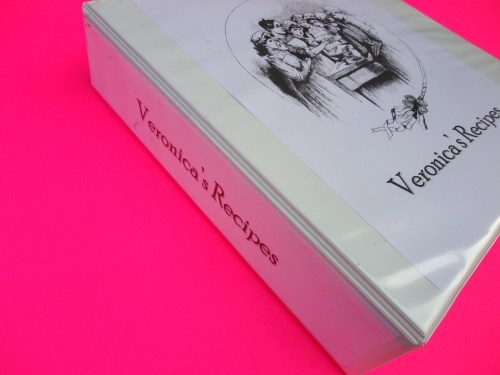
To create the title page, I did the same thing and searched for a picture I liked (I remember searching for cooking related coloring pages and liked the old-time feel of the one I chose). For the side title, I printed it in a Word document in landscape format in the middle of the page, then folded it to fit the pocket, and with much wailing and gnashing of teeth, I finally managed to get it in. It is difficult to get a paper in that tight spot, so you definitely want to use a folded paper for its sturdiness, or cardstock.

All that’s left is to fill the binder with recipes!

I have this slow cooker enchilada chile recipe posted here.

I put my blank page protector sheets in the front of my binder, before the recipes so that when I want to add a new one, I slip it in, then put it in the correct spot in my binder. I give each recipe its own sheet to make it easier to alphabetize them, therefore they are easier to find, but eventually I will have to start putting two recipes into each protector sheet (one facing forward, one backward) so that it doesn’t get too thick.

That’s about all there is to it! Very simple and quick.  What system do you use for organizing your recipes?  I also have about a million and a half saved to my computer into folders with different recipe categories!

Homemade Deodorant

Posted on

You’d be surprised the conversations you get involved in at church.  The teens are talking about the “Ponzi scheme” of social security, while one sister is talking about how knitting can “tighten your bosom” if you do it enough (knitting, that is), another is recommending Robitussin for infertility (really??), and two others are talking about how much they love their homemade deodorant while you’re trying to ignore the bloody photos & details of a hunting trip some of your brothers just returned from.  I love my brothers and sisters in Christ for all their diversity!  And thanks to two of them, I found out how to make my own deodorant and so will you.

Many are concerned about the aluminum found in store-bought deodorants, afraid that daily use will raise the aluminum levels in our bodies above what is healthy.  The reason deodorants contain aluminum is to actually prevent perspiration, which is the only down-side to making your own deodorant.  If you’re hot enough to sweat, you will still sweat.  But at least you won’t smell!  And sweating is actually a very healthy thing, allowing your body to release chemicals and toxins through your pores.

Like I mentioned in one of my Thankful Thursday posts, this homemade deodorant passed the ultimate test for me: teaching Sunday school.  I’m not a very stinky or sweaty person even without deodorant, and with it I’m always fresh as a daisy, except on the Sunday mornings that I’m teaching Sunday school.  It’s ridiculous, but I’m totally intimidated by children when I’m supposed to be in a position of authority.  I love playing with kids, having fun with them, but when I’m supposed to be their superior and not their colleague, hoping that I sound like I know what I’m talking about, and required to discipline them if necessary, I almost can’t handle it.   (One big reason it might be a blessing that I’m not a mother!)  Before the homemade deodorant, I always stunk to high heaven after teaching Sunday school, but when I went in wearing the homemade stuff, I came out smelling just as shower-fresh as before!

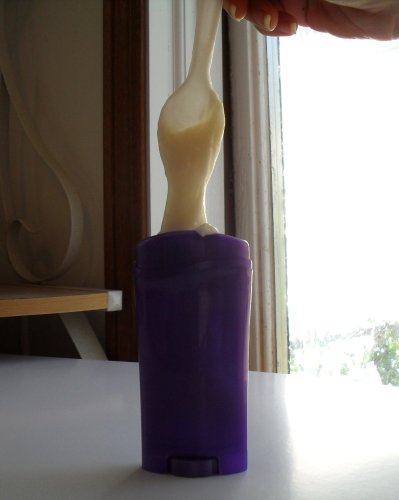
So, it definitely is an effective deodorant.  As for the look and feel of it, it does not compare to the invisible types, but depending on how thick you make it, can actually be less visible than traditional stick-deodorants.  The first batch I made quite thick, only adding enough coconut oil to make the consistency like a thick, whipped frosting, and it went on a little thick when applied.  The second batch I made thinner so that I could actually pour it into the deodorant tube (the first batch I scooped and smashed into it), and while I have to keep it in the fridge so that it stays solid, it goes on very thin and smooth so I like it better that way.  I find I only need a very light smear of it, which means it lasts much longer than regular deodorant.  This may differ from person to person, and your mileage may vary.

While reading other reviews of this type of deodorant, I found that extra virgin coconut oil is ideal, as it is antifungal and antibacterial, which boosts the odor-eliminating power of the deodorant.   I also discovered that some people are sensitive to baking soda and can get a rash from it, so you may have to tinker with the recipe to reduce it (and upping the cornstarch as you do) until you get a formula that your body likes.  If your skin starts to get dark under your arms and starts to itch, this is a skin yeast infection which one person said is caused by the baking soda (I tend to think it would be the cornstarch since it is something that yeast could feed off of, but I don’t know).  If this happens to you, get a generic athlete’s foot cream to clear it up.  I have had this happen before for a different reason, and found that Lotrimin (I got generic) worked best for me, clearing it up in just a few days.  Go back to your regular deodorant until it’s cleared up, then tinker with your recipe to adapt it until it no longer has this effect.  You could even try putting Lotrimin in the mixture.

OK, so here’s the church lady-inspired homemade deodorant recipe!  Up next, how to naturally give your bosom a lift while learning to knit! ;)

Homemade Deodorant

Printable recipe
Printable recipe with picture

3 tablespoons baking soda
3 tablespoons arrow root powder or cornstarch
3 tablespoons extra-virgin coconut oil, heated just enough to become fairly liquid
Tea tree oil (a natural antifungal), and/or other essential oils for fragrance (optional)

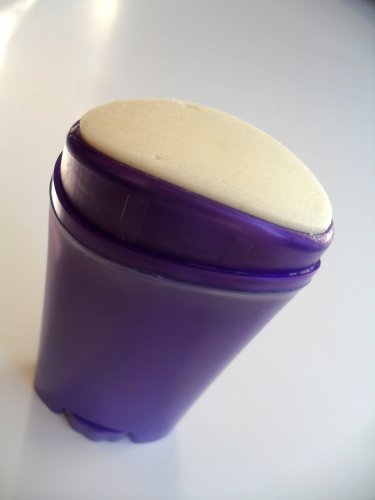
Start with an empty deodorant tube.  If yours still has deodorant in it, just roll it up and pull it off the base.  Reusing the container and wasting the deodorant is cheaper than buying a brand new empty container by itself, because you don’t have to pay for shipping.

Be sure to wind the base down to the bottom before filling.

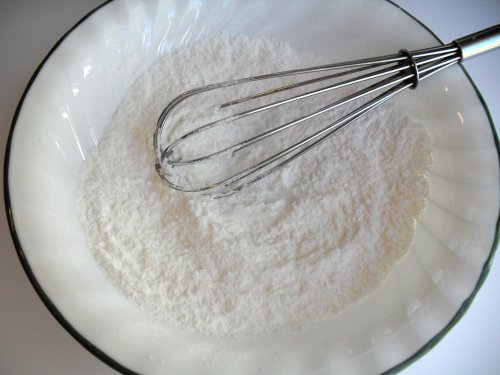
Whisk the baking soda and arrow root powder or cornstarch together in a bowl until lump-free and fine.

Add the oil…

and stir with a spoon until incorporated, then whisk it up until smooth.

Add your essential oil(s) in now to reach your desired fragrance, then add additional coconut oil or dry ingredients of equal measure as necessary to achieve your desired consistency.  Pour or pack into an empty deodorant tube and refrigerate until solid.

This may be stored at room temperature, but if you made the mixture very thin, you will have to keep it in the refrigerator if you want to apply it as a solid rather than a cream.

Miracle Pan Release


I bake a lot of cakes.  It’s kind of my thing.  I even have a T-shirt that says, “Real Girls Eat Cake.”  Because I want people to know that the reason I eat so much cake is that I’m real, and not because I have a problem.  Although I may not be fooling anyone but myself with that shirt.

Anyway, because of all the cake-baking happening in my kitchen, I usually also have a can of Baker’s Joy or a bottle of Wilton’s Cake Release in my pantry because they make such an easy one-step job of greasing and flouring my cake pans, which nearly every cake requires.  With a push of a spray nozzle or a swirl of a pastry brush, my pans are covered in seconds and there is never a pile of flour laying around my trashcan.

However, I can be kind of a tightwad, so when my friend, Suzie, sent me the link for a miraculous recipe to make my own “Cake Release”-type product, I was overjoyed.  And let me tell you, it works SO much better than Baker’s Joy.  And just as good as Wilton’s product at a fraction of the price.  I’ve never had a cake slide out so easily, except when using Wilton’s Cake Release!  It is very shelf-stable and easy to make, so I encourage you to whip up a batch to keep on hand for your own baking projects.

Miracle Pan Release

Printable recipe
Printable recipe with picture

1/2 cup vegetable shortening
1/2 cup vegetable oil
1/2 cup all-purpose flour

Whisk thoroughly until everything is incorporated and smooth. Store in airtight container at room temperature. To use, dip a pastry brush or impeccably clean fingers into the mixture and spread a thin layer over the bottom and sides of pan(s) for any recipe that calls for “greasing and flouring” your pans.

*Note: you can make any size batch you’d like, just make sure all amounts of each ingredient are equal to each other.

Recipe source: Apron of Grace

Beef and Cheese Enchiladas & How to shred lettuce or cabbage

Posted on

I often say that I was raised in a “health food only home,” but that isn’t completely true.  If it were, I would have starved to death before I ever started kindergarten.  The sad fact is that as a child, I hated everything healthy and loved everything else.  My Mom still has a note from me, written in third grade, in which I thanked her for being a wonderful Mommy but asked if we could please have pizza sometimes.  LOL!  Needless to say, I went hungry most nights and gorged myself when we were allowed to have spaghetti (this was junk food to us), cheese sandwiches, or Mom made enchiladas.  She didn’t do it often, but it was one of my favorite meals that she made. To this day, enchiladas are my favorite meal.

Mom made them very simply.  She made taco meat and rolled it up with cheddar cheese in corn tortillas.  She made red enchilada sauce from a mix and always stirred in a liberal amount of cilantro.  She dipped each tortilla in the hot sauce before filling them, which made it a very messy procedure.  She poured the leftover sauce over the top, topped with more cheese, and that was it.

I updated the recipe to simplify things, using canned sauce and stirring the cilantro into the beef mixture instead, and decided to top them with lettuce because my husband has always insisted this is the proper way to serve enchiladas.  I fought this for a long time, because Mom knows best and she never served hers with lettuce, but I finally saw the light.  Lettuce really freshens up this cheesy dish.  Even with the changes, these are still very much like my Mom’s enchiladas, which makes me happy.  Don’t we all love foods that remind us of our childhood homes?

Beef and Cheese Enchiladas

Printable recipe
Printable recipe with picture

1 lb. lean ground beef
1 medium onion, diced
2 tablespoons homemade taco seasoning (or a packet of store-bought)
½ cup cilantro
2 (8 oz) packages sharp cheddar cheese
16 corn tortillas
2 cans red enchilada sauce
½ head lettuce, shredded
Sour cream to garnish (optional)

Preheat oven to 350 degrees. Spray a large baking dish with cooking spray, then cover the bottom with a thin layer of enchilada sauce, about half a can. Set aside.

Cook beef and onion together in skillet over medium-high heat until meat is browned. Do not drain. Stir in taco seasoning and cook another minute, until liquid is absorbed. Remove from heat and stir in cilantro. Shred both packages of cheese and set half aside in the refrigerator. Dampen a paper towel and squeeze out water; wrap around a stack of five tortillas and microwave one minute or until hot and pliable. Place stack on a plate. Now you have everything you need to put the enchiladas together.

Place about two tablespoons of cheese down the middle of a tortilla, then top with 3 tablespoons of the beef mixture.  The temptation is always to overfill them, but you must resist.  Overfilled enchiladas means unsightly enchiladas that won’t close, and we want to keep things nice, tidy, and appealing.

Roll tightly and place in prepared dish.

Repeat, heating fresh stacks of tortillas as necessary, until all ingredients are used and dish is full of enchiladas.  I always have to scooch my enchiladas to make them fit, but scooch they will. :)

Pour remaining sauce over the top, then sprinkle on reserved cheese. I was short on cheese but if you follow the recipe, yours will be fairly smothered with cheese.  Which is proper.  This sad amount of cheese is sacrilege.

Cover with foil and bake 30 minutes. Remove foil and bake another 5-10 minutes, until cheese is melted.

After plating, sprinkle with lettuce and add sour cream, if desired.
Devour.

**********************************************

I’m sure many of you know how to shred lettuce, but I get very basic questions about cooking from time to time, including how to prep veggies, and thought I’d give a quick tutorial on this for those who don’t.  You can also use this method to shred cabbage for coleslaw.

Cut thin slices of lettuce starting from the outside edge, working your way towards the center.  Do not go all the way to the core.

Once you are getting close, turn the lettuce and start from the opposite side.

It is very important that you wear your Tweety bird pajama shorts during this process.  Arg!  I changed my shirt so you guys wouldn’t know I wore my PJ’s all day (it was my day off and I spent it cleaning), and didn’t think that my shorts would show above the table.  On the plus side, I guess I’m taller than I thought I was. :)

Continue until you have sliced away on all sides, then do the top.  Discard the core.

I didn’t cut very much off the core because I didn’t need a ton of lettuce.  Usually I would cut down a lot more.

You should have a row of sliced lettuce.  Chop along the row in 1/2″ increments, or smaller.

Turn your cutting board/sheet and repeat in the perpendicular direction, slicing every 1/2″ or so.

If you want your lettuce shredded even more finely, mix the lettuce with your hands, spread out in a line again, and repeat the cutting in both directions.

Voila!  Shredded lettuce.

How To Henna Your Hair

Posted on

Being raised in a whole-foods home, it only makes sense that my mother also chose all-natural hair and body products.  I started breaking into her stash of henna hair color when I was in middle school, so I have more than 15 years experience with it by now.

You may have heard of henna tattoos, popularized by the Indian culture, which are temporary and slowly fade over time.  You may not have been aware that you can use henna to color your hair as well, but it has been done since at least 400 AD.


Henna is a tall bush or small tree, and the leaves, once dried, are powdered and can be mixed with hot water or an acidic liquid to dye skin, hair, and nails.  The benefit of using henna on hair is that it  seals in oils and tightens the cuticle, resulting in a rich, healthy shine.  It contains no ammonia, peroxide, or other chemicals that are damaging to hair.  Unlike other hair dyes, it fades slowly over time (usually it lasts 4-6 weeks) so there are no tell-tale roots as your hair grows out.

Things you should know about henna:

1) It can only make your hair darker.  It bonds with the protein in your hair, adding color to it (unless you use the neutral henna, which only conditions without adding color); you can’t use it to lighten your hair.

2) If you get any color besides “neutral” or “black,” you will get red highlights in your hair.  In my case, I buy “light brown” and I get a medium brunette color with pretty red highlights.  You can get many tones of red, such as strawberry blonde, auburn, copper, etc, but all of these will only add color to what you already have so don’t expect your black hair to turn strawberry blonde if you choose that color.  It may give some warmth to your color, but will not lighten.

3)  In my experience, henna will not take your hair too far from the color you start with, so if you buy black and have light brown hair, you will become a darker brunette.

4) It is quite goopy and messy and can stain anything it touches.

5) It can react with chemicals in your hair, such as chlorine, or those used in coloring or perming.  In the picture below, taken before a homecoming dance my freshman year of high school,  you can see I turned the ends of my hair green when I tried using black henna after an entire summer of swimming daily in a public pool.  The photo was taken two months after the application, so you can see that green really hung on!  If you want to use henna after your hair has been exposed to chemicals, I highly recommend doing a strand test first.

 photo scan0031.jpg

6) You can add things to the henna mixture to enhance the conditioning and coloring properties, and adjust the amount of water used accordingly.  For deeper conditioning, add an egg or two tablespoons of yogurt.  To bring out golden highlights in already light hair, replace heated water with half warm water and half warm lemon juice or chamomile tea brewed with three tea bags.  To create rich golden or copper highlights add three tablespoons vinegar or fresh lemon juice.  To enrich browns or reds, add one teaspoon ginger, allspice, nutmeg or paprika.  To enhance brown tones, replaced heated water with day-old, black, very warm coffee (not instant).

7) Henna has a distinct herbal smell, which is quite pleasant compared to some of the harsh chemical dyes, but it can be off-putting to some.  It reminds me of a blend of powdered algae, herbal tea, and marijuana.  I sort of feel like a hippie when I’m applying it. :)

8) You can not use any metal during henna preparation or application, as it will react to it and make your hair a funky color.  Which could be fun, but if you’re hoping for a natural color, steer clear of the metal and use a glass, ceramic, or plastic bowl and stir with a wooden or plastic spoon.  I used a small silicone scraper this time.  They also recommend you use distilled water, but I just use purified water and this has never been a problem for me.

There are many henna products for hair and I have tried a few brands, but the one my Mom used is Light Mountain Natural, and after trying other brands, it continues to be my preferred henna product to this day.  Light Mountain Natural is a pure, natural product made from 100% organic powdered botanicals of three species of herbs: Red (Lawsonia inermis), Neutral (Cassia auriculata), and Black (Indigoferae tinctoria).  These powdered botanicals are blended for a rich medly of color.   Botanical color may vary from crop to crop and season to season, but their blending process helps compensate for these variations.

The instructions I’m giving are according to my experience with the Light Mountain Natural henna, and may not work with other henna products.  I use light brown, which I buy at a local health food store that has nothing to do with the Whole Foods chain.  In the box, you will get a bag of henna, instructions, plastic gloves, and a plastic cap.

The day before, please do an allergy and strand test according to the package directions.  I never do, but it is in your best interest, especially if you’ve never used henna before.

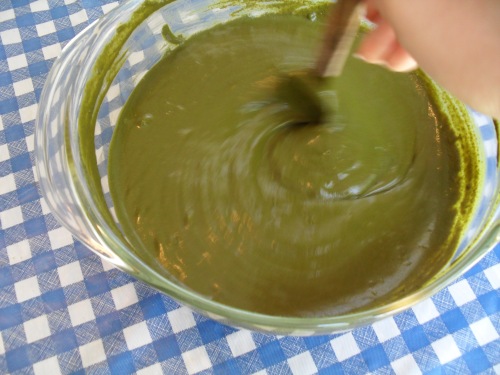
To start, empty your henna into a glass or plastic bowl. Add enough water, stirring with a non-metal utensil, that you get a consistency similar to yogurt.  I like to go a little thin, using two or more cups of water, because it thickens a bit upon standing, and it’s easier to apply if it’s not too thick.

Let mixture sit for 1-3 hours to cure.  I usually just wait an hour.  Curing cuts down on the time you will have to leave it on your hair, but you can use it as soon as ten minutes after mixing if you like.  The mixture will thicken and get darker on top. Stir to check the consistency and add more hot water if necessary.

They tell you to get your hair wet, and I went ahead and did it this time, but usually I apply the henna to my dry hair and I noticed no difference in the final outcome, except my grays didn’t seem to be covered as well.  Whether you get it wet or not, it’s now time to don your “henna shirt,” i.e. any shirt that you don’t mind ruining.  I have a shirt designated for henna application and it has been used many times.

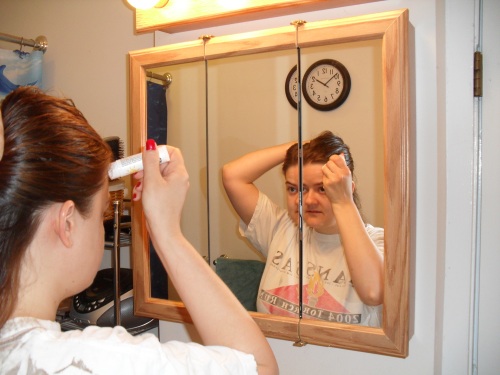
Apply a cream or Vaseline around your hairline to protect your skin from getting stained.  I used a sunscreen stick.  Whatever works. :)

It helps to pretend you have no teeth while you apply it.

“Back in my day, we didn’t have these fanshy schmancy sunshreen shticks, but they sure are handy!”

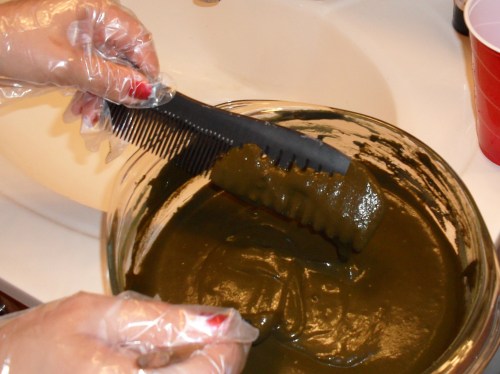
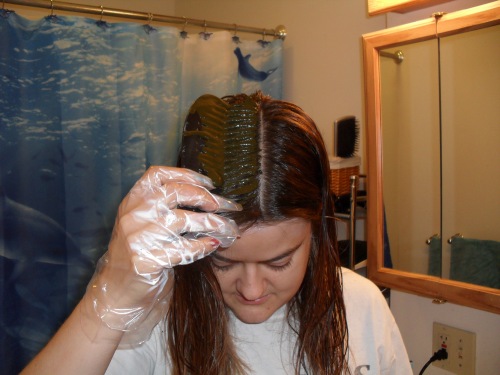
Apply the henna from roots to tips whichever way you please.  With a comb…

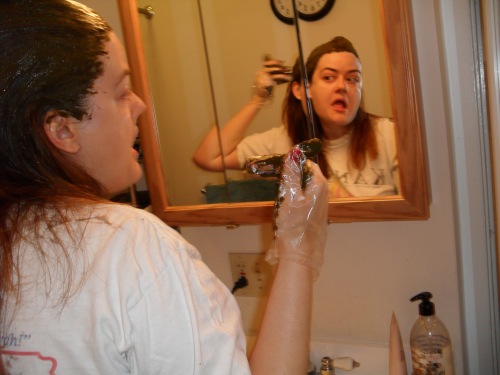
Or my preferred barbarian method–slapping it on and rubbing it in with my hands.

I think I make this same face when I apply mascara.  Perhaps the synapses in my brain were misfiring and telling my face that doing any beauty regimen requires wide eyes and an open mouth.  Apparently I channel the elderly quite a lot during this process as well…

“What’s that, shonny?  I can’t hear you, shpeak up!”

As I apply the henna downward, I like to pile my hair up on top of my head to keep it out of the way.  You can see what I meant when I said it gets messy.  I always put cream or Vaseline on my ears and all the way around my hairline because it never fails to get on my skin.

I just keep applying it until the entire bowl is on my head.  My hair is fine and I don’t really need that much, but at least I know every inch is covered.  If you have very long or thick hair, you might need two boxes of henna, but as you saw, one bag makes quite a bit.  If you’re spreading it further, be sure to massage it into your hair before covering with a cap.

When you’re finished applying the henna, the first thing you should do is clean up.  Discard your gloves and clean up all the henna that dropped on your sink and floor.  Use damp paper towels or a damp washcloth to wipe away any henna that is on your face, ears, and neck.  Next, don your plastic cap.

The one that comes with the kit (right) is square and after fitting it to your head, you have to close the gap at your nape with a hair tie, so I usually use a handy-dandy shower cap instead (left).

It is now time to apply heat, which activates the henna and bonds it to your hair.  My Mom used to have a retro hair dryer that came down over her head, which was uber fabulous for this part, but at my house, I apply heat with a handheld blow dryer.

Move the dryer around constantly so you don’t melt the cap, and maybe take this time to practice your lip curls and strengthen your forehead with eyebrow lifts.   I also like to use my other hand to press down on the cap while I’m heating my hair, so that the henna disperses even better while the color is setting.  The directions say to heat intermittently to maintain constant warmth, but I use the blow dryer for fifteen minutes straight, then, depending on  my mood, I will either go online until my hair gets cold, or go straight into the shower.  This time I went straight into the shower, which could be why my grays weren’t covered as well as they usually are–not enough time with the henna on.  Depending on your hair type (mine is super thin), the process usually takes 45-minutes of off-and-on heat application.

Get thee to the shower and rinse the henna out of your hair with warm water.  It is gritty, so it will take some time. Once you get as much of the henna out as you can, fill your hand with a huge pile of conditioner and work it through your hair from roots to tips.  Use a wide-tooth comb or your fingers to comb through it so that your hair is saturated with conditioner and tangle-free.  This will help get the remaining henna out as you rinse it again.  Do not use shampoo.  Ideally, you shouldn’t use shampoo on your henna’ed hair for 24 hours, but I usually do my first shampoo after 12 or so.

Style your hair as usual.  I usually just comb my hair and let it air dry, but after applying henna, I usually at least blow dry it because I’m eager to see what color it is.  Plus, I imagine that the heat helps set the color even more.

Here’s my hair about 6 weeks after the last henna treatment, and the day before this one:

And here it is after this henna treatment:

Another note: there is a specific Light Mountain Natural henna treatment for gray hair, but I haven’t tried it yet, as it is a two-step system and I’m not terribly patient, plus buying it would confirm my suspicion that I’m getting old.  The gray hairs are bad enough without having to buy a special gray hair treatment for them, you know what I mean?

Disclaimer: Light Mountain Natural doesn’t know I exist and did not compensate me in any way for this tutorial or for my opinion of their products.  I just included it here because it is the best henna product I know of and wanted to share the best with you. Check out their website here.

I gathered my information about henna and the henna hair color process from knowledge passed on to me from my mother, from Wikipedia, and from the Light Mountain Natural instructions.  I nabbed the first two pictures off the sites given on the actual pictures themselves.