RSS Feed

Category Archives: Condiments & ETC.

Simple Strawberry Jam {No Pectin}

Posted on

Strawberries were $1.25/lb a couple weeks ago, so I got more than I usually would to make some jam.  Ever since I made raspberry jam and realized how good homemade is, I don’t tolerate store bought very well.  Bonne Maman is the only thing I’ve found that even comes close, and why pay $4 for a jar of delicious jam when you can make your own for less than $1 a jar?

So I made a simple jam, and it’s just amazing how boiling few ingredients can make something so delicious.  It is the concentrated flavor of perfect, sweetened & ripe strawberries, and pretty much makes everything you put it on taste like heaven.

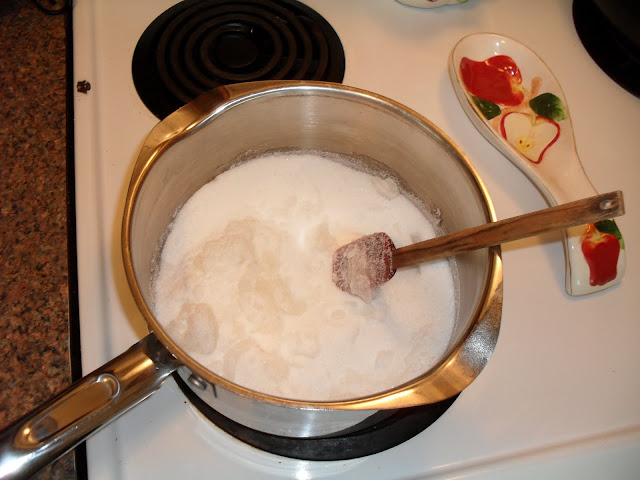
The second best part is it’s so easy to make! The butter in it keeps it from foaming, so you don’t need to skim it, and you don’t have to boil the jars after filling them.  Perfect for a lazy (or first time) canner like me.

Simple Strawberry Jam

Printable recipe
Printable recipe with picture

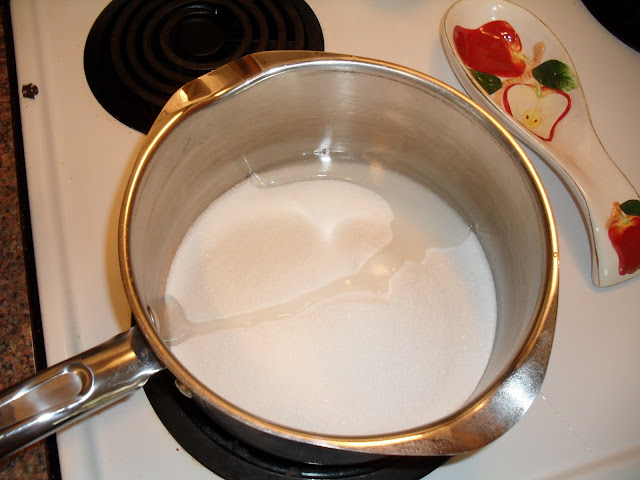
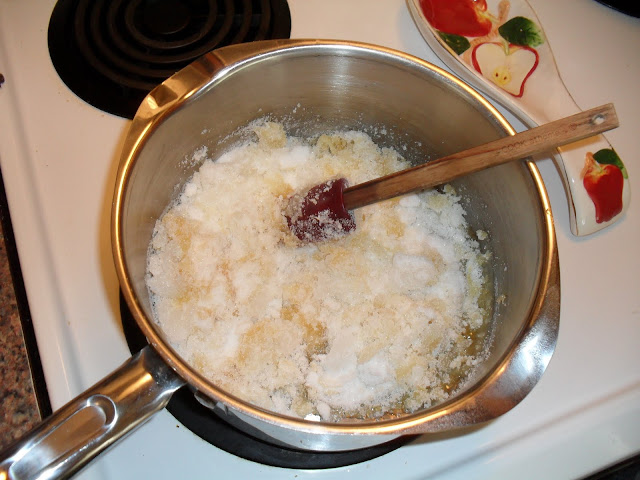
2 lbs strawberries, stemmed & hulled
2 cups sugar
1/4 cup lemon juice
1 tablespoon butter

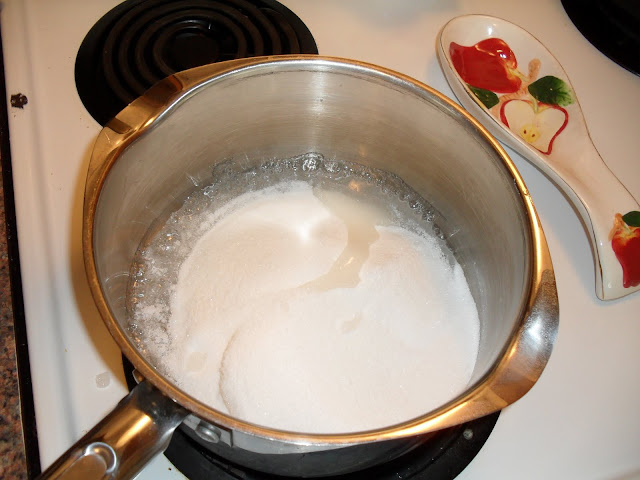
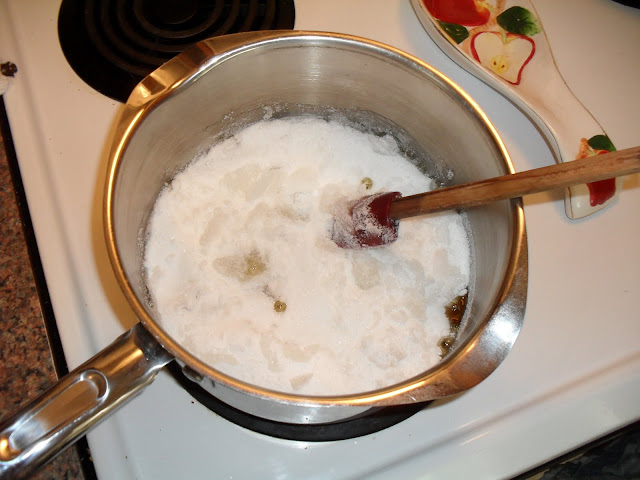
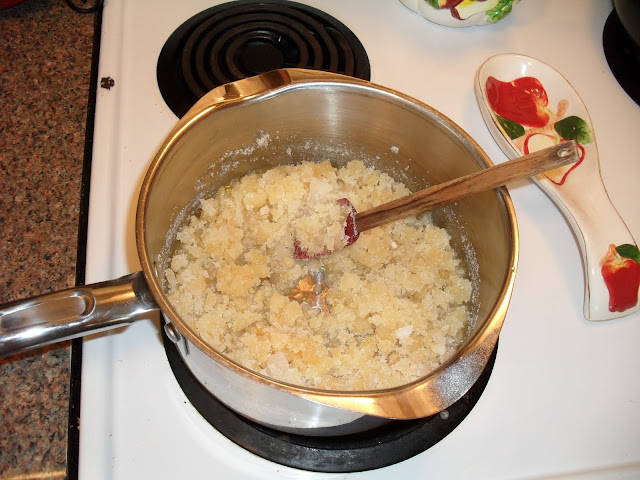
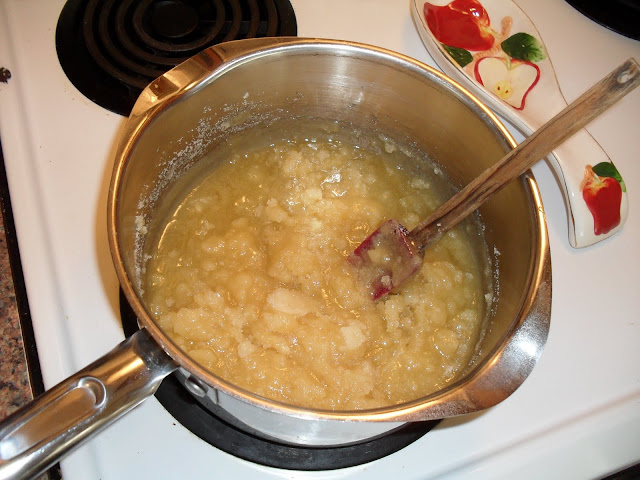
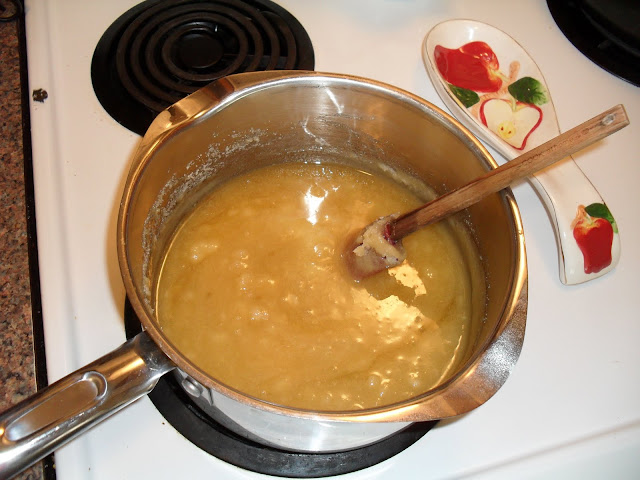
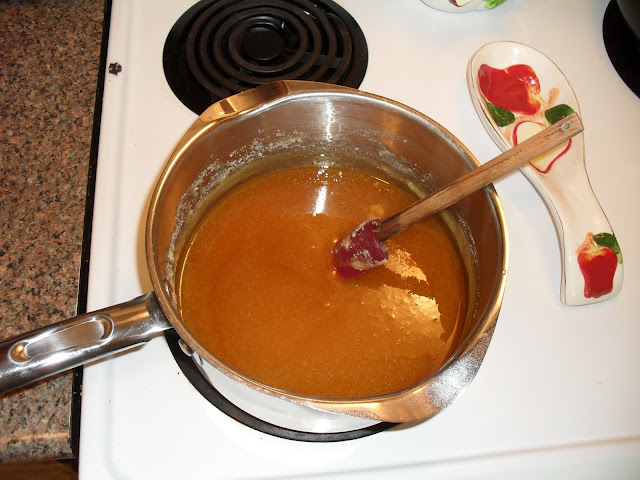
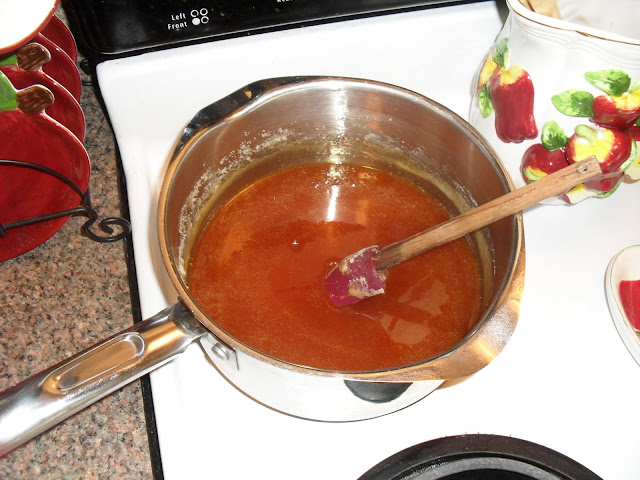
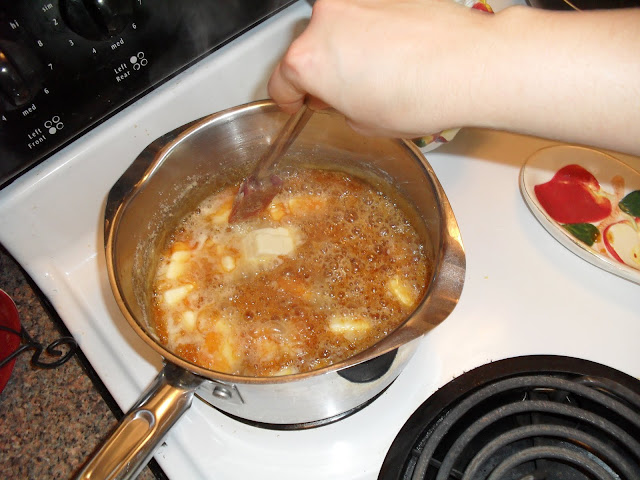
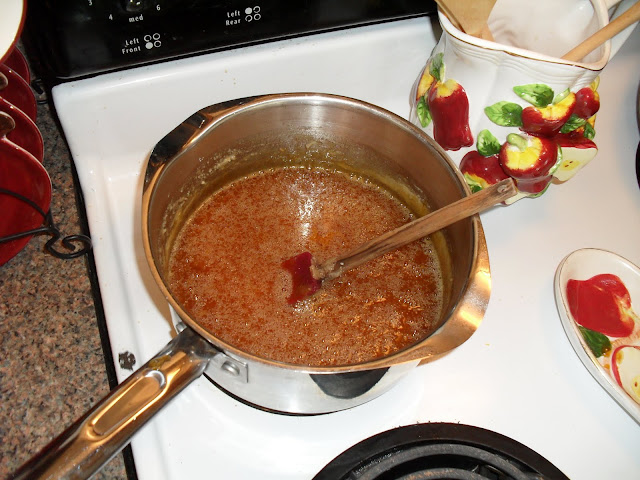
Combine all ingredients in a large saucepan and heat over medium-high heat while mashing with a potato masher. Mash it as smooth or chunky as you like, and continue to stir the mixture while boiling it. Boil until the jam reaches 220 degrees, or until it gels up when you put a spoonful on a frozen plate and stick it in the freezer for a minute. You’ll know it’s getting there when it turns from watery to starting to get thick and coating your spoon. Using a funnel (this is my favorite for canning), pour into sterilized jars, then screw on the lids and allow to sit until sealed. Jars may be stored in refrigerator for up to a month. For instructions on how to can the jam to keep it at room temperature for up to a year, click the recipe link below.

Recipe source: adapted from Sweet & Savory by Shinee

Oh, and if you’re interested, the bread I used for my photos is non-alcoholic honey beer bread. Made the Buttery Soft Beer Bread with a bottle of non-alcoholic beer (Beck’s) and used local raw honey in place of sugar. So good!

Red Raspberry Jam

Posted on

Does anyone remember this post last October where I teased you with this picture?

https://lh6.googleusercontent.com/-VQbTH43Z544/UnH1scURz3I/AAAAAAAAKTw/YIjt8BflQsY/w685-h514-no/DSC08626b.jpg

{Pancakes recipe here}

It all started when I bought a gazillion pints of raspberries because they were unseasonably on sale for $1 each at that time.

After we ate half a gazillion, the rest were about to go bad, so I decided to try my hand at homemade jam.

It’s something I’ve never done but always wanted to.  Let me tell you, it couldn’t be easier! You don’t even need to go out and buy pectin, at least not for this recipe.  That’s one reason I never made it, it just annoyed me that I needed to go buy something that was already in fruit anyway. This method uses a method of cooking the sugar first to gel the jam, rather than an abundance of pectin.  Cool.

If you’ve never had homemade jam, there is just no comparison to store bought. So good.  You might not be able to eat store bought after making your own!  And if you can bear to part with some, it makes great gifts too.

Red Raspberry Jam

Printable recipe
Printable recipe with picture

2 lbs fresh raspberries
3 1/3 cups granulated sugar
2 tablespoons lemon juice
1 tablespoon butter

Combine all ingredients in a large saucepan and bring to a boil over high heat, stirring to combine and break down the berries. I mash them with my spoon or a potato masher to break them down and the jam still has a pleasantly chunky consistency when finished. Cook until jam reaches 221 degrees, or until a small amount gels on a plate when placed in the freezer for 2 minutes. Pour into a 4-cup glass measure and pour into sterilized & prepared jars. Screw on lids and allow to sit until sealed.  Jars may be stored in refrigerator for up to a month.  For instructions on how to can the jam to keep it at room temperature for up to a year, click the recipe link below.

Recipe source: adapted from Martha Stewartx

Stabilized Whipped Cream

Posted on

OK, I’m almost ready to share CW‘s recipe for strawberry shortcake, but the draft started out so long that I’m trying to break up the longer parts into separate blogs, and this stabilized whipped cream recipe certainly deserves its own post.

Dollops of whipped cream top so many summer-time desserts and a recipe for a stabilized version comes in quite handy for me throughout the year.  Since I need it so often, but very rarely have the time to whip it up right before serving dessert, and can’t make it much in advance since it waters out over time, I usually make the other recipe for stabilized whipped cream that I have on my blog.  But then a reader (shout out to Miss Sandi Rose!) shared her own recipe for stabilized whipped cream with me back in March and I tried it out the first chance I got because it was so interesting!  I can tell you that not only was I pleased with the results, but my family was as well.  I left the leftover whipped cream at my parents’ house and when Mom gave me my piping tip back next time I was over, I asked if they ate the leftovers.  She answered, “We ate the h#@& out of it!”  LOL!  I can totally see her squirting the whipped cream straight into her mouth and laughing like a lunatic while dodging Dad as he tries to get it away from her to hog it for himself.  That’s totally Crazy Man and CW.

Anyway, while you can’t tell the other recipe apart from regular whipped cream, this one doesn’t increase in volume very much, if at all, so it’s very thick and creamy and has just a little bit of tang to it, which I happen to love.  The texture reminds me of mousse and it really could be a dessert in and of itself.

I used it to top a strawberry shortcake (bet you figured that out already since you’re smart like that) that I added blueberries to for our Independence Day barbecue.  Check back tomorrow for the shortcake recipe-it was a huge hit and this whipped cream put it over the top!

Stabilized Whipped Cream

Printable recipe
Printable recipe with picture

3 oz. cream cheese, softened
1 cup heavy cream
24 miniature marshmallows
1/4 cup granulated sugar

Mash cream cheese with a fork in a medium metal mixing bowl. Slowly add the whipping cream and stir until blended. Stir in marshmallows and sugar. Chill 4 hours or overnight. (Do not cover the bowl.) Place beaters in freezer to chill while the mixture is in the fridge.  Whip mixture with the chilled beaters until the marshmallows are completely dissolved and mixed in and the mixture is thick and hold stiff peaks.  Cover and keep refrigerated until ready to use.

Recipe source: Sandi Rose

Watermelon Black Bean Salsa

Posted on

For the Holiday Recipe Club‘s Memorial Day blog hop, the secret ingredients to choose from were watermelon, beer, and pork.  I think I’m on a salsa kick because my last recipe for the HRC on Cinco de Mayo was for Fresh Mild Salsa, and the first thing I thought of when I saw that watermelon was one of the ingredients for Memorial Day was the salsa recipe my hair dresser gave me back in February.  I have been craving it ever since I read the recipe, imagining how wonderful it must taste, and I was trying to wait until watermelon were truly in season here in Wichita to try it (that happens in August for us), but with the added incentive of the Holiday Recipe Club blog hop, I knew the time had come.

This stuff is the bomb, yo!  The only change I made was to add in some lime juice, which I feel was essential to achieve the salsa flavor and balance the sweetness of the watermelon.  The beans, which may seem strange, are somehow a perfect fit with the flavors & textures.  I could eat this as a meal, it is so good!  It is juicy, and seriously addictive.  It is, however, best if eaten within four hours of making it as the watermelon leaks more and more water and becomes mushy after a while.  To serve this at your Memorial day barbecue or another gathering,  just have the watermelon prepped in a separate container than the other ingredients, then stir them all together and refrigerate an hour before serving and you’ll have a bowl of salsa perfection ready to wow your guests.

Watermelon Black Bean Salsa

Printable recipe
Printable recipe with picture

2 cups diced seedless watermelon
3/4 cup finely diced sweet onion
3/4 cup canned black beans, rinsed and drained
2 jalapeno peppers, seeded and finely diced
1/4 cup minced fresh cilantro
Juice from 1/2 a lime
2 teaspoons brown sugar, packed
1 garlic clove, minced
1/2 teaspoon salt
Tortilla chips

In a small bowl, combine all ingredients but the chips. Cover and refrigerate for at least 1 hour. Drain if necessary before serving. Serve with chips within 2-3 hours of making.

Yield: 3-1/2 cups.

Veronica’s Note: I advise wearing latex gloves when handling and dicing the jalapenos, as the oils can burn your skin.

Recipe source: Jennifer L.

A big thank you to Erin for creating this club!  I’m having a lot of fun with it.  If you’d like to join or find out more, check out the Holiday Recipe Club website.  And don’t forget to check out the other Memorial Day recipes by clicking the linky frog below.


Fresh Mild Salsa

Posted on

The secret ingredients chosen for the Holiday Recipe Club‘s Cinco de Mayo blog hop were dulce de leche, tomatoes, and chorizo.  For last month’s Easter blog hop, I went crazy and put a lot of effort into creating something with all three secret ingredients (carrot cracker treats with carrots, spinach, and eggs).  This month, I’m totally cheating and taking the easy route by using this as an excuse to finally post my fresh salsa recipe that I won third place for at the fair last year.

My inspiration for the recipe came from my sister, Danielle, who usually only makes recipes that turn out things like soap, lip balm, or bath fizzies.  But one edible thing she does make, and well, is fresh salsa.  Her secret ingredient is orange juice, and while I didn’t follow her original recipe to a T, I did make sure to use some fresh orange juice in it. I also replaced the jalapeño with poblano, which is a mild pepper, sort of like a bell pepper with just a bit of kick to it.  (I love spicy food but I was making this salsa for the “mild” category.  The salsa also had to use fresh ingredients, which is why I didn’t just make my favorite salsa.)  If you’d like a hotter salsa, dice up some seeded jalapeño instead!

The judges loved my salsa, but said it had a bit too much garlic, so I’ve adjusted the recipe to up it to blue ribbon status by cutting the garlic from four cloves (hey, what can I say, I love garlic!) to two (the amount in Dani’s original recipe–I should have listened to the expert!).  But as with all recipes, just add amounts to suit your own tastes!

Fresh Mild Salsa

Printable recipe
Printable recipe with picture

6 medium fresh tomatoes on the vine
1 poblano pepper, seeded and finely diced
½ large red onion, finely diced
½ a bunch of fresh cilantro, finely chopped
1-2 cloves fresh garlic, minced
Juice from ½ a lime, ½ a lemon, and ½ an orange
1 teaspoon salt
¼ teaspoon freshly grated pepper

Finely dice the tomatoes, removing the seeded pulp as you go, and place them in a wire mesh sieve set over a bowl to drain for five minutes. Discard juice, then stir the tomatoes and all other ingredients together in a large bowl. Store in the refrigerator.

Makes 2 pints.

Recipe source: adapted from Danielle Davis

Check out the other Cinco de Mayo recipes in the blog hop by clicking below!


Blackening Seasoning

Posted on

If you’ve ever had blackened chicken, you know what this stuff will do to your chicken or fish: make it spicy, flavorful, and…well, kinda black!  This is my second favorite way to eat salmon, coating it in this before cooking it.  (This is my first favorite.)  This is perfect if you’re low-carbing it–just serve your blackened meat with veggies…or if you’re lovin’ the carbs, head on over to Suzie’s blog to get a recipe for Olive Garden’s copycat fettucine alfredo to serve with your blackened goodness!

Blackening Seasoning

Printable recipe
Printable recipe with picture

2 teaspoons black pepper
1 teaspoon salt
1 teaspoon dried basil
1 teaspoon dried thyme
1 teaspoon garlic powder
1 teaspoon onion powder
1 teaspoon cayenne pepper
1 teaspoon paprika

Stir all spices together and store in an airtight container. Rub onto chicken, salmon, or meat of choice before pan-frying or grilling.

The blackening seasoning blackens better the more batches of meat you cook in the pan. I think it helps to have it on high heat, at least to begin with.

Breadless Breading

Posted on

Pictured: Chicken in Basil Cream, using Breadless Breading

This is a fabulous low-carb, gluten-free substitute for breading that can be used as a coating for things you’re either going to be baking or frying.  I use it on both chicken and fish (it’s best for mild white fish, though it’s pretty good on salmon too) and have even added it to meatloaf*.  I prefer this tremendously over any other coating I’ve used, as it has so much flavor in comparison to even seasoned breadcrumbs.  The first time I used it on fish, my husband said, “this is like…onion ring-fried fish!!”  While this breading isn’t overly onion-y (in my opinion, it is perfectly seasoned), I will say that if you like onion rings, you’re going to love it as it does lend a similar flavor and texture experience to your meal.  I hope you enjoy!

Breadless Breading

Printable recipe
Printable recipe with picture

2 (3.75 oz) jars (2 cups) dehydrated minced onion
2 teaspoons salt
½ teaspoon black pepper
½ teaspoon ground sage
1 teaspoon dried rosemary
1 teaspoon dried coriander
1 teaspoon dried thyme
½ teaspoon dried oregano
½ teaspoon paprika
¼ teaspoon red pepper flakes
2 bay leaves, crushed
1 ¼ cups grated Parmesan cheese

Place dehydrated onion in food processor bowl and process for 1 minute. Add remaining ingredients except the cheese and process 30 seconds. Add Parmesan and pulse to blend. Store refrigerated in an airtight container.

Recipe source: adapted from Suzanne Somers’ Fast & Easy Bake & Fry Mix

*This doesn’t replace bread crumbs in meatloaf because there is nothing in it to absorb moisture the way real bread can, but it does add great flavor!  For a gluten-free meatloaf, you can add in quick-cooking oats along with some of this breadless breading.  You will not need to add onions to your meatloaf if you use this breading because it adds plenty of flavor, but I added a red pepper to mine and it was really good!

A quick and easy meal: coat one side of fish (this is swai) with breadless breading and fry in olive oil until golden.  Flip and cook until the fish flakes easily.  Enjoy your Onion Rings-Fried Fish!

Homemade Miracle Whip & Tartar Sauce

Posted on

OK, which side are you on?  Mayonnaise or Miracle Whip?  In our house, my husband goes for the mayo, and I reach for the whip.  I just love the sweet tanginess of it!  So when I discovered how easy making my own mayonnaise was, I very quickly adapted it to taste like my preferred sandwich spread.  I don’t know what took me so long to share it with you.  Enough delaying, here you go!

Homemade Miracle Whip

Printable recipe
Printable recipe with picture

1 egg
1 tablespoon sugar
1 tablespoon white vinegar
½ tablespoon lemon juice
½ teaspoon mustard powder
½ teaspoon salt
¼ teaspoon onion powder
1 ½ cups flavorless oil

Place all ingredients, except the oil, in the bowl of a food processor fitted with blade attachment. Have the oil measured and at hand. Turn on the food processor and pour the oil through the feed tube in a thin, steady stream. Gradually increase the flow until all oil is in the mixture. Continue to process until a thick mixture. Refrigerate.

To make tartar sauce, stir in finely chopped onion and dill relish (or finely chopped pickles), as much as you desire. I think I added 3 tablespoons of each to about half the Miracle Whip recipe.  It’s so yummy with fish sticks!

Caramel Sauce

Posted on

When I need caramel sauce as an ingredient in frosting or in baking, I prefer to use homemade because the flavor is more pronounced and comes through better in the finished product.  It is wonderful as a garnish on top of ice cream or cake, and I’ve successfully added it to frosting to make caramel buttercream, and to Amish Friendship bread, which I’ll be posting the recipe for tomorrow.  And since it’s so useful and beloved in our home, my recipe makes a rather large batch so I always have some in the refrigerator, but if you only need enough to garnish ice cream, you might want to halve the recipe.  Then again, this stuff will last months in the refrigerator so it wouldn’t hurt to have too much.  Who knows what delicious creativity it might spawn in your kitchen!

Caramel Sauce

Printable recipe
Printable recipe with picture

2 cups granulated sugar
2 tablespoons corn syrup
¼ teaspoon salt*
1 teaspoon vanilla
12 tablespoons (1 ½ sticks) unsalted butter, cut into cubes*
1 cup heavy whipping cream

Measure sugar into a large saucepan and measure corn syrup over the top. Set the heat to medium-high.

When the corn syrup starts to bubble around the edges, stir with a spoon or silicone spatula.

Allow to sit again without stirring until it starts melting around the edges.

Stir infrequently until the sugar really starts melting, then begin to stir constantly.

Now we’re getting somewhere!
Now it’s completely melted, but I want mine to be a little darker before I remove it from the heat.  The darker the color, the stronger the flavor.  Just be sure not to burn it.

When the sugar is completely dissolved and deep amber in color, remove from heat and stir in the salt, vanilla, and butter. The mixture will bubble up a lot.

When completely combined, add the whipping cream and stir until combined; mixture will bubble up again. Keep stirring until smooth and uniform in color.

Pour into a heat-safe dish and allow to cool to room temperature.  Your pot will have a ring of crystallized sugar around it–don’t try to scrape it into the caramel sauce because it will make it grainy–just soak your pan in hot water and it will come right off.

Cover and store in the refrigerator once cool.

*Omit salt from recipe if using salted butter.

Homemade Magic Shell

Posted on

Have you ever had Magic Shell?  If you haven’t heard of it, it’s a Smucker’s ice cream topping that comes out liquid, like chocolate syrup, but hardens when it comes in contact with your ice cream, so that you have to tap and break it to take a spoonful of icecream.  It’s so cool!

My husband is obsessed with it, but you can rarely find the peppermint kind, his favorite, so I started making it for him last year.

It is super simple to make, and you can add any extracts you like to change the flavor profile.   You can also use dairy-free chocolate, such as Ghirardelli semisweet chips, and you have a vegan topping for your vegan one-ingredient ice cream. Since that ice cream is so healthy, I didn’t feel too guilty about adding some of this to the top of it and calling it my breakfast.  :)


Homemade Magic Shell

Printable recipe
Printable recipe with picture

1 1/2 cups (300 grams) semisweet chocolate chips
1 cup (200 grams) refined coconut oil
pinch of salt

Place the chocolate and oil in a microwave-safe dish and microwave for thirty seconds, stir, and microwave another 15 seconds. Repeat, if necessary, stirring well every 15 seconds, until mixture is melted and smooth.  This can also be done in a double boiler. Stir in salt and store in an airtight container at room temperature.  Mixture will remain liquid during the summer, but might solidify during the winter.  If it becomes solid, simply heat it until liquid again.

Peppermint Magic Shell: add 2 teaspoons peppermint extract.  I like to divide the batch in half, leaving half plain and adding 1 teaspoon peppermint to the other half.

Makes about 2 cups Magic Shell.

Recipe source: adapted from Brownie Points