RSS Feed

Category Archives: Lighter Fare

Sausage Minestrone


I’ve been making the most amazing soups this winter.  My secret? I finally gave up following recipes! I never thought I could cook without a recipe, as I’ve never been what I think of as a “natural cook” – someone who can just keep adding things to a dish or pot until it tastes amazing. But I decided to give it a shot, and have surprised myself with the results.

Sadly, a lot of the delicious things I’ve made, I didn’t measure anything and didn’t take notes, so I can’t share recipes or even make them exactly the same way again.  But this one turned out so good that I immediately wrote down exactly how I made it so I could duplicate and share it.  I’ve made it twice in the past month – we love it so much! It’s also quite nutritious and low in fat, which is a big bonus in my book, as many of my favorite meals are huge calorie bombs. Not this one. Enjoy the flavor, guilt-free. :)
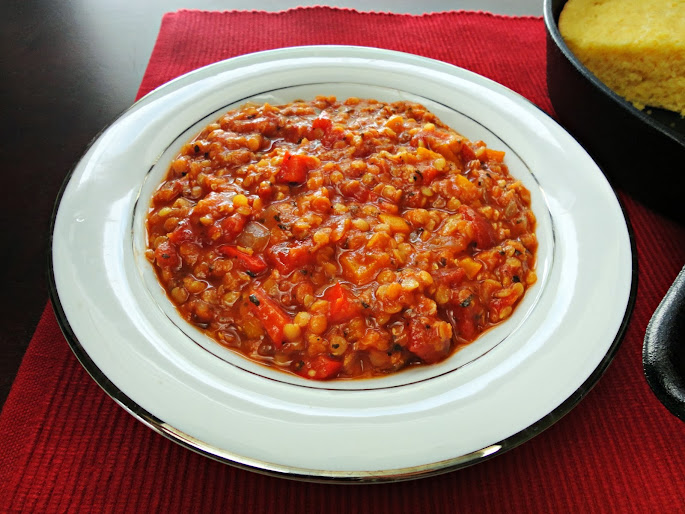
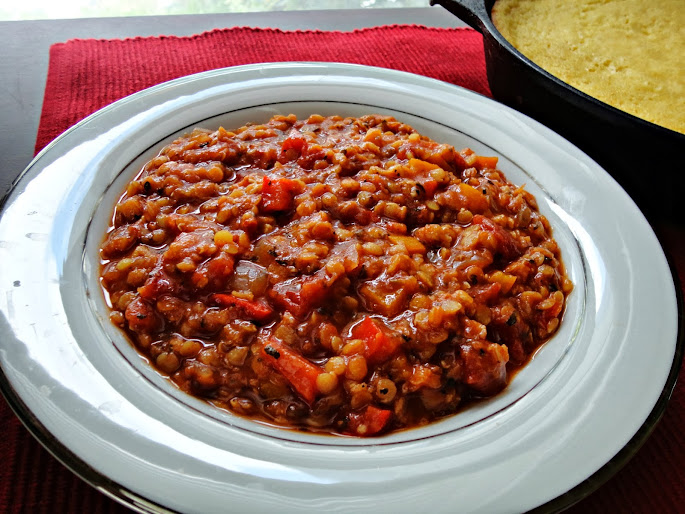
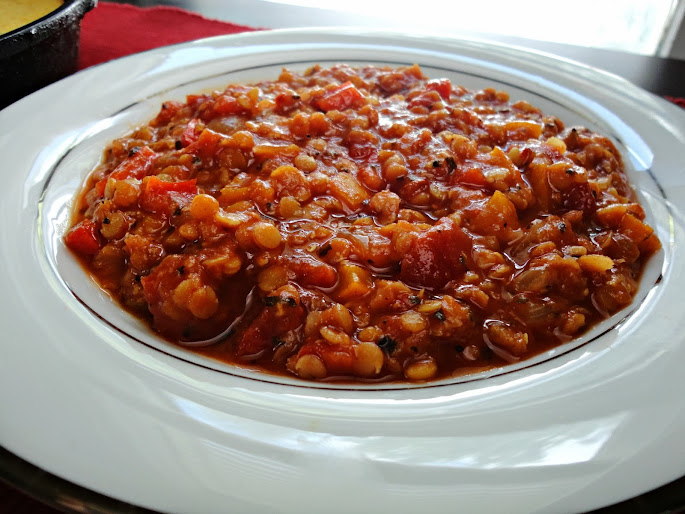
Sausage Minestrone

Printable recipe
Printable recipe with picture

1 (8 oz) package baby portabella (“bella”) mushrooms, sliced
1 (20 oz) package Italian turkey sausage, casings removed
8 chicken bouillon cubes*
8 cups water
1 (15-16 oz) can white cannellini beans
1 (15-16 oz) can dark red kidney beans
2 (14.5 oz) cans diced tomatoes with basil, garlic & oregano, undrained
2-3 carrots, peeled and chopped
1 large zucchini, cut in half & sliced
1 large onion, diced
3 cloves garlic, minced
2 bay leaves
2 cups kale, hard stems removed and chopped into small pieces

Cook the mushrooms in olive oil in a skillet over medium heat until they are cooked down and soft and a darker color. Scrape into a stock pot. In the same skillet, brown the turkey sausage, breaking it up as it cooks to make crumbles. Once cooked, add to the pot. Add the remaining ingredients except for the kale, and bring to a boil over high head. Reduce heat and simmer until vegetables are tender, 15-30 minutes.  Add kale and cook another five minutes.

*Veronica’s notes: you want the smaller size bouillon cubes, the ones that need only one cup water each for broth. If using the bigger ones that need two cups, use only 4 cubes. You can use 8 cups chicken broth instead, omitting the water from the recipe, and add salt to taste.  The second time I made this, I added in 3 stalks of celery and a pound of fresh green beans. Feel free to add what you like, and just add more seasoning to taste, if necessary.

Advertisement

Iron-Woman Ginger Cake


I don’t usually post on Saturdays, but I’ve had the honor of being a guest contributor for whattoexpect.com, a site I go to every week to see my baby’s progress!  I really hope you will visit to check out my recipe for Iron Woman Ginger Cake.  It’s so nice to have healthier options (especially ones that taste good) during the holidays, and this cake definitely fits the bill!

XOXO,

Veronica

Smoky Red Lentil Chili {vegan}

Posted on

This was the chili I made the Sweet Buttermilk Cornbread to go with last week.  It was the smoky factor that called to me when I saw it on Tami’s blog, and it didn’t disappoint! I upped the spicy factor to suit our tastes and it was just wonderful.  The only change I would make next time is to take the suggestion to run the red peppers through the food processor (and use two red peppers instead of one orange-lol), because I imagine that makes the chili thicker and more red and visually appealing.  I wasn’t reading the recipe closely and just diced the peppers as I usually do, which was fine, but I look forward to trying it the recommended way.

And don’t be scared of the lentils! I personally have a distaste for regular lentils, but red lentils are totally different and do not have that earthy flavor to them at all.  I found mine at a Lebanese market (you can get them at N & J Cafe’s market here in Wichita), and hope you’ll be able to find them in your area too.  So much tastier than regular lentils, IMO.

This chili has a wonderful balance of flavors and I was impressed that the creator even thought to add vinegar, something I’ve never added to chili, but somehow it’s perfect here.  You won’t really notice it, but it did need some tang to balance everything.  So good, you won’t even miss the meat.

Smoky Red Lentil Chili

Printable recipe
Printable recipe with picture

2 ounces dates (approximately 9 Deglet Noor)
1 pound red lentils (they look orange in the package)
7 cups water, divided
2 14.5-ounce cans diced tomatoes (fire roasted preferred)
1 6-ounce can tomato paste
1 large chopped onion
2 large red bell peppers, finely chopped*
8 cloves garlic, finely minced
¼ cup apple cider vinegar
1½ tablespoons dried parsley
1½ tablespoons dried oregano
1½ tablespoons chili powder
2 teaspoons smoked paprika (different than regular paprika)
1 teaspoon salt
½ teaspoon chipotle chile powder (or more to taste – I used 1 teaspoon)
¼ teaspoon crushed red pepper flakes (or more to taste – I used 1 teaspoon)
scallions or Faux Parmesan – optional (for topping at the end)

Blend the dates in one cup of the water until smooth (unless you have a water-tight food processor, use a blender, or the liquid will fly out. Lesson learned the hard way by me). Place the puree, along with all remaining ingredients in a stock pot and bring to a boil. Reduce heat to medium and simmer for 20 minutes, or until lentils are soft. Alternatively, you can cook in an electric pressure cooker and cook on high for 10 minutes, or in a slow cooker on low for 8 hours. Sprinkle with chopped scallions or Faux Parmesan and serve with baked tortilla chips or over a baked potato if desired.

*Chef AJ’s note: I like to use the food processor so it’s almost a puree.

*Veronica’s note: If you live in Wichita, go to The Spice Merchant for the smoked paprika and chipotle chile powder – you will pay much less than you would for the pricey McCormick spices, and they’re just as good!

Yield: 8 servings

Recipe source: Nutmeg Notebook, originally from Unprocessed by Chef AJ.

Fully Loaded Vegetarian Salsa Chili


Though my tastes have changed during pregnancy, mainly from loving sweets, to abhorring them, to loving them again, one thing has remained pretty consistent. My zeal for soup. It started early on, I think before I even announced I was pregnant, and continues now, though not as strong. I enjoyed and made many soups during the heat of summer, which was previously against my food religion (ewwww, hot soup in summer?!), but pregnancy knows no restrictions on seasonal meals.  I enjoyed winter meals all summer!

I created this chili during one of the weeks a month or so back when we had to eat mainly out of our cupboards because we were stretching our budget to include things like baby bedding, a 3D sonogram and bigger bras.  :D  And what a blessing that necessity became, because we had some of our best meals during those weeks, including the Tilapia with Chile Lime Butter (I found like 2 tons of tilapia in our freezer).

It’s hard to believe I actually had all these ingredients on hand (even the peppers – I barely saved them before they went bad), but I’m so glad I did because the flavor was just incredible and I can’t imagine leaving any of them out.  I usually enjoy meat in my chili, but I never missed it here because it’s so hearty and flavorful.  I ate leftovers for lunch for several days and was sad to eat the last bowl.  It is so, so very good, and for the record I never once ate it with the additional toppings pictured.  I just didn’t need anything else – it was so good all on its own.

Fully Loaded Vegetarian Salsa Chili

Printable recipe
Printable recipe with picture

3 carrots, peeled and roughly chopped
3 cloves garlic, peeled
1 red pepper, seeded and diced
1 green pepper, seeded and diced
1 orange or yellow pepper, seeded and diced
2 stalks celery, chopped
1 large onion, diced
1 ½ cups salsa
1 (14.5 oz) can diced tomatoes (roasted, if you have them)
2 (15.5 oz) cans white beans (great Northern or navy) , drained and rinsed
1 (15.5 oz) can black beans, drained and rinsed
1 (15.5 oz) can kidney beans, drained and rinsed
1 (15.25 oz) can corn, drained
1 (10 oz) can diced tomatoes and green chiles (such as Rotel)
1 (8 oz) can tomato sauce
1 serrano pepper, finely chopped, seeds included (optional for a spicy kick)
2 tablespoons chili powder
2 tablespoons ground cumin
2 tablespoons real maple syrup
½ teaspoon rubbed sage
Salt to taste
1 bunch cilantro, leaves only, chopped
Optional garnishments: shredded cheddar, sour cream, limes for squeezing over individual bowls

Add the carrots and garlic to a food processor and process until very fine and wet, about a minute, stopping to scrape down the sides often. Add to a stock pot along with the remaining ingredients, except for the cilantro. Bring to a boil, reduce heat to medium, cover, and simmer for an hour or until veggies are tender, stirring occasionally. You can simmer as long as you want but I recommend at least an hour. Stir in the cilantro and serve hot with optional garnishments and cornbread (this chili is especially good with some sweet cornbread to contrast the heat if you made it hot like I did). I have several recipes to choose from below, if you’re looking for a new one to try.

Favorite Cornbread (this one is a sweet Northern cornbread and it is the best. ever.)
Lighter Northern Cornbread
Homestead Cornbread (a flourless, sugarless, Southern-style cornbread)
Amish Friendship Creamed Cornbread
Honey Whole Wheat Cornbread
Sweet Corn Muffins (two ingredients!)

A Veronica’s Cornucopia original, with help from Biz’s Beef & Bean Salsa Chili, and Suzie’s award-winning Next Day Chili.

Secret Recipe Club

Interested in other delicious meatless meals? You might enjoy…

Chickpea Salad Wraps {Mock Tuna Salad}

Corn, Avocado & Black Bean Tostadas

Bean Curry

Tilapia with Chile Lime Butter

Posted on

I have been enjoying a lot of flavorful & healthy meals lately, this being perhaps my favorite of them all.  This fish is just bursting with flavor and while I enjoy fish normally, I don’t think I’ve ever enjoyed it to this degree, except for with my favorite salmon.  But I like this fish even more than the salmon!

I don’t think it’s just my pregnancy hormones tricking me into thinking this is one of the most wonderful things I’ve ever eaten.  I got the recipe from Suzie, who proclaimed it a restaurant-worthy meal (I so agree!).  Her husband is super picky and usually will only eat things like pizza and burgers, but even he ate this and enjoyed it.  I knew it must be good if he was willing to even taste it, let alone eat a whole serving. My hubs couldn’t stop at one piece, he had to have two. :)

The chile-lime butter is the key here – it’s your secret weapon to make tilapia, which isn’t that exciting by itself, seem like the most incredible edible thing ever.  It has so much flavor that you don’t need much to make your filet absolutely craveable, so it only adds 50 (healthy!) calories to your meal.  Light, fresh, totally amazing.  Do it.

e

Tilapia with Chile-Lime Butter

Printable recipe
Printable recipe with picture

For the butter:
2 tablespoons unsalted butter, softened
1/2 tablespoon finely chopped shallot (I used green onion)
1/2 teaspoon finely grated lime zest
1 teaspoon fresh lime juice
1/2 teaspoon minced fresh Thai or Serrano chile, including seeds (this adds almost no heat – use more if you like it hot!)
1/4 teaspoon salt
Cilantro for garnish

For the fish:
1 tablespoon vegetable oil
1/4 teaspoon salt
4 tilapia fillets

Stir together butter, shallot, zest, lime juice, chile and salt in a bowl.  Pat dry the fillets and sprinkle with salt.  Heat oil in a non-stick skillet over moderately high heat until just smoking, then saute the fillets, turning over once with a spatula until golden brown and just cooked through (4-5 minutes).  Transfer to a plate.

Serve each warm fillet with a dollop of chili lime butter spread over the top.  Garnish with cilantro.

Recipe Source: Two Dogs in the Kitchen

Buffalo Chicken Chili

Posted on

I have Biz to thank for this amazeballs recipe.  I like a lot of different chili’s (this is the eighth chili recipe on my blog!), but this is definitely a contender for my favorite.  I love the heat level–we like spicy and for us this was perfect.  Spicy but not so spicy that you can’t taste the wonderful flavor.  Your lips may burn a bit, but you can still feel your mouth after eating a bowl, which is a plus in my book.

Since the veggies are pureed and totally not visible, there’s less risk of complaints from picky eaters.  I felt super manly while eating it, with all the meat and beans and spiciness, and apparent lack of vegetables.  But then I couldn’t pee standing up, so that was the end of my manliness.

Also, just an FYI, your chili will not be this thick right after cooking it.  This was the day after I made it, and before I heated up the bowl.  Not many things look good cold, but apparently chili is one exception to the rule. I think it’s so purdy.  (I believe I just lost my man card again.)

Buffalo Chicken Chili

Printable recipe
Printable recipe with picture

2 large carrots, peeled & cut into 1-2″ pieces
3 stalks celery, cut into 1-2″ pieces
1 large red pepper, cored & cut into 1-2″ pieces
5 cloves garlic
1 tablespoon olive oil
2 pounds ground chicken
5 tablespoons chili powder
2 tablespoons ground cumin
1 tablespoon paprika
1/2 cup Frank’s Hot Sauce
2 (15 oz) cans tomato sauce
1 (15 oz) diced tomatoes
1 (15 oz) black beans, drained
1 (15 oz) chili beans in sauce (do not drain)
salt and pepper to taste

Optional garnish: blue cheese crumbles or Spicy Ranch Crackers

Place carrots, celery, red pepper, and garlic in the bowl of a food processor fitted with the blade attachment.  Process until pureed and set aside.  In a soup pot, heat oil and add ground chicken and cook about 10 minutes on medium heat until no longer pink.  Add vegetable purée to chicken mixture and cook about 5 minutes until veggies start to soften.  Add the remaining ingredients and bring to a boil over medium-high heat, then reduce to a simmer and cook for 1 hour.  Serve with blue cheese crumbles or Spicy Ranch Crackers, if desired.

Nutrition Per Cup (without garnish): 239 calories, 3.4 fat, 29 carbs, 7.5 fiber and 23.5 protein.

Recipe source: My Bizzy Kitchen

***

I won’t be posting Wednesday, so I’m going to take this opportunity to remind you to enter my cookies giveaway by Wednesday at midnight. Good luck!

Paleo Orange Chicken

Posted on

This dish is a revelation for healthy eating.  It has no breading, not even a thickener for the sauce, doesn’t require frying, is naturally sweetened with fresh squeezed juice alone, contains only healthy fat, and yet it is so. delicious.

And guess what?  It is yet another way to use virgin coconut oil!  I’ll be drawing the winner for the Tropical Traditions oil at midnight tonight (click here to enter the giveaway if you haven’t yet), so I decided to sneak in another recipe that uses it before I did.  I myself just got a gallon of it (happy happy, joy joy! Thank you to those who made first-time purchases through my links, that’s how I earned it!), so you can be sure I’ll be posting many more recipes using it.

Full disclosure: for the record, I mainly cook with/eat extra virgin olive oil, just so you don’t think I’ve devoted my life to saturated fat, even if it is a healthy one.  :)  Also, for the record, I am not on the Paleo diet, but am all for eating healthy.  And lastly, this was Den’s plate, as I had no rice on mine because I’m not eating starches right now. </TMI>

As for this chicken, I don’t have much to add beyond that it was incredible.  It is sweet, even without refined sugars of any kind, and packed with flavor.  I have to admit I totally forgot to include the sriracha (*sob* we love spicy, how could I?), which probably would have improved the consistency so that it coated the pieces a little better, but it was still great even without it. Who needs fried chicken pieces drenched in a sickeningly sweet syrup sauce when eating healthy tastes even better?  Move over, take-out!

Paleo Orange Chicken

Printable recipe
Printable recipe with picture

1 lb. boneless, skinless chicken breasts or thighs (cut into bite size pieces)
3 tablespoons virgin coconut oil
juice of 2 oranges*
zest from 1 orange
1 teaspoon grated fresh ginger
3 tablespoons low-sodium soy sauce
1 teaspoon chili garlic sauce or sriracha
3 green onions, sliced (white and green parts)

In a medium-sized saucepan, add the orange juice, zest, ginger, soy sauce, and chili garlic sauce or sriracha. Set over medium-high heat and let simmer to reduce and thicken while the chicken cooks. In a large saute pan, heat the coconut oil over medium high heat. Add the chopped chicken thighs and cook until a nice brown crust has developed on the chicken pieces, about 6 minutes. If your chicken pieces are really close together, you’ll likely have a lot of water in the pan (it doesn’t evaporate as well), and you should drain the excess liquid off to help the pieces brown.  Remove from heat and if the sauce is ready (it will be reduced to very little, coating just the bottom of the pot, thick and almost like a glaze), add the chicken to the saucepan and stir to coat with the orange sauce. Serve topped with sliced green onions.

*Taste your oranges. If they don’t taste orange-y, then neither will this dish. Use tangerines if you need to, or add a teaspoon of sweetener, such as stevia or agave nectar, until you’re satisfied with the flavor.

Recipe source: Health-Bent

Barley with Butternut Squash, Apple & Onion

Posted on

This is one of the “meals” (it’s really a side dish but I like to eat it as a meal) I’ve been making for years and usually resurrect come fall/winter.  My family absolutely loves it too, even my little nephew (or at least he did at 4 years old, the last time he ate it)!  I appreciate delicious vegetarian meals that satisfy me and this one fits the bill fo sho. The combination of the creamy squash, chewy barley, crisp red pepper & apple, and the contrasting savories and sweetness–it’s all just magic to me.  And I guess if a four year old boy will relish something that only contains unrecognizable healthy ingredients, it is pretty magical.

Barley with Butternut Squash, Apple & Onion

Printable recipe
Printable recipe with picture

3/4 teaspoon salt, divided
1/2 cup uncooked barley
1 tablespoon olive oil
2 cups butternut squash, peeled & diced
1 cup onion, chopped
1/2 cup sweet red pepper, diced
1 medium apple, peeled, cored, diced
1 1/2 teaspoons garlic, minced
3/4 teaspoon dried thyme
1/4 teaspoon black pepper
1/3 cup fat-free chicken or vegetable broth

Bring 3 cups of water and 1/2 teaspoon of the salt to a boil in a medium saucepan; add barley. Cover saucepan and simmer barley until tender, about 30 to 35 minutes; drain.

Meanwhile, heat oil in a large nonstick skillet over medium-high heat; add squash and cook, stirring often, until it’s starting to soften–about five minutes. Add the onion and red pepper and cook for an additional 3 minutes.

Stir in apple, garlic, thyme, black pepper and remaining 1/4 teaspoon of salt. Cook, stirring, until apple is almost tender, about 2 minutes; stir in broth, scraping bottom of skillet with a wooden spoon to loosen any browned bits. Stir in cooked barley; toss over low heat to mix and coat. Remove from heat and serve.

Serves 4, about 1 cup per serving.

Per serving: 192 calories; 4.2 g fat; 0 g cholesterol; 37 g carbohydrate; 8 g fiber; 5 g protein; 5 Points Plus

Recipe source: WeightWatchers.com

Quick Veggie Quesadillas

Posted on

Secret Recipe Club

This month for the Secret Recipe Club, I was assigned to Itzy’s Kitchen.  Erica lives a healthier lifestyle than I’m living now (she’s a fitness instructor and has lots of yummy, healthy eats on her blog), so browsing her blog got me back into the “healthy thinking mode.”  I wish I didn’t have a switch that was either turned to “healthy” or “totally heart-clogging, butt dimple-building unhealthy,” but unfortunately, this is my history.  I have decided to ease myself back into healthier eating as I need to lose the fifteen or twenty pounds I’ve gained since going off the rails in March, and Erica helped me do that.

I have been making quick stove top meals often this summer, and I was happy to find her recipe for veggie quesadillas because they were 1) healthy, 2) quick, ad 3) easy.  Perfect summer eating.

We really enjoyed these, especially dipped in salsa.  They come together so fast and easy and I know I’ll be making this again.  FYI, if you have leftover filling, it’s great as a hot dip mixed with salsa with cheddar melting on top. But maybe not as healthy if you use as many tortilla chips as I did. >:)

Quick Veggie Quesadillas

Printable recipe
Printable recipe with picture

1 (15 oz) can black beans, rinsed & drained well
1 (11 oz) can Mexican style corn (or 14.5 oz regular corn), drained well
1 teaspoon chili powder, or to taste
¼ teaspoon cumin
Optional: 1 cup additional vegetables
8 oz. cheddar cheese, shredded
8 flour tortillas (soft-taco size)
Salsa & sour cream for serving

Mix the black beans, corn, chili powder & cumin. If you’d like to add any other vegetables (I added onions), cook them in a skillet until softened and stir into the bean & corn mixture. Place one tortilla in a skillet over medium heat (you can oil the skillet if you like, but I didn’t) and sprinkle no more than ½ cup cheese over it, then scatter no more than ½ cup of the bean mixture over the cheese. Top with another tortilla. Once the cheese is melted on the bottom, about two minutes, carefully flip the quesadilla over and cook for an additional two minutes to heat through and crisp up the other tortilla. Remove to a plate and cook the remaining three quesadillas. Cut each into 6 triangles and serve with salsa and sour cream, if desired.

Recipe source: adapted from Itzy’s Kitchen


A special thank you to my friends Kriss and Nicole for generously giving me the Japanese steak plates pictured in this post, along with  many other dishes that will be gracing my blog in the future.  They are moving their family to Japan this week and not taking much with them, so I was the happy recepient of much of their dishware. It’s hard to say goodbye and feel like I have to do it too often (Japan has already stolen one of my friends!), but I wish you guys the best!

Greek Chicken with Tzatziki

Posted on

I took the above photo on a cold day in February, when there was only about five minutes of daylight left.  I’m sorry if it looks  a little unappealing, it seems somehow off to me but since I started with this:

I can’t be sure. It was just so bad to begin with that I’m really happy I got it to come this far! lol

If the photo doesn’t entice you to try this, maybe it will help to know how delicious it is.  I love the tangy yogurt sauce with the tender, flavorful chicken–it’s just perfect.  And it goes great with the Greek Salad I posted yesterday!  If you don’t want to heat up your kitchen, just slide the pieces of meat onto skewers and grill them. (If using wooden skewers, please soak them in water for half an hour so they don’t catch on fire during grilling.)  Bet they’d taste even better off the grill!

Greek Chicken with Tzatziki

Printable recipe
Printable recipe with picture

Chicken:
1 ½ lbs. boneless, skinless chicken breasts, cut into large chunks
1/3 cup extra virgin olive oil
¼ cup lemon juice
2 tablespoons red wine vinegar
2 teaspoons dried oregano
2 teaspoons dried thyme
1 teaspoon onion powder
1 teaspoon garlic powder
1 teaspoon dried parsley
¼ teaspoon coriander
Salt and pepper

Tzatziki:
1 medium cucumber
1 cup plain non-fat Greek yogurt
1 tablespoon lemon juice
2 teaspoons dried dill weed
2 teaspoons minced garlic
¼ teaspoon salt
1/8 teaspoon pepper

Mix the oil, juice, vinegar, and seasonings together and marinate the chicken for 30 minutes but no longer or the texture of the chicken will change and won’t be as good.

While the chicken marinates, prepare the Tzatziki. Slice the cucumber in half lengthwise and scoop out the seeds and pulp and discard. Shred the cucumber (you should get about 1 cup of cucumber), then wrap in several layers of paper towel and squeeze it dry. Mix with the remaining ingredients and refrigerate until ready to serve.

Preheat oven to 375 degrees.

Line a rimmed baking sheet with foil, then place a cooling rack on top of it. Spray the rack with oil, then remove the chicken from marinade and place on the rack. Dab the remaining marinade over the top of the chicken pieces. Bake for 15 minutes. Serve with tzatziki and Greek Salad.

Recipe source: Eat Little, Eat Big

%d bloggers like this: