I’m killing two birds with one stone today! I’ve got a Thankful Thursday for you, and it’s also part of my Kansas State Fair series!
While on the way home from the fair on Saturday, I started to think about how many people helped me win those ribbons and realized I never could have done it alone. Then I laughed out loud, realizing that in my head, I was preparing somewhat of an award acceptance speech, as if I had just won a music or acting award. Well, baking may be small time but it’s a big part of my life and what I love to do so I figure, why not give an acceptance speech?
So here you are, an embarrassed and awkward impromptu acceptance speech to thank everyone who helped me win my ribbons.
Yes, this happened. Ree Drummond, The Pioneer Woman herself, came to my little hometown for a book signing!! When Julie told me about it, I about flipped out. Foodie celebrities just do not come to our town for anything. This was the most exciting thing that ever happened in Wichita! Well, at least for me.
Julie and I had planned to go together, but she ended up moving earlier than planned so Dennis was my date for the evening. Dennis, the anti-foodie. The anti-foodie who won’t even read his own wife’s food blog. Perhaps not the best date for the occasion, but he’s a trooper and is usually up for anything. He’s incredibly supportive, despite refusing to read my blog, and I think my excitement made him a little eager himself to meet this superwoman.
We arrived at the Forum Theater (previously a church) an hour early and still there was a massive line. We were even further back than in the photo above, rounded around a corner, but I forgot to take a photo until that moment. Hello, Veronica, a blogger must remember to photograph everything when it comes to such a monumental occasion! I didn’t make that mistake again and documented the remainder of the evening by snapshots…and even short video. Of P-Dub singing!!
I apologize for all the exclamation points. It’s hard to control my excitement and enthusiasm.
It only took us about fifteen minutes to get through the line and into the theater. Everyone with tickets #500 and under could go in right away. There were tickets all the way up into the 1,300s and I think they managed to fit most people in. Apparently there was an “overflow section” but I never saw it, and I guess those who couldn’t find seats waited there for the signing.
Dennis, the sweetheart, went to the front of the theater to take these photos for me. We were seated in the middle, way in the back. That section was flat, not tiered like the front rows, so it’s harder to see all the people back there. I can’t even make out my own head, but I could see the stage just fine.
After an hour of waiting and reading her cookbook (yes, reading, I read cookbooks like novels) while Dennis read Anthony Robbins’ Awaken the Giant Within, Ree was finally introduced and came striding out on stage.
Seriously. P-Dub in the flesh. Is this really happening? Really? But she made it very clear how real she was as she nervously criticized her entrance and the awkward way she walked behind the movie screen instead of in front of it. She apologized for being nervous and sweaty, then asked for a show of hands of everyone that got sweaty when they were nervous. She was so genuine and sweet, even if you didn’t know her from her blog already, you had to love her immediately. Dennis was not immune to her charms and was laughing all through her presentation.
She gave a slideshow presentation of her life, with all the humor she infuses into her blog.
which explains her senior photo…
I stopped snapping shots of her slideshow at that point, but did catch the last half of her “special moment” with her basset hound, Charlie. She started singing “My Endless Love” along to pictures she had taken of him…
Then we waited. Books were signed according to the number on your card, so there were 182 people ahead of me. And there were no limit to the amount of books she would sign. I’m sure Ree is sporting a permanent hand cramp right now, as she had to have signed thousands and thousands of books that night. What a trooper! After waiting foreeeeever (OK, more like two hours), we finally were next in line!!
I was so flustered, I had nothing to say. I could have said, “I made your chunky chicken soup five times this year already!” I could have told her how well she did with her presentation. I could have told her how honored I was to meet her. I could have told her how much I enjoyed her book, Black Heels to Tractor Wheels, or even asked her if Marlboro Man was taking care of the kiddos by himself while she was away. But I couldn’t say anything!
Since I was so quiet, she finally asked me, “Are you from Wichita?” How humiliating, to have forced a huge celebrity to try to spark a conversation in the face of my epic silence. That she even bothered is a testament to how nice she truly is. “Yes, this is the most exciting thing that’s ever happened to me!” I blurted. And that’s all I said. Ugh. Dork master!
And then the picture from hell happened. A lady offered to take one with both of us in the picture, so I made sure my ugly heavy-duty bra strap was showing, and Dennis made sure to give the camera what I’ve dubbed his “creeper” look…the one that makes you think there’s something seriously wrong going on inside his head. Here’s another version of his creeper look:
Run awaaaaay! IT’S THE CREEPER BUNNY!
This is my impression of his creeper look, given at a restaurant after we left the signing:
Creeper V!
OK, way too much creepiness happening here. Let me remind you of how handsome and non-creeper-like my husband actually is:
There. I feel much better now.
So that was it, a lovely presentation, a long wait, and an awkward introduction in which I made a fool of myself. And I came out of it with this:
Poor Ree, it’s a wonder I can read this at all. Here’s the translation, as best I can tell: Love to Veronica, ♥ Ree D
The cookbook follows the format of her blog, giving step-by-step photos for each recipe. If you like photos with your cookbooks, this one is for you! As far as I can tell, there are no new recipes–you can get them all online (though at least a few recipes in the book are improved from the website versions, like the Coffee Cake (the first one I’ll be trying!)), but if you love owning cookbooks, love the Pioneer Woman, or need a gift for a new bride/groom to help them learn how to cook, this would be great.
Would you like your own signed copy? Well, it might just be your lucky day, because I got a second copy signed to give away to one of my readers!
If you’d like to enter to win, just tell me what your favorite Pioneer Woman recipe is, or what recipe of hers you’re looking forward to making. You can still leave a comment without entering, just be sure to answer this question for your comment to count in the drawing. Giveaway will close April 19th at 10 PM CST, and I’ll announce the winner on Friday.
If you’d like additional chances to win, you can do any or all of the following (and yes, it counts if you already do/have done them, just leave a comment letting me know). Be sure to leave a separate comment for each, and make sure you answer the question above first, or none of the additional entries will count.
*Subscribe to Veronica’s Cornucopia by RSS or email (email subscribe box is in the upper right column).
*”Like” Veronica’s Cornucopia on Facebook.
*Follow me on Twitter.
*Pin this post on Pinterest.
*Tweet the following message: @vraklis Win a signed copy of Food From My Frontier by Ree Drummond, The Pioneer woman! https://veronicascornucopia.com/2012/04/17/an-evening-with-p-dub-plus-a-giveaway/ #giveaways Please RT
*Tell your friends about this giveaway on Facebook, including a link to the post.
UPDATE: This giveaway is now closed. Congratulations to Brandee Lake!
All right, since this is a cake for “dummies” series, I’m going to show you how to decorate a cake using natural embellishments that don’t require decorating skills. Truth be told, I really dislike traditional decorating (not the look, the process) and “decorate” my cakes in this manner whenever possible.
In this video, you’ll see me have issues as I proceed with my “decorating,” and I kept the footage in the video to give you an idea of how to overcome issues you might run into with your cakes as well.
Don’t let your cake intimidate you. You are the master of the cake, and I can tell you from experience that no matter how bad you mess the cake up, there’s almost always something you can do to fix it. Namely, by covering up the mistake!
Also, for those new to cake making, I want to reassure you because it will take some practice before you start turning out really attractive cakes. Don’t be discouraged if your first cakes aren’t as pretty as you would like. Just do your best and you will get better and better with each cake you make. And I promise that no matter what you think of your cake, your family and friends will always be impressed that you made it. You will be adored whether you’re a beginner with crumbs in your frosting, or have advanced to fondant and tiered cakes. Cakes that come out of your own kitchen are more special and when you give a cake made with your own two hands and your love, the recipient will be that much more grateful and impressed.
This is the first cake I ever decorated, for a friend who was moving to another city. If I hadn’t watched my mother make cakes for several year’s prior to this attempt, I assure you it would have been much worse. As it was, even with the imperfections, Brooke appreciated the cake very much. She knew it came from my heart.
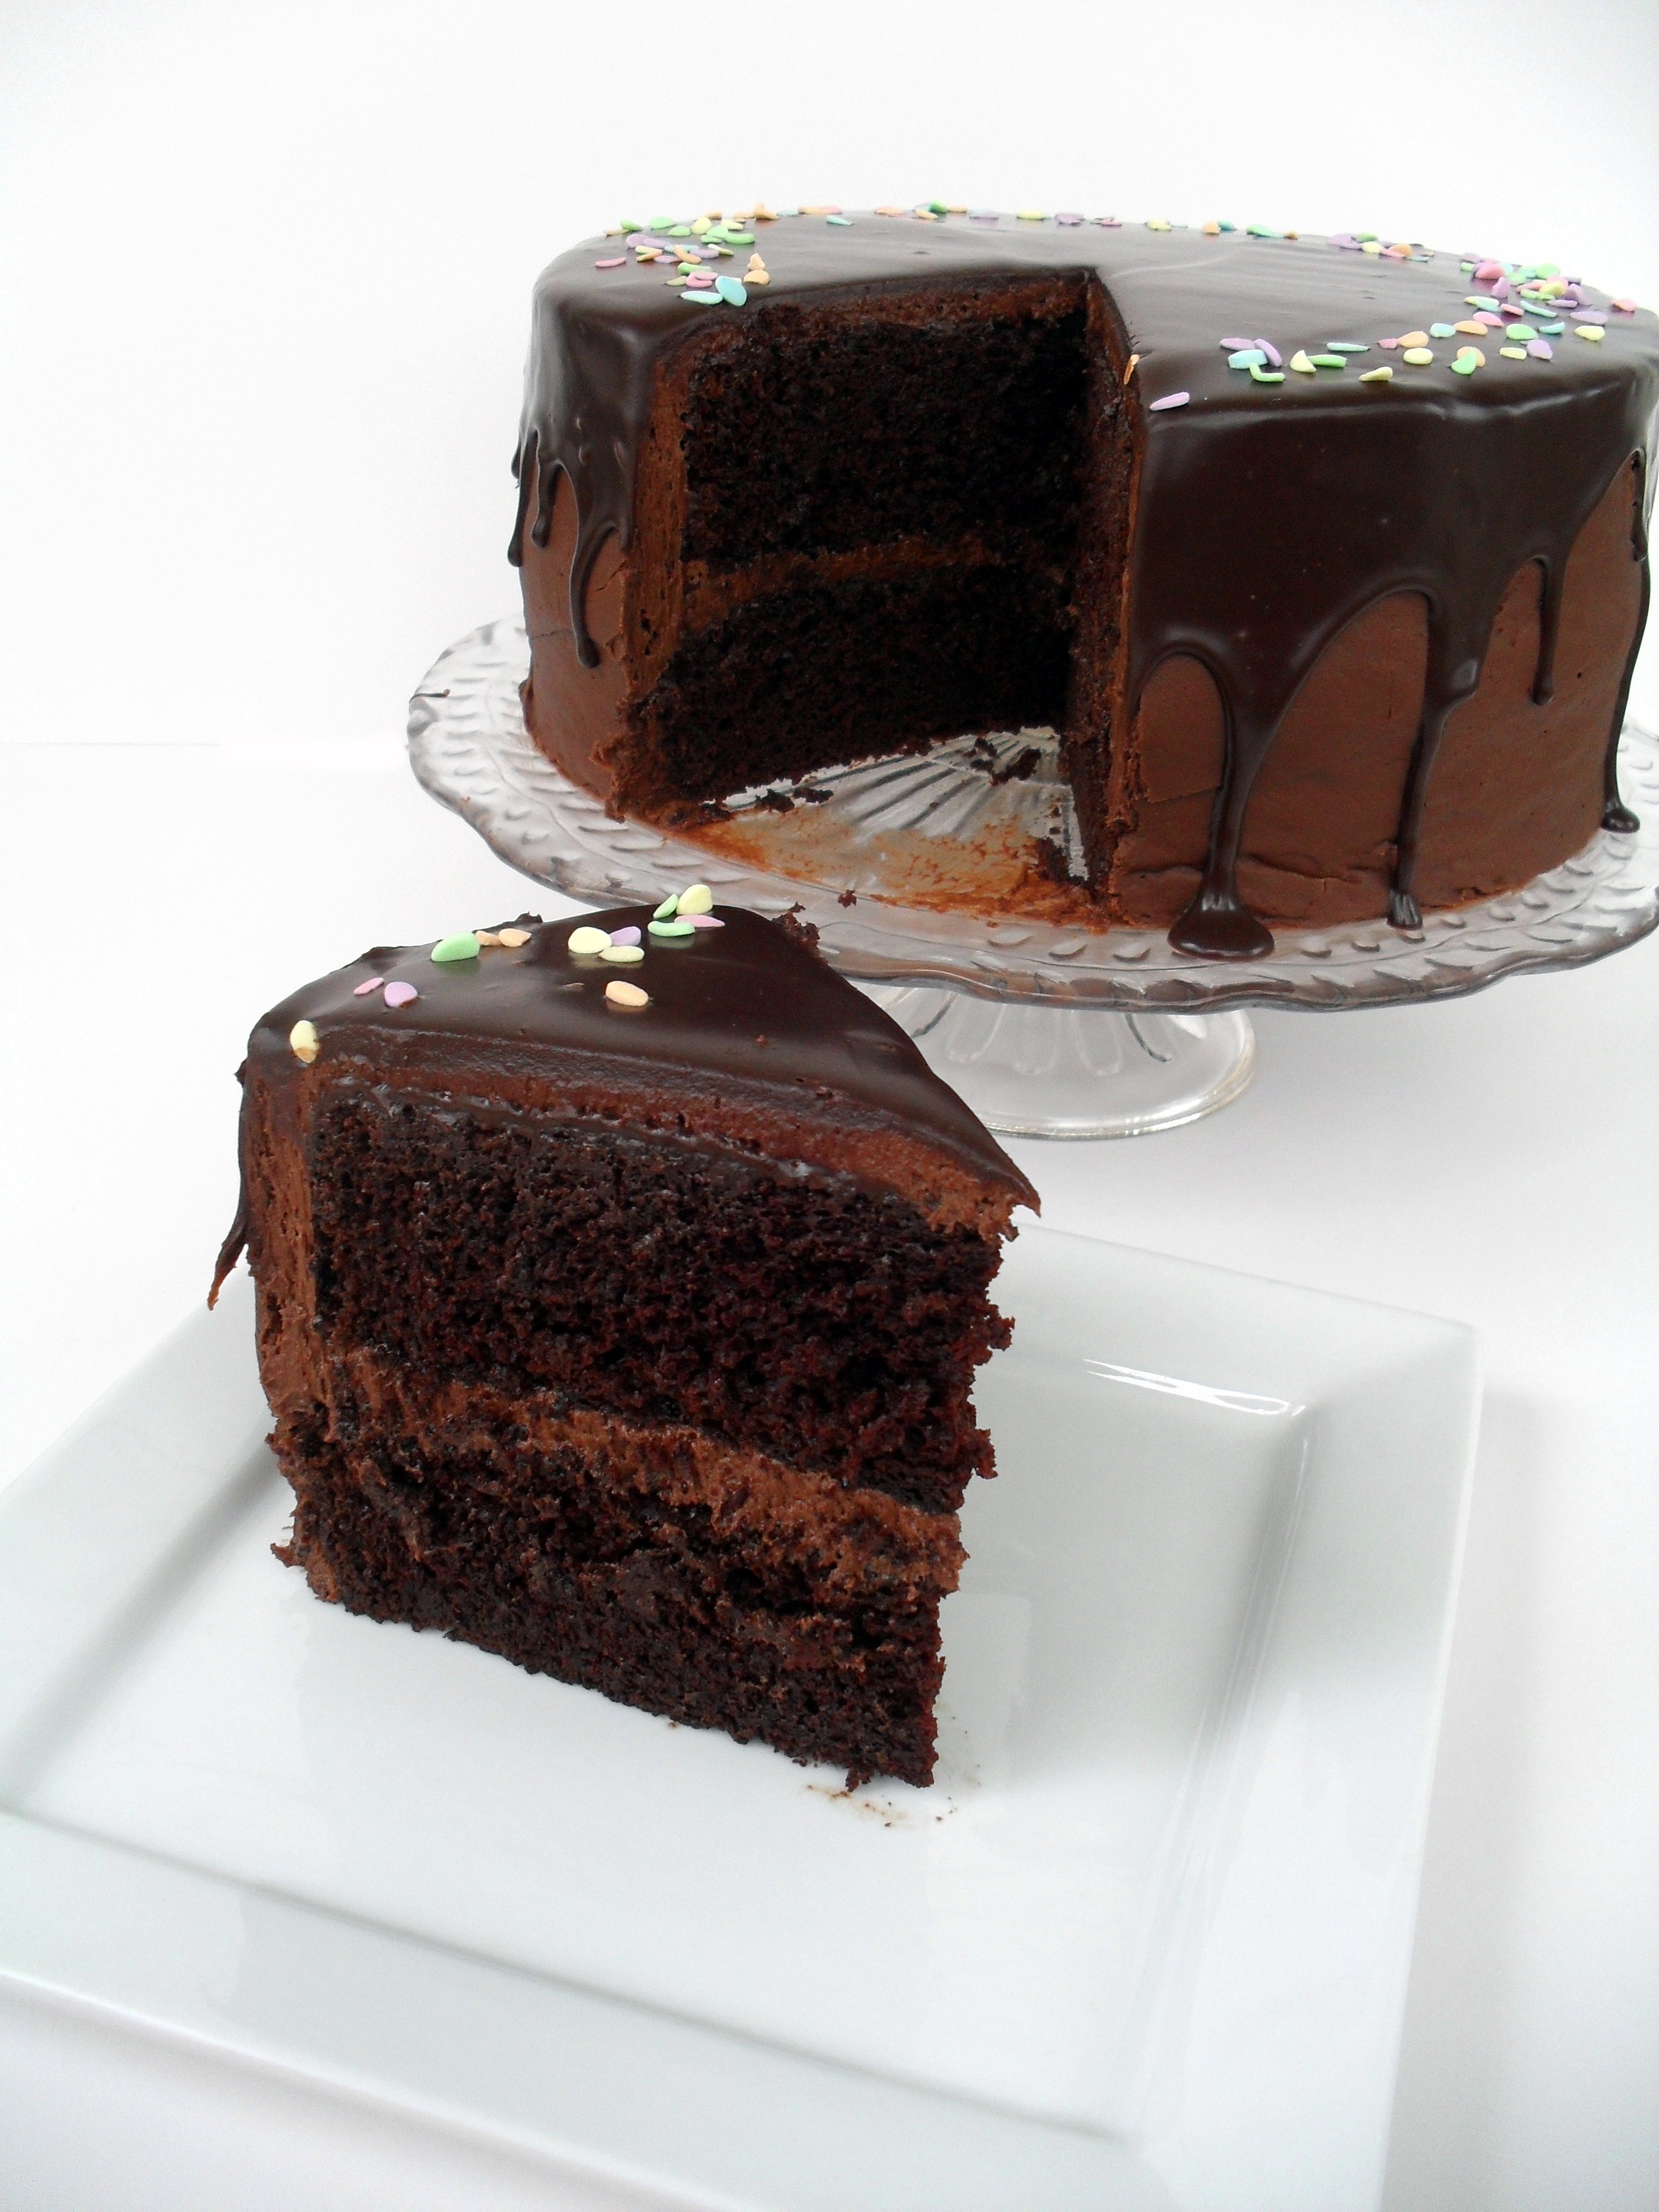
And now, many years later, I’m making cakes like this Dark Chocolate Raspberry Cake that actually require less decorating skills but are, IMHO, much prettier.
I hope I’ve encouraged you and helped you in your future cake-making adventures!
Much love, and happy caking!
For the previous videos in this series and other cake-related posts, check out this page: Cake for Dummies
I’ve made a “Cake For Dummies” page where I’ve linked to all the cake tips and resources on my blog, including those on tiered cakes and general baking tips. You can find the past videos from this series there if you have missed anything and would like to catch up. The first video includes my “water bottle trick” for ensuring a moist cake every time, and the second covers levelling. Now we’re up to frosting and stacking (which also includes a water bottle trick-I tell you that water bottle is my secret weapon!)–3/4ths of the way to a finished cake! Tomorrow is the final video and will cover “decorating.” I put that in quotations because my decorations are more like embellishments, but it still makes for a pretty cake, and is much more manageable for those without decorating experience.
OK, I’m a big dork. While frosting the cake, I got caught up in telling a story about my childhood when I should have been explaining what I was doing. I think by this time, I had lost my focus and forgot I was doing a tutorial. Oops.
Allow me to explain in writing. :) When you spread on your frosting, you want to make sure you don’t get any crumbs in it. If you do get crumbs in it, it’s not the end of the world, it will still taste great, but it won’t look as nice.
1) Apply a thin coat of frosting over the whole cake to trap the crumbs before you apply a thicker layer. This is not my method of choice because it seems too time consuming to have to apply the frosting twice, but it works. Just be sure to refrigerate the cake for an hour or up to overnight after applying the crumb coat before you frost it again.
2) Pipe the frosting on using a large pastry bag fitted with a wide, flat tip, such as Wilton’s #789. This gives you an even thickness of frosting over the entire cake, and there is no risk at all of getting crumbs in your frosting because the cake is covered already when you start using your spatula to smooth it out.
3) Be careful and just go for it. On the rare occasion that I don’t use a pastry bag & frosting tip to pipe the frosting on, this is what I do. I just put a lot of frosting on each spot before I start spreading it and don’t spread it very thin, adding more before I get to the point when the crumbs start lifting up as I move the spatula. I make sure that my spatula never comes into contact with the cake itself, and I avoid lifting my spatula in a way that pulls the frosting (and crumbs) off the cake. This is the method you’ll see me demonstrate in the video.
A layer cake is just about the prettiest dessert there is, don’t you think? Stacked high and impressive with a smooth buttercream finish and a few embellishments, a layer cake, properly done, is almost enough to take one’s breath away.
I am passionate about cake and I believe there should be at least one person in every family who can create an attractive cake, with or without decorating skills. Cake is used to celebrate so many special occasions, and unfortunately many of those celebratory cakes come from Walmart or other sub-par bakeries. Making your own cake is not only more economical than purchasing one, but it tastes better, and is more special. The cake you create will be remembered (not to mention crazy delicious), whereas that nasty Walmart cake will be forgotten within five minutes, even if it did have your child’s favorite cartoon character on it.
Therefore, I’m embarking upon a quest to give anyone interested the tools they need to create an attractive layer cake at home. My husband recorded me while I constructed a cake for a friend last month, and I used the footage to create a four-part video tutorial series which I will share every day through Friday. (Thankful Thursdays will be cancelled this week so I can get this series done, but will resume next week.)
You don’t need any sort of decorating skills to create a gorgeous layer cake, you only need a little know-how. I promise. You can do this. Let’s get started!
Click here to find out more about Magi-Cake Strips.
Despite all the teasers I’ve been giving you in the recipe department lately (deodorant, red velvet cake, butterscotch swirl cake, etc., etc.), I am not ready to post any of them because I have no photos. The photos of my deodorant-making process were accidentally deleted (along with butterscotch syrup pics that I needed for the butterscotch cake-oy!), and I have to make the cakes I promised recipes for a second time because me being me, I can not possibly post a recipe using only photos of the cake in a box, and the only picture of the inside being a stale piece behind glass in low-lighting on a paper plate. I may not use a fancy-schmancy camera, but I do have some standards. I’m sorry to those of you who could care less about the quality or lack of photos, but please be patient while I re-make everything and take more photos. Thank you!
While I do have other recipes with photos I can share, I thought I’d change things up and share a video I shot in the poultry exhibit at the Kansas State Fair last Monday instead. They have such interesting birds in there, and I’m only showing you a smidgen of them. Usually we skip the poultry exhibit because birds aren’t as cute to look at as other animals, but we had so much fun in there (maybe a little too much–we are easily amused, as you will see) , it is now my new favorite exhibit. I hope you enjoy!
A cake I made, sugar roses and all, for my cousin and his wife for their 5th anniversary party. I stressed and agonized to complete this cake, took two days off work to do it, couldn’t get it as perfect as I wanted, but overall I was satisfied with the cake when it was finished.
Exhibit B:
A cake I made willy-nilly for a sister’s housewarming, completing it in 15 minutes from frosting to finish, and obviously exerting very little effort by comparison.
The first cake I did my way, striving for perfection. The second cake I made the way my husband would have me do every cake, taking the easiest route possible to get it done as fast as possible, without worrying too much about the end result and not stressing over it one lick. (Funny, but he doesn’t appreciate the level of stress in our home when I’m working on a cake!)
For your optional viewing pleasure, a video showcasing (some of) the stress that abounds during my cake escapades:
Obviously the effort I exerted had a direct impact on the finished cake. Although I think both have their appeal, I’m definitely more happy with the first and find it much more attractive. When I look at the second, I have slight feelings of shame and embarrassment for not putting more effort into it.
Even before making a sub-par (for me) cake, I had been thinking about my crazy perfectionist approach to things, versus my husband’s relaxed and laid-back approach. Evaluating the benefits and drawbacks of each, and coming to some surprising (to me) conclusions.
I used to envy, and still do, the way my husband breezes through life with scarcely a care. It is taxing to be as uptight as I am! Everything I do has to be perfect, which of course is impossible, which upsets me, which causes me angst and stress. I stress way too much because I can never attain the perfection I constantly seek.
You can see where I crushed my finger into the corner. Happens every time!
Dennis takes an interest in something and learns how to do it to a moderate degree, and doesn’t bother to perfect it or care that his technique isn’t perfect. His interests are wide and varied and he has talent in many areas, such as playing the guitar, drums, bass, juggling, doing martial arts like Wing Chun, Shaolin Kung Fu, Tae Kwon Do, Judo, Kempo, and Aikido, doing Tai Chi, using weapons such as nunchuks and bali song knives, a whip, and a bow and arrow. A little more than a year ago he started taking singing lessons. He enjoys all these things and they never cause him stress.
You can see some of his skills in this crazy random video we made a couple years ago. (Just skip to :47 and 1:36 to see him in action.)
His approach seems healthier and I love the zen thing he has going on (I love everything about the man!), but I have realized there is a profound benefit to my own as well. The few things that I do, (obviously not including martial arts) I do quite well, or at least a little better than average. Which has led me to formulate the following philosophy for myself…
If you reach for the stars and land on the moon, you have still achieved more than you would if you had only reached for the moon to begin with. In other words, if you strive for excellence and come up short, what you achieve will still be greater than if you had little or no regard for the quality of the outcome. If you set your sights higher than what you think you can accomplish, you will attain something much greater than you would trying to accomplish what you know you are capable of.
I shared this perspective with my husband, who recently entered Guitar Center’s King of the Blues contest, and I could see the lightbulb go on in his head. He made it to the store finals here in Kansas, but only by default because they pick two players each night of the preliminaries, and the night he competed, there were only two players. Including him.
As always, his playing was decent (OK, a little less than decent because he was quite nervous), but we both realized it wasn’t on par with the people he would be competing against in the finals. I sometimes have trouble discerning when I should support him without criticizing, and when gentle criticism would be helpful, but I realized that he was going to have to try harder and reach higher, so to speak, if he ever wanted to get to a level where he was worthy of even entering this contest. It was hard to say, and I didn’t know if I was even doing the right thing, but Dennis is very open to criticism (I always forget this, most likely because I do not take it well myself) and was actually extremely grateful for it. Right away, he began practicing with a mental intensity he never had before. Before, he only strived to do as good as he could with the least amount of effort possible. Now he’s striving for excellence and not taking the shortcuts he used to actively seek out.
Realizing this direct benefit to striving for perfection or excellence makes me feel a little bit better about my anal approach to most tasks I undertake, however I feel I need to work on the stress that accompanies my perfectionist tendencies. Despite Dennis following my advice and applying higher standards to his guitar playing, I don’t see him stressing about it one little bit. He’s not screaming every time he hits a wrong note or wailing after he completely messes up the rhythm. (I can be quite dramatic when decorating cakes, and will wail like a colicky baby over every little single thing that doesn’t go my way.) He practices every night for hours, repeating the same things over and over like a machine. He knows what he needs to do and he’s doing it. He messes up, he corrects it, he moves on, and tries to get it right the next time.
“Reaching for the stars” had an impact on his performance at the store finals, which, while still not on par with the other contestants, was leagues better than his performance two weeks prior in the prelims. So if he can reach for the stars without herniating his anus in the process, that probably means that the stress is not a necessary byproduct of striving for excellence! Wow. News to me.
Here is a video compilation of the store finals, in which Dennis plays next to last.
Ultimately, these hobbies of ours have very little importance in the large scheme of things, so it does seem ridiculously silly to get so bent out of shape when I can’t get the sides of my cake perfectly smooth and the corners sharp. Particularly when I know, based on experience, that I can and will get them fairly smooth and sharp enough that the cake overall will be impressive even if it’s not perfect. Particularly when I consider the things that are most important to me. This differs from person to person, but I have to think, what is a finger smashed into a nearly perfect cake in comparison to growing my relationship with God, or helping bring someone to Him?
Not that everything is made unimportant by comparison to what is most important, for certainly our hobbies matter. They give us a sense of accomplishment. Sometimes they are a much needed distraction. They bring us joy.
Which is exactly the point. If I’m stressing over my hobbies, I’m not accomplishing the main reason to have them in the first place. Finding that joy!
I think Matthew 6:34 can translate to more than just worrying about tomorrow, and perhaps to cakes as well:
“Therefore do not worry about tomorrow, for tomorrow will worry about itself. Each day has enough trouble of its own.” ~Jesus
Perhaps it is high time I put my perfectionist tendencies to good use in applying this scripture to my life.
What about you? Do you suffer from perfectionist-related stress? Or are you one of those laid-back types that I would love to be? Do you think it’s possible to reach for the stars without getting stressed in the process?
Although pies certainly have their place in the fall and winter, I find myself making more of them during the warmer months, when fruit is plentiful, and my family begins to favor it over cake. I’m getting ready to post another summer pie recipe, but thought I’d first share a video tutorial on working with pie dough that I made last summer for The Cooking Photographer and never got around to sharing on my own blog.
I can hardly claim to be a pie master, but with as many pies as my family demands, I do feel pretty comfortable by now when working with pie dough. I realize pie dough scares some people the way yeast bread used to scare me, and I hope that this video might help you with whatever difficulty you have had in the past. This is just the way I do it, and it works for me, but once you try it you will realize in time what works for you. If at first you don’t succeed, try, try again!
I used this recipe for the pie dough in this video. It is my favorite and the one I use if I have time to make my dough from scratch, otherwise I go for Pillsbury!
This spicy vegan dip originates in Syria and I didn’t discover it until my friend, Pia, introduced me to it. It’s her favorite dip and she recommended it to me when she found out I enjoy Middle Eastern cuisine. I knew it was right up our alley simply because it’s spicy, and since I’d seen some of the pomegranate syrup the recipe calls for at a market attached to our favorite Lebanese restaurant, I snapped a bottle up next time we were there and set out to make this dip.
It is great simply as a dip, but I’m also going to include a “recipe” for a veggie wrap that I’ve incorporated it into for quick lunches. The first time I served this to my husband, he raved, and it wasn’t until afterward that I realized he had eaten an entirely vegan meal with no complaints. Score!
1 (12 oz) jar of roasted red peppers, drained and rinsed
3/4 cup walnuts, toasted and chopped
1/2 cup breadcrumbs — 1/2 cup (I turned pita bread into crumbs in the food processor)
3 cloves garlic, minced
1 tablespoon lemon juice
2 tablespoons pomegranate molasses/syrup/concentrate
1 tablespoon sriracha hot chile sauce
1 teaspoon ground cumin
Salt and pepper to taste
1/2 cup extra virgin olive oil
Chop the peppers roughly and place them, along with all the remaining ingredients, except the olive oil, into a food processor or blender. Pulse to roughly chop the ingredients, then slowly pulse in the olive oil. Try not to purée the ingredients too much. You want the dip to have a little texture. Adjust seasoning to taste and serve as a dip or spread with pita wedges, vegetables or kebabs.
*Veronica’s notes: the original recipe calls for four fresh red peppers which you roast before processing. Click the recipe source link below for instructions on this if you would like to do it this way. The original recipe also calls for red pepper flakes instead of sriracha, so that can be used in place of sriracha if you desire. As for the pomegranate syrup, my bottle is actually a pomegranate juice concentrate and I know that Pom is now selling this so you might be able to find it where Pom brand pomegranate juice is sold if you don’t have a market that sells ethnic foods in your area.
Spread muhammara down the center of your tortilla or bread, then sprinkle on some beans, a little parsley, a handful of spinach and shredded carrots. Wrap tightly and cut in half to serve.
I’ve made several tiered cakes over the last few years (you can see them all here), but a friend’s surprise 40th birthday party last November was my first opportunity to do a really decadent chocolate one. Needless to say, I was extremely excited to try something new!
With my husband, left, and the birthday boy at his party
If I had to pick a single type of cake to eat for the rest of my life, it would be white with cream cheese wedding frosting, but if you are a chocolate lover, this is the cake for you. I know I tend to be quite effusive over most of my cake recipes (I’m effusive by nature, and I can’t help it–my cakes are the bomb! I kid, but really. They are. :) ), but I can tell you that this is the cake that I have gotten the most positive feedback for. That may be in part due to the number of people I served it to, since most of my cakes are only made for groups of about 10 people, but I do think this is probably the best chocolate cake I have in my repertoire, and I have made it several times since the birthday party to great reviews as well. It is my husband’s all-time favorite cake, and although it isn’t my favorite cake, it is my favorite chocolate cake.
If you are thinking about making a tiered cake in the future, but are intimidated, I highly recommend the method I used for this particular cake. If you frost each cake on top of a thick, foil covered cake board that is at least 2″ larger in diameter than the cake itself, then insert four hidden pillars into the bottom two tiers, all you have to do is transport the cake in three tiers to the location where the cake will be set up, and plop each cake on top of the pillars. And you’re done! With the usual way I do it (you can read about that process here), the stress level is considerably higher and there is more chance of messing up the cake. It is almost impossible to mess it up using hidden pillars.
*Hidden pillars aren’t actually invisible, as you can see, but since they are tall you can insert them down into the cake so that each tier is supported from the base of the cake below it. It is the part of the pillar inserted to the cake that is hidden.
Another tip is that once the cakes have been removed from the refrigerator to come to room temperature, make sure they have a way to breathe. After inserting the pillars in the bottom two, you don’t have to worry about them. But you should insert a hole with a skewer through the top of the top tier as well, or choose a place on the least attractive side of the cake (the one you’ll face to the back of the room) to poke a hole into each layer of the cake. This is to prevent air pockets from forming underneath the icing. This is a problem that cake decorators face across the world, and according to the professionals I have consulted, no one knows why it happens. When I make real buttercream with eggs and no powdered sugar, this never happens. So I suspect it has something to do with a reaction between the cake and the powdered sugar frosting on the surface. So if you are using a powdered sugar frosting (aka American buttercream), please make sure there is a place for air to escape so that your frosting job will not be ruined. (I used to be concerned this would make the cake dry out, but an entire day with a hole poked in the cake does not seem to affect it at all. If I’m making the cake 2 or more days in advance, I keep it in the refrigerator to keep it fresh and to keep air bubbles from forming beneath the frosting, and then poke it before I take it out to come to room temperature.)
UPDATE: It has now been explained to me that when you frost a cake cold and refrigerate it, once you bring it to room temperature the air inside the cake expands, causing the icing bulge, aka “icing budge.” While this is the most likely explanation, I have actually had the bulge happen when frosting room temperature cakes and never refrigerating them. So weird!
Here are some pictures of icing eruptions that have happened to my cakes before I figured out I needed to poke them so they could breathe:
You can see the bump on the left side where air or gas is trying to escape.
And this is the view straight on. The bottom two tiers of this cake never gave me any trouble, but the top tier didn’t have dowel rods in it so there was no way for it to breathe and I had to fix probably 10 of these eruptions!
This has been such a pain for me, that I even caught one of the incidents on video! This was before I figured out I needed to poke the cake to prevent the air pockets.
A tip for getting your frosting perfectly smooth is to spray the cake with water after smoothing it out as much as you can with an offset spatula, then going over it again with a clean spatula. The water helps your spatula to glide over the surface and make it very smooth. You can also dip your spatula in water, but I find using a squirt bottle to apply it makes the job much faster.
OK, let’s get to my favorite chocolate cake recipe! I took a bunch of photos of my latest one so I included a few extra for you at the end of the post. You’re welcome. :)
Favorite Chocolate Cake
This recipe makes one 9″ two-layer cake. To make a tiered cake the size pictured above, you’ll need to make about 7 batches of the cake recipe (2 batches for each 14″ layer, 1 batch for each 10″ layer and less than 1 recipe for both 6″ layers combined), 5 batches of the frosting, and 5 batches of the glaze. Printable recipe Printable recipe with picture Printable recipe for cake only
Favorite Chocolate Cake
1 ¼ cups unsweetened cocoa powder
2 ½ cups all purpose flour
2 ½ cups sugar
2 ½ teaspoons baking soda
1 ¼ teaspoons baking powder
1 ¼ teaspoons salt
2 large eggs plus 1 large egg yolk
1 ¼ cups warm water
1 ¼ cups buttermilk
½ cup plus 2 tablespoons vegetable oil
1 ½ teaspoons pure vanilla extract
Favorite Chocolate Frosting
2 sticks unsalted butter, room temperature
½ cup vegetable shortening
2 oz semisweet chocolate, melted and cooled
1 cup unsweetened cocoa powder
¼ cup dutch-process cocoa powder
¼ teaspoon salt
2 lbs (8 cups) powdered sugar
¾ cup milk
2 teaspoons vanilla
Favorite Chocolate Glaze
½ cup heavy cream
4 oz semisweet chocolate, chopped
2 teaspoons corn syrup
½ teaspoon vanilla
Make the cake: Preheat the oven to 350 degrees, making sure the baking rack is in the middle of the oven. Prepare two 9” round cake pans by cutting out a piece of parchment or wax paper to line the bottom of them. Grease the pans, place the parchment or wax paper in the bottoms and lightly grease again. Dust the pans with flour (or cocoa powder if you don’t want the white dusting on the finished cakes). Set the pans aside.
Sift together the cocoa, flour, sugar, baking soda, baking powder, and salt into a large bowl. Add the eggs, yolk, warm water, buttermilk, oil and vanilla. Mix on low speed until smooth, about 3 minutes.
Divide the batter evenly between the prepared pans. Bake the cakes for about 35 minutes, until a toothpick inserted into the middle comes out clean or with moist crumbs. Do not overbake! Remove the pans from the oven and set the pans on a wire rack to cool for 15 minutes. Gently run a thin knife around the edges of the pans and unmold the cakes, removing the parchment paper liners from the bottom of the cakes. Let them cool completely, top sides ups, on a wire rack. Trim the tops of the cake layers with a long serrated knife to make them level.
*Veronica’s notes: Although I have never had a problem with this cake recipe overflowing in my pans, many people have left comments on Melanie’s blog (and once on mine when I used it before for THE Mocha Crunch Cake) that they did, so I recommend either making sure the batter is no more than 2/3 full in your pans or placing a baking sheet below the pans to catch any overflow, just in case. If you have extra batter, make a few cupcakes! Also, please do not skip lining the pans with parchment or waxed paper. This cake is sticky and I learned the hard way that it will stick to the pan even if you grease and flour it.
Make the frosting: Cream butter and shortening together until smooth. Beat in melted chocolate until smooth. Add the cocoa powders, salt, sugar and milk to the bowl and turn the mixer to a very low setting until it’s combined enough to increase the speed. Continue increasing the speed and scraping the sides of the bowl until everything is incorporated, then add the vanilla and continue beating until fluffy. Frost cooled cake and freeze leftovers. This makes a large batch so unless you lay the frosting on super thick, you should have enough leftover to frost a dozen cupcakes, but the batch isn’t quite large enough to cut in half. I know, I make things difficult, but you won’t regret having some extra on hand.
Make the glaze: Gently heat the cream and chocolate together in the microwave or in a double boiler, stirring often until smooth and shiny. Stir in the corn syrup and vanilla. Allow to come to room temperature before pouring over the top of the cake and spreading to the edge with a spatula so that it drips over the sides. If the glaze gets too thick, heat it again for a few seconds (it won’t take long) and stir before pouring over the cake. Serve the cake at room temperature.
Recipe source: cake recipe from My Kitchen Cafe, frosting and glaze by Veronica Miller.


