RSS Feed

Category Archives: My Favorites

Mom’s Goulash

Posted on

I never learned to make goulash – I just knew it had noodles, ground beef, and tomatoey stuff going on in it, according to my Mom’s memories of what her mother made. But she never made it so I just came up with my own way of making it which was sort of like the same way I made spaghetti with meat sauce, but just with macaroni noodles instead.  I have my favorite version of my own version posted here.

I finally had real (real as in the Americanized real, not the Hungarian real) goulash at my in-law’s house.  I’d been wanting to get my MIL’s recipe for a long time, because although Dennis never says “this isn’t like Mom used to make,” I’ve always wanted to cook his favorite meals that he grew up eating and goulash topped that list.  His Mom’s goulash is really, really good!  After enjoying it on Easter, I asked her exactly what she put in it so I could recreate it at home.  I’ve never turned out better goulash and Den’s favorite is now one of my absolute favorites as well. We could eat this almost every week!

Mom’s Goulash

Printable recipe
Printable recipe with picture

1/2 lb macaroni
1 1/2 lbs ground beef
1 large onion, diced
garlic salt, pepper, chili powder, & hot sauce to taste
2 (14.5 oz) cans whole stewed tomatoes, undrained
2 tablespoons ketchup
Tomato juice as needed

Cook the macaroni to al dente according to package directions. While it’s cooking, brown the ground beef and onion together in an extra-large skillet or in a dutch oven. Drain and season with spices to taste. In a large bowl, mash tomatoes with potato masher and add to beef along with the ketchup. Drain macaroni and add to the beef mixture, stirring well. Taste and add additional seasoning as needed. I didn’t need to add any tomato juice to mine, but if you like yours very juicy you can add as much tomato juice as you like. Phyllis adds it to her leftovers, which I would also recommend, because the noodles tend to soak up all the juice with time.

Recipe source: Phyllis Miller

P.S. Happy anniversary to my hubby! These have been the best 14 years of my life.

Creamy Green Chile Chicken Enchilada Casserole


Wow, that title is a mouthful!  Sometimes it’s hard to stick to a two or three-word recipe name when there’s so much goodness going on with it.  I had to tell you this was creamy, because that’s one of the best features of this dish.  I had to tell you it features green chiles, both straight up and in salsa verde, because the flavor profile this creates with the creamy & cheesy ingredients is rockin’.  And it’s a chicken enchilada casserole so I couldn’t exclude those words.  For your sake, I didn’t mention the beans in the title, though I was tempted to call this “Creamy Green Chile Chicken & White Bean Enchilada Casserole.”  You gotta draw the line somewhere, am I right?
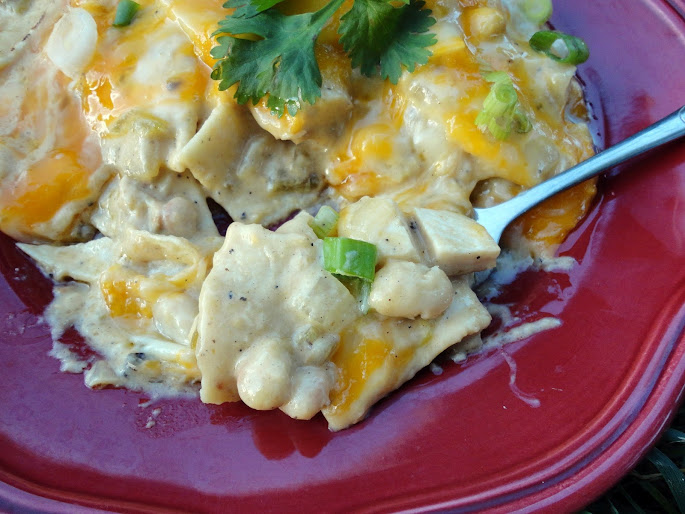
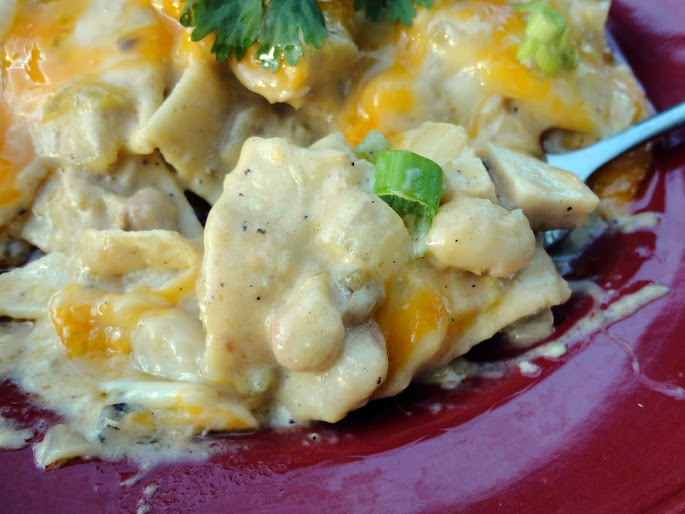
Pretty much everything I eat right now seems like the best thing I’ve ever eaten in my life.  So maybe it’s not true that this is the best thing I’ve ever eaten in my life, but it sure felt that way while I was eating it.  It’s filling (yay for protein, fat and fiber! hehe), which made me so sad because I wanted to eat the whole casserole, in one sitting, all by myself.  It seriously rocked my world.  I was so excited to serve it to my husband (we hardly ever eat dinner together, and on this occasion I actually ate before him, which is unusual since he usually gets off work before me) and I tried not to lean over his shoulder to gauge his reaction.  But I kinda did.  He never gets excited about food like I do, but he said it was “really good” and ate a huge plateful rather quickly, then went back for more.  I’d say that’s a big two thumbs up from the Den man!

There’s pepper in this dish, but the black flecks come mainly from the roasted salsa verde, linked to in the recipe.

I based the recipe off of my favorite Creamy Chicken Enchiladas, and maybe it’s just that I haven’t had them in over a year (so many recipes, so little time), but I do believe this green casserole version is even better than the original enchiladas.  All I know is it’s good, and I would definitely make it for company!
Creamy Green Chile Chicken Enchilada Casserole

Printable recipe
Printable recipe with picture

1 ½ lbs. boneless, skinless chicken breasts
1 medium onion
2 tablespoons butter
1 (7 oz) can chopped green chiles
½ cup salsa verde (I used Walmart’s World Table Roasted Salsa Verde, which I highly recommend)
1 (15.5 oz) can white beans (such as navy or Great Northern), drained and rinsed
1 cup light sour cream
1 (10.5 oz) can light cream of chicken soup
1 ½ cups Monterrey Jack, divided
1 ½ cups Cheddar, divided
*OR 3 cups shredded Mexican cheese blend substituted for both cheeses
½ teaspoon garlic powder
¼ teaspoon salt
¼ teaspoon black pepper
8-10 white corn tortillas, quartered
Butter for pan

Preheat oven to 350 degrees F. Grease a 13×9 pan with butter and set aside.

Salt your chicken breasts and cook them in a skillet or grill (I use my George Foreman). Allow to cool enough that they won’t burn your hands, then chop them up; set aside.

While the chicken is cooking, heat a skillet over medium-high heat and chop up your onion. Melt the butter in the heated skillet and add the onions, sautéing until softened. Stir in the green chiles and salsa verde and cook for 3-5 more minutes to cook off some of the liquid. Add the chicken, white beans, sour cream, cream of chicken soup, 2 cups of the cheese (reserve the rest for the top), garlic powder, salt, and pepper.  Stir together until well blended and cheese is melted.

Spread a small amount of the chicken mixture over the bottom of your prepared pan, then put a layer of the quartered tortillas over it, slightly overlapping. Spread half of the remaining chicken mixture over the tortillas, then another layer of tortillas, and finish with the remaining chicken mixture. Sprinkle the reserved cheese over the top, then cover with foil that has been sprayed with cooking spray to keep the cheese from sticking (or use the nonstick foil). Bake for 15 minutes, remove foil, and bake another 5 minutes or until bubbling around the edges. Let sit 10 minutes before cutting.

Veronica’s notes: I highly recommend shredding your own cheese, as the preshredded kind doesn’t melt as well and IMHO, does not taste as good. You will need ¾ of an 8 ounce block of both cheddar and Monterrey Jack for this recipe (every 8 oz block makes 2 cups of shredded cheese). The tortillas are super simple to cut into quarters if you layer five tortillas and use a pizza cutter on them, or a chef’s knife. Also, this would make an excellent meatless meal if you just replace the chicken with another 2-3 cans of white beans.

A Veronica’s Cornucopia original, with help for transforming it into a casserole from 4 Little Fergusons

Fluffy Whole Wheat Pancakes


I like pancakes.  But for some reason, I can let years go by without making them.  I’m even worse with waffles.  It’s been probably four years since I made waffles.  I don’t know why!  They are so good and so simple.

Last week I woke up with a hankering for pancakes.  I consider buttermilk pancakes made with white flour the best, but I had no buttermilk and I wanted them to be a little more on the healthy side, so I whipped up a whole wheat batch instead, using coconut sugar (a Christmas gift from Emma H., a sweet reader) in place of regular and raw coconut nectar instead of maple syrup.  I didn’t plan to blog them, figuring they’d be nothing all that special, so I took a bite without taking any pictures first.  And then I died.  Or at least I thought I did, because as soon as I dug in, I was transported to heaven. Pictures ensued.

The pancakes are surprisingly fluffy and light for being whole wheat.  The whole wheat aspect gives them more substance, but doesn’t seem to weigh them down.  I definitely love the flavor whole wheat adds to pancakes.  Slathered with butter and syrup, they are a delicious and wholesome breakfast treat!

Warning: tangent ahead.  If you have no interest in coconut sweeteners, just skip to the recipe and use whatever kind of sweetener in and out of the pancakes you like. :)

If you’ve never tried coconut sweeteners and are curious about them, here’s the deal.  They are low-glycemic sweeteners (35 on the glycemic index, which is comparable to most fruits and veggies) that won’t spike your blood sugar like regular sugar, or even good-for-you honey and maple syrup.  This is good news not only for diabetics, but for everyone, since eating sugary foods can cause a crash that makes you crave more sugar – the vicious sugar cycle.  Coconut sweeteners are unrefined as well, meaning a lot healthier for you than regular sugar!  They both are an abundant source of minerals, amino acids, vitamin-C, broad spectrum B vitamins, and have a nearly neutral PH.

As for the taste, you might be surprised to know that neither come from the coconut fruit itself, or taste anything like coconut!  The sugar is produced from the flower buds of the coconut tree, and the syrup/nectar comes from the tree sap, just like maple syrup is taken from the sap of maple trees.  I think the sugar is similar to brown sugar, and looks like it too, except it doesn’t stick/clump together.  The syrup is similar to molasses, especially when tasted straight, but much milder in flavor.  I didn’t think I’d like it on pancakes because I’m not a huge fan of molasses, but the flavor changed when added to them.  Not molasses at all, just a nice mildly sweet flavor that compliments the pancakes – absolutely fantastic!

Fluffy Whole Wheat Pancakes

Printable recipe
Printable recipe with picture

1 cup (4 oz) whole wheat flour
1 ½ tablespoons sugar (I used coconut sugar)
¾ teaspoon baking powder
½ teaspoon salt
1 egg
1 cup (8 oz) milk
2 tablespoons butter or oil, plus more for skillet (I used coconut oil)

Combine flour, sugar, baking powder, and salt in a small bowl. In a separate small bowl, whisk egg and then mix in milk and oil. Add the wet ingredients to the dry and stir until mixed, but not smooth. Let batter rest for five minutes while you preheat the skillet or griddle to 350F. Test if it’s ready by scattering drops of water over it. If they sizzle and dance, it’s ready.

Grease the skillet with a tablespoon of butter or coconut oil, then pour batter onto skillet to make pancakes the size of your choice. Once bubbles are over the surface and the edges are turning dry, flip over and cook until done. Serve warm with butter and syrup (I use raw coconut nectar).

Makes two giant pancakes, or four regular-sized ones.

Recipe source: adapted from Alton Brown’s recipe

You may also enjoy…

Fluffy Buttermilk Pancakes (my favorite!)

Brown Sugar Bacon Waffles

Cornmeal Griddle Cakes

Baked Cream Cheese Spaghetti Casserole

Posted on

I went through a comfort food phase last month  where, despite the heat, all I wanted were piping hot casseroles and soups.  Plain Chicken to the rescue, yet again!  This is one of the things which satisfied my craving for comfort food.  I resisted every temptation to change the recipe, except for using reduced fat cream cheese in place of regular, and while I will say there are some things I’d do different next time (as noted below), this was just so stinkin’ good.  Creamy pasta, topped with an easy meat sauce and Parmesan cheese. Just. so. good.

Baked Cream Cheese Spaghetti Casserole

Printable recipe
Printable recipe with picture

12 oz spaghetti
1 (28 oz) jar prepared spaghetti sauce
1 lb. lean ground beef
1 teaspoon Italian seasoning
1 clove garlic, minced
8 ounces reduced fat cream cheese, softened
1/2 cup Parmesan cheese, shredded

Preheat oven to 350 F degrees.

In a skillet, brown the ground beef until cooked through; drain fat and stir in spaghetti sauce. Set aside.

Cook spaghetti according to directions on packet. Drain and place cooked spaghetti in bowl. Add cream cheese, Italian Seasoning and minced garlic. Stir until cream cheese is melted and the spaghetti is thoroughly coated.

Lightly grease a 9×13″ pan. Spread a small amount of meat sauce in the bottom of the dish. Put spaghetti on top of sauce and top with remaining meat sauce. Sprinkle Parmesan cheese on top.

Bake for 30 minutes, until bubbly.

*Veronica’s note: I would suggest covering your dish with foil while baking to prevent the cheese and spaghetti drying out like mine did. Also, you might reserve some pasta water to add in when you mix in the cream cheese – it is quite thick and dry and I think some extra moisture would make it creamier. I also plan to use more sauce next time – maybe up to even two jars.  What can I say, I like the sauce. :)

Recipe source: Plain Chicken

Easy Salisbury Steaks with Onion Gravy

Posted on

This is how you know that food might be way too important to you.  You make a bucket list.  Which entirely consists of recipes you want to make before you die.  Or in my case, before I turn 40.  Lots of young food bloggers have a 30 Before 30 list, but since I’m older I made a 40 Before 40.  I don’t turn 40 for another 8 years (OK, 7 years and 2 months if you want to get all technical and make me feel even older) so I should totally be able to do it, right?

Check out my 40 Before 40 list here.

Salisbury steak just so happens to be one of the recipes on my bucket list.  Number 13 to be exact.  I don’t know what it is about the number thirteen this year but it, and three (I just realized while talking about my age that I’ll be 33 when Joshua is born-more three’s!), just keep showing up!  Anyway, I made the list several months ago and am happy to finally be able to cross off one of the recipes on it.

And what a delicious one it was!  This is another goodie from The Better Baker, who makes a lot of “my kind” of foods (comfort food) but usually they are healthier options.  My ultimate comfort food is meatloaf with mashed potatoes and gravy and Salisbury steak is sort of like little individual meatloaves with gravy so this was just a big plate of comfort for me.  These were so good!  So good.  Like so good, guys.  And unlike some more complicated recipes (which I’m sure are even more delish, however), they come together really quick and easy.  I had my Salisbury steaks and mashed potatoes from scratch ready in half an hour.  Dinner time!

Easy Salisbury Steaks with Onion Gravy

Printable recipe
Printable recipe with picture

1 egg
1 medium onion, finely chopped
1/2 cup crushed saltine crackers (about 15 crackers)
1/2 teaspoon pepper
1 lb. lean ground beef
1 tablespoon canola oil
1 (1 oz) envelope beefy onion soup mix*
2 tablespoons all-purpose flour
2 cups cold water

In large bowl, combine egg, onion, saltines and pepper. Crumble beef over mixture and mix well. Shape into 5 oblong patties.

Heat the oil in a large skillet over medium-high heat. Add the patties and sear each side until browned, about 3 minutes per side. Remove patties to a platter and cover with foil to keep warm.

In small bowl whisk together soup mix, flour and water; stir into skillet. Bring to a boil, stirring often. Return patties to skillet. Reduce heat; cover and simmer 5 – 7 minutes or until meat is no longer pink.

Serve with mashed potatoes and a veggie. I served mine with sour cream and chive mashed potatoes.

*The original recipe calls for regular onion soup mix, but I found a beefy version available for a limited time at Aldi.  If you can’t find the beefy kind, I’m sure it’s just as good with regular!  The color of your gravy will just be lighter.

Recipe source: adapted from The Better Baker

The Masters Pimento Cheese

Posted on

Me and pimiento cheese go way back.  Although Mom fed us a very healthy diet growing up, cheese (and butter, thank God) was always present in our house and to this day, my favorite food in the whole world is a cheddar cheese sandwich with lettuce, tomato, and onion.  Mom would occasionally indulge in one of her favorite treats and buy a tub of pimiento cheese, and I was always more than OK with that.

But there’s quite a difference between store bought and homemade!  I didn’t try making it at home until a few years ago, and haven’t looked back.  I used to follow a Paula Deen recipe that’s quite good, but I have now found an even better recipe.  In fact, I’d go so far as to say it’s the BEST, or at least the best I’ve tried.

This one includes Parmesan cheese, which I never would have thought to put in pimiento cheese, but it makes it so good!  You just gotta try it.

The Masters Pimento Cheese

Printable recipe
Printable recipe with picture

1/4 cup (2 oz) cream cheese, room temperature
1/2 cup (4 oz) mayonnaise
1/2 cup (4 oz) sour cream
1/8 tsp garlic powder
¼ tsp minced dried onion
2 cups (8 oz) shredded sharp cheddar cheese
1/2 cup (1 ½ oz) shredded Parmesan cheese
1 (4 oz) jar diced pimientos, drained
Salt to taste (I don’t use any)

Using a mixer, whip the cream cheese until creamy, then beat in the remaining ingredients.  Beating them will help break down the cheese and pimientos.

Veronica’s note: I used reduced fat cream cheese, mayonnaise, and sour cream and you couldn’t tell – it was so good.

Recipe source: adapted from Plain Chicken

American Potato Salad

Posted on

Haus and I grilled a ton of meat last Saturday (we feel like we’re wasting the charcoal if we don’t load the grill up at least twice) and while it was grilling, I made up a batch of this potato salad from the current issue of Cook’s Illustrated. Reader Kerry C. gifted me with a subscription to Cook’s Country (LOVE it!) for Christmas, and they sent me a complimentary issue of the regular Cook’s Illustrated mag this month-lucky me!

We were starving since we started grilling late, and as soon as the potato salad was mixed together, I took a big bite and hollered for Dennis to come taste it. We agreed it was the best potato salad EVER! We polished off the entire batch, which equals about a pound of potato salad each, and ended up skipping the meat. This potato salad was so good, it turned into our dinner for the night and we just refrigerated all the meat to eat as leftovers throughout the week.

The potato salad was so good I made a second batch within an hour of making the first one, because I knew we’d want it to go with our leftover meat. Luckily we made the second batch last for two whole days, which is like a miracle, people. This potato salad is good. If you don’t have a great recipe for classic American potato salad, Cook’s Illustrated has got you covered. They tested every ingredient, every method, and every amount to get it just so for us. Thank you Cook’s Illustrated!

American Potato Salad

Printable recipe
Printable recipe with picture

2 lbs. (3-4 medium) russet potatoes, peeled and cut into 3/4-inch cubes
1 tablespoon salt
2 tablespoons distilled white vinegar
1 medium celery rib, chopped fine (about 1/2 cup)
2 tablespoons minced red onion
3 tablespoons sweet pickle relish
2 tablespoons minced fresh parsley leaves
1/2 cup mayonnaise (see note)
3/4 teaspoon powdered mustard
3/4 teaspoon celery seed*
1/2 teaspoon salt*
1/4 teaspoon ground black pepper
2 large hard-cooked eggs, peeled and cut into 1/4-inch cubes (optional)

*You can use celery salt in place of the celery seed, omitting the 1/2 teaspoon salt from the dressing.

Place potatoes in large saucepan and add water to cover by 1 inch. Bring to boil over medium-high heat; add 1 tablespoon salt, reduce heat to medium, and simmer, stirring once or twice, until potatoes are tender, about 8 minutes.

Drain potatoes and transfer to large bowl. Add vinegar and, using rubber spatula, toss gently to combine. Let stand until potatoes are just warm, about 20 minutes.

Meanwhile, in small bowl, stir together celery, onion pickle relish, parsley, mayonnaise, powdered mustard, celery seed, 1/2 teaspoon salt, and pepper. Using rubber spatula, gently fold dressing and eggs, if using, into potatoes. Cover with plastic wrap and refrigerate until chilled, about 1 hour; serve.

Veronica’s Notes: We actually ate the first batch warm and I prefer it that way, though it’s great cold too.  Cook’s Illustrated says the salad can be refrigerated up to one day. Well ours was just fine after two days and I’m sure it would be great after three or four days.

Recipe source: Cook’s Illustrated

Favorite Blueberry Muffins

Posted on

These are currently my favorite blueberry muffins.  For me, the best blueberry muffins are stark white (no brown sugar or cinnamon, please) to contrast the pretty purplish blue of the bursting berries, a little dense, and quite sweet.  My perfect blueberry muffin is also leavened with baking powder, as baking soda tends to give the blueberry juice a greenish tinge and the color appeal is very important to me in a blueberry muffin.  In essence, my ideal blueberry muffins are blueberry cupcakes disguised as breakfast by the heaviness of the crumb and a lack of frosting.  Though a nice crumb topping is certainly not out of the question. :)

Thanks to Carolyn of Inner Chef for introducing me to this fabulous recipe!  It’s now my go-to, though I desperately need to make a batch with the crumb topping, as I’m sure I’ll love it even more.  Thanks for helping me using up some of my Grandpa’s blueberries, Carolyn!  (I inherited 16 pints back in March in a very strange way–I really need to share the story!)  Thankfully, between several batches of these muffins, eating the blueberries straight, and this pound cake, not a single pint had to go to waste. :)

Favorite Blueberry Muffins

Printable recipe
Printable recipe with picture

1½ cups all-purpose flour
¾ cup granulated sugar
½ teaspoon salt
2 teaspoons baking powder
⅓ cup vegetable oil
1 egg
⅓ cup milk
1 cup fresh blueberries*

Crumb Topping (optional)
½ cup granulated sugar
⅓ cup all-purpose flour
¼ cup butter, cubed
1 ½ teaspoons ground cinnamon

*I used 1 1/2 cups fresh blueberries, which made each muffin bursting with berries (we loved this). 1 cup will give you a more typical blueberry muffin.

Preheat oven to 400 degrees F (200 degrees C). Grease muffin cups or line with paper liners.

Combine 1 ½ cups flour, ¾ cup sugar, salt and baking powder. Place vegetable oil into a 1 cup measuring cup; add the egg and enough milk to fill the cup. Mix this with flour mixture. Fold in blueberries. Fill muffin cups right to the top, and sprinkle with crumb topping mixture.

To Make Crumb Topping: Mix together ½ cup sugar, ⅓ cup flour, ¼ cup butter, and 1 ½ tsp. cinnamon. Mix with a fork, and sprinkle over muffins before baking.

Bake for 20 to 25 minutes in the preheated oven, or until a toothpick inserted in center (not into a blueberry) comes out clean.

Recipe source: Inner Chef

Note: I photographed my muffins the day after I baked them, so the blueberries had withered up a little as the juices absorbed into the muffins, making them crazy moist. Although we enjoyed them more after storing 8 hours in an airtight container (I baked them the night before), rest assured they will be beautiful and not withered when you take them out of the oven.

Turkey & Onion Grilled Cheese

Posted on

So so so excited today!  This is probably my last month with the Secret Recipe Club, and I’m so excited that I was assigned to Desi’s blog, Steak ‘n Potatoes Kinda Gurl!  I actually “met” Desi through being in Group C of the Secret Recipe Club, and have been following her since she joined.  Very happy to be assigned to someone I know and love for my last hurrah!

For those who may have missed or never understood my monthly Secret Recipe Club posts, here’s the premise.  You are assigned to a participating blog each month, but no one knows who’s assigned to who.  It’s a secret!  You secretly stalk browse your assigned blog and pick a recipe, make it, photograph it, and post it on reveal day.  It’s something I’ve always enjoyed, I think because it’s kind of like Christmas each month with a big surprise on reveal day.  If this sounds like something you’d like to participate in, click here to find out how to join.

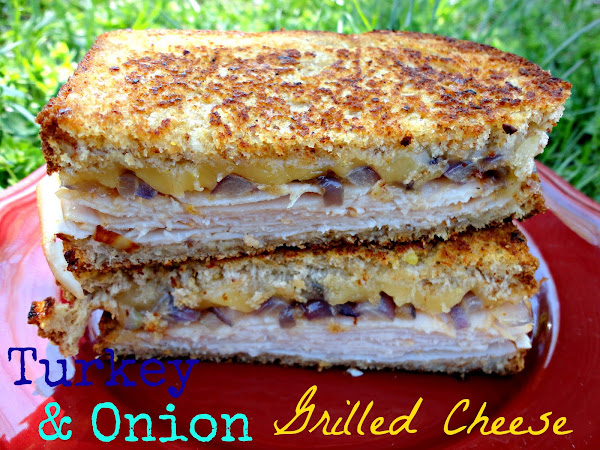
Now let’s talk gooey cheese.  Since April is National Grilled Cheese Month, and I’ve been meaning to make this recipe since Desi posted it during last year’s Grilled Cheese Month, there really wasn’t any question as to which one I’d choose from her blog.  I had to have this sandwich!

It was well worth the wait.  Totally crazy delicious.  I couldn’t find maple turkey, so I had to add in some maple flavor a different way.  I was a little scared I might have ruined it, but Dennis and I both loved it!  Delicious smoked turkey, sweet grilled onions, and melty Gouda cheese packed between two slices of multigrain buttery, crunchy, toasty bread make for  quite the delicious sandwich.  Thank you, Desi, for creating this masterpiece and thus giving me an opportunity enjoy it and spread the gooey gouda love a little further through my own blog.  Love ya girl!

Also, a huge THANK YOU and shout out to our SRC leader, April Tuell, and our hostesses (especially Debbi Smith, my hostess!), and all the volunteers that keep it running.  And of course, to all my group C bloggers (OK, and group A too, I enjoyed my short time with you guys as well!)!  It has been a beautiful, wonderful ride and I wouldn’t trade my time in the SRC for anything.  Love you guys!  But I won’t miss you because I’ll still be stalking you forever! >:)

Turkey and Onion Grilled Cheese

Printable recipe
Printable recipe with picture

1 small red onion, halved and sliced
2 tablespoons butter
1/2 teaspoon maple syrup (optional)
4 slices of multigrain bread
3 tbsp or so of softened butter
4 slices (or more) of quality deli turkey (I used Applewood Smoked Turkey)
4 slices of gouda cheese

In a medium skillet, add 2 tablespoons butter over medium heat. Once melted, add the sliced red onion and saute until softened and golden brown. Remove to a small bowl and stir in the maple syrup if desired.

Spread the bread slices with 3 tablespoons softened butter. In a large skillet on medium-low, add the bread slices. If you have a large enough skillet, you can add two slices of bread at once. If not, you will need to make one sandwich at a time. Top one slice of bread with 2 slices of gouda. Then add 2 slices of turkey, then some sauteed red onions. Top with the other slice of bread, buttering the outside before you place it on top. Cook until golden brown, then flip and cook until golden brown on the other side.  Repeat with second sandwich.

*Yields 2 sandwiches

Recipe source: adapted from SteakNPotatoesKindaGurl.

Check out the other Group C Secret Recipe Club Posts by clicking below!


Shredded Chicken with Noodles

Posted on

I made this two years ago, it’s about time I shared it!  This is basically chicken noodle soup but with sauce instead of broth. As I’m all about chicken noodle soup, especially with homemade egg noodles, I love it with or without the broth (forget that my “sauce” looks more like broth, I obviously messed up by not thickening it enough, but you’re not going to, right?), and this is one of those hot comforting meals that seem essential during cold winter months.

In other news, today is the last day to enter my Tropical Traditions Gold Label Coconut Oil giveaway, and I also posted my announcement about February’s Sweetest Swap a lot later in the day than usual (after staying up until 6 AM on Monday so I could get all the details worked out and schedule the blog, I forgot to schedule it! Of course.) , so if you missed it, please check that out as well.  Now let’s scare the chill out of our bones with some savory chicken and noodles shall we?  And if you’d like to make your egg noodles from scratch, it couldn’t be easier, you can snag my recipe here.

Shredded Chicken with Noodles

Printable recipe
Printable recipe with picture

1 whole cut up fryer chicken
2 whole carrots, diced
2 stalks celery, diced
½ whole medium onion, diced
1 teaspoon salt
½ teaspoons turmeric
¼ teaspoons white pepper (more to taste) (I used black)
¼ teaspoons ground thyme
2 teaspoons parsley flakes
16 ounces, weight frozen “homemade” Egg Noodles or same amount dried large egg noodles
3 tablespoons all-purpose flour
1. Cover chicken in 4 quarts water. Bring to a boil, then reduce heat to low. Simmer for 30 minutes.
2. Remove chicken from pot with a slotted spoon. With two forks, remove as much meat from the bones as you can, slightly shredding meat in the process. Return bones to broth and simmer on low, covered, for 45 minutes.
3. Remove bones from broth with a slotted spoon, making sure to get any small bones that might have detached. Add the carrots and celery and onions to the pot, followed by the herbs and spices. Stir to combine and simmer for ten minutes to meld flavors.
4. Increase heat and add egg noodles and chicken. Cook for 8 to 10 minutes.
5. Mix flour and a little water. Stir until smooth. Pour into soup, stir to combine, and simmer for another 5 minutes, or until broth thickens a bit. Test and adjust seasonings as needed.
Recipe Source: The Pioneer Woman via Framed Cooks