Although the first day of spring has come and gone, it’s been chilly and blustery here in Kansas, so I thought I’d share this warm and delicious casserole for everyone that’s still eagerly awaiting spring before it’s hot and sweltering and nobody wants to bake a casserole. This is pure comfort food and perfect to warm the soul on a chilly day. It’s very quick and simple to make, which is good if you have a baby that has decided that if you aren’t holding him or playing with him or taking him on a stroller ride, he isn’t happy, because you won’t have to listen to him scream for very long before dinner is in the oven. ;)
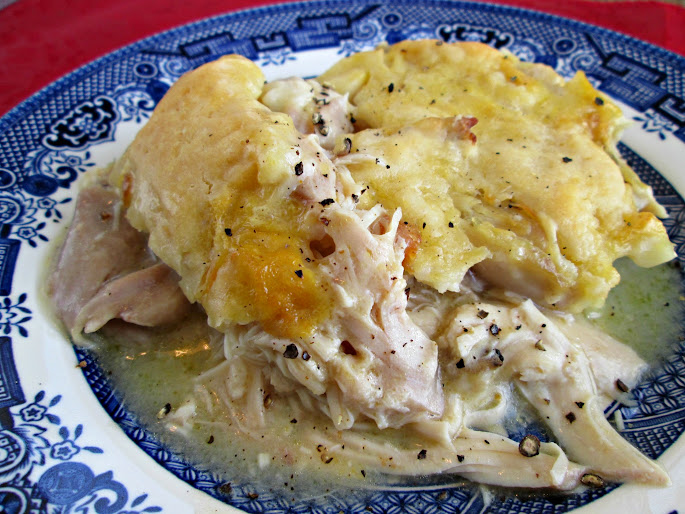
Chicken and Dumpling Casserole
Printable recipe
Printable recipe with picture
3 – 4 cups cooked chicken, cut into bite sized pieces (use rotisserie chicken if desired)
4 tablespoons butter
1 cup milk
1 cup all-purpose flour
1 1/4 teaspoons baking powder
1/4 teaspoon salt
2 cups chicken broth
1 (10.75 oz) can cream of chicken soup
Preheat oven to 400F. Place butter in 9″ X 13″ baking dish and place in oven while it’s preheating. Once butter is melted, you can remove the pan to continue with the recipe, or let it cook a little to brown it and add an extra dimension of flavor. Be sure to watch it if you decide to let it brown because it can go from nutty to burnt pretty quickly.
Remove pan from the oven and sprinkle prepared chicken over the top of the butter. In a medium bowl, whisk together milk, flour, baking powder and salt. Pour over the chicken, but do not stir. In same bowl, after scraping out as much flour mixture as possible, whisk together chicken broth and cream of chicken soup. Pour that over top of casserole; do not stir.
Bake uncovered for 35 – 45 minutes. When done, the top will be beautifully browned and bubbly around the edges.
Yield: about 6 servings
Veronica’s notes: I boiled a whole chicken for this recipe. It was about 5 lbs and I covered it with water in a stock pot and added a teaspoon of salt, boiling for an hour or two. I forgot to set the timer so I really don’t know how long I boiled it because I was so busy with the baby- lol. If you make it this way, it’s very economical, and you automatically make your own broth to use in the recipe.
Recipe source: The Better Baker