RSS Feed

Category Archives: Burgers & Sandwiches

Preacher Tuna Salad

Posted on

Mike and Nancy, our preacher and his wife, invited us and two other couples to dinner after the evening worship service several Sunday’s ago, and we dined on sandwiches, chips, veggies, and fruit – the perfect “after church meal” because everything could be prepped in advance and put out to serve upon arrival.  I was absolutely delighted to discover that the tuna salad had been prepared by Mike himself!  I do know men that cook, but not very many, so this just tickled me to pieces to know that our preacher had made the main part of our supper.

Nancy told us there was only two things he makes, and judging by how much we loved his tuna salad, I’m probably going to be wanting the recipe for his other specialty soon!  He informed me there was a secret ingredient before I bit into it, so I was prepared to encounter it. Apples! Of all things.  I’ve never ever heard of adding apples to tuna salad, but he said it helps cut the fishy taste. I agree, it does cut it!  And I can’t tell you how good it tastes and feels to bite into a crisp chunk of sweet apple in a tuna sandwich.  So good.  Maybe you have to taste it to believe it, and I hope you’ll make this so you can experience it for yourself.

Mike doesn’t really use a recipe, but he gave me the ingredients he uses, and I’ve included my own measurements for those ingredients in this recipe.  Definitely add more or less to suit your own tastes.

Preacher Tuna Salad

Printable recipe
Printable recipe with picture

1 can tuna, drained well
1 hard boiled egg, diced
2 slices of apple, diced (use a sweet variety)
1 tablespoon sweet pickle relish or finely diced sweet pickle
2 tablespoons diced sweet onion (optional – Mike doesn’t use onion, but we prefer it this way)
2 tablespoons mayonnaise

Mix all ingredients in a bowl & serve on bread or croissants for that extra-special preacher touch. Makes 2 sandwiches.

Recipe source: Mike O’Neal

Italian Grilled Cheese

Posted on

I love quick, easy meals like sandwiches in the summer.  Usually cold, but this is one grilled cheese I really enjoy when the temps start to rise.  I think because it reminds me of bruschetta, which reminds me of summer.  Probably because that’s when fresh basil abounds!  This is a very nice change from the traditional grilled cheese, and I love the flavor of the basil and melty mozarella and tomato all together…almost like a Margherita pizza but in the form of a quick sandwich. Can’t beat that.  Bring on the melty bruschetta/pizza sammich.

Italian Grilled Cheese

Printable recipe
Printable recipe with picture

8 fresh basil leaves
8 thin tomato slices
4 slices provolone or mozzarella cheese
4 slices Italian bread ( 1/4″ thick)
2 tablespoons prepared Italian salad dressing

Layer the basil leaves, tomato slices and provolone cheese on two slices of bread. Top with remaining bread. Brush outsides of sandwiches with salad dressing. Grill, uncovered, over medium heat for 3-4 minutes on each side or until cheese is melted. Makes 2 sandwiches.

The Masters Pimento Cheese

Posted on

Me and pimiento cheese go way back.  Although Mom fed us a very healthy diet growing up, cheese (and butter, thank God) was always present in our house and to this day, my favorite food in the whole world is a cheddar cheese sandwich with lettuce, tomato, and onion.  Mom would occasionally indulge in one of her favorite treats and buy a tub of pimiento cheese, and I was always more than OK with that.

But there’s quite a difference between store bought and homemade!  I didn’t try making it at home until a few years ago, and haven’t looked back.  I used to follow a Paula Deen recipe that’s quite good, but I have now found an even better recipe.  In fact, I’d go so far as to say it’s the BEST, or at least the best I’ve tried.

This one includes Parmesan cheese, which I never would have thought to put in pimiento cheese, but it makes it so good!  You just gotta try it.

The Masters Pimento Cheese

Printable recipe
Printable recipe with picture

1/4 cup (2 oz) cream cheese, room temperature
1/2 cup (4 oz) mayonnaise
1/2 cup (4 oz) sour cream
1/8 tsp garlic powder
¼ tsp minced dried onion
2 cups (8 oz) shredded sharp cheddar cheese
1/2 cup (1 ½ oz) shredded Parmesan cheese
1 (4 oz) jar diced pimientos, drained
Salt to taste (I don’t use any)

Using a mixer, whip the cream cheese until creamy, then beat in the remaining ingredients.  Beating them will help break down the cheese and pimientos.

Veronica’s note: I used reduced fat cream cheese, mayonnaise, and sour cream and you couldn’t tell – it was so good.

Recipe source: adapted from Plain Chicken

Special Egg Salad

Posted on

I have a couple easy and delicious sandwich fillings for you this week!  This one I got from one of my favorite people, Marsha of The Better Baker.  And her last name just so happens to be Baker – how cute it that?  Anyway, I bought her cookbook several months ago (she has a new one coming out soon, too!) and she made a list of her family’s favorite recipes in it for me.  This was one of the first one I picked – her description of it being the “best egg salad” sold me.

Usually I make my egg salad crunchy, with celery, red, green, and yellow or orange peppers mixed in.  I just like to have some crunch that boosts the nutrition.  But if I made enough for leftovers, it tended to get watery from the veggies and it’s a pretty loose salad to begin with because I only used Miracle Whip as the binder.  Although this one has absolutely no vegetables in it, it really is the best egg salad I’ve ever had.  It’s got a wonderful, creamy texture (the cream cheese is just brilliant here), and incredible flavor.  And if you serve it the way Marsha suggests, on toasted wheat bread with lettuce, you do get a very satisfying crunch.  I served mine on multigrain bread and thought it was just over-the-top wonderful.

Photo courtesy of Jaclyn H.

Another tip for this salad – to make easy work of the eggs, you can use a pastry blender as Marsha mentions in her cookbook, or you can try using a cooling rack! My friend, Jaci, introduced me to this idea and at first I thought I’d never try it, because chopping eggs isn’t that hard. But when it came to dicing up six eggs, pushing them through my cooling rack only took a few seconds and was a real time saver. Thanks, Jax!

Special Egg Salad

Printable recipe
Printable recipe with picture

1 (3 oz) package reduced-fat cream cheese, softened
1/4 cup reduced fat mayonnaise or Miracle Whip*
1/2 teaspoon sugar*
1/4 teaspoon onion powder
1/4 teaspoon garlic powder
1/8 teaspoon salt
1/8 teaspoon pepper
6 hard boiled eggs, chopped

In a small mixing bowl, beat the cream cheese until smooth. Add the mayonnaise, sugar, onion powder, garlic powder, salt and pepper; fold in the eggs. Cover and refrigerate at least one hour before serving. Will keep for several days in refrigerator.

*You probably won’t need the sugar if you use Miracle Whip since it already has sugar added.

Veronica’s note: Although my method of hard-boiling eggs probably isn’t the best one, it works for me: put eggs in a pan and cover with an inch of water.  Add several dashes of salt (I heard this helps with something, maybe peeling them, but can’t remember. I just do it out of habit.)  Bring to a boil, then reduce heat to medium-high and continue to boil for 15 minutes.  Carefully drain off water and fill pan with cold tap water.  Pour off water and fill again with cold tap water.  At this point you can add ice to quickly cool the eggs, or keep the cold tap water running so that the pan is continually being cooled. Once  the eggs have cooled to room temperature or lower, which shouldn’t take too long, you can peel them and continue with the recipe.

Recipe source: The Better Baker

Homemade Sloppy Joes (look Ma, no cans!)

Posted on

I follow a lot of blogs and some of them I rarely comment on (if I commented on every blog I follow it would be my full-time job), but will pin their recipes almost daily.  Such as Plain Chicken and Jam Hands.  Everything they post is like, “Oh that is the most fattening and delicious thing I’ve ever seen. I must make it!”  FYI, I really love fattening recipes, especially right now.  (And more and more am not loving sweet stuff!  To the point that I almost would have rather died than taste the frosting on the last order of cupcakes I made, though I made myself do it to make sure it was good. I couldn’t tell if it was good, I hated it so much.  Oh well, fat is better for you than sugar anyway.)  This one  isn’t fattening, but I won’t hold that against it because it is family friendly.  And maybe that’s a better way to classify Ali’s recipes (she has two little girls).  I love family friendly too, even if it doesn’t have a pound of butter in it.

I pinned Ali’s Best Ever Sloppy Joes over a year ago and finally made them recently.  I have never made them from scratch so I don’t know if this is the best-ever recipe from personal experience, but it sure beats using a canned sauce!  Totally delicious.  I ate two sloppy joe’s for dinner the night I made this, and Dennis ate the rest of the pan! I think he had at least four!  So I guess you could say this is husband-approved.  Like I said, family friendly.

*I didn’t serve these with bakery fresh buns, but her instructions to do so reminded me I have an award-winning buns recipe I need to share! Will do that soon!

Best Ever Sloppy Joes

Printable recipe
Printable recipe with picture

1 lb. ground beef
1 medium onion
1 tablespoon mustard
1 tablespoon Worcestershire sauce
1 tablespoon sugar
1 tablespoon vinegar
3/4 cup ketchup
1 teaspoon salt
1/2 cup chopped green or red bell peppers (I use a small bell pepper)
1/2 cup chopped celery (I used three stalks)

Cook ground beef and chopped onion. Drain fat off meat. Add back to large pan. Add remaining ingredients. Mix. Reduce heat to low and cook 40 minutes. Serve with fresh bakery buns.

Recipe source: Jam Hands

Turkey & Onion Grilled Cheese

Posted on

So so so excited today!  This is probably my last month with the Secret Recipe Club, and I’m so excited that I was assigned to Desi’s blog, Steak ‘n Potatoes Kinda Gurl!  I actually “met” Desi through being in Group C of the Secret Recipe Club, and have been following her since she joined.  Very happy to be assigned to someone I know and love for my last hurrah!

For those who may have missed or never understood my monthly Secret Recipe Club posts, here’s the premise.  You are assigned to a participating blog each month, but no one knows who’s assigned to who.  It’s a secret!  You secretly stalk browse your assigned blog and pick a recipe, make it, photograph it, and post it on reveal day.  It’s something I’ve always enjoyed, I think because it’s kind of like Christmas each month with a big surprise on reveal day.  If this sounds like something you’d like to participate in, click here to find out how to join.

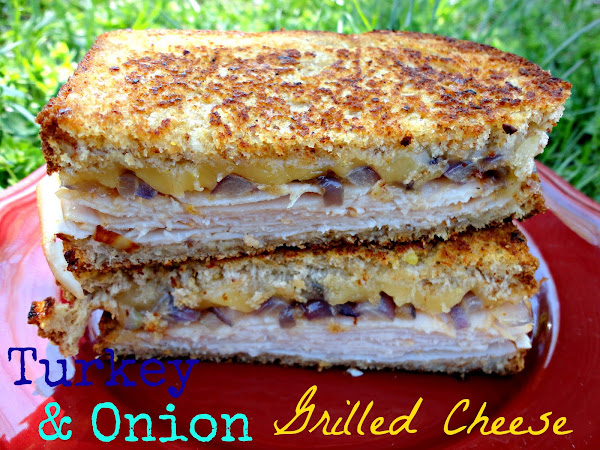
Now let’s talk gooey cheese.  Since April is National Grilled Cheese Month, and I’ve been meaning to make this recipe since Desi posted it during last year’s Grilled Cheese Month, there really wasn’t any question as to which one I’d choose from her blog.  I had to have this sandwich!

It was well worth the wait.  Totally crazy delicious.  I couldn’t find maple turkey, so I had to add in some maple flavor a different way.  I was a little scared I might have ruined it, but Dennis and I both loved it!  Delicious smoked turkey, sweet grilled onions, and melty Gouda cheese packed between two slices of multigrain buttery, crunchy, toasty bread make for  quite the delicious sandwich.  Thank you, Desi, for creating this masterpiece and thus giving me an opportunity enjoy it and spread the gooey gouda love a little further through my own blog.  Love ya girl!

Also, a huge THANK YOU and shout out to our SRC leader, April Tuell, and our hostesses (especially Debbi Smith, my hostess!), and all the volunteers that keep it running.  And of course, to all my group C bloggers (OK, and group A too, I enjoyed my short time with you guys as well!)!  It has been a beautiful, wonderful ride and I wouldn’t trade my time in the SRC for anything.  Love you guys!  But I won’t miss you because I’ll still be stalking you forever! >:)

Turkey and Onion Grilled Cheese

Printable recipe
Printable recipe with picture

1 small red onion, halved and sliced
2 tablespoons butter
1/2 teaspoon maple syrup (optional)
4 slices of multigrain bread
3 tbsp or so of softened butter
4 slices (or more) of quality deli turkey (I used Applewood Smoked Turkey)
4 slices of gouda cheese

In a medium skillet, add 2 tablespoons butter over medium heat. Once melted, add the sliced red onion and saute until softened and golden brown. Remove to a small bowl and stir in the maple syrup if desired.

Spread the bread slices with 3 tablespoons softened butter. In a large skillet on medium-low, add the bread slices. If you have a large enough skillet, you can add two slices of bread at once. If not, you will need to make one sandwich at a time. Top one slice of bread with 2 slices of gouda. Then add 2 slices of turkey, then some sauteed red onions. Top with the other slice of bread, buttering the outside before you place it on top. Cook until golden brown, then flip and cook until golden brown on the other side.  Repeat with second sandwich.

*Yields 2 sandwiches

Recipe source: adapted from SteakNPotatoesKindaGurl.

Check out the other Group C Secret Recipe Club Posts by clicking below!


Italian Roast Beef {crockpot recipe}

Posted on

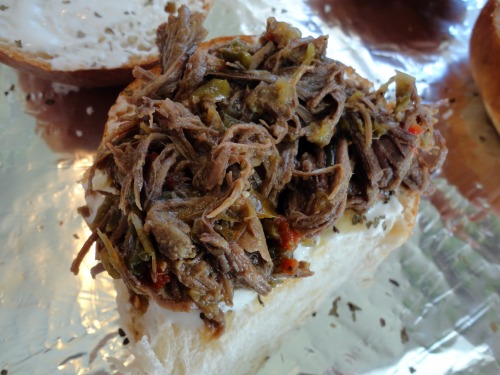
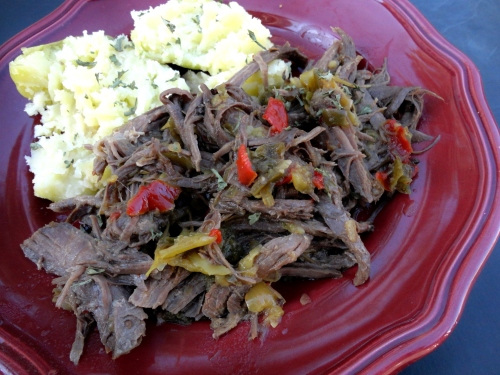
This Italian roast beef was inspired by Tami’s comment on my banana pepper roast, telling me she did the same thing but added a packet of dry Italian dressing mix, and that it made great sandwiches.  Well, I’m all about making great things better, and all about sandwiches, so I decided to try it out.  And it is even better than the banana pepper roast. And it does make killer sandwiches. Thanks, Tami!

Just as with the banana pepper roast, there is a pleasant piquant flavor from the peppers and the acid in the brine and the slow cooking makes the roast ultra-tender.  The difference is that there’s even more flavor–garlic & onion and whatever else they put in those dressing mixes.  I have tried making my own Italian dressing mix but I really want it to be exactly like the store-bought ones and so far, no luck.  If you have one that’s close please let me know! I buy at least four of those packs a month (I make our Italian dressing with them, and things like parmesan garlic chicken) and I know it would be cheaper and probably healthier to make my own.

We ate the roast straight the first day (it’s so good with mashed or baked potatoes!), then made sandwiches with the leftovers.  I’ll include my idea for sandwiches too, because it was so good!  Can you tell I thought this roast was so good? ;)
Italian Roast Beef

Printable recipe
Printable recipe with picture

1 (5 lb) beef roast
1 (.7 oz) envelope dry Italian dressing mix
½ cup dehydrated red & green bell pepper (optional)
¼ cup dehydrated minced onion
1 (12 oz) jar banana pepper rings

Place beef roast in the bottom of a 6-quart crockpot. Sprinkle the dressing mix, red & green pepper (if using), and minced onion over it, then pour the jar of banana pepper rings over the top, juice and all. Cover and set to cook on low for 8 hours or on high for 4 hours.

Remove the roast onto a platter and shred with two forks. Return to the juices and mix well, then serve with mashed potatoes.

To make sandwiches, you’ll need:

Sandwich buns or rolls
Ranch dressing
Dried basil*
Italian roast beef, warmed
Fresh mozzarella or provolone cheese, thinly sliced
Tomatoes, thinly sliced
Other toppings of choice, such as shredded lettuce, sliced olives, chopped onion, etc.

To make sandwiches, split the buns and cover the insides with a generous smear of ranch dressing. Sprinkle with basil.*

*If you use fresh basil, add it along with the tomato at the end.

Doncha love those sweet Italian buns? ;)
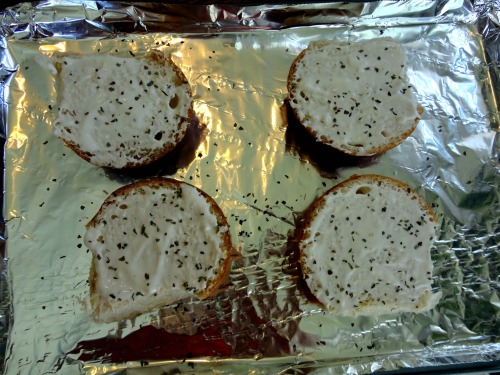
Draining off as much juice as possible, put some roast beef on the bottom buns, then place a slice of mozzarella on top. Please slice your cheese thinner than this or you’ll have to practically burn the buns before it’s melted.  Learn from my mistakes.

Broil open-faced on high, the top buns ranch-side up, until cheese is melted, 1-2 minutes. If your cheese is thicker *ahem*, it may take up to five minutes and you will want to remove the top buns before the bottom so that they don’t burn.
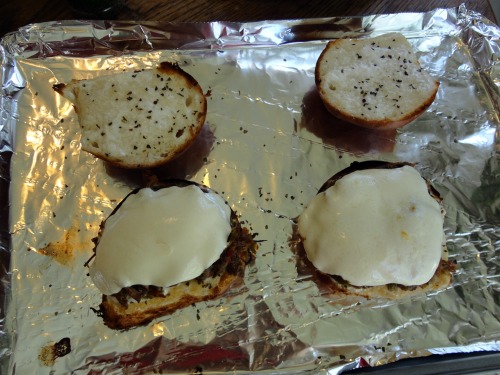
Even after five minutes, the cheese was barely melted.  I have to show off the one I made when Dennis requested seconds.  I got the cheese much thinner, so it only took about a minute for it to melt and I didn’t have to remove the top bun before the bottom was done.  Look at this beautiful deliciousness!

Much better!  OK, once it’s melted, top it with a slice of tomato, another sprinkle of basil, and any other toppings you’d like.
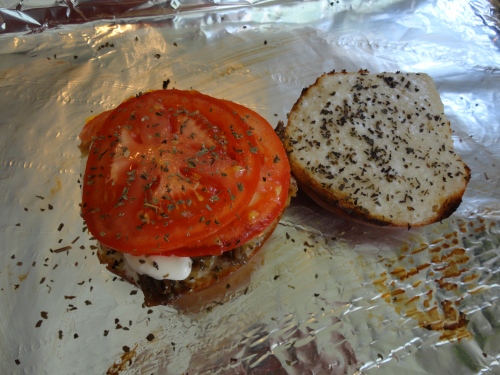
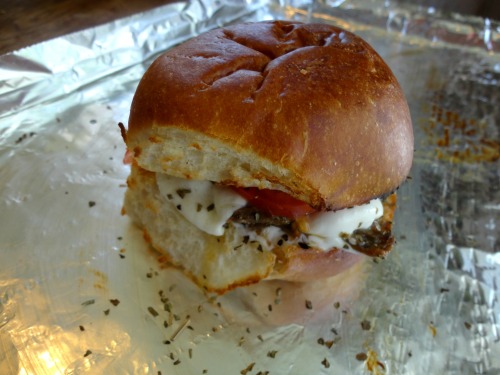
Cover with the top bun and enjoy warm.

It’s 3 AM as I finish this blog, and I nearly forgot to do the drawing for the cookbook.  So without further ado….

Congratulations to Brandee Lake, you won P-Dub’s signed cookbook!

P.S. Some people were asking me why she’s called P-Dub.  Dude, it’s because she’s a straight up gangsta!  lol.  P is for Pioneer and Dub is short for the “double u” that Woman starts with.  And in my cousin Andrea’s comment, she gave me a gangster name so I can be hip like the Pioneer Woman.  You can now call me “V-Dawg.” My little sister gave me the name “Throwback Vrak,” which I LOVE, but that would require too much explaining in order for it to make sense.  So V-Dawg it is.  Until further notice.  Peace out, yo.

Chickpea Salad Wraps {Mock Tuna Salad}

Posted on

The Jey of Cooking is donating $1 to the American Heart Association for each heart-healthy recipe that is linked to her fundraiser, and I thought this was a fun way to spread the word on the importance of heart health, so I decided to post this particular recipe because it’s chock full of ingredients to keep your ticker in tip-top shape!

Heart disease is the leading cause of death for both men and women in the United States.  In 2008, 616,000 people died of heart disease.  Studies have shown that lowering blood pressure and cholesterol can reduce your risk of developing of heart disease, and this recipe perfectly fits into a dietary plan focused on doing both.

The chickpeas and celery add dietary fiber (and so will your tortilla, if you choose a whole wheat one), which is well-known for naturally lowering cholesterol and blood pressure.  What you may not know about onions  is that they stave off heart disease by promoting thinner blood and breaking up blood clots.  They contain a powerful antioxidant called quercetin, which can help with high blood pressure.  These benefits are most powerful when onions are eaten raw, as in this salad.  And last but not least, the sunflower seeds add some heart-healthy poly- and monounsaturated fat into the mix, not to mention a tasty crunch!

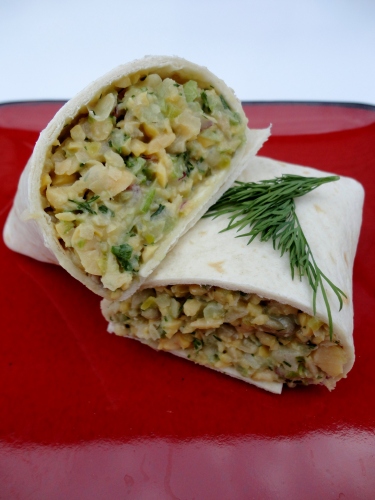
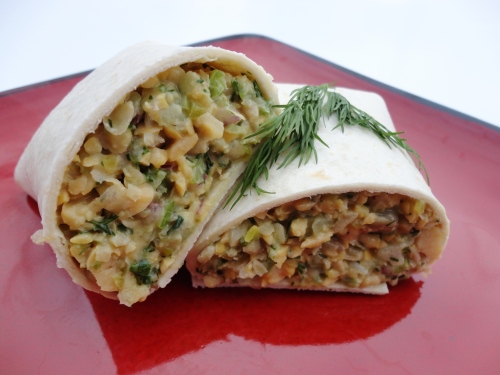
Now that we know how healthy this recipe is, let’s talk about how it tastes.  Eating foods for the sake of health is all well and good, but I’m a firm believer that those foods should also be full of flavor to make it an enjoyable experience.  And this salad certainly fits the bill!  It tastes very similar to tuna salad, and if you like tuna salad, I know you will like this as well.  The beans make it creamy, with a lovely contrasting crunch from the celery, onions and sunflower seeds.  You might be surprised how similar this tastes to tuna salad, and if you are following a vegan diet, this would be a great substitute.

Chickpea Salad Wraps

Printable recipe
Printable recipe with picture

1 (15 oz) can chickpeas, drained and rinsed
½ cup celery, diced
¼ cup roasted, salted sunflower seeds
¼ cup mayonnaise, Miracle Whip or Vegenaise
3 tablespoons red onion, diced
3 tablespoons dill pickle, diced (or use dill relish)
2 tablespoons fresh dill, minced (or 2 teaspoons dried)
1 tablespoon fresh parsley, minced (or 1 teaspoon dried)
2 tablespoons lemon juice
1 garlic clove, minced
1 teaspoon reduced sodium soy sauce
½ teaspoon prepared mustard
Salt & pepper to taste

Place everything in the bowl of a food processor fitted with the blade attachment. Pulse until it is the texture you desire. I wanted mine to be slightly chunky and a little creamy, which took about 20 pulses. Serve in burrito-size tortillas, other wraps, or on bread as a sandwich.

Recipe source: adapted from Oh She Glows

*Sources for information on heart health: Centers for Disease Control and Prevention, How Dietary Fiber Lowers Cholesterol, The Healing Power of Onions, Nutritional Power of Sunflower Seeds

And you know you want to see my First Day of Spring manicure (I did it yesterday):

I forgot the grass but still love it.  Guess how many nail polishes I used on it?  Every single one of these:

I know. I’m crazy.  Big thanks to Suzie, who gifted me with a gazillion polishes, some pictured here.  You know you’re feeding my problem, right Suze? ;)

Chicken Shawarma Pita Sandwiches

Posted on

I don’t know what to tell you except that these are great and if you like Mediterranean foods, you need to make them! :)  I’ve discovered that no two chicken shawarma recipes are the same, and this one seems very different from all the others I’ve seen.  So I don’t know how typical or traditional this particular recipe is, but I enjoyed it nonetheless.

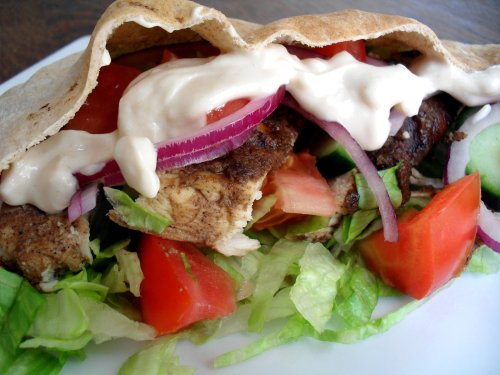
The chicken has a unique and potent marinade that includes plenty of acids to tenderize the meat.  I love the combination of the flavorful meat with fresh vegetables and the tahini sauce wrapped in pita bread.  I’ve been making these sandwiches for several months now and only had to tweak the recipe a little to suit my preference.  I hope you enjoy!

Chicken Shawarma Pita Sandwiches

Printable recipe
Printable recipe with picture

Chicken
2 teaspoons fenugreek
1 teaspoon cumin
1 teaspoon allspice
1 teaspoon black pepper
1 teaspoon cinnamon
1 teaspoon nutmeg
1 teaspoon ginger
1/2 teaspoon cardamom
1/2 teaspoon ground cloves
1/2 teaspoon salt
3 tablespoons lemon juice
2 Tbsp White Vinegar
2 Tbsp Minced Garlic
2 pounds boneless, skinless chicken breasts

Tahini Sauce
1/2 cup plain yogurt
1/4 cup tahini
1/4 cup lemon juice
5 cloves garlic, minced
2 teaspoons sugar

Sandwiches
Pita bread
Shredded lettuce
Tomato slices
Cucumber slices
Red onion slices

The night before, combine spices for chicken in a gallon-size Ziploc bag and shake to combine. Add the lemon juice, vinegar, and garlic, and massage the bag to combine. Add chicken, seal, and massage the marinade around (will be thick like a paste) until all the chicken pieces are coated. Refrigerate overnight. You can also prepare the tahini sauce the night before by whisking all the ingredients together and storing in the refrigerator until it’s time to serve the sandwiches.

Grill the chicken breasts until no longer pink in the center. To serve sandwiches, fill pita bread with lettuce, chicken, tomato, cucumber, and onion, and top with tahini sauce.

Recipe source: adapted from Food o’ del Mundo

Barbecue Beef Sandwiches

Posted on

I saved a recipe for “Perfect Pulled Pork” that I found in a magazine in an ad for pork, but since I don’t like pork (other than bacon, of course), I decided to try the recipe with beef and turn it into barbecue beef sandwiches.  It worked famously!  I’m not a huge meat eater, but I kind of went crazy for these and was so sad when the last of the leftovers were gone.  I can’t wait to make them again.

Barbecue Beef Sandwiches

Printable recipe
Printable recipe with picture

5 lbs. beef roast
2 teaspoons smoked paprika
2 teaspoons black pepper
1 teaspoon cayenne pepper
1 teaspoon dried thyme
1 teaspoon garlic powder
½ teaspoon salt
1 cup water
2-3 cups barbecue sauce (I use Sweet Baby Ray’s)
Soft sandwich buns
Dilly Cucumber Salad or coleslaw (optional)

Combine all seasoning in a small bowl and rub evenly over roast. Place meat in a 6-quart slow cooker; add water. Cover and cook on low for 6-8 hours or on high for 4-5 hours or until beef is very tender. If you are at home, I recommend turning the roast over halfway through cooking time because the top will get a little dry. Place beef on large cutting board or platter and let rest for 10-15 minutes. Meanwhile, pour out all the juices from the crockpot. Pull, slice, or chop the meat and return to crockpot. Stir in as much barbecue sauce as you desire. Serve on buns and top with Dilly Cucumber Salad or coleslaw, if desired.

Serves 16-20

Recipe source: adapted from the National Pork Board’s Perfect Pulled Pork