RSS Feed

Tag Archives: diet-friendly

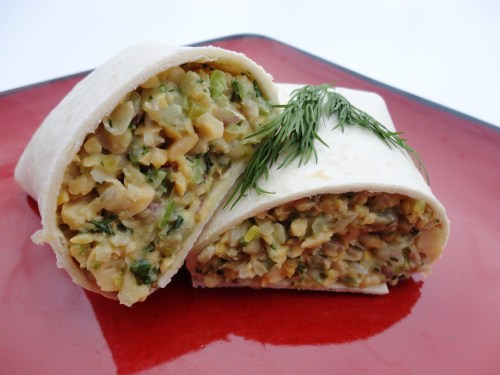
Chickpea Salad Wraps {Mock Tuna Salad}

Posted on

The Jey of Cooking is donating $1 to the American Heart Association for each heart-healthy recipe that is linked to her fundraiser, and I thought this was a fun way to spread the word on the importance of heart health, so I decided to post this particular recipe because it’s chock full of ingredients to keep your ticker in tip-top shape!

Heart disease is the leading cause of death for both men and women in the United States.  In 2008, 616,000 people died of heart disease.  Studies have shown that lowering blood pressure and cholesterol can reduce your risk of developing of heart disease, and this recipe perfectly fits into a dietary plan focused on doing both.

The chickpeas and celery add dietary fiber (and so will your tortilla, if you choose a whole wheat one), which is well-known for naturally lowering cholesterol and blood pressure.  What you may not know about onions  is that they stave off heart disease by promoting thinner blood and breaking up blood clots.  They contain a powerful antioxidant called quercetin, which can help with high blood pressure.  These benefits are most powerful when onions are eaten raw, as in this salad.  And last but not least, the sunflower seeds add some heart-healthy poly- and monounsaturated fat into the mix, not to mention a tasty crunch!

Now that we know how healthy this recipe is, let’s talk about how it tastes.  Eating foods for the sake of health is all well and good, but I’m a firm believer that those foods should also be full of flavor to make it an enjoyable experience.  And this salad certainly fits the bill!  It tastes very similar to tuna salad, and if you like tuna salad, I know you will like this as well.  The beans make it creamy, with a lovely contrasting crunch from the celery, onions and sunflower seeds.  You might be surprised how similar this tastes to tuna salad, and if you are following a vegan diet, this would be a great substitute.

Chickpea Salad Wraps

Printable recipe
Printable recipe with picture

1 (15 oz) can chickpeas, drained and rinsed
½ cup celery, diced
¼ cup roasted, salted sunflower seeds
¼ cup mayonnaise, Miracle Whip or Vegenaise
3 tablespoons red onion, diced
3 tablespoons dill pickle, diced (or use dill relish)
2 tablespoons fresh dill, minced (or 2 teaspoons dried)
1 tablespoon fresh parsley, minced (or 1 teaspoon dried)
2 tablespoons lemon juice
1 garlic clove, minced
1 teaspoon reduced sodium soy sauce
½ teaspoon prepared mustard
Salt & pepper to taste

Place everything in the bowl of a food processor fitted with the blade attachment. Pulse until it is the texture you desire. I wanted mine to be slightly chunky and a little creamy, which took about 20 pulses. Serve in burrito-size tortillas, other wraps, or on bread as a sandwich.

Recipe source: adapted from Oh She Glows

*Sources for information on heart health: Centers for Disease Control and Prevention, How Dietary Fiber Lowers Cholesterol, The Healing Power of Onions, Nutritional Power of Sunflower Seeds

And you know you want to see my First Day of Spring manicure (I did it yesterday):

I forgot the grass but still love it.  Guess how many nail polishes I used on it?  Every single one of these:

I know. I’m crazy.  Big thanks to Suzie, who gifted me with a gazillion polishes, some pictured here.  You know you’re feeding my problem, right Suze? ;)

Low-Carb Eggplant Parmesan with Fire-Roasted Tomato Sauce & Fried Garlic {gluten-free}

Posted on

Growing up, my Mom made an eggplant dish about once a year that was basically chopped up eggplant mixed with homemade marinara sauce, garnished with Parmesan cheese.  The only way I could swallow the evil stuff was to absolutely drown it in Parmesan–I’m pretty sure I used half a bottle of the grated cheese every time she made it.  It’s not that the taste was terrible, the marinara was always good, as was the Parmesan, but the eggplant itself was spongy and a bit bitter, so I had to distract myself by making it super cheesy in order eat it.

Despite never fully enjoying this dish, I was convinced that I would enjoy eggplant if prepared differently.  I really wanted to try making eggplant Parmesan, sensing that frying eggplant and making it crispy could be the key.  But for some reason, I just never got around to it.  Probably because I had been tainted by a long history of a dish with similar elements that was always abhorrent to me.  I finally tried eggplant on a pizza (click here for the recipe: Eggplant & Olive Pizza) and then in baba ghanoush (a Middle Eastern roasted eggplant dip) and discovered I was right, I did like eggplant!

Well, finally, in a lower-carbohydrate phase of our diet last month, I decided to try my hand at eggplant parmesan, using only cheese for “breading” before frying it.  It. was. fabulous.  I’m sure I’d love it with the breading as well, but this was truly delicious and in my opinion, need not be changed.  I seriously can not wait to make this again. I’m now a full-fledged eggplant convert.  They key, it seems, is not so much in the frying, which obviously doesn’t hurt, but in the salting and draining prior to cooking.  This takes away the bitterness and makes the eggplant flavor much more enjoyable.

I also want to take a moment to mention the tomato sauce, which I snagged from Jenna’s blog and kicked up a notch with fire-roasted tomatoes, and a touch of fennel seeds and red pepper flakes.  This is my most favorite marinara sauce I’ve made to date, very flavorful and a great compliment to the eggplant.  It makes a large batch, so you’ll have enough leftover to freeze for future eggplant Parmesan meals, or to ladle over pasta. It gives me such a heady feeling to know this delicious sauce is waiting for me in pre-portioned bags in the freezer, and all I have to do is defrost it in order to enjoy it again. Thanks for the wonderful recipe, Jenna!

One last note: the fried garlic is totally optional but I highly recommend you throw some cloves into the oil while you’re frying your eggplant.  I discovered that frying garlic gives the same flavor as roasting it, sweetening it and making it so delicious you can just pop the whole thing into your mouth without any of the sulphurous burning that usually accompanies such an act with raw garlic.  It is so delicious, I’ve found it to be addictive!  I ended up keeping this part of the recipe secret from my husband, who arrived after I’d eaten an entire bulb of fried garlic because I couldn’t keep my hands off of it after I popped the first clove into my mouth.  What he doesn’t know won’t hurt him. :)

I’m submitting this recipe to Renee for this week’s BSI (Blogger Secret Ingredient contest): Parmesan.
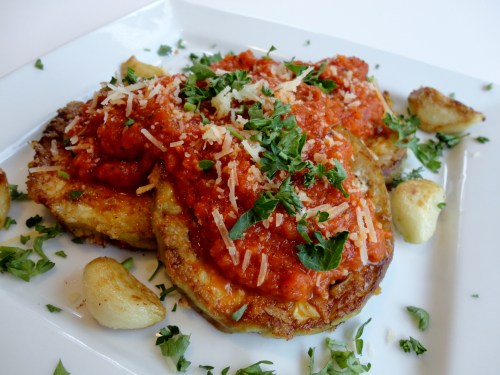
Low-Carb Eggplant Parmesan with Fried Garlic

Printable recipe
Printable recipe with picture

1 medium eggplant, peeled
Salt
2 eggs
¼ cup water
1 cup shredded or grated Parmesan cheese, plus more for garnish
Garlic powder
½ cup olive or canola oil
1 bulb of garlic, peeled
1 ½ cups Fire-Roasted Tomato Sauce, warmed
Fresh parsley, chopped, for garnish

Peel and slice eggplant into ¼” thick slices. Sprinkle both sides liberally with salt and place in a colander set over a bowl. Allow the eggplant to drain for 30-45 minutes or until 2 tablespoons of water have been drawn out from the eggplant. Tear off three sets of two sheets of paper towels (each set of two still connected), stack together, then lay out eggplant slices on top of it. Tear off another three sets of two paper towels, lay on top of the eggplant, and press down firmly on each slice to draw out excess moisture.

In a flat-bottomed bowl large enough in diameter to fit the largest eggplant slices, whisk the eggs and water together until foamy. Put the Parmesan cheese on a plate and have your garlic powder nearby. Line a baking sheet with foil, sprinkle evenly with garlic powder, and set nearby.

Dip each eggplant slice in the egg mixture, shake off, then sprinkle both sides with Parmesan. Lay the slices on the prepared baking sheet as you finish them. Once all slices are coated, sprinkle garlic powder on top.

Heat a cast iron or other heavy-duty skillet over medium-high heat. Add enough oil to cover the bottom well and come up about 1/8”. Place as many eggplant slices in the skillet as will fit, and tuck as many of the cloves of garlic in between them as you can. Fry the eggplant until the first side is golden brown, about 2 minutes, then flip. Flip the garlic cloves when then skin is golden brown and bubbled. Once the second side is golden brown, remove to a cooling rack lined with paper towels to drain. Remove the garlic as it is finished cooking as well. Continue cooking eggplant in batches until all is fried. If the first batch of eggplant has cooled too much by the time you are finished frying it all, pour out the oil in the skillet and add them back in to reheat for a minute. Alternately, as the eggplant is drained, you can add them to a foil-lined baking sheet and keep them in a warm oven until ready to serve.

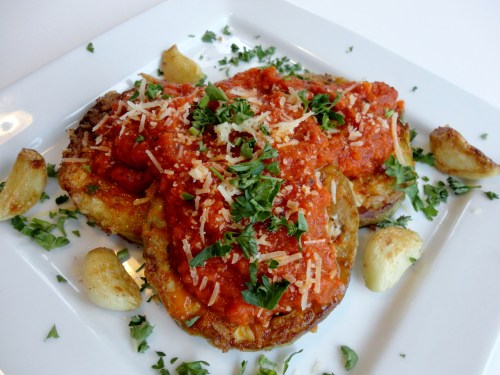
To serve, arrange eggplant slices on plates with fried garlic scattered around. Scoop tomato sauce over the top and garnish with Parmesan and parsley, if desired. Serve hot.

Fire-Roasted Tomato Sauce

Printable recipe
Printable recipe with picture

1/3 cup olive oil
1 large onion, diced
5 cloves garlic, minced
1 stalk celery, diced
1 carrot, diced
Kosher salt and black pepper, to taste
1 (28 oz) can crushed tomatoes
2 (14.5 oz) cans fire roasted tomatoes, undrained
2 dried bay leaves
1 tablespoon dried basil
1 teaspoon dried oregano
¼ teaspoon fennel seeds
¼ teaspoon red pepper flakes

In a large pot or Dutch oven, heat the olive oil over medium high heat. Add the onion and garlic, and cook for about 2 minutes, until soft and translucent. Add the celery, carrot, and some salt and pepper. Cook for about 5 minutes, until softened. Add the tomatoes, bay leaves, basil, oregano, fennel seeds, and red pepper flakes, and cover the pot with a splatter screen. Turn down the heat to low, and simmer gently for 1 hour.

Remove the bay leaves and taste for seasoning, adding salt and pepper as needed. Using an immersion blender, blend the sauce until smooth. Allow the sauce to cool completely and, if not using immediately, pour it into freezer bags in 1-2 cup portions. It will keep frozen for about 6 months.

Crockpot Chicken Cacciatore

Posted on

It’s Secret Recipe Club time again!  I can’t tell you how thankful I am to Amanda for starting this club.  The amount of fun I have with it is a little ridiculous.  My favorite part is getting my blog assignment and stealthily stalking that blog, hunting down recipes that I want to make and post for reveal day.  I always bookmark a million and it takes me an entire week to narrow down my choice to one recipe.

{You can find my past Secret Recipe Club posts here.}

This month I was assigned to A Little Nosh and unlike previous assignments, I knew which recipe I was going to make within a minute of clicking on her blog.  I still went through Amy’s archives and bookmarked half her recipes, but did eventually return to the original that caught my eye and knew I couldn’t fight it.  I had to make the crockpot chicken cacciatore because:

1) It’s beautiful and I like pretty food.

2)  I’d never eaten or made it and thought it would be fun to try something new.

3) It fit perfectly in our diet plan while we were in the 2nd cycle of the 17 Day Diet.

4) I noticed the recipe originally came from one of my blogging buddies, Renee of My Kitchen Adventures, and it tickled me to think that I’d be making Amy’s and Renee’s recipe at the same time.


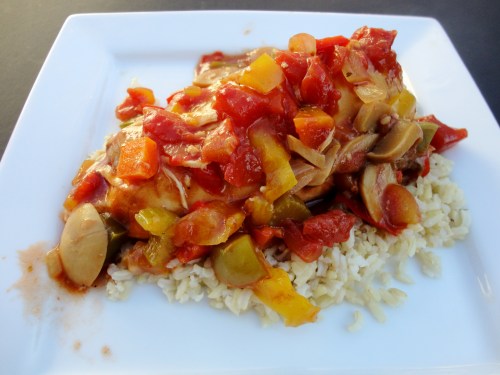
I changed the recipe to make it on a slightly larger scale with a higher ratio of veggies, and it completely filled my 6-quart crockpot to the brim.  The leftovers were enough to last us all week, and what beautiful lunches we were bringing to work!  The vegetables and sauce were such a tasty compliment to the tender chicken breast meat, which pretty much fell apart as soon as you touched it with a fork.  So delicious.

Thanks, Amy, for sharing this great recipe.  I never even saw it on Renee’s blog, so I’m glad to have gotten the opportunity through you and the SRC to try it!

Crockpot Garden Chicken Cacciatore

Printable recipe
Printable recipe with picture

6 large skinless, boneless chicken breasts
1 green bell pepper, seeded and chopped
1 red bell pepper, seeded and chopped
1 yellow or orange bell pepper, seeded and chopped
1 medium onion, chopped
2 large ribs of celery, diced
3 large carrots, diced
2 (4 oz) cans sliced mushrooms, drained
2 tablespoons minced garlic
2 (14.5 oz) cans of diced tomatoes with basil, oregano and garlic
1 (6 oz) can tomato paste
½ cup chicken broth
2 tablespoons balsamic vinegar
¼ cup cornstarch
1-2 tablespoons water or chicken broth
Additional salt and pepper, to taste

Place chicken breasts inside the bottom of a 6-quart crockpot. Add in the bell peppers, onion, celery, carrots, mushrooms, and garlic. Pour the juice from the tomatoes into a medium bowl, then put the tomatoes into the crockpot.

Into the bowl with the tomato juice, add the tomato paste, chicken stock, and balsamic vinegar. Mix well, then pour on top of the tomatoes and vegetables. Cover and cook on low for 7-8 hours, or high for 4 hours, or until the chicken is tender.

Mix the cornstarch and water together until no lumps remain, then pour over the top of the vegetables. Stir, turn the crockpot to high, and allow to cook for another 20 minutes, or until the sauce has thickened. Season with additional salt and pepper to taste.

Serve over brown rice or your choice of starch.

Recipe source: adapted from A Little Nosh, originally from My Kitchen Adventures

To check out the other submissions in Group A for The Secret Recipe Club, click on the Mr. Linky below!


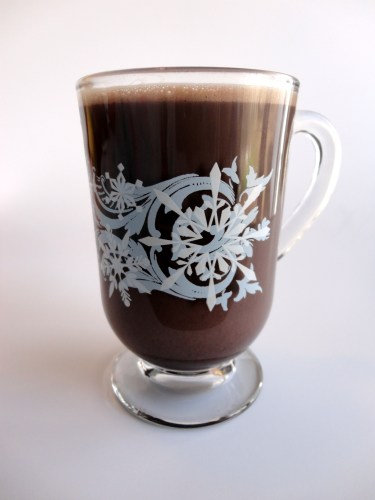
Skinny Dark Hot Cocoa


Hot cocoa?  Hot chocolate?  I’ve always said hot chocolate, no matter if it’s made with real chocolate or cocoa powder or a mix.  I also have always said pop, not soda or soda pop.  Potato, potahto I guess.  What about you?

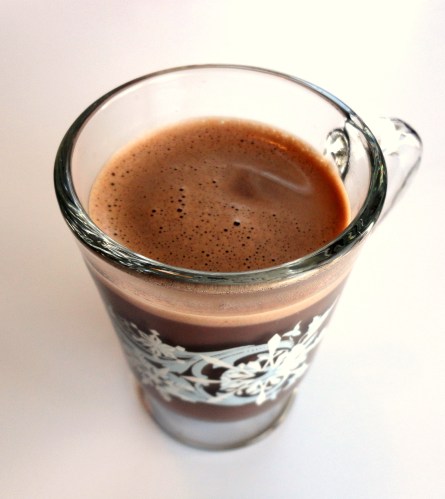
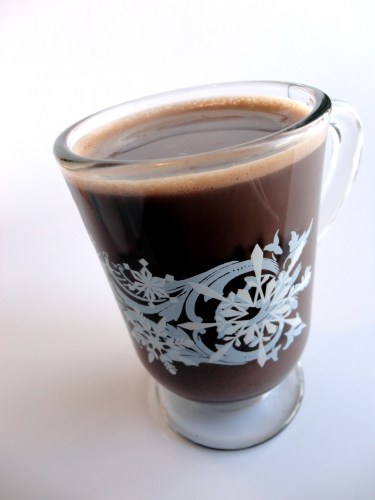
Anyway, remember how Dennis and I weren’t planning on having sugar on Valentine’s Day?  Well, it would be just be unAmerican not to have any chocolate on the day when the rest of the country is eating 58 million pounds of it.  (I know, right?)  So, inspired by Faith’s delicious Skinny Caramel Hot Cocoa, I made this plain version for our Valentine’s Day dinner dessert, only changing the basic recipe a smidge to deepen the chocolate flavor (had to make up for our lack of chocolate candy, you know).  We like our chocolate dark in this house.

This hot cocoa is so sweet, so chocolatey and delicious, creamy even, that you wouldn’t guess that it’s fat and sugar free.  That it’s actually healthy.  Protein and calcium-rich milk?  Check.  The antioxidant power of cocoa powder?  Check.  Totally natural with no chemical sweeteners?  You got it.

I’m usually semi-opposed to healthifying sweet treats because, in my opinion, they’re called treats because they are meant to be enjoyed.  Mostly what cutting out fat and sugar does is make them less enjoyable (although I hope to prove my own theory wrong because I’m going to be experimenting soon, given that we’ve nixed sugar in our house!).  But when you can do it with such a satisfying result, I’m all for feeling great about drinking something that tastes so sinful.

*A note about stevia: I’m a huge advocate of using stevia to sweeten things, versus chemical sweeteners and even real sugar.  This is the ONLY completely natural sweetener out there that is also calorie free.  It is taken from the leaves of a plant and it is tremendously sweet so you need much less of it than sugar.  I was blessed to win a bunch of NuNaturals products through a giveaway from Renee of My Kitchen Adventures (thank you so much Renee!), and hope to do a review soon with comparisons to other sugar substitutes.  NuNaturals products are by far the best I’ve tried and I highly recommend them.

Since I’m not counting calories on the 17 Day Diet, I didn’t calculate them for this cocoa when we drank it, but just going from the labels on the milk and the cocoa (the only things that have calories in the recipe), I can tell you that there is 120 calories, 1 g fat,  22 g carbohydrates, and 2 grams fiber. Not to shabby, and I think you’ll agree that this hot cocoa is totally worth every healthy & delicious calorie.

Skinny Dark Hot Cocoa

Printable recipe
Printable recipe with picture

1 tablespoon cocoa powder
1 tablespoon Dutch process cocoa powder
2 packets NuNaturals NuStevia
Pinch fleur de sel or kosher salt
1 ¼ cups nonfat milk
½ teaspoon pure vanilla extract

Whisk together the cocoa powders, stevia powder, and salt in a small saucepan. Add half the milk and whisk vigorously until the cocoa powder is dissolved. Turn the heat to medium, and whisk in the remaining milk. Heat until the hot cocoa starts to steam (do not boil), and pour into a mug.  Enjoy!

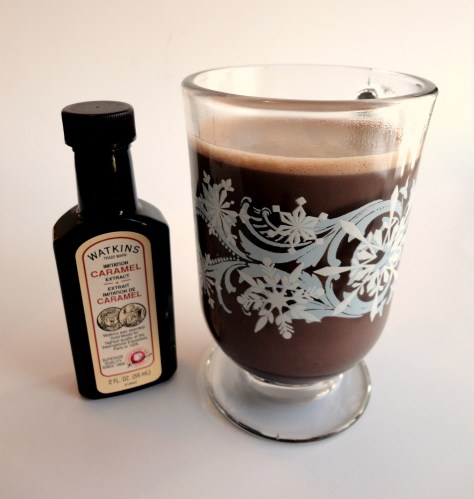
For a caramel hot cocoa: stir in ¼ teaspoon caramel extract along with the vanilla at the end.

Serves 1

Recipe source: adapted from An Edible Mosaic

Yummy either way!

P.S. Happy leap day!  I know this is crazy, but this is the first year I’ve actually been aware that it’s a leap year.  How did I miss the other seven I lived through?  Queen Oblivious here! I know I’m getting random here but did anyone else used to watch the show Quantum Leap?  I honestly can’t remember a thing about it except I think I liked it (I was pretty young so maybe it was too mature for me), and I always associated the name with leap year.  Did it even have anything to do with a leap year?  OK, seriously, I’ll shut up now.

Creamy Chicken Tortilla Soup


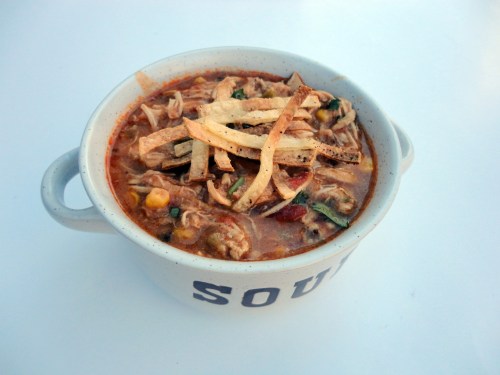
I don’t think there is anything else to say.  Although this is the first chicken tortilla soup I’ve ever made, I’ve had many versions in restaurants and deli’s, and this is so much better than any of them.  If you couldn’t tell from the above exchange, I kinda get excited about food, and I’m pretty sure I moaned and squealed simultaneously when I took my first bite of this soup.  It is so bangin’ with flavor.  I just love it.

Now, I know my pictures aren’t portraying a creamy-type soup.  The day I made it, it looked super creamy like I had poured real cream into the soup, but then the leftovers betrayed me when I reheated them the next day for lunch and a photo, and it just looked like regular chicken tortilla soup.  Well, my pictures may be misleading, but I promise you this is one soup worth trying.

Creamy Chicken Tortilla Soup Recipe

Printable recipe
Printable recipe with picture

1 1/2 lbs. boneless skinless chicken breasts
1 (16 oz) carton chicken broth
1 (15 oz) can diced tomatoes (I used roasted)
1 (7 oz) can green chiles, or 2 (4 oz) cans
1 large onion, chopped
1 green pepper, seeded and chopped
1 tablespoon minced garlic
1 bay leaf
2 teaspoons chili powder
1 teaspoon dried oregano
1 teaspoon ground cumin
1 teaspoon salt
¼ teaspoon pepper
6 corn tortilla, cut into thin strips
1 (15.25 oz ) can corn, drained
½ cup plain Greek yogurt
1/4 cup cilantro, chopped
Optional toppings: Tortilla strips*, sour cream or Greek yogurt, cheddar cheese or avocado

Add chicken breasts, broth, tomatoes, green chiles, onion, green pepper, garlic, bay leaf, and spices to a large stock pot.  Bring to a boil, then reduce heat and simmer for 1 ½-2 hours, or until the chicken is very tender.  Add the tortillas during the last fifteen minutes of cooking.  Remove chicken to a cutting board and let rest ten minutes, or until it is cool enough to touch without burning your fingers.  If your tortillas haven’t completely broken down yet, continue simmering the soup while the chicken rests.  Shred or chop the chicken and return to the pot, along with the corn, Greek yogurt, and cilantro.  Heat through and serve with optional toppings.

Crockpot directions: Add everything but the Greek yogurt and cilantro to the crockpot and cook on high for 4 hours or low for 6 – 8 hours, until chicken is tender.  Shred chicken, return to crock.  Add yogurt and cilantro.  Cook an additional half hour.  Garnish as desired.

*Tortilla Strips:  Preheat oven to 400 degrees. Line a rimmed baking sheet with foil and pour 1-2 teaspoons of vegetable oil on it.  Cut 3 corn tortillas into strips, then put on the baking sheet and use your hands to toss them with the oil until coated.  Spread out, sprinkle with salt and pepper, and bake until crispy, about 10 minutes.I made my tortilla strips super thin and burnt most of them, so if yours are thin, keep an eye on them–they may only need five minutes.

Recipe source: Debbi Does Dinner Healthy

Chunky Chicken Soup

Posted on

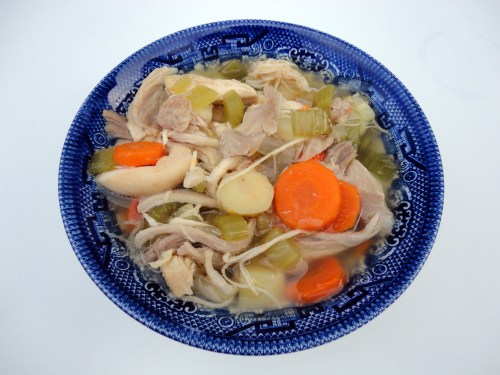
It was snowing here in Kansas yesterday, and what better way to chase away the chill than with a big bowl of soup?  This is from The Pioneer Woman‘s recipe collection, and it is fantastic.  Although I adore noodles in my chicken soup, the chicken and vegetables are the stars here and I found that I didn’t even miss the noodles.  This soup is so delicious and flavorful, the health factor was an afterthought, but realizing how healthy it is makes it a win-win in my book.  Happy mouth, happy body.

Chunky Chicken Soup

Printable recipe
Printable recipe with picture

1 whole chicken
2 (32 oz) cartons chicken broth
1 whole bay leaf
2 large onions, chopped
8 ribs of celery, trimmed & chopped
8 carrots, peeled and chopped
5 parsnips, peeled and chopped
Freshly ground black pepper, for serving

Place chicken in large stock pot and pour broth over it. Add the bay leaf and chopped vegetables. Bring to a boil, then reduce heat and simmer for 1 ½ to 2 hours, or until meat is cooked through. Remove chicken to a cutting board and allow to cool until you can touch it without burning your fingers, about ten minutes. Pull the chicken from the bone, discarding the skin, and shred or chop the meat before returning it to the pot. Taste and add salt if desired. Serve hot with freshly ground black pepper over the top.

Recipe source: adapted from The Pioneer Woman

Pumpkin Pie Baked Oatmeal

Posted on

I’m atoning for my sins of last week: fattening, nitrate-filled chili-cheese dog casserole, decadent red velvet cake with a pound of butter and over a pound of cream cheese in it, and beef roast slathered with high-sodium cream of mushroom soup and onion soup mix.  I felt I owed myself, and you, a healthy reprieve.

I usually don’t like labeling my recipes “healthy” or unhealthy” in the title (although I have been known to do so) because that’s not how I want you to think of them.  If something is healthy, I want you to think about how delicious it is, not how healthy it is.  And if something is unhealthy, I don’t want you to focus on that either, I just want you do enjoy your splurge.  So, I’m not labeling this as “healthy” in the title, but I am telling you right now it’s pretty darn healthy.

First of all, it’s naturally sweetened from three sources: apple cider, maple syrup, and honey (because it’s sweeter and because I was running low on maple syrup).  Second, it’s packed with fiber from the pumpkin and the oats.  It’s even got a little protein from the eggs (and the oats)!  I did use a smidgen of butter, but I’m not one who thinks of butter as unhealthy, especially in meager amounts.  It could easily be left out if you want to reduce the fat.

Now let’s talk about the important stuff: the taste.  It’s all well and good to eat healthy foods, but who wants to eat them if they taste terrible?  Not me, and there’s no reason to when healthy food can (and should) be just as delicious as unhealthy food.  These baked oats are perfectly sweet, with a great spiced pumpkin taste, very soft and creamy, with a nice nutty crunch from the pecans.  Served with a drizzle of maple syrup over the top, it is a breakfast treat that is good enough to make your mouth so happy that you forget that you’re doing your body good as well.

Pumpkin Pie Baked Oatmeal

Printable recipe
Printable recipe with picture

1 cup pumpkin puree
1 cup apple cider
2 eggs
½ cup milk (any kind)
¼ cup honey
2 tablespoons maple syrup
2 tablespoons butter, melted
2 teaspoons pumpkin pie spice
1 teaspoon vanilla
1 ¾ cups rolled oats
1 ½ teaspoons baking powder
¼ teaspoon salt
1/8 teaspoon baking soda
¼ cup chopped pecans

Preheat oven to 350. Spray a deep-dish pie plate or a casserole dish with oil; set aside.

In a large bowl, whisk together pumpkin, apple cider, eggs, milk, honey, maple syrup, butter, pumpkin pie spice, and vanilla until smooth. Stir in the oats, baking powder, salt, and baking soda.

Pour into prepared dish and sprinkle with pecans. Bake for 35-40 minutes, or until set. Serve hot with maple syrup or honey.

Recipe source: adapted from The Other Side of Fifty, as seen on Betcha Can’t Eat Just One and Little Bit of Everything (this one’s really making the rounds!)

If you have leftovers, they will slice a lot nicer and will resemble a piece of pie more when served. You can even serve this cold, though I do like it better hot! If you want the oatmeal to be more firm so that you can slice it like pie after removing it from the oven, you’ll have to do some tweaking to reduce the amount of liquid and maybe add another egg.

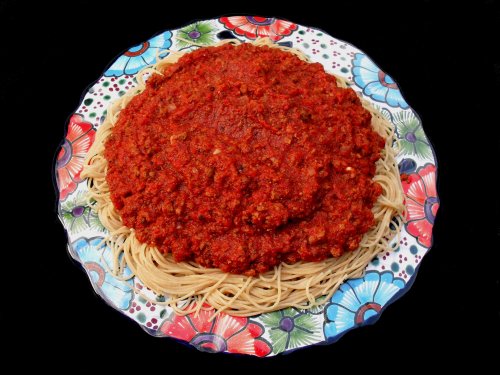
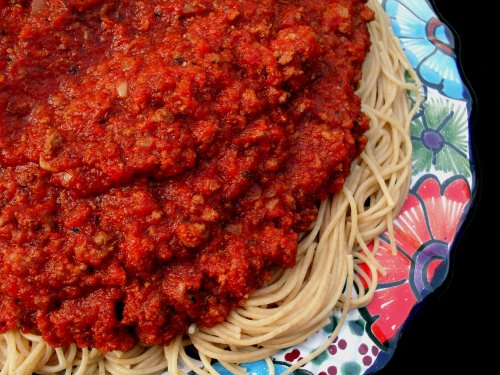
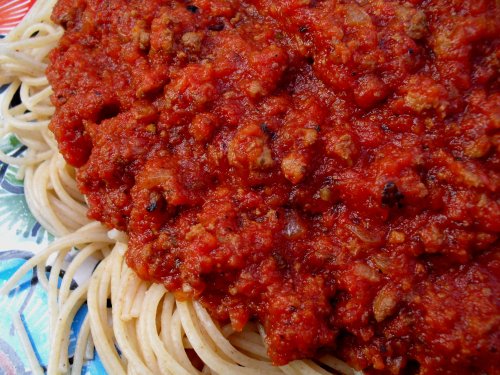
Healthy Slow Cooker Meat Sauce


Dennis and I have been eating out a lot now that I work through the dinner hour.  I finally got fed up with the unhealthy food and the weight gain we’re both experiencing, and decided to cook up enough real homemade food on my days off to last us for the week.  This meat sauce was the first thing I threw together, and Dennis was in heaven!

https://i0.wp.com/a4.l3-images.myspacecdn.com/images02/106/e4b697be95db4cacb0b570413a915d69/l.jpg

This is an old picture from 2009 but I had to include it. Dennis eats everything with chopsticks-he's obsessed!

I’m not completely back on the healthy bandwagon, but this meal is a good start. The sauce is hearty, flavorful & robust, and very low in fat. I chose to sweeten the sauce mainly with carrots, and you may find this balances the acidity of the tomatoes enough for your taste, but I decided to add some agave nectar to mine to sweeten it a little more. You could also try upping the carrots to 2 cups.

Serve this over whole wheat pasta along with a salad and you’ve got a nutritious, delicious meal!

Healthy Slow Cooker Meat Sauce

Printable recipe
Printable recipe with picture

1 pound bison, venison, or lean ground beef
2 links mild Italian turkey sausage, casings removed
1 onion, chopped
4 cloves garlic, minced
3 (14.5 ounce) cans fire-roasted diced tomatoes
1 ½ cups finely shredded carrots (about 4 medium carrots)
2 (8 ounce) cans tomato paste
2 tablespoons agave nectar or sugar
1 tablespoon oregano
1 tablespoon basil
1 tablespoon garlic salt
3 bay leaves
1 teaspoon garlic powder
¼ teaspoon red pepper flakes
¼ teaspoon fresh ground black pepper
Salt to taste

In a large skillet, cook the meat and onions until the meat is brown and the onions are tender. Add the minced garlic and cook another minute. Do not drain unless you used meat with a higher fat content. If you used the suggested meat, you will have a little broth in the pan with only a tiny amount of fat, which I like to leave for flavor.

Meanwhile, add the undrained tomatoes and carrots to a 4-quart (or larger) slow-cooker and puree using an immersion blender (if you don’t have an immersion blender, do this with your regular blender). Stir in the tomato paste, agave nectar, oregano, basil, garlic salt, bay leaves, garlic powder, red pepper flakes, and pepper. Stir in the meat mixture and cover.

Cook on high for 5-6 hours, or low for 10-12 hours, stirring caramelized sides back into the sauce. When complete, stir well, fishing out the bay leaves, and add salt to taste. Serve on top of your favorite pasta.

Recipe source: inspired by The Cooking Photographer

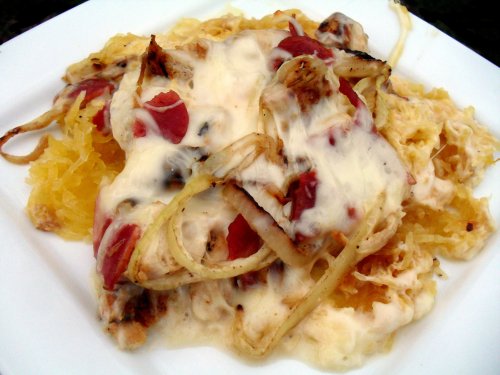
Garlic Chicken & Bacon Spaghetti Squash Alfredo


I made this recipe in the spring and thought it would be nice to share in the fall when it was starting to get chilly.  Not so chilly that you are ready to dig into the really heavy foods, but are just starting to think about it.  That day has come a lot sooner than I expected!  Does it seem like an early fall is coming on in your neck of the woods as well?

If so, here’s a fantastic meal that seems pretty hearty and is totally comforting while still managing to be quite healthy and diet-friendly.  Debbi, the creator of this recipe, calculated it as only about 200 calories per serving (1/8th of the recipe) so even if you ate half of the whole casserole (which would be quite a feat!), you’d probably still be eating less calories than a restaurant alfredo dish would have, and it’s so much healthier!

I thought this dish was absolutely positively scrumptious and although it takes some time to prepare because you have to pre-roast the spaghetti squash, it’s very simple.  I eat a lot of spaghetti squash, but this is only one of two dishes I’ve ever eaten it in with such gusto.  I don’t even like alfredo sauce, especially jarred, and I L-O-V-E-D this meal.  I really felt like I was indulging because meals this delicious usually have a ton of fat and calories.  Not true in this case–it really is like having your cake and eating it too!

Garlic Chicken and Bacon Spaghetti Squash Alfredo

Printable recipe
Printable recipe with picture

1 large spaghetti squash, about 2 1/2 lbs.
1 (15 oz.) jar Classico Garlic Alfredo Sauce
8 oz. mozzarella cheese, shredded
9 oz. chicken, cooked & chopped
6 slices turkey bacon
1 onion, sliced
Salt and pepper

Split spaghetti squash in half lengthwise and scoop out the seeds. Line a baking sheet with foil and spray with cooking oil. Place the squash face-down on the sheet and roast in oven at 375 for about 45 min – 1 hour or until tender when poked with a fork on the underside.  Let cool until you can handle the squash without burning your hands, and scrape the squash out with a fork into a 9 x 13 pan sprayed with cooking spray. Leave the oven on.

While the squash is cooling enough to handle, cook bacon until crispy and remove to a plate to cool.  Grill onions in the small amount of bacon grease in pan, using additional oil or cooking spray if needed. If you want your onions to get crispy dark edges, let them sit for a minute or two before stirring each time. Season with salt and pepper and set aside.  Crumble the cooled bacon.

Spread alfredo sauce over the spaghetti squash in the pan, sprinkle on half the cheese, top with chopped chicken, bacon and sauteed onions, then top with remaining cheese.  Bake, uncovered, for about 25 minutes until heated through and cheese is melted.

Recipe source: Debbi Does Dinner Healthy

Healthy Blueberry Muffins

Posted on

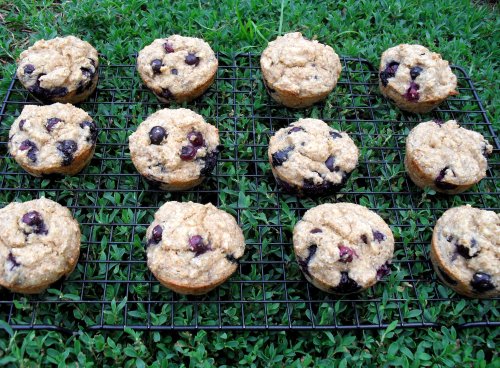
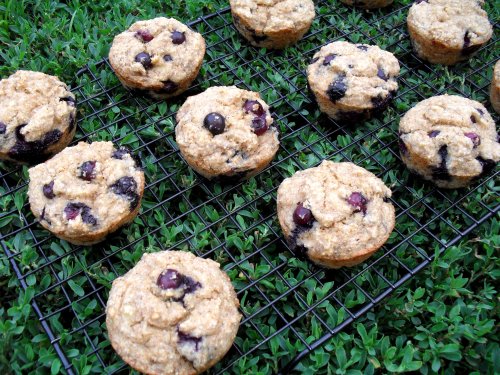
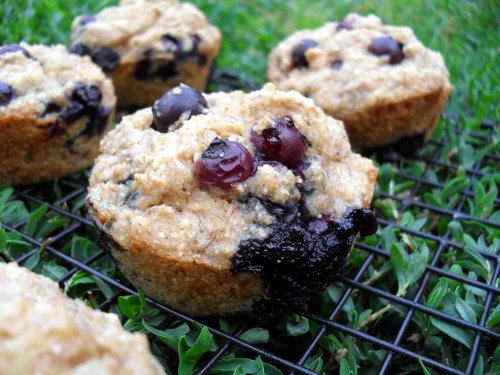
Did I scare you off with the word healthy?  For those who are still reading, I have a nice treat in store for you!  I whipped these babies up because I had some seriously overripe bananas begging to be used and also scored three pints of blueberries for $1.50 each at Aldi (love Aldi!).  These are healthy in every sense of the word: whole wheat, all-natural, sugar-free, and low fat.  Each muffin comes in at just 3 Points Plus.  And yes, they are quite delicious!  Maybe not delicious in the same way that a white, sugar-sweetened blueberry muffin with streusel topping is delicious, but delicious in a way that makes you happy not only in your mouth but in your overall sense of well-being.

I calculated the nutritional information for the recipe using both Truvia and sugar (since most people probably don’t have Truvia sitting around in their home), and either way the muffins come to 3 Points Plus.    If you like baking sugar-free, I encourage you to try Truvia because in my experience it acts like sugar in baking, unlike many substitutes.  (I’ve used it before in my Chocolate Chip Banana Bread and Apple Cake Mabel, both with excellent results.) It is all natural, coming from the stevia plant, so you don’t have to be scared of any side-effects.  There are none!  It is the only all-natural calorie-free sweetener out there (stevia, not Truvia.  There are many sweeteners made from stevia and Truvia is just one of them.)

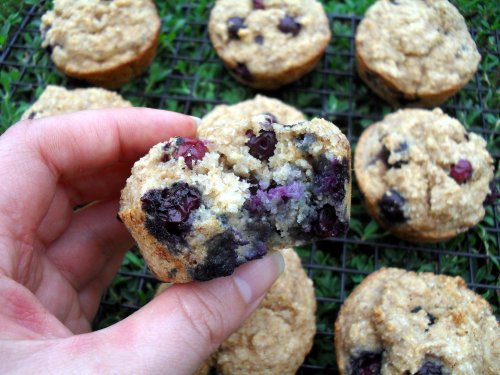
I often complain to other bloggers when they fail to describe how their recipes taste because that is what I care about most when reading a recipe on a blog, so I’d better include my review too, lest those bloggers I’ve ticked off with my whining come back to haunt me. ;)  The banana flavor doesn’t come through at all on the first day, it just naturally sweetens the muffins and makes them moist without a lot of added fat. Somehow the banana flavor develops overnight because I could faintly taste it when eating the leftovers, which were just as good.  I also couldn’t detect the mace so I wouldn’t say it’s essential.  I just threw it in on a whim.  I thought the sweetness level was just right–not too sweet and not under-sweet.  The texture is very moist, tender, and the whole grain makes them a little more hearty than I’m used to, but they seem more wholesome for it, which I like.  The only thing I’d change next time is adding 1/2 cup more blueberries to make the muffins larger without changing the calories much (plus the blueberries add a lot of sweetness), and perhaps sprinkling a little sugar over the top of each before baking to make them prettier.  What I liked most was eating them warm so that the blueberries burst in my mouth and hot juice squirted out.  Oh, so delicious.

Healthy Blueberry Muffins

Printable recipe
Printable recipe with picture

3 medium over-ripe bananas
½ cup buttermilk
2 tablespoons canola oil
2 tablespoons Truvia, or 1/2 cup granulated sugar
1 teaspoon vanilla
½ teaspoon salt
½ teaspoon mace (optional)
1 ¼ cups white whole wheat flour
½ teaspoon baking soda
½ teaspoon baking powder
1 cup fresh blueberries (please try 1 1/2 cups!)

Preheat oven to 350 degrees. Grease or line 12 muffin cups with paper; set aside.   Get out your overripe bananas and peel them into a large bowl.

When I said I had overripe bananas, I meant really overripe.  There’s no reason why you can’t use black bananas in baking.  The older they are, the better they are for baking because they get sweeter and have more banana flavor (in this case, that doesn’t affect the flavor of the muffins but it’s great for banana bread).  You’ll only need three unless you’re doubling the recipe.  I happened to make this recipe twice because I put too much liquid and not enough flour in it the first time, so I was glad to have just the right amount of bananas to make another batch and perfect the recipe.

As you can see, the insides are nice and golden and very soft.

Mash ’em up.

Stir in the buttermilk, oil, Truvia (or sugar), vanilla, salt, and mace.

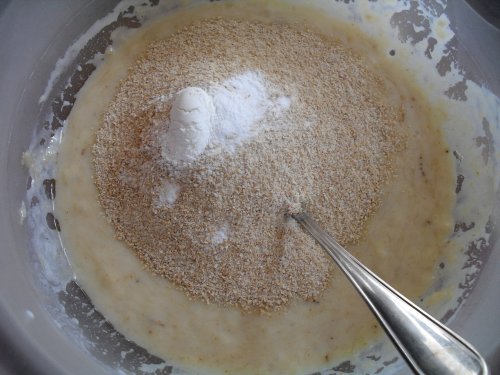
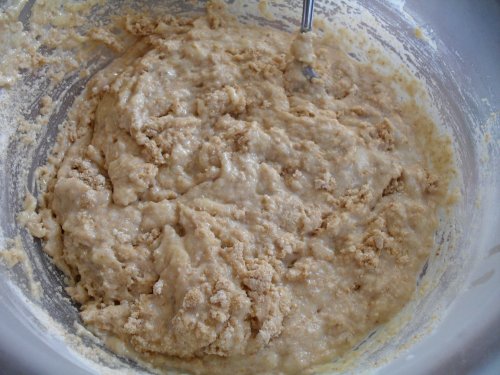
Add flour, baking soda, and baking powder, and stir until moistened but lumpy.

It doesn’t need to be any more mixed than this because you’ll be stirring it more when you add the blueberries.  The more you mix muffin batter, the tougher the muffins will be.

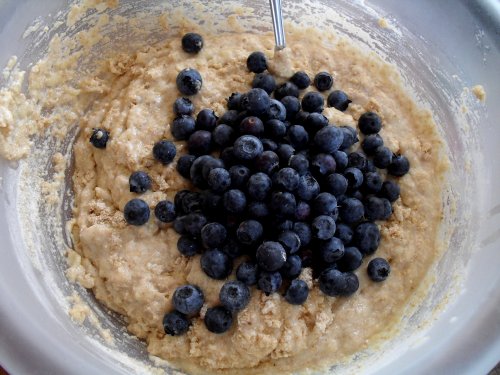
Stir in the blueberries.

Using an icecream scoop, divide the batter between prepared muffin cups. (I didn’t take any more pictures for some reason so just imagine one of the finished batter, and one of the filled muffin tin before baking. Thanks. :))  Bake 15-20 minutes, until done. Cool on wire rack for a few minutes before serving. Cool leftovers completely and store in a Ziploc bag or airtight container.

Makes 12 muffins.

Per muffin: 100 calories; 2.8 g fat; 17 g carbohydrates; 2.3 g fiber; 2.4 g protein; 3 Points Plus

Made with ½ cup sugar in place of Truvia: 133 calories; 2.8 g fat; 25 g carbohydrates; 2.3 g fiber; 2.4 g protein; 3 Points Plus

Recipe by Veronica Miller