RSS Feed

Category Archives: Meatless

The Masters Pimento Cheese

Posted on

Me and pimiento cheese go way back.  Although Mom fed us a very healthy diet growing up, cheese (and butter, thank God) was always present in our house and to this day, my favorite food in the whole world is a cheddar cheese sandwich with lettuce, tomato, and onion.  Mom would occasionally indulge in one of her favorite treats and buy a tub of pimiento cheese, and I was always more than OK with that.

But there’s quite a difference between store bought and homemade!  I didn’t try making it at home until a few years ago, and haven’t looked back.  I used to follow a Paula Deen recipe that’s quite good, but I have now found an even better recipe.  In fact, I’d go so far as to say it’s the BEST, or at least the best I’ve tried.

This one includes Parmesan cheese, which I never would have thought to put in pimiento cheese, but it makes it so good!  You just gotta try it.

The Masters Pimento Cheese

Printable recipe
Printable recipe with picture

1/4 cup (2 oz) cream cheese, room temperature
1/2 cup (4 oz) mayonnaise
1/2 cup (4 oz) sour cream
1/8 tsp garlic powder
¼ tsp minced dried onion
2 cups (8 oz) shredded sharp cheddar cheese
1/2 cup (1 ½ oz) shredded Parmesan cheese
1 (4 oz) jar diced pimientos, drained
Salt to taste (I don’t use any)

Using a mixer, whip the cream cheese until creamy, then beat in the remaining ingredients.  Beating them will help break down the cheese and pimientos.

Veronica’s note: I used reduced fat cream cheese, mayonnaise, and sour cream and you couldn’t tell – it was so good.

Recipe source: adapted from Plain Chicken

Special Egg Salad

Posted on

I have a couple easy and delicious sandwich fillings for you this week!  This one I got from one of my favorite people, Marsha of The Better Baker.  And her last name just so happens to be Baker – how cute it that?  Anyway, I bought her cookbook several months ago (she has a new one coming out soon, too!) and she made a list of her family’s favorite recipes in it for me.  This was one of the first one I picked – her description of it being the “best egg salad” sold me.

Usually I make my egg salad crunchy, with celery, red, green, and yellow or orange peppers mixed in.  I just like to have some crunch that boosts the nutrition.  But if I made enough for leftovers, it tended to get watery from the veggies and it’s a pretty loose salad to begin with because I only used Miracle Whip as the binder.  Although this one has absolutely no vegetables in it, it really is the best egg salad I’ve ever had.  It’s got a wonderful, creamy texture (the cream cheese is just brilliant here), and incredible flavor.  And if you serve it the way Marsha suggests, on toasted wheat bread with lettuce, you do get a very satisfying crunch.  I served mine on multigrain bread and thought it was just over-the-top wonderful.

Photo courtesy of Jaclyn H.

Another tip for this salad – to make easy work of the eggs, you can use a pastry blender as Marsha mentions in her cookbook, or you can try using a cooling rack! My friend, Jaci, introduced me to this idea and at first I thought I’d never try it, because chopping eggs isn’t that hard. But when it came to dicing up six eggs, pushing them through my cooling rack only took a few seconds and was a real time saver. Thanks, Jax!

Special Egg Salad

Printable recipe
Printable recipe with picture

1 (3 oz) package reduced-fat cream cheese, softened
1/4 cup reduced fat mayonnaise or Miracle Whip*
1/2 teaspoon sugar*
1/4 teaspoon onion powder
1/4 teaspoon garlic powder
1/8 teaspoon salt
1/8 teaspoon pepper
6 hard boiled eggs, chopped

In a small mixing bowl, beat the cream cheese until smooth. Add the mayonnaise, sugar, onion powder, garlic powder, salt and pepper; fold in the eggs. Cover and refrigerate at least one hour before serving. Will keep for several days in refrigerator.

*You probably won’t need the sugar if you use Miracle Whip since it already has sugar added.

Veronica’s note: Although my method of hard-boiling eggs probably isn’t the best one, it works for me: put eggs in a pan and cover with an inch of water.  Add several dashes of salt (I heard this helps with something, maybe peeling them, but can’t remember. I just do it out of habit.)  Bring to a boil, then reduce heat to medium-high and continue to boil for 15 minutes.  Carefully drain off water and fill pan with cold tap water.  Pour off water and fill again with cold tap water.  At this point you can add ice to quickly cool the eggs, or keep the cold tap water running so that the pan is continually being cooled. Once  the eggs have cooled to room temperature or lower, which shouldn’t take too long, you can peel them and continue with the recipe.

Recipe source: The Better Baker

Barley with Butternut Squash, Apple & Onion

Posted on

This is one of the “meals” (it’s really a side dish but I like to eat it as a meal) I’ve been making for years and usually resurrect come fall/winter.  My family absolutely loves it too, even my little nephew (or at least he did at 4 years old, the last time he ate it)!  I appreciate delicious vegetarian meals that satisfy me and this one fits the bill fo sho. The combination of the creamy squash, chewy barley, crisp red pepper & apple, and the contrasting savories and sweetness–it’s all just magic to me.  And I guess if a four year old boy will relish something that only contains unrecognizable healthy ingredients, it is pretty magical.

Barley with Butternut Squash, Apple & Onion

Printable recipe
Printable recipe with picture

3/4 teaspoon salt, divided
1/2 cup uncooked barley
1 tablespoon olive oil
2 cups butternut squash, peeled & diced
1 cup onion, chopped
1/2 cup sweet red pepper, diced
1 medium apple, peeled, cored, diced
1 1/2 teaspoons garlic, minced
3/4 teaspoon dried thyme
1/4 teaspoon black pepper
1/3 cup fat-free chicken or vegetable broth

Bring 3 cups of water and 1/2 teaspoon of the salt to a boil in a medium saucepan; add barley. Cover saucepan and simmer barley until tender, about 30 to 35 minutes; drain.

Meanwhile, heat oil in a large nonstick skillet over medium-high heat; add squash and cook, stirring often, until it’s starting to soften–about five minutes. Add the onion and red pepper and cook for an additional 3 minutes.

Stir in apple, garlic, thyme, black pepper and remaining 1/4 teaspoon of salt. Cook, stirring, until apple is almost tender, about 2 minutes; stir in broth, scraping bottom of skillet with a wooden spoon to loosen any browned bits. Stir in cooked barley; toss over low heat to mix and coat. Remove from heat and serve.

Serves 4, about 1 cup per serving.

Per serving: 192 calories; 4.2 g fat; 0 g cholesterol; 37 g carbohydrate; 8 g fiber; 5 g protein; 5 Points Plus

Recipe source: WeightWatchers.com

Quick Veggie Quesadillas

Posted on

Secret Recipe Club

This month for the Secret Recipe Club, I was assigned to Itzy’s Kitchen.  Erica lives a healthier lifestyle than I’m living now (she’s a fitness instructor and has lots of yummy, healthy eats on her blog), so browsing her blog got me back into the “healthy thinking mode.”  I wish I didn’t have a switch that was either turned to “healthy” or “totally heart-clogging, butt dimple-building unhealthy,” but unfortunately, this is my history.  I have decided to ease myself back into healthier eating as I need to lose the fifteen or twenty pounds I’ve gained since going off the rails in March, and Erica helped me do that.

I have been making quick stove top meals often this summer, and I was happy to find her recipe for veggie quesadillas because they were 1) healthy, 2) quick, ad 3) easy.  Perfect summer eating.

We really enjoyed these, especially dipped in salsa.  They come together so fast and easy and I know I’ll be making this again.  FYI, if you have leftover filling, it’s great as a hot dip mixed with salsa with cheddar melting on top. But maybe not as healthy if you use as many tortilla chips as I did. >:)

Quick Veggie Quesadillas

Printable recipe
Printable recipe with picture

1 (15 oz) can black beans, rinsed & drained well
1 (11 oz) can Mexican style corn (or 14.5 oz regular corn), drained well
1 teaspoon chili powder, or to taste
¼ teaspoon cumin
Optional: 1 cup additional vegetables
8 oz. cheddar cheese, shredded
8 flour tortillas (soft-taco size)
Salsa & sour cream for serving

Mix the black beans, corn, chili powder & cumin. If you’d like to add any other vegetables (I added onions), cook them in a skillet until softened and stir into the bean & corn mixture. Place one tortilla in a skillet over medium heat (you can oil the skillet if you like, but I didn’t) and sprinkle no more than ½ cup cheese over it, then scatter no more than ½ cup of the bean mixture over the cheese. Top with another tortilla. Once the cheese is melted on the bottom, about two minutes, carefully flip the quesadilla over and cook for an additional two minutes to heat through and crisp up the other tortilla. Remove to a plate and cook the remaining three quesadillas. Cut each into 6 triangles and serve with salsa and sour cream, if desired.

Recipe source: adapted from Itzy’s Kitchen


A special thank you to my friends Kriss and Nicole for generously giving me the Japanese steak plates pictured in this post, along with  many other dishes that will be gracing my blog in the future.  They are moving their family to Japan this week and not taking much with them, so I was the happy recepient of much of their dishware. It’s hard to say goodbye and feel like I have to do it too often (Japan has already stolen one of my friends!), but I wish you guys the best!

Black Bean & Butternut Squash Burritos

Posted on

Really, I don’t know what to tell you about these burritos.  They are fabulous.  And that sums it up.  Really, truly, seriously the best burritos I’ve ever made or eaten.  I have nothing else to tell you except that Dennis is losing his job.

WHAT?

Yeah, I know.  What a way to drop a bomb.  I guess I’m not good at breaking things gently.  Or very good at segues, apparently.  It’s something we’ve known about for several weeks and it’s something I’ve wanted to share, but how do you fit in personal information like that on a blog that usually only features recipes and reasons for thanksgiving?  So I figured I’d just fit it in where I could.

Burritos and unemployment.  Sure, it fits. :)

They no longer need him in the position he fills at his current job, and rather than move to a different department and take a pay cut and a position that would make him miserable, he accepted the soon-to-come lay-off.  He applied for a job with the state as a 911 emergency call-taker, which would be a pay raise for him, and something he would find fulfilling and rewarding.  He passed both his tests for the position with flying colors, and is scheduled for a “job information” session next week.  We’re not sure what that exactly means, but we think it’s a good sign that they’ve asked him to come back.

When our preacher says a prayer, many times he has thanked God for the doors he opens, and the doors he closes.  It is a good reminder to stay thankful not only for the good that God provides, but for things we perceive as bad as well.  In this case, the closed door may very well lead to a better future for us.

It is easy to become complacent when you can make ends meet, so it can be good to be forced out of your comfort zone to reach a little higher for  something that will allow you to provide better for your family.  In addition to some house repairs, I could really use a new car, because I’m not sure Baby will last much longer. (You can witness Baby in all her hooptie glory, and me in my Valley-girl glory, in this video.)  So this 911 job would be a step in a better direction for us!  We are hopeful, but we know that whatever may come, God will provide.

As for the burritos, really, there’s nothing else for me to say.  Best burritos ever.  I really hope you try them!

Black Bean & Butternut Squash Burritos

Roasting the squash and cooking the rice makes this a long process for a lunch. I recommend preparing these two things in advance, so that when you’re ready for lunch, you only have to proceed as the recipe directs: heat and eat!

Printable recipe
Printable recipe with picture

1 tablespoon canola oil
1 cup chopped onion
2 garlic cloves, minced
1 red pepper, chopped
1/2 teaspoon salt, or to taste
2 teaspoons ground cumin, or to taste
1/4 teaspoon cayenne pepper, or to taste
1 (15 oz) can black beans (about 1.5-2 cups cooked), drained and rinsed
1 1/2 cups cooked brown rice
1/2 of a medium butternut squash, peeled, cubed, & roasted*
1 cup (4 oz) shredded cheddar cheese
4 large/extra-large flour tortillas

Toppings of choice: avocado, salsa, sour cream, spinach/lettuce, cilantro, etc

In a large skillet over medium-low heat, add oil, onion, and minced garlic. Sauté for about 5 minutes, stirring frequently. Add the salt and seasonings and stir well. Add chopped red pepper, black beans, and cooked rice and sauté for another 10 minutes on low. Add the roasted butternut squash to the skillet and stir well.  You can mash the squash with a fork if some pieces are too large. Add the cheese and heat another couple minutes.

Scoop bean filling onto tortillas along with desired toppings. Wrap and serve. Leftover filling can be reheated the next day for lunch in a wrap or as a salad topper.

*To roast the squash, preheat oven to 425F and line a rimmed baking sheet with tinfoil. Drizzle olive oil on squash and give a shake of salt and pepper. Coat with hands. Roast chopped butternut squash for 30-45 minutes (depending on the size of your cubes), or until tender.  I highly recommend using the second half of your butternut squash in Jenna’s Split Pea Soup. It is fantastic!

Recipe source: tweaked from Oh She Glows

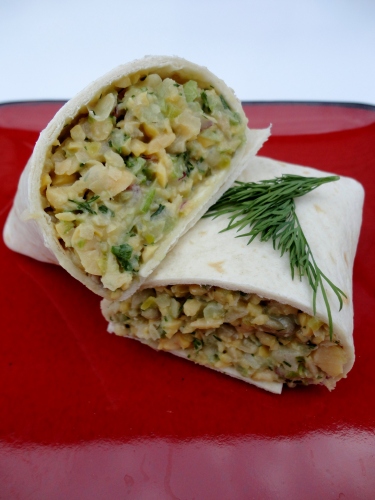
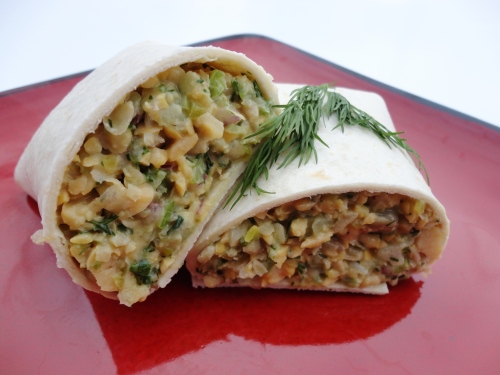
Chickpea Salad Wraps {Mock Tuna Salad}

Posted on

The Jey of Cooking is donating $1 to the American Heart Association for each heart-healthy recipe that is linked to her fundraiser, and I thought this was a fun way to spread the word on the importance of heart health, so I decided to post this particular recipe because it’s chock full of ingredients to keep your ticker in tip-top shape!

Heart disease is the leading cause of death for both men and women in the United States.  In 2008, 616,000 people died of heart disease.  Studies have shown that lowering blood pressure and cholesterol can reduce your risk of developing of heart disease, and this recipe perfectly fits into a dietary plan focused on doing both.

The chickpeas and celery add dietary fiber (and so will your tortilla, if you choose a whole wheat one), which is well-known for naturally lowering cholesterol and blood pressure.  What you may not know about onions  is that they stave off heart disease by promoting thinner blood and breaking up blood clots.  They contain a powerful antioxidant called quercetin, which can help with high blood pressure.  These benefits are most powerful when onions are eaten raw, as in this salad.  And last but not least, the sunflower seeds add some heart-healthy poly- and monounsaturated fat into the mix, not to mention a tasty crunch!

Now that we know how healthy this recipe is, let’s talk about how it tastes.  Eating foods for the sake of health is all well and good, but I’m a firm believer that those foods should also be full of flavor to make it an enjoyable experience.  And this salad certainly fits the bill!  It tastes very similar to tuna salad, and if you like tuna salad, I know you will like this as well.  The beans make it creamy, with a lovely contrasting crunch from the celery, onions and sunflower seeds.  You might be surprised how similar this tastes to tuna salad, and if you are following a vegan diet, this would be a great substitute.

Chickpea Salad Wraps

Printable recipe
Printable recipe with picture

1 (15 oz) can chickpeas, drained and rinsed
½ cup celery, diced
¼ cup roasted, salted sunflower seeds
¼ cup mayonnaise, Miracle Whip or Vegenaise
3 tablespoons red onion, diced
3 tablespoons dill pickle, diced (or use dill relish)
2 tablespoons fresh dill, minced (or 2 teaspoons dried)
1 tablespoon fresh parsley, minced (or 1 teaspoon dried)
2 tablespoons lemon juice
1 garlic clove, minced
1 teaspoon reduced sodium soy sauce
½ teaspoon prepared mustard
Salt & pepper to taste

Place everything in the bowl of a food processor fitted with the blade attachment. Pulse until it is the texture you desire. I wanted mine to be slightly chunky and a little creamy, which took about 20 pulses. Serve in burrito-size tortillas, other wraps, or on bread as a sandwich.

Recipe source: adapted from Oh She Glows

*Sources for information on heart health: Centers for Disease Control and Prevention, How Dietary Fiber Lowers Cholesterol, The Healing Power of Onions, Nutritional Power of Sunflower Seeds

And you know you want to see my First Day of Spring manicure (I did it yesterday):

I forgot the grass but still love it.  Guess how many nail polishes I used on it?  Every single one of these:

I know. I’m crazy.  Big thanks to Suzie, who gifted me with a gazillion polishes, some pictured here.  You know you’re feeding my problem, right Suze? ;)

Low-Carb Eggplant Parmesan with Fire-Roasted Tomato Sauce & Fried Garlic {gluten-free}

Posted on

Growing up, my Mom made an eggplant dish about once a year that was basically chopped up eggplant mixed with homemade marinara sauce, garnished with Parmesan cheese.  The only way I could swallow the evil stuff was to absolutely drown it in Parmesan–I’m pretty sure I used half a bottle of the grated cheese every time she made it.  It’s not that the taste was terrible, the marinara was always good, as was the Parmesan, but the eggplant itself was spongy and a bit bitter, so I had to distract myself by making it super cheesy in order eat it.

Despite never fully enjoying this dish, I was convinced that I would enjoy eggplant if prepared differently.  I really wanted to try making eggplant Parmesan, sensing that frying eggplant and making it crispy could be the key.  But for some reason, I just never got around to it.  Probably because I had been tainted by a long history of a dish with similar elements that was always abhorrent to me.  I finally tried eggplant on a pizza (click here for the recipe: Eggplant & Olive Pizza) and then in baba ghanoush (a Middle Eastern roasted eggplant dip) and discovered I was right, I did like eggplant!

Well, finally, in a lower-carbohydrate phase of our diet last month, I decided to try my hand at eggplant parmesan, using only cheese for “breading” before frying it.  It. was. fabulous.  I’m sure I’d love it with the breading as well, but this was truly delicious and in my opinion, need not be changed.  I seriously can not wait to make this again. I’m now a full-fledged eggplant convert.  They key, it seems, is not so much in the frying, which obviously doesn’t hurt, but in the salting and draining prior to cooking.  This takes away the bitterness and makes the eggplant flavor much more enjoyable.

I also want to take a moment to mention the tomato sauce, which I snagged from Jenna’s blog and kicked up a notch with fire-roasted tomatoes, and a touch of fennel seeds and red pepper flakes.  This is my most favorite marinara sauce I’ve made to date, very flavorful and a great compliment to the eggplant.  It makes a large batch, so you’ll have enough leftover to freeze for future eggplant Parmesan meals, or to ladle over pasta. It gives me such a heady feeling to know this delicious sauce is waiting for me in pre-portioned bags in the freezer, and all I have to do is defrost it in order to enjoy it again. Thanks for the wonderful recipe, Jenna!

One last note: the fried garlic is totally optional but I highly recommend you throw some cloves into the oil while you’re frying your eggplant.  I discovered that frying garlic gives the same flavor as roasting it, sweetening it and making it so delicious you can just pop the whole thing into your mouth without any of the sulphurous burning that usually accompanies such an act with raw garlic.  It is so delicious, I’ve found it to be addictive!  I ended up keeping this part of the recipe secret from my husband, who arrived after I’d eaten an entire bulb of fried garlic because I couldn’t keep my hands off of it after I popped the first clove into my mouth.  What he doesn’t know won’t hurt him. :)

I’m submitting this recipe to Renee for this week’s BSI (Blogger Secret Ingredient contest): Parmesan.

Low-Carb Eggplant Parmesan with Fried Garlic

Printable recipe
Printable recipe with picture

1 medium eggplant, peeled
Salt
2 eggs
¼ cup water
1 cup shredded or grated Parmesan cheese, plus more for garnish
Garlic powder
½ cup olive or canola oil
1 bulb of garlic, peeled
1 ½ cups Fire-Roasted Tomato Sauce, warmed
Fresh parsley, chopped, for garnish

Peel and slice eggplant into ¼” thick slices. Sprinkle both sides liberally with salt and place in a colander set over a bowl. Allow the eggplant to drain for 30-45 minutes or until 2 tablespoons of water have been drawn out from the eggplant. Tear off three sets of two sheets of paper towels (each set of two still connected), stack together, then lay out eggplant slices on top of it. Tear off another three sets of two paper towels, lay on top of the eggplant, and press down firmly on each slice to draw out excess moisture.

In a flat-bottomed bowl large enough in diameter to fit the largest eggplant slices, whisk the eggs and water together until foamy. Put the Parmesan cheese on a plate and have your garlic powder nearby. Line a baking sheet with foil, sprinkle evenly with garlic powder, and set nearby.

Dip each eggplant slice in the egg mixture, shake off, then sprinkle both sides with Parmesan. Lay the slices on the prepared baking sheet as you finish them. Once all slices are coated, sprinkle garlic powder on top.

Heat a cast iron or other heavy-duty skillet over medium-high heat. Add enough oil to cover the bottom well and come up about 1/8”. Place as many eggplant slices in the skillet as will fit, and tuck as many of the cloves of garlic in between them as you can. Fry the eggplant until the first side is golden brown, about 2 minutes, then flip. Flip the garlic cloves when then skin is golden brown and bubbled. Once the second side is golden brown, remove to a cooling rack lined with paper towels to drain. Remove the garlic as it is finished cooking as well. Continue cooking eggplant in batches until all is fried. If the first batch of eggplant has cooled too much by the time you are finished frying it all, pour out the oil in the skillet and add them back in to reheat for a minute. Alternately, as the eggplant is drained, you can add them to a foil-lined baking sheet and keep them in a warm oven until ready to serve.

To serve, arrange eggplant slices on plates with fried garlic scattered around. Scoop tomato sauce over the top and garnish with Parmesan and parsley, if desired. Serve hot.

Fire-Roasted Tomato Sauce

Printable recipe
Printable recipe with picture

1/3 cup olive oil
1 large onion, diced
5 cloves garlic, minced
1 stalk celery, diced
1 carrot, diced
Kosher salt and black pepper, to taste
1 (28 oz) can crushed tomatoes
2 (14.5 oz) cans fire roasted tomatoes, undrained
2 dried bay leaves
1 tablespoon dried basil
1 teaspoon dried oregano
¼ teaspoon fennel seeds
¼ teaspoon red pepper flakes

In a large pot or Dutch oven, heat the olive oil over medium high heat. Add the onion and garlic, and cook for about 2 minutes, until soft and translucent. Add the celery, carrot, and some salt and pepper. Cook for about 5 minutes, until softened. Add the tomatoes, bay leaves, basil, oregano, fennel seeds, and red pepper flakes, and cover the pot with a splatter screen. Turn down the heat to low, and simmer gently for 1 hour.

Remove the bay leaves and taste for seasoning, adding salt and pepper as needed. Using an immersion blender, blend the sauce until smooth. Allow the sauce to cool completely and, if not using immediately, pour it into freezer bags in 1-2 cup portions. It will keep frozen for about 6 months.

Corn, Avocado, and Black Bean Tostadas

Posted on

For some reason, before I made these tostadas, I had an aversion to chipotle peppers that came canned in adobo sauce.  I think I made one bad dish with them that turned me off, and I was hesitant to use them in anything again.  This recipe has completely turned me around!  These are the absolute best tostadas I’ve ever made.  I love how the sweet corn balances the smoky and spicy flavor of the chiles.

I really love it when I can find vegan meals that don’t require a lot of fake ingredients, and love it even more when those meals are just as delicious as a meat-centric meal.  I have to say that these tostadas beat the pants off of any tostada I’ve made with meat to date.  Although I did put cheddar cheese on these, you can leave it off for a vegan meal because you get plenty of (healthy) fat from the avocado.

This is a great summer meal because it comes together really quickly and only requires a few minutes of heat on the stovetop.  Enjoy!

Corn, Avocado, and Black-Bean Tostadas

Printable recipe
Printable recipe with picture

1 large zucchini, diced
2 cups frozen corn kernels
2-3 medium tomatoes, diced
1/3 cup red onion, chopped
¼ cup cilantro, chopped
2-3 chipotle chiles in adobo sauce, minced
2 tablespoons fresh lime juice
½ teaspoon kosher salt
8 tostada shells
1 cup refried black beans*
Shredded lettuce
1 avocado, peeled & sliced
1 cup shredded cheddar cheese

Spray a large nonstick skilled with oil and heat over medium-high head. Add zucchini and sauté 3 minutes. Add corn and cook until heated through. Remove from heat and stir in tomatoes, onion, cilantro, chipotle chiles, lime juice, and salt. Spread each tostada shell with 2 tablespoons of heated beans and top with shredded lettuce. Spoon corn mixture over lettuce, then top with shredded cheddar and slices of avocado.

*To make your own quick refried black beans, drain a can of black beans and reserve the liquid. Place beans in a food processor fitted with the blade attachment, along with 1 teaspoon cumin, 1/2 teaspoon onion powder, and 1/4 teaspoon garlic powder. Process, adding in liquid through the feeding tube as necessary to obtain your desired texture. Taste and add salt, pepper, and additional seasonings if desired.

Makes 8 tostadas.

Per tostada: 235 calories; 11.6 g fat; 27.5 g carbohydrates; 5.4 g fiber; 8.6 g protein; 6 Points Plus

Recipe source: adapted from Redbook, October 2010

Secret Recipe ClubThis recipe has actually been recreated twice by the SRC. Here is the first blogger who made it (click the box above for the second): Thru the Bugs on My Windshield

Black Bean and Sweet Corn Quinoa Salad

Posted on

Last week, I shared the Fudge Babies recipe, divulging how late I was in jumping on the raw dessert train.  Well, raw desserts aren’t the only thing I was incredibly slow to catch on to.  Until this week, I also had not tried quinoa (pronounced keen-wah), despite seeing it on nearly every blog I frequent!  I’ve been saving recipes for years, finally bought some over a month ago, and finally, finally, made something with it this week.

Quinoa is gluten-free and while it’s not a grain (it’s a seed), it is often used in place of rice and is cooked the same way.  Although I’ve now enjoyed it, I still can’t tell you if I like quinoa or not, because I couldn’t identify its flavor apart from everything else in this salad.  The salad itself was stupendous, so I guess if I didn’t like quinoa, I wouldn’t have liked the salad as much.

It has a pleasant Mexican flavor profile, and while carbohydrate-heavy, it is also fiber and protein-rich.  It is so delicious that I am a bit ashamed to admit I couldn’t even wait to sit down and eat it from a bowl like a civilized human being.  As soon as it was done, I took a taste and then stood over the pan, shoveling it into my mouth with the ginormous serving spoon.  In my defense, I was stressed, approaching a certain time of month, very hungry, and found this salad to be irresistible.  The perfect storm of coincidences to bring out the barbarian in me.

Black Bean and Sweet Corn Quinoa Salad

Printable recipe
Printable recipe with picture

1 tablespoon olive oil
1 medium yellow onion, chopped
2 cloves garlic, minced
3/4 cup uncooked quinoa
1 1/2 cups chicken or vegetable broth
1 teaspoon ground cumin
1/4 teaspoon cayenne pepper
1/2 teaspoon salt
1/2 teaspoon freshly ground black pepper
1 cup frozen sweet yellow corn
2 (15-ounce) cans black beans, drained and rinsed
1/2 cup cilantro, chopped

In a medium pot, heat the olive oil over medium heat. When shimmering and hot, add the onions and saute for 4-5 minutes, stirring often. Add the garlic and stir for a minute or two until the garlic is fragrant, being careful not to burn the garlic.  Add the quinoa and cover with broth. Stir in cumin, cayenne pepper, salt and pepper. Bring the mixture to a boil. Cover, reduce heat and let simmer for 20 minutes (or until all the liquid is absorbed).  Stir in the frozen corn and black beans. Cover and let the pot sit off the heat until the corn and beans are heated through, about 5-6 minutes. Stir in the cilantro. Serve warm or chilled – it is delicious both ways!

Serves 4 as a main dish, serves 6-8 as a side

Per serving (1/4 of recipe): 417 calories; 7 g fat; 72 g carbohydrates; 17 g fiber; 20 g protein; 10 Points Plus

Recipe source: Mel’s Kitchen Cafe

Bean Curry

Posted on

I have secrets.  Delicious secrets.  There are many recipes I’ve made, a few that I’ve won ribbons for, that I’ve never shared.  (Not on purpose, mind you, I just forget!)  But I can hide this one from you no longer.  I stumbled across this old picture in my Garam Masala post while I was indexing all my recipes, and since it seemed so bright and cheerful I thought it would be a nice one to share with you now that the weather is bright and cheerful.

This was one of the first Indian dishes I ever made.  In fact, I think it was THE very first.  I can still remember the delicious flavor and how taken I was with the dish at first bite.  I know it seems strange to use black-eyed peas in a curry dish, but I promise you, it works.  I may keep secrets, but I wouldn’t lie to you.  This curry is fantastic!

Bean Curry

Printable recipe
Printable recipe with picture

1 tablespoon canola oil
1 onion, chopped
3 cloves garlic, finely minced
1 teaspoon freshly grated ginger
1 large tomato, chopped
1/2 teaspoon turmeric
pinch cayenne, or to taste
1/2 teaspoon salt
1 teaspoon paprika
1 teaspoon Garam Masala
3/4 cup half and half
1 cup vegetable stock or chicken broth
1 can black-eyed peas, lightly drained
2 tablespoons chopped fresh cilantro

Heat oil in a large skillet over medium heat. Add onion; saute 5 minutes or until translucent and slightly browned. Stir in garlic and grated ginger root; stir constantly for 30 seconds. Add tomato; cook for 2 minutes. Stir in turmeric, cayenne, salt, paprika, and garam masala; stir constantly for 30 seconds. Add half and half, stock, and black-eyed peas. Reduce heat and simmer 5 minutes, stirring occasionally. Stir in cilantro. Serve immediately with rice, chapati, or naan. Although it doesn’t show in the picture, the curry has plenty of sauce to go over your rice.  I recall draining it off for this plate to make a better picture.  That doesn’t count as a lie…does it? ;)

Makes 4 servings.  

Per serving (calculated with 1 cup white rice): 188 calories; 9.5 g fat; 23 g carbohydrates; 5 g fiber; 5 g protein; 10 Points Plus

Recipe source: Mel’s Kitchen Cafe