RSS Feed

Category Archives: Uncategorized

I’m still alive! :)

Posted on

Once upon a time I wrote posts 3-5 days out of the week and I felt like my readers were friends. I don’t know how many of you really even know me any more, it’s been so long since I’ve shared my heart (and recipes!) like I used to in the good ol’ days. Or even followed others’ blogs! I do miss that, but wouldn’t trade it for the time I now spend with my little homey. I wanted him my whole life, and blogging just isn’t as important to me right now. The days fly by and I know that soon this brief time in my life, raising the child I always wanted, will be over.  I’m just soaking them up!

But today my little guy is out of town for a sleepover with his grandparents, and I have some time all to myself, and I believe I’m way overdue for an update! Last time I blogged, I mentioned our fundraising efforts to afford the fertility treatments we need to give Joshua a sibling. I also mentioned professional photos and it’s about time I share those (which you can see two of them above) and update on the former!

Our fundraising went very well and we are gearing up for our first IUI of this year.  Several blog readers donated, some that were just stopping in for a random recipe and saw the fundraiser link, and I’m so grateful for this help, thank you. I have been going to a chiropractor since we started fundraising, and we’ve both done natural (herbal) things to help our fertility. A large percentage of the money raised, as well as money of our own, went to these natural treatments but it was money well spent.  Quite a bit went into consultations, blood tests, fertility drugs (non-herbal), and sonograms as well. I’ve even been doing acupuncture in hopes to give myself an extra fertility boost!

We got to a point where we were ready to move forward with an IUI and we needed one more fundraiser to meet our goal so we did a chili cook-off & silent auction.  This was our most successful fundraiser (I also did a cupcake sale, a garage sale, and a Mary Kay party) and was also the easiest!

The cookies were glued to the plate and he was pretty mad they weren’t real. He tried so hard to get them off! lol

So now we are excited and looking forward to the IUI, amazed how God has guided and blessed us through this journey, through family, friends, and even strangers.  Taking heart that this is the path we were meant to take, and hoping for a positive outcome, though we know that is not a guarantee. No one knows that more than us.  After thirteen years to get our son, and a failed IUI last year, we know.  I still can’t help but be very hopeful, as I’ve never been on this many drugs (for fertility) before, LOL!

So that’s the excitement going on for us right now.  Hopefully I will have some good news for you guys some time this year, as it’s the last year we will be trying. :) Prayers are much appreciated! <3

Thomas the Cupcake Train!

Posted on

Oh boy, time has really gotten away from me. I can’t believe my last post was in September!  I wanted to post our professional photos we had done for Christmas, then realized I hadn’t even shared about Joshua’s birthday so I better do that first. He turned two on November 23rd!

This little guy is very into trains. I can’t even tell you the number of times I hear “choo choo!” a day, either because he hears a train, sees a train track, is playing with trains, or sees Thomas on his socks & pajamas, or on TV. He finds trains everywhere, like on a Christmas tree figurine I never even noticed a train was at the base of, or in the background of pictures in books. You never know how surrounded you are by trains until you have a toddler signaling their presence once every few minutes. Needless to say, we went with a Thomas the Train theme for his birthday this year.

This was his Halloween costume, and the photos worked nicely for his birthday invitations.

I saw a really cool cupcake train idea on A Britt Without Boys (see her post for a much better train, and tutorial), and was really excited to make it. It was very simple to put together and while mine didn’t look as great as Brittney’s, everyone loved it and it was a hit!

Basically you need a large engine to start the train off with, if you want to go with Thomas I’d look into the “My First Thomas” set you can get at Target for around $20. I went with a projector toy I found on eBay that was a bit too small, and I’m not sure the My First Thomas is bigger but it seemed to be in the online pictures. Then you need cupcakes, the number is up to you. You need half as many graham crackers as cupcakes, and 4 large marshmallows and Oreo’s per graham cracker.

“Glue” marshmallows with melted chocolate (I used a disposable piping bag that I melted white chocolate chips in the microwave) onto the bottom of the graham crackers where you want the tires to be. Place them marshmallow side down and then glue Oreo’s over the outside of each marshmallow to make them look more like train wheels.  To set up the train, arrange two cupcakes per graham cracker and set up in a line behind the engine. Add candles and you’re done! I got the “Happy Birthday” candle set for $1 at Dollar Tree.

He started out dressed in his train engineer costume but HAD to put on the Thomas jammies from Auntie Joan as soon as they were out of the gift bag! 

I didn’t get too crazy with the decorations, just cheap stuff in basic colors that went with the Thomas theme, but I did put some creativity into the favor bags.  I got blue paper bags 3/$1 at Walmart, then designed my own labels for them and stuck them on with double sided tape. I include a wooden train whistle ($1 at Dollar Tree), Train Smoke (Vanilla Snow Cotton Candy, $1 from Dollar Tree, filled 6 bags), bubbles (8-pack of wedding bubbles $1 at Dollar Tree, printed out my own Thomas’s and taped them on), and a few fun-size candy bars that I got half price after Halloween. What can I say, I’m thrifty!

And this was the front of the thank-you cards I designed and mailed to those who gave him a gift. I print my “cards” at Walmart as 4×6 photos for about a quarter each with tax (for 1 hour, only 9 cents if you can wait for home delivery). If it’s just a card front like this, I cut out some card stock to size, fold it, and tape the picture to the front, then write a message inside. Can’t beat a personalized card for a quarter!

Oh and one more cute thing from the party, my Mother-in-Law, with the help of her artistic sister, made this Thomas veggie train with a cardboard Thomas they made “from scratch” and long baskets (I’ve seen these at Dollar Tree, like MIL, like DIL!) filled with veggies. It looked much cooler spread out until I pushed it aside to make way for my big crock pot full of Easy White Chicken Chili, but you get the idea.

I didn’t do any games but had a coloring table set up just in case there were slow points and children got bored, but it actually ended up being filled with all adults! My sisters joined after I took this picture. I printed this Thomas Birthday Express coloring sheet and they went to town while they waited for everyone to finish eating and the presents to begin.

I purposely kept the decorating and prep to a minimum to avoid stress and it was a really enjoyable party!  I wonder how many more years I’ll be able to continue my cake strike before this little boy starts working on me and convinces me to make a dragon cake like his cousin did once upon a time. For now, I’m enjoying cupcaking it up! hehe.


Supporting your infertile friends & The Stork OTC giveaway *CLOSED*


*This giveaway is now closed. Congratulations to Laura (dandelionsarenotweeds6)!*

I know, you are waiting for my blue ribbon banana bread recipe (still happy dancing) I promised last week! Well it is still coming, I’ve gotta take pictures of the loaf I just baked, and in the mean time I have something very near and dear to my hear to talk to you about, and there is a giveaway involved so don’t be too hasty to close the window in a fit of banana bread frustration. ;)

Before the incredible gift of our son, I shared fairly often about my personal 13-year struggle with infertility, and the heartbreak.  There’s nothing quite like infertility to make you realize you’re really not in full control here. You can do everything within your power to improve your chances, from natural remedies to over-the-counter, to medical help…and you still may never get pregnant.  It’s hard to want something so badly, and not be able to accomplish it no matter the lengths you go to, or how hard you pray.

Which is why I agreed to join The Stork OTC with other bloggers to help raise awareness about how to support infertile couples and to introduce you to their nifty at-home conception device (with a chance to win one, and more, stay tuned!).  Even if you’ve never suffered from infertility, or known anyone else who did, chances are there is more than one couple you know that does, and has never revealed it.  Infertility is largely suffered with silent tears because it’s a very personal struggle that is awkward and embarrassing to share even with close loved ones.  (After fifteen years, I’m mostly past that, and it’s also easier to share to a larger semi-anonymous audience than it is one-on-one.)

Some things you should know:

Infertility doesn’t affect every person the same way, but in general these are some things that can be difficult for us (or even heartbreaking, depending on the day):

  • Pregnancy announcements. Personally these aren’t as hard for me as other infertiles I know, but at times, they have brought me to my knees.
  • Baby showers. Though I’m the odd infertile duck that really LOVES baby showers (part of it is the white cake, I just love it, LOL), I’m ashamed to admit that there have been times when I couldn’t force myself to go to them because my circumstances grieved me too much to join in the celebration.  I know it sounds terrible – jealous and selfish, and I was. Infertility can really put the ugly on beautiful things.
  • Mother’s Day, especially if at a place or function where mothers are singled out and honored in a way that shows them apart from the women they hope to be some day, and don’t know if they will ever be. This can be really shaming to infertile women, almost a pointing finger showing them unable to achieve what every other woman that wants to can.
  • Questions like, “When are you guys going to have a baby?” This truly isn’t an appropriate question to ask anyone, but especially if they’re infertile.  No matter who it is, this simply is not your business, and if the couple has been trying for an extended time without your knowledge, a question like that can really rip into their heart.
  • Hearing a pregnant woman or mother bitterly complaining about her pregnancy or child/children.  Having now been through pregnancy and mothering my own child, I know there are lots of hard times, but I make a point to only vent/complain to those who get it because I know how easy it is to hurt those who would give anything for the hard times by complaining.

This short list isn’t so much advice as information to help you understand your infertile friends and family a little better.  For a really wonderful series that is far more extensive with advice, you can start reading “Loving Your Friend Through Infertility.”  But if you’re looking for the short and sweet answer, it’s this: the best thing you can do is simply offer your love, prayers, and support.  And if possible, lots of hugs and a shoulder to cry on.

Now for the fun part, a giveaway!  If you are trying to conceive and it’s taking longer than you anticipated, using The Stork OTC is a nifty way to increase your odds if you want to try something at home before getting medical help.   Let’s talk shop for a minute, this thing is really fascinating, and forgive me but I’m going to do a little copying and pasting on their info so if it doesn’t sound like me, you know why:

The Stork OTC is an innovative, home-use device that helps with becoming pregnant. Whether you are just starting on your journey to parenthood or have been trying for longer, let The Stork OTC optimize your chances of conceiving. This NEW treatment option is FDA-cleared for home-use without a prescription. The Stork OTC offers a relaxed and private way of conceiving in your own home using new technology based on cervical cap insemination. This smart technique puts the sperm at the opening of the cervix as possible, optimizing your chances of conception.

• The Stork OTC is the only conception assistance device cleared by the FDA for over-the-counter sales to consumers, without a prescription.
o The Stork OTC could change the way couples approach challenges becoming pregnant.
• The Stork OTC is delivering hope to millions of Americans struggling to conceive a child.
o Can be used if you are diagnosed with infertility, have tried months without success, or simply want to get pregnant more quickly; also if you want to conceive without intercourse.
• With The Stork OTC, consumers finally have an easy-to-use, drug-free, economical conception aid they can use at home, without a prescription.
o A sensible first step before trying more costly, invasive procedures.
• The Stork OTC uses an established and effective conception technique—cervical cap insemination—which helps with many common fertility difficulties.
o Cervical cap insemination’s documented success rate is around 10-20% , similar to the success rate for IUI .
• The Stork OTC puts you in control; you can use it to optimize chances to conceive this month.
• It is available now, online and in select retailer stores, for where to buy visit http://www.storkotc.com/

The Stork OTC lets you take charge of your family planning, and act as a team while you do it. FDA-cleared applications for The Stork OTC include common fertility difficulties attributed to both men and women, including:

• Low Sperm Count
• Motility Issues
• Unfavorable Vaginal Environment (pH imbalance)
• Unexplained Infertility

Sounds pretty rad, right? If you’d like to enter to win one, simply comment below and mention you’d love to try it out. I will draw a name from the eligible entries on Thursday, September 24th and notify the winner by email. I will update this post with the winner’s name on Friday.

Finally, there will be a Stork Twitter chat tomorrow – please join me to exchange ideas on the best ways to support others during their struggle to conceive. You’ll also have a chance to win one of three $25 gift cards to CVS/pharmacy by answering some trivia questions during the chat!

When: Tuesday, September 22 at 1 p.m. ET

Where: We’ll be on Twitter – follow the #TheStorkOTC hashtag to track the conversation. You can see the details and RSVP via this Vite: http://vite.io/thestorkotc

Hashtag: #TheStorkOTC

Prizes: Three prizes will be awarded to randomly selected participants who answer the trivia questions correctly. Each prize includes a $25 CVS/pharmacy gift card

Hosts: @TheMotherhood, @TMChatHost, @CooperMunroe, @EmilyMcKhann

This content is not intended to be a substitute for medical advice. Always seek the advice of your physician.

Some Updatey Stuff


 photo IMG_2705b.jpg

Well my weekly posting was short-lived, but life has been a whirlwind lately.  Look how much my boy has grown up since I last posted! Can you even believe he’s the same baby I introduced you guys to less than two years ago? Time just FLIES when you’re having fun, and I’m enjoying every fleeting second.

In other news, I was interviewed after dropping off my (whopping three) baked goods at the fair this year, and ended up in the Hutchinson newspaper on Saturday. If you click the photo you can enlarge it to read it if you like.

 photo IMG_2725.jpg

So now everyone knows I’m just a wannabe. Ha!! And by the way, it’s not true that I place 3rd every year. I’ve placed 3rd twice (for my Favorite Banana Bread and Black Walnut Banana Bread), and didn’t place at all the other times. So yeah, pretty much doomed. It’s also not true that I’m “cautiously optimistic,” as I have no hope for placing with the banana bread competition this year.  In fact, I have no idea what recipe I’m even going to make even though I have to make it today. But I’m entering anyway. Pretty sure I’ll be doing this until I die, I’m all in and can’t stop now, even if it feels foolhardy and a time waste at this point. LOL! For new readers, you can see all about my banana bread journey here.

 photo IMG_2701.jpg

We’ve also decided to do some fundraising to try and give our son a sibling, and I raised $320 (profit) selling a ton of cupcakes at my sister’s shop recently, and am currently organizing a garage sale that will be mainly donated items. My wonderful friend, Holly, started a Gofundme page for us that you can check out here if you want the scoop.

Joshua is currently recovering from his first bout with strep throat, which has been hard on all of us. Thankfully he loves his medicine and is doing so much better already.  It is so hard seeing your baby in so much pain, and I was so relieved when the doc said it was strep. If it had been a virus we just had to ride out, I don’t know what I would have done with myself. I was about to lose it, because nothing I did was enough to make him feel better, not the Motrin every four hours, not the Hyland’s cough syrup, not diffusing Thieves oil, not feeding him fresh pineapple, and he could hardly stand to eat and drink so he lost his baby fat again. (He had the stomach flu at the beginning of the year and couldn’t eat for almost a week, that was the first time he lost it.)  So everyone is much happier now, and we’re all trying to catch up on lost sleep.  Hopefully Joshua will be eating like a pig soon and getting back the little thigh rolls I adore so much.

I’ll be sure to update you guys on the banana bread competition when I find out. If you don’t hear from me this week, you can assume it’s more bad news. Ha! ;)

TILT: My two favorite cake piping tips

Posted on

Welcome to another edition of Things I Like Thursday (TILT)! Today begins a series containing the many things I love to use to make cake & cupcake decorating quick and easy.

I’m going to start with just TWO piping tips, because I use them for nearly every cake, and/or cupcake I make. They are very inexpensive, and worth the small investment. Each of these have had about twenty five years of use between my Mother and I, and have stood the test of time. I would not be nearly so fond of making cakes and cupcakes if it weren’t for these tips.

The first is Wilton’s “Icer Tip” #789. I used it to frost both wedding cakes above, and nearly every other cake I’ve ever made. It’s wide and flat and you use it to pipe frosting in an even layer in stripes all over your cake.  This means you don’t have to crumb coat it, it means that once you stripe your cake, all you have to do is smooth the lines.  (Don’t forget my water bottle trick for a perfectly smooth finish on your frosted cake!)  You can see me in action using my trusty icing tip in the video below.

The second is just as invaluable to me, as I now go the easier route of cake-making, doing cupcakes instead.  All it takes is 1-2 seconds per cupcake to pipe on a pretty swirl and voilà! You’re done. It’s probably the fastest thing you’ll ever do with this nice a result.

white cupcakes 6-27-11

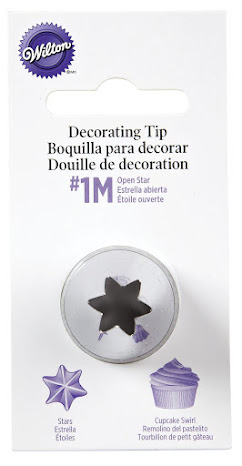
I use Wilton’s Tip 2110 (1M) for nearly all my cupcakes, as I just prefer the size of swirl it makes, and I also use it to decorate my most popular cake on this site, the Cookies ‘n Cream Cake, along with CW’s Strawberry Shortcake, and many pies, like Key Lime Pie, and yesterday’s Strawberry Cream Cheese Pie. Pretty much anything requiring a swirl of whipped cream, this is the tip I use.  I have a video tutorial on how to use it to frost cupcakes here if you want to see this tip in action.

I hope this TILT was helpful, and that you haven’t been overwhelmed with the sheer amount of links I was able to provide in just one post. Ha! Catch you next week with another cake-y edition of Things I Like Thursday.

Some links are affiliate. All opinions are my own, I wouldn’t recommend something I didn’t stand behind 100%.

Quick Coconut Oil & Kahlua Brownies

Posted on

In looking over all the food photos I have in my “future blog” folder, I’m noticing a trend. Everything is baked in the oven! In the past, I’ve tried to save most of my baked recipes to share in cooler weather, but I just bake so much in summer, that’s really all I’ve got for you. Even the main dishes I’ve been making have come from the oven.  Am I the only one? Maybe I’ve got some Australian readers eager for baked treats & casseroles? haha!

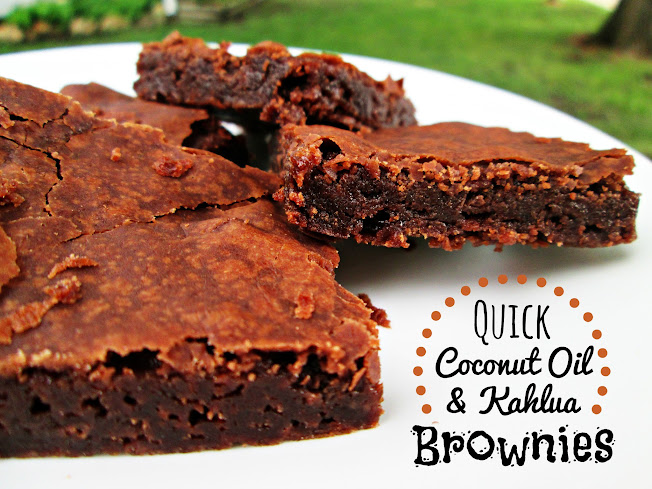
So these are a box mix recipe which I know, is probably a food crime combining wonderful virgin coconut oil in conjunction with a box mix, but it’s really good! If you’re wanting a good from-scratch coconut oil brownie you might be able to just sub coconut oil in my favorite Fudge Brownies recipe.  But if you’re in a hurry, this one will do you.

My usual trick to make box mix brownies taste homemade is to sub melted butter for the oil, but I was out, so I used coconut oil. The slight coconut oil flavor mixed with the Kahlua (I used my homemade stuff) is pretty out of this world. Using the coconut oil changes the finish on the top and although it’s got that flaky crispy layer, it’s dull, not shiny. I also noticed they were harder to remove from the pan, but nice and fudgy and the flavor is much better than just following the instructions on the back. Enjoy!

Quick Coconut Oil & Kahlua Brownies

Printable recipe
Printable recipe with picture

1 fudge brownie mix
2/3 cup virgin coconut oil, melted
2 eggs, room temperature
1/4 cup Kahlua, room temperature

Mix all ingredients and bake according to package directions.

Veronica’s note: You want the ingredients at room temperature to keep the coconut oil from hardening during the mixing. If it hardens, it will not mix evenly. Also, if your box calls for 1/2 cup oil, use 1/2 cup coconut oil, not 2/3 cup. Mine turned out pretty thin in a 9×13 pan so if you like thicker brownies, go with a smaller pan.

You can’t see in this photo, but he’s already holding a half-eaten brownie while reaching for another. These are definitely Joshua-approved. I served these to five other children and three adults besides myself, they were a hit all-around.

Apricot & Pineapple Jam

Posted on

This is yet another winner from my Foodie Mama’s cookbook (I think she still has a few available, just let me know if you’re interested) that she has not only won a blue ribbon for, but included it in a coffee cake recipe and won a blue ribbon for that as well. She’s pretty much unstoppable. :)

I don’t know what to tell you about this jam other than it’s really good! The pineapple isn’t very pronounced, but does decrease the intensity of the apricot a little and make it more exotic.  If you do adult Easter baskets like our family, this would be a wonderful addition.  A certain Mother-in-law may be getting one from the Easter bunny this year! :)

Apricot & Pineapple Jam

Printable recipe
Printable recipe with picture

1 lb. dried apricots
1 quart warm water
6 cups sugar
1 (20 oz) can crushed pineapple, undrained
5 whole cinnamon sticks
5 pint jars

Soak apricots 3 hours in warm water. Process in a food processor with blade attachment until finely ground. Place apricots and the undrained pineapples into a medium pot. Add sugar and cook rapidly until thick, stirring often. Pour into prepared jars. Insert one cinnamon stick to each jar and processes with simmering water bath about 5 minutes. Cool jars completely.

Veronica’s notes: I didn’t measure my soaking water, I just put the apricots in a very large bowl and covered them with twice as much water as the line they came to in the bowl. I let them soak for 8 hours, just because I was too busy to get back to them any sooner, and then drained before processing. I also did my canning the cheater way I learned from Suzie and Erin, which doesn’t include processing the jars in a water bath. I just put the jam in the sterilized jars and screwed on the caps and the heat from the jam sealed them all, as it always does. I only do this with jams or cranberry sauce, basically stuff with lots of sugar in it (which if you didn’t know, is an incredible preservative), and have never had any go bad within a year, though I’m not making any guarantees here and this certainly isn’t FDA approved. There’s my disclaimer so try it at your own risk. :) And perhaps it was because I didn’t process my jars in a water bath and reheat them once the cinnamon stick was inserted, but I couldn’t detect any flavor that the stick imparted so would likely just skip that ingredient unless I was going to can them properly. I might even try stirring a little cinnamon directly into the jam next time, which sounds so lovely to me.

Recipe source: Splendour In My Kitchen by Marina Castle

Daddy’s Boy

Posted on

It’s been a while since I’ve done a baby/toddler update, and even longer since I shared a video.  I took this one recently and I love it so much that I just had to share. I think it’s my favorite video to date. Joshua has suddenly turned into a Daddy’s boy and calls for his Daddy all day while he’s gone at work. This particular day, Dennis went in very early to work and Joshua didn’t get his usual morning time with him.  When I put him to bed, he woke up crying every 15-30 minutes for two hours until I finally allowed him to stay up a bit longer and wrestle with his favorite person.  You can tell he missed him. This just fills my heart so much.  Oh, and don’t be frightened by Den’s appearance, he was utterly exhausted but he got to sleep 12 hours the next day and no longer has those awful sunken eyes.

Happy Valentine’s Day!


I just couldn’t resist sharing this V-day card I made on PicMonkey just now. You may not be able to tell, but Joshua’s been very sick all week with a tummy bug and has lost a lot of weight. Today he’s starting to feel better and has his smile back. Best Valentine’s Day gift ever!

Sweet Potato Cookies


I was assigned to Saundra’s blog, Famished Fish, Finicky Shark, for the Secret Recipe Club’s Cookie Carnival. I found her recipe for Sweet Potato Cookies just after having bought a bunch of sweet potatoes on sale. I adore sweet potatoes and love baking with them (and eating them baked, and in stew, and in a casserole, and even raw cut into sticks….try it before you make that face). So sweet potato cookies – I was all over it.

What impressed me about this recipe is not only does it have sweet potatoes, which is totally unique and fun, but Saundra came up with this recipe herself.  There was no link to credit her recipe elsewhere, and I have to admit, I was skeptical. Seriously, who makes a recipe for something like sweet potato cookies and gets it right the first time?! Did she really just say “oh, I’ll throw this butter in here and add some sugars and flour and sweet potato and other sundry and various awesomnesses,” and then shazam! There was magic? Apparently so, because I went a-Googling and could find no recipe like hers anywhere. Um, Saundra? You’s be amazin’.  If I tried to do some shazam’ing like you did, there would have been a big sha-THUD and  no zam to be found.

So I should have left well enough alone because as we already know, Saundra is the amazing one, but I didn’t have enough butterscotch chips so I did some tinkering.  I will say I LOVED this base cookie recipe sans chips. So much love.  I could have just eaten the entire batch of dough by itself. Like wow.  It’s soft and tender and not very cakey like I’d expected.  Perhaps because I didn’t make her recipe according the original ingredients, I would have preferred this without any chips at all and just the glaze.  Both of them made it too sweet.  So make your choice, I would either go with her original recipe, or make mine with the glaze but leave out the chips.

I sent these to some friends in the mail along with my award winning chocolate chip cookies and fudge brownies, and one friend’s husband chose these as his favorite of all three so even being oversweet, they are pretty darn good to outrank two of the best things I make!  Thanks for sharing this fun and delicious recipe, Saundra!

Sweet Potato Cookies

1 ½ cups sweet potato puree
¾ cup unsalted butter
½ teaspoon salt
¾ cup granulated sugar
¾ cup brown sugar, packed
1 teaspoons baking soda
½ teaspoon baking powder
1 teaspoon pumpkin pie spice
1 teaspoon vanilla extract
2 ½ cups all-purpose flour
2/3 cup butterscotch chips (optional)
2/3 cup cinnamon chips (optional)

Glaze
¼ cup unsalted butter
Two dashes of salt (I forgot this so I added some salt flakes on top)
1 ½ cups powdered sugar
1 teaspoon vanilla
1-2 tablespoons heavy cream

Preheat oven to 350F. Line baking sheets with parchment paper or silpat mats; set aside.

To make the sweet potato puree, peel a large sweet potato or two medium and cut into chunks. Cover with water in a saucepan and boil until very tender, 10-15 minutes. Drain and measure out 1 ½ cups- if you have extra, set it aside for another use. Mash with a fork in a mixing bowl along with the butter to melt it into the potatoes.

Add the salt, pumpkin pie spice, and the sugars. Beat for several minutes until lightened and fluffy. Add the baking soda, baking powder, and vanilla, beating until well combined. Ad the flour and stir it in. When nearly mixed, add the chips and stir until incorporated.

Using a small cookie scoop, place the cookies evenly spaced apart on prepared cookie sheet and press down with fingers to flatten slightly. Bake for 8 minutes, or until they are starting to puff but still look ever so slightly underdone. Allow to cool on cookie sheet 5 minutes before removing to a wire rack to cool completely-they will be very soft. Repeat with remaining dough.

To make the glaze, melt the butter in a small saucepan and continue cooking over medium heat, stirring frequently, until the solids separate and turn a deep brown and the butter turns golden. Stir in the sugar and vanilla until as mixed as you can get it, smashing out lumps, then add cream a teaspoon at a time until you get your desired drizzling consistency. Drizzle over cooled cookies or put in a Ziploc bag, snip the corner, and squeeze over the cookies.

Makes about 3 dozen cookies.

Recipe source: Famished Fish, Finicky Shark

Be sure to check out the other Cookie Carnival cookies for some Christmas baking inspirations – just click the linky frog below!