RSS Feed

Category Archives: Breakfast

Triple Coconut Doughnuts (or Muffins)

Posted on

I’m not much of a doughnut girl, but when I get a hankering for one, it’s usually on a Saturday. I had one such a hankering this last Saturday, and decided to see if I could throw some together with the ingredients I had on hand. I found some coconut in the pantry and threw these together real quick, amplifying the coconut flavor with coconut milk and coconut oil, topping with a coconut glaze and a sprinkle of toasted coconut. And…perfection! Dense and moist, the perfect doughnut or muffin texture, and they keep well to enjoy leftovers the next day.

Triple Coconut Doughnuts or Muffins

Printable recipe
Printable recipe with picture

¼ cup virgin coconut oil, room temperature
1 cup granulated sugar
1 large egg
½ teaspoon vanilla extract
½ teaspoon almond extract
2 cups all-purpose flour
1 tablespoon baking powder
¼ teaspoon salt
1 cup coconut milk, or whole milk
¾ cup sweetened, shredded coconut

Glaze
2 tablespoons virgin coconut oil, melted
1 cup powdered sugar
Coconut milk or heavy cream, for thinning

½ cup sweetened, shredded coconut

Preheat oven to 350F. Grease doughnut pan(s) and/or line muffin pans with paper or foil liners; set aside.

In a large bowl, cream coconut oil and sugar for two minutes. Add egg and extracts and beat another minute. Sift together the flour, baking powder, and salt into a separate bowl. Add it alternately to the creamed mixture with the milk, starting and ending with the flour. Fold in the coconut.

Spoon into doughnut or muffin pans, filling ¾ full. Bake doughnuts 10 minutes, muffins 20 minutes, or until a toothpick inserted in center comes out clean.

While they are baking, toast the coconut and make the glaze. Place the 1/2 cup coconut in a skillet and toast over medium heat, stirring frequently until golden. Remove from heat and prepare the glaze by mixing the oil and powdered sugar together as well as possible with a fork in a small bowl. Add coconut milk or cream a little at a time until glaze consistency.

Once doughnuts and/or muffins are done, turn out onto wire rack and spoon glaze over the top. If they are cool enough to handle, you can also turn them upside down to dip into the glaze while they are warm. After glazing each, sprinkle with coconut while the glaze is still wet. Enjoy warm or allow to cool. For storing leftovers, allow to cool completely before storing in a Ziploc bag with the air pressed out.

Veronica’s notes: while the doughnuts came out of the pan with ease, perhaps due to the shorter bake time (sugar hadn’t had time to caramelize onto the pan), this batter tends to stick to even the most nonstick muffin pans and I highly recommend using liners if baking in a muffin pan. Also, the almond extract in this tends to flavor it as much as, or a little more than, the coconut. It is a nice compliment, but if you’d like the coconut flavor to come through more, especially if using cow’s milk instead of coconut, use 1/4 teaspoon or replace with more vanilla. Last, please do NOT substitute coconut milk beverage (found in the refrigerated non-dairy section) for coconut milk. Use the full-fat canned stuff.
Cake Batter Lovins

Posted on

Remember the “Cake Batter Everything” craze that swept over the food blog world in 2011? Yeah, I hopped on that and enjoyed it to the fullest.  I shared only one of my cake batter explorations with you, the Cake Batter Crispy Treats, which were my favorite cake batter flavored treat, but do you think I let the remainder of my bag of yellow cake mix go to waste? No way, Jose.

Here’s a few ideas if you need some ways to use up extra cake mix.

Cake Batter Oats. This is actually a pretty healthy recipe, considering there’s cake mix in it. And tasty too!

Cake Batter French Toast. What can I say, cake batter is such a great way to start the day. And sprinkles just make everything so happy.  This one would be fun for a birthday breakfast! I made a simple icing glaze by mixing like 1/4 cup powdered sugar with just enough milk to get it a drizzling consistency.

Cake Batter Candies. For these, I just melted some vanilla almond bark and added enough yellow cake mix to make it taste like cake batter, but not so much it got too thick.  I poured most of it in a chocolate bar mold (like the one I used for this Vegan White Chocolate), but I didn’t get a picture of that before I gave it to a friend as part of a thank you gift for turning a stain on my jeans into a work of art. The rest of it I poured into peanut butter cup molds and put sprinkles over the tops while it was still setting up.  Kids went crazy for these at a get together, even more so than my Cupcake Bites!

Have you made any cake batter flavored yums?

Potato, Onion & Spinach Hash

Posted on

This is something I threw together to use up a few things before they went bad, and ended up with a plate of magics. Weeks later, we are still eating this once or twice a week and is one of Joshua’s favorite meals.  I’ve never been very much of a potato person, but man, you can’t hardly beat crispy seasoned potatoes dipped in runny egg yolk.

Potato, Onion & Spinach Hash

Printable recipe
Printable recipe with picture

1 medium potato
2 thick slices of sweet onion
1/2 cup fresh spinach
Extra-virgin olive oil
Garlic salt & pepper to taste

Pierce the potato through the middle with a knife and microwave for 3 minutes, or until tender all the way through. Meanwhile, dice the onion. Once the potato is cooked, put a skillet on medium-high heat, and cut the potato into small cubes, removing the peel if you wish. Once the skillet is hot, add a generous swirl of olive oil to the pan, along with the potato and onion. Stir to coat with the oil, then sprinkle with garlic salt and pepper to taste. Allow to cook without stirring until golden brown on one side, then stir, trying to turn over as many of the pieces as possible. Allow to sit again until golden brown, then add the fresh spinach and cook for a few more minutes, until wilted and soft. Serve hot with eggs, or as a side dish.

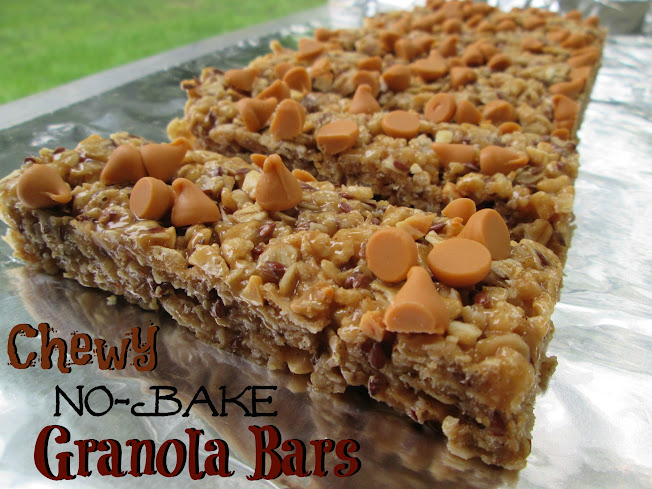
Chewy No-Bake Granola Bars

Posted on

Are you a crunchy granola bar person, or a chewy granola bar person? I’m the latter.  My favorite granola bars are the Sunbelt Bakery ones. and it has been a quest of mine for a long time to find a recipe that would duplicate their soft, chewy texture.  I felt that baking them wasn’t the way to go, as all the ones I baked were just a little too firm, a little too dry, and not chewy enough.  I made lots of my own recipes in the search to find that perfect recipe, and never did find it.

Until Sarah.  She posted a recipe for Chewy Coconut Oil Granola Bars and my search ended there.  I’m tellin’ ya, coconut oil is such a good friend in the kitchen.  Makes great cookies, coffee, and granola bars!  These are exactly what I was looking for, and a little healthier than Sunbelt Bakery’s with the flaxseed, honey, coconut oil, and lack of processed/weird ingredients.  And totally crazy delicious!

Chewy No-Bake Granola Bars

Printable recipe
Printable recipe with picture

2 1/2 cups Rice Krispies cereal
1 3/4 cup rolled oats
1/4 cup ground flaxseed* (I used whole)
1/2 cup mix-ins of your choice (I used peanuts)
1/2 cup honey
1/2 cup brown sugar
dash of salt
1/3 cup unrefined virgin coconut oil
1/3 cup natural peanut butter
1 teaspoon vanilla extract
1/2 teaspoon ground cinnamon
1/2 cup dark chocolate chunks (I used butterscotch chips)

*You can use wheat germ, wheat bran, or more rolled oats in place of the flaxseed.

Line a 9×13 pan with aluminum foil or wax paper, and grease well with cooking spray.

In a large bowl, stir together cereal, oats, flaxseed, and mix-ins. In a saucepan, stir together honey, brown sugar, and salt. Turn heat onto medium-low, then stir constantly until mixture comes to a boil. Boil for 60 seconds, then remove from heat and gently mix in coconut oil and peanut butter, careful not to splash. Stir in vanilla and cinnamon. Pour wet ingredients over the dry and mix to combine.

Press mixture into prepared pan, then evenly distribute chocolate chunks over top. If you mix the chocolate in, it will melt. Press into granola mixture with a spatula then cover and refrigerate for 2 hours to set. Cut into bars and wrap in aluminum foil or wax paper for easy transport.

Recipe source: The Pajama Chef

Banana Muffins of Perfection

Posted on

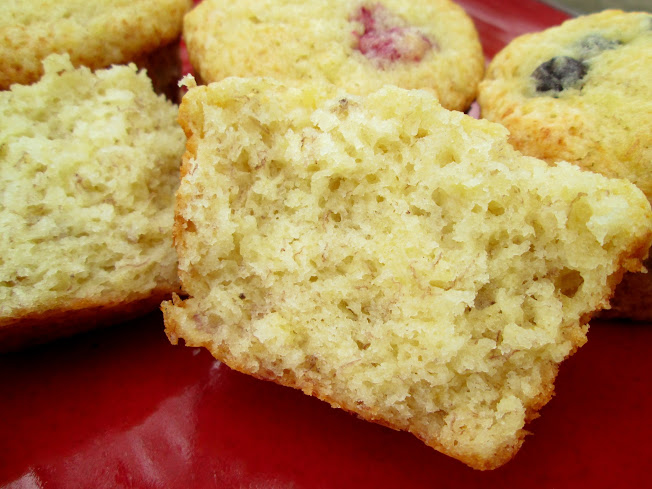
I got this recipe from my friend, Staci, and have made them twice in the last month. They were originally called “Banana Nut Muffins” but Dennis insisted on this new title and since it makes me laugh, I obliged him.  They really are perfect, so much so that I’m thinking about turning this recipe into a loaf and entering it into the fair this year.  Such a nice, soft, texture!

I shared them with an old co-worker and she deemed them the “best muffins ever.”  The base recipe is a good one that results in a tender, moist muffin with great banana flavor.  These are now my favorite thing to make with bananas!

Banana Muffins of Perfection

Printable recipe
Printable recipe with picture

2 cups (9 oz) all-purpose flour
1 tablespoon baking powder
½ teaspoon salt
½ cup butter
1 cup (7 oz) granulated sugar
2 eggs
1 1/3 cups mashed ripe bananas
1 cup mix-in’s

Sift together flour, baking powder, and salt; set aside. Cream together butter and sugar. Beat in eggs, one at a time. Stir in mashed bananas. Add dry ingredients all at once, stirring just enough to moisten. Gently stir in mix-in’s. Spoon into greased muffin tin, filling 2/3 full. Bake in 350F oven for 18-20 minutes or until golden. Makes 15-18 muffins.

Staci’s & V’s favorite mix-in’s: chopped nuts, diced prunes, chopped strawberries, blueberries, dried cranberries, chocolate chips. Staci also likes to add spices like cinnamon, nutmeg, cloves, and cardamom, but doesn’t measure so you’ll have to figure out how much you like if you add them. I’d add a teaspoon total of spices (max) if it was me, but you might like more or less.

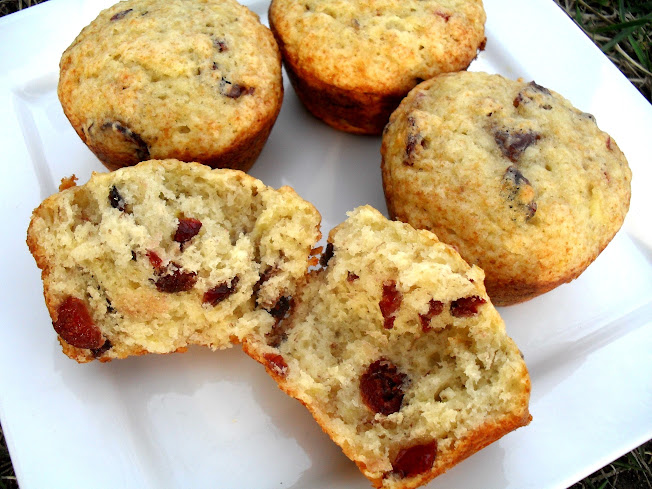
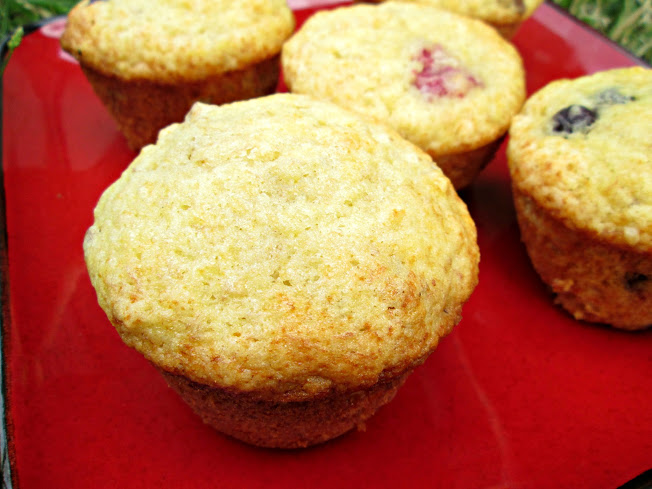
I make mine nut-free to keep them easy to chew for Joshua. My two favorite ways (so far) are with blueberries (above) and dried cranberries (first picture)! I can’t wait to try them with FRESH cranberries come fall. Oh my!

Peanut Butter Cookie Dough Baked Oatmeal

Posted on

I like keeping things simple and easy at meal time, especially breakfast, so when I discovered how much Joshua enjoys baked oatmeal, I decided to make more of it.  A pan lasts several days and it’s so nice to be able to just take out a square and heat it in the microwave. Bam. Breakfast is done. He takes care of the rest.

I made this in an attempt to make a baked oatmeal that really would be reminiscent of cookie dough, since the pumpkin didn’t really have that feel to me (granted, I may have over baked it a tad, as I tend to do a lot these days). And wow, you guys, I nailed it.  *pats self on shoulder* ;) This stuff is warm and gooey and melty and soft and creamy and really, a lot like a thick, warm cookie dough. Dennis even ate it for dessert after dinner one day, with some whipped cream on top. It’s that good. And low in sugar, or sugar-free if you want to leave the chocolate chips out. You would never guess, it’s just so good, but feel free to use sugar if you prefer. This one is definitely worth a try.

Peanut Butter Cookie Dough Oatmeal

Printable recipe
Printable recipe with picture

2 cups quick-cooking oats
4 packets stevia*
½ teaspoon salt
1/3 cup peanut butter
2/3 cup milk
1 (4 oz) snack cup of unsweetened applesauce (heaping 1/3 cup)
1 egg
2 tablespoons oil or melted butter
2 teaspoons vanilla
½ cup chocolate chips, plus more for top if desired

Mix all ingredients together well until blended. Pour batter into an 8×8 pan sprayed with oil. Bake at 350F for 30 minutes.

*If you want to use sugar, I’d recommend brown sugar for a more cookie dough-like flavor. I’m not certain on the amount, but I’d try 1/3 cup and add more to your taste if needed.

***

I have to show you guys what this looks like with the flash – the photo is cheaper-looking but this really shows off how cookie dough-like it is. It’s soooo soft and I just couldn’t capture that gooey softness as well with natural light. Honestly, sometimes the flash is the only way to show the true colors & textures. Amateur photographer problems. :)

Cookie Dough Pumpkin Baked Oatmeal

Posted on

It’s been a long time since I’ve posted recipes regularly, or even at all, and I’m hoping to start changing that. I’ve just gotten out of the habit of blogging as this active little boy in my life has taken over it almost completely.  So here’s the first recipe of hopefully many more to come this year. :)

Don’t mind the hair, he has bedhead twice a day. :)

Have you ever baked oatmeal? I haven’t been feeling traditional oats for quite a while, but I saw this recipe on Marsha’s blog, The Better Baker (her last name is Baker and she loves to bake – how cute is that?), and it sounded really yummy to me.  I baked it the minute I saw it and we enjoyed it for lunch when Joshua woke from his nap.  I wouldn’t say it’s like eating cookie dough, but it’s more like cookie dough than other baked oatmeal recipes so I’ll keep the title. :) It’s more dry and dense than traditional oats and can be eaten in hand if you don’t mind a few chocolate smears.  I found it especially good topped with some peanut butter, but my little man was really happy to eat it as is!  He and I ate the entire pan ourselves over the course of several days.

Cookie Dough Pumpkin Baked Oatmeal

Printable recipe
Printable recipe with picture

2 cups rolled oats
1/2 teaspoon salt, scant
1/2 teaspoon cinnamon
1/2 teaspoon pumpkin pie spice OR additional cinnamon
4 packets stevia or 1/3 cup pure maple syrup
1-1/3 cups pumpkin puree
2/3 cup milk of choice (cut back to 1/3 cup if using maple syrup)
2 tablespoons coconut oil, butter, or or more milk of choice
1 teaspoon pure vanilla extract
1/2 cup chocolate chips, plus more for the top if desired

Grease an 8″ x 8″ square pan. Set aside. Preheat oven to 380*F. In a large mixing bowl, stir together all dry ingredients, then add all remaining ingredients. Smooth evenly into the prepared pan, sprinkle chips on top if desired, and press down with a spoon. Bake 24 minutes, then let sit in a closed oven 20 minutes with the heat turned off. Top with syrup, or coconut or nut butter.

Recipe source: Chocolate Covered Katie, as seen on The Better Baker

Other oatmeal favorites:

Banana Oatmeal Bake – this is probably my favorite baked oatmeal dish.

Pumpkin Pie Baked Oatmeal – it’s even baked in a pie dish! :)

Savory Oatmeal – onions, cheddar, bacon, and an egg turn the classic breakfast on its head.

Baked Banana Doughnuts with Brown Butter Glaze

Posted on

My sister-in-law gave me a doughnut pan for Christmas two years ago…maybe three.  It’s what I asked for, had wanted for years, and yet I only used it to bake the doughnut mix she gave me with it until now!  What is UP with that?

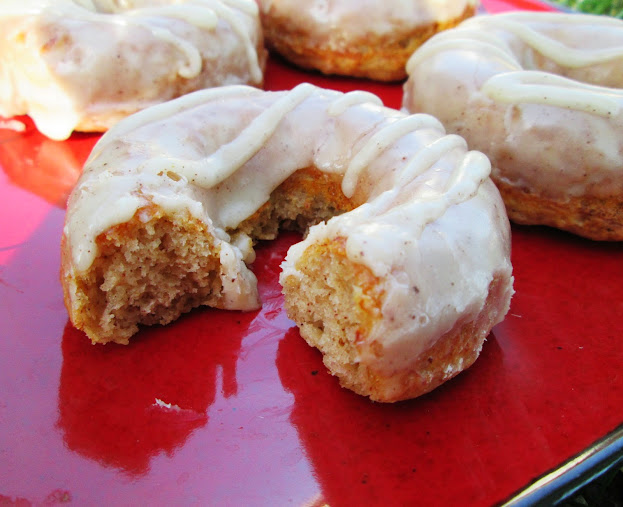
I was Pinteresting (yes, I’m allowed to turn nouns into verbs haha) and came across Shelby’s baked banana doughnuts with a browned butter rum glaze and I HAD TO HAVE IT RIGHT THEN…or at least my own version of it.  :) I had my nearly forgotten doughnut pan, a single overripe banana, and the baby was taking a nap – it was like the stars aligned and God smiled down on me in that instant. I got to work and boy oh boy. These were quick to make and so delicious!  Brown butter and banana are a match made in heaven.  Actually, browned butter makes everything better, don’t you think?

Baked Banana Doughnuts with Brown Butter Glaze

Printable recipe
Printable recipe with picture

1 cup (4 ¼ oz / 120 g) all-purpose flour
2 teaspoons baking powder
1 teaspoon ground cinnamon
¼ teaspoon salt
1 large (about 5 ½ oz / 156 g without peel) overripe banana
1 large egg
¼ cup (2 ¼ oz / 64 g) buttermilk
2 tablespoons vegetable oil
¼ cup (2 oz / 58 g) light brown sugar, packed
2 tablespoons butter
1 cup (4 oz / 113 g) powdered sugar
1-3 teaspoons milk, as needed to thin the icing

Preheat oven to 350F. Spray a 6-well doughnut pan with oil and set aside (I wipe off the top with a paper towel to reduce the amount of baked-on oil build-up on there but that is your call). Whisk together the flour, baking powder, cinnamon, and salt in a medium sized bowl. In a separate smaller bowl, mash the banana, then whisk in the egg, buttermilk, oil, and sugar. Add to the dry ingredients and stir together until just combined (a few small flour lumps are OK). You can either use a spoon to fill the doughnut pan or put the batter in a ziploc bag and snip a corner to squeeze the batter into the pan. Fill each well 3/4 full. If you have extra, you can make it into mini muffins or wait until the first batch is done baking to make a couple more doughnuts. Bake doughnuts for 12-15 minutes, or until golden and doughnuts bounce back when lightly pressed. Turn out onto cooling rack to cool completely.

While doughnuts are cooling, brown the butter. Place in a small saucepan and cook over medium heat, stirring constantly, until the solids separate and turn a chocolate brown color. Remove from heat and add the powdered sugar and enough milk to get a glaze consistency (it doesn’t take much. Dip the tops of each doughnut in the warm glaze with the cooling rack over the sink so the glaze can drip off as you finish dipping each one. If you have extra, you can put it in a ziploc bag or disposable piping bag and snip a corner to drizzle over the doughnuts because extra glaze makes them extra good! :)

Recipe source: adapted from The Life and Loves of Grumpy’s Honey Bunch

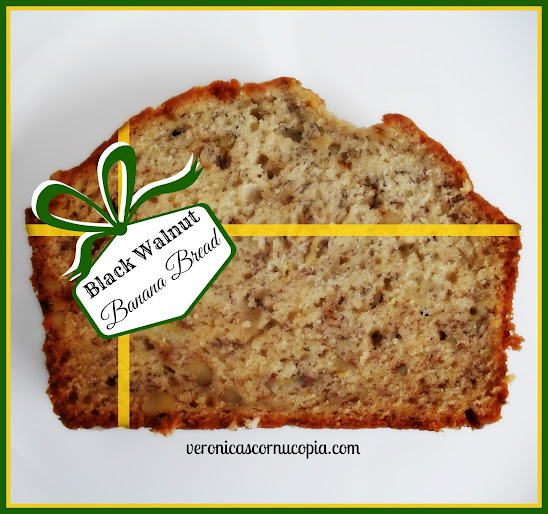
Black Walnut Banana Bread

Posted on

Well look at that, I wrapped a slice just for you! ;)

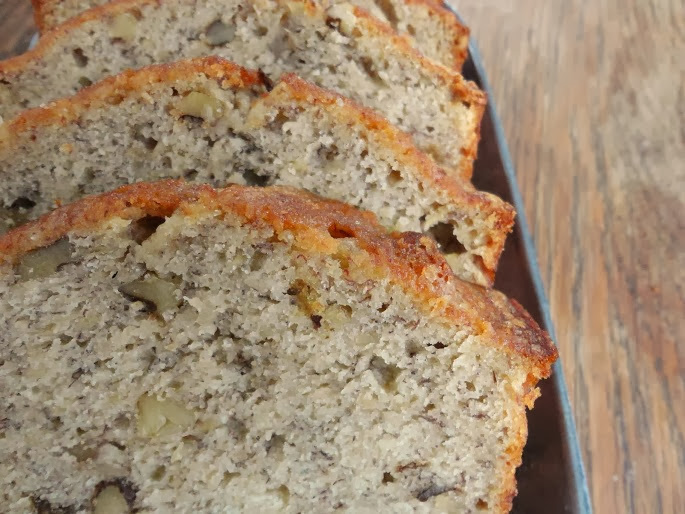
If you’ve never tasted the magic that happens when you combine banana and black walnuts, you need to try it, starting with this bread! Black walnuts used to be the only nut I used in my banana bread and I have no idea what happened but for some reason, I just stopped and totally forgot about them.  Maybe because they are harder to find, I moved on to using pecans, my overall favorite nut for baking, and didn’t remember the superior black walnut until my Mom gave me a bag from the Nifty Nuthouse recently.  I seriously wasted about three years on black walnut-less banana bread before she reminded me of the wondermosity that is the black walnut.

There is something really special about black walnuts in combination with banana. I also like to use them in banana cake- both in it and on top of the icing.  Just so good.  I can’t describe the flavor but there’s a little something extra to them that the regular walnuts don’t have.  I want to say they have a sulfuric  quality but I’m not sure that’s exactly right.  You’ll have to tell me how you would describe them because I’m at a loss.

I made this particular recipe very simple in order to showcase the banana and black walnut flavors without muddying the waters with butter or vanilla or cinnamon or  bourbon, et al.  I’m really partial to using oil in quick breads and cake because, in my opinion, it makes a superior crumb that butter just can not compete with, except in flavor, of course.  When the butter flavor isn’t necessary, I happily use oil.  I’ve made this bread both ways, and we both prefer the oil version – much more moist, tender, and almost silky.  The butter version is good, but not as good.  It’s also heavier and more dense.  I really recommend trying it this way before you scoff at the lack of butter.  You won’t believe how good it is!

Black Walnut Banana Bread

Printable recipe
Printable recipe with picture

2 cups (9 oz) all-purpose flour
1 cup (7 oz) granulated sugar
½ teaspoon salt
½ teaspoon baking soda
2 eggs
1 ½ cups (14 oz) mashed overripe banana
½ cup (3 1/2 oz) vegetable oil
½ cup (2 ¼ oz) black walnuts

Preheat oven to 350F. Spray a large 9×5 loaf pan with oil and set aside.

In a large bowl, whisk together the flour, sugar, salt, and baking soda. In a separate smaller bowl, whisk the eggs, then add the banana and oil and whisk until completely incorporated. Using a rubber spatula, scrape the wet mixture into the dry, then use the spatula to stir until somewhat blended. Add the black walnuts and stir until everything is just combined.

Pour into prepared pan and bake for 70 minutes, or until toothpick inserted in the center comes out clean. Invert onto your hot pad-covered hand and then invert again onto a cooling rack to cool as long as you can stand it. Wrap up to seal in moisture if it doesn’t get eaten in one sitting. :)

Just had to share this cautionary photo of my thumbs after I’d tried to harvest my own black walnuts since they grow abundantly in the neighborhoods around here. It took me two hours to fill maybe a single teaspoon with tiny little nut shards (it’s so hard to get through the shell!) and my thumb nails broke through the latex gloves I was wearing while I was working on them and my thumbs were stained like this for weeks. I highly recommend paying for them – the free nuts are just not worth the effort!

Lemon Muffins

Posted on

I adore baking up lemony treats any time of year, but lemon has such a bright and cheerful color and flavor that I find it particularly appealing on a cold winter day.  I picked this recipe from my foodie mama’s cookbook to brighten up one such day a couple weeks ago.  Her cookbook is self-published, the same kind that churches print for fundraising, so it’s pretty straightforward without a lot of extra words, but at the end of this recipe, she said, “Wonderful!” so I knew it had to be good.  If she didn’t say anything at the end of her blue ribbon recipes, which I’ve tried and loved (like this banana bread and this peanut butter pie), I knew this one had to be a real winner.  And I was right.

Seriously y’alls.  The texture.  The flava flav.  It’s all kinds of wondermous.  It’s like someone crossed a pound cake with angel food cake and turned it into a muffin.  The lemon flavor is really incredible, with lemon zest and juice in the muffins, and a lemon syrup soaking down into them.  The only thing I almost changed was the walnuts, because nuts seemed such a strange addition to a lemon muffin to me.  Then I almost decided to use another nut,  like almonds or macadamia nuts because they seemed more suited.  I’m so glad I went with my foodie mama’s instinct because she never steers me wrong.  The walnuts are perfect and they even take on a pretty golden color from being toasted and baked, and look so appealing studding the yellow muffins.

Marina still has copies of her cookbook available and is selling them for $10 plus $3.50 S&H.  Email me at vraklis@yahoo.com if you’d like to purchase one!  You can see some of the recipes in her cookbook here.

Lemon Muffins

Printable recipe
Printable recipe with picture

Lemon syrup
1/2 cup granulated sugar
1/4 cup fresh lemon juice

Muffins
4 eggs, separated
1 cup (2 sticks) unsalted butter, softened
1 cup (7 oz) granulated sugar
3-4 teaspoons lemon zest
2 teaspoons baking powder
1 teaspoon salt
2 cups (8 1/2 oz) all-purpose flour
3/4 cup walnuts, toasted & finely chopped
1/2 cup fresh lemon juice

Preheat oven to 350F. Combine the sugar and lemon juice for the syrup and set aside. Butter or place paper liners in 12 muffin tin wells.

Making sure your mixer and beater(s) are completely grease-free, beat the egg whites on high speed until stiff. Scrape into a separate bowl and set aside. Cream the butter and sugar until light, about five minutes. Add egg yolks, lemon zest, baking powder, and salt, and beat well. Add the flour in three additions, alternating with the lemon juice, beating until combined. Gently fold the beaten egg whites into the batter, then stir in the walnuts. Fill prepared muffin tins almost full to the top and bake for about 25 minutes, or until a toothpick inserted in center comes out clean.

Leaving the muffins in the tins, pierce them several times with a fork while still hot. Drizzle the lemon syrup over the tops, then remove the muffins from the tins to cool completely on a wire rack.  Store in an airtight container.

Recipe source: Marina Castle