RSS Feed

Tag Archives: best

One-Bowl Chocolate Cake

Posted on

This is a very simple chocolate cake but I daresay it might be even better then my previous favorite. It is incredibly moist and so tender, with the perfect amount of chocolate flavor. It is a perfect cake to whip up when you don’t have time for a fussy recipe, and who needs fussy when simplicity brings such deliciousness? I hope you try it.

One-Bowl Chocolate Cake

Printable recipe

Printable recipe with picture

2 cups all-purpose flour

2 cups sugar

1/2 cup baking cocoa

2 teaspoons baking soda

1 teaspoon baking powder

1/2 teaspoon salt

2 large eggs, lightly beaten

1 cup canola oil

1 cup buttermilk

1 cup hot water

Frosting of your choice

Colored sprinkles, optional

Preheat oven to 350°. Grease a 13×9-in. baking pan, or spray with cooking oil. In a large bowl, whisk the first six ingredients. Stir in eggs, oil and buttermilk. Add water; stir until combined.

Transfer batter to prepared pan. Bake 35-40 minutes or until a toothpick inserted in center comes out clean. Cool completely in pan on a wire rack. Frost cake. If desired, decorate with sprinkles.

Chocolate Buttercream Frosting: In a large bowl, beat 1/2 cup softened butter until creamy. Beat in 2 cups confectioners’ sugar, 1/4 cup baking cocoa, 1-1/2 teaspoons vanilla extract and 3-4 tablespoons 2% milk (I used heavy cream) to achieve desired consistency.

*Veronica’s notes: I sifted my dry ingredients since my cocoa powder was really lumpy. If you find yourself in the same boat, with big clumps of cocoa powder in the dry ingredients that won’t mix out, I would suggest sifting so you don’t have any clumps.

Recipe source: Taste of Home

Velvet Banana Bread – my blue ribbon winner!


It all started in 2009 when I entered the foods competitions at the Kansas State Fair for the first time, and met a wonderful & talented woman named Colleen Woker.  We met while watching the pie judging and I asked her if she’d won any ribbons in the other competitions. She listed off approximately 241 things she’d placed in, including getting “Best in Show” for her banana bread, which as far as I understand means that her banana bread was so good, that the judges deemed it better than anything else submitted for judging in the foods competitions. I mean, it beat cakes!  CAKES! I was so impressed by her and in that moment, knew that some day I had to get myself a blue ribbon in the banana bread competition.  Little did I know it would become nearly an obsession.

In my quest to win a blue ribbon, I’ve made over fifty different banana bread recipes, and no matter how hard I tried to find the best, most perfect banana bread, the highest I ever placed was 3rd.  I really thought I was doomed to never get my blue ribbon, or even a red one.  This year I had no idea what recipe I was going to make until the day before the competition.  In fact, I had even forgotten to buy bananas in advance to let them get super duper ripe, and all I had was bananas that were still green at the stems.  Not acceptable!

I posted a last minute plea on Facebook for rotten bananas and was given some by two wonderful women (thank you Lacey & Lisa!), enough to make a practice loaf or two if I could find the time.  I decided to take my best good friend, Jackie‘s, advice and replace the pumpkin in my most favoritest pumpkin bread recipe with bananas, which she has been doing for a year.  That recipe has 1/2 cup of water in it, which I’d never ever seen in all the banana bread recipes I’ve read in my search for the perfect one, and I was so scared to try it.  I asked her probably five times, “Do you really put the water in it when you make it? REALLY?” She assured me she did, and that it wasn’t wet or gummy, but really similar in texture to the pumpkin bread.  That sold me, because that soft texture is the ultimate for me in a quick bread.

Despite my deep fears of including the water, and the temptation to replace it with something more exciting like milk or pineapple juice, I gave her idea a go, adding a touch of cardamom, and was absolutely floored by the result.  I had never in my life had such tender, soft banana bread.  And so delicious, sweet & perfectly banana-y with a the perfect balance of spices to set it off.  Unfortunately, it was one of the uglier loaves I’d ever made, and since 25% of the judging score was based on appearance, I lost all hope right there.  Because I knew it was too good not to submit, but also knew it was too ugly to win a blue ribbon. I just hoped it was good enough to win a red.

So many things went wrong in making the official loaf and my spirits sunk deeper and deeper with each obstacle. I kept questioning why I was even bothering.  This wasn’t the regular little banana bread competition, this one was sponsored by King Arthur Flour and the first place prize was a $150 gift card to their catalog, which is much bigger than the usual $9 prize.  This was a big deal, and more people would be entering than usual.  I didn’t have a chance! I was exhausted, would have loved to sleep in the next morning, didn’t want to waste the gas or the effort when I knew it was hopeless, but I’d been in the paper about the being the Banana Bread Queen Wannabe, and everyone on Facebook knew about it.  I had to go.

When I arrived to submit my bread, I noticed that everyone around me had loaves that were the same dark shiny brown, which I found unattractive.  That made me feel a little better, until I looked to see if any of my other three baked goods I’d already turned in had placed, and they hadn’t.  I knew it was going to be my very first no-ribbon year, and I went home defeated, knowing my quest might never end.

But when we returned to the fair as a family two days later, there it was. My ugly brown banana bread sitting front and center.  Next to a blue ribbon.
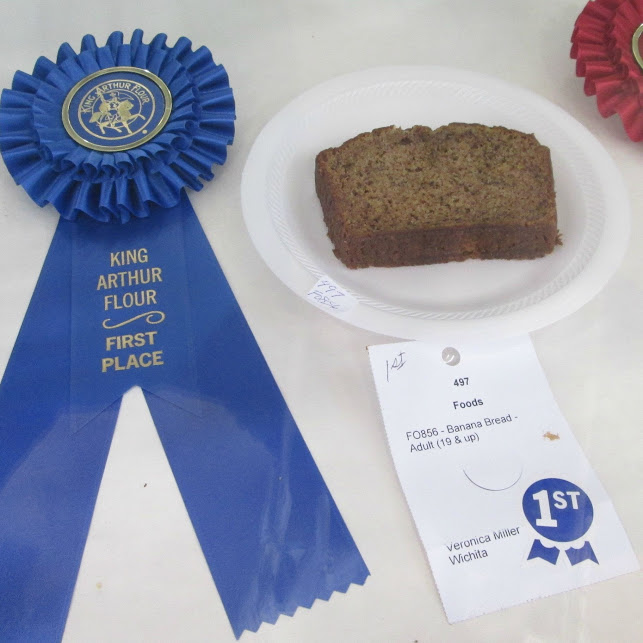
I squealed. I hopped around.  I squealed and hopped some more.  I think there was a lot of, “I can’t believe it!!”  I gushed my entire banana bread story to the poor couple standing nearby when my freak out started.  They were so happy for me, but everyone else looked pretty perturbed & disturbed by my antics.  I stopped myself several times from running up to random people to tell them I won.  Joshua was grinning and giggling, clearly trying to figure out what had Mom so excited.  I took his hands and we did a little celebration dance together.  When Dennis approached us (he’d been in the bathroom), I wanted to let him discover it on his own but I just couldn’t contain myself and as soon as I saw him I beamed and jumped up and down and waved him over, pointing wildly at the display case where my winning bread resided. He knew instantly of course what that meant, and he hopped up and down with me a little in celebration.  Joshua was so happy to see all the happiness and I was so happy, and Dennis was so happy, I thought all our heads might explode.

It took six years and countless loaves of banana bread, but I did it. The blue ribbon is MINE! Thanks be to God, to Jackie, Lisa, Lacey, and to Colleen for not entering the banana bread competition this year and giving me a chance.  And to everyone who has rooted for me all these years, thank you!!  My quest is complete and I couldn’t be happier to have found my very favorite recipe for banana bread and gotten the blue for it so that I never have to try another recipe again.  I’m so DONE with new banana bread recipes.  This one is definitely my new favorite, and I truly may never make another recipe again.

Velvet Banana Bread

Printable recipe
Printable recipe with picture

1 cup (8 oz) mashed overripe banana
1 1/2 cups (10 1/2 oz) granulated sugar
1/2 cup (4 1/8 oz) vegetable oil
1/2 cup (4 oz) water
2 large eggs
1 3/4 cups (7 1/2 oz) King Arthur Unbleached All-Purpose Flour
1 teaspoon baking soda
1 teaspoon cinnamon
1/2 teaspoon salt
1/2 teaspoon baking powder
1/4 teaspoon nutmeg
1/4 teaspoon ground cloves
1/4 teaspoon cardamom

Preheat oven to 350F. In a large mixing bowl, combine banana, sugar, vegetable oil, water, and eggs. Whisk until well mixed. Measure the flour, baking soda, cinnamon, salt, baking powder, nutmeg, and cloves into a separate bowl and stir until combined. Slowly add the dry ingredients to the banana mixture, beating until smooth. Mixture will be very very thin and it’s OK to mix until no flour streaks remain, but if you see little lumps of flour that won’t mix out, don’t sweat it, they will dissolve while baking and overmixing will make this tender loaf tough and dry.

Spray the bottom of a 9×5 loaf pan and pour batter in (if your pan sticks, go ahead and grease the whole thing). Bake for 60-70 minutes or until a toothpick inserted in center comes out clean. Immediately remove from pan, and cool at least 15 minutes before slicing. Remove from pan immediately and allow to cool at least 15 minutes on a wire rack before slicing. Cool completely before wrapping leftovers in plastic wrap.

Veronica’s notes: If you aren’t measuring your ingredients on a scale, please use a very light hand when measuring the flour, spooning it gently into the cup and not packing it at all before leveling it.

Also, I only left the sides of my pan ungreased because the state fair judges have disqualified me in the past for greasing the whole pan. According to them, this is a baking sin and the sides of your bread will be much more tender if you grease only the bottom. This works fine with my new nifty galifty USA Loaf Pan because it’s crazy nonstick, but if you have any other not fabulously non-stick pan, you’d better go ahead and grease the sides. I honestly can’t tell a difference in the finished loaf whether the sides have been greased or not, the judges need to chill.

Speaking of loaf pans, be sure to use a large 9×5 as this is too much batter for an 8×4 loaf pan.  If you only have a small loaf pan, make some muffins with the extra batter, but don’t fill your pan more than 3/4 full.

Lastly, if you overbake your loaf a bit (I did on the one photographed, by a couple minutes because I was busy when the timer went off), don’t forget my water trick. It works on quick breads as well as cakes! Spray the sides and bottom well with water, don’t be shy with it, and it will all absorb while cooling and soften those hardened edges right up.

TILT: some more kitchen favorites

Posted on

Welcome to another edition of TILT: Things I Like Thursday.

Doughmakers 15-Inch Large Pizza Pan

First up is the pizza pan I have used to make every pizza on my blog (here’s the whole list if you’d like it), plus many more.  This one was recommended to me by Laura Flowers, previously known as The Cooking Photographer, who is also the person who supplied me with the chocolate chip cookie recipe that won me a blue ribbon!  All that to say, I trust this woman, and her recommendation was spot on.  This pan bakes up perfect crusts, and has a pebbled surface that prevents anything from sticking to it.

Fun note: this is also the pan I used for the My Little Pony cake display. You can see the surface of the pan in many of the prep photos on that post, and it still looks new after five years of use.  It’s made to last.


OXO SoftWorks Can Opener

Next up is something very simple: a can opener. I was so fed up with can openers that didn’t last before I bought this little gem.  It was recommended to me by two different friends on opposite sides of the country, who’ve both had theirs for years (one more than ten, the other I believe was five), and it still works perfectly.  I haven’t had mine very long, but it already has impressed me. I had bought some higher priced ones that were already wearing out after a few months of use. This simple little gadget has made me very happy.


Gourmet Rolling Fresh Herb and Multipurpose Kitchen Mincer

This is what Teri uses to make her homemade noodles, so I bought one and have used it to make thousands of delicious noodles over the last four years.  While affordable, it is good quality, I haven’t had any trouble with it at all.  And of course, you can also use it to mince your herbs.

Last but not least is my beloved canning funnel.


Prepworks Regular and Wide Mouth Canning Funnel

I love that it fits most any size jar, and has an outer collar that keeps the funnel lifted off the counter when not in use, preventing contamination and minimizing mess if you need to sit it down while canning for any reason.  Also, the handle doesn’t get piping hot as you fill jars – no burnt fingers!  It also features headspace measurements for precise filling. I love it so much.

Thanks for TILT’ing it up with me today, folks.  You can check out last week’s TILT on USA Pans if you missed it, and if you are thinking about cloth diapering, check back next Thursday for some cloth diaper fun. :)

Full disclosure: I am not being compensated for these reviews, I just really love these things and think you deserve to know about them!  This post does contain affiliate links and I will earn a commission if you buy anything after clicking the links. Thank you for supporting my blog!

Things I Like Thursday: USA Pans

Posted on

I’m starting something new!  Things I Like Thursday. TILT.  I like it. :)  I hope you like it too.

First off, I’m a thrifty person, as we are a family of four (don’t forget the dog – she is almost as expensive than the toddler!) living on one small income, so I try to buy things that are lower in price.  However, I am also willing to save and pay more for something that is really good quality because I’ve learned over and over, the hard way, that you almost always get what you pay for.  Not always, but usually.  And you actually do end up saving money, and getting better results, by paying more for high quality pans that last a lifetime than paying for $5 pans over and over and over.

Which leads me to my favorite pans.  I have bought a lot of cheap pans and the results I got with them were OK, not great, but I’m a good baker, so it wasn’t terrible.  I finally decided, after the state fair judges told me for the millionth time not to grease the sides of my pans (and finally disqualified me for doing so after many warnings), that it was time to buy some really killer pans that baked goods would actually come free of, even if I didn’t grease the sides.

I did some research, comparing different brands, and I was swayed by the overwhelmingly positive reviews on Amazon for the USA pans.  So despite them costing more than I’d usually like to pay, I used some of my state fair winnings money several years ago to purchase a loaf pan and two muffin pans.

USA Pans 6-Piece Bakeware Set

Oh my wow, people.  These pans are amazing.  I actually had previously purchased an even higher priced Williams-Sonoma Goldtouch Nonstick Loaf Pan with a gift card I got for a birthday, and these pans beat the pricey Goldtouch pans out of the park.  Yes, the Goldtouch pans are nicely nonstick, and they give breads and muffins an excellent rise, but they also consistently over-browned the sides and bottom of my baked goods.  And dark brown on the sides, golden on the top is just not a good look for baked goods.  State Fair judges are definitely not fans of that look. The pans also tend to collect yucky stuff in the corners that was a lot of work to get out with a toothpick.


USA Pans 9 x 5 x 2.75 Inch Loaf Pan, Aluminized Steel with Americoat

The USA Pans are not only fabulously nonstick, and give your baked goods an excellent rise, but they do not over-brown the bottom and sides of your baked goods, and do not collect gunk in the corners.  I have also had no problems with rust, and my pans are still in the same condition they were when I bought them two years ago.


USA Pans 8.5 x 4.5 Inch Aluminized Steel Loaf Pan with Americoat Loaf Pan

I can now present my quick breads to the judges without having the “fry line,” as they call it, on the sides, and last year I was not disqualified.  In fact, my Black Walnut Banana Bread got third place. (Yes, the blue ribbon STILL eludes me! One day, people, one day. Here is the main part of my Banana Bread adventures if you’re unfamiliar with my epic quest for a blue ribbon and want to catch up.)

USA Pans 5-1/2 by 3-Inch Mini Loaf Pan, Set of 4

I will say that the one drawback with the muffin pans is that they won’t fit side by side in a regular-sized oven if you want to bake two dozen muffins or cupcakes at once. Which I often do.  It hasn’t slowed me down though, I just put one in the middle rack on the far right, and one on the very top, far left. The bottom one gets done first and I move the top one down to finish, or sometimes just leave it up there to slowly finish.  It really upset me when I discovered they wouldn’t fit side by side, but I don’t mind it at all now.  Since it bothered me so much, though, I wanted to make sure to mention it so you guys don’t have any surprises if you decide to buy them!  They are definitely my favorite muffin pans, even with the unfortunate size problem.


USA Pans 12 Cup Cupcake/Muffin Pan, Aluminized Steel with Americoat

I highly recommend USA pans to anyone that enjoys baking.  They are definitely “Things I Like.” :)

Check back next Thursday for another kitchen edition of TILT! After that I might get all wild and crazy with posts on cloth diapers and essential oils. I be so crunchy! :D

Full disclosure: I’m not being paid to provide this review, nor was I provided with anything free to do it.  I just really LOVE these pans and want to spread the word.  There are affiliate links contained in this post, and I will earn a commission if you decide to purchase any of these items through the links I provide, but again, the thoughts and opinions stated here are 100% my own. Thank you for supporting my blog! :)

Banana Muffins of Perfection

Posted on

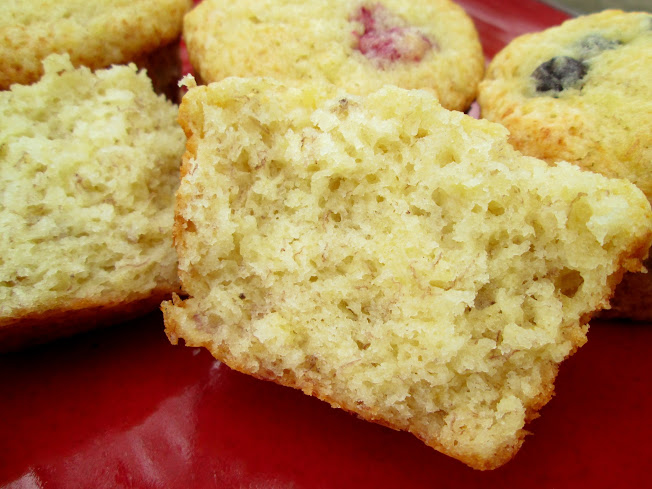
I got this recipe from my friend, Staci, and have made them twice in the last month. They were originally called “Banana Nut Muffins” but Dennis insisted on this new title and since it makes me laugh, I obliged him.  They really are perfect, so much so that I’m thinking about turning this recipe into a loaf and entering it into the fair this year.  Such a nice, soft, texture!

I shared them with an old co-worker and she deemed them the “best muffins ever.”  The base recipe is a good one that results in a tender, moist muffin with great banana flavor.  These are now my favorite thing to make with bananas!

Banana Muffins of Perfection

Printable recipe
Printable recipe with picture

2 cups (9 oz) all-purpose flour
1 tablespoon baking powder
½ teaspoon salt
½ cup butter
1 cup (7 oz) granulated sugar
2 eggs
1 1/3 cups mashed ripe bananas
1 cup mix-in’s

Sift together flour, baking powder, and salt; set aside. Cream together butter and sugar. Beat in eggs, one at a time. Stir in mashed bananas. Add dry ingredients all at once, stirring just enough to moisten. Gently stir in mix-in’s. Spoon into greased muffin tin, filling 2/3 full. Bake in 350F oven for 18-20 minutes or until golden. Makes 15-18 muffins.

Staci’s & V’s favorite mix-in’s: chopped nuts, diced prunes, chopped strawberries, blueberries, dried cranberries, chocolate chips. Staci also likes to add spices like cinnamon, nutmeg, cloves, and cardamom, but doesn’t measure so you’ll have to figure out how much you like if you add them. I’d add a teaspoon total of spices (max) if it was me, but you might like more or less.

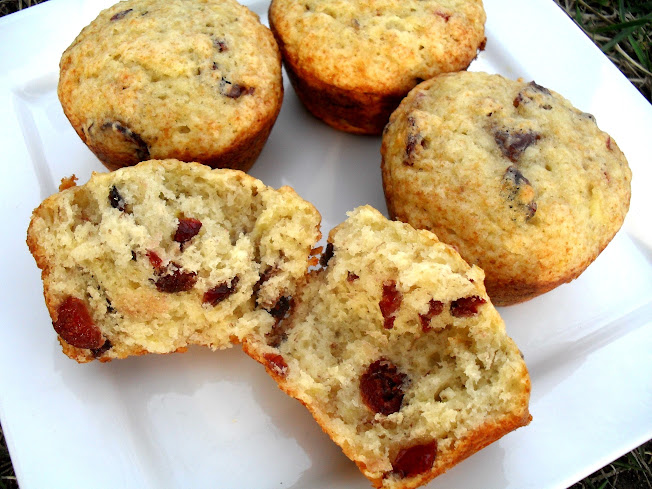
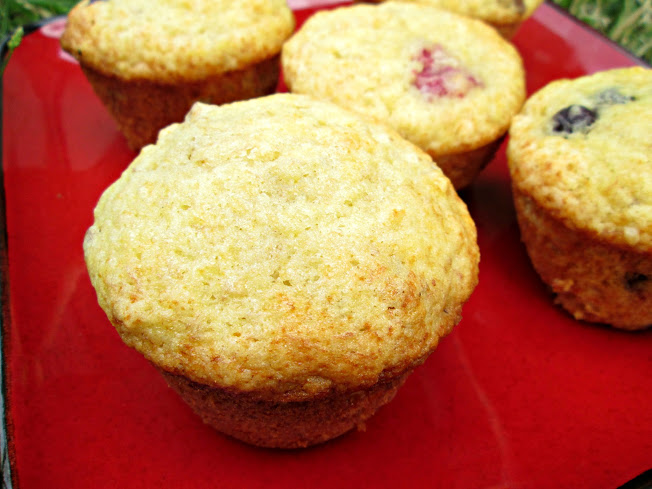
I make mine nut-free to keep them easy to chew for Joshua. My two favorite ways (so far) are with blueberries (above) and dried cranberries (first picture)! I can’t wait to try them with FRESH cranberries come fall. Oh my!

Mom’s Goulash

Posted on

I never learned to make goulash – I just knew it had noodles, ground beef, and tomatoey stuff going on in it, according to my Mom’s memories of what her mother made. But she never made it so I just came up with my own way of making it which was sort of like the same way I made spaghetti with meat sauce, but just with macaroni noodles instead.  I have my favorite version of my own version posted here.

I finally had real (real as in the Americanized real, not the Hungarian real) goulash at my in-law’s house.  I’d been wanting to get my MIL’s recipe for a long time, because although Dennis never says “this isn’t like Mom used to make,” I’ve always wanted to cook his favorite meals that he grew up eating and goulash topped that list.  His Mom’s goulash is really, really good!  After enjoying it on Easter, I asked her exactly what she put in it so I could recreate it at home.  I’ve never turned out better goulash and Den’s favorite is now one of my absolute favorites as well. We could eat this almost every week!

Mom’s Goulash

Printable recipe
Printable recipe with picture

1/2 lb macaroni
1 1/2 lbs ground beef
1 large onion, diced
garlic salt, pepper, chili powder, & hot sauce to taste
2 (14.5 oz) cans whole stewed tomatoes, undrained
2 tablespoons ketchup
Tomato juice as needed

Cook the macaroni to al dente according to package directions. While it’s cooking, brown the ground beef and onion together in an extra-large skillet or in a dutch oven. Drain and season with spices to taste. In a large bowl, mash tomatoes with potato masher and add to beef along with the ketchup. Drain macaroni and add to the beef mixture, stirring well. Taste and add additional seasoning as needed. I didn’t need to add any tomato juice to mine, but if you like yours very juicy you can add as much tomato juice as you like. Phyllis adds it to her leftovers, which I would also recommend, because the noodles tend to soak up all the juice with time.

Recipe source: Phyllis Miller

P.S. Happy anniversary to my hubby! These have been the best 14 years of my life.

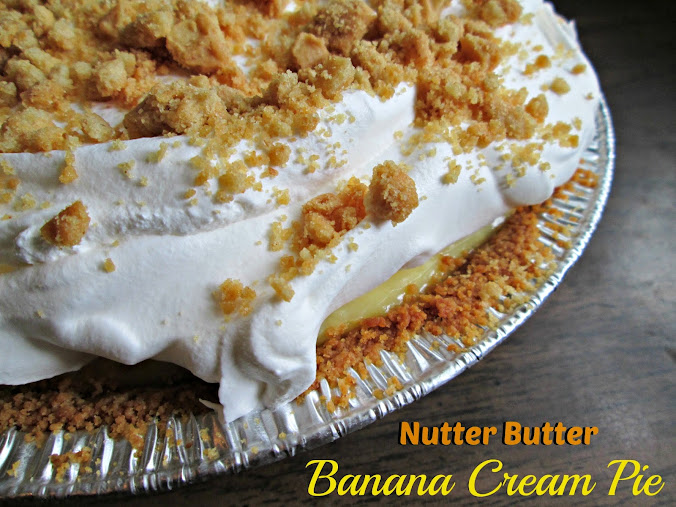
Nutter Butter Banana Cream Pie

Posted on

This month for the Secret Recipe Club I was assigned to Our Eating Habits – pretty nifty considering I had Jamie’s blog last month!  Jamie called my blog “pay dirt” and I’d have to say the same of hers – there were just so many comfort food recipes (my favorite kind!) that I had a blast browsing through them.  I decided to make something for our annual Mother’s Day picnic from her blog and ended up making two things, this delicious pie and Smoky Baked Beans – both fabulous!

There was only one piece of pie left when we arrived late to the picnic (the pie preceded us in my IL’s van), but I had a good excuse to make it again in order to get pictures of the inside – my Father-in-law’s birthday was coming up, and he just so happens to adore banana cream pie.  Turns out so do I. It was so hard not to hog the pie all to myself but I took my single slice and let him have the three pieces that were left after we’d all had one.  He raved, everyone raved, and the pie is an official success.  Thank you, Jamie, for sharing such a fun and delicious recipe! I never would have thought to use Nutter Butters for a pie crust but it is the perfect compliment to the banana cream filling.

Nutter Butter Banana Cream Pie

Printable recipe
Printable recipe with picture

Crust
12 nutter butter cookies
1- 1/2 tablespoons cream cheese, softened

Banana Cream Filling
3/4 cup white sugar
1/3 cup all-purpose flour
1/4 teaspoon salt
2 cups milk
3 egg yolks
2 tablespoons cold butter
1 1/4 teaspoons vanilla extract
3-4 bananas, sliced

Topping
1 (8 oz) tub frozen whipped topping, defrosted
4 Nutter Butters, crushed
Place 12 Nutter Butters in food processor and pulse until fine crumbs. Add cream cheese and process until completely incorporated. Press into 9″ pie plate (not deep dish) and bake at 350F for 12 minutes. Set aside to cool while you continue with the recipe.

In medium-sized saucepan whisk together white sugar, flour, and salt.  Whisk in the milk and cook over medium heat, whisking constantly, until bubbles form. Cook for additional 2 minutes, whisking constantly to avoid scorching. Remove from heat.

Place egg yolks in a small bowl and whisk. Whisk in a small amount of milk mixture to egg yolks, then repeat a second time.  Pour egg yolk mixture into remaining milk mixture in pot and whisk to combine. Return to burner and heat again over medium heat for about 2 more minutes. Remove from heat and stir in butter and vanilla. Slice bananas into the pudding and stir gently to combine well, then pour and smooth into prepared crust.  Place plastic wrap directly on top of the pie to seal out air and refrigerate until ready to serve, at least four hours.  Before serving, spread whipped topping over the top and sprinkle on the crushed Nutter Butters.

Recipe source: Our Eating Habits

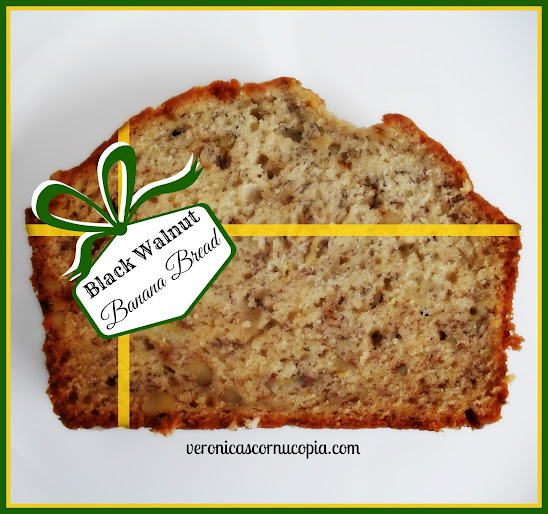
Black Walnut Banana Bread

Posted on

Well look at that, I wrapped a slice just for you! ;)

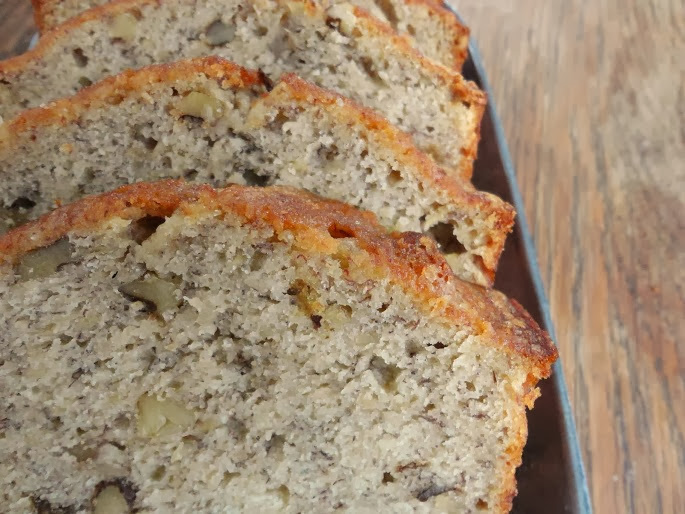
If you’ve never tasted the magic that happens when you combine banana and black walnuts, you need to try it, starting with this bread! Black walnuts used to be the only nut I used in my banana bread and I have no idea what happened but for some reason, I just stopped and totally forgot about them.  Maybe because they are harder to find, I moved on to using pecans, my overall favorite nut for baking, and didn’t remember the superior black walnut until my Mom gave me a bag from the Nifty Nuthouse recently.  I seriously wasted about three years on black walnut-less banana bread before she reminded me of the wondermosity that is the black walnut.

There is something really special about black walnuts in combination with banana. I also like to use them in banana cake- both in it and on top of the icing.  Just so good.  I can’t describe the flavor but there’s a little something extra to them that the regular walnuts don’t have.  I want to say they have a sulfuric  quality but I’m not sure that’s exactly right.  You’ll have to tell me how you would describe them because I’m at a loss.

I made this particular recipe very simple in order to showcase the banana and black walnut flavors without muddying the waters with butter or vanilla or cinnamon or  bourbon, et al.  I’m really partial to using oil in quick breads and cake because, in my opinion, it makes a superior crumb that butter just can not compete with, except in flavor, of course.  When the butter flavor isn’t necessary, I happily use oil.  I’ve made this bread both ways, and we both prefer the oil version – much more moist, tender, and almost silky.  The butter version is good, but not as good.  It’s also heavier and more dense.  I really recommend trying it this way before you scoff at the lack of butter.  You won’t believe how good it is!

Black Walnut Banana Bread

Printable recipe
Printable recipe with picture

2 cups (9 oz) all-purpose flour
1 cup (7 oz) granulated sugar
½ teaspoon salt
½ teaspoon baking soda
2 eggs
1 ½ cups (14 oz) mashed overripe banana
½ cup (3 1/2 oz) vegetable oil
½ cup (2 ¼ oz) black walnuts

Preheat oven to 350F. Spray a large 9×5 loaf pan with oil and set aside.

In a large bowl, whisk together the flour, sugar, salt, and baking soda. In a separate smaller bowl, whisk the eggs, then add the banana and oil and whisk until completely incorporated. Using a rubber spatula, scrape the wet mixture into the dry, then use the spatula to stir until somewhat blended. Add the black walnuts and stir until everything is just combined.

Pour into prepared pan and bake for 70 minutes, or until toothpick inserted in the center comes out clean. Invert onto your hot pad-covered hand and then invert again onto a cooling rack to cool as long as you can stand it. Wrap up to seal in moisture if it doesn’t get eaten in one sitting. :)

Just had to share this cautionary photo of my thumbs after I’d tried to harvest my own black walnuts since they grow abundantly in the neighborhoods around here. It took me two hours to fill maybe a single teaspoon with tiny little nut shards (it’s so hard to get through the shell!) and my thumb nails broke through the latex gloves I was wearing while I was working on them and my thumbs were stained like this for weeks. I highly recommend paying for them – the free nuts are just not worth the effort!

White Chocolate Macadamia Nut Cookies

Posted on

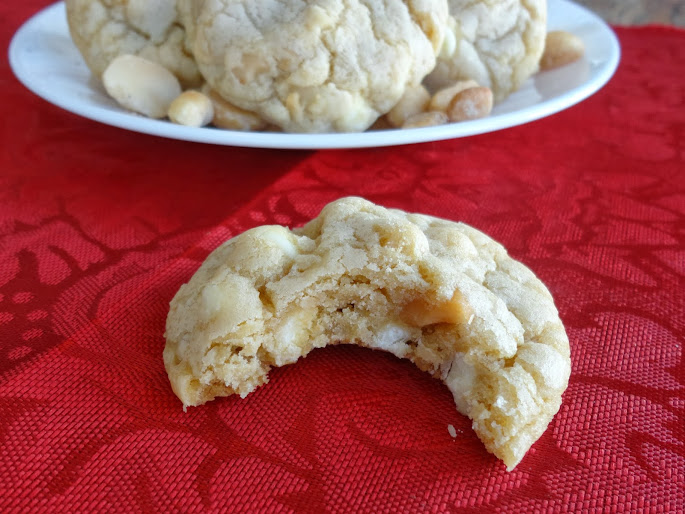
Looky what I did! I kind of feel like a rock star, having made my first batch of cookies post-baby, and not even the bar kind. The kind you actually form the dough into individual balls before baking.  I still haven’t recovered the sleep I lost over them since devoting this kind of time to baking requires staying up at night while the baby is sleeping, but they were oh so worth it.  And who am I kidding, I do that every night anyway! :)

Mel worked hard to perfect her recipe, and the cookies are truly wonderful.  Soft and chewy, which is my favorite cookie texture, with the crunch of macadamia nuts and the complimentary sweetness of white chocolate.  Cookie perfection.

White Chocolate Macadamia Nut Cookies

Printable recipe
Printable recipe with picture

1 cup (2 sticks) salted butter, softened
3/4 cup granulated sugar
1 cup packed light brown sugar
2 teaspoons vanilla extract
2 large eggs
3 cups all-purpose flour
3/4 teaspoon salt
1 teaspoon baking soda
12 ounces white chocolate chips
1 cup macadamia nuts, coarsely chopped
1 cup toasted coconut (optional)

Preheat the oven to 350F.

In a large bowl, beat together the butter, granulated sugar and brown sugar with a handheld mixer (or in the bowl of a stand mixer) until the mixture is well-combined. Add the vanilla and eggs and beat until the mixture is creamy and light in color, 2-3 minutes. Beat in the salt and baking soda until incorporated, then stir in the flour until just combined; a few streaks of flour are OK. Add the white chocolate chips and macadamia nuts and mix until combined and no streaks of flour remain.

Roll tablespoon (or slightly larger) size balls of dough and place on silpat or parchment lined baking sheets, 1 to 2 inches apart. Bake for 9-11 minutes and remove from pan to cool on wire racks. Repeat with remaining dough.

*Veronica’s Notes: if using unsalted butter, increase salt in the recipe to 1 1/4 teaspoons.  If your macadamia nuts are roasted and salted like mine, you might want to reduce the amount of salt. I omitted it completely since both my butter and nuts were salted. I added toasted coconut to half the batch (unphotographed because they were gone by the time I broke the camera out), and although they weren’t the classic white chocolate macadamia nut cookie, they were even better in their own class. I like both versions so I recommend you try half and half!

Recipe source: slightly tweaked from Mel’s Kitchen Cafe

Lemon Muffins

Posted on

I adore baking up lemony treats any time of year, but lemon has such a bright and cheerful color and flavor that I find it particularly appealing on a cold winter day.  I picked this recipe from my foodie mama’s cookbook to brighten up one such day a couple weeks ago.  Her cookbook is self-published, the same kind that churches print for fundraising, so it’s pretty straightforward without a lot of extra words, but at the end of this recipe, she said, “Wonderful!” so I knew it had to be good.  If she didn’t say anything at the end of her blue ribbon recipes, which I’ve tried and loved (like this banana bread and this peanut butter pie), I knew this one had to be a real winner.  And I was right.

Seriously y’alls.  The texture.  The flava flav.  It’s all kinds of wondermous.  It’s like someone crossed a pound cake with angel food cake and turned it into a muffin.  The lemon flavor is really incredible, with lemon zest and juice in the muffins, and a lemon syrup soaking down into them.  The only thing I almost changed was the walnuts, because nuts seemed such a strange addition to a lemon muffin to me.  Then I almost decided to use another nut,  like almonds or macadamia nuts because they seemed more suited.  I’m so glad I went with my foodie mama’s instinct because she never steers me wrong.  The walnuts are perfect and they even take on a pretty golden color from being toasted and baked, and look so appealing studding the yellow muffins.

Marina still has copies of her cookbook available and is selling them for $10 plus $3.50 S&H.  Email me at vraklis@yahoo.com if you’d like to purchase one!  You can see some of the recipes in her cookbook here.

Lemon Muffins

Printable recipe
Printable recipe with picture

Lemon syrup
1/2 cup granulated sugar
1/4 cup fresh lemon juice

Muffins
4 eggs, separated
1 cup (2 sticks) unsalted butter, softened
1 cup (7 oz) granulated sugar
3-4 teaspoons lemon zest
2 teaspoons baking powder
1 teaspoon salt
2 cups (8 1/2 oz) all-purpose flour
3/4 cup walnuts, toasted & finely chopped
1/2 cup fresh lemon juice

Preheat oven to 350F. Combine the sugar and lemon juice for the syrup and set aside. Butter or place paper liners in 12 muffin tin wells.

Making sure your mixer and beater(s) are completely grease-free, beat the egg whites on high speed until stiff. Scrape into a separate bowl and set aside. Cream the butter and sugar until light, about five minutes. Add egg yolks, lemon zest, baking powder, and salt, and beat well. Add the flour in three additions, alternating with the lemon juice, beating until combined. Gently fold the beaten egg whites into the batter, then stir in the walnuts. Fill prepared muffin tins almost full to the top and bake for about 25 minutes, or until a toothpick inserted in center comes out clean.

Leaving the muffins in the tins, pierce them several times with a fork while still hot. Drizzle the lemon syrup over the tops, then remove the muffins from the tins to cool completely on a wire rack.  Store in an airtight container.

Recipe source: Marina Castle