RSS Feed

Tag Archives: perfect

Banana Muffins of Perfection

Posted on

I got this recipe from my friend, Staci, and have made them twice in the last month. They were originally called “Banana Nut Muffins” but Dennis insisted on this new title and since it makes me laugh, I obliged him.  They really are perfect, so much so that I’m thinking about turning this recipe into a loaf and entering it into the fair this year.  Such a nice, soft, texture!

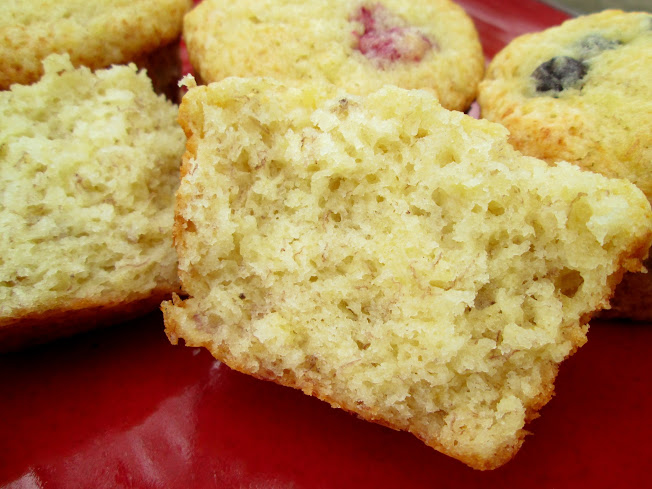
I shared them with an old co-worker and she deemed them the “best muffins ever.”  The base recipe is a good one that results in a tender, moist muffin with great banana flavor.  These are now my favorite thing to make with bananas!

Banana Muffins of Perfection

Printable recipe
Printable recipe with picture

2 cups (9 oz) all-purpose flour
1 tablespoon baking powder
½ teaspoon salt
½ cup butter
1 cup (7 oz) granulated sugar
2 eggs
1 1/3 cups mashed ripe bananas
1 cup mix-in’s

Sift together flour, baking powder, and salt; set aside. Cream together butter and sugar. Beat in eggs, one at a time. Stir in mashed bananas. Add dry ingredients all at once, stirring just enough to moisten. Gently stir in mix-in’s. Spoon into greased muffin tin, filling 2/3 full. Bake in 350F oven for 18-20 minutes or until golden. Makes 15-18 muffins.

Staci’s & V’s favorite mix-in’s: chopped nuts, diced prunes, chopped strawberries, blueberries, dried cranberries, chocolate chips. Staci also likes to add spices like cinnamon, nutmeg, cloves, and cardamom, but doesn’t measure so you’ll have to figure out how much you like if you add them. I’d add a teaspoon total of spices (max) if it was me, but you might like more or less.

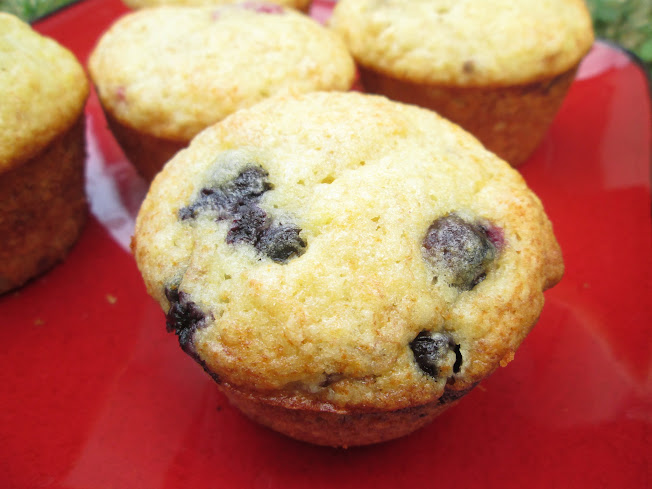
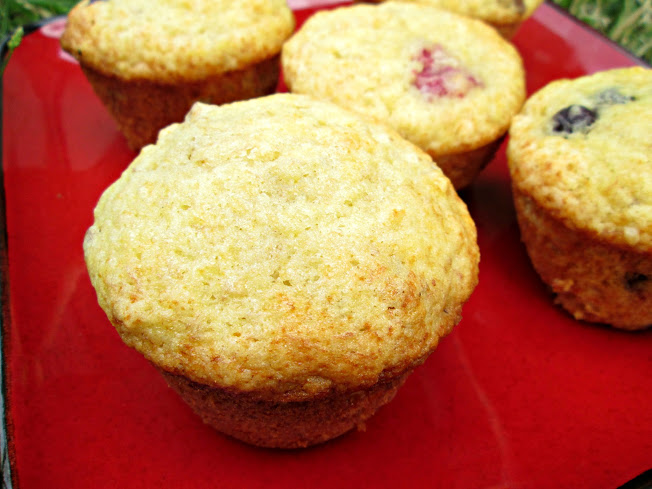
I make mine nut-free to keep them easy to chew for Joshua. My two favorite ways (so far) are with blueberries (above) and dried cranberries (first picture)! I can’t wait to try them with FRESH cranberries come fall. Oh my!

Advertisement

White Chocolate Macadamia Nut Cookies

Posted on

Looky what I did! I kind of feel like a rock star, having made my first batch of cookies post-baby, and not even the bar kind. The kind you actually form the dough into individual balls before baking.  I still haven’t recovered the sleep I lost over them since devoting this kind of time to baking requires staying up at night while the baby is sleeping, but they were oh so worth it.  And who am I kidding, I do that every night anyway! :)

Mel worked hard to perfect her recipe, and the cookies are truly wonderful.  Soft and chewy, which is my favorite cookie texture, with the crunch of macadamia nuts and the complimentary sweetness of white chocolate.  Cookie perfection.

White Chocolate Macadamia Nut Cookies

Printable recipe
Printable recipe with picture

1 cup (2 sticks) salted butter, softened
3/4 cup granulated sugar
1 cup packed light brown sugar
2 teaspoons vanilla extract
2 large eggs
3 cups all-purpose flour
3/4 teaspoon salt
1 teaspoon baking soda
12 ounces white chocolate chips
1 cup macadamia nuts, coarsely chopped
1 cup toasted coconut (optional)

Preheat the oven to 350F.

In a large bowl, beat together the butter, granulated sugar and brown sugar with a handheld mixer (or in the bowl of a stand mixer) until the mixture is well-combined. Add the vanilla and eggs and beat until the mixture is creamy and light in color, 2-3 minutes. Beat in the salt and baking soda until incorporated, then stir in the flour until just combined; a few streaks of flour are OK. Add the white chocolate chips and macadamia nuts and mix until combined and no streaks of flour remain.

Roll tablespoon (or slightly larger) size balls of dough and place on silpat or parchment lined baking sheets, 1 to 2 inches apart. Bake for 9-11 minutes and remove from pan to cool on wire racks. Repeat with remaining dough.

*Veronica’s Notes: if using unsalted butter, increase salt in the recipe to 1 1/4 teaspoons.  If your macadamia nuts are roasted and salted like mine, you might want to reduce the amount of salt. I omitted it completely since both my butter and nuts were salted. I added toasted coconut to half the batch (unphotographed because they were gone by the time I broke the camera out), and although they weren’t the classic white chocolate macadamia nut cookie, they were even better in their own class. I like both versions so I recommend you try half and half!

Recipe source: slightly tweaked from Mel’s Kitchen Cafe

American Potato Salad

Posted on

Haus and I grilled a ton of meat last Saturday (we feel like we’re wasting the charcoal if we don’t load the grill up at least twice) and while it was grilling, I made up a batch of this potato salad from the current issue of Cook’s Illustrated. Reader Kerry C. gifted me with a subscription to Cook’s Country (LOVE it!) for Christmas, and they sent me a complimentary issue of the regular Cook’s Illustrated mag this month-lucky me!

We were starving since we started grilling late, and as soon as the potato salad was mixed together, I took a big bite and hollered for Dennis to come taste it. We agreed it was the best potato salad EVER! We polished off the entire batch, which equals about a pound of potato salad each, and ended up skipping the meat. This potato salad was so good, it turned into our dinner for the night and we just refrigerated all the meat to eat as leftovers throughout the week.

The potato salad was so good I made a second batch within an hour of making the first one, because I knew we’d want it to go with our leftover meat. Luckily we made the second batch last for two whole days, which is like a miracle, people. This potato salad is good. If you don’t have a great recipe for classic American potato salad, Cook’s Illustrated has got you covered. They tested every ingredient, every method, and every amount to get it just so for us. Thank you Cook’s Illustrated!

American Potato Salad

Printable recipe
Printable recipe with picture

2 lbs. (3-4 medium) russet potatoes, peeled and cut into 3/4-inch cubes
1 tablespoon salt
2 tablespoons distilled white vinegar
1 medium celery rib, chopped fine (about 1/2 cup)
2 tablespoons minced red onion
3 tablespoons sweet pickle relish
2 tablespoons minced fresh parsley leaves
1/2 cup mayonnaise (see note)
3/4 teaspoon powdered mustard
3/4 teaspoon celery seed*
1/2 teaspoon salt*
1/4 teaspoon ground black pepper
2 large hard-cooked eggs, peeled and cut into 1/4-inch cubes (optional)

*You can use celery salt in place of the celery seed, omitting the 1/2 teaspoon salt from the dressing.

Place potatoes in large saucepan and add water to cover by 1 inch. Bring to boil over medium-high heat; add 1 tablespoon salt, reduce heat to medium, and simmer, stirring once or twice, until potatoes are tender, about 8 minutes.

Drain potatoes and transfer to large bowl. Add vinegar and, using rubber spatula, toss gently to combine. Let stand until potatoes are just warm, about 20 minutes.

Meanwhile, in small bowl, stir together celery, onion pickle relish, parsley, mayonnaise, powdered mustard, celery seed, 1/2 teaspoon salt, and pepper. Using rubber spatula, gently fold dressing and eggs, if using, into potatoes. Cover with plastic wrap and refrigerate until chilled, about 1 hour; serve.

Veronica’s Notes: We actually ate the first batch warm and I prefer it that way, though it’s great cold too.  Cook’s Illustrated says the salad can be refrigerated up to one day. Well ours was just fine after two days and I’m sure it would be great after three or four days.

Recipe source: Cook’s Illustrated

Perfect Pumpkin Pie


I make this pie every year for Thanksgiving and every year I forget to blog it when Thanksgiving rolls around again.  Well that ain’t happenin’ this year!  I need this sucker on my blog for next year when I make the pie and need to look up the recipe.  It will be so much easier to find it where I keep all my favorites. :)

This is all you need to make the pie. How simple could this be?

If you’re looking for a simple traditional pumpkin pie recipe, this one has got you covered.  I prefer pumpkin gooey butter cake to pumpkin pie, but I have to provide a real pumpkin pie for those who actually enjoy it in my family, namely our oldest nephew, who is a pumpkin pie purist.  This simple recipe has a traditional taste, but comes together quickly with a purchased crust, and because it combines two ingredients (milk & sugar) into one (sweetened condensed milk), and uses pumpkin pie spice, there is much less measuring than with a traditional recipe.

Despite my yearning to add more ingredients (sweet potatoes! cream cheese! vanilla bean! booze!) to change things up, I always resist this since I know my oldest nephew wouldn’t touch anything but a real pumpkin pie.  And I’m always pleasantly surprised at how wonderful it tastes without any extra additions.  Great texture with a perfect balance of spices & sweetness.  May the pumpkin pie purists in your family rejoice & be thankful.

Perfect Pumpkin Pie

Printable recipe
Printable recipe with picture

1 (9″) unbaked pie crust (frozen deep dish, refrigerated or homemade)
2 large eggs
1 can (15 oz) unsweetened pumpkin puree
1 can (14 oz) sweetened condensed milk
2 teaspoons pumpkin pie spice
OR 1 teaspoon cinnamon + 1/2 teaspoon ginger + 1/2 teaspoon nutmeg
1/2 teaspoon salt
1 egg white, for brushing onto the crust
Preheat oven to 425 degrees. If you’re using refrigerated or homemade crust, roll it out and fit it into a 9″ pie plate (not deep dish–you only want deep dish if using a frozen crust).

In a medium bowl, lightly beat eggs, then add the remaining ingredients, except for the egg white, and beat to combine.  Do not go crazy with the beating, you just want everything mixed without excessive air bubbles.  Set filling aside and brush the egg white over the bottom and sides of the pie crust.  This will create a seal & help prevent the crust from becoming soggy.  Pour the filling into the pie crust.

Bake 15 minutes at 425 degrees. Reduce oven temperature to 350 and continue baking 35-40 minutes or until knife inserted in center comes out clean. I don’t like to mar the pretty surface, so I bake the pie until it is mostly set but still a little jiggly in the center because the residual heat will continue baking it after you remove it.  Cool pie completely before cutting. Garnish with whipped topping, if desired. Refrigerate any leftovers.

Makes one 9-inch pie.

Recipe source: adapted from Eagle Brand Perfect Pumpkin Pie

Perfect Pie Crust


https://i0.wp.com/a3.ec-images.myspacecdn.com/images02/100/b5963b3cbcd14857a4007feb95448b8d/l.jpg

Before I had much experience with pie, I tried a recipe called “perfect pie crust,” which employed butter instead of shortening for the fat.  At the time, I’d only ever made shortening crusts and the butter one had a much better flavor, so I thought the name apt, although it wasn’t as flaky as I desired. Although I balk at the word “perfect,” I have now found my own favorite pie crust that for me is very close to it, and although I’ve included the recipe before on a previous blog for apple pie, I think it’s good enough to warrant a blog of its own.

This one has the best of both worlds–the butter adding flavor and the shortening, flakiness. It turns out well even when I over-process it, which I almost always do (I don’t like to see big globs of fat in my crust so I tend to over-mix the fat into the flour). I don’t think there’s a way to ruin this crust besides burning it, which would be really hard to do. It puffs as it bakes and is so flaky that you can see it with the naked eye.

Like I said, it’s perfect!

Perfect Pie Crust

Printable Recipe

*Makes enough for two pies or one double-crust pie

2 1/2 cups flour
1/2 tsp. salt
2 sticks butter, cold and cut into 16 pieces
1/4 cup shortening, chilled in freezer
6-10 T ice-cold water (I use a scant 1/3 cup every time)

Mix flour and salt.  Cut the butter and shortening in with a pastry blender or food processor until pieces are the size of small peas (I usually make them half that size at least or smaller, but the crust will be more flaky if you can resist following my example).  Add ice water and mix until it starts to form a ball.  Divide dough in half, gather in your hands and gently shape each into a ball, flatten them into discs, cover with plastic wrap and refrigerate until ready to use.  If they get too hard, I leave them on the counter until pliable enough to roll out.

When ready to make your pie, roll out one disk and fit into a pie plate, trimming off the excess. Fill, cover with the top crust, pinch and flute the edges. Brush beaten egg over the top crust (that’s how you get that golden shine), cut a few vents holes and then bake according to pie recipe directions. If you are making a one-crust pie, you can either halve the recipe or freeze the second disc for later use.

Recipe Source: The Dessert Lover’s Cookbook by Marlene Sorosky

%d bloggers like this: