RSS Feed

Tag Archives: Pie

Strawberry Cream Cheese Pie

Posted on

I was challenged by a former co-worker years ago (five years ago, to be exact), to reproduce the Strawberry Cream Cheese Pie you could get at Long John Silvers.  He was slightly obsessed.

Although I didn’t duplicate it exactly, the crust is almost spot-on (it’s an unbaked graham cracker crust, unusual but so good), and it’s fairly close.  It has taken me this long to share the recipe because I couldn’t share the first one with you – I used wild strawberry essence in it, and not many people would have that on hand to use in a humble pie, such as this.  But I remembered how good it was and wanted to see if I could recreate my recreation of Mrs. Smith’s pie by concentrating the strawberry flavor in another way.  Then I made jam a few weeks ago, inspiration hit.  Jam, to me, is the essence of the fruit used to create it.

So I tried it, replacing the gelatin and fresh strawberries in my original recipe with the homemade jam, and it was perfect. It’s not as light as the original*, but so good in it’s own right. So thick and creamy, so cream cheese-y, so strawberry-y. And so perfect for summer because, unlike most of my recipes this summer, no part of it requires an oven. You’re welcome.

Strawberry Cream Cheese Pie

Printable recipe
Printable recipe with picture

Crust
1 ½ envelopes graham crackers (13 1/2 sheets)
6 tablespoons butter, melted
2 tablespoons sweetened condensed milk
2 tablespoons brown sugar
1 tablespoon water

Filling
1 (8 oz) package cream cheese
1 heaping cup (13 oz jar) good quality strawberry jam
1 (14 oz) can (minus 2 tablespoons for the crust) sweetened condensed milk
2 cups whipped topping or homemade (sweetened) whipped cream

Garnish
Leftover whipped topping or 1-1 1/2 cups homemade sweetened whipped cream
Leftover crust crumbs

While still in the package, smash up the graham crackers a little bit, then empty into the bowl of a food processor fitted with the blade attachment. Pulse & process until fine crumbs. Add the butter, sweetened condensed milk, brown sugar & water and process until thoroughly combined. Set aside 1/2 cup of the crumbs and press the remaining crumbs into a 9” pie plate. Place in fridge.

Wipe out the food processor. Add the cream cheese, jam, and sweetened condensed milk, and process until smooth. Add the whipped topping or whipped cream and pulse until mixed. Pour into prepared pie plate, cover with plastic wrap, and refrigerate overnight. Pipe whipped cream around the edge in stars or rosettes using Wilton tip 2110 (1M). Garnish with whipped cream & the remaining crumbs before serving.

Veronica’s notes: If you’d like a lighter pie, you could use 3 cups of whipped cream, or the entire carton of whipped topping, and use another cup or two for garnish. You will have too much pie filling, but I doubt you’ll complain about eating the extra. ;) Also, it’s important to use the best jam possible, as this is what gives the pie its strawberry flavor. If you buy cheap Walmart jam, it will taste like you bought a Great Value frozen pie, not made it yourself. I’ve actually tried this using Walmart strawberry jam, so I unfortunately speak from experience (it was bad).  Homemade is ideal, and Bonne Maman is the only brand I can put my own stamp of approval on if you go with store-bought.

Key Lime Pie


So happy to return today for the Secret Recipe Club‘s Group C reveal day!  Life has been keeping me pretty busy, but I’ll talk about life another day.

Today I need to tell you about this Key Lime Pie.  This amazing key Lime Pie.  I was assigned to Mother Thyme‘s blog this month, which is a new-to-me blog, and I was really excited to peruse it.  Jennifer’s blog is attractive, organized (yay for a recipe index!), and her photos are beautiful, so it was a real treat!  Not to mention that most of the recipes are her own creations!  I truly admire bloggers like Jennifer who mostly post their original creations, since I find that difficult, personally.  My creations are very rarely blog-worthy. LOL!

So when I ran across this key lime pie recipe, I was excited because Dennis loves Key Lime Pie and I’ve been wanting to make him one for a long time, but I was also very skeptical.  The main ingredients are sweetened condensed milk and lime juice.  And it only calls for for 9 minutes of baking.  I thought it was mis-typed, and eggs and extra baking time were missing.  I mean, how can two very liquid hardly-baked ingredients make a thick, creamy filling?

So I searched online recipes and found some similar ones that didn’t even require any baking.  What?  Really?  Wouldn’t this make soup pie?

I decided to give it a go, and I’m so glad I had faith in Mother Thyme!  This is kitchen science, folks, and utterly fascinating.  Apparently when the acidic lime juice is combined with the condensed milk, it thickens it, because as soon as I whisked it in, the two liquids turned into a thick, pudding-like filling.  Amazing!  After just two hours, it was ready to slice, and I didn’t even bake it at all!

The taste?  Just as amazing as the magical thickness.  Perfect balance of sweet and tart!  I’m just so excited by this pie, you guys, you don’t even know.  It’s so easy to make, so magical, and so delicious.  You could even say…it’s magically delicious.  :)

I made it a little festive by adding some food coloring to intensify the green (it’s really more ivory without the food coloring), and added shamrock sprinkles for a St. Patrick’s Day look.  This would make a nice change for a St. Patty’s day dessert since most of them feature booze and/or mint.  But even if you don’t try it for a holiday (would also be cool for Christmas with red sprinkes!), it’s great any time of year–especially spring and summer.  Dig in!

Key Lime Pie

Printable recipe
Printable recipe with picture

Crust
1 1/2 cups crushed graham crackers
5 tablespoons melted butter
4 tablespoons granulated sugar

Filling
3 (14.5 oz) cans sweetened condensed milk
2 drops green food coloring + 1 drop yellow (optional)
1/2 cup sour cream
1 cup key lime juice (or regular lime juice)
2 tablespoons freshly grated lime zest (from about 2 large limes)

Garnish
Whipped cream or Cool Whip
Extra lime zest or sprinkles

Preheat oven to 350 degrees. Mix crumbled graham crackers, butter and sugar in a 9” spring form pan or a deep dish pie plate and firmly press evenly over bottom and sides of pan. Bake for 8 minutes. Let cool before adding filling.

Meanwhile, combine sweetened condensed milk and food coloring if desired, mixing until totally blended. Add the sour cream, lime juice and lime zest and whisk until thickened and completely incorporated. Pour mixture in to cooled crust and refrigerate 2 hours or until ready to serve.

If desired, just before serving, pipe whipped cream around the edge of the pie (I used Wilton tip 1M) and garnish with some extra lime zest or festive sprinkles of your choice.  Or you can just serve with a dollop of whipped cream on top.  Refrigerate leftovers.

Veronica’s note: never mind my shallow pie dish, do not use a regular pie dish or you will have too much crust and filling, as I did (I made a second small dish of pie with my leftovers). Do as I say, not as I do. ;)

Recipe source: Mother Thyme

You can see all the other Group C SRC recipes by clicking the linky man below:


Creamy Chocolate-Mint Pie

Posted on

I know, I know.  I’m supposed to be on vacation.  What am I doing blogging, right?  Thanks to the miracle of scheduled posting, I wrote this blog last week and scheduled it to publish today.  I’m so tech-savvy!  (And I’m a big liar because I can barely even text, but I’m glad I at least have this one thing figured out.  It helps me a lot!)

So last month our friend, Joe, came over with a tractor to help us level out our back yard so the water wouldn’t collect in the middle and run up against our house and under the back door, flooding the basement.  Yay for no more basement flooding!!!

Like my husband, Joe loves mint desserts, and as part of my thanks for his help, I made him a creamy chocolate-mint pie.  Actually, I made two, because my husband deserved a “thank you” too. :)  Also, you deserved the recipe, and how could I share it without cutting up a pie to show you the inside?  And how could I do that to Joe’s pie?  I could not.  So I made Dennis a pie and butchered his pie up for you.  And for me, because I ate this piece.

This pie is creamy, fudgy, smooth, and minty.  I don’t know why, but mint desserts just aren’t my number one choice, and I’d probably never make them if it weren’t for Dennis and Joe (Joe is also responsible for these peppermint patties I posted a while back), but I thoroughly enjoyed my half of this pie.  Yes, my husband let me have half the pie!  I will not overshare how fast I ate that half, however.  That would be my version of TMI. Hey, a girl has to have some secrets.

Creamy Chocolate-Mint Pie

Printable recipe
Printable recipe with picture

1 1/4 cups milk
1 package (4-serving size) chocolate pudding and pie filling mix (not instant)
1 cup semisweet chocolate chips
4 oz cream cheese, softened
1/2 cup powdered sugar
1/4 teaspoon peppermint extract
1-2 drops green food color
2 cups frozen (thawed) whipped topping, divided
1 Oreo cookie crust
2-4 thin rectangular chocolate and green mints, unwrapped

In 2-quart saucepan, stir together milk and pudding mix; cook as directed on package. Continue cooking over low heat while adding chocolate chips, stirring until melted. Set aside.

In medium bowl, beat cream cheese, powdered sugar, peppermint extract and green food color until smooth. Gently fold in 1 cup of the whipped topping.  Spread cream cheese mixture in the Oreo crust, then top with chocolate mixture, spreading it smooth. Spread remaining 1 cup whipped topping over the top, then either chop mints or use a vegetable peeler to shave off curls, and sprinkle over whipped topping. Cover and refrigerate at least two hours before serving.

Recipe source: tweaked from Pillsbury.com

Cheeseburger Pie

Posted on

Nearly every single recipe that Faith from An Edible Mosaic posts, I want to try.  I have saved so many, but just like most recipes I save, I forget about them quickly.  However, this one really stuck in my cranium and even a week after I made it, I still can’t get it out.  I have to make this again, stat, and luckily I still have another sheet of puff pastry waiting in the freezer for me!

Her Cheeseburger Pie jumped out at me for several reasons.  First, it’s fairly simple.  Second, it’s pizza.  Third, it’s pizza that tastes like a cheeseburger, with a crust that looks like a bun!  Fourth, the ketchup and mustard are mixed in with the hamburger filling along with Worcestershire to kick it up a notch.  And fifth, she added a garlic & chive dressing to the top that I thought was a stroke of genius. I’ve had cheeseburger pies before, but never one quite like this.

This pizza not only met, but exceeded my expectations.  I wasn’t so sure using puff pastry as a pizza crust would work, but I really loved the shattering-crisp flakiness of it.  It really went well with the toppings.  The flavors in the filling were spot-on, and the lettuce, tomato, and dressing on top gives it a very nice, fresh quality that pairs well with the salty, cheesy filling.  This recipe is definitely worthy of my my “favorite recipes” folder and has already claimed it’s spot inside.  Thanks, Faith!

Cheeseburger Pie

Printable recipe
Printable recipe with picture

1 sheet (1/2 lb) puff pastry, thawed
1 medium onion, diced
1/2 to 3/4 lb 95% lean ground beef*
2 cloves garlic, minced
2 tablespoons dill relish
1/4 cup ketchup
1 tablespoon yellow mustard
1 tablespoon Worcestershire sauce
1/2 teaspoon steak seasoning
4 oz sharp cheddar, shredded
1 egg, beaten (for eggwash)
1 teaspoon sesame seeds
2 cups shredded lettuce
2 medium tomatoes, diced
Creamy Garlic & Chive Dressing (recipe below)

Preheat oven to 375F and line a baking sheet with parchment paper. Place onion and beef in skillet and cook over medium heat, mixing and crumbling with spatula, until meat is browned. Add garlic and cook 1 minute longer. Add relish, ketchup, mustard, Worcestershire, and steak seasoning and cook until the liquid is evaporated (about 3 minutes). Remove from heat.

Unfold puff pastry and place on prepared baking sheet. Spread the meat mixture on the pastry (leaving a 1-inch border all the way around), and sprinkle the Cheddar on top. Use your finger to lightly brush the border with eggwash (you will have extra eggwash) and sprinkle sesame seeds around the edge. Bake about 20 minutes, or until the pastry is puffed and golden.

Cut into four slices and top each with lettuce, tomato, and a drizzle of Creamy Garlic & Chive Dressing.

*If you use meat with more fat than this, drain off the fat after browning.

Creamy Garlic & Chive Dressing
Yields about 1/3 cup

1/4 cup buttermilk or plain yogurt
2 tablespoons mayonnaise
1 tablespoon dried chives
1/4 teaspoon garlic powder
Pinch salt and pepper

Whisk together all ingredients; store refrigerated until serving.

Recipe source: adapted from An Edible Mosaic

Triple Berry Pie

Posted on

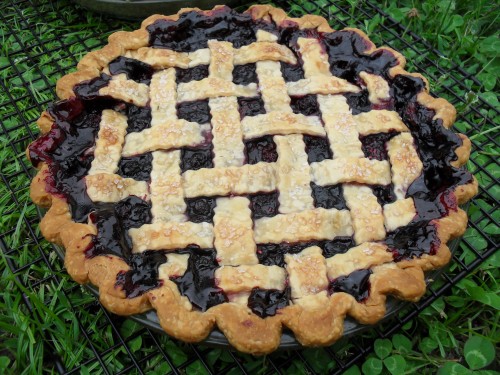
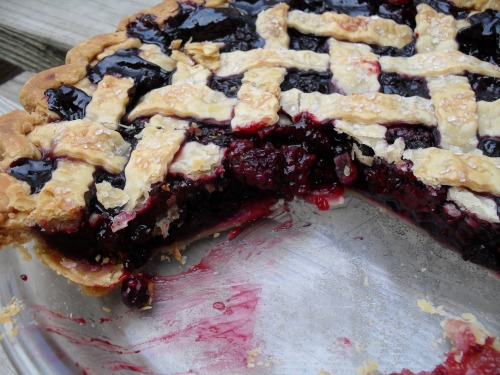
This was one of the pies I brought to the Memorial Day barbecue at my preacher’s home and it was a big hit!  Although I really prefer to make cakes, what I do appreciate about pie is how simple it is.  Just a few ingredients turn into utter magic in a Pyrex dish.  Essentially pie crust, fruit, and sugar and you’ve got the perfect summertime dessert.  This one really is all about the sweet berries, gently complimented by flaky pastry!

Triple Berry Pie

Printable recipe
Printable recipe with picture

Pastry for a 2-crust pie (I cheated and used Pillsbury)
1 cup sugar
1/3 cup cornstarch
1/8 teaspoon salt
6 cups frozen mixed berries, thawed & drained
Milk & coarse sugar for top crust

Preheat oven to 450 F. Roll out one disc of dough, line pie plate with pastry, leaving a 3/4″ overhang, and place in refrigerator. In a large bowl, mix sugar, cornstarch, and salt together. Gently toss with the berries and let stand for 15 minutes. Spoon into crust-lined pie plate. Roll out second dough disc and cut into strips with a pastry wheel or pizza cutter. Arrange the strips to make a lattice design over filling (I have a tutorial on this process here). Trim, fold overhang from bottom crust over the ends of the lattice top crust, seal, and flute edges (I have a video tutorial on working with pie crust here, in which I include a demonstration on fluting edges). Brush crust with milk (I used my finger) & sprinkle with sugar. Place pie on middle oven rack; place large cookie sheet on rack below pie pan in case of spillover. Bake pie 15 minutes. Reduce temperature to 375 and place a pie shield on the crust to prevent overbrowning. Bake another 40-45 minutes, or until crust is golden brown & filling is bubbling. Cool at least two hours before serving.  (I always make fruit pies a day in advance and they are always nicely set up by the time I serve them.)

*Veronica’s Notes: the original recipe calls for fresh OR frozen berries so I guess this recipe will work with fresh berries too, but I haven’t tried it yet.  The original recipe also calls for ½ cup more sugar than mine, which you may need if your fresh berries are very tart.  Frozen berries are packaged at their peak and are usually quite sweet, so 1 cup of sugar was plenty and more would have been overkill.

Recipe source: adapted from the Three Berry Pie recipe on the side of my Pillsbury refrigerated pie crusts box.

Making a Lattice Top Crust {Step-by-Step Tutorial}

Posted on

Today is my 11th wedding anniversary and Dennis and I are gallavanting around Wichita during the annual River Festival to celebrate, but thanks to the magic of prescheduled blogging, I am able to instruct you on how to make a lattice top crust for a pie despite my absence!  This would be even cooler if I could preschedule my hair to get cut and dyed at the same time, but I’ll take what I can get.

OK, I know I promised a pie recipe next, but since the recipe instructs you to make a lattice top crust, I thought it was high time I broke out my ancient step-by-step lattice top crust photos to explain how to do it.

Making the nifty woven lattice top crust only seems complicated but the process is quite simple.  See for yourself!

Step 1: Lay 5-7 strips of pie dough on top of pie in one direction.

Step 2: Lift every other strip and pull back half-way.

Step 3: Lay a strip down across the middle in the opposite direction.

Step 4: pull folded strips back down over the horizontal strip.

Step 5: pull back the strips that weren’t folded back the first time.

Step 6: lay down another horizontal strip.

Step 7: lay the folded strips back down over the horizontal piece.

Repeat, repeat, repeat, alternating the strips you lift, and then spinning the pie plate around when you finish the first side to do the other.

Looking dandy!  Time to give her a spin and repeat on the other side.

Like so.

Until…

Voilà! Your lattice top crust is complete.

‘Tis a thing of beauty, my friend.

Now.  I must tell you, I do not have pictures of how to properly do the fluted edge for a pie with a lattice top crust.  On this particular one, which happens to be a Razzcherry Pie, I didn’t leave an overhang on the bottom crust so I chose to simply tuck the lattice pieces underneath the scant edge that remained.  Which is perfectly fine and much easier than making a fluted edge.  However, if you want a fluted edge, such as I have here on this cherry pie:

…this is what you do: leave a 3/4″ overhang on the bottom crust.  After finishing the lattice strips, trim them just beyond the inner edge of the pie, then fold the overhang over the strips and press to seal.  Then you can flute the edges using the technique I demonstrated in this video, and you’ll have a gorgeous pie!  I will update this post with pictures to accompany these instructions on finishing the edge when I make my next lattice top crust, but for now, I hope the instructions alone will suffice.

Happy pie making, my lovlies!

French Silk Pie with Stabilized Whipped Cream


Every time my husband sees a French Silk Pie, or a picture of one, or even the name of it listed on a menu, he says, “oooooh, French Silk.”  After ten years of this, I finally decided it was time to make him one–and what better day than Valentine’s Day?  It is, after all, considered the most romantic pie to share by 27% of Americans.  (I acquired this tidbit of trivia from Village Inn restaurant, where it was noted in a bubble beside a picture of the pie…which I noticed after Dennis said “oooooooh, French Silk.”)

Both Dennis and I agree that this one was the best French Silk either of us has ever had.  Some I’ve had in the past had fillings that were thicker, more like pudding, but this one, although rich, is light and velvety and very chocolatey. The crunchy crust is nutty and a bit salty, which really complimented the sweet filling & whipped cream perfectly! My husband doesn’t like crust but actually enjoyed it for the first time in his life with this pie. I chose to top the pie with stabilized whipped cream since I needed to make it in advance and didn’t want the whipped cream to water out before we dug in.  This particular whipped cream can be made 24 hours in advance without watering out, so it is a nice recipe to keep handy if you need to make your whipped cream the day before serving your dessert.

Jean Webster’s French Silk Pie
from marthastewart.com
Makes 1 nine-inch pie

FOR THE CRUST
8 tablespoons (1 stick) chilled salted butter, cut into pieces, plus more for pan *
1/3 cup pecan halves
1 1/3 cups all-purpose flour
1/4 cup firmly packed light-brown sugar
1/4 teaspoon salt

FOR THE FILLING
12 tablespoons (1 1/2 sticks) salted butter, room temperature
1 cup granulated sugar
3 ounces unsweetened chocolate, melted and cooled
1 1/2 teaspoons pure vanilla extract
3 large eggs
Whipped cream, for serving (Stabilized Whipped Cream recipe follows)
Chocolate curls, for serving

Make the crust: Preheat oven to 325 degrees. Butter a 9-inch pie plate; set aside. (I recommend using a deep dish plate–I used a regular one and had enough leftover crust & filling to make a second miniature pie.) Grind pecans in a food processor, or chop very finely with a knife. In a medium bowl, combine flour, pecans, sugar, and salt. Cut in cold butter with a pastry cutter until mixture resembles coarse meal. Press firmly into prepared pie plate. Bake until golden, 20 to 25 minutes. Transfer to a wire rack to cool. (Mine took 25 minutes to cool completely.)

Make the filling: In the bowl of an electric mixer fitted with the paddle attachment, cream butter and sugar until light and fluffy, about 2 minutes. With machine running, gradually add melted chocolate and the vanilla. Add eggs, one at a time, beating at medium speed for five minutes after each addition. Pour filling into cooled pie crust. Cover with plastic wrap, and transfer to the refrigerator to cool for at least 4 hours and up to overnight.

Just before serving, top pie with whipped cream, and decorate with chocolate curls.

*I only had unsalted butter, so I added 1/4 teaspoon salt to the recipe, for a total of 1/2 teaspoon.

Stabilized Whipped Cream
from THE CAKE BIBLE by Rose Levy Beranbaum

2 T powdered sugar
1 t cornstarch
1 cup heavy cream
1/2 t vanilla

Refrigerate your mixing bowl and beaters for at least 15 minutes. (I always place mine in the freezer.)

In a small saucepan place powdered sugar and cornstarch and gradually stir in 1/4 c of the cream. Bring to a boil, stirring constantly, and simmer for just a few seconds (until liquid is thickened). (Mine thickened before it ever came to a boil.) Scrape into a small bowl and cool to room temperature. (I placed mine in the freezer, stirring every few minutes, to speed the process.) Add vanilla.

Beat the remaining 3/4 cup cream just until traces of beater marks begin to show distinctly. Add the cornstarch mixture in a steady stream, beating constantly. Beat just until stiff peaks form when the beater is raised.

Store in the refrigerator until ready to serve.

Turtle Pumpkin Pie


https://i0.wp.com/a4.ec-images.myspacecdn.com/images02/57/dcfb12f2f4b145f4aa61ca12e38a8252/l.jpg

I don’t like pumpkin pie.  But I do like turtles.  And now that I’ve made this, I know that I love turtles enough to make me like pumpkin pie if their elements are a part of it.

As for all normal humans (you know, the ones who already like pumpkin pie), they will like this pie too.  It was a huge hit at my husband’s potluck at work.  It is sweet & creamy–more like a cream pie than your usual custard filling, but still with the pumpkin flavor (made more palatable enhanced by the caramel & pecans).

This is a very simple recipe, so of course I had to make it difficult and fussy by making my own caramel sauce and graham cracker crust.  I wouldn’t make my own breadcrumbs for a meatloaf , but I’ve spent up to an hour making huge amounts of frosting that requires boiling sugar & corn syrup, beating egg yolks to death…etc, etc, ad nausium.

I think I have a problem.

If you have similar problems, you can watch my step-by-step video at the end and prepare your own caramel sauce as well.


Turtle Pumpkin Pie
 
1 graham cracker pie crust
1/4 cup plus 2 Tbsp. caramel syrup, divided
1/2 cup plus 2 Tbsp. chopped pecans, divided
2 pkg.  (3.4 oz. each) vanilla instant pudding
1 cup cold milk (I used egg nog, which worked well)
1 cup  canned pumpkin
1 tsp. ground cinnamon
1/2 tsp.  ground nutmeg
1 tub (8 oz.) whipped topping, thawed, divided
Pour 1/4 cup caramel topping into crust; sprinkle with 1/2 cup nuts.
Beat dry pudding mixes, milk, pumpkin and spices with whisk until well blended. Stir in 1-1/2 cups COOL WHIP; spoon into crust.
Refrigerate 1 hour. Top with remaining COOL WHIP, caramel topping and nuts just before serving.

Perfect Pie Crust


https://i0.wp.com/a3.ec-images.myspacecdn.com/images02/100/b5963b3cbcd14857a4007feb95448b8d/l.jpg

Before I had much experience with pie, I tried a recipe called “perfect pie crust,” which employed butter instead of shortening for the fat.  At the time, I’d only ever made shortening crusts and the butter one had a much better flavor, so I thought the name apt, although it wasn’t as flaky as I desired. Although I balk at the word “perfect,” I have now found my own favorite pie crust that for me is very close to it, and although I’ve included the recipe before on a previous blog for apple pie, I think it’s good enough to warrant a blog of its own.

This one has the best of both worlds–the butter adding flavor and the shortening, flakiness. It turns out well even when I over-process it, which I almost always do (I don’t like to see big globs of fat in my crust so I tend to over-mix the fat into the flour). I don’t think there’s a way to ruin this crust besides burning it, which would be really hard to do. It puffs as it bakes and is so flaky that you can see it with the naked eye.

Like I said, it’s perfect!

Perfect Pie Crust

Printable Recipe

*Makes enough for two pies or one double-crust pie

2 1/2 cups flour
1/2 tsp. salt
2 sticks butter, cold and cut into 16 pieces
1/4 cup shortening, chilled in freezer
6-10 T ice-cold water (I use a scant 1/3 cup every time)

Mix flour and salt.  Cut the butter and shortening in with a pastry blender or food processor until pieces are the size of small peas (I usually make them half that size at least or smaller, but the crust will be more flaky if you can resist following my example).  Add ice water and mix until it starts to form a ball.  Divide dough in half, gather in your hands and gently shape each into a ball, flatten them into discs, cover with plastic wrap and refrigerate until ready to use.  If they get too hard, I leave them on the counter until pliable enough to roll out.

When ready to make your pie, roll out one disk and fit into a pie plate, trimming off the excess. Fill, cover with the top crust, pinch and flute the edges. Brush beaten egg over the top crust (that’s how you get that golden shine), cut a few vents holes and then bake according to pie recipe directions. If you are making a one-crust pie, you can either halve the recipe or freeze the second disc for later use.

Recipe Source: The Dessert Lover’s Cookbook by Marlene Sorosky

Tamale Pie

Posted on

Did you know that Campbell’s has a “Fiesta Nacho Condensed Soup?”  I didn’t, until I made my friend, Katy’s, mother’s tamale pie, which calls for it.  As soon as I tasted it, I knew I had to try it in other things to have some fun with it.

You know that slightly spicy cheese & tomato dip  (I think it’s made with Velveeta & Rotel) that people bring in crockpots to potlucks & serve with tortilla chips?  Well, that is what the soup reminds me of!  And at 120 calories/half cup–I can guarantee you it’s a calorie bargain compared to the Velveeta dip (you’d get less than half as much Velveeta dip for that many calories).

After making the tamale pie….

I bought a few more cans and made nacho appetizers (which we turned into a meal)….

And then whipped up some nacho tacos (just replace the cheese with the heated soup)

As for the tamale pie, it was very good (everything was good, but this blog is about the pie so I’m concentrating on that).  It will definitely be a recurring meal at our dinner table.  I’m almost embarrassed to say it’s the best thing I’ve eaten in a few weeks b/c it’s so simple to prepare & doesn’t that sort of mean I’m a bad cook if I can’ t make something from scratch that tastes better?  Oh well, I don’t care!

Honestly, I don’t know if the best thing about it is how easy it is to make, how tasty it is, or that it’s Weight Watchers friendly.  That’s right, people!  You can have a big slice of beefy, cheesy, cornbread topped pie without feeling guilty!!!  Now how’s that for a winner?

Tamale Pie

Recipe courtesy of Katy R.
Serves 6

1 lb. lean ground beef (I used bison, so mine was lower in cals than what is stated below)
1 pkg. taco seasoning (or 3 tablespoons homemade)
1 can Rotel tomatoes
1 can nacho cheese soup
1 can corn, drained
1 box of Jiffy corn bread
1 egg
1/2 cup milk (I used skim)

Brown meat & drain off any fat. Stir in taco seasoning, Rotel tomatoes, and can of corn.  Simmer for 15 minutes, stirring occasionally.  Pour into 13×9 baking dish that has been coated with cooking spray & spread nacho soup over the beef.  Mix Jiffy mix with the egg & milk & spread over the nacho cheese soup.  Bake at 425 until cornbread is brown on top, about 15 minutes.

Serve with a salad and you are good to go!!!  *Heads up to Moms: this dish is very kid friendly!

Nutrition Facts (prepared with lean ground beef & skim milk)
Per Serving
436 Calories
15.2 g Fat
6.9 g Saturated fat
113 mg Cholesterol
835 mg Sodium
42.9 g Carbohydrates
2.8 g Fiber
12 g Sugar
31 g Protein
*9 Weight Watchers Points

Based on a 2,000 calorie diet, one serving provides
15% Vitamin A
14% Vitamin C
17% Calcium
25% Iron

______________________
Update 7/15/09

I made this again today, but this time added a cup each of quartered and sliced zucchini and yellow summer squash, along with a cup of diced onion.  This really bulked up the filling layer and it was no less tasty. There is no end of variations on this recipe, I’m sure–I think beans would be a wonderful addition or even replacement for the meat.