RSS Feed

Tag Archives: raspberry

Chocolate Oblivion Truffle Torte

Posted on

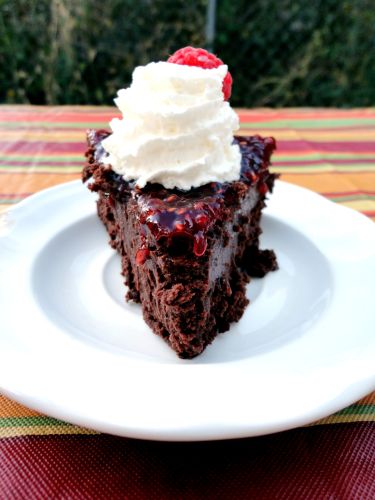
“This cake is my favorite way to eat chocolate.  It is easy to make and contains only three essential ingredients: the very best chocolate, for a full, rich flavor and smooth, creamy texture; unsalted butter to soften the chocolate and release the flavor; and eggs to lighten it.  The result is like the creamiest truffle wedded to the purest chocolate mousse.  It is chocolate at its most intense flavor and perfect consistency.” -Rose Levy Beranbaum, creator of the Chocolate Oblivion Truffle Torte

That pretty much says it all!  I would like to add that although it seems there are many steps to the recipe, it is very simple to make.  Think of it this way: all you have to do is melt the butter and chocolate together, beat the eggs to death and fold them into the chocolate mixture and bake.  The reason the instructions are so long is that they are very detailed so you are sure to have success with this cake.  Enjoy!

Chocolate Oblivion Truffle Torte

Printable recipe
Printable recipe with picture

1 lb. semisweet chocolate
1 cup unsalted butter
6 large eggs

Preheat oven to 425 degrees. Butter the bottom and sides of an 8″x2″ cake pan and place a circle of parchment or wax paper in the bottom, then butter the top of it.

In a large metal bowl set over a pan of hot, not simmering, water (the bottom of the bowl should not touch the water), combine the chocolate and butter and let stand, stirring occasionally until smooth and melted. (The mixture can be melted in the microwave on high power, stirring every 15 seconds. Remove when there are still a few lumps of chocolate and stir until fully melted.)

In a large bowl set over a pan of simmering water, heat the eggs, stirring constantly to prevent curdling, until just warm to the touch. Remove from the heat and beat with an electric mixer until tripled in volume and soft peaks form when the beater is raised, about 5 minutes.

Using a large wire whisk or rubber spatula, fold half the eggs into the chocolate mixture until almost incorporated. Fold in the remaining eggs until just blended and no streaks remaining. Finish by using a rubber spatula to ensure that the heavier mixture at the bottom is incorporated. Scrape into the prepared pan and smooth with the spatula. Set the pan in a larger pan and surround it with 1 inch of very hot water. Bake 5 minutes. Cover loosely with a piece of foil and bake 10 minutes. The cake will look soft, but this is as it should be.

Let the cake cool on a rack for 45 minutes. Cover with plastic wrap and refrigerate until very firm, about three hours.

To unmold, have ready a serving plate and a flat plate at least 8 inches in diameter, covered with plastic wrap. Wipe the sides of the pan with a hot, damp towel, then run a thin metal knife around the sides of the cake. Submerge the bottom in hot water for 10-20 seconds, then invert onto the plastic wrap-lined plate. Remove the parchment from the bottom, then invert onto the serving plate and peel off the plastic wrap.

If desired, you can spread good-quality raspberry or strawberry jam over the top of the cake.  (I have an excellent recipe for raspberry jam here.)  Allow to come to room temperature before serving.  Serve with whipped cream, if desired.

Recipe source: The Cake Bible

***Reminder***

Today is the day to return to the Postcard Project spreadsheet and make sure you report how many pieces of mail you sent this week.  I will be drawing only from the names that have a number in the “completed” column for this week (not last week).  I’m SO thrilled that so many more have signed up and hope you will be able to return to report your goal completed before I draw for the cookies tonight at midnight. Good luck and thank you!

Triple Berry Pie

Posted on

This was one of the pies I brought to the Memorial Day barbecue at my preacher’s home and it was a big hit!  Although I really prefer to make cakes, what I do appreciate about pie is how simple it is.  Just a few ingredients turn into utter magic in a Pyrex dish.  Essentially pie crust, fruit, and sugar and you’ve got the perfect summertime dessert.  This one really is all about the sweet berries, gently complimented by flaky pastry!

Triple Berry Pie

Printable recipe
Printable recipe with picture

Pastry for a 2-crust pie (I cheated and used Pillsbury)
1 cup sugar
1/3 cup cornstarch
1/8 teaspoon salt
6 cups frozen mixed berries, thawed & drained
Milk & coarse sugar for top crust

Preheat oven to 450 F. Roll out one disc of dough, line pie plate with pastry, leaving a 3/4″ overhang, and place in refrigerator. In a large bowl, mix sugar, cornstarch, and salt together. Gently toss with the berries and let stand for 15 minutes. Spoon into crust-lined pie plate. Roll out second dough disc and cut into strips with a pastry wheel or pizza cutter. Arrange the strips to make a lattice design over filling (I have a tutorial on this process here). Trim, fold overhang from bottom crust over the ends of the lattice top crust, seal, and flute edges (I have a video tutorial on working with pie crust here, in which I include a demonstration on fluting edges). Brush crust with milk (I used my finger) & sprinkle with sugar. Place pie on middle oven rack; place large cookie sheet on rack below pie pan in case of spillover. Bake pie 15 minutes. Reduce temperature to 375 and place a pie shield on the crust to prevent overbrowning. Bake another 40-45 minutes, or until crust is golden brown & filling is bubbling. Cool at least two hours before serving.  (I always make fruit pies a day in advance and they are always nicely set up by the time I serve them.)

*Veronica’s Notes: the original recipe calls for fresh OR frozen berries so I guess this recipe will work with fresh berries too, but I haven’t tried it yet.  The original recipe also calls for ½ cup more sugar than mine, which you may need if your fresh berries are very tart.  Frozen berries are packaged at their peak and are usually quite sweet, so 1 cup of sugar was plenty and more would have been overkill.

Recipe source: adapted from the Three Berry Pie recipe on the side of my Pillsbury refrigerated pie crusts box.

Dark Chocolate Raspberry Swirl Brownies

Posted on

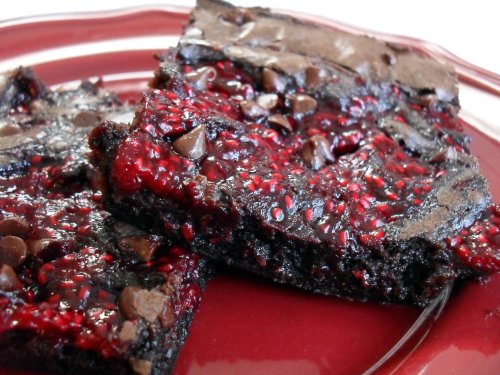
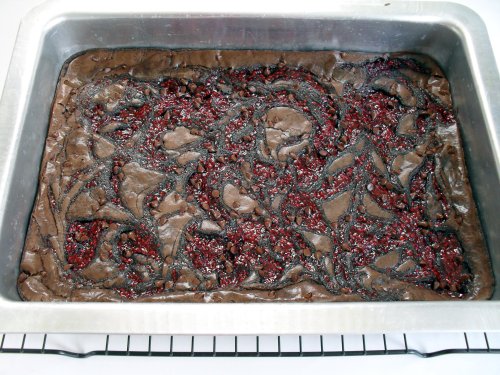
I threw these together last-minute for a birthday gift with some leftover raspberry puree I’d made for another project and they garnered high praise from the recipients (the birthday girl, her sister, and my husband who nabbed a huge hunk for himself before I packaged them.)  I always test my treats to make sure they’re worthy of gifting and oh boy, these were good.  I meant to have half a brownie, but of course I had to eat the entire thing after the first bite.  I love the tart berry flavor with the sweet dark chocolate.  Oh yeah, baby.

Dark Chocolate Raspberry Swirl Brownies
Printable recipe
Printable recipe with picture

1 (19.9 oz) Dark Chocolate Brownie mix
1/2 cup (1 stick) butter, melted
1 egg
1/3 cup water
 ~OR your favorite dark chocolate brownie recipe
1/2 cup raspberry puree (recipe follows)
1/2 cup mini semi-sweet chocolate chips

Preheat oven to 350 and grease the bottom of a 9×13″ pan with shortening.  Mix everything but the raspberry puree about 50 strokes, or until glossy & well-mixed.  Pour into prepared pan and smooth with a spatula.  Pour small puddles of raspberry puree over the top, then run a knife through them from side to side lengthwise and then width-wise a few times to create a marble effect.  Sprinkle chocolate chips over the top. Bake for 30-40 minutes, or until toothpick inserted one inch from side of pan comes out clean.  Cool completely on a wire rack before serving.  For easier cutting, place pan in refrigerator for a 1/2 hour. These can be frozen for up to six months in an airtight container.

Raspberry Puree
16 oz frozen raspberries
1 teaspoon lemon juice
1/2 cup sugar

Place berries in a microwave-safe bowl and heat for a minute, stir, and continue heating in 30 second bursts, stirring in between, until they are defrosted but not hot.  Their juices should be flowing.  Place a wire sieve over a bowl and dump the berries into it.  Stir them until they have given up about 1/2 cup of juice.  Pour the juice into the bowl you used to heat the berries and microwave, stirring occasionally, until liquid is reduced to 2 tablespoons.  Stir the drained berries into the reduced juice along with the lemon juice and sugar.  You can process this until smooth or you can just stir it to leave it slightly chunky, which is what I prefer.  Store extra covered in fridge–goes great on pancakes.  Can be stored 10 days in the refrigerator  or 1 year frozen.

Recipe by Veronica Miller

Razzcherry Pie

Posted on

I am a cake lover, born to a family of pie lovers.  Making pie does not thrill me the way making and decorating a cake can, but in most cases, my family would prefer I bring pie to our get-togethers.  I’m making them so often now that I seem to have earned an unwanted reputation and have become, somewhat grudgingly, the designated pie maker amongst my friends and family.

This is how my Razzcherry Pie was born. Dad wanted pie for his birthday celebration last year, so I did an experiment to come up with a cherry & raspberry filling.  Though delicious, it turned out pretty runny so I tweaked it a bit and tried it again for our belated Mother’s Day barbecue this year (because, of course, Mom wanted pie instead of cake).  It came out perfect so I thought I’d share the recipe now that I’ve worked out the kinks.

Veronica’s Razzcherry Pie

Prepare to be razzle dazzled!

Almond Crust
1/2 cup slivered almonds
2 cups all-purpose flour, plus extra for rolling
1 teaspoon salt
1 heaping teaspoon brown sugar
1 cup (2 sticks) unsalted butter, very-cold, cut into 16 pieces
4 to 6 Tbsp ice water, very cold

Raspberry-Cherry Filling
1 (10-oz) package frozen raspberries
2 (14.5-oz) cans sour pitted cherries, drained well (juice reserved)
1 cup sugar
4 tbsp. cornstarch
2 tbsp butter
¼ tsp salt
½ tsp. almond extract
½ tsp red food coloring (optional)

Additional
milk & coarse sugar for top crust

Directions


This slideshow is meant as an accompaniment to the directions and has step-by-step photos & instruction for making a lattice top crust.

The night before you make the pie, put the raspberries into a colander and set it over a bowl.  Put the whole thing in the refrigerator and by the time you use them, they’ll be thawed and drained.  Save the juice.

For the crust (which can be made up to two days ahead), I recommend using a food processor.  Process the almonds until very finely ground—about the texture of cornmeal.  Add the flour, salt & brown sugar, then pulse a couple times to combine.  Cut in the butter until the mixture resembles coarse meal & pieces are no larger than peas.  Sprinkle 4 tbsp ice water over the top and pulse until it starts to clump together & holds together when you pinch it with your fingers.  Add additional water if necessary (I personally use 5 tbsp).  Form the dough into 2 disks, dust with flour, cover with plastic wrap and refrigerate at least one hour.  Roll out one of the disks on a floured surface and fit it into a 9 inch deep dish pie plate, trimming off the excess (leave a ½” overhang if you will be using a lattice top crust).  Set in the fridge until ready to use.

Preheat oven to 400 degrees & place one oven rack in the lowest position and one in the middle. If you only have one rack, put it in the lowest position.

Pour the collected raspberry juice into a 1-cup measuring cup (you’ll probably only have a few tablespoons).  Add the reserved cherry juice until you have ¾ cup of liquid. In a saucepan mix the sugar, cornstarch, and salt. Stir in the juice and simmer over medium heat until filling is thick and clear (by clear I don’t mean the red will disappear, but that the cloudy appearance from the cornstarch will go away), about 4 to 5 minutes. Since you’ll be adding more liquid after it’s done cooking and the berries will break down and make the glaze juicier, you want to get it pretty thick.  If it isn’t gel-like after 5 minutes, whisk in more cornstarch (1 tsp at a time) and cook for another few minutes after each addition until it’s very thick.

Remove from heat and stir in the butter, almond extract & food coloring until the butter is melted and incorporated. Gently fold in the cherries & very gently fold in the raspberries.  Yes, the raspberries will fall apart but the more careful you are, the less likely it is they’ll turn to unrecognizable mush. Pour into pastry-lined pie dish and set aside. Roll out second dough disk and cut into 1/2-3/4″ strips.  Arrange the strips on top to make a lattice, trim them to the edge of the plate (slightly shorter than the overhanging edge), fold the edge over & seal.  Pour some milk (I used cream) into a dish and use your clean fingertips to moisten the strips.  Sprinkle the strips with coarse sugar (try to get it on the strips but it’s OK if some falls into the filling).

If you are just using a full top crust, seal & flute the edges, brush with milk/cream, sprinkle with sugar and cut steam vents so you don’t have a royal pie explosion in your oven. Place pie on the bottom shelf of the oven. Bake for 10 minutes, and then move to the middle shelf & reduce the heat to 350 degrees F.  At this point, you MUST put an oven liner on the rack below the pie, or cover a rimmed baking sheet with foil and place it below, because the pie will most likely bubble over and make a mess.  Continue to bake until bubbling & the crust is a golden brown, about 30 to 35 minutes more. Cool completely (best if made the day before serving) before cutting & serve with vanilla ice cream.

Will last several days on the counter & longer in the fridge.