RSS Feed

Tag Archives: cream cheese

Strawberry Cream Cheese Pie

Posted on

I was challenged by a former co-worker years ago (five years ago, to be exact), to reproduce the Strawberry Cream Cheese Pie you could get at Long John Silvers.  He was slightly obsessed.

Although I didn’t duplicate it exactly, the crust is almost spot-on (it’s an unbaked graham cracker crust, unusual but so good), and it’s fairly close.  It has taken me this long to share the recipe because I couldn’t share the first one with you – I used wild strawberry essence in it, and not many people would have that on hand to use in a humble pie, such as this.  But I remembered how good it was and wanted to see if I could recreate my recreation of Mrs. Smith’s pie by concentrating the strawberry flavor in another way.  Then I made jam a few weeks ago, inspiration hit.  Jam, to me, is the essence of the fruit used to create it.

So I tried it, replacing the gelatin and fresh strawberries in my original recipe with the homemade jam, and it was perfect. It’s not as light as the original*, but so good in it’s own right. So thick and creamy, so cream cheese-y, so strawberry-y. And so perfect for summer because, unlike most of my recipes this summer, no part of it requires an oven. You’re welcome.

Strawberry Cream Cheese Pie

Printable recipe
Printable recipe with picture

Crust
1 ½ envelopes graham crackers (13 1/2 sheets)
6 tablespoons butter, melted
2 tablespoons sweetened condensed milk
2 tablespoons brown sugar
1 tablespoon water

Filling
1 (8 oz) package cream cheese
1 heaping cup (13 oz jar) good quality strawberry jam
1 (14 oz) can (minus 2 tablespoons for the crust) sweetened condensed milk
2 cups whipped topping or homemade (sweetened) whipped cream

Garnish
Leftover whipped topping or 1-1 1/2 cups homemade sweetened whipped cream
Leftover crust crumbs

While still in the package, smash up the graham crackers a little bit, then empty into the bowl of a food processor fitted with the blade attachment. Pulse & process until fine crumbs. Add the butter, sweetened condensed milk, brown sugar & water and process until thoroughly combined. Set aside 1/2 cup of the crumbs and press the remaining crumbs into a 9” pie plate. Place in fridge.

Wipe out the food processor. Add the cream cheese, jam, and sweetened condensed milk, and process until smooth. Add the whipped topping or whipped cream and pulse until mixed. Pour into prepared pie plate, cover with plastic wrap, and refrigerate overnight. Pipe whipped cream around the edge in stars or rosettes using Wilton tip 2110 (1M). Garnish with whipped cream & the remaining crumbs before serving.

Veronica’s notes: If you’d like a lighter pie, you could use 3 cups of whipped cream, or the entire carton of whipped topping, and use another cup or two for garnish. You will have too much pie filling, but I doubt you’ll complain about eating the extra. ;) Also, it’s important to use the best jam possible, as this is what gives the pie its strawberry flavor. If you buy cheap Walmart jam, it will taste like you bought a Great Value frozen pie, not made it yourself. I’ve actually tried this using Walmart strawberry jam, so I unfortunately speak from experience (it was bad).  Homemade is ideal, and Bonne Maman is the only brand I can put my own stamp of approval on if you go with store-bought.

Baked Cream Cheese Spaghetti Casserole

Posted on

I went through a comfort food phase last month  where, despite the heat, all I wanted were piping hot casseroles and soups.  Plain Chicken to the rescue, yet again!  This is one of the things which satisfied my craving for comfort food.  I resisted every temptation to change the recipe, except for using reduced fat cream cheese in place of regular, and while I will say there are some things I’d do different next time (as noted below), this was just so stinkin’ good.  Creamy pasta, topped with an easy meat sauce and Parmesan cheese. Just. so. good.

Baked Cream Cheese Spaghetti Casserole

Printable recipe
Printable recipe with picture

12 oz spaghetti
1 (28 oz) jar prepared spaghetti sauce
1 lb. lean ground beef
1 teaspoon Italian seasoning
1 clove garlic, minced
8 ounces reduced fat cream cheese, softened
1/2 cup Parmesan cheese, shredded

Preheat oven to 350 F degrees.

In a skillet, brown the ground beef until cooked through; drain fat and stir in spaghetti sauce. Set aside.

Cook spaghetti according to directions on packet. Drain and place cooked spaghetti in bowl. Add cream cheese, Italian Seasoning and minced garlic. Stir until cream cheese is melted and the spaghetti is thoroughly coated.

Lightly grease a 9×13″ pan. Spread a small amount of meat sauce in the bottom of the dish. Put spaghetti on top of sauce and top with remaining meat sauce. Sprinkle Parmesan cheese on top.

Bake for 30 minutes, until bubbly.

*Veronica’s note: I would suggest covering your dish with foil while baking to prevent the cheese and spaghetti drying out like mine did. Also, you might reserve some pasta water to add in when you mix in the cream cheese – it is quite thick and dry and I think some extra moisture would make it creamier. I also plan to use more sauce next time – maybe up to even two jars.  What can I say, I like the sauce. :)

Recipe source: Plain Chicken

Guiness Brownies with Bailey’s Cream Cheese Swirl

Posted on

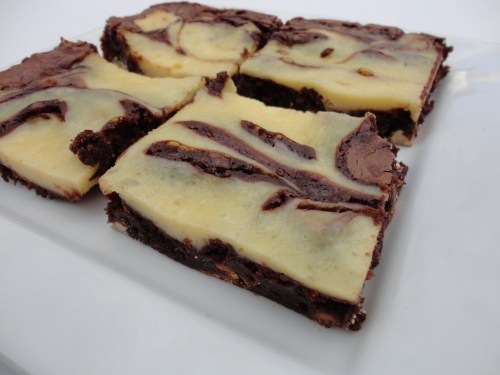
In the name of culinary exploration, I bought a single bottle of Guiness to make Wednesday’s cupcakes, knowing I could never use an entire 6-pack.  Unfortunately, the bottle was pretty ginormous so I still have more than half of it left.  I also have quite a bit of Bailey’s left, and since I can’t give this stuff to people I know who drink because they either don’t drink anything but the occasional wine or have drinking problems, I’m either going to have to toss it or keep baking up a storm with it.  And you guys know I can’t waste anything, right?

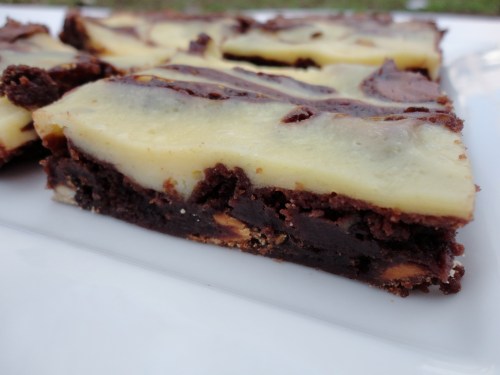
Hence, these brownies.  These crazy, rich, gooey, decadent brownies.  I went with my Kahlua brownies recipe, switching out the Kahlua for Guiness, and then went a little crazy with the mix-ins, adding butterscotch chips, white chocolate chips, and walnuts.  Then I glanced the cream cheese in my fridge and got excited, thinking of my Brownie Cakes recipe and using it as a springboard to create a Bailey’s Irish Cream cheese swirl.

I liked these a lot, despite the Guiness.  I’ve discovered from reading Guiness & chocolate recipe reviews on blogs that I may be the only blogger alive not in the “Yay, Guiness and chocolate are the best combo evarrrr!” camp, but at least the flavor was not overpowering here, thanks to the sweet chips and cream cheese swirl.  There is a slight yeasty flavor from the Guiness, which is interesting but not off-putting.  For most people, that would translate to, “Yaaaaaaay, Guiness brownies are the best thing EVARRRR!!!!”

The only bad thing about these brownies (unless you want to count the calories, but who counts dessert calories??), is that they used up so little of this leftover alcohol.  I’m giving up on the Guiness, but as for the Irish cream…Bailey’s Banana Bread anyone?

Guiness Brownies with Bailey’s Cheesecake Swirl

Printable recipe
Printable recipe with picture

Guiness Brownies:
1 brownie mix
½ cup (1 stick) butter, melted
¼ cup Guiness Extra Stout beer
1 egg
Optional mix-ins (add up to 1 ½ cups total): chopped walnuts or pecans, caramel bits, butterscotch chips, white chocolate chips, milk chocolate chips, or semi-sweet chocolate chips

Bailey’s Irish Cream Cheese Swirl:
1 (8 oz) package cream cheese, softened
1/3 cup granulated sugar
1 egg
1 tablespoon Bailey’s Irish Cream

Preheat oven to 350 degrees. Grease the bottom only of a 9×13” baking pan and set aside.

Combine the first four ingredients in a large mixing bowl and whisk until shiny and smooth, about a minute. Add optional mix-ins and stir until well combined. Spread into prepared pan; set aside.

Beat the cream cheese and sugar in a small mixing bowl until creamy, then beat in the egg and Bailey’s Irish Cream. Drop batter by spoonfuls on top of the brownie batter and swirl through with a knife.

Bake for 40 minutes, or until the cheesecake is golden on top and the brownies are puffed in the middle but firmer at the edges. Allow to cool completely before cutting.

Optional Reading:

OK, so this blog was too long to include this story before the recipe, but I wanted to put it at the end for those whose patience is still holding.

In high school drama class, we were doing a project where we were creating a spoof episode of the X-Files.  I remember nothing about the episode we came up with, except that some genius decided to cast me as an evil leprechaun.  (Speaking of evil leprechauns, doesn’t that one in my first picture look a little sadistic?)  We were actually filming it, just like a real TV show.

I showed up on filming day dressed head to toe in bright green.  I had no idea what I was going to wear for the role, but my mother happened to have a pair of bright green corduroy pants (oh, the glorious high fashion of the 90s!) stashed away in her closet.  She was a tiny woman and even at 115 pounds, I really had to stuff myself into those things and could hardly breathe all day.  I paired it with a matching shirt and called it golden (or emerald, if you will).

For my scene, we were filming in the hall and I was told to run off laughing after delivering my line.  It wasn’t until the camera started rolling that I thought to wonder how long I should run while laughing.  Convinced I should fight my urge to do it only a few seconds, thinking it was just my shyness trying to get the better of me, I tore off down the hall, squealing insanely with evil leprechaun laughter, throwing my hands up over my head and swinging them wildly back and forth as I ran…all the way down the hall.

That’s right.

I passed about five classrooms, squealing with high-pitched insane laughter at the top of my lungs.

When I turned back around, hoping I’d laughed long enough, there were curious heads leaning out of every single closed door I had passed, and in the far distance, I could see my classmates rolling with laughter while my drama teacher looked like he wished he could crawl under a rug.

I could have died.  The walk back to join my drama group was the longest walk of my life.  Every classroom stared at me as I passed, surely wondering who the crazy girl dressed in green was and if there was anything beyond my insanity that spurred the laughter that disrupted their class.

And of course, after that day, I was known far and wide as “the evil leprechaun.”

The end.


Cream Cheese Chocolate Truffles


Here’s another easy-peasy recipe that you can add to your holiday spread, or package up for gifts!  And it makes a ton, so there really is plenty for a crowd.  And did I mention they’re delicious?  Because they are.

The original recipe instructs you to refrigerate the truffle mixture for an hour, but I take a shortcut and roll them into balls immediately.  This is particularly beneficial if you decide to roll them in nuts,* because they adhere much easier to the softer truffles than when they’re hard after refrigerating.

*I like to use ice cream nut topping because the nuts are chopped nice and fine, salted, and have a little sugar added.

As a last note, if you like the look of truffles rolled in cocoa powder but don’t like the bitter edge to them, you can add powdered sugar to your cocoa to sweeten it before rolling.  It’s been a while since I made these, but I’m 95% certain this is what I did, and that little white spot on one the truffle in the back on the right most likely confirms it.  (Might want to sift your powdered sugar so it blends perfectly!)  I think I remember remarking that they seemed more likely to be approved by the general public, but I do like the bitterness of pure cocoa to contrast the sweet truffle.  Whatever floats your boat!

Cream Cheese Chocolate Truffles

Printable recipe
Printable recipe with picture

1 (8 ounce) package cream cheese, softened
3 cups confectioners’ sugar, sifted
3 cups semisweet chocolate chips, melted
1 1/2 teaspoons vanilla

In a large bowl, beat cream cheese until smooth. Gradually beat in confectioners’ sugar until well blended. Stir in melted chocolate and vanilla until no streaks remain.  Shape into 1 inch balls, then roll in cocoa powder, finely chopped nuts, or powdered sugar.  Store in an airtight container and serve at room temperature. You may refrigerate the truffles if you won’t be serving them for several days, but remove them at least ½ hour before serving.

Makes about 60 truffles.

Recipe source: Allrecipes

Creamed Corn

Posted on

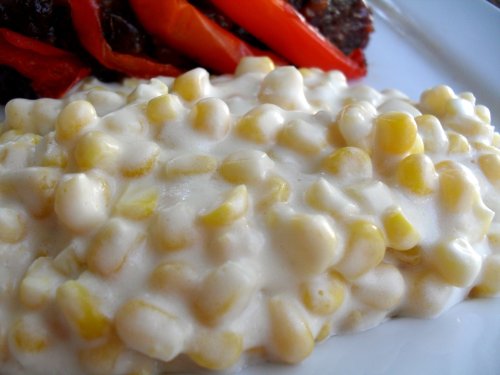
Until I married Dennis, I defined creamed corn as that uber-sweet yuck that comes in a can.  My first Thanksgiving with my in-laws, however, brought to light the real stuff that puts the canned goop to shame.  My sister-in-law, Joan, is in charge of the creamed corn in the Miller family, and she brings it to every single family gathering we have, for which my husband is eternally rejoicing and thankful.

It’s a Miller-family staple, and one of Dennis’ favorite foods.  At Thanksgiving, the creamed corn is just as important to him as the turkey.  Although I’ve brought it to my own family reunion before, I rarely make it at home (I prefer to indulge in desserts rather than side dishes), so he is super excited to pile it on his plate at every holiday gathering.  He got lucky recently, however, because I decided to make it in lieu of the usual mashed potatoes to go with our meatloaf.

Creamed corn the Miller way (OK, I know lots of you already make it this way, but to me, it will always be the Miller way) is buttery, creamy, has just a bit of tang to offset the sweet corn, and is crazy delicious.  It’s homestyle comfort food at it’s finest!  If you want to do it up completely Miller-style for a big gathering, triple the corn, double the other ingredients, and throw it in a crockpot to heat all day, stirring to combine everything once it’s hot, until it’s time to eat.

Creamed Corn

Printable recipe
Printable recipe with picture

1 bag frozen sweet yellow corn
1 (8-oz) package cream cheese
1 stick salted butter*

Melt the cream cheese and butter together in a large saucepan over medium heat. Once they are melted and pretty smooth, stir in the corn. Continue cooking, stirring every few minutes, until heated through. Serve hot.

*If using unsalted butter, add 1/4 teaspoon salt to the recipe.

**The above recipe is the long-loved and family-approved version, but I tried adding 1/4 teaspoon garlic powder to the latest batch since Teri adds it to hers, and Dennis loved it. He doesn’t like sweet in his savory foods and usually adds extra salt to combat the corn’s sweetness, but he didn’t have to do that with the addition of garlic powder.  I like this corn either way, so it’s up to you.

Green Chile and Cream Cheese Burgers

Posted on

I’m a sucker for a grilled burger in the summer, so I broke this recipe from Debbi out as soon as it was grilling weather!  Usually I just go for a plain grilled burger with lettuce, tomato, pickle, onion, ketchup and mustard, but sometimes you want something a little different and this one really satisfies.  The chiles give the burger a kick (for more kick, you could use jalapenos) and the cream cheese is a cooling, tangy contrast.  I really love grilled onions on any burger and they are perfect with the green chiles on this one.  I served mine with Dilly Cucumber Salad, and I found the tangy sweetness really complimented this burger!

Green Chile and Cream Cheese Burgers

Printable recipe
Printable recipe with picture

1 teaspoon canola oil
1/2 of a large onion, diced (I sliced mine)
1 (4 oz.) can of green chiles (I bought canned whole chiles and cut into strips)
Salt and pepper
1 lb. ground beef or bison (click here to find out why bison is better)
4 hamburger buns
4 oz. cream cheese

Heat oil in skillet over medium-high heat. Saute onion until softened and is browned in places (it helps to only stir occasionally). Add chiles, season with salt and pepper, saute until heated through. Divide meat into four patties, salt and pepper, and cook or grill until done. Spread 1 oz. cream cheese on each bun and divide the green chile-onion mixture among the burgers. Serve hot.

Makes 4 burgers.

Per burger, using bison, light (80-calorie) buns, and neufchatel: 302 calories; 10 g fat; 24 g carbohydrates; 5 g fiber; 31 g protein; 8 Points Plus.  Using 93% lean ground beef makes the burgers 9 Points Plus.

Recipe source: adapted from Debbi Does Dinner

Celebration Frosting & A Giveaway! {CLOSED}

Posted on

***The giveaway is now closed.  Congratulations to Jenna, Suzie, Biz, Cheryl, and Kim~the lucky winners!***

Celebration Frosting | veronicascornucopia.com

Wedding and birthday cakes from good bakeries, at least here locally, have a certain evasive flavor in the icing that I’ve always mentally defined as “celebration.”  I am still unable to describe the flavor any other way, but I learned the secret of that flavor and have been using it in the frostings for my own homemade celebration cakes ever since.

It is a flavor emulsion called “Crème Bouquet.”  This is wonderful stuff.  It is an oil-based flavoring with lemon and other essential oils that aren’t listed on the label (because they are sneaky and don’t want us to figure out how to duplicate it at home!).  Believe me, I’ve tried, but I can’t make anything that tastes even remotely as wonderful as this emulsion.  It doesn’t taste like lemon to me, although that’s the only essential oil listed, and it doesn’t taste like anything else I’ve ever had.  Well, besides wedding and birthday cake.  I have relatives that call it “that sweet flavor.”  But that is not an apt description, either.  You just have to try it for yourself!

Since I’m so in love with this flavoring and know it’s not a common household ingredient, I am going to give five lucky readers a 2-ounce bottle from Cake Stuff!  To enter, just leave me a comment on this post and I will draw the winners using Random.org on Friday, November 5th .  Simple as that.  For those interested in purchasing crème bouquet, you can order by phone from Cake Stuff–just call the number on their website.   It is very reasonably priced at $2.50 for a 2-ounce bottle, and they also have two larger sizes available.

You can turn any vanilla frosting into celebration frosting by adding crème bouquet to it, and I’ll share the two that I use it in.  Enjoy!

White Celebration Frosting

I try to avoid this one since it’s kind of a non-food, one but sometimes, you just need a good, bright white frosting and the only way to achieve that is with shortening. And believe me, it does not taste like non-food. It is utterly delicious. I promise. The meringue powder is essential in this recipe to eliminate the greasy mouth-feel that shortening frostings usually have. It is also important to use good shortening because cheaper brands tend to be clearish, off-colored, and slimy. You want one that is an opaque white, like Crisco.
Printable recipe
Printable recipe with picture

2 cups Crisco vegetable shortening
2 tablespoons meringue powder
2 teaspoons crème bouquet
1 teaspoon clear vanilla extract
1 teaspoon butter flavoring
Pinch of salt
2 lbs. (8 cups) powdered sugar
1/3-1/2 cup water

Put the Crisco in the bowl of an electric mixer and beat on medium a few seconds, until creamy. Add in the meringue powder, flavorings, and salt and beat until smooth. Slowly add in the powdered sugar, alternating with water when it becomes too thick. Add more or less water to get your desired consistency. Once it is all added, beat on medium-low speed for four minutes. This frosting will keep for up to a month, tightly covered, at room temperature, or several months in the refrigerator.

Cream Cheese Celebration Frosting

This is my favored celebration frosting. This frosting on white cake, for me, makes the ultimate celebration cake. And be sure to try it on red velvet as well–divine!
Printable recipe
Printable recipe with picture

1 (8 oz) package cream cheese, room temperature
1/2 cup (1 stick) unsalted butter, room temperature
2 pounds powdered sugar
2 teaspoons crème bouquet
2 teaspoons clear vanilla extract*
Pinch of salt
Milk, if desired

Beat the cream cheese and butter until smooth. Add the remaining ingredients and beat on low, scraping the sides, until all the sugar is incorporated, then turn to medium/high and beat for another two minutes. I prefer not to add any extra liquid because I find it easier to get a perfectly smooth cake with thick frosting**, but you can add milk as needed to make it creamier. Refrigerate or freeze if you won’t be using it within a few days.

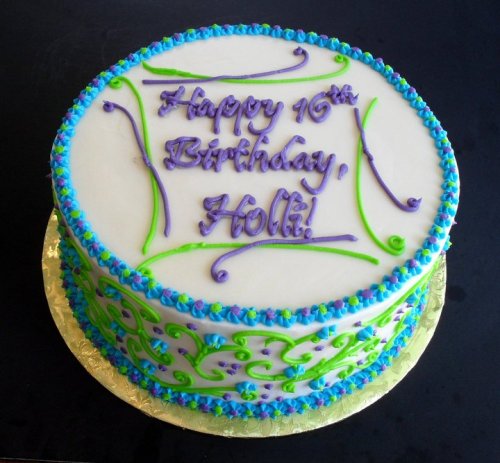
*You can use regular vanilla but the color will turn more yellowish-ivory (like Mom’s birthday cake above), which is fine unless you are aiming for a lighter color.  To illustrate, I made the following two wedding cakes with the same recipe for cream cheese celebration frosting, but used clear vanilla on the first and regular on the second:

**To get my icing perfectly smooth, I use a straight-edged offset spatula and the water bottle trick: fill a clean (ideally, brand new or designated for water only) squirt bottle with water and spray the frosted cake all over.  This allows the spatula to glide over the surface and smooth it easily.  I recommend placing the cake, uncovered, in the refrigerator for an hour or overnight to allow the water on the surface to evaporate completely before decorating.  You can see me demonstrating the “water bottle trick” in this video: How to Make a Layer Cake part 3: stacking and frosting.

~Disclaimer: I was not compensated for this blog or sponsored by Cake Stuff to promote them.  That is the store where I’ve always purchased my crème bouquet and it is consistently delicious.  So I decided to buy some to share with my readers so you can experience the awesomeness for yourselves!~

Carrot Cake Cookies


This is another recipe from my foodie Mama, Marina, and it won me second place in the “filled cookies” category at the state fair this year!  I also won first place with another cookie recipe of hers, but this is the recipe that everyone on Facebook demanded after seeing the picture, so I’m posting it first.  My only other first place ribbon was for Cinnamon Roll Sugar Cookies, in the “refrigerated cookies” category, which I have already posted the recipe for. I got eleven ribbons total and plan to share most of the recipes with you in future posts.

I don’t know what to say about these cookies that isn’t obvious just from looking at the picture.  They are delicious!!  Imagine classic carrot cake flavors combined with the buttery taste and soft, chewy texture of a cookie and there you have it.  Perfection!


CARROT CAKE COOKIES
Printable recipe
Printable recipe with picture

1 cup light brown sugar
1 cup sugar
1 cup unsalted butter, room temperature
2 large eggs, room temperature
1 teaspoon vanilla
2 ½ cups all-purpose flour
1 teaspoon baking soda
1 teaspoon baking powder
¼ teaspoon salt
1 teaspoon cinnamon
½ teaspoon ground nutmeg
½ teaspoon ground ginger
1 cup old-fashioned rolled oats
1 ½ cups finely grated carrots
1 cup raisins
1 cup chopped walnuts
Cream Cheese Filling (recipe follows)
Powdered sugar for dusting (I skipped this)

Heat oven to 350°. Line two baking sheets with Parchment paper, and set aside. Cream butter and sugars until fluffy. Mix in eggs and vanilla until well combined. Sift together flour, baking soda, baking powder, salt, cinnamon, nutmeg, and ginger; stir to combine. Gradually add flour to butter mixture; mix on a low speed until just blended. Mix in oats, carrots, raisins and walnuts. Chill dough in refrigerator for at least 30 minutes, or up to overnight. Drop dough onto parchment paper, leaving 2 inches between cookies. Bake until light brown, about 12 minutes. Cool cookies on cooling rack. Repeat with remaining dough. Once cooled completely, pipe or spread about 2 teaspoons of filling on half the cookies & sandwich together with a second cookie; dust with powdered sugar on both sides. Serve at room temperature. Store leftovers in an airtight container in the refrigerator.

CREAM CHEESE FILLING:
Makes about 2 cups

1 (8 oz) package cream cheese, room temperature
½ cup unsalted butter, room temperature
1 cup powdered sugar
1 teaspoon pure vanilla extract
2 tablespoons crushed pineapple, well-drained and squeezed dry
1/3 cup finely chopped walnuts

Place the cream cheese in a medium mixing bowl. Beat the cream cheese until soft. Gradually add the butter, and continue beating until smooth and well blended. Sift in the powdered sugar, and beat until smooth. Add vanilla, and stir to combine. By hand stir in the pineapple and walnuts.

Recipe source: Marina C.