RSS Feed

Tag Archives: wedding

Chocolate Mocha Punch


Seriously, a recipe today! :D I drafted this November 14th so it’s about time I posted it-lol.  I’ve shared a few of my friend, Teri’s, recipes before (see them all here), and this one is just as wonderful as the others.  She made this punch for my last baby shower and it was delicious! I’m sure once you scan the ingredients, you won’t have a hard time figuring out why.  It’s very decadent!  She also made it for her daughter’s wedding and the holiday party at her home last week, and I think it’s great for any occassion.  New Year’s Eve, maybe? :)

Chocolate Mocha Punch

Printable recipe
Printable recipe with picture

3 quarts water
1 cup Nesquik
1 cup granulated sugar
1/2 cup instant coffee granules (decaf is fine)
1/2 gallon vanilla ice cream
1/2 gallon chocolate ice cream
2 cups whipped cream (Teri uses Cool Whip)
Chocolate curls for garnish

In a large saucepan, bring the water to a boil. Remove from heat and add Nesquik, sugar and coffee; stir until dissolved. Cover and refrigerate for 4 hours or overnight. About 30 minutes before serving, pour into a punch bowl. Add ice cream by scoopfuls, stir until partially melted. Garnish with dollops of whipped cream and chocolate curls.

Cream Cheese Mints & Peppermint Patties

Posted on

I’ve been making these mints for years and they are always a hit.  Unlike the hard & powdery ones you buy at the store, these are soft and the flavor far superior to the aforementioned imposters.  Combine them with white cake and nuts, and you’ve got my idea of heaven.  :)  They are also very simple to make, though if you use a mold, it is a little time-consuming.  You can let them air dry until they are almost like the classic mints that accompany most wedding and baby shower cakes, but I usually only let them dry overnight so they are just dry enough to hold their shape (unless smashed), but are still soft and creamy on the inside.

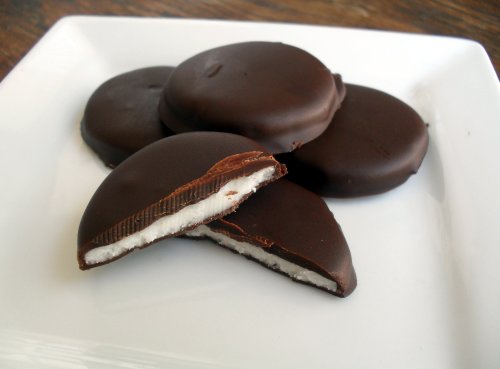
I made this batch because a co-worker requested them, and after turning 1/4 of the batch into the classic square mints for him and a girlfriend that loves them, I got bored and tried a couple other things with the dough.  I figured I could use them as filling for peppermint patties, and although the flavor is a little different than the classic (I have a recipe for York-style peppermint patties here), I like it even better because I like the added tang of cream cheese.  I also had another stroke of genius (if I do say so myself) after I made the peppermint patties, but that one deserves a post all of it’s own.  Check back Friday!

Cream Cheese Mints

Printable recipe
Printable recipe with picture

1 (8-oz) package cream cheese, room temperature
1/2 teaspoon peppermint extract
2 lbs. powdered sugar
Food coloring (optional)
Granulated sugar, for coating (if using a mold)

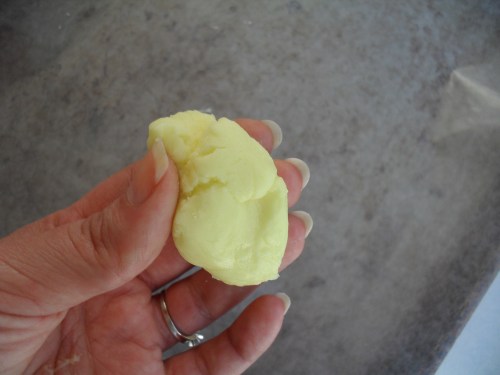
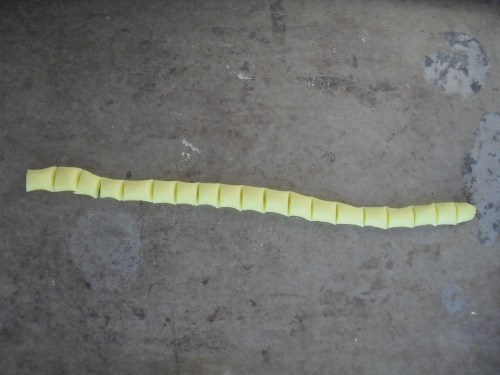
Beat the cream cheese until creamy, then beat in the extract. Beat in the powdered sugar until well blended.  Depending on your mixer, you may have to use your hands to fully incorporate the sugar.  The mixture will be smooth and like a stiff dough. Add icing gel coloring if desired. Pinch off a chunk of dough and roll it into a slender log.

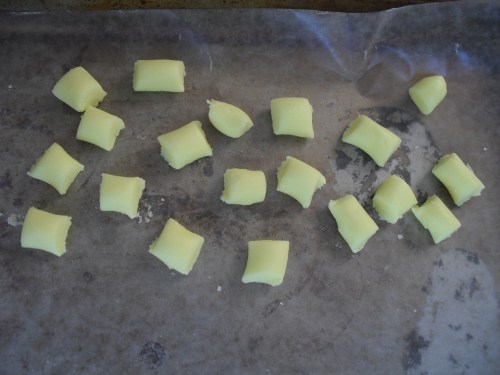
Cut the log into small squares set onto waxed paper to dry.(Keep the remaining dough covered or sealed in Ziploc bag(s) during the rolling and cutting process, or it will dry out.)

Repeat until all the dough has been cut into squares. If you wish to shape the mints using a mold, pull off a small piece of dough, enough to fill the mold, and roll it into a ball. Roll the ball in granulated sugar, coating it very well, then press into the mold. Turn it over and pop the mint out onto wax paper. Allow to dry overnight before packing in an airtight container. Store in the refrigerator until ready to serve.

Yield: 2 1/2 lbs. mints

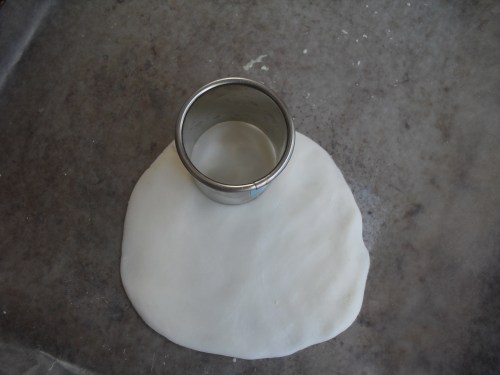
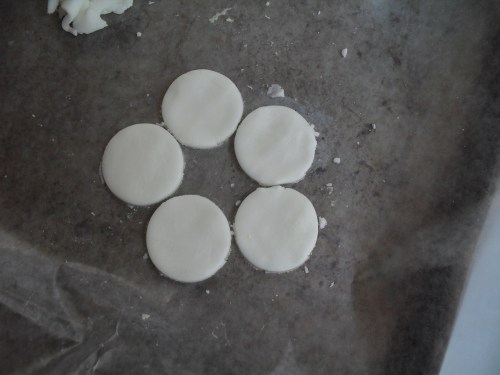
To make peppermint patties, roll dough out to desired thickness and use a small round cookie cutter or juice or shot glass to cut circles.

Place on wax-paper lined baking sheet and freeze, uncovered, for an hour. Melt a 12-oz bag of semi-sweet chocolate chips with 1 teaspoon oil or shortening and drop the peppermint patties in one at a time, turning and lifting out with a fork. Quickly tap off excess and use another fork or your finger to help slide the dipped patty onto another waxed paper-lined baking sheet. Once all patties are dipped, place baking sheet in refrigerator until chocolate is set, about 15-30 minutes. Store in airtight container and keep refrigerated.

Celebration Frosting & A Giveaway! {CLOSED}

Posted on

***The giveaway is now closed.  Congratulations to Jenna, Suzie, Biz, Cheryl, and Kim~the lucky winners!***

Celebration Frosting | veronicascornucopia.com

Wedding and birthday cakes from good bakeries, at least here locally, have a certain evasive flavor in the icing that I’ve always mentally defined as “celebration.”  I am still unable to describe the flavor any other way, but I learned the secret of that flavor and have been using it in the frostings for my own homemade celebration cakes ever since.

It is a flavor emulsion called “Crème Bouquet.”  This is wonderful stuff.  It is an oil-based flavoring with lemon and other essential oils that aren’t listed on the label (because they are sneaky and don’t want us to figure out how to duplicate it at home!).  Believe me, I’ve tried, but I can’t make anything that tastes even remotely as wonderful as this emulsion.  It doesn’t taste like lemon to me, although that’s the only essential oil listed, and it doesn’t taste like anything else I’ve ever had.  Well, besides wedding and birthday cake.  I have relatives that call it “that sweet flavor.”  But that is not an apt description, either.  You just have to try it for yourself!

Since I’m so in love with this flavoring and know it’s not a common household ingredient, I am going to give five lucky readers a 2-ounce bottle from Cake Stuff!  To enter, just leave me a comment on this post and I will draw the winners using Random.org on Friday, November 5th .  Simple as that.  For those interested in purchasing crème bouquet, you can order by phone from Cake Stuff–just call the number on their website.   It is very reasonably priced at $2.50 for a 2-ounce bottle, and they also have two larger sizes available.

You can turn any vanilla frosting into celebration frosting by adding crème bouquet to it, and I’ll share the two that I use it in.  Enjoy!

White Celebration Frosting

I try to avoid this one since it’s kind of a non-food, one but sometimes, you just need a good, bright white frosting and the only way to achieve that is with shortening. And believe me, it does not taste like non-food. It is utterly delicious. I promise. The meringue powder is essential in this recipe to eliminate the greasy mouth-feel that shortening frostings usually have. It is also important to use good shortening because cheaper brands tend to be clearish, off-colored, and slimy. You want one that is an opaque white, like Crisco.
Printable recipe
Printable recipe with picture

2 cups Crisco vegetable shortening
2 tablespoons meringue powder
2 teaspoons crème bouquet
1 teaspoon clear vanilla extract
1 teaspoon butter flavoring
Pinch of salt
2 lbs. (8 cups) powdered sugar
1/3-1/2 cup water

Put the Crisco in the bowl of an electric mixer and beat on medium a few seconds, until creamy. Add in the meringue powder, flavorings, and salt and beat until smooth. Slowly add in the powdered sugar, alternating with water when it becomes too thick. Add more or less water to get your desired consistency. Once it is all added, beat on medium-low speed for four minutes. This frosting will keep for up to a month, tightly covered, at room temperature, or several months in the refrigerator.

Cream Cheese Celebration Frosting

This is my favored celebration frosting. This frosting on white cake, for me, makes the ultimate celebration cake. And be sure to try it on red velvet as well–divine!
Printable recipe
Printable recipe with picture

1 (8 oz) package cream cheese, room temperature
1/2 cup (1 stick) unsalted butter, room temperature
2 pounds powdered sugar
2 teaspoons crème bouquet
2 teaspoons clear vanilla extract*
Pinch of salt
Milk, if desired

Beat the cream cheese and butter until smooth. Add the remaining ingredients and beat on low, scraping the sides, until all the sugar is incorporated, then turn to medium/high and beat for another two minutes. I prefer not to add any extra liquid because I find it easier to get a perfectly smooth cake with thick frosting**, but you can add milk as needed to make it creamier. Refrigerate or freeze if you won’t be using it within a few days.

*You can use regular vanilla but the color will turn more yellowish-ivory (like Mom’s birthday cake above), which is fine unless you are aiming for a lighter color.  To illustrate, I made the following two wedding cakes with the same recipe for cream cheese celebration frosting, but used clear vanilla on the first and regular on the second:

**To get my icing perfectly smooth, I use a straight-edged offset spatula and the water bottle trick: fill a clean (ideally, brand new or designated for water only) squirt bottle with water and spray the frosted cake all over.  This allows the spatula to glide over the surface and smooth it easily.  I recommend placing the cake, uncovered, in the refrigerator for an hour or overnight to allow the water on the surface to evaporate completely before decorating.  You can see me demonstrating the “water bottle trick” in this video: How to Make a Layer Cake part 3: stacking and frosting.

~Disclaimer: I was not compensated for this blog or sponsored by Cake Stuff to promote them.  That is the store where I’ve always purchased my crème bouquet and it is consistently delicious.  So I decided to buy some to share with my readers so you can experience the awesomeness for yourselves!~

Grandma Ople’s Apple Pie

Posted on

A couple ordered an apple pie from me last month b/c they were searching for someone who could make their son’s groom’s cake, which he chose to be apple pie.  They liked it so much they ordered 15 for the wedding and at first I regretted agreeing since it takes me about 3 hours to make a pie from scratch and I don’t have the heart to charge more than $10 a pie, which pretty much barely covers the cost of the ingredients (3 sticks of butter per pie, 8 apples, sugars, etc.) and supplies (pie tin & holder).  But now that I’ve made all but 3 of the apple pies, I feel under less pressure and I have no regrets.  I love to bake, so if someone is willing to pay for the ingredients, it gives me a good excuse to do it and I don’t even have to eat it which make my waistline happy!  I guess this is just my weird way of looking on the positive side of slaving away in a hot kitchen on a warm spring day, my heart pounding with anxiety as I glance at the clock, thinking how little time I have left, and burn my fingers on the oven rack for the thirteenth time.

Anyway, all this to introduce my favorite recipe for apple pie.  I know I caught your attention with the three sticks of butter comment, but I think the crazy amount of it just might be the secret to the deliciousness!!  That, and the unconventional recipe for the filling.  It’ll rock your friggin’ socks off.

Rich All-Purpose Pastry
This is my favorite basic pie crust.  It is buttery, flaky, tender, extremely versatile and always reliable.  The combination of butter and shortening is a good one–the butter adds flavor, the shortening, flakiness.
*Makes enough for two pies or one double-crust pie

2 1/2 cups flour
1/2 tsp. salt
2 sticks butter, cold and cut into 16 pieces
1/4 cup shortening, chilled in freezer
6-10 tbsp. ice cold water (I use a scant 1/3 cup every time)

Mix flour and salt.  Cut the butter and shortening in with a pastry blender or food processor until pieces are the size of small peas.  Add ice water and mix until it starts to form a ball.  Divide dough in half, gather in your hands and gently shape each into a ball, flatten them into discs, cover with plastic wrap and refrigerate until ready to use.  If it gets too hard I leave it on the counter until it’s pliable enough to roll out.

Grandma Ople’s Apple Pie
No, I don’t have a Grandma named Ople. I got the recipe off allrecipes.com so if you want the original version you can look it up there.  This is mine, and I have a good reason for every change I made but I won’t bore you with all that!

1 recipe Rich All-Purpose Pastry
8 granny smith apples, peeled, cored and sliced thin
1 tsp. cinnamon + 1 tbsp. all-purpose flour, mixed together in a small bowl
1/2 cup unsalted butter
3 tbsp. all-purpose flour
1/2 cup white sugar
1/2 cup packed brown sugar
1/4 cup water
1 egg, beaten

Preheat oven to 425 degrees.

Roll out one disc of pie dough on a lightly floured surface and arrange in a pie plate, trimming off the edges.  Place plate in refrigerator until ready to use it.

Sprinkle the cinnamon mixture over the apple slices and mix well.  Arrange apples in your prepared pie plate and set back in the fridge.

Melt butter in a saucepan.  Whisk in flour until no lumps remain.  Add white sugar, brown sugar and water and whisk until combined, then bring to a boil.  Once it reaches a boil, leave it boiling over medium heat for five minutes.

Meanwhile, roll out your top pie crust.

Once caramel sauce has boiled for five minutes, pour slowly over the apples so that it can seep down into the cracks and not over the sides.  Be careful–it’s really hot!  (I’ve burned myself a lot on this stuff, trying to push a bit of overflow back into the crust with my bare fingers–owie!) Arrange the top crust over the apples, trim the edges, fold the edges under the edge of the bottom crust and flute with your fingers.  For my tutorial on working with pie dough, including how I flute a crust, you can click here.

Brush the entire surface with the beaten egg, using a pastry brush.  I suggest using a silicone brush–it doesn’t mar the surface of the crust and that’s important with this particular pie since the hot caramel softens the dough and makes it susceptible to damage.

Pop it into the oven for 20 minutes.  Reduce heat to 350 and continue baking for about 40 minutes, or until bubbly & crust is browned.  Oh, and be sure to use an oven liner or place a baking sheet below the pie b/c it almost always leaks!

Allow to cool overnight on a cooling rack.