RSS Feed

Tag Archives: christmas

Classic Cherry Pie

Posted on

If you had trouble accessing the Preacher Tuna Salad recipe yesterday, I apologize. I accidentally posted it twice and deleted the original, making the link most everyone got lead to nowhere.  You can click here to view the recipe.With the 4th of July holiday quickly approaching, I thought it was about time I shared my favorite cherry pie recipe.  Maybe it’s all the red, but it just seems very festive to me! :)  There’s nothing fancy about it, unless you consider a lattice top crust fancy, but it’s a very good pie and excellent with a scoop of vanilla ice cream.  I love the flavor the almond extract adds, to me it is the essential key to a good cherry pie.

I love my Perfect Pie Crust above all others, and is the crust pictured here.  I highly recommend it for any and all pies, but truth be told, I just as often use a box of Pillsbury refrigerated pie crusts.  Judge me if you must, but it saves so much time!  If you buy pre-made crusts, don’t bother with generic/off-brands, they are awful. Pillsbury is pretty good if you don’t have time to make your own.

Classic Cherry Pie

Printable recipe
Printable recipe with picture

Pastry for a two-crust pie
1 cup granulated sugar
¼ cup cornstarch
2 (14.5 oz) cans tart cherries in water
2 tablespoons butter
1 teaspoon almond extract
½ teaspoon red food coloring (optional)
Milk & coarse sugar for top crust

Preheat oven to 375 degrees. Roll out one pie crust and line a 9” pie plate; place in refrigerator. In a large saucepan, combine the sugar & cornstarch and mix well. Drain the juice from the cherries into the pan with the sugar & cornstarch; set the cherries aside. Stirring constantly, cook the juice mixture over medium heat, until bubbling and thickened. Remove from heat and stir in butter, almond extract, and food coloring, if desired, until butter is melted. Stir in the cherries. Spoon into prepared pie plate. Roll out second disc of dough and cut into strips with a pastry wheel or pizza cutter. Arrange strips on top of filling to make a lattice design. Seal and flute edges. Brush milk over crust and sprinkle with sugar. Place on middle oven rack and put a cookie sheet below to catch any spillover. Bake 30 minutes, then put a pie shield on the pie to protect the crust from over-browning. Bake another 15 minutes, or until crust is golden brown and filling is bubbling. Cool at least two hours or overnight before serving.

Veronica’s note: I tend to cook my fruit pie filling until extremely thick, as I prefer my pies not to run at all when cut, as you can see in the photos. If you like yours to run a little, just follow the directions and you’ll be fine. My weirdness for cooking it until nearly cement is not included in them. :)  Also, I have a step-by-step video tutorial on another pie that includes how to make a lattice design here.

**Be sure to visit my “Current Favorites” in the sidebar at the right for other recipes that would be a great addition to your July 4th menu.**

Pecan Praline Cake with Butter Sauce

Posted on

It’s been a while since I made this cake, but it was so incredibly good that I still remember the feel and taste of it in my mouth. You know a recipe is good when the end result leaves that kind of impression. Soft, warm, gooey, sweet, rich, nutty, crunchy, creamy, pillowy – basically, everything good. A whole lotta yum.  There is frosting mixed into the cake. And then it’s topped with even more goodness. Need I say more?

Pecan Praline Cake with Butter Sauce

Printable recipe
Printable recipe with picture

Cake:
1 (15 oz) box Butter Pecan Cake Mix
1 (16 oz) tub Coconut Pecan Frosting
4 large eggs
3/4 cup vegetable oil
1 cup water
1/2 cup chopped pecans

Sauce:
1 (14 oz) can sweetened condensed milk
2 tablespoons butter
1/2 cup chopped pecans (optional)

Preheat oven to 350F. Spray a 9×13 pan with oil and set aside.

Combine all cake ingredients except the pecans and beat together until well combined, a minute or two, then stir in the pecans.  Pour into prepared pan and bake for 40 minutes, or until a toothpick inserted in the center comes out clean.  Rest on a cooling rack while you make the sauce.

In a saucepan over medium heat, melt the butter and stir in the sweetened condensed milk.  Continue to stir until heated through, then stir in the pecans.  Pour over the whole cake, or individual slices.

Recipe source: The Country Cook

More cake mix favorites:

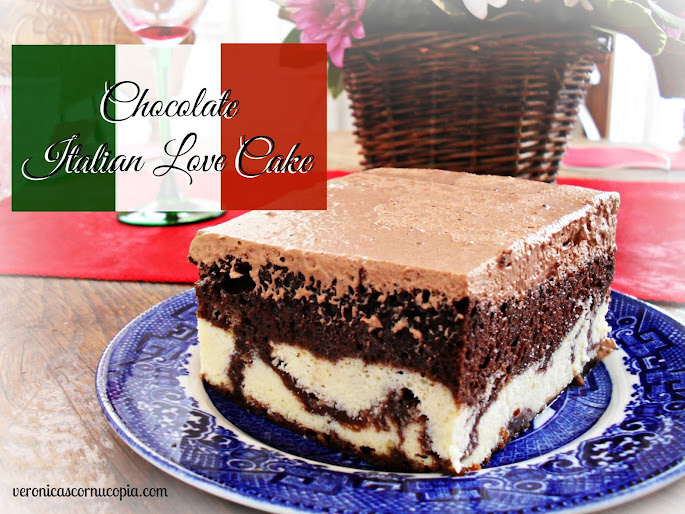
Chocolate Italian Love Cake – perfect for Valentine’s Day.

Easy Italian Cream Cake – chock full of pecans, coconut, and maraschino cherries, topped with cream cheese frosting. To die for.

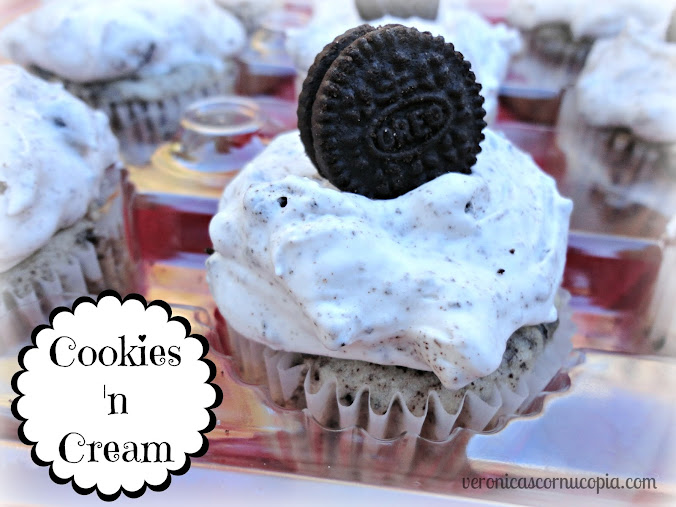
Cookies ‘n Cream Cake/Cupcakes. I didn’t like Oreos until this cake.

Tiger Butter


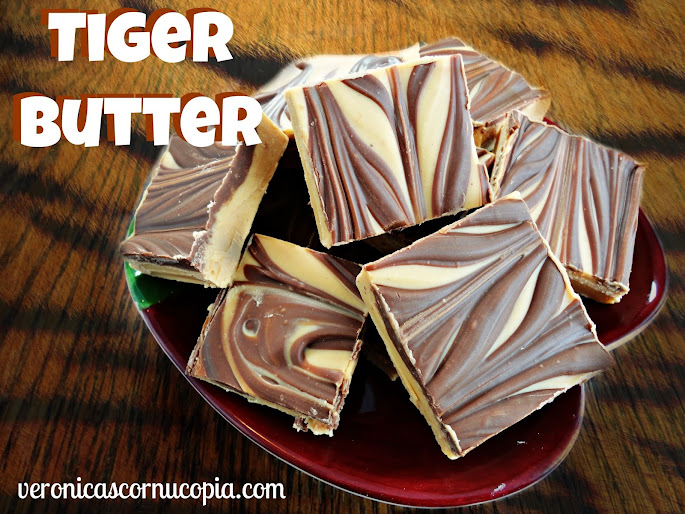
If you need an idea for last-minute Valentine’s Day treats for your loved ones, I gotcha covered!  I’ve made four batches of this Tiger Butter fudge since Christmas and everyone has been so impressed with it, I don’t know whether to be proud or ashamed of how easy it is to make!  Three ingredients, melt, stir, and swirl, and you’re done.

And if you’re wondering about the taste, it is oh so good.  The peanut butter layer is incredibly creamy and of course the chocolate is the perfect complement.  Need I say more?

Tiger Butter

Printable recipe
Printable recipe with picture

1 (24 oz) package vanilla almond bark candy coating
1 (1 lb 2 oz) jar creamy peanut butter
1 1/4 cups milk chocolate chips

Line a rimmed baking sheet with foil; set aside.

In a microwave-safe bowl, microwave the chocolate chips for one minute and stir well. Microwave in 15-second intervals, stirring well in between, until completely melted. This takes 2 intervals for my microwave. Be careful not to overheat the chocolate and stir well after each interval, allowing the residual heat to melt the chips before microwaving again. If you overheat them, they will get too thick and you won’t be able to use the melted chocolate for swirling. Once melted, set aside.

Melt the almond bark according to package directions. Usually that would be to place them in a microwave safe bowl, microwave for 1-1 1/2 minutes, stir well, and microwave in 15 second intervals, stirring in between, until melted and smooth. Once melted, stir in the peanut butter until creamy and smooth. Spread into prepared baking sheet.

If the melted milk chocolate has become too firm with standing, microwave for ten seconds, stir, then pour it over the peanut butter mixture in long horizontal lines. Drag a spatula through the lines in a vertical pattern, going up on one line, then down on the next, repeating until the pan is swirled. Allow to set for several hours or overnight before cutting. You may refrigerate the fudge to set it up quickly.

Stores great at room temperature, and you don’t even have to cover it. Great shelf life. I’ve left some uncovered for up to two weeks with no spoiling.

Veronica’s notes: although I haven’t tried it, you should be able to substitute 1 1/2 lbs white baking chips for the candy coating if you can’t find it in your area, or even real white chocolate if you don’t mind the big price tag. I like to use milk chocolate with peanut butter, but semisweet chocolate is perfectly fine and would create a more dramatic stripe effect.

Recipe source: adapted from The Better Baker

Chocolate Mocha Punch


Seriously, a recipe today! :D I drafted this November 14th so it’s about time I posted it-lol.  I’ve shared a few of my friend, Teri’s, recipes before (see them all here), and this one is just as wonderful as the others.  She made this punch for my last baby shower and it was delicious! I’m sure once you scan the ingredients, you won’t have a hard time figuring out why.  It’s very decadent!  She also made it for her daughter’s wedding and the holiday party at her home last week, and I think it’s great for any occassion.  New Year’s Eve, maybe? :)

Chocolate Mocha Punch

Printable recipe
Printable recipe with picture

3 quarts water
1 cup Nesquik
1 cup granulated sugar
1/2 cup instant coffee granules (decaf is fine)
1/2 gallon vanilla ice cream
1/2 gallon chocolate ice cream
2 cups whipped cream (Teri uses Cool Whip)
Chocolate curls for garnish

In a large saucepan, bring the water to a boil. Remove from heat and add Nesquik, sugar and coffee; stir until dissolved. Cover and refrigerate for 4 hours or overnight. About 30 minutes before serving, pour into a punch bowl. Add ice cream by scoopfuls, stir until partially melted. Garnish with dollops of whipped cream and chocolate curls.

Cranberry Bliss Cookies & Cookie Swap Recap

Posted on

Happy new year!  While most food bloggers are recapping 2012 with their top recipes, I’m totally disorganized and sharing an unseasonal recipe instead, weeks after I’d intended to.  Hey, give me a break, I still don’t have my head on straight after the hectic holiday season and still have one holiday party to go to before I’ll feel truly like I can settle back into a normal routine.

It’s been a while since I shared a recipe, and I wanted to share the yummy cookie recipe I used for  my cookie swap. I know most people are probably drinking green smoothies and training for marathons to attain lofty new year’s resolutions, but I’m going to share this cookie recipe anyway because I really don’t want to wait until next December to do it.  You can save it for next year, but if you have some dried cranberries left over from your holiday baking, why not use them up in these cookies?  I promise those you share them with won’t complain about cookie season being over.  But they might blame you for not making their goal weight loss this week.  :)

This recipe is for a super ginormous batch that makes about 9 dozen cookies, which is great if you are planning on sharing lots of cookies.  If you’d like a more moderate single batch (wuss), you can refer to That Skinny Chick Can Bake‘s recipe, which is what I used to make my ginormous recipe.

Cranberry Bliss Cookies (large batch)

*Note: the pecans need to be toasted so do this step first to avoid frustration.

Printable recipe
Printable recipe with picture

1 ½ cups (3 sticks / 12 oz) unsalted butter, room temperature
1 ½ cups (10 ¼ oz) vegetable shortening
2 ¼ cups (1 lb) sugar
2 cups (1 lb) brown sugar, packed
2 tablespoons vanilla extract
1 ½ teaspoons salt
1 tablespoon baking soda
3 large eggs
6 cups (1 lb 9 ½ oz) all-purpose flour
2 ¾ cups dried cranberries, chopped
1 1/2 cups chopped pecans, toasted
1 cup crystallized ginger, finely chopped
1 ½ lbs Ghirardelli white chips or chopped white chocolate

Preheat oven to 350ºF. Line baking sheets with parchment (I used foil this time) and set aside.

Cream butter, shortening and sugars. Add vanilla, salt, and baking soda and mix well. Add the eggs in while the mixer is running and continue to beat until well combined. Add flour and beat on low to combine. The mixer will be very full at this point so be careful to keep the flour from going over the edge before it is mixed in. Transfer the batter to a very large bowl and stir in the remaining ingredients until incorporated.

Scoop out tablespoonfuls of dough and place 2 inches apart on baking sheets. Bake for 12-14 minutes or till golden. Cool for a few minutes on baking sheet then remove to wire rack to finish cooling.

Makes about 9 dozen.

*To toast the pecans, place on a rimmed baking sheet and bake at 350F for about 4 minutes, or until fragrant and toasted. Remove and cool completely.

Recipe source: adapted from That Skinny Chick Can Bake!

***

Cookies from Kristin Moya to Devangi Raval; photo by Devangi.

I know I’m all kinds of evil, but I soon will be announcing a Postcard Project Candy Swap for February.  Don’t blame me, the people have spoken and have begged for more swapping throughout the year.  We’ll see how many actually sign up once they realize it could interfere with resolution number 1: lose weight!  lol

Red Velvet Pinwheel Cookies made by Paula Hartson; photo by Carmel Hodge.

As for the cookie swap, it was so much fun this year (OK, last year–I’m still not adjusted to this being a new year)! I added a Facebook page where we could all connect and gush about the cookies we were baking and receiving, and share pictures, and we just had a blast.

Cookies from Carmel Hodge to Paula Hartson; photo by Paula.

I toughened up and was pretty in-your-face about coming through with the cookies, whereas last year I tried to keep it totally positive. Well sometimes you gotta be tough or people will walk all over you!  Last year six people flaked out and I didn’t know what to do beyond apologize to the those who were left in the cold as I couldn’t afford to make and mail that many cookies (6×3 dozen would be 18 dozen! Yikes.).  Because of my new zero tolerance policy for flakes that I stated in the sign-up form (all flakes are blocked from future swaps), we only had 3 this year, though there were more participants.  I also clued in this year and when those three people didn’t come through with their cookies, I asked for “cookie angels”–volunteers to fill in and send extra cookies to the cookie orphans.  That worked great as there were so many who were eager to share more cookies and no one was left in the cold this year.  Apologies to those who didn’t get all their cookies last year!  I’m a better hostess now so please give me a second chance. :)

Cookies from Marlo Edwards to Paula Hartson; photo by Paula.

All in all the cookie swap was a roaring success, the highlight being raising money for kids cancer and the mixer I got as a reward (see this post if you missed all that).

Cookies from Paula Hartson who volunteered as a cookie angel for Shania Ortiz; photo by Shania.

Cookie Swap Stats:

Participants 2011: 52 2012: 72

Number of packages sent 2011: 162, 2012: 216

Number of cookies swapped 2011: 1,944 2012: 3,574

Money raised for kids cancer: $3,574 (2012 only)

Number of smiles created 2011 & 2012: countless :)

Eight Days ‘Till Christmas?!


I have several cookie recipes that I really wanted to share before Christmas but it’s looking like I won’t be able to do it.  :(  It’s go-go-go right now, not only with Christmas-related stuff, but it just so happens everyone in my family was born in December (maybe a slight exaggeration) so there are a lot of celebrations going on right now.  I’m also busy in my kitchen making the only gifts we’re giving this year, and my sister is begging for help with an order for 12,000 lip balms that she has to do on top of her regular orders, and I think we should take pity on her overworked hide. Soooo yeah…nos be bloggin’.

I do have a giveaway that I’d like to do it this week so you can look forward to at least one post if I can find the time.  It’s for Tropical Traditions Coconut Oil (it seriously rocks) and I’m writing a review for it too, otherwise I’d just say “hey leave a comment for a chance to win some awesome coconut oil!”  I’ll do my very best because I’d love for the winner to get it in time for Christmas.

For now I will leave you with some pictures from my middle sister’s 30th birthday party with an ugly Christmas sweater theme.  Of course, pretty much me and the Haus were the only ones who actually wore ugly sweaters (and Danielle b/c I brought one and forced her to wear it).  It was obviously a conspiracy to make fools of us…but you’d be surprised how easy that is to accomplish.  No, you actually wouldn’t be surprised, would you?

Two additional notes, the party was in Danielle’s shop in case you’re wondering what’s going on in the background, and my little sister dyed her hair black (she was blonde last time you saw her here), just in case you don’t recognize her!

Dennis wore my sweater and said “my rock hard manly abs are stretching it out.” Meanwhile, I was stretching out a friend’s sweater with my bodacious curves (thanks, Stephanie!)

Holiday Eating Tips


Pinned Image

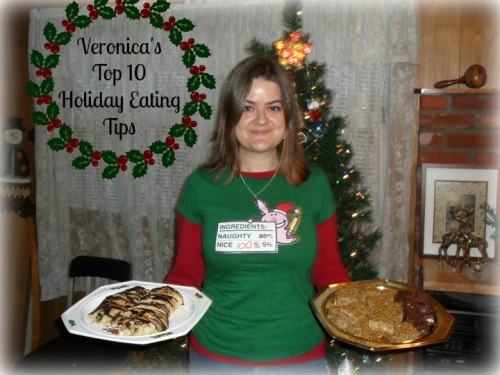
I just got an email from Joy Bauer with the subject line, “12 Ways to Avoid Holiday Weight Gain.”

Say whaaaaat?  Weren’t the holidays invented to give me an excuse to gain weight?  If not, I guess I’ve been doing it wrong all these years.  But it’s so much more fun my way!

(tips snagged from an email)

1. Avoid carrot sticks. Anyone who puts carrots on a holiday buffet table knows nothing of the Christmas Spirit. In fact, if you see carrots, leave immediately. Go next door, where they’re serving rum balls.

2. Drink as much eggnog as you can. And quickly.  Who cares that it has 10,000 calories in every sip? It’s not as if you’re going to turn into an eggnogaholic or something. It’s a treat. Enjoy it. Have one for me. Have two. It’s later than you think. It’s almost Christmas!

3. If something comes with gravy, use it. That’s the whole point of gravy. Gravy does not stand alone. Pour it on. Make a volcano out of your mashed potatoes. Fill it with gravy. Eat the volcano. Repeat.

4. As for mashed potatoes, always ask if they’re made with skim milk or whole milk. If it’s skim, pass. Why bother? It’s like buying a sports car with an automatic transmission.

5. Do not have a snack before going to a party in an effort to control your eating. The whole point of going to a Christmas party is to eat other people’s food for free.

6. Under no circumstances should you exercise between now and New Year’s. You can do that in January when you have nothing else to do. This is the time for long naps, which you’ll need after circling the buffet table while carrying a 10 lb. plate of food and that vat of eggnog.

7. If you come across something really good at a buffet table, like frosted Christmas cookies in the shape and size of Santa, position yourself near them and don’t budge. Have as many as you can before becoming the center of attention. They’re like a beautiful pair of shoes. If you leave them behind,you’re never going to see them again.

8. Same for pies. Apple. Pumpkin. Mincemeat. Have a slice of each. Or if you don’t like mincemeat, have two apples and one pumpkin. Always have three. When else do you get to have more than one dessert?  Labor Day?

9. Did someone mention fruitcake? Granted, it’s loaded with the mandatory celebratory calories, but avoid it at all costs. I mean, have some standards.  (The one exception: Friendship Fruit Cake.  If you receive one, hide it from the family and eat it quickly before they have a chance to impinge on your fruit cake joy.)

10. One final tip: If you don’t feel terrible when you leave the party or get up from the table, you haven’t been paying attention. Re-read tips; start over, but hurry, January is just around the corner.

Now that’s the holiday spirit I’m talkin’ bout!

Friendship Fruit Cake

Posted on

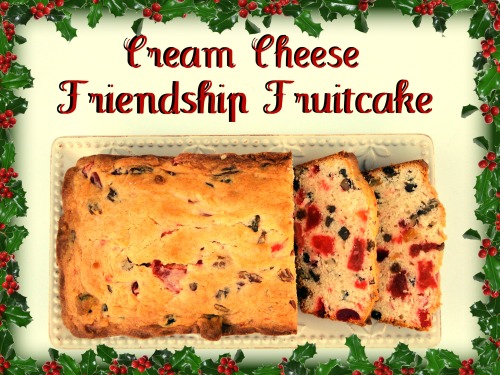
I posted the recipe for the friendship fruitcake starter yesterday, and although the holidays are still far in the distance, I wanted to post the full recipe for the fruitcakes now to help you decide whether or not you want to embark upon this fruitcake adventure, because the decision will need to be made fairly soon.  The starter takes three weeks to make, and the cake itself takes a month.  So I figured you’d need a better description of the resulting cake and photos to help you understand why you should bother with any cake that is going to take this long to make.
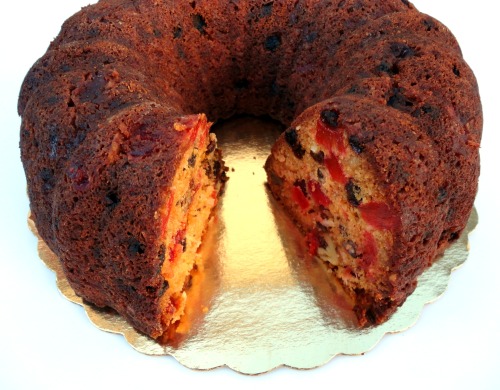
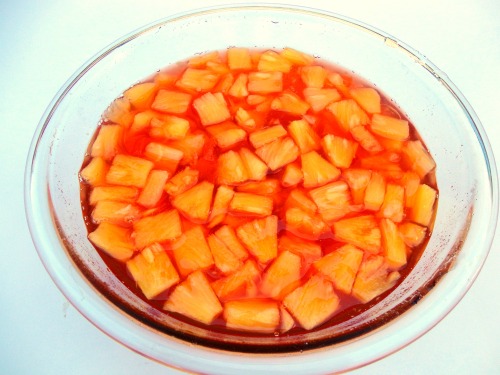
After you have your starter ready, you will add peaches, pineapple, and maraschino cherries to it over time, along with copious amounts of sugar.  Your fruit will become essentially candied in it’s own sugary juices, giving you the most flavorful candied fruit you could ever add to fruitcake.  This fruit beats the stems off store-bought candied fruit.  It is just sooo….fruity.  Usually when I taste a candied cherry, it doesn’t taste like much except sweet.  This candied fruit is sweet, but has so much flavor!

The actual time you will spend working on the starter and the fruit is maybe a minute a day, and totally worth the result.  And if the fruit itself wasn’t enough, the recipe for the cake itself is outstanding.  I have two versions available, but both are moist and delicious, and studded with this magical fruit, nuts, and shredded coconut.  Absolutely fantastic and nothing like the fruit cake you last turned your nose up at.

Now, let’s talk about the batter that surrounds the fruit, nuts, and coconut.  Usually, friendship fruit cake is made with a cake mix.  Two of them, to be exact.  When I made this cake last year on Christmas eve, I only had one mix, and of course every grocery store was closed, and I couldn’t find a single convenience store that sold cake mixes.  Rather than let the lack of a second mix defeat me, I decided to halve the recipe for the cake (what I now call the “easy version” although technically it’s the “original version”) and use half the fruit for it, then make a batter from scratch to mix the remaining fruit into.
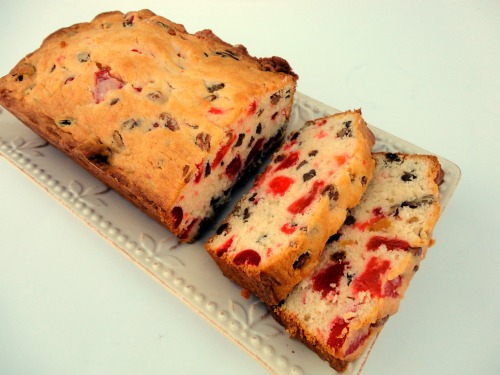
To tell you the truth, I really can not pick a favorite.  I love, love, love them both.  In fact, I actually would recommend you do the same as me, halving both recipes and using half the fruit in both to see if you can pick one.  (Just be very careful to halve everything–this can get tricky if you don’t physically write down the new measurements before starting.)  They are so different and both so good in their own way.

The cake mix cake is very moist, and very sweet with a great cake mix flavor.  I’d say the cake mix version has more of a holiday feel than the other, because it is sweeter.  The cream cheese cake is less sweet, the slight tang of the cream cheese pairing nicely with the sweet, candied fruit.  It tastes more “real,” for lack of a better word, more home made.  It seems more of like a cake to enjoy with tea, and this would be a great version to make throughout the year.  I keep wanting to pick the cream cheese one as my favorite, until I remember how nice the cake mix one was, so I have given up.  I leave the decision entirely up to you, but either way, I don’t think you will be disappointed.

Friendship Fruit Cake

Printable recipe
Printable recipe with picture

Day 1
In a large glass bowl, combine:

  • 1 pint friendship fruit starter
  • 1 (16 oz) can sliced peaches with juice, each slice cut into 4 pieces
  • 2 ½ cups granulated sugar

Stir every day for ten days.  When not stirring mixture, keep it covered with a splatter guard, paper towel, foil, or a loose lid. Let sit at room temperature. Do not refrigerate it or cover it airtight. A pan of water underneath the jar or bowl will keep the ants out, but I had no problem with bugs since I made mine in the winter.

Day 10
Add:

  • 1 (16 oz) can chunk pineapple with juice, each chunk cut in half
  • ½ cup granulated sugar

Stir every day for ten days.
Day 20
Add:

  • 2 (10 oz) jars maraschino cherries, drained, and each cherry cut in half
  • 2 ½ cups granulated sugar

Stir every day for the final ten days.

Day 30
Drain fruit and reserve it and the liquid.  Pour the liquid into three glass pint jars.  Save one for yourself for your next fruit cake, and give two to friends, along with a copy of this recipe.  Cake must be started within 3 days after receiving the starter or you should freeze the starter to use at a later date. Do not use plastic or metal containers to store liquid.

~To make the cake~

Easy version

2 (18.25 oz) yellow or butter recipe golden cake mixes
2 (3.5 oz) boxes instant vanilla pudding mix
1 1/3 cups vegetable oil
8 eggs
2 cup raisins (golden or regular, or a combination)
2 cups chopped nuts
2 cups sweetened, shredded coconut
Reserved fruit

Preheat oven to 325 degrees F. Grease and flour two 12-cup Bundt pans or four large loaf pans. In a very large bowl, combine cake mix, pudding mix, oil and eggs.  Stir in the raisins, nuts and coconut, and the reserved fruit from the starter. Stir until all ingredients are well combined. The batter will be stiff. Spread batter into the prepared cake pans. Bake for 60-75 minutes, or until toothpick inserted in center comes out clean.  Sit on wire racks and wait ten minutes before turning them out onto the racks to cool completely.  I spray my cakes thoroughly with water while cooling to help make them more moist—the water absorbs and does not change the flavor.  Store in an airtight container or wrap in plastic wrap.  Serve at room temperature.

Cream Cheese Version
5 cups all-purpose flour
4 teaspoons baking powder
2 teaspoons salt
1 cup (2 sticks) unsalted butter, room temperature
2 cups granulated sugar
2 (8 oz) packages cream cheese, room temperature
1 cup vegetable oil
8 eggs, room temperature
2 teaspoons vanilla extract
2 cups golden raisins
2 cups chopped nuts
2 cups sweetened, shredded coconut
Reserved fruit

Preheat the oven to 325°F. Grease and flour two 12-cup Bundt pans or 4 large loaf pans; set aside.  In a medium bowl, whisk together the flour, baking powder, and salt; set aside.  In a separate large bowl, cream together the butter, cream cheese, and sugar.  Beat in the oil. Beat in the eggs and vanilla extract until incorporated.  Fold the dry ingredients into the wet ingredients; the batter will be thick. When barely any streaks remain, mix in the raisins, nuts and coconut, and the reserved fruit from the starter stirring well.  Scrape batter into the prepared pans, smoothing the tops.  Place the cakes in the oven and bake for 60-70 minutes, or until a tester comes out clean. Allow cake to cool in the pan for 10 minutes, then remove to a wire rack to finish cooling.

Friendship Fruitcake Starter

Posted on

Yes, I know it isn’t even Halloween yet and you’re thinking I’m crazy for posting such an obvious December holiday-related recipe, but bear with me, I have good reason for posting this early. 

Many of us have heard of and possibly been gifted (AKA cursed) with friendship bread starter. If you have no idea what I’m talking about, you can either click here to find out more, or just pretend you never heard about it and maybe you can live out the rest of your life in friendship bread-less bliss. OK, I have to admit that friendship bread is delicious, but it never dies and once the starter infiltrates your circle of friends, you practically have to start shooting people to get them to stop pushing it off on you.

(Forgive me, I still suffer post-traumatic friendship bread disorder, despite my temporary reconciliation with the starter.)

Well, friendship fruitcake starter is a whole different ball of wax. This starter is not the same flour/sugar/milk mixture that is aged and fed like a sourdough, nor is it as widespread, at least not in my neck of the woods. This starter is a thick, red, fruity syrup that you use to candy real, non-dried fruit, and you have enough leftover after making your cakes that you can either pass it on to two other friends, or keep all three jars for yourself and freeze them to use throughout the year.

The kind of fruitcake you get from this starter is also unique. It is not the typical disgusting sickeningly-sweet brick you find in grocery stores.  In fact, I can tell you flat out that this is not only the only good fruitcake I have ever had in my life, it is actually so good that I would eat it any time of year, not just because it’s a holiday tradition.  Seriously, you’ve never had a non-alcoholic* fruitcake that tasted this good, and maybe not even one that has been completely doused with alcohol could be better than this.

*Brandy is used in this initial starter recipe, but since you are using it to candy fruit, and not adding the liquid itself to the cake, you will put very little alcohol into the cake because of it, and the amount you put in will bake out.  Also, once you make this starter, you never again have to add brandy to the future starters that come from this batch, so the percentage of alcohol will become nill after several batches.

If you don’t already have one of these starters in your freezer, and you would like to try this fruitcake for yourself, you will need to plan ahead and make the starter fairly soon, which is why I’m sharing the recipe for it now rather than after Thanksgiving.  The starter takes three weeks to make, and the fruitcake takes another month.  If you want to make small loaves as gifts before Christmas, start your starter now-within the next week or so.  If you want to have your fruitcake ready on Christmas day, start by November 4 or 5 at the very latest.  I guarantee you that you will have some very impressed people when you give them this fruitcake or at your party where you serve it, and many disappointed that you only have two starters to share.

I believe it will most likely take further persuasion on my part to convince you that this fruitcake is worth your time, so I will be following this recipe tomorrow with the two recipes I have for the cake itself, one using a mix, and one that I created from scratch.

*A big thank you to my friend Cheryl in Florida for passing the starter recipe and instructions on to me since she couldn’t give me one of her starters in person.*

Friendship Fruit Cake Starter

Printable recipe
Printable recipe with picture

1 (20 oz) can pineapple chunks, drained
1 (16 oz) can apricots, drained
1 (16 oz) can sliced peaches, drained
1 (10 oz) jar maraschino cherries, drained
1 1/4 cups brandy
1 1/4 cups sugar

Combine ingredients in a large glass jar or bowl and stir well.

Store at room temperature, covered with a lid or plastic wrap, for three weeks, stirring at least twice a week. Mixture will become more and more red as time passes.  This is what mine looked like on day 21:

Drain fruit and reserve the liquid. You should have two cups of liquid, and this is your starter.  It won’t look as red or thick as the photos above because those are photos of the starter you get after you use this initial starter to candy your fruit when you actually start making the cake.  The 2 cups of liquid you have now will all be used for candying fruit.

You can save the sweetened, brandied fruit for another use (topping on ice cream, turn it into jelly, etc.) or discard.

I added some cinnamon and instant pectin (it needed quite a lot, 1/2 cup if I remember correctly) to mine after pureeing in a food processor to make a brandied holiday fruit jam.  It wasn’t sweet enough, so I’d suggest adding your sweetener of choice if you go this route.

***

Wow, guys!  Thirty people signed up for the cookie swap as soon as it was open for business. I’m kinda scared of your enthusiasm, and excited by it at the same time. :D Rock on!

Bird’s Nest Cookies

Posted on

Most of my readers probably know by now that I’m a Christian.  What might surprise you is that I don’t celebrate Christmas and Easter as Christian holidays.  We do the secular stuff with our families, exchanging gifts, hunting for baskets, but we do not recognize any affiliation of those holiday traditions with our faith.  We recognize Christ as our savior, remember his birth, life, death, and resurrection, but we do not do it just because it’s Easter or just because it’s Christmas–holidays that ultimately have pagan roots and nothing to do with Christ, despite the emphasis put on Him during this time by many. Not that I despise that emphasis, it’s actually refreshing, but we choose to keep these holidays secular while keeping our focus on Christ year-round.  Make sense?

*crickets chirping*

Hello?  Is anyone left?  Hopefully I didn’t lose everyone by starting out on such a serious note.  I have lots of thoughts on this subject…and maybe I should share them some day.  I was thinking about starting a “my faith” page on my blog where I can file my thoughts on spiritual matters in more detail.  Let me know if you’d be interested.

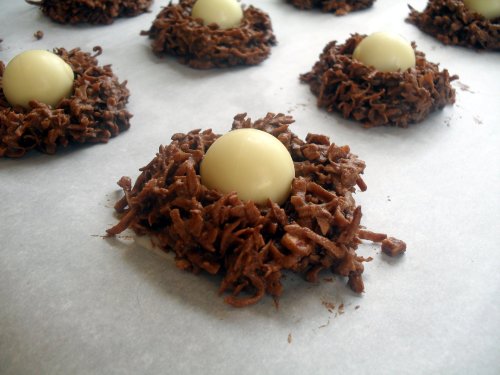
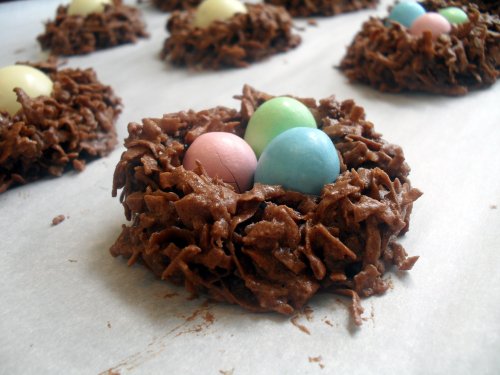
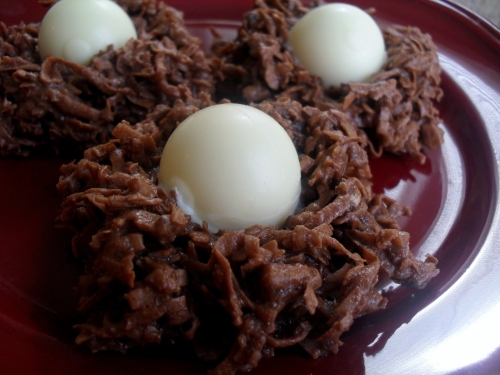
Anyway, whether you celebrate Easter or not, these moist chocolate macaroons shaped into nests with white chocolate truffle “eggs” are a perfect spring-time treat!  I made these a couple years ago and nearly forgot about them until I ran across the photos I took.  Perfect timing!  I hope you enjoy them, I know our family did!

Bird’s Nest Cookies

Printable recipe
Printable recipe with picture

2 squares (2 oz) unsweetened baking chocolate
2 egg whites, room temperature
1/3 cup hazelnuts, toasted and chopped*
1/4 teaspoon salt
1 teaspoon real vanilla extract
1/2 cup powdered sugar
1/2 cup sweetened condensed milk
1 (14 oz) bag sweetened shredded coconut
16 to 18 white chocolate Lindt Lindor balls (2 bags), or other egg-shaped candies

Move the oven racks to the upper and lower thirds of the oven and preheat to 275 degrees. Cover two cookie sheets with parchment paper.

Melt baking chocolate in a small bowl in the microwave on high 30 seconds at a time. Stir after each stop until melted; set aside.  With a hand mixer or stand mixer, beat the egg whites on high until stiff and glossy. Add the salt, vanilla extract, powdered sugar, sweetened condensed milk, and chocolate. Beat until mixed. Stir in the coconut and hazelnuts. Scoop into mounds with a small (size 24) ice-cream scoop or a 1/4th cup dry measuring cup. Place on cookie sheets and make an indent in the middle with your thumb.

Place both cookie sheets in the oven and bake for 20 minutes. Switch the cookies to the opposite shelf halfway through baking. This will prevent over-browning. Meanwhile, unwrap the candy.

Move cookies to a cooling rack and allow to sit for five minutes, or until they are barely warm to the touch. If you place the truffles on top while they are more than barely warm, they will melt into goo. If you are using candies with a shell, wait until the cookies are cool to place them on top, or the shells will crack. For the truffles, working quickly, set the Lindt balls on top of the cookies. Let cool completely. The Lindt balls may drip a little so you may want to place a sheet of parchment underneath the cookies.

*To toast the hazelnuts, place them in a small bowl and microwave on high for 30 seconds. Stir, and microwave another 30 seconds. Immediately rub together in a paper towel to remove a little of the excess skin. Leave most of the skin on. Chop coarsely and set aside.

Makes 16 to 18 large cookies.

Recipe source: The Cooking Photographer

Question of the day: if you celebrate Easter, what are your favorite traditions?  Our family (technically Den’s family–mine doesn’t really celebrate) always does a Easter basket hunt, even for the adults. I love hiding them almost as much as finding them! :)