RSS Feed

Tag Archives: gifts

Simple Strawberry Jam {No Pectin}

Posted on

Strawberries were $1.25/lb a couple weeks ago, so I got more than I usually would to make some jam.  Ever since I made raspberry jam and realized how good homemade is, I don’t tolerate store bought very well.  Bonne Maman is the only thing I’ve found that even comes close, and why pay $4 for a jar of delicious jam when you can make your own for less than $1 a jar?

So I made a simple jam, and it’s just amazing how boiling few ingredients can make something so delicious.  It is the concentrated flavor of perfect, sweetened & ripe strawberries, and pretty much makes everything you put it on taste like heaven.

The second best part is it’s so easy to make! The butter in it keeps it from foaming, so you don’t need to skim it, and you don’t have to boil the jars after filling them.  Perfect for a lazy (or first time) canner like me.

Simple Strawberry Jam

Printable recipe
Printable recipe with picture

2 lbs strawberries, stemmed & hulled
2 cups sugar
1/4 cup lemon juice
1 tablespoon butter

Combine all ingredients in a large saucepan and heat over medium-high heat while mashing with a potato masher. Mash it as smooth or chunky as you like, and continue to stir the mixture while boiling it. Boil until the jam reaches 220 degrees, or until it gels up when you put a spoonful on a frozen plate and stick it in the freezer for a minute. You’ll know it’s getting there when it turns from watery to starting to get thick and coating your spoon. Using a funnel (this is my favorite for canning), pour into sterilized jars, then screw on the lids and allow to sit until sealed. Jars may be stored in refrigerator for up to a month. For instructions on how to can the jam to keep it at room temperature for up to a year, click the recipe link below.

Recipe source: adapted from Sweet & Savory by Shinee

Oh, and if you’re interested, the bread I used for my photos is non-alcoholic honey beer bread. Made the Buttery Soft Beer Bread with a bottle of non-alcoholic beer (Beck’s) and used local raw honey in place of sugar. So good!

Advertisement

Cranberry Bliss Cookies & Cookie Swap Recap

Posted on

Happy new year!  While most food bloggers are recapping 2012 with their top recipes, I’m totally disorganized and sharing an unseasonal recipe instead, weeks after I’d intended to.  Hey, give me a break, I still don’t have my head on straight after the hectic holiday season and still have one holiday party to go to before I’ll feel truly like I can settle back into a normal routine.

It’s been a while since I shared a recipe, and I wanted to share the yummy cookie recipe I used for  my cookie swap. I know most people are probably drinking green smoothies and training for marathons to attain lofty new year’s resolutions, but I’m going to share this cookie recipe anyway because I really don’t want to wait until next December to do it.  You can save it for next year, but if you have some dried cranberries left over from your holiday baking, why not use them up in these cookies?  I promise those you share them with won’t complain about cookie season being over.  But they might blame you for not making their goal weight loss this week.  :)

This recipe is for a super ginormous batch that makes about 9 dozen cookies, which is great if you are planning on sharing lots of cookies.  If you’d like a more moderate single batch (wuss), you can refer to That Skinny Chick Can Bake‘s recipe, which is what I used to make my ginormous recipe.

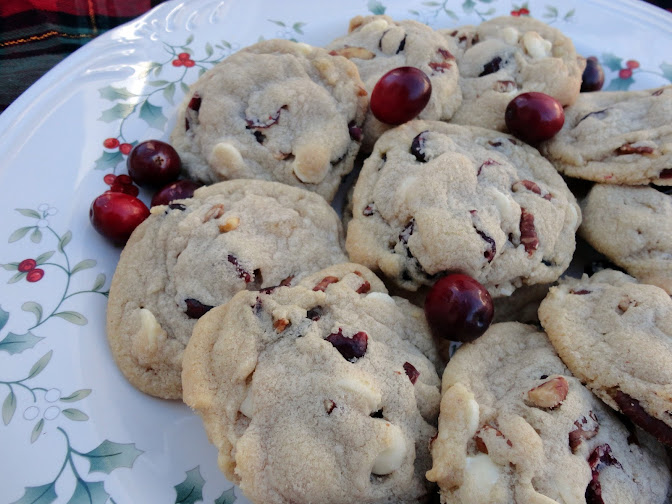
Cranberry Bliss Cookies (large batch)

*Note: the pecans need to be toasted so do this step first to avoid frustration.

Printable recipe
Printable recipe with picture

1 ½ cups (3 sticks / 12 oz) unsalted butter, room temperature
1 ½ cups (10 ¼ oz) vegetable shortening
2 ¼ cups (1 lb) sugar
2 cups (1 lb) brown sugar, packed
2 tablespoons vanilla extract
1 ½ teaspoons salt
1 tablespoon baking soda
3 large eggs
6 cups (1 lb 9 ½ oz) all-purpose flour
2 ¾ cups dried cranberries, chopped
1 1/2 cups chopped pecans, toasted
1 cup crystallized ginger, finely chopped
1 ½ lbs Ghirardelli white chips or chopped white chocolate

Preheat oven to 350ºF. Line baking sheets with parchment (I used foil this time) and set aside.

Cream butter, shortening and sugars. Add vanilla, salt, and baking soda and mix well. Add the eggs in while the mixer is running and continue to beat until well combined. Add flour and beat on low to combine. The mixer will be very full at this point so be careful to keep the flour from going over the edge before it is mixed in. Transfer the batter to a very large bowl and stir in the remaining ingredients until incorporated.

Scoop out tablespoonfuls of dough and place 2 inches apart on baking sheets. Bake for 12-14 minutes or till golden. Cool for a few minutes on baking sheet then remove to wire rack to finish cooling.

Makes about 9 dozen.

*To toast the pecans, place on a rimmed baking sheet and bake at 350F for about 4 minutes, or until fragrant and toasted. Remove and cool completely.

Recipe source: adapted from That Skinny Chick Can Bake!

***

Cookies from Kristin Moya to Devangi Raval; photo by Devangi.

I know I’m all kinds of evil, but I soon will be announcing a Postcard Project Candy Swap for February.  Don’t blame me, the people have spoken and have begged for more swapping throughout the year.  We’ll see how many actually sign up once they realize it could interfere with resolution number 1: lose weight!  lol

Red Velvet Pinwheel Cookies made by Paula Hartson; photo by Carmel Hodge.

As for the cookie swap, it was so much fun this year (OK, last year–I’m still not adjusted to this being a new year)! I added a Facebook page where we could all connect and gush about the cookies we were baking and receiving, and share pictures, and we just had a blast.

Cookies from Carmel Hodge to Paula Hartson; photo by Paula.

I toughened up and was pretty in-your-face about coming through with the cookies, whereas last year I tried to keep it totally positive. Well sometimes you gotta be tough or people will walk all over you!  Last year six people flaked out and I didn’t know what to do beyond apologize to the those who were left in the cold as I couldn’t afford to make and mail that many cookies (6×3 dozen would be 18 dozen! Yikes.).  Because of my new zero tolerance policy for flakes that I stated in the sign-up form (all flakes are blocked from future swaps), we only had 3 this year, though there were more participants.  I also clued in this year and when those three people didn’t come through with their cookies, I asked for “cookie angels”–volunteers to fill in and send extra cookies to the cookie orphans.  That worked great as there were so many who were eager to share more cookies and no one was left in the cold this year.  Apologies to those who didn’t get all their cookies last year!  I’m a better hostess now so please give me a second chance. :)

Cookies from Marlo Edwards to Paula Hartson; photo by Paula.

All in all the cookie swap was a roaring success, the highlight being raising money for kids cancer and the mixer I got as a reward (see this post if you missed all that).

Cookies from Paula Hartson who volunteered as a cookie angel for Shania Ortiz; photo by Shania.

Cookie Swap Stats:

Participants 2011: 52 2012: 72

Number of packages sent 2011: 162, 2012: 216

Number of cookies swapped 2011: 1,944 2012: 3,574

Money raised for kids cancer: $3,574 (2012 only)

Number of smiles created 2011 & 2012: countless :)

Small Batch Coconut-Chocolate Chunk Cookies {Vegan}


This month my Secret Recipe Club blog assignment was to Delicious Existence.  (Gotta love that blog title!)  On Twitter, Danielle (that’s my sister’s name, I love her already!) describes herself as a social worker, holistic health coach, lifestyle motivator and kitchen magician.  And after perusing her blog, I’d have to agree with the last two–all her wonderful vegan recipes are definitely motivating and magical!  Although not a vegan myself, I have mad love for their choice and actually try to eat vegan or vegetarian at least once a week, which isn’t too hard for me since I prefer fat and carbs (the good and bad kind :)) over meat anyway.  Over time I’ve been so wonderfully surprised how delicious & satisfying a completely meatless, dairy-free, and egg-free meal can be.

Don’t believe me?  Check out Danielle’s Herb Pinwheels, Jalapeno Popper Panini, Triple Chocolate Lust Cookies (I’m so making these!), Zucchini, Onion & One Pepper Stew, and Cinnamon Raisin Oatmeal Pie with Dark Chocolate Drizzle–just a few of the contenders for the recipes I marked to try.  I have gone vegan before and found it challenging to find enough variety, but Danielle is clearly a master.  Definitely go to her blog to get some inspiration!

I chose her coconut-chocolate chunk cookies to make for this month’s reveal, which is totally random, I know.  If it was December, they’d fit right in since that’ s the month everyone starts baking hoards of them to give away.  And these would be a great addition to your cookie tins this year!  But it’s the week of Thanksgiving and there’s not a speck  of cinnamon or pumpkin or even sweet potato in the recipe I chose.  I’m sorry, but you guys know about my obsession with coconut oil.  Did you really think I could pass up a recipe for cookies that contained not only my beloved coconut oil, but chocolate as well?  I think not.

You guys, these are so good.  Crazy good.  So good that I’m glad I kept it a small batch recipe so I could only eat a dozen at a time.  OK, so I didn’t really eat them all myself…but I did eat quite a few.  Both times I made them.  Yes, I made them twice this month, and will be making them again in a larger batch in December.  They’re so good!

The coconut flavor is perfectly balanced with the semisweet chocolate, IMHO.  You just would not believe how wonderful the coconut oil makes these cookies taste.  So much better than using an extract!  The cookies are sticky-crispy on the outside and the middles are soft & chewy-my favorite texture for a cookie, and I believe the corn syrup helps with it.  The original recipe did not call for corn syrup, but I wanted to use ingredients that most people would have in their kitchen so instead of making a flax seed egg (mixing flax meal with water creates a binder similar to egg), I decided to use something else that was sticky to bind the cookie together.  (You could also use agave nectar for a more natural cookie.) I used more corn syrup in the first batch and the cookies were a lot more chewy and a lot more crispy at the edges, and I think I’ve improved them by subbing a tablespoon of the corn syrup for milk (I used almond milk but coconut would obviously work great here), making the cookies softer but still crispy-chewy.

Whether you’re vegan or not, if you like coconut, I think you’re going to love these cookies!  If you don’t believe me take my friend Kevin’s word for it (it was his birthday and I gave him some, along with an accidentally egg-less version of this banana bread)–he cracks me up!

I call Kevin “Obiewan,” thus his Star Wars reference. :)

Thank you Danielle for sharing your fabulous recipe!  It pleases Jedi masters and padawans alike. :)

Coconut-Chocolate Chunk Cookies {Vegan}

Printable recipe
Printable recipe with picture

1/4 cup (1 7/8 oz / 52 g) virgin coconut oil, melted & cooled slightly (measured solid)
1/3 cup ( 2 ½ oz / 72 g) packed light brown sugar
1 tablespoon corn syrup or agave nectar
1 tablespoon milk of choice (I used almond)
1 teaspoon vanilla extract
1/4 teaspoon baking soda
1/8 teaspoon salt
¾ cup (3 oz / 85 g) all-purpose flour
¼ cup shredded sweetened coconut
1/3 cup semisweet chocolate chunks

Preheat oven to 350F and line a baking sheet with parchment or a silpat mat.

In a small mixing bowl combine the coconut oil, brown sugar, corn syrup, milk, and vanilla. Stir until blended, then add the baking soda and salt and stir well. Add the flour and mix well, using your hands if necessary, then stir in the coconut & chocolate, again using your hands to combine. Roll the dough into 12 (1-inch) balls, making sure there are three chocolate chunks per cookie. Place on prepared baking sheet and bake for 10 minutes, or until golden at the edges. As soon as you remove them from the oven, use a spatula to push any misshapen cookies into place so that they retain a round shape. Allow to cool on baking sheet for five minutes, then remove to a cooling rack to cool completely. Store in an airtight container or Ziploc bag.

Makes 1 dozen cookies.

Recipe source: adapted from Delicious Existence

I learned this trick from fellow SRC members Katrina & Liz–to whip any misshapen cookies back into shape, as soon as they’re out of the oven, scoot them into a round shape with your metal spatula.  Easy peasy and looks so much better!

To check out the other Group C SRC recipes, click the linky man below!  As always, thank you for being the bestest hostess with the mostest Miss Debbi!


Cream Cheese Chocolate Truffles


Here’s another easy-peasy recipe that you can add to your holiday spread, or package up for gifts!  And it makes a ton, so there really is plenty for a crowd.  And did I mention they’re delicious?  Because they are.

The original recipe instructs you to refrigerate the truffle mixture for an hour, but I take a shortcut and roll them into balls immediately.  This is particularly beneficial if you decide to roll them in nuts,* because they adhere much easier to the softer truffles than when they’re hard after refrigerating.

*I like to use ice cream nut topping because the nuts are chopped nice and fine, salted, and have a little sugar added.

As a last note, if you like the look of truffles rolled in cocoa powder but don’t like the bitter edge to them, you can add powdered sugar to your cocoa to sweeten it before rolling.  It’s been a while since I made these, but I’m 95% certain this is what I did, and that little white spot on one the truffle in the back on the right most likely confirms it.  (Might want to sift your powdered sugar so it blends perfectly!)  I think I remember remarking that they seemed more likely to be approved by the general public, but I do like the bitterness of pure cocoa to contrast the sweet truffle.  Whatever floats your boat!

Cream Cheese Chocolate Truffles

Printable recipe
Printable recipe with picture

1 (8 ounce) package cream cheese, softened
3 cups confectioners’ sugar, sifted
3 cups semisweet chocolate chips, melted
1 1/2 teaspoons vanilla

In a large bowl, beat cream cheese until smooth. Gradually beat in confectioners’ sugar until well blended. Stir in melted chocolate and vanilla until no streaks remain.  Shape into 1 inch balls, then roll in cocoa powder, finely chopped nuts, or powdered sugar.  Store in an airtight container and serve at room temperature. You may refrigerate the truffles if you won’t be serving them for several days, but remove them at least ½ hour before serving.

Makes about 60 truffles.

Recipe source: Allrecipes

Sneaky Snickers Cookies


The Cooking Photographer posted this recipe over two years ago and her picture, with the caramel and peanuts oozing out, planted itself and made deep roots in my cranium.  Then she had to go and use that same picture in her website header, reminding me weekly how much I wanted to make them.

Well, as I may have mentioned before, cookies are my favorite food group (in my perfect world, yes, they would be a food group, and a prominent one), and as I may have also mentioned, I do not make treats that I REALLY like very often because I simply can not trust myself with them.  I knew I would be in trouble if I made these without a specific purpose in mind and without  a good reason to get rid of most of the batch.

That reason finally arrived with The Great Blogger Cookie Swap of 2011.  (If you missed this year’s, sign up to be notified of of next year’s swap here!)  I had just picked up a bunch of half price Halloween candy when I was brainstorming what kind of cookies I could make for the swap, and how I could use up some of the candy I bought and of course, the first thing I though of was Laura’s Sneaky Snickers Cookies.

Well, the batch made enough that there was still plenty for me to sample and go a little overboard on, but it was well worth it!  Soft peanut butter cookies surrounding a chewy chocolate, peanut, caramel, and nougat center is just a lovely combination.  I especially love them warm so that the middles are oozing gooey caramel when you bite into them, and might have kept a few for myself in the freezer to nuke in the microwave for cookie-craving emergencies.  They are so yummy!

Sneaky Snickers Cookies

Printable recipe
Printable recipe with picture

1 cup (2 sticks) unsalted butter, softened
1 cup granulated sugar
1 cup brown sugar, packed
½ teaspoon salt
1 tablespoon real vanilla extract
1 cup creamy peanut butter
2 eggs
1 teaspoon baking soda
3 ½ cups all-purpose flour
2 (11.5 ounce) bags Snickers Miniatures (Half a bag is for snacking during cookie making.)

Preheat oven to 350 degrees. Cover cookie sheets with parchment paper.

In the bowl of a stand mixer, add the butter, sugar, brown sugar, salt, and vanilla until light and fluffy, five minutes. Add the peanut butter and beat until combined, another minute. Add the eggs and baking soda and beat until incorporated, scraping down sides of bowl. Add the flour and beat until just incorporated. Don’t over-mix. Press plastic wrap down over the surface of the dough and refrigerate at least two hours before baking.

Unwrap 52 mini Snickers bars. Then with a standard cookie scoop (size 50), scoop the dough into your hand. Press the dough together and flatten. Place a Snickers bar in the center of the dough and push the dough around to seal, rolling into a ball.

Place cookies 2 inches apart on cookie sheets and bake for about 12 minutes. Let the cookies rest on the baking sheets for 5 minutes before removing to cooling racks.

Recipe source: The Cooking Photographer, with slight changes in preparation method.

***

I wanted to share the cookies I received through this swap as well!  Click the blog links to get their recipes, which are posting today.

Christian of M.E. sent me these Carrot Cake Cookies with Cream Cheese Icing and they were a lifesaver.  It was 4 PM when I received them, and I hadn’t eaten anything all day.  I was running on empty and didn’t have time to stop and figure out something to eat.  I ripped into the cookies and ate half a dozen right away, which got me through to the party I was preparing for.  Thanks, Christian!

Check out the carrots, nuts & raisins these cookies were loaded with!

Lauren Brennan of Lauren’s Latest sent me these soft and buttery Vanilla Bean Sugar Cookie Stars (aren’t they beautiful?):

Julie M. of Burnt Carrots sent me my favorite batch of cookies, at least for the blogger swap.  Her Chocolate and Butterscotch Chip Cookies took me by surprise because I would have thought they had butterscotch chips in them, and maybe they do, but they also have toffee chips and I looooove toffee.  The combination of chocolate chips and toffee is a winner!

I also received cookies through my own cookie swap for non-bloggers, and will share those with tomorrow’s cookie recipe that I sent out for that swap!

Aunt Ruby’s Party Mix


Every year when I was growing up, my Aunt Ruby would make up baskets of goodies for all her extended family and I eagerly anticipated her visit each year to dig into all the delicious treats she slaved away in her kitchen to make.  Sometimes there would be cookies, sometimes her homemade summer sausage, and always  her famous party mix.

I never knew until recently why it was so much better than other party mixes until I finally asked her for the recipe and discovered her secret ingredient.  Life Cereal!!  It looks so much like Chex Cereal that it’s camouflaged and you don’t really notice it visually, but it gives a hint of sweetness to every bite that makes this buttery, salty concoction utterly addictive.

If you already have a favorite party mix recipe, try substituting in some Life cereal for part of the Chex–I think you’ll like it!

Aunt Ruby’s Party Mix

I’ve scaled down and altered the recipe a bit since her original recipe makes enough to feed an army.  If you’d like to feed an army, click here for her original recipe.

Printable recipe
Printable recipe with picture

In a large roaster pan, mix together:
4 cups Rice Chex Cereal
4 cups Corn Chex Cereal
4 cups Wheat Chex Cereal
4 cups Life cereal
3 cups pretzel sticks
2 cups Spanish peanuts (roasted & salted)

In a saucepan, melt together:
2 sticks (1 cup) butter or margarine
¼ cup Worcestershire sauce
1 tablespoon seasoned salt
2 teaspoons garlic powder
1 teaspoon onion powder

Pour the mixture over the cereal and mix well. Bake uncovered in preheated oven at 250 degrees for 2 hours, stirring every 15 minutes. Spread on waxed paper to cool and store in an airtight container or Ziploc bags.

%d bloggers like this: