RSS Feed

Tag Archives: candy

Cake Batter Lovins

Posted on

Remember the “Cake Batter Everything” craze that swept over the food blog world in 2011? Yeah, I hopped on that and enjoyed it to the fullest.  I shared only one of my cake batter explorations with you, the Cake Batter Crispy Treats, which were my favorite cake batter flavored treat, but do you think I let the remainder of my bag of yellow cake mix go to waste? No way, Jose.

Here’s a few ideas if you need some ways to use up extra cake mix.

Cake Batter Oats. This is actually a pretty healthy recipe, considering there’s cake mix in it. And tasty too!

Cake Batter French Toast. What can I say, cake batter is such a great way to start the day. And sprinkles just make everything so happy.  This one would be fun for a birthday breakfast! I made a simple icing glaze by mixing like 1/4 cup powdered sugar with just enough milk to get it a drizzling consistency.

Cake Batter Candies. For these, I just melted some vanilla almond bark and added enough yellow cake mix to make it taste like cake batter, but not so much it got too thick.  I poured most of it in a chocolate bar mold (like the one I used for this Vegan White Chocolate), but I didn’t get a picture of that before I gave it to a friend as part of a thank you gift for turning a stain on my jeans into a work of art. The rest of it I poured into peanut butter cup molds and put sprinkles over the tops while it was still setting up.  Kids went crazy for these at a get together, even more so than my Cupcake Bites!

Have you made any cake batter flavored yums?

Advertisement

Tiger Butter


If you need an idea for last-minute Valentine’s Day treats for your loved ones, I gotcha covered!  I’ve made four batches of this Tiger Butter fudge since Christmas and everyone has been so impressed with it, I don’t know whether to be proud or ashamed of how easy it is to make!  Three ingredients, melt, stir, and swirl, and you’re done.

And if you’re wondering about the taste, it is oh so good.  The peanut butter layer is incredibly creamy and of course the chocolate is the perfect complement.  Need I say more?

Tiger Butter

Printable recipe
Printable recipe with picture

1 (24 oz) package vanilla almond bark candy coating
1 (1 lb 2 oz) jar creamy peanut butter
1 1/4 cups milk chocolate chips

Line a rimmed baking sheet with foil; set aside.

In a microwave-safe bowl, microwave the chocolate chips for one minute and stir well. Microwave in 15-second intervals, stirring well in between, until completely melted. This takes 2 intervals for my microwave. Be careful not to overheat the chocolate and stir well after each interval, allowing the residual heat to melt the chips before microwaving again. If you overheat them, they will get too thick and you won’t be able to use the melted chocolate for swirling. Once melted, set aside.

Melt the almond bark according to package directions. Usually that would be to place them in a microwave safe bowl, microwave for 1-1 1/2 minutes, stir well, and microwave in 15 second intervals, stirring in between, until melted and smooth. Once melted, stir in the peanut butter until creamy and smooth. Spread into prepared baking sheet.

If the melted milk chocolate has become too firm with standing, microwave for ten seconds, stir, then pour it over the peanut butter mixture in long horizontal lines. Drag a spatula through the lines in a vertical pattern, going up on one line, then down on the next, repeating until the pan is swirled. Allow to set for several hours or overnight before cutting. You may refrigerate the fudge to set it up quickly.

Stores great at room temperature, and you don’t even have to cover it. Great shelf life. I’ve left some uncovered for up to two weeks with no spoiling.

Veronica’s notes: although I haven’t tried it, you should be able to substitute 1 1/2 lbs white baking chips for the candy coating if you can’t find it in your area, or even real white chocolate if you don’t mind the big price tag. I like to use milk chocolate with peanut butter, but semisweet chocolate is perfectly fine and would create a more dramatic stripe effect.

Recipe source: adapted from The Better Baker

Traditional Turkish Delight {gluten-free & vegan}


Turkish Delight is perhaps the recipe I’ve been wanting to make longer than any other, for  over twenty years!  I’ve wanted to try it ever since I was in elementary school and read about the Turkish Delight which the witch seduced Edward with in The Lion, The Witch, and The Wardrobe.  It just sounded so delicious!  Dennis also told me years ago that he also has wanted to try Turkish Delight ever since reading the book.  So this year I decided to make it for him for Valentine’s Day, and to send it to my matches for The Sweetest Swap as well.

I decided to go with the traditional recipe, which doesn’t include gelatin and takes quite a long time to make.  But the texture is worth the effort!  I took my recipe and method from Titli’s video, and I tell you this woman is mad, but I love her.  You have to watch a few of her videos to start jiving with her craziness.  Anyway, we discovered that we quite liked Turkish Delight, especially the nice soft, chewy texture.  It’s similar to a jelly candy but really so much softer that it’s not really jelly-like at all, it’s just the closest thing I can compare it to. And so smooth!  The flavor is very nice, bright from the lemon juice, and mysterious & romantic from the rose water.  While the rose water is nice, I think I would like this a lot better using lemon extract and would suggest it if you don’t have the rose water, but cutting the amount down to maybe a teaspoon (or to taste) since it’s much stronger than rose water.

The downside is that they tend to weep.  You should store them packed in the extra powdered sugar, but even so, after only a day mine were pretty much a mess.  I wish I’d taken photos right away because right after cutting and dredging in powdered sugar, they were so pretty with such smooth surfaces.  Instead I took my photos two days later when the bowl had turned into  the nastiness above. :( I had to cut off the worst of the edges and then roll them in fresh powdered sugar for my photos, but believe me they are so much prettier the first day!  I asked Titli if this was normal and she said it was likely our damp weather to blame, but even so, hers start weeping after four days.  Her cure for the weeping?  “Eat them quickly!” lol

This is what my poor swappees received (along with a dozen oatmeal candies–thank goodness I sent enough of those to make up for the Turkish Delight mess!)–photo courtesy of Shesten M.

If I haven’t scared you off with my cautionary photos, here’s the recipe!  Just be sure to make this when you’re enjoying a spell of dry weather and perhaps when you have enough company to polish them off within a few days.

Turkish Delight

Printable recipe
Printable recipe with picture

Note: I followed the gram measurements for this recipe, using my kitchen scale.

3 ½ cups water, divided
1 tablespoon freshly squeezed lemon juice
4 cups (800 g) sugar
1 teaspoon cream of tartar
1 cup (120 g) cornstarch
1 tablespoon rosewater
Few drops of red food coloring (I used icing gel coloring)

For dusting
1 cup (160 g) powdered sugar
¼ cup (30 g) cornstarch

Oil an 8” square pan, then line the bottom and sides with parchment paper. Oil the parchment paper; set aside.

In a medium saucepan, combine 1 ½ cups of the water, the lemon juice, and sugar. Bring to a boil while stirring and continue to cook over medium heat, stirring frequently, until the mixture reaches 115C (soft ball stage). Remove from heat and set aside.

In a large saucepan, combine the remaining 2 cups water, the cream of tartar, and the cornstarch. Bring to a boil, using an electric mixer to beat it on low speed the entire time. It will get thick quite quickly. It will be very milky and opaque in the beginning, but will get more clearish. Once it is a thick gluey paste and turns more and more clear, add in a little of the sugar syrup and beat with the mixer until blended. Scrape down the sides of the pan, and add a bit more at a time, beating well after each addition until smooth. When all the syrup is added, it will be thick but fluid. Turn on the heat again and bring to a gentle boil. Turn heat to low and simmer very, very gently for about an hour, stirring frequently (I stirred every 1-3 minutes). It will turn a light golden brown color. Add in the rosewater and food coloring if desired, and mix well.

Pour into prepared pan and shake the pan to make sure the mixture reaches all the corners. Allow to sit at room temperature until set, about 3-5 hours, or overnight.

Combine the powdered sugar and cornstarch for dusting and sift them together into a large bowl. Sift some on top of the pan of Turkish Delight. Sift some over a surface, then turn the Turkish Delight upside down onto prepared surface. Carefully remove the paper and sift some sugar over the top. Using a sharp knife or pizza cutter, cut the Turkish Delight into small squares. Put the squares into the bowl of sugar and toss them around every so often. Once all are added, toss them around really well to make sure they are well coated with the sugar/cornstarch mixture.

To store, place Turkish Delight in a container with an airtight lid, and pour the sugar/cornstarch mixture over the top to keep them from weeping or sticking together.

Recipe source: Titli’s Busy Kitchen

Sweetest Swap Recap

The swap went very smoothly and I was lucky enough to get 6 packages in the mail!  They disappeared all too quickly…

Oreo & Biscoff Truffles from Shania, Lemon Muddy Buddies and Pretzel Caramel Bark from Lynn.  Dennis ate all the Oreo Truffles by the time I got home, so I’m glad I got one before I left for work! I enjoyed the Biscoff Truffles all to myself, which was fine by me because I liked them even better.  Lynn wasn’t a match of mine, but she was kind enough to send me two packages! One stuffed with the Lemon Muddy Buddies (YUM!) and another with the Pretzel Caramel Bark (love salty and sweet!).  Thank you ladies!

Snickers Bars from Laurie.  Wow!  Talk about impressive.  These were every bit as good as they look and I had trouble saving any for Haus.  I had to beg him to hurry up and eat some before I ate the whole package. LOL!

Vanilla Sea Salt Caramels from Shesten (that’s Hawaiian Black Lava Sea Salt on them). Oh so incredible.  These I ate one after another until they were all gone, in just a matter of minutes.  Poor Haus.  Poor me! I need a refill, Shesten. ;)

In total, 1,275 candies were exchanged through our swap, and because swapper Marcia L. registered us with Cookies for Kids Cancer, Barmioli Rocco matched $1 for each and we raised another $1,275 for pediatric cancer research just by doing what we love to do.  And I’m also very glad to report that we had zero flakes for this swap!  Every single person sent out their candies.  These swaps just keep getting better.  Thank you to all who participated, I had a ball.


Oatmeal Candy


I have already shared Grandma’s original recipe from 1890 for her oatmeal candy in her writing, but I have to share my updated version that I submitted to the fair. The original is good, like caramel with oatmeal in it, but with a little cinnamon and vanilla, it reminds me of a candy version of oatmeal cookies!

Like most old recipes, this one is simple. There are a lot of candies I’d consider better, but I love these for their old-timey-ness. They even taste old-timey and are truly delicious. If you are nostalgic for the days of yore, try these out.

Oatmeal Candy

Printable recipe
Printable recipe with picture

½ cup salted butter
1 cup light corn syrup
2 ½ cups light brown sugar
2 cups quick-cooking oats (uncooked)
2 tablespoons all-purpose flour
1 teaspoon cinnamon, plus more for sprinkling
1 teaspoon vanilla extract
Powdered sugar, for rolling

Bring butter and corn syrup to a boil in a large saucepan. Remove from heat and stir in brown sugar, oats, flour, and cinnamon, and mix well. Return to heat and turn burner to medium heat. Cook slowly, stirring often, until mixture comes to softball stage, 240F.  Remove from heat and stir in vanilla. Pour into a 9″x13” buttered dish and cool completely, about 4 hours or more. Cut into squares, roll in powdered sugar, sprinkle with a little cinnamon, and wrap in waxed paper.

Veronica’s Notes: Butter was likely salted during the time this recipe originated, as it acts as a preservative, so that’s what I used. I used corn syrup, and though I’m not sure that’s what is meant by “white syrup,” it seems to work quite well. And while I know from personal research that quick-cooking oats did not exist until the 20s, I thought rolled oats to be too chewy and took the liberty of updating the recipe with quick-cooking oats, and adding in some cinnamon and vanilla. Those were probably expensive or maybe less common during the time Dennis’ great-great-grandmother was making this candy, but I hope I’m doing her proud with these additions since they are easily accessible now and add a nice flavor.

Kansas State Fair 2012 part 3: You Miss Every Shot You Don’t Take


*Update: You can now get my updated recipe that I submitted to the fair here.

So that you won’t have to endure reading this whole blog to find out whether I won or lost, I’ll tell you right now.  I got a ribbon. :)  Read on if you’d like to hear the whole story.

Wayne Gretzky is famously quoted as saying, “You  miss 100% of the shots you don’t take.”

That is really good life advice, and though I do miss a lot of shots because I’m too scared to take them, I can proudly say I would have made Gretzky proud with the way I put myself out there for the state fair competitions this year!  Well, either proud, or at least impressed by my audacity. ;)

From my snot sauce cookies, to my un-risen bread (not to be confused with the risen dead, though almost as horrifying from a baker’s perspective), to my burnt up and crust-fallen-off pies, I took a lot of chances this year and really set myself up for a lot of criticism, which I will be reading come this Sunday when I get my judging papers.  But as with the short loaf of bread that won third place, you just never know what the judges will think or how your entry will compare to others, and sometimes you just gotta take the shot and put yourself out there, ready to be disappointed & embarrassed, so that when you succeed, it’s even sweeter.

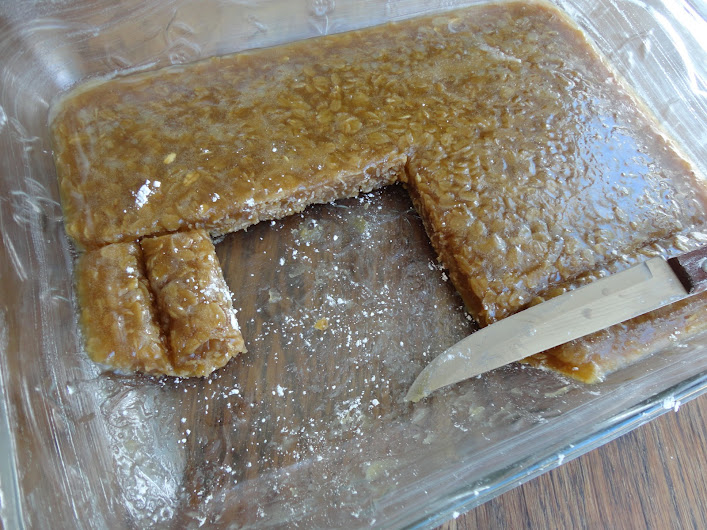
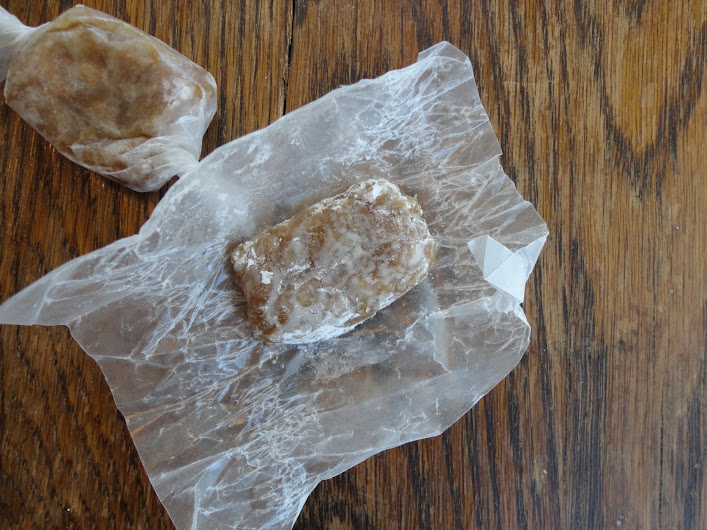
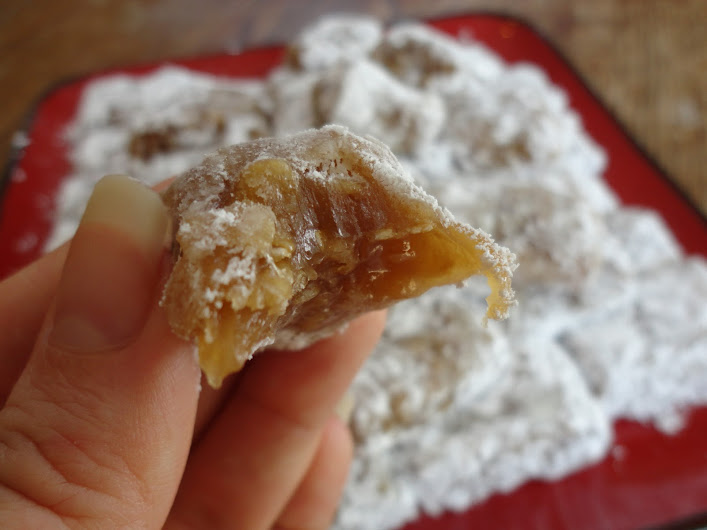
Such is the case with Grandma Joy’s Oatmeal Candy.  I did learn a lesson this year (make that many lessons), which is READ THE RULES VERY CLOSELY.  I scanned the information about the Heritage Recipes Contest, gathered that they were looking for old recipes that had been passed down in families since at least 1950, got excited and stopped reading.  I made Grandma Joy’s Oatmeal Candy recipe, which has been in Dennis’ family since 1890, put six of the candies on a white paper plate, following the requirements for the baked goods contests, and sealed it in a Ziploc bag, ready to submit it for judging.

It wasn’t until 1 AM the day I was to enter the contest that I read the rules and information more closely.  To my chagrin, I discovered that not only were they looking for “recipes suitable for family or community dinners” but they wanted you to include an entire aesthetic set-up with props.

Since there were only about five hours left before I needed to get up in order to get to the fair on time to turn in my entries, and I was already sleep-deprived, I decided I wasn’t going to enter it after all.  How could I?  Candy isn’t served at a dinner, is it?  And what in the world would I use for props? I had no idea, and no time to figure it out.

I was crushed.  This was the contest I was most excited to enter and that mattered most to me, because the recipe was special and I’d actually harbored fond dreams of presenting Grandma Joy with a ribbon for her recipe.  But I underestimated the power of my hope.  I do know after almost thirty-two years (yikes) of living with myself, that my hope has great strength and is very hard to kill, if not impossible.  If I want something bad enough, that hope inside me will rise up even after I mentally decide against trying for it, and force me to find a way to make it happen.

So only a few minutes after telling Dennis I wasn’t going to enter the Heritage Recipes Contest, and should probably just opt out of the pie contest too, that hope forced me to find a way to make it happen.  Maybe candy isn’t usually served with dinner, but I oculd see the judges accepting it because at a big dinner, it might be passed out afterward.  On my second wind, I hustled to the kitchen and piled the candies on a Blue Willow plate because although the plate is new, the pattern has been popular since the 1800s so I thought it would be suitable as a prop.  I searched desperately for any picture of Grandma Joy that I could frame and place beside the plate but couldn’t find one that had the right old-timey feel.  I did find several copies that my Mom made of an old photo of my Great Grandma Millner (her Grandma) and in a crazy act of desperation, I cut one down to fit a frame and stuffed it in there to set beside the plate. Well, I never said anything about the woman in the photo being the Grandmother mentioned in my history write-up.  So it wasn’t even a lie.  I mean, I can’t help it if they just happen to assume the woman in the photo was the one who gave me the recipe, simply because she’s sitting right next to it.

I then experimented with using dried roses and potpourri to round out the setting but it just looked terribly wrong and in the end, decided to use ingredients in the recipe as part of the props–oatmeal in a measuring cup, and powdered sugar and cinnamon in little dishes.  I knew it wasn’t the best, but I thought it was passable.

As I set up my presentation later that day next to the other ladies and gentlemen that entered, oh how unprepared I felt.  This was the first entry I saw and that unfailing hope nearly died on the spot.

Now this lady was prepared.  Miniature cast iron stove with miniature baked Zwieback rolls in miniature foil baking pans and the regular sized ones in front, with a gorgeous display with sunflowers, wheat, miniature enamelware used as backings for old family photos, and a sign over the top!

And here’s my sad presentation by comparison.

I didn’t even have a place mat.  I knew I was doomed.  But still…my hope was there.  Small, but alive.

I was watching the pie judging nearby and would get up and check on the Heritage Recipes contest judging from time to time.  I happened to get up just as they were reading and tasting mine…

It went fairly quick.  They each took a bite of the candy and set it down, reading the history about it and the recipe.  I felt even deeper that it would not place.  There were so many attractive entries…

I got caught up with talking to one of the other ladies that entered the contest and almost missed it when they announced I won third place!  The microphone was so quiet it would have been easier to hear her without it and I moved forward, catching only that they liked my presentation and the taste and history, and mostly how unique it was.

Everyone somehow knew it was me that had won despite no one there knowing my name, perhaps by the look of pure shock on my face, and they all turned to me, clapping.  If I had been alone, I would have been jumping up and down.  But knowing that almost-thirty-two-year-old women are generally more collected and mature, I smiled and nodded  and celebrated with the second and first place contestants.  Then I proceeded to exclaim “I can’t believe it, Dennis!” at random intervals throughout the remainder of the day.  So much for acting my age.

I went back later to see how they had put the winning entries on display and ran into Jane, the first place winner with her beautiful Zwieback.  We took pictures of each other in front of our displays and she sent this one to me by email:

I know I don’t look excited here but I was pretty exhausted by that point, only having had a couple hours of sleep.

She also sent me a picture of the second place entry, which I failed to catch somehow!  These are kolaches. a Czeck pastry (I actually have a recipe for them here, though my fillings aren’t the best):

And here’s Jane with her blue ribbon winner!

So there you have it.  I nearly opted out of a contest that I ended up placing in!  And if I hadn’t entered, I wouldn’t have met Jane, which I count as one of the best things abut my fair experience this year-the ladies I met.  There are definitely times when I regret my decisions, but as for this one, I’m just so happy I went through with it.  I can’t wait to give Grandma her ribbon! :)

If you’ve missed the previous entries in my 2012 State Fair series, you can check them out here:

2012 State Fair part 1: Murphy’s Law

2012 State Fair part 2: How I fared at the fair
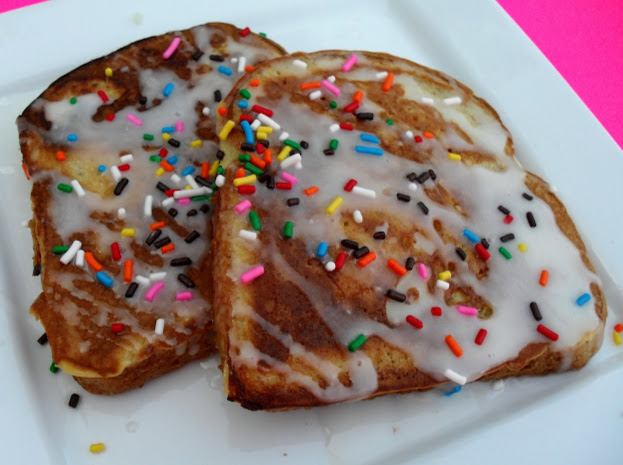
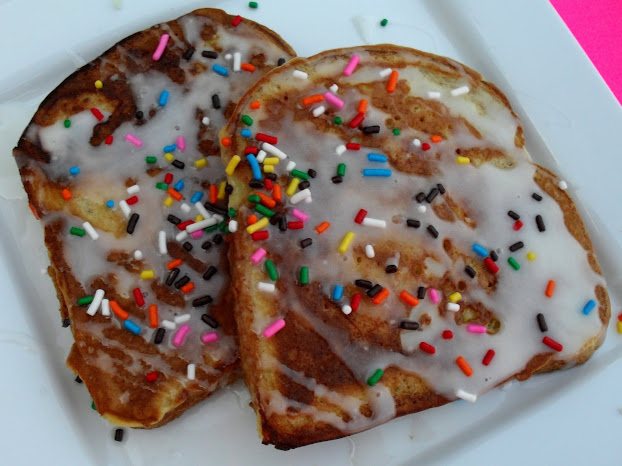
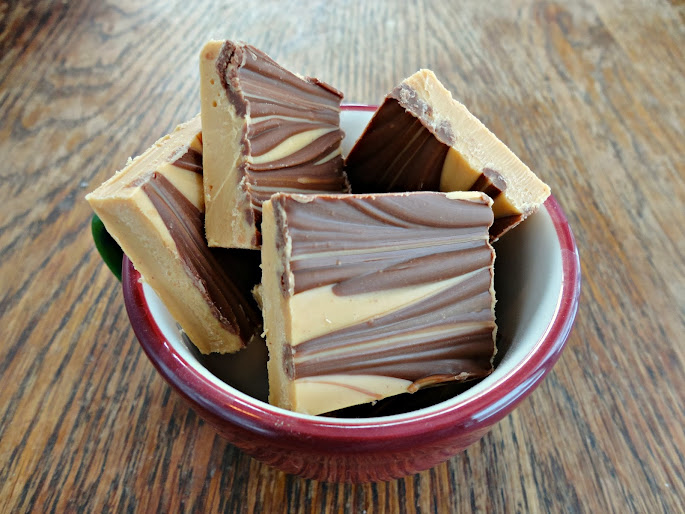
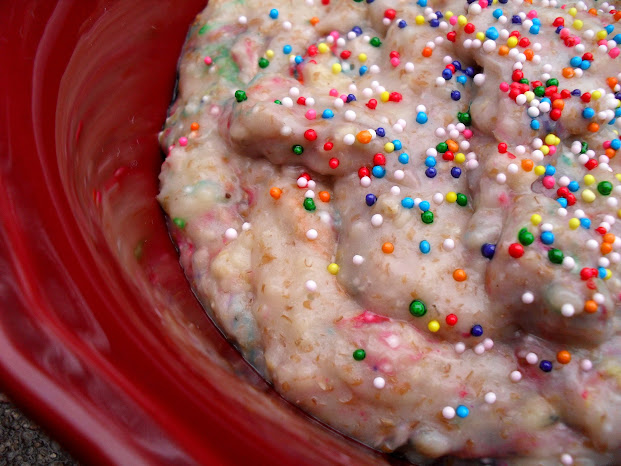
Pecan Toffee Fudge and some sad/happy news


Usually I don’t include my daily life in food posts, but I wanted to honor sister June, whose funeral I’ll be attending this morning. June was 95 years old and it was her time. She spent her last night on Earth in good spirits with her family in Christ at our weekly Bible study, then she passed gently in her sleep. It is such a joy to think of her with her heavenly family now, that I have not shed more than a few tears, but I’m sure they will come in abundance as we remember her life here and how she touched each of us. It was a privilege to know this dear & faithful lady, who I knew only to miss a handful of church services due to health concerns. She was such a treasure and such a blessing to everyone who knew her–she had a great sense of humor and some really great stories!

I thought I would share this video of June from our preacher’s holiday party last year, in which she got quite the hilarious white elephant gift from Dennis. (That’s her son, Mike, helping her open it, and I would appreciate your prayers for him during this time of mourning. He never married and lived with her all these years, so this will be hardest for him.)

OK, let’s talk fudge.  (Sorry, terrible segue, but how do you segue from a funeral announcement to fudge???  Maybe that’s why I don’t talk about my personal life in these posts-LOL!)  I’m featuring only simple holiday recipes this week, since Christmas is less than a week away and you might need a little help with last-minute goodies ideas.  This one certainly fits the bill!  It doesn’t involve cooking or a candy thermometer, just beating some ingredients together and voilà!  Absolutely perfect, delicious, soft fudge, studded with toffee and pecans.  Fantastico!

Pecan Toffee Fudge

Printable recipe
Printable recipe with picture

1 teaspoon butter
1 package (8 ounces) cream cheese, softened
3-3/4 cups confectioners’ sugar
6 ounces unsweetened chocolate, melted and cooled
1/4 teaspoon almond extract
Dash salt
1/2 cup coarsely chopped pecans
1/2 cup English toffee bits

Line an 8 or 9-in. square pan with foil and grease the foil with butter; set aside. In a large bowl, beat cream cheese until fluffy. Gradually beat in confectioners’ sugar. Beat in the melted chocolate, extract and salt until smooth. Stir in pecans and toffee bits. Spread into prepared pan. Cover and refrigerate overnight or until firm. Using foil, lift fudge out of pan. Gently peel off foil; cut fudge into 1-in. squares. Store in an airtight container in the refrigerator. Yield: 2-1/2 pounds.

Recipe source: slightly tweaked from Taste of Home

Turtle Cookies


Since this is my second cookie post in a row, and I have enough cookie recipes to share every day this week*, I’m officially declaring it “Cookie Love” week on Veronica’s Cornucopia!  Next to dog love, this is the best kind of love there is. ;)

*Except for Thursday, of course, when I will be doing my Thankful Thursdays feature.

These are the cookies I made for The Postcard Project Cookie Swap.  I had purchased a bag of Kraft Caramel Bits on sale, because I couldn’t resist the 75-cent sale price, even if I had no specific purpose in mind for them.  As with the Snickers and the Sneaky Snickers Cookies, thought maybe I could use them in my cookies for the swap.  My first idea was to use them in a vanilla dough with chocolate and pecans, and it turned out to be a great one!  These are now in my top five favorite cookies, for sure.

I based the dough off the recipe for these blue-ribbon chocolate chip cookies and just stirred in chocolate chips, toasted pecans, and the caramel bits.  I was surprised how something so simple (no browning of the butter, no toasting & grinding of oatmeal!) could be so wonderful.  Soft, crispy on the outside, chewy on the inside, gooey with caramel and studded with chocolate & pecans.  Just soooo wonderful.  If I do say so myself. :)

Turtle Cookies

Printable recipe
Printable recipe with picture

1 cup (2 sticks) unsalted butter, softened
¾ cup granulated sugar
¾ cup packed light brown sugar
1 teaspoon salt
1 tablespoon real vanilla extract
½ teaspoon white vinegar*
2 large eggs
1 ½ teaspoons baking soda
3 cups all-purpose flour
1 cup semi-sweet chocolate chips
1 cup caramel bits
1 cup pecans, toasted and chopped**

Preheat oven to 350 and line cookie sheets with parchment paper or silpat mats to prevent the caramel from sticking.

Cream the butter, sugar, salt, vanilla, and vinegar together until light and fluffy, five minutes. Add the eggs and baking soda and beat until combined. Add the flour and mix just until combined. Add the chocolate chips, caramel bits, and pecans, and either stir them in or beat just until combined.

Using a cookie scoop, portion the dough out onto the cookie sheets, leaving an inch between cookies. Bake for 10-12 minutes or just until the cookies are beginning to get golden brown around the edges. Remove and leave on pan for 5 minutes before removing cookies to a wire rack to cool completely. Repeat with remaining dough.

*The vinegar helps make the cookies tender. You can not taste it, as the extra baking soda neutralizes its flavor.

** To toast the pecans, place them in a single layer on a microwave-safe plate. Microwave in 30-second intervals, stirring in between with fingers, until toasted and fragrant, 1-2 minutes total. Set aside to cool. Chop before using in recipe.

***

I wanted to share the cookies I received in this swap like I did yesterday for the ones I received in the blogger cookie swap.  Amber sent me four each of three kinds in a holiday tin (I had no idea you could ship in a tin–very cool!): gingerbread cut-outs, chai snickerdoodles, and spiral slice-and-bake cookies.

And check it out–I even got a stocking with my name on it! :)

The chai snickerdoodles were fantastic–they were (were because they have long since departed this world through my belly) all-butter snickerdoodles and instead of a plain cinnamon-sugar coating, there are other spices in the mix to give them a chai flavor.  I can’t even imagine how great these must be fresh from the oven!  However, despite their yumminess and being Amber’s favorite, I have to say my favorite in the tin was the spiral sliced cookies. I know, I’m so boring, but I just love a good sugar cookie (much like my favorite cake is white with white icing!) and these were perfect–nice and soft with a kiss of almond. Yum! Thanks, Amber!

Katie sent me two kinds of cookies, both recipes from Mel’s Kitchen Cafe.  I was so tickled when Katie wrote that is her favorite baking blog because it is one of my favorites too–in fact, I think I trust Mel more than any other food blogger!  Her recipes have never failed me.

Katie sent me cranberry white chocolate cookies that she adapted from Mel’s Oatmeal Chocolate Chip Cookies with Coconut:

These were nice and soft and chewy and I really loved the white chocolate and cranberry combo.

However, the other cookies Katie sent are the ULTIMATE and my favorite of ALL COOKIES SENT IN BOTH SWAPS.  Yes, I needed caps for that statement, that’s how strongly I feel about these cookies.  These are Mel’s Peanut Butter Chocolate Chip Cookies, and they arrived tasting so fresh, I doubt they were any better the day she made them.

Seriously, just like with the Sneaky Snickers Cookies, I have been dying to make this recipe ever since I first laid eyes on it over a year ago.  But I was able to steer clear for the sake of my thighs.  Do you even understand how wonderful it was to receive just six of these cookies, the best cookies perhaps of all time, and maybe, just maybe, even better than my favorite cookies, so that I could savor them without risking my health by eating an entire batch made in my own kitchen?!?!?!  Thank you Katie, you rocked my world. :)

I haven’t received my third dozen yet, but as I wait patiently, I have a few cookies stashed in my freezer to keep me happy until it arrives.  See you tomorrow for a cookie that is perfect for shipping!

Fudge Babies

Posted on

I’ve been seeing raw desserts around the blogosphere for a while now and am kind of late in joining in on this remarkable food trend.  I finally made the first raw dessert recipe I ever saved after I started seeing it in varied forms on other blogs.  And I was blown. away.  I’ve made other raw desserts since, and these are still my favorite.

These things are called Cocoa Nibbles on the blog I nabbed them from, but I think Katie’s name for them, Fudge Babies (same ingredients, slightly different recipe), is much more apt.  Because they really do have the consistency of fudge!  And they’re healthy.  Gluten-free.  Fruit-sweetened with no added sugars.  Vegan.  Simple.  Easy.  Perfect for a summer treat because there’s no cooking involved, and they’re served cold.  And did I already say they’re amazing?

Fudge Babies

Printable recipe
Printable recipe with picture

½ cup raw cashews (or any other nut you love)
1 ¼ cups Medjool dates, chopped
2 tablespoons cocoa powder
Optional add ins: vanilla, 6 leaves mint, chopped; ¼ – ½ tsp chili flakes; 1 tbsp chopped candied ginger; 1 tbsp raw cocoa nibs; 2 tsp freshly grated orange rind; ½ tsp cinnamon, or play with other spices of your choice

In a food processor, process the nuts, dates and cocoa until you have what looks like a fine meal. Sprinkle with optional add-ins, if using, and continue to process until the mixture comes together as a ball that rolls around the edge of the processor bowl.  The “dough” is ready when, if you pinch some and press it between your fingers, it sticks together readily and looks a bit shiny. (If you are using regular dates, the mixture might be too dry to produce this type of dough, in which case you can sprinkle up to 2 teaspoons water and proceed as above).

Pull off pieces of dough and roll into truffle-like balls, placing on a plate.   Go ahead and eat one while they’re room temperature and give a little sigh of pleasure.  Cover with plastic wrap and refrigerate  at least two hours or overnight.  They are much better cold, as they firm up considerably and will attain the texture of a dense fudge.

Makes 16 fudge babies

Per fudge baby: 61 calories; 2 g fat; 12 g carbohydrates; 1.3 g fiber; 1 g protein; 2 Points Plus

Recipe source: slightly tweaked from The Copycat Cook, while the name came from Chocolate-Covered Katie, who uses a similar recipe.

Cow Pies Candy

Posted on

I got the above Hallmark (because I care enough to send the very best, lol!) card for my Mother-in-Law’s birthday.  Most of my husband’s family lives a couple hours north of us and I usually mail some sort of edible goodies to them on their birthdays.  Since I haven’t figured out how to ship a cake without destroying it, I thought this would be a great card to send  to her along with some cow pies candy.  Cute, if a little gross, right? :)

I’m not sure where this recipe originated but you can find it all over the web.  Mine is a little different from the others, which only call for almonds and raisins with the chocolate.  Because cow pies have grass in them (OK, maybe I’m getting a little too graphic here!), I like to add coconut to mimic that.

Although I went with sliced almonds this time (it was all I had on hand), my favorite way to make these is with roasted, salted peanuts, raisins, and coconut.  If you like Chunky candy bars, you’ll like that version too because it is very similar in taste.  (I also have an award-winning recipe for cookies that are based off the flavor profile of the Chunky Candy bar, if you’re interested in that!)

It’s best to use salted nuts to counteract the super-sweetness of the candy.  If you only have unsalted, just add some salt to the mixture before stirring. Kids love these things (apparently the idea/grossness as much as the taste–KIDS!), and they would be great for Halloween…and maybe even Easter.  We usually think of barn animals (OK, barn animal babies) in correlation to Easter, so I guess cow pies fits, right?  Or maybe I’ve grown a little twisted over the years.  I blame my husband.  He is the King of Strange.  I mean, remember those horrific-looking no bake cookies he made? Yeah.  He totally started it.

Cow Pies Candy

Printable recipe
Printable recipe with picture

1 (12 oz) bag milk chocolate chips
1 tablespoon vegetable shortening
2/3 cup roughly chopped salted nuts*
1/2 cup packed raisins
1/3 cup packed shredded coconut
*Add 1/4 teaspoon salt to the recipe if not using salted nuts.

Gently melt chocolate and shortening together in double boiler or in microwave, stirring frequently until smooth. Stir in remaining ingredients. Drop spoonfuls onto a wax paper lined baking sheet and let sit until firm, about an hour.

Veronica’s Note: If you want to add more mix-ins, decrease the amounts of the other mix-ins accordingly (for instance, decrease nuts to ½ cup and raisins to ⅓ cup in order to add an additional ⅓ cup mix-ins). Ideas for mix-ins: toffee bits, crushed pretzels, bacon bits, crumbled potato chips, additional types of nuts or dried fruits.

Makes 24 candies. Per serving: 121 calories; 7.6 g fat; 12.7 g carb; 1.1 g fiber; 2.2 g protein

Recipe source: adapted from Taste of Home

Secret Recipe Club

Peppermint Pretzel Crisps


Although we don’t have a Trader Joe’s in Kansas (don’t you pity me?), I found out through a blog I happened to scroll through one day (I do not remember which one it was), that they sell a product (and I don’t even remember the name) that is basically pretzel crisps coated in white chocolate and sprinkled with pepperminty-looking things.  (Pepperminty is a word because I say so.)

Well, just because we don’t have a Trader Joe’s doesn’t mean I can’t have make them myself, right?  I mean, all I need are three ingredients:

Easy peasy, and this is one of the very few holiday treats that you can enjoy nearly guiltlessly.  That is, unless you eat the entire batch.  I calculated the calories and it’s 104 for every three crisps.  That is about the equivalent of an ounce of fudge, but it much more satisfying because the serving is larger and it takes a while to eat since it’s crunchy.

The best part?  They don’t taste diet-friendly.  They aren’t imposters masquerading as the real thing like fat-free half-and-half (this is an oxymoron if I ever heard one!) or sugar free syrup (gag me!).  They are the real deal, salty & sweet with a hit of peppermint. They rock my socks.

Do your poor friends on diets a favor and give these as gifts in lieu of that tub of fudge.  Believe me, we have plenty holiday temptations to avoid without your help!

Peppermint Pretzel Crisps

Printable recipe
Printable recipe with picture

4 squares vanilla almond bark candy coating
1 (7.2 0z) bag original pretzel crisps
1 cup Andes Peppermint Crunch Baking Chips

Melt the almond bark according to package directions.  Using a small silicone spatula, spread the top of a pretzel crisp with almond bark, lay on a sheet of waxed paper, and immediately sprinkle with peppermint baking chips; repeat with the remaining pretzel crisps.  Once almond bark has set, package in an airtight container or in cellophane gift bags or tins.

*If you are unfamiliar with the Peppermint Crunch Baking Chips, read this post to find out more.

%d bloggers like this: