RSS Feed

Tag Archives: low calorie

Crockpot Chicken Cacciatore

Posted on

It’s Secret Recipe Club time again!  I can’t tell you how thankful I am to Amanda for starting this club.  The amount of fun I have with it is a little ridiculous.  My favorite part is getting my blog assignment and stealthily stalking that blog, hunting down recipes that I want to make and post for reveal day.  I always bookmark a million and it takes me an entire week to narrow down my choice to one recipe.

{You can find my past Secret Recipe Club posts here.}

This month I was assigned to A Little Nosh and unlike previous assignments, I knew which recipe I was going to make within a minute of clicking on her blog.  I still went through Amy’s archives and bookmarked half her recipes, but did eventually return to the original that caught my eye and knew I couldn’t fight it.  I had to make the crockpot chicken cacciatore because:

1) It’s beautiful and I like pretty food.

2)  I’d never eaten or made it and thought it would be fun to try something new.

3) It fit perfectly in our diet plan while we were in the 2nd cycle of the 17 Day Diet.

4) I noticed the recipe originally came from one of my blogging buddies, Renee of My Kitchen Adventures, and it tickled me to think that I’d be making Amy’s and Renee’s recipe at the same time.


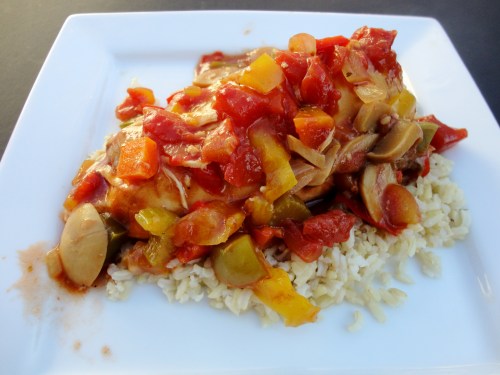
I changed the recipe to make it on a slightly larger scale with a higher ratio of veggies, and it completely filled my 6-quart crockpot to the brim.  The leftovers were enough to last us all week, and what beautiful lunches we were bringing to work!  The vegetables and sauce were such a tasty compliment to the tender chicken breast meat, which pretty much fell apart as soon as you touched it with a fork.  So delicious.

Thanks, Amy, for sharing this great recipe.  I never even saw it on Renee’s blog, so I’m glad to have gotten the opportunity through you and the SRC to try it!

Crockpot Garden Chicken Cacciatore

Printable recipe
Printable recipe with picture

6 large skinless, boneless chicken breasts
1 green bell pepper, seeded and chopped
1 red bell pepper, seeded and chopped
1 yellow or orange bell pepper, seeded and chopped
1 medium onion, chopped
2 large ribs of celery, diced
3 large carrots, diced
2 (4 oz) cans sliced mushrooms, drained
2 tablespoons minced garlic
2 (14.5 oz) cans of diced tomatoes with basil, oregano and garlic
1 (6 oz) can tomato paste
½ cup chicken broth
2 tablespoons balsamic vinegar
¼ cup cornstarch
1-2 tablespoons water or chicken broth
Additional salt and pepper, to taste

Place chicken breasts inside the bottom of a 6-quart crockpot. Add in the bell peppers, onion, celery, carrots, mushrooms, and garlic. Pour the juice from the tomatoes into a medium bowl, then put the tomatoes into the crockpot.

Into the bowl with the tomato juice, add the tomato paste, chicken stock, and balsamic vinegar. Mix well, then pour on top of the tomatoes and vegetables. Cover and cook on low for 7-8 hours, or high for 4 hours, or until the chicken is tender.

Mix the cornstarch and water together until no lumps remain, then pour over the top of the vegetables. Stir, turn the crockpot to high, and allow to cook for another 20 minutes, or until the sauce has thickened. Season with additional salt and pepper to taste.

Serve over brown rice or your choice of starch.

Recipe source: adapted from A Little Nosh, originally from My Kitchen Adventures

To check out the other submissions in Group A for The Secret Recipe Club, click on the Mr. Linky below!


Skinny Dark Hot Cocoa


Hot cocoa?  Hot chocolate?  I’ve always said hot chocolate, no matter if it’s made with real chocolate or cocoa powder or a mix.  I also have always said pop, not soda or soda pop.  Potato, potahto I guess.  What about you?

Anyway, remember how Dennis and I weren’t planning on having sugar on Valentine’s Day?  Well, it would be just be unAmerican not to have any chocolate on the day when the rest of the country is eating 58 million pounds of it.  (I know, right?)  So, inspired by Faith’s delicious Skinny Caramel Hot Cocoa, I made this plain version for our Valentine’s Day dinner dessert, only changing the basic recipe a smidge to deepen the chocolate flavor (had to make up for our lack of chocolate candy, you know).  We like our chocolate dark in this house.

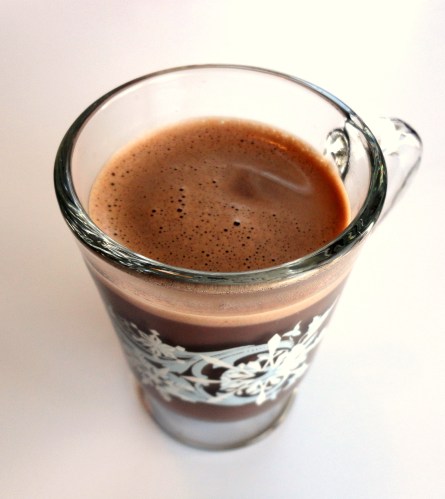
This hot cocoa is so sweet, so chocolatey and delicious, creamy even, that you wouldn’t guess that it’s fat and sugar free.  That it’s actually healthy.  Protein and calcium-rich milk?  Check.  The antioxidant power of cocoa powder?  Check.  Totally natural with no chemical sweeteners?  You got it.

I’m usually semi-opposed to healthifying sweet treats because, in my opinion, they’re called treats because they are meant to be enjoyed.  Mostly what cutting out fat and sugar does is make them less enjoyable (although I hope to prove my own theory wrong because I’m going to be experimenting soon, given that we’ve nixed sugar in our house!).  But when you can do it with such a satisfying result, I’m all for feeling great about drinking something that tastes so sinful.

*A note about stevia: I’m a huge advocate of using stevia to sweeten things, versus chemical sweeteners and even real sugar.  This is the ONLY completely natural sweetener out there that is also calorie free.  It is taken from the leaves of a plant and it is tremendously sweet so you need much less of it than sugar.  I was blessed to win a bunch of NuNaturals products through a giveaway from Renee of My Kitchen Adventures (thank you so much Renee!), and hope to do a review soon with comparisons to other sugar substitutes.  NuNaturals products are by far the best I’ve tried and I highly recommend them.

Since I’m not counting calories on the 17 Day Diet, I didn’t calculate them for this cocoa when we drank it, but just going from the labels on the milk and the cocoa (the only things that have calories in the recipe), I can tell you that there is 120 calories, 1 g fat,  22 g carbohydrates, and 2 grams fiber. Not to shabby, and I think you’ll agree that this hot cocoa is totally worth every healthy & delicious calorie.

Skinny Dark Hot Cocoa

Printable recipe
Printable recipe with picture

1 tablespoon cocoa powder
1 tablespoon Dutch process cocoa powder
2 packets NuNaturals NuStevia
Pinch fleur de sel or kosher salt
1 ¼ cups nonfat milk
½ teaspoon pure vanilla extract

Whisk together the cocoa powders, stevia powder, and salt in a small saucepan. Add half the milk and whisk vigorously until the cocoa powder is dissolved. Turn the heat to medium, and whisk in the remaining milk. Heat until the hot cocoa starts to steam (do not boil), and pour into a mug.  Enjoy!

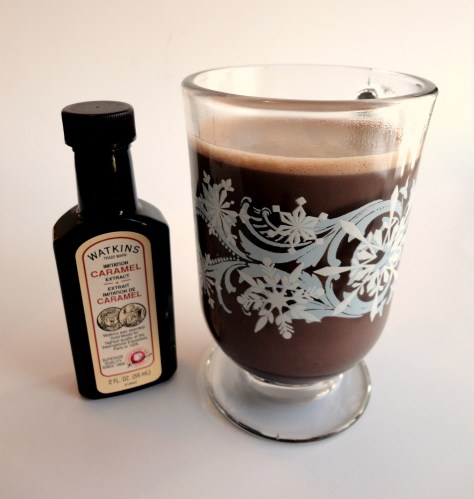
For a caramel hot cocoa: stir in ¼ teaspoon caramel extract along with the vanilla at the end.

Serves 1

Recipe source: adapted from An Edible Mosaic

Yummy either way!

P.S. Happy leap day!  I know this is crazy, but this is the first year I’ve actually been aware that it’s a leap year.  How did I miss the other seven I lived through?  Queen Oblivious here! I know I’m getting random here but did anyone else used to watch the show Quantum Leap?  I honestly can’t remember a thing about it except I think I liked it (I was pretty young so maybe it was too mature for me), and I always associated the name with leap year.  Did it even have anything to do with a leap year?  OK, seriously, I’ll shut up now.

Healthy Blueberry Muffins

Posted on

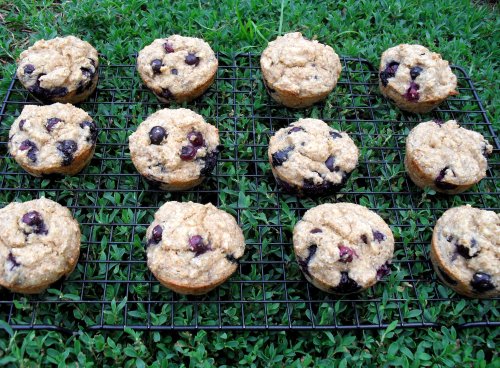
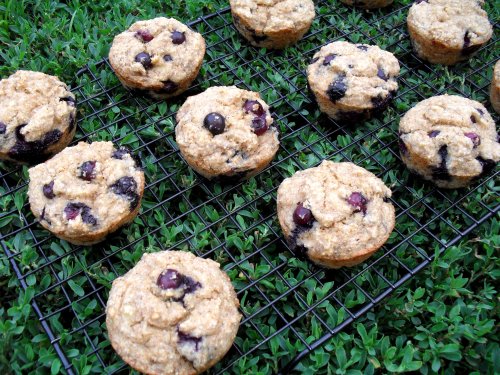
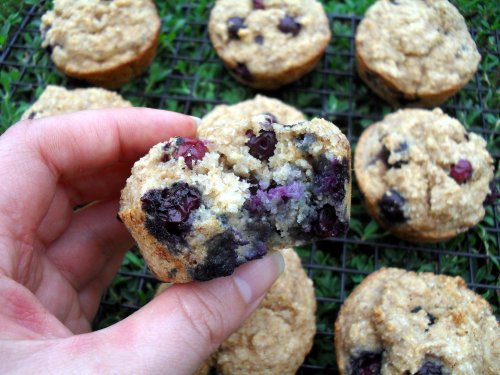
Did I scare you off with the word healthy?  For those who are still reading, I have a nice treat in store for you!  I whipped these babies up because I had some seriously overripe bananas begging to be used and also scored three pints of blueberries for $1.50 each at Aldi (love Aldi!).  These are healthy in every sense of the word: whole wheat, all-natural, sugar-free, and low fat.  Each muffin comes in at just 3 Points Plus.  And yes, they are quite delicious!  Maybe not delicious in the same way that a white, sugar-sweetened blueberry muffin with streusel topping is delicious, but delicious in a way that makes you happy not only in your mouth but in your overall sense of well-being.

I calculated the nutritional information for the recipe using both Truvia and sugar (since most people probably don’t have Truvia sitting around in their home), and either way the muffins come to 3 Points Plus.    If you like baking sugar-free, I encourage you to try Truvia because in my experience it acts like sugar in baking, unlike many substitutes.  (I’ve used it before in my Chocolate Chip Banana Bread and Apple Cake Mabel, both with excellent results.) It is all natural, coming from the stevia plant, so you don’t have to be scared of any side-effects.  There are none!  It is the only all-natural calorie-free sweetener out there (stevia, not Truvia.  There are many sweeteners made from stevia and Truvia is just one of them.)

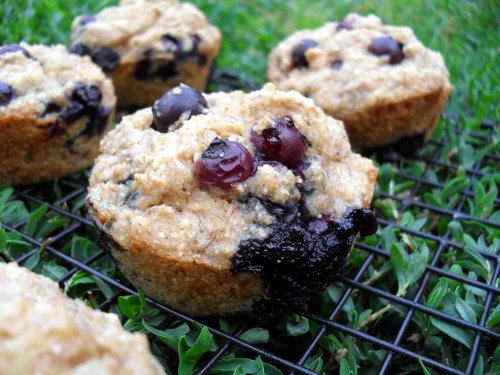
I often complain to other bloggers when they fail to describe how their recipes taste because that is what I care about most when reading a recipe on a blog, so I’d better include my review too, lest those bloggers I’ve ticked off with my whining come back to haunt me. ;)  The banana flavor doesn’t come through at all on the first day, it just naturally sweetens the muffins and makes them moist without a lot of added fat. Somehow the banana flavor develops overnight because I could faintly taste it when eating the leftovers, which were just as good.  I also couldn’t detect the mace so I wouldn’t say it’s essential.  I just threw it in on a whim.  I thought the sweetness level was just right–not too sweet and not under-sweet.  The texture is very moist, tender, and the whole grain makes them a little more hearty than I’m used to, but they seem more wholesome for it, which I like.  The only thing I’d change next time is adding 1/2 cup more blueberries to make the muffins larger without changing the calories much (plus the blueberries add a lot of sweetness), and perhaps sprinkling a little sugar over the top of each before baking to make them prettier.  What I liked most was eating them warm so that the blueberries burst in my mouth and hot juice squirted out.  Oh, so delicious.

Healthy Blueberry Muffins

Printable recipe
Printable recipe with picture

3 medium over-ripe bananas
½ cup buttermilk
2 tablespoons canola oil
2 tablespoons Truvia, or 1/2 cup granulated sugar
1 teaspoon vanilla
½ teaspoon salt
½ teaspoon mace (optional)
1 ¼ cups white whole wheat flour
½ teaspoon baking soda
½ teaspoon baking powder
1 cup fresh blueberries (please try 1 1/2 cups!)

Preheat oven to 350 degrees. Grease or line 12 muffin cups with paper; set aside.   Get out your overripe bananas and peel them into a large bowl.

When I said I had overripe bananas, I meant really overripe.  There’s no reason why you can’t use black bananas in baking.  The older they are, the better they are for baking because they get sweeter and have more banana flavor (in this case, that doesn’t affect the flavor of the muffins but it’s great for banana bread).  You’ll only need three unless you’re doubling the recipe.  I happened to make this recipe twice because I put too much liquid and not enough flour in it the first time, so I was glad to have just the right amount of bananas to make another batch and perfect the recipe.

As you can see, the insides are nice and golden and very soft.

Mash ’em up.

Stir in the buttermilk, oil, Truvia (or sugar), vanilla, salt, and mace.

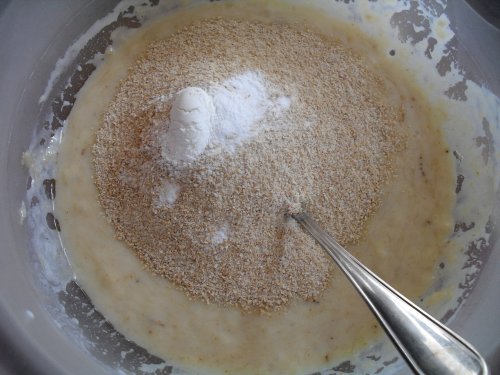
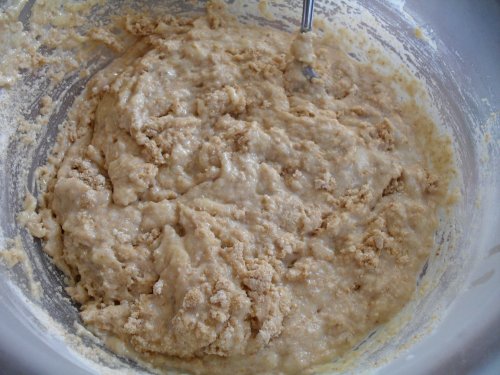
Add flour, baking soda, and baking powder, and stir until moistened but lumpy.

It doesn’t need to be any more mixed than this because you’ll be stirring it more when you add the blueberries.  The more you mix muffin batter, the tougher the muffins will be.

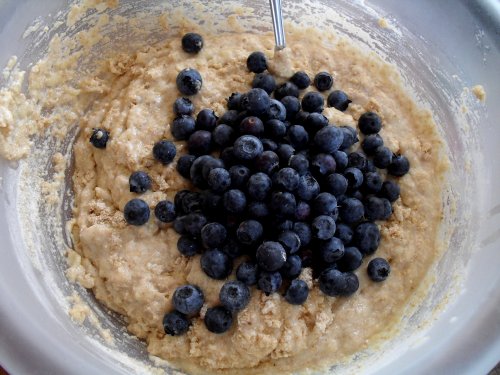
Stir in the blueberries.

Using an icecream scoop, divide the batter between prepared muffin cups. (I didn’t take any more pictures for some reason so just imagine one of the finished batter, and one of the filled muffin tin before baking. Thanks. :))  Bake 15-20 minutes, until done. Cool on wire rack for a few minutes before serving. Cool leftovers completely and store in a Ziploc bag or airtight container.

Makes 12 muffins.

Per muffin: 100 calories; 2.8 g fat; 17 g carbohydrates; 2.3 g fiber; 2.4 g protein; 3 Points Plus

Made with ½ cup sugar in place of Truvia: 133 calories; 2.8 g fat; 25 g carbohydrates; 2.3 g fiber; 2.4 g protein; 3 Points Plus

Recipe by Veronica Miller

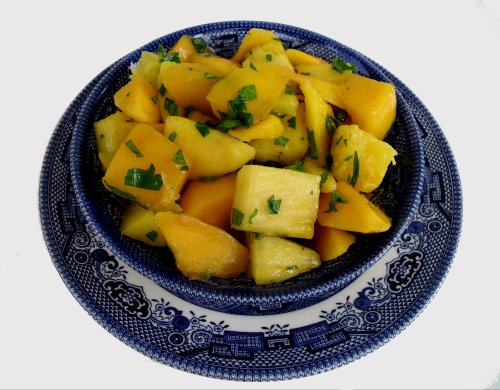
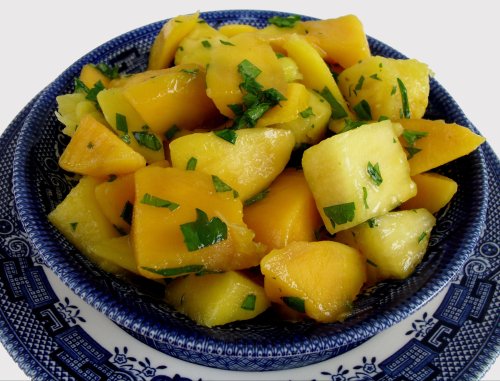
Pineapple & Mango Salad

Posted on

I’m ba-ack!  My husband, sister, and I had a fabulous time with our friends in Texas and I put together a slideshow if you are interested, which you can view here.

I had planned to share my favorite basic cheesecake recipe with you upon my return, but you will have to wait until Monday for that one because I’m on a deadline to get a mango recipe posted for BSI (Blogger Secret Ingredient). Trust me, I’m doing you a favor! This salad is so delicious and you don’t risk gaining ten pounds if you go wild and eat the entire recipe.  Which you might be tempted to do with the cheesecake.

OK, so I’m a mango purist.  Mangoes are my absolute favorite fruit and I find them so delicious as they are, with nothing added, that it’s hard for me to make a recipe with them.  There is, however, a lovely salad that I make with them from time to time (usually when I have a mango surplus, because using my only mango for anything other than eating plain would be sacrilege) that is so simple and pure in itself, I don’t feel like I’m adulterating the fruit by including it in the salad.

There are only three ingredients and they marry so well together that in the past I have been inspired to give the salad names that would usually be associated with cocktails, like Hawaiian Sunrise and Tropical Paradise.  To keep things simple and pure, in keeping with the recipe itself, I decided to just go with Pineapple & Mango Salad for it’s official title.

I’ve made this salad with parsley, mint and cilantro and I usually prefer the parsley, though any of them will work.  If you think another sounds better, go with that.  I think it is a matter of personal taste, or perhaps even occasion, as when I’m serving it as dessert after a Mexican meal, the cilantro seems best.  And if you want to give it a little more tropical feel, add in some sweetened coconut.  I did that this morning on my second bowl and thought it was nice, though being a mango purist I can’t exactly condone the behavior. ;)

Pineapple & Mango Salad

Printable recipe
Printable recipe with picture

1 ripe pineapple
4 ripe mangoes
1/2 cup fresh parsley, mint, or cilantro, chopped fine

Cut a slice off the bottom of the pineapple and cut the top off as well.  Sit the pineapple up on on its now-flat end and slice down around the sides to remove the outside.  Keep cutting until you have no pits remaining in the flesh.  Cut the pineapple into quarters, then slice the middle off of each to remove the pit.  Lay each quarter on its back, cut into thirds length-wise, then chop into chunks.  Place the pineapple chunks in a large bowl.  Peel the mangoes and cut the flesh away from the seed.  Chop the flesh into chunks and add to the bowl.  Add the parsley and stir until combined.  Cover and refrigerate overnight, or at least until well chilled, before serving.

Veronica’s notes: this salad is perfectly delicious when the fruit is ripe, but if yours is a little under-ripe, you can add in some agave nectar or other sweetener of your choice.  If you don’t feel like cutting up a pineapple, you can usually find fresh cut pineapple at salad bars at supermarkets, or even in the refrigerated produce section.  There is a simpler way to cut the flesh from a mango, which is depicted here (I don’t use this method because I feel like I can’t cut the cubes close enough to the skin and I waste too much of the mango), and to see a tutorial on cutting pineapple, click here.

Recipe source: CW (that’s my Mom.  Dad calls her CW, which stands for Crazed Woman, and she calls him “crazy man.”  Gotta love my dysfunctional family! :) )

This is linked with Nutmeg Nanny for BSI: mangoes.

Questions of the day: 1) Is there anything you love so much in its natural state you can’t alter it?  2) What is your favorite fruit?  3) Do you know anyone that has mean/teasing pet names for their significant other?

Restaurant-Style Tabouli

Posted on

Hummus and tabouli are my favorite sides to serve with Lebanese fare.  Not only are they simple to make, but crazy delicious!  My Mom’s tabouli consists predominantly of bulgar wheat, and most recipes I’ve found are the same, but I noticed when I ordered it at restaurants, it was mostly parsley with a tiny bit of bulgar in it.  Not only is this lower in calories (bonus!), but I actually prefer the taste.    The parsley and lemon make for a very refreshing salad!  Here’s my version of restaurant-style tabouli.

Restaurant-Style Tabouli

Printable recipe
Printable recipe with link

3 bunches parsley, chopped
1/3 cup chopped onion
2 medium tomatoes, diced
1/4 cup fine bulgar wheat
1/4 cup lemon juice
1 tablespoon extra-virgin olive oil
1/4 teaspoon salt

Mix all ingredients in a bowl, cover, and let sit overnight before serving.  There is no need to cook the bulgar, as it will absorb moisture from the salad and become tender in a few hours.

Makes 6 servings. Per serving: 76 calories; 3 g fat; 12 g carbohydrates; 3.5 g fiber; 3 g protein

Recipe by Veronica Miller

I used red onions in the first picture, and white onions in this one. You can also use green onions, if you prefer.

On a personal note: I’m leaving to visit friends in Texas so this is the last recipe I’ll be posting for a while.  I know I’m not a regular poster anyway, so you guys won’t even miss me!  Nevertheless, I will return later next week with some sweets & savories for you. You’re in for a few treats! :)

Masoor Dal with Cauliflower and Kale

Posted on

Before we get to some major Indian yumminess, I wanted to mention two things.  First, you may notice things look a bit different around here.  I changed my theme and I like it but I’m not sure it’s “the one.”   I think the header is very plain…but I’m cheap and I don’t want to pay to get fancy so this is probably as good as it gets. :) Let me know what you think!

Second, I think I caused some confusion with my post on the cake decorating competition at work.  I’m not sure how many of you saw that, but I wanted to clarify that the date on it is correct.  I wrote it two years ago on my MySpace blog, and newly copied it to Recipe Rhapsody so that I could link to it in reference to how to make a tiered cake in an upcoming post.  I posted it with the original date I wrote it, so I didn’t think any one would see it, but I started getting some comments on it so apparently it came across some of your radars!  Just wanted to clarify that it’s now old news, but I appreciate your kind words and congratulations.

Red Lentils

<image source>

Although I still have a large backlog of recipes to post, the weather is heating up again and it looks like the casseroles, soups, and pumpkin recipes will probably have to wait until next year, so I thought I’d gush (or perhaps rhapsodize would be a more appropriate word for this blog!) about the lunch I made today instead.  I’m on a mission to spring-clean my wreck of a house into sparkling submission, and I started eying the red lentils I’d purchased at a Lebanese market over a month ago while I was organizing the kitchen.

I decided I was (finally) going to make something with them, but by the time I took a break to cook,  I was starving and didn’t want to bother with looking up any recipes.  I needed a quick meal and I threw this one together in just over half an hour, so it would be great for a busy day.  While I’m usually not a good enough cook to come up with anything edible without using a recipe, I think I knocked this one out of the park, if I do say so myself!  Becoming familiar with the cuisine by cooking several Indian dishes over the last few months helped a lot.

I made a masoor dal (a thick stew made of red lentils) that is almost vegan, and could certainly be turned so by using vegetable stock in place of the water and chicken bullion.  It is spicy in the full sense of the word–with plenty of Indian aromatics and and a moderate heat index, though you can certainly reduce or increase the spiciness to your tastes.

I’m usually not a fan of lentils, but I liked this more than any lentil dish I’ve made before.  I’m not sure if red lentils have a better flavor (which I do suspect, because I detected none of the usual musky lentil flavor in this dish), or if the spices just overwhelmed it.  The tender cauliflower pieces were a perfect accompaniment, but I don’t think the kale is absolutely necessary.  I couldn’t really detect any of its flavor, and it got kind of dull & ugly during the cooking process, but I don’t think it hurts to have all that extra nutrition!  Kale has powerful  antioxidant properties and is considered an anti-inflammatory so if you have it on hand, throw it in!  If not, don’t sweat it.  The only thing I didn’t have that I really felt it needed was a little cilantro to sprinkle over the top.  I had to make do with some dried parsley.  Bummer!

I served mine with whole wheat couscous since I was in a hurry to eat (it only takes 5 minutes to make), but you can serve it with rice or bulgar or even pasta.  Whatever floats your boat!

Masoor Dal with Cauliflower and Kale

Printable recipe
Printable recipe with picture

2 cups water
2 chicken bullion cubes
1 cup red lentils
1/2 cup chopped onion
2 cloves garlic, minced
2 (8 oz) cans tomato sauce
2 teaspoons garam masala
2 teaspoons curry powder
1 teaspoon sriracha hot chile sauce, or to taste
1/2 teaspoon cumin
1/2 head cauliflower, separated into florets
2 cups loosely packed kale
2 tablespoons extra-virgin olive oil
Fresh cilantro, for garnish

In a large 3-quart saucepan, combine water, bullion, lentils, onions, and garlic; cover and bring to a boil over high heat.  Reduce heat to medium and cook for ten minutes.  Stir in the tomato sauce, garam masala, curry powder, sriracha, and cumin.  Add the cauliflower and kale, stir & cover.  Cook for 20 more minutes, stirring often to make sure the dal isn’t sticking, or until the lentils are tender.  Stir in the olive oil during the last five minutes of cooking and serve with a sprinkle of cilantro over rice or couscous.

Serves 4

Per serving: 231 calories; 8 g fat; 40 g carbohydrates; 15 g fiber; 13 g protein

Chocolate Torte


*A note before the blog: I have updated my cherry cordials recipe with notes on how to make sure the centers liquify and included a new picture from my latest batch with liquified centers.

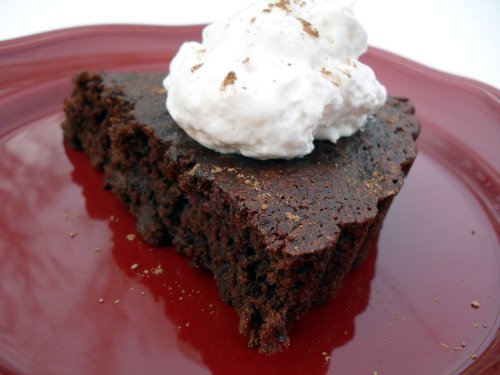
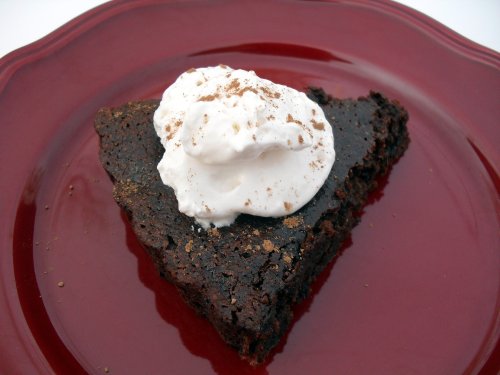
Without realizing it, I scheduled a sandwich bread recipe to post today, Valentine’s Day, which included no mention of love or chocolate, or even an apology for giving a bread recipe on the international day of love.  So I hurriedly snapped pictures of our dessert today so that I could atone for my sins.  ;)

Usually I steer clear of desserts that don’t include real butter, sugar (preferably more than one kind), and white flour.  But I’m discovering that not all sweet treats need to be loaded with fat and processed sugar and flour to taste good.

I made this chocolate torte for our Valentine’s Day dessert and we both loved it with a little whipped cream on top.  It is soft, moist, and almost fudgy because of the dates.  The recipe was born of a mistake, having used dates instead of the prunes it originally called for.  I really liked the result, but will be trying it with prunes next time, which I think will give it more of a cake consistency.  With the dates, it’s somewhere between and a brownie and a cake.  It definitely tastes healthier than regular full-fat and full-sugar desserts, but not in an off-putting way.  It is probably my favorite diet-friendly dessert to date!  That it has natural, whole-food ingredients like dates and whole wheat flour is as an added bonus and makes me feel like I’m almost eating health-food.

Chocolate Torte

Printable recipe
Printable recipe with picture

1/3 cup cocoa powder, plus 1 tsp for dusting
1 cup dates, pitted and chopped
1/2 cup strong, hot coffee
1/3 cup whole-wheat flour
2 tbsp all-purpose flour
3/4 tsp baking powder
1/4 tsp baking soda
1/8 tsp salt
1/2 cup packed light-brown sugar
1/4 cup unsweetened applesauce
2 tbsp egg substitute or 1 egg white
2 tsp vanilla extract

Heat oven to 350˚. Coat a 9″ tart pan with cooking spray. Dust with 1 tsp cocoa. Set aside. Combine dates and coffee in a large bowl. Set aside to cool. Sift remaining 1/3 cup cocoa, flours, baking powder, baking soda and salt into a small bowl and stir. To the date mixture, add sugar, applesauce, egg substitute and vanilla and stir until combined. Pour dry mixture into the wet and stir until combined. Pour into prepared pan. Bake until a toothpick inserted in center of cake comes out mostly clean, about 25 minutes. Cool completely before removing and slicing. Serve with whipped cream.

Serves 8. Per slice: 153 calories; .7 fat; 43 g carbohydrates; 4 g fiber; 3 g protein

Recipe source: adapted from Self

Oatmeal Sandwich Bread


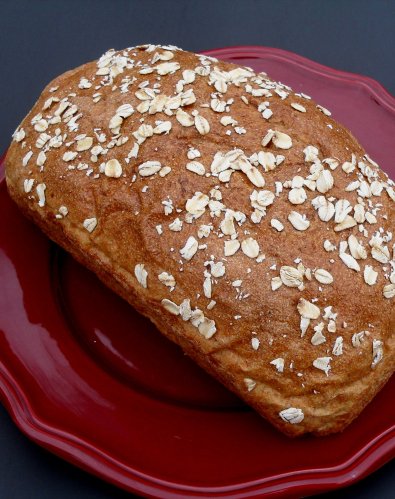
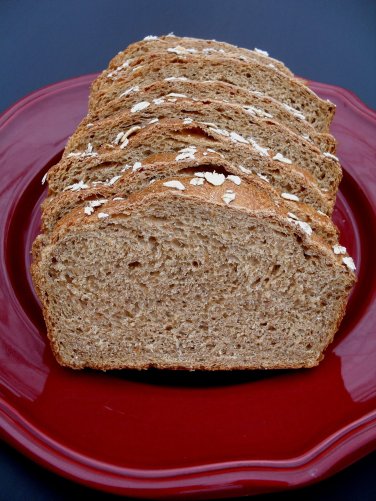
This isn’t my favorite bread, but it does have a great, wholesome & hearty flavor. It is an excellent loaf for slicing and making sandwiches. My favorite use for it is making grilled cheese sandwiches, and I also made some yummy ham and cheese melts (with apricot preserves spread on the insides) that this bread was wonderful with. This makes a very large, tall loaf, so if you prefer you can make two smaller, shorter loaves with the dough as I chose to, which makes the bread go further, although your sandwiches will be smaller.  I’m on a mission to lose these last 15 pounds so the smaller sandwiches totally fits in with my plan!  I love it when I can eat real food (read: non-“free” stuff.  Free is good as long as it’s not associated with fat or sugar!) and stay within my calorie budget.

Be sure to check out the recipe source at the end–this gal has tons of healthy, delicious recipes!  I won her low-fat cinnamon rolls in an online bake sale auction and I have to say they are crazy good.  I never thought to replace butter in the filling with applesauce–brilliant!

Oatmeal Sandwich Bread

Printable recipe
Printable recipe with picture

2 cups warm water
1 tablespoon yeast
3 tablespoon molasses
2 1/2 cups whole wheat flour
2 cups all purpose flour
2 tablespoons vital wheat gluten
1 cup rolled oats
4 tablespoon butter, melted and cooled slightly
1 tablespoon salt

For optional topping
1 egg, beaten with a teaspoon of water
2 tablespoons rolled oats

Butter a large bowl and a 9″ loaf pan and set aside. In a large mixing bowl or food processor fitted with a dough hook, mix together water, yeast and molasses. Allow the yeast to stand for 5 minutes until it begins to bubble. Add the whole wheat and bread flour, the oats and the melted butter. Stir to combine. Cover with towel and let rise for 30 minutes. Add in salt and then mix until dough pulls away from sides and becomes a ball. You can add a tablespoon or two of flour or water if necessary. Scrape dough onto a lightly floured surface and knead 5-10 times. Place into the large, buttered bowl. For the first rise, scrape the dough onto a lightly floured work surface and knead it a few times. Put the dough into the buttered bowl, cover with a towel, and leave it to rise for about 1 hour or until it doubles in size. Turn dough out onto floured surface after first rise. Shape by folding into a square, folding top down towards center and bottom up towards the center. Pinch the new top and bottom together to seal, roll to shape and place in the loaf pan, seam side down. Allow to rise in a warm place, covered with a towel for one hour or until dough rises an additional half its size. Preheat oven to 400° F. Right before placing in oven, brush egg wash over the top of the loaf and sprinkle on the rolled oats. Bake for 40 minutes or until the loaf sounds hollow when tapped on the bottom. Remove from pan and cool on wire rack. The loaf slices best when at room temperature.

Veronica’s notes: I substituted rapid-acting yeast as usual, so I mixed it in with the dry ingredients and then added the wet–no proofing necessary.  You don’t technically have to do two rises when you use rapid-acting/instant yeast, so you can just shape it into a loaf and let it rise once before baking, but I usually go ahead and do two rises anyway to develop a more yeasty flavor.

I calculated the nutritional information based on making two loaves and dividing each into 14 slices.  Per slice: 111 calories; 2.7 g fat; 21 g carbohydrate; 2.2 g fiber; 3.4 g protein

Recipe source: From Apples to Zucchini

Lighter Northern Cornbread

Posted on

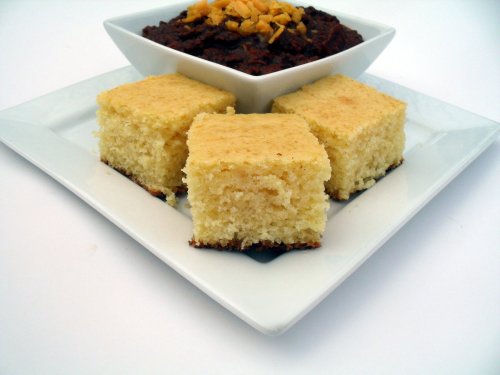
The civil war may have ended over 100 years ago, but there are still some battles between the north and south that continue to rage.  The cornbread issue, for instance.  It basically boils down to unsweetened (the south) versus sweetened (the north).  (Isn’t it ironic that the issue of the iced tea is the opposite, the south preferring sweetened?)  I was raised on a hearty whole wheat, unsweetened variety, and loved smothering it with butter and eating it with pinto beans during the cold winter months.  But now that I’m an adult and making my own cornbread, I most often make the northern kind since my hubby won’t eat the other.   I’m Switzerland–a fan of both, which is apt since we live in the middle of the US and aren’t really in the north or the south.

For you that enjoy northern-style cornbread, you can find the absolute best recipe here, but if you’re looking for something a little lighter, I’ve come up with a great one for you that won’t disappoint!

Lighter Northern Cornbread

Printable version
Printable version with picture

1 cup all-purpose flour
1 cup fine yellow cornmeal
½ cup sugar
1 tablespoon baking powder
1 teaspoon salt
1 cup nonfat milk
½ cup canola or vegetable oil
2 eggs, lightly beaten

Preheat oven to 350; grease a 9×9 pan and set aside.  Combine dry ingredients in large bowl and stir.  Add wet ingredients and stir just until mixed (it’s OK if there are some lumps).  Bake 30-40 minutes or until toothpick inserted in center comes out clean or with a few moist crumbs. Cut into rows of 4 x 4 to make 16 squares.

Per square: 137 calories; 5.5 g fat; 19 g carbohydrate; .8 g fiber; 3 g protein

Recipe by Veronica Miller

Out of curiosity, how do you prefer your cornbread and tea?  Sweet or not?

Apple Cake Mabel

Posted on

Before we get to the cake, please remember to head on over to Steph’s Bite by Bite to check out all the wonderful goodies up for auction in the online bake sale, which started at 7 AM today and goes until 9 PM EST.  She’s raising money for the Leukemia and Lymphoma Society and I can’t wait to mail a batch of my Mocha Toffee Brownies to the winning bidder!  Good luck!

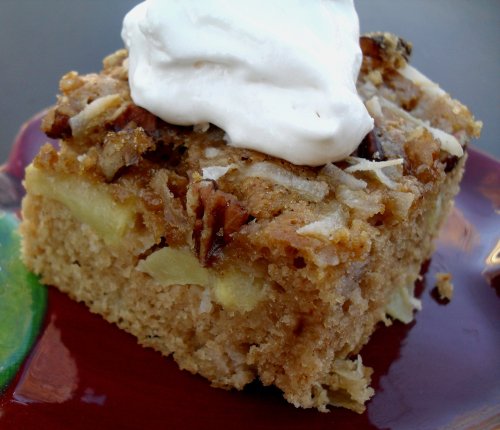
OK, now let’s get down to business.  I begged this recipe off my friend, Judy, when she mentioned she had made a sugar-free apple cake that turned out well.  I’m intrigued by anything that is sugar-free that also tastes good, as I have not had a lot of personal success with this.  I discovered that the cake was made with Splenda and shortening and this repelled me on many levels, but also awakened a creative desire to make it healthier with a natural sweetener and not only non-hydrogenated fat, but less of it.  As I mentioned in my post on chocolate chip banana bread, I’ve been experimenting with Truvia, a natural calorie-free sweetener made from the stevia plant’s leaves, so I used that in addition to brown sugar to give a better, more natural flavor.  I didn’t mess with the diet soda in the recipe, but it could easily be switched out for any variety of Zevia (a calorie-free soda made with stevia), or with club soda and additional Truvia.

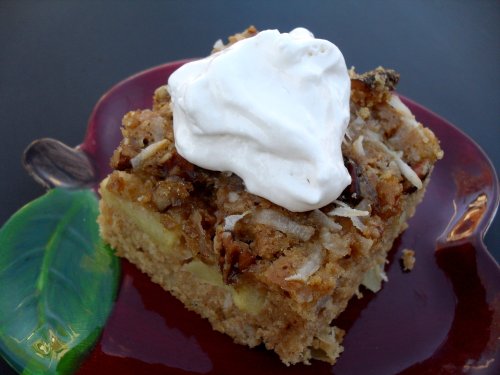
Now, I’m not sure who Mabel is, or if she was even the one to come up with the original recipe, but I hope that she would be as pleased as I am with my adaptation.  It isn’t as light and tender as a traditional cake, but a little more dense like coffee cake, moist, perfectly sweet & spiced, with tender chunks of apple in every bite.  It is best served the day you bake it as it gets a little dry a couple days later, but it can be returned to it’s former glory with a few seconds in the microwave.

Apple Cake Mabel

Printable recipe
Printable recipe with picture

2 eggs
½ cup brown sugar
4 oz cup (1/2 cup) unsweetened applesauce
1 cup diet Dr. Pepper or cream soda
2 tablespoons canola oil
1 teaspoon vanilla
2 ½ cups all-purpose flour
1/4 cup Truvia
1 teaspoon Vietnamese cinnamon
1 t freshly grated nutmeg
1/4 teaspoon cloves
1 teaspoon baking powder
1 teaspoon baking soda
1 teaspoon salt

1 large apple, peeled & chopped

Toppping
¼ chopped pecans
2 tablespoons brown sugar
2 tablespoons shredded, sweetened coconut

Preheat oven to 350. Grease and flour a 9×13 pan.  Beat eggs until smooth & uniform in color, then add in brown sugar and beat until sugar is incorporated and mixture is slightly thickened. Add applesauce, diet Dr. Pepper, canola oil, and vanilla and mix until incorporated. Add in the remaining ingredients, except for the apples, and beat until smooth, 1-2 minutes. Fold in apples and pour into prepared pan. Sprinkle the toppings over the top in the order listed and bake for 40 minutes, or until a toothpick inserted in the center comes out clean. Cool on a wire rack at least 15 minutes before serving. Serve with whipped cream if desired.

*Veronica’s note: I recommend using a sweet baking apple, such as Braeburn, Rome, or Gala.

Makes 15 servings. Per piece: 139 calories; 2.6 g fat; 28 g carb; 1.4 fiber; 3.2 protein

Recipe source: adapted from Judy L.