RSS Feed

Tag Archives: healthy

Cake Batter Lovins

Posted on

Remember the “Cake Batter Everything” craze that swept over the food blog world in 2011? Yeah, I hopped on that and enjoyed it to the fullest.  I shared only one of my cake batter explorations with you, the Cake Batter Crispy Treats, which were my favorite cake batter flavored treat, but do you think I let the remainder of my bag of yellow cake mix go to waste? No way, Jose.

Here’s a few ideas if you need some ways to use up extra cake mix.

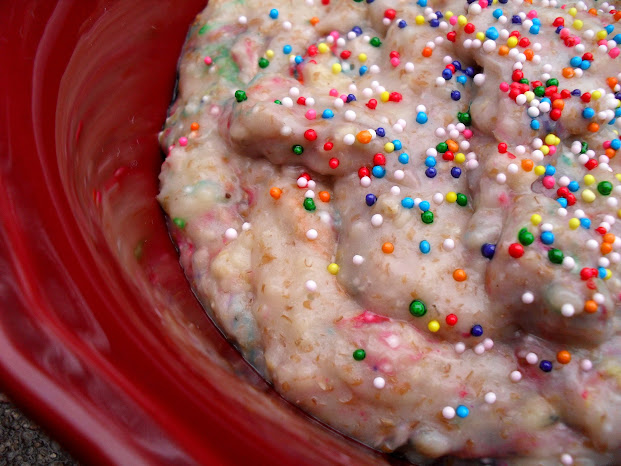
Cake Batter Oats. This is actually a pretty healthy recipe, considering there’s cake mix in it. And tasty too!

Cake Batter French Toast. What can I say, cake batter is such a great way to start the day. And sprinkles just make everything so happy.  This one would be fun for a birthday breakfast! I made a simple icing glaze by mixing like 1/4 cup powdered sugar with just enough milk to get it a drizzling consistency.

Cake Batter Candies. For these, I just melted some vanilla almond bark and added enough yellow cake mix to make it taste like cake batter, but not so much it got too thick.  I poured most of it in a chocolate bar mold (like the one I used for this Vegan White Chocolate), but I didn’t get a picture of that before I gave it to a friend as part of a thank you gift for turning a stain on my jeans into a work of art. The rest of it I poured into peanut butter cup molds and put sprinkles over the tops while it was still setting up.  Kids went crazy for these at a get together, even more so than my Cupcake Bites!

Have you made any cake batter flavored yums?

Potato, Onion & Spinach Hash

Posted on

This is something I threw together to use up a few things before they went bad, and ended up with a plate of magics. Weeks later, we are still eating this once or twice a week and is one of Joshua’s favorite meals.  I’ve never been very much of a potato person, but man, you can’t hardly beat crispy seasoned potatoes dipped in runny egg yolk.

Potato, Onion & Spinach Hash

Printable recipe
Printable recipe with picture

1 medium potato
2 thick slices of sweet onion
1/2 cup fresh spinach
Extra-virgin olive oil
Garlic salt & pepper to taste

Pierce the potato through the middle with a knife and microwave for 3 minutes, or until tender all the way through. Meanwhile, dice the onion. Once the potato is cooked, put a skillet on medium-high heat, and cut the potato into small cubes, removing the peel if you wish. Once the skillet is hot, add a generous swirl of olive oil to the pan, along with the potato and onion. Stir to coat with the oil, then sprinkle with garlic salt and pepper to taste. Allow to cook without stirring until golden brown on one side, then stir, trying to turn over as many of the pieces as possible. Allow to sit again until golden brown, then add the fresh spinach and cook for a few more minutes, until wilted and soft. Serve hot with eggs, or as a side dish.

Fluffy Whole Wheat Pancakes


I like pancakes.  But for some reason, I can let years go by without making them.  I’m even worse with waffles.  It’s been probably four years since I made waffles.  I don’t know why!  They are so good and so simple.

Last week I woke up with a hankering for pancakes.  I consider buttermilk pancakes made with white flour the best, but I had no buttermilk and I wanted them to be a little more on the healthy side, so I whipped up a whole wheat batch instead, using coconut sugar (a Christmas gift from Emma H., a sweet reader) in place of regular and raw coconut nectar instead of maple syrup.  I didn’t plan to blog them, figuring they’d be nothing all that special, so I took a bite without taking any pictures first.  And then I died.  Or at least I thought I did, because as soon as I dug in, I was transported to heaven. Pictures ensued.

The pancakes are surprisingly fluffy and light for being whole wheat.  The whole wheat aspect gives them more substance, but doesn’t seem to weigh them down.  I definitely love the flavor whole wheat adds to pancakes.  Slathered with butter and syrup, they are a delicious and wholesome breakfast treat!

Warning: tangent ahead.  If you have no interest in coconut sweeteners, just skip to the recipe and use whatever kind of sweetener in and out of the pancakes you like. :)

If you’ve never tried coconut sweeteners and are curious about them, here’s the deal.  They are low-glycemic sweeteners (35 on the glycemic index, which is comparable to most fruits and veggies) that won’t spike your blood sugar like regular sugar, or even good-for-you honey and maple syrup.  This is good news not only for diabetics, but for everyone, since eating sugary foods can cause a crash that makes you crave more sugar – the vicious sugar cycle.  Coconut sweeteners are unrefined as well, meaning a lot healthier for you than regular sugar!  They both are an abundant source of minerals, amino acids, vitamin-C, broad spectrum B vitamins, and have a nearly neutral PH.

As for the taste, you might be surprised to know that neither come from the coconut fruit itself, or taste anything like coconut!  The sugar is produced from the flower buds of the coconut tree, and the syrup/nectar comes from the tree sap, just like maple syrup is taken from the sap of maple trees.  I think the sugar is similar to brown sugar, and looks like it too, except it doesn’t stick/clump together.  The syrup is similar to molasses, especially when tasted straight, but much milder in flavor.  I didn’t think I’d like it on pancakes because I’m not a huge fan of molasses, but the flavor changed when added to them.  Not molasses at all, just a nice mildly sweet flavor that compliments the pancakes – absolutely fantastic!

Fluffy Whole Wheat Pancakes

Printable recipe
Printable recipe with picture

1 cup (4 oz) whole wheat flour
1 ½ tablespoons sugar (I used coconut sugar)
¾ teaspoon baking powder
½ teaspoon salt
1 egg
1 cup (8 oz) milk
2 tablespoons butter or oil, plus more for skillet (I used coconut oil)

Combine flour, sugar, baking powder, and salt in a small bowl. In a separate small bowl, whisk egg and then mix in milk and oil. Add the wet ingredients to the dry and stir until mixed, but not smooth. Let batter rest for five minutes while you preheat the skillet or griddle to 350F. Test if it’s ready by scattering drops of water over it. If they sizzle and dance, it’s ready.

Grease the skillet with a tablespoon of butter or coconut oil, then pour batter onto skillet to make pancakes the size of your choice. Once bubbles are over the surface and the edges are turning dry, flip over and cook until done. Serve warm with butter and syrup (I use raw coconut nectar).

Makes two giant pancakes, or four regular-sized ones.

Recipe source: adapted from Alton Brown’s recipe

You may also enjoy…

Fluffy Buttermilk Pancakes (my favorite!)

Brown Sugar Bacon Waffles

Cornmeal Griddle Cakes

Tilapia with Chile Lime Butter

Posted on

I have been enjoying a lot of flavorful & healthy meals lately, this being perhaps my favorite of them all.  This fish is just bursting with flavor and while I enjoy fish normally, I don’t think I’ve ever enjoyed it to this degree, except for with my favorite salmon.  But I like this fish even more than the salmon!

I don’t think it’s just my pregnancy hormones tricking me into thinking this is one of the most wonderful things I’ve ever eaten.  I got the recipe from Suzie, who proclaimed it a restaurant-worthy meal (I so agree!).  Her husband is super picky and usually will only eat things like pizza and burgers, but even he ate this and enjoyed it.  I knew it must be good if he was willing to even taste it, let alone eat a whole serving. My hubs couldn’t stop at one piece, he had to have two. :)

The chile-lime butter is the key here – it’s your secret weapon to make tilapia, which isn’t that exciting by itself, seem like the most incredible edible thing ever.  It has so much flavor that you don’t need much to make your filet absolutely craveable, so it only adds 50 (healthy!) calories to your meal.  Light, fresh, totally amazing.  Do it.

e

Tilapia with Chile-Lime Butter

Printable recipe
Printable recipe with picture

For the butter:
2 tablespoons unsalted butter, softened
1/2 tablespoon finely chopped shallot (I used green onion)
1/2 teaspoon finely grated lime zest
1 teaspoon fresh lime juice
1/2 teaspoon minced fresh Thai or Serrano chile, including seeds (this adds almost no heat – use more if you like it hot!)
1/4 teaspoon salt
Cilantro for garnish

For the fish:
1 tablespoon vegetable oil
1/4 teaspoon salt
4 tilapia fillets

Stir together butter, shallot, zest, lime juice, chile and salt in a bowl.  Pat dry the fillets and sprinkle with salt.  Heat oil in a non-stick skillet over moderately high heat until just smoking, then saute the fillets, turning over once with a spatula until golden brown and just cooked through (4-5 minutes).  Transfer to a plate.

Serve each warm fillet with a dollop of chili lime butter spread over the top.  Garnish with cilantro.

Recipe Source: Two Dogs in the Kitchen

Healthier Lasagna Soup

Posted on

If you haven’t seen recipes for lasagna soup all over the web for the last couple years, then you don’t follow as many blogs as I do-lol!  It is everywhere.  It’s taking over the blogging world.  If it wasn’t so delicious, it might scare me a little, but now that I’ve made it I totally get it.

Everyone has their own variation and I just took the one from Suzie’s blog and made it a little healthier.  I have to tell you that Biz is actually the reason I finally made this soup because I think she’s made it (and raved about it) 55.7 times since Suzie posted it and I just couldn’t resist any longer.

So glad I gave in–this soup is completely frabrilis!  I mean hello, lasagna in soup form?  Frabrilosity! 

P.S. A lot of things went wrong with my pictures and I do not care to explain the unattractive, cold plops of cheese and how thick this is because you would scoff at me and I’m not in the mood for your scoffing beyond the scoffing you’re doing at my cheese plops.  :D  Just follow my directions and you will have frabrilis soup that looks as delicious as it tastes.

Healthier Lasagna Soup

Printable recipe
Printable recipe with picture

2 teaspoons olive oil
1 (19.5 oz) package lean sweet Italian turkey sausage
1 cup chopped onions
4 garlic cloves, minced
2 tablespoons dried basil
2 teaspoons dried oregano
1/2 teaspoon crushed red pepper flakes
2 tablespoons tomato paste
1 (28 oz.) can fire-roasted diced tomatoes
2 bay leaves
6 cups chicken stock
8 oz. broken up whole wheat lasagna noodles or other pasta of choice
salt and freshly ground black pepper, to taste

For the cheesy goodness:
1 cup low-fat cottage cheese or ricotta
1/2 cup grated Parmesan cheese

1 cup shredded part-skim mozzarella cheese

Heat olive oil in a large pot over medium heat. Remove sausage from casings and add to skillet along with the onions and cook, breaking up into bite-size pieces, for 5-10 minutes, until meat is cooked through. Add garlic, basil, oregano and red pepper flakes. Cook for 1 minute.

Add tomato paste and stir well to incorporate. Cook for 3-4 minutes or until the tomato paste turns a rusty brown color.

Add diced tomatoes, bay leaves and chicken stock. Stir to combine all ingredients. Bring to a boil and then reduce heat and simmer for 30 minutes. Add uncooked pasta and cook until al dente. Don’t over cook or let soup simmer too long, as the pasta will get mushy and absorb all the broth.*

While pasta is cooking, prepare the cheesy goodness by combining the cottage cheese or ricotta and Parmesan together in a small bowl. To serve, place a dollop of the cheesy goodness in each soup bowl, sprinkle some of the mozzarella on top and ladle the hot soup over the cheese.

*Note: If you are anticipating leftovers, it’s best to cook the noodles separately and add them to the bowl along with the soup, then store them separately, drizzled with olive oil so they don’t stick together.  They will become mushy if stored in the broth.

Recipe source: slightly adapted from Two Dogs in the Kitchen.

Paleo Orange Chicken

Posted on

This dish is a revelation for healthy eating.  It has no breading, not even a thickener for the sauce, doesn’t require frying, is naturally sweetened with fresh squeezed juice alone, contains only healthy fat, and yet it is so. delicious.

And guess what?  It is yet another way to use virgin coconut oil!  I’ll be drawing the winner for the Tropical Traditions oil at midnight tonight (click here to enter the giveaway if you haven’t yet), so I decided to sneak in another recipe that uses it before I did.  I myself just got a gallon of it (happy happy, joy joy! Thank you to those who made first-time purchases through my links, that’s how I earned it!), so you can be sure I’ll be posting many more recipes using it.

Full disclosure: for the record, I mainly cook with/eat extra virgin olive oil, just so you don’t think I’ve devoted my life to saturated fat, even if it is a healthy one.  :)  Also, for the record, I am not on the Paleo diet, but am all for eating healthy.  And lastly, this was Den’s plate, as I had no rice on mine because I’m not eating starches right now. </TMI>

As for this chicken, I don’t have much to add beyond that it was incredible.  It is sweet, even without refined sugars of any kind, and packed with flavor.  I have to admit I totally forgot to include the sriracha (*sob* we love spicy, how could I?), which probably would have improved the consistency so that it coated the pieces a little better, but it was still great even without it. Who needs fried chicken pieces drenched in a sickeningly sweet syrup sauce when eating healthy tastes even better?  Move over, take-out!

Paleo Orange Chicken

Printable recipe
Printable recipe with picture

1 lb. boneless, skinless chicken breasts or thighs (cut into bite size pieces)
3 tablespoons virgin coconut oil
juice of 2 oranges*
zest from 1 orange
1 teaspoon grated fresh ginger
3 tablespoons low-sodium soy sauce
1 teaspoon chili garlic sauce or sriracha
3 green onions, sliced (white and green parts)

In a medium-sized saucepan, add the orange juice, zest, ginger, soy sauce, and chili garlic sauce or sriracha. Set over medium-high heat and let simmer to reduce and thicken while the chicken cooks. In a large saute pan, heat the coconut oil over medium high heat. Add the chopped chicken thighs and cook until a nice brown crust has developed on the chicken pieces, about 6 minutes. If your chicken pieces are really close together, you’ll likely have a lot of water in the pan (it doesn’t evaporate as well), and you should drain the excess liquid off to help the pieces brown.  Remove from heat and if the sauce is ready (it will be reduced to very little, coating just the bottom of the pot, thick and almost like a glaze), add the chicken to the saucepan and stir to coat with the orange sauce. Serve topped with sliced green onions.

*Taste your oranges. If they don’t taste orange-y, then neither will this dish. Use tangerines if you need to, or add a teaspoon of sweetener, such as stevia or agave nectar, until you’re satisfied with the flavor.

Recipe source: Health-Bent

Chocolate-Glazed Honey Macaroons

Posted on

Once upon a time I entered some honey macaroons into the Kansas state fair and won a  blue ribbon for them.  Then I promised you I would share the recipe.  Well I may be a bit slow, but a promise is a promise!  I thought this was the perfect time since I’m giving away a gallon of coconut oil and this recipe has some in it.  I figured one of you guys would need a lot of ways to use up that coconut oil once the giveaway was over.  (I’m still packing just in case the winner agrees to let me move in until the oil is gone. hehehe)

We have a special honey class in our state fair baking competition and I won for the cookies last year.  I had never entered the honey cookies category before, but knew from looking at past year’s cookies what I wasn’t going to do, which was a flour-based cookie.  I wanted to do something different that the other bakers hadn’t.  I did lots of brainstorming and finally decided that a honey coconut macaroon might be nice.  Luckily I found a great recipe at Gourmande in the Kitchen and all I had to do was create a glaze for them.

Less heavy than a normal macaroon, these are light, sweet, tender, and very moist.  And the coconut-flavored chocolate just puts them over the top.  I love these cookies because not only are they tasty, they also are allergy friendly (gluten-free, dairy-free) and healthy (good fat & naturally sweetened).  I do hope you enjoy them!

For more coconut oil recipes, check out my Coconut Oil Coffee, Coconut Chocolate Chunk Cookies, Vegan Gluten-Free Mounds Cake, Dairy-Free White Cupcakes, Homemade Magic Shell, and Vegan Dark Chocolate Cake Pops.

Honey Coconut Macaroons

Printable recipe
Printable recipe with picture

Cookies
2 ¼ cups (180 g) unsweetened shredded coconut
2 large egg whites
¼ cup (60 g) raw local honey
½ teaspoon vanilla extract
Pinch of fine sea salt

Honey & Coconut Chocolate Glaze
¼ cup dark chocolate chips
1 tablespoon virgin coconut oil
1 teaspoon local raw honey

Put oven rack in middle position and preheat to 400°F. Line a baking sheet with parchment paper; set aside.

Process the coconut in a food processor until very fine.  Whisk together egg whites, honey, vanilla, and salt until combined, then stir in the coconut until completely moistened.  Using a small cookie scoop, portion out the dough onto the prepared baking sheet, about 2 inches apart.

Bake until pale golden in spots, about 10 minutes. Transfer to a rack to cool completely.

Make the Glaze: Place the chocolate in a small microwave-safe bowl and microwave for 30 seconds at 50% power.  Stir, then repeat. Stir until residual heats melts the chocolate completely, then stir in the coconut oil and honey. Drizzle over the cooled macaroons and serve immediately, or allow to set before storing.  It takes this glaze several hours to set up, but the cookies are so moist they will  not suffer for being left out.

Recipe source: adapted from Gourmande in the Kitchen

Barley with Butternut Squash, Apple & Onion

Posted on

This is one of the “meals” (it’s really a side dish but I like to eat it as a meal) I’ve been making for years and usually resurrect come fall/winter.  My family absolutely loves it too, even my little nephew (or at least he did at 4 years old, the last time he ate it)!  I appreciate delicious vegetarian meals that satisfy me and this one fits the bill fo sho. The combination of the creamy squash, chewy barley, crisp red pepper & apple, and the contrasting savories and sweetness–it’s all just magic to me.  And I guess if a four year old boy will relish something that only contains unrecognizable healthy ingredients, it is pretty magical.

Barley with Butternut Squash, Apple & Onion

Printable recipe
Printable recipe with picture

3/4 teaspoon salt, divided
1/2 cup uncooked barley
1 tablespoon olive oil
2 cups butternut squash, peeled & diced
1 cup onion, chopped
1/2 cup sweet red pepper, diced
1 medium apple, peeled, cored, diced
1 1/2 teaspoons garlic, minced
3/4 teaspoon dried thyme
1/4 teaspoon black pepper
1/3 cup fat-free chicken or vegetable broth

Bring 3 cups of water and 1/2 teaspoon of the salt to a boil in a medium saucepan; add barley. Cover saucepan and simmer barley until tender, about 30 to 35 minutes; drain.

Meanwhile, heat oil in a large nonstick skillet over medium-high heat; add squash and cook, stirring often, until it’s starting to soften–about five minutes. Add the onion and red pepper and cook for an additional 3 minutes.

Stir in apple, garlic, thyme, black pepper and remaining 1/4 teaspoon of salt. Cook, stirring, until apple is almost tender, about 2 minutes; stir in broth, scraping bottom of skillet with a wooden spoon to loosen any browned bits. Stir in cooked barley; toss over low heat to mix and coat. Remove from heat and serve.

Serves 4, about 1 cup per serving.

Per serving: 192 calories; 4.2 g fat; 0 g cholesterol; 37 g carbohydrate; 8 g fiber; 5 g protein; 5 Points Plus

Recipe source: WeightWatchers.com

Avocado Chocolate Pudding

Posted on

You may have noticed I’m no longer posting regularly.  I have a feeling that’s how VC will be from now on, with periodic posts when I have the time.  While I hope my sporadic posting doesn’t bother any of my readers, I likely wouldn’t begin to post regularly for your sake at the expense of my own, so it would help my conscience out a lot if you would just be OK with it.  Thanks. :)

Onto the pudding.  I know it sounds weird, but you just have to try this to believe it how good it is.  Even my avocado-hating husband loves this pudding!  Basically it’s just avocado blended up with cocoa powder and agave nectar to create a sweet, silky, perfectly chocolate-y pudding.  No dairy, no refined sugar, no gluten, no cooking, just blending and eating of the most delicious & wholesome dessert ever…refrigeration totally optional.  We couldn’t wait and ate ours as soon as it was blended and it was fabulous.  But I bet it would be even better cold.

Chovocado Pudding

Printable recipe
Printable recipe with picture

1 ripe avocado
1/4 cup cocoa powder
1/4 cup raw agave nectar
1/4 cup almond milk
1 teaspoon vanilla extract

Peel and quarter the avocado. Put all the ingredients in a Magic Bullet or food processor and blend until smooth. Serve and enjoy!

Recipe source: Forgiving Martha

Zucchini Spaghetti

Posted on

**I apologize to subscribers for the weird “password protected” post that came to your inbox or feed early this morning!  It was me just being a spaz, but I’ve got this “top secret” recipe now set to public visibility instead of password protected.  Sorry to disappoint if you thought my zucchini spaghetti recipe must contain codes to reveal a huge conspiracy theory, but I hope you’ll find the delicious recipe is quite enough to get excited about in and of itself.  :) **

Have you been wondering what ever happened to the weight loss contract and the 17 Day Diet?  Join the club–I’m wondering too! :D  We did save a good amount of money with the contract, though we only actually stuck to the agreements made in it for like a week.  And we ended up with a bunch of emergencies (car stuff, etc.) that most of the money went toward.  We did much better with the 17 Day Diet and stuck with it for over a month, but soon after got to the third 17-day cycle, which allows for a wider range of foods, we cheated our way into widening the range to all foods, and in great abundance.  Soooo, I think I lost 15 pounds and gained most of it back.  Story of my adult life.  I pretty much diet half the year so I can eat like a pig the other half.  It kind of works for me.

Anyway, this “spaghetti” was the romantic Valentine’s Day dinner I made while we were on the first cycle of the 17 Day Diet, which allows for no starches except for fruit.  The lean meats allowed are minimal as well (turkey, chicken, and fish) and I was challenged to come up with a 17 Day Diet-friendly recipe that would be really delicious and impressive.  Debbi posted her version of Kalyn’s zucchini spaghetti and I knew I had a winner.  And wow, I was right!  This was the most delicious thing we ate during the entire diet, and I would even say it’s one of the most delicious meals I’ve eaten in my entire life.  The sauce is just spectacular (it would be great on real spaghetti, too) and the zucchini is perfect here.  I always have thought zucchini was a vegetable best suited to Italian seasonings and this recipe further proves it.   I can’t even tell you how much I love this dish!

A funny thing about the “spaghetti” strands.  The only julienne slicer I could find was this one, which also has three other cutting blades.  For some reason, I didn’t look at the owners manual and thought that the crinkle cutter was the julienne blade.  I was so frustrated with the slicer, thinking that it was just a poor product, because every time I “julienned” a zucchini, I had to go back and cut the strands apart because the stupid julienning blade was just cutting crinkle-cut slabs.  DUH!  Seriously, I didn’t figure out my mistake until just this week when I finally opened the owners manual and saw that there was another blade that I had missed.  The one for julienning veggies.  DOY.

If you don’t have a julienne cutter, The Pampered Chef has a julienne peeler for $10.50 that I’d recommend–it won’t take up a lot of space and does a fabulous job of julienning your veggies.  I got one and gave the other cutter to Goodwill because, well, you guys know I don’t even have room for my cake pans in this house, so I’m  not about to give up good space for a bulky cutting tool when I could just use Pampered Chef’s fabulous peeler!  Thanks, Tracy (my Pampered Chef consultant)!

Zucchini Spaghetti

Printable recipe
Printable recipe with picture

3 links low-fat turkey Italian sausage, hot or mild
2 tablespoons olive oil, divided
3 large cloves of garlic, minced + 4 more to season the oil
pinch hot pepper flakes (optional)
1 (14.5 oz.) can roasted diced tomatoes with juice
1 (8 oz) can tomato sauce
1 tablespoon dried basil
1 teaspoon dried oregano
¼ teaspoon fennel seeds
2 medium sized zucchini (9-10 inches long)
salt and fresh ground black pepper to taste (for seasoning zucchini)
freshly grated Parmesan cheese for serving, if desired

Heat about 1 tablespoon olive oil in a heavy frying pan, then add turkey sausage, squeezed out of the links, and use a spatula to break the sausage apart and cook until it’s lightly browned, about 5 minutes. When the sausage is browned, add 3 cloves of minced garlic, and hot pepper flakes, if using. Stir together and let cook with the sausage about a minute, then add the tomatoes, tomato sauce, fennel, basil, and oregano. Turn heat down to low and let the sauce simmer while you prep the zucchini.

Use a julienne cutter to cut the zucchini into long spaghetti-like strands. (Cut off the ends, wash and dry the zucchini, and then cut into julienne strands. You can also do this with a knife if you’re patient.)

Heat about 1 tablespoon olive oil over high heat in a very large frying pan, add 3 whole garlic cloves and sauté until you can start to smell garlic, then remove garlic to another dish (you can discard it, but fried garlic cloves are delicious and you can add them to salad or even eat them straight!) Immediately add the zucchini strands to the hot pan and cook stirring a few times just until the zucchini is heated through, about 2 minutes. Season the cooked zucchini with salt and fresh ground black pepper to taste. Divide between 2-4 plates, then ladle sauce over the top. Serve hot, with freshly grated Parmesan cheese if desired.

Recipe source: adapted from Kalyn’s Kitchen, as seen on Debbi Does Dinner