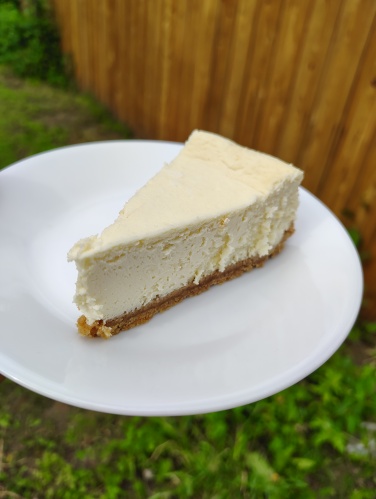
I’ve been making a super-delicious, low carb cheesecake for years, and I think I finally got it perfected, so I decided to resurrect this blog and share it here!
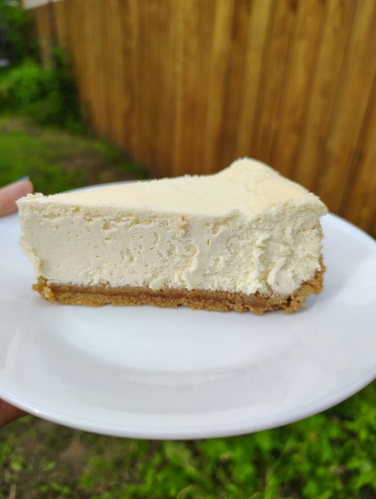
I took my favorite cheesecake recipe and tweaked it to make it sugar-free. The only challenge was the crust, as graham crackers are not sugar-free or low carb. Usually I would consult Google on how to make a low carb crust, but I went rogue and came up with something absolutely fabulous. I hope you’ll try it and let me know what you think! Leave me a comment if you followed me ten years ago, and got a shock to see me post today, haha!
V’s Favorite Low Carb Cheesecake
Crust
- 1 1/2 cups (5.25 oz/150 g) almond flour
- 1 stick salted butter
- 1/3 cup monk fruit brown sugar substitute*
Filling
- 2 (8 oz) packages cream cheese, room temp
- 1 cup sweetener**
- 3 eggs
- 1 teaspoon vanilla extract
- Zest from 1 lemon
- 1 (16 oz.) tub of sour cream
Directions
To prepare the crust: toast the almond flour in a skillet over medium high heat, stirring constantly, until golden brown. Scrape into a small mixing bowl and set aside.
Add your butter to the skillet and melt it over medium heat. Continue to cook it, stirring slowly and constantly with the same spatula, until the solids separate and start to brown. Keep an eye on the color, and remove the butter from the heat when it is a medium toasty brown. Scrape into the bowl with the toasted almond flour, add the sweetener, and stir well to combine. Scrape it into an eight or nine inch springform pan and press evenly along the bottom. Place the pan in the refrigerator to chill while you prepare the filling.
To prepare the filling: In a large bowl, beat the cream cheese on low speed for 1 minute just until smooth and free of any lumps. Gradually add the sugar and beat just until incorporated. Periodically scrape down the sides of the bowl and the beaters. Add the eggs, 1 at a time, and continue to slowly beat until combined. Stir in the vanilla and lemon zest. Blend in the sour cream. The batter should be well mixed, but not over-beaten. Over-beating incorporates too much air and will cause the cake to puff when baking, then fall and crack when cooling. Pour filling into the crust-lined pan and poke any air bubbles you see with a toothpick. Smooth the top with a spatula.
Bake in a preheated 325 degree oven for 50-60 minutes (mine usually takes an hour). If you like your cheesecake really creamy, be careful not to bake it too long, it should jiggle in the middle. I like mine a little more done because I like it a little more dry, so mine doesn’t jiggle as much. Be careful not to overcook! Do not do a toothpick test in the cake’s center, this will make a crack. Loosen the cheesecake from the sides of the pan by running a thin metal spatula around the inside rim. Let cool in the pan for 30 minutes. Chill in the refrigerator, loosely covered, for at least 4 hours to set up. Demold and transfer to a cake plate. Slice the cheesecake with a thin, non-serrated knife that has been dipped in hot water and wiped dry after each cut.
*I use Lakanto brand, it’s great. I’m sure any brand would be fine, I know swerve makes a brown sugar substitute as well. If you only have regular monk fruit sweetener, or another sugar sub that measures cup for cup like sugar, you can use that instead, and add a teaspoon of vanilla extract, which is how I made it for years.
**For the cheesecake in the picture, I used Walmart’s generic granulated monk fruit sweetener that includes erythritol. It was great! It seemed to to change the texture a little bit and make my mixture more thick, but I was happy with the result. I’ve had really good success with Gentle Sweet as well. I think overall I’d recommend a confectioner’s style sweetener that measures cup for cup like sugar, but granulated works too.
Macros for 1/16th of the cheesecake: 274 calories, 3.5 net carbs, 25.6 g fat, 5.9 g protein


