Jessie turned ten earlier this month and I decided that I was finally, finally, going to throw her the birthday party I’d always wanted to throw her ever since we got her. I had invitations I meant to use for it so long I finally ended up selling them at our garage sale last year, thinking I would always have too much going on to actually do it. Ironically, I ended up throwing her a birthday party the year I’m most busy, with a little human puppy taking up most of my time. Just goes to show, you always have enough time for whatever you put your mind to.
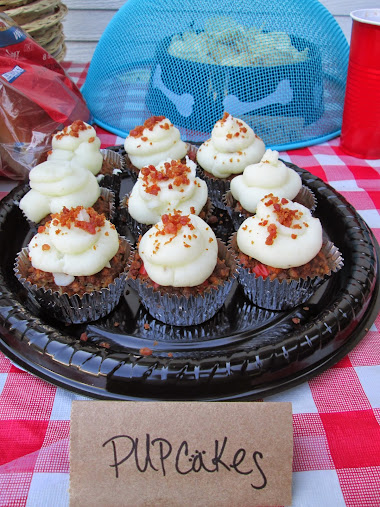
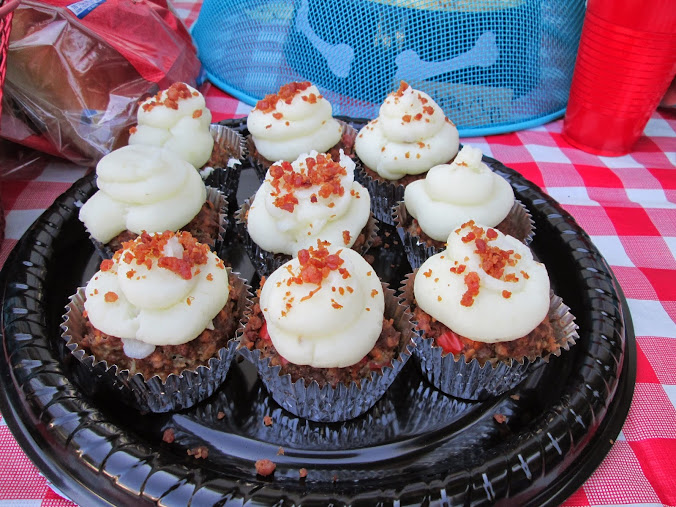
I plan to do a whole separate blog post about the party because it was the sauce, if I do say so myself, but first I wanted to share the recipe I made for the PupCakes. Rather than make something flour-based, I decided I wanted to go with meat-centric PupCakes because, let’s get real here, it’s a rare dog that prefers a flour & fruit-based treat over a meaty one. Jessie is alll about the meat.
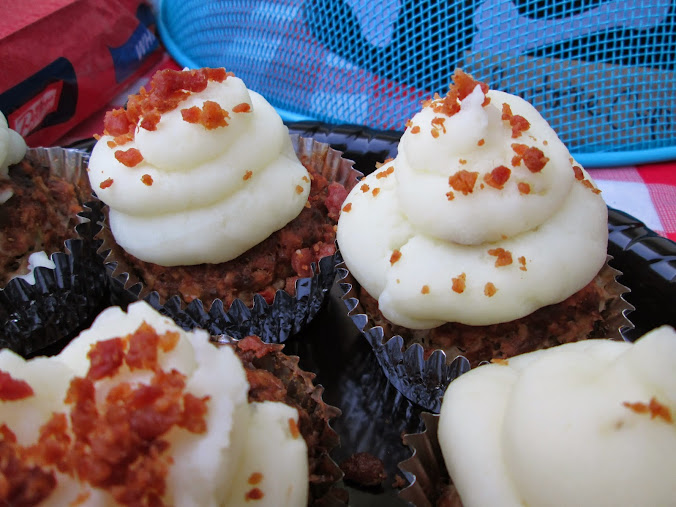
So I just threw together a bunch of stuff that seemed like it might make good dog-friendly (i.e. no onions) meatloaf into a bowl, mixed it up, and took a tiny taste test after baking. Wow, I was impressed! The only salt in the recipe comes from the ketchup, so I thought it would be rather bland, but these are so good I wished I’d made extra to enjoy along with the pups! I added a mashed potato “frosting” that I thinned with yogurt. So healthy and delicious, and the dogs devoured them! (Don’t be fooled by Doc giving up his to Jessie in the video, he’s so sweet that if Jessie even looks at him when he has a treat, he drops it so she can have it. Kind of breaks my heart, actually! lol) Even the little tiny dogs ate an entire PupCake by themselves. I’d say they are definitely dog-approved. :)
1 ½ teaspoons extra-virgin olive oil
½ cup finely diced red bell pepper
½ cup finely diced zucchini
1 egg, beaten
1 lb 93% lean ground beef
½ cup quick oats
1 teaspoon parsley flakes
1 teaspoon rubbed sage
1/2 cup ketchup
Frosting
2 large russet potatoes, peeled
1 cup plain yogurt
Milk to thin
Optional garnish: real bacon bits
Remove ground beef from refrigerator to allow the chill to come off while you begin the recipe. Heat oven to 350°F. Line 9 muffin cups with foil liners; set aside.
Heat a skillet over medium-high heat. Add olive oil, red pepper, and zucchini, and sauté until softened, about 5-10 minutes. In large bowl, combine the cooked veggies with the remaining pupcake ingredients until well combined. Roll mixture into 9 large balls and place in prepared muffin cups.
Bake 35 to 40 minutes or until meat thermometer inserted in center of loaves reads 160ºF. Cool slightly in muffin cups.
While loaves are baking, cut potatoes into large chunks. Place in 3-quart saucepan, cover with water, and heat to boiling. Reduce heat; cook potatoes until fork-tender. Drain; return to saucepan. Add yogurt and beat with an electric mixer, adding milk as necessary, until creamy and smooth like frosting.
Place potatoes in a 10-inch decorating bag and snip the tip as large as you want it to come out. Alternatively, you can place them in a Ziploc bag and snip the corner. Remove the pupcakes from the muffin pan and place on serving plate. Starting at outside of each cake and in a circular motion, pipe potatoes onto each meat loaf. If desired, garnish with bacon bits. Serve warm or room temperature. A Veronica’s Cornucopia original
This seems to be happening to me more and more, the longer I blog: I either create a recipe out of my own head, or I see a blog with a recipe and I immediately think of a new direction I want to take it in. I type out the recipe, including the measurements and steps. Then, after I’ve made my new and improved recipe, I discover that someone else already did it. Kinda takes the wind out of my sails!
This has happened twice just this week. I typed up a recipe for banana bread (I always type up baking recipes before I actually go to town, since they require more precision than just throwing things in a pot and tasting as you go along) that I thought was pretty stinking original, but before I’d even made it, I found that same recipe, almost exactly with the same ingredients and measurements except for just a few things, on Steak & Potato Kinda Girl’s blog (it was a Joy the Baker recipe, though, from her new cookbook). I kinda had a freak-out and changed my recipe just so I wouldn’t be a copycat, even if I did come up with it on my own. (I really want the banana bread recipe I win with at the fair this year *knock on wood* to be my own creation. I’m in the process of creating the BEST recipe (or discovering, if I must) so I can beat my baking nemesis–more about that here.)
Then I decided I was going to make some Guiness chocolate cupcakes for St. Patrick’s Day and came up with my own decadent recipe, using this cake recipe, and using inspiration from this cake to add in some caramel to compliment the Guiness, chocolate, & Bailey’s Irish Cream flavors. Then I happened to stumble upon Annie’s Eats, who has a spookily similar recipe. She’s got the Guinness cupcake, the Bailey’s ganache filling (sans caramel), and Bailey’s Irish Cream frosting.
How is this even possible? Is this some weird phenomenon among food bloggers that we’ve read so many of each others blogs that we start thinking the same? Or am I just a freak of nature? (Don’t answer that.) Well, whatever it is, I’m considering myself flattered to have come up with similar recipes as the likes of Joy & Annie, who I respect greatly. Who knows, maybe I’m becoming one of these “great minds” that “think alike.” :)
Well, despite these cupcakes having doppelgangers in who-knows-what corners of the blogosphere, I’m pretty proud of them because, besides the cake recipe, they are my own creation. They are very decadent, as I intended, and are tremendously delicious.
Now, I need to tell you that I absolutely detest beer (except in beer bread, of course), and Guinness is at the top of my hate list *shudder*, but it somehow works in the chocolate cupcakes. Although I would definitely prefer a Guiness-free cupcake, the stout flavor does add depth to the chocolate, making it deeper and more sultry, with a slightly bitter edge. The rich caramel ganache is thick and sweet, and the frosting is like a fluffy silken dream-both elements a perfectly sweet compliment to the dark chocolate cake, and in my opinion, absolutely required to balance the cupcake. You get quite a heady feeling when taking a bite of these–although low in alcohol*, they are very “boozy” tasting (at least to my virgin palate), but not in an offensive way. Still, I wouldn’t recommend you try serving these to your toddler.
*A last note to those worried about the alcohol content. It bakes off from the cupcakes, leaving only the flavor behind, and the amount in the filling and frosting is not much more than you’d get from using vanilla. So never fear, you will not get intoxicated from eating one of these, though I still consider them to be an adult treat. To nix the alcohol completely, I believe you could use Irish Cream coffee creamer in place of the real Irish Cream in this recipe. I hope you enjoy!
Note: I didn’t edit my photos, but this one is pretty washed out so I did try to darken it, but just couldn’t capture the true color so I apologize it does not represent the cupcakes accurately. The cake is much darker than this. The other photos are pretty spot-on, even without editing.
Guiness Chocolate Cupcakes:
1 ½ sticks unsalted butter (cold is fine)
¾ cup unsweetened cocoa
1 cup Guinness Extra Stout (cold is fine)
1 tablespoon vanilla extract
1 ½ cups granulated sugar
1 ¼ cups all-purpose flour
1 teaspoon baking soda
½ teaspoon salt
2 eggs
Bailey’s Chocolate-Caramel Filling:
½ cup semisweet chocolate chips
¼ cup caramel sauce, plus more for garnish (I used homemade)
1 tablespoon Bailey’s Irish Cream
½ cup powdered sugar, as needed
Preheat oven to 350 degrees. Line two dozen cupcake tins with papers.
In a small saucepan, melt butter and whisk in the cocoa powder until smooth. Stir in the Guinness and vanilla extract and remove from heat.
While the Guinness mixture is cooling, whisk together the sugar, flour, baking soda, and salt. Pour the Guinness mixture onto the dry ingredients, then add the eggs and whisk until the batter is shiny and smooth, about a minute. Divide batter between cupcake tins, filling half full. Bake for 17-20 minutes, or until a tester comes out clean. Remove from pans to cool completely on a wire rack.
Meanwhile, make the filling. Combine the chocolate and caramel sauce in a microwave-safe bowl and heat on 50% power for 1 minute. Stir until the mixture is smooth and glossy, then stir in the Bailey’s Irish Cream. Set aside to cool and thicken.
Lastly, make the buttercream. Beat the butter until creamy, then add the sugar and Bailey’s. Beat on low until mixed, then increase speed to medium and beat until fluffy, light, and silky, about five minutes. Set aside.
Return to the filling, which should be room temperature by now. (If not, refrigerate for five minutes and stir, repeating until cooled completely.) Remove two tablespoons to a small bowl, then stir in powdered sugar ¼ cup at a time into the remaining filling, until the filling is your desired thickness.
Put the filling into a pastry bag fitted with a round tip or a squeeze bottle with a nozzle. Insert the tip into the top of each cupcake and squeeze briefly to fill, stopping once the top starts to rise. Once all are filled, pipe or spread the buttercream on top. Drizzle with the reserved filling and caramel sauce. Serve at room temperature. If making more than two days in advance, you can keep the cupcakes in the refrigerator and remove them two hours prior to serving.
Wacky Cake (also called Crazy Cake), so named because it uses vinegar and no eggs, is perhaps the first cake I ever baked, and the only recipe my Mom really passed on to me. The first time she told me about it I was a little girl, and she fondly recalled baking it when she was a little girl at a time when I was lamenting the lack of eggs in the house. I immediately asked if she still had the recipe, because anything that had chocolate in it and had such a cool name had to be good. I was the designated family baker even at the age of nine, and I baked up this cake that night, much to my family’s delight.
It became popular during the depression, when eggs and butter were rationed and hard to come by, and many of us continue to enjoy it today because it is economical, delicious, and easy to make! I’ve made this cake many times over the years, including as the base for my vegan Mounds Cake, and was just about to use it as the base in another recipe when I realized I should probably give it a post of it’s own so I can link to it each time I post a recipe that uses it, rather than typing it out each time.
Many recipes for Wacky Cake make an 8×8″ pan, but this one will give you a 9×13 pan (or two 9″ round layers) full of chocolatey goodness. I’m also going to include a yummy vegan frosting recipe that goes really good on this cake. The cake is great just with a dusting of powdered sugar (I really like to eat it a little warm like this), but the shiny chocolate icing really puts it over the top. Enjoy!
3 cups all-purpose flour
2 cups granulated sugar
1 teaspoon salt
2 teaspoon baking soda
½ cup cocoa powder*
¾ cup vegetable oil
2 teaspoons vanilla extract
2 tablespoons distilled white vinegar
2 cups cold water
*I use Dutch process cocoa powder because it makes a darker cake with more intense chocolate flavor, but you can use any kind you wish. Hershey’s Special Dark cocoa powder is available in most supermarkets, which works well here.
Preheat oven to 350. Spray a 9×13 pan with cooking spray and set aside. Sift all dry ingredients together into a large bowl.
Make three wells and put the oil in one, the vanilla in another and the vinegar in the last. Is this really necessary? I don’t know, I’ve never disobeyed the recipe. I like to think of it as keeping history alive. Our foremothers made Wacky Cake this way, so who am I to change it now?
Pour water over it all and mix until well blended. Look at all the bubbles as the vinegar interacts with the baking soda! This is the kind of science I can get behind.
Pour into prepared pan and bake 30-40 minutes, or until a toothpick inserted in center comes out clean.
Cool completely on a wire rack. Frost or sprinkle with powdered sugar to serve. I love how dark it gets while baking–the magic of Dutch process cocoa!
You wouldn’t believe how moist and delicious a vegan cake can be! This is one of my hubby’s faves.
1 cup sugar
6 tablespoons cornstarch
¼ cup cocoa*
1/2 teaspoon salt
1 cup water or nondairy milk
2 tablespoons vegetable oil
1 teaspoon vanilla
Mix sugars, cornstarch, salt, and cocoa in a medium sauce pan. Whisk in the coconut milk. Stirring constantly, heat over medium until it gets thick and starts to boil. Continue stirring and boil for 1-2 minutes or until very thick. Remove from heat and stir in oil and vanilla. Allow to cool to room temperature, then spread over the top of your cooled cake.
*Again, I used Dutch processed cocoa, but regular is fine.
Recipe source: I apologize to the originator of this recipe! I did not copy the source and since I changed it, I couldn’t locate it by entering the recipe words into Google. The original was very similar but called for water instead of milk. Both work great but I like using coconut milk.
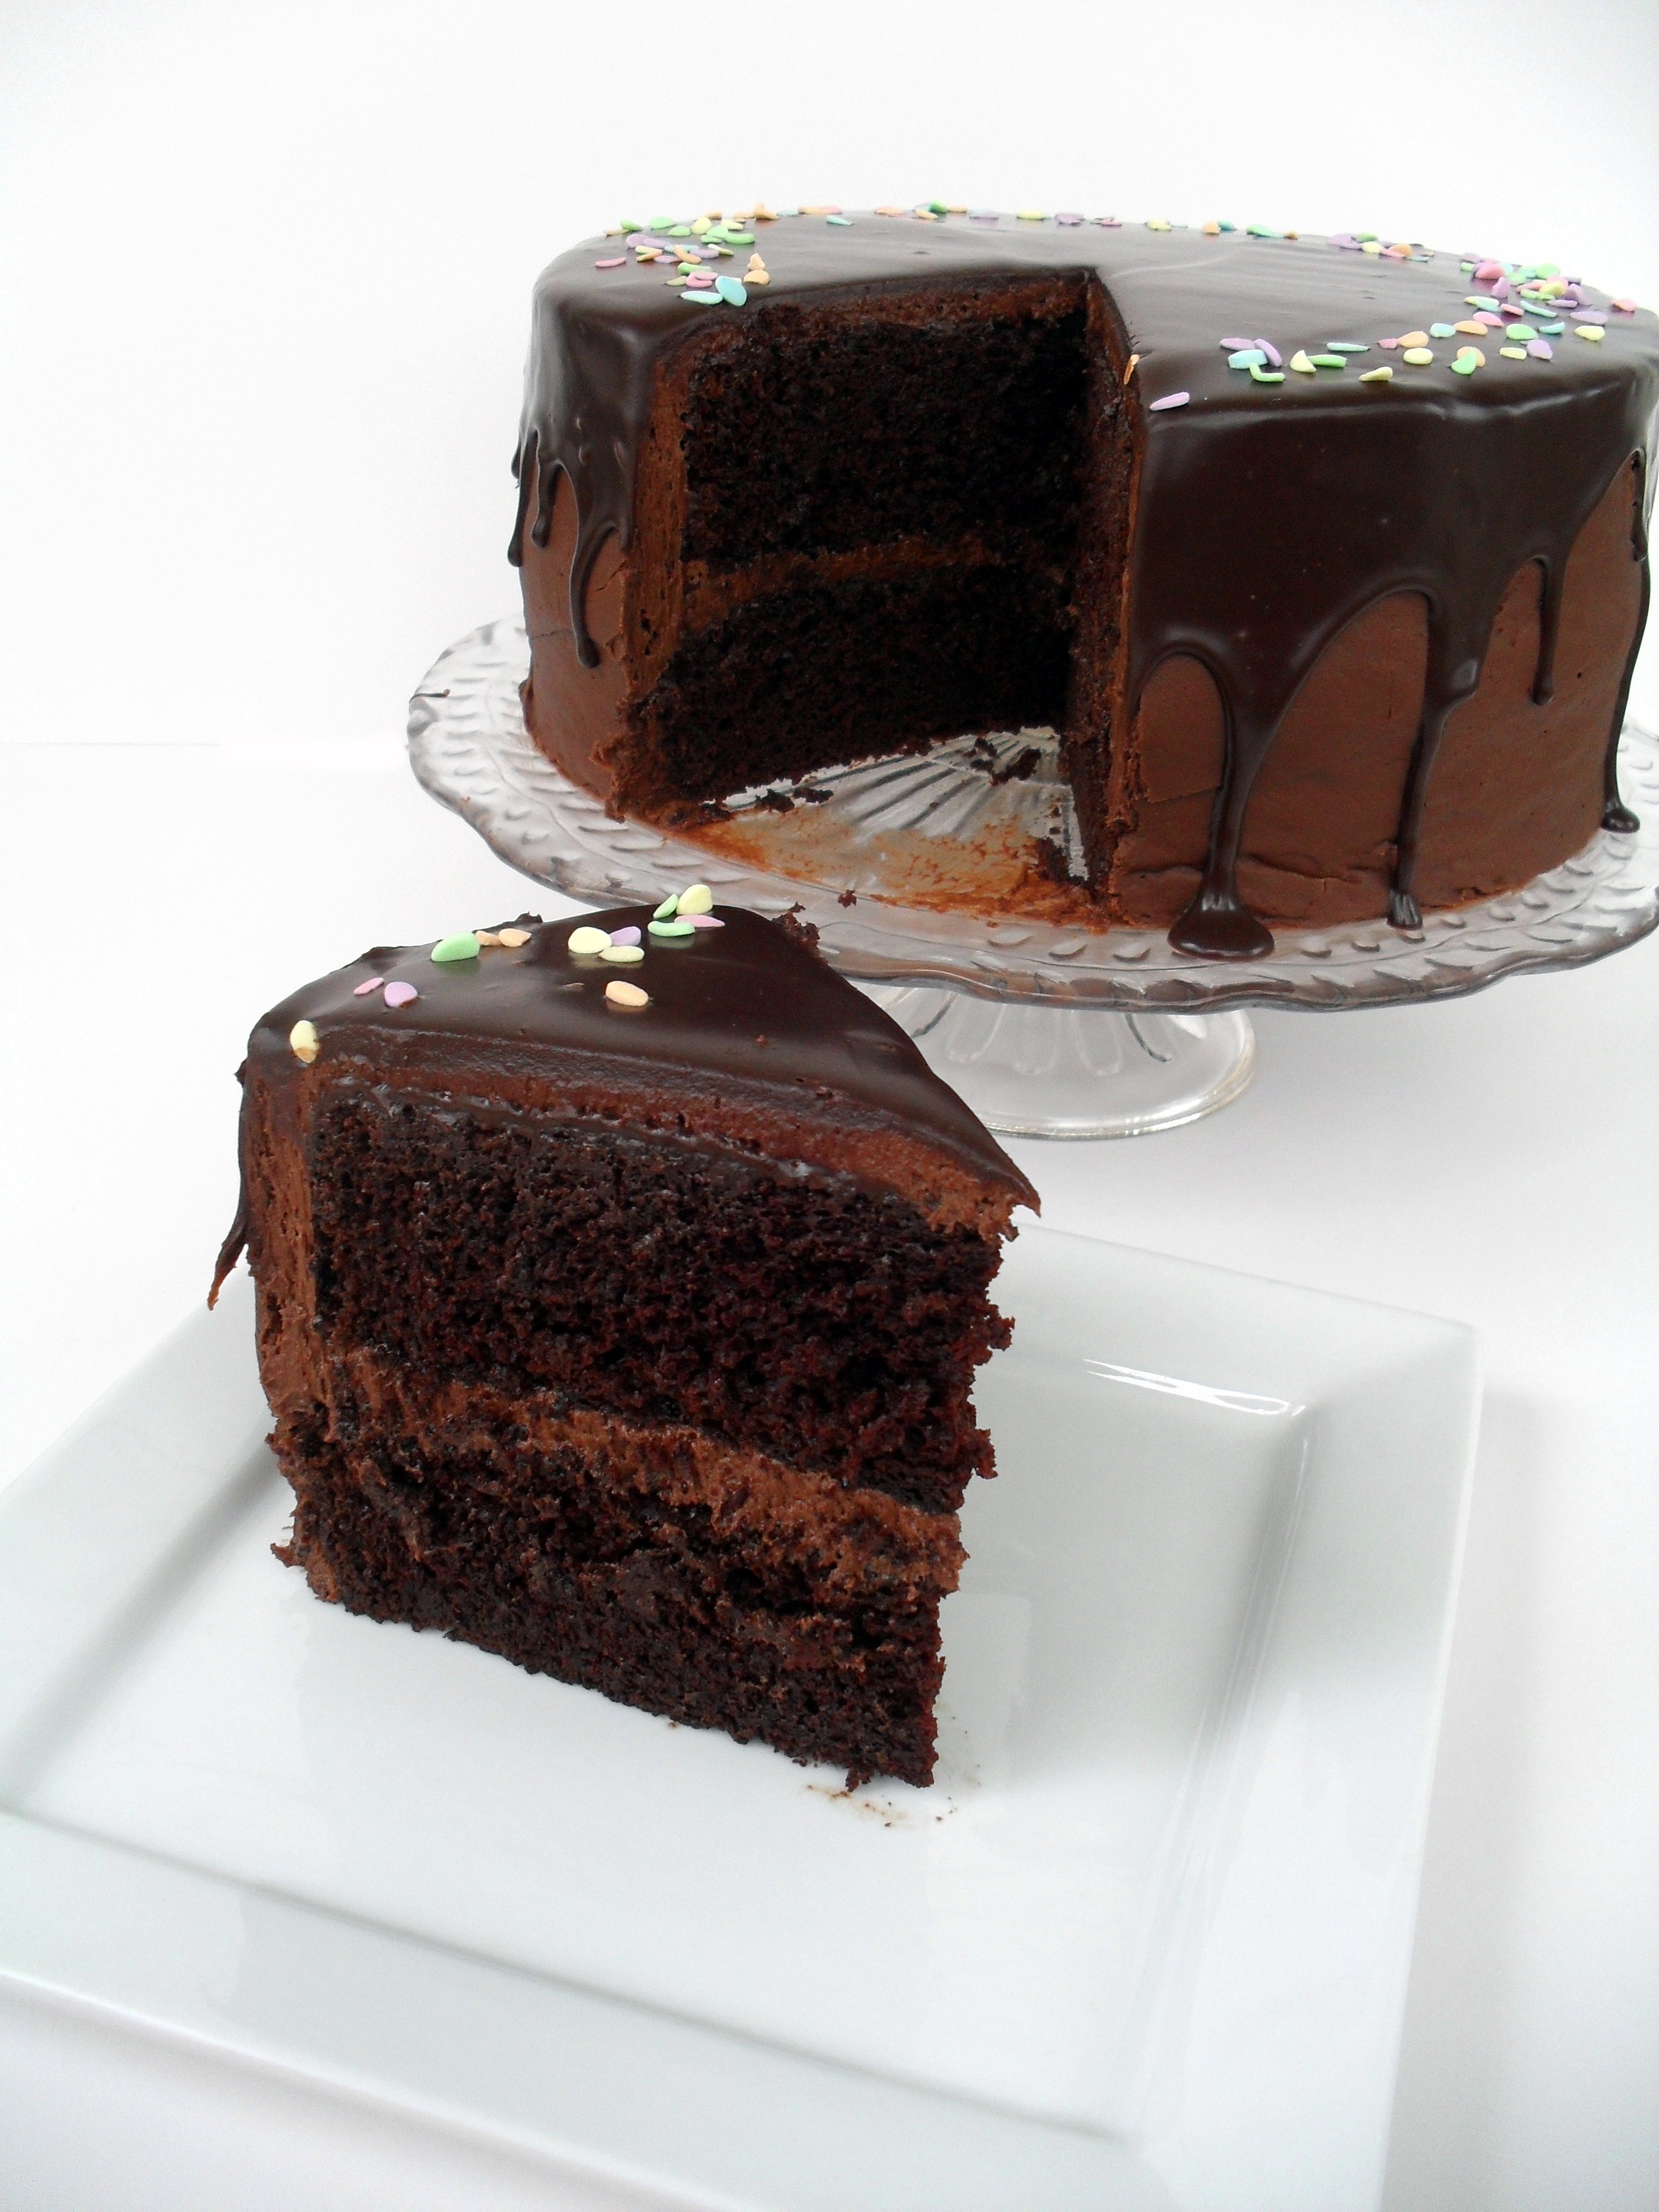
Usually it’s a little thicker like real frosting, but I made this one a little thinner like a glaze, plus I put it on a slightly warm cake which made it run a little more.
I’ve made several tiered cakes over the last few years (you can see them all here), but a friend’s surprise 40th birthday party last November was my first opportunity to do a really decadent chocolate one. Needless to say, I was extremely excited to try something new!
With my husband, left, and the birthday boy at his party
If I had to pick a single type of cake to eat for the rest of my life, it would be white with cream cheese wedding frosting, but if you are a chocolate lover, this is the cake for you. I know I tend to be quite effusive over most of my cake recipes (I’m effusive by nature, and I can’t help it–my cakes are the bomb! I kid, but really. They are. :) ), but I can tell you that this is the cake that I have gotten the most positive feedback for. That may be in part due to the number of people I served it to, since most of my cakes are only made for groups of about 10 people, but I do think this is probably the best chocolate cake I have in my repertoire, and I have made it several times since the birthday party to great reviews as well. It is my husband’s all-time favorite cake, and although it isn’t my favorite cake, it is my favorite chocolate cake.
If you are thinking about making a tiered cake in the future, but are intimidated, I highly recommend the method I used for this particular cake. If you frost each cake on top of a thick, foil covered cake board that is at least 2″ larger in diameter than the cake itself, then insert four hidden pillars into the bottom two tiers, all you have to do is transport the cake in three tiers to the location where the cake will be set up, and plop each cake on top of the pillars. And you’re done! With the usual way I do it (you can read about that process here), the stress level is considerably higher and there is more chance of messing up the cake. It is almost impossible to mess it up using hidden pillars.
*Hidden pillars aren’t actually invisible, as you can see, but since they are tall you can insert them down into the cake so that each tier is supported from the base of the cake below it. It is the part of the pillar inserted to the cake that is hidden.
Another tip is that once the cakes have been removed from the refrigerator to come to room temperature, make sure they have a way to breathe. After inserting the pillars in the bottom two, you don’t have to worry about them. But you should insert a hole with a skewer through the top of the top tier as well, or choose a place on the least attractive side of the cake (the one you’ll face to the back of the room) to poke a hole into each layer of the cake. This is to prevent air pockets from forming underneath the icing. This is a problem that cake decorators face across the world, and according to the professionals I have consulted, no one knows why it happens. When I make real buttercream with eggs and no powdered sugar, this never happens. So I suspect it has something to do with a reaction between the cake and the powdered sugar frosting on the surface. So if you are using a powdered sugar frosting (aka American buttercream), please make sure there is a place for air to escape so that your frosting job will not be ruined. (I used to be concerned this would make the cake dry out, but an entire day with a hole poked in the cake does not seem to affect it at all. If I’m making the cake 2 or more days in advance, I keep it in the refrigerator to keep it fresh and to keep air bubbles from forming beneath the frosting, and then poke it before I take it out to come to room temperature.)
UPDATE: It has now been explained to me that when you frost a cake cold and refrigerate it, once you bring it to room temperature the air inside the cake expands, causing the icing bulge, aka “icing budge.” While this is the most likely explanation, I have actually had the bulge happen when frosting room temperature cakes and never refrigerating them. So weird!
Here are some pictures of icing eruptions that have happened to my cakes before I figured out I needed to poke them so they could breathe:
You can see the bump on the left side where air or gas is trying to escape.
And this is the view straight on. The bottom two tiers of this cake never gave me any trouble, but the top tier didn’t have dowel rods in it so there was no way for it to breathe and I had to fix probably 10 of these eruptions!
This has been such a pain for me, that I even caught one of the incidents on video! This was before I figured out I needed to poke the cake to prevent the air pockets.
A tip for getting your frosting perfectly smooth is to spray the cake with water after smoothing it out as much as you can with an offset spatula, then going over it again with a clean spatula. The water helps your spatula to glide over the surface and make it very smooth. You can also dip your spatula in water, but I find using a squirt bottle to apply it makes the job much faster.
OK, let’s get to my favorite chocolate cake recipe! I took a bunch of photos of my latest one so I included a few extra for you at the end of the post. You’re welcome. :)
Favorite Chocolate Cake
This recipe makes one 9″ two-layer cake. To make a tiered cake the size pictured above, you’ll need to make about 7 batches of the cake recipe (2 batches for each 14″ layer, 1 batch for each 10″ layer and less than 1 recipe for both 6″ layers combined), 5 batches of the frosting, and 5 batches of the glaze. Printable recipe Printable recipe with picture Printable recipe for cake only
Favorite Chocolate Cake
1 ¼ cups unsweetened cocoa powder
2 ½ cups all purpose flour
2 ½ cups sugar
2 ½ teaspoons baking soda
1 ¼ teaspoons baking powder
1 ¼ teaspoons salt
2 large eggs plus 1 large egg yolk
1 ¼ cups warm water
1 ¼ cups buttermilk
½ cup plus 2 tablespoons vegetable oil
1 ½ teaspoons pure vanilla extract
Favorite Chocolate Frosting
2 sticks unsalted butter, room temperature
½ cup vegetable shortening
2 oz semisweet chocolate, melted and cooled
1 cup unsweetened cocoa powder
¼ cup dutch-process cocoa powder
¼ teaspoon salt
2 lbs (8 cups) powdered sugar
¾ cup milk
2 teaspoons vanilla
Favorite Chocolate Glaze
½ cup heavy cream
4 oz semisweet chocolate, chopped
2 teaspoons corn syrup
½ teaspoon vanilla
Make the cake: Preheat the oven to 350 degrees, making sure the baking rack is in the middle of the oven. Prepare two 9” round cake pans by cutting out a piece of parchment or wax paper to line the bottom of them. Grease the pans, place the parchment or wax paper in the bottoms and lightly grease again. Dust the pans with flour (or cocoa powder if you don’t want the white dusting on the finished cakes). Set the pans aside.
Sift together the cocoa, flour, sugar, baking soda, baking powder, and salt into a large bowl. Add the eggs, yolk, warm water, buttermilk, oil and vanilla. Mix on low speed until smooth, about 3 minutes.
Divide the batter evenly between the prepared pans. Bake the cakes for about 35 minutes, until a toothpick inserted into the middle comes out clean or with moist crumbs. Do not overbake! Remove the pans from the oven and set the pans on a wire rack to cool for 15 minutes. Gently run a thin knife around the edges of the pans and unmold the cakes, removing the parchment paper liners from the bottom of the cakes. Let them cool completely, top sides ups, on a wire rack. Trim the tops of the cake layers with a long serrated knife to make them level.
*Veronica’s notes: Although I have never had a problem with this cake recipe overflowing in my pans, many people have left comments on Melanie’s blog (and once on mine when I used it before for THE Mocha Crunch Cake) that they did, so I recommend either making sure the batter is no more than 2/3 full in your pans or placing a baking sheet below the pans to catch any overflow, just in case. If you have extra batter, make a few cupcakes! Also, please do not skip lining the pans with parchment or waxed paper. This cake is sticky and I learned the hard way that it will stick to the pan even if you grease and flour it.
Make the frosting: Cream butter and shortening together until smooth. Beat in melted chocolate until smooth. Add the cocoa powders, salt, sugar and milk to the bowl and turn the mixer to a very low setting until it’s combined enough to increase the speed. Continue increasing the speed and scraping the sides of the bowl until everything is incorporated, then add the vanilla and continue beating until fluffy. Frost cooled cake and freeze leftovers. This makes a large batch so unless you lay the frosting on super thick, you should have enough leftover to frost a dozen cupcakes, but the batch isn’t quite large enough to cut in half. I know, I make things difficult, but you won’t regret having some extra on hand.
Make the glaze: Gently heat the cream and chocolate together in the microwave or in a double boiler, stirring often until smooth and shiny. Stir in the corn syrup and vanilla. Allow to come to room temperature before pouring over the top of the cake and spreading to the edge with a spatula so that it drips over the sides. If the glaze gets too thick, heat it again for a few seconds (it won’t take long) and stir before pouring over the cake. Serve the cake at room temperature.
Recipe source: cake recipe from My Kitchen Cafe, frosting and glaze by Veronica Miller.
***The giveaway is now closed. Congratulations to Jenna, Suzie, Biz, Cheryl, and Kim~the lucky winners!***
Wedding and birthday cakes from good bakeries, at least here locally, have a certain evasive flavor in the icing that I’ve always mentally defined as “celebration.” I am still unable to describe the flavor any other way, but I learned the secret of that flavor and have been using it in the frostings for my own homemade celebration cakes ever since.
It is a flavor emulsion called “Crème Bouquet.” This is wonderful stuff. It is an oil-based flavoring with lemon and other essential oils that aren’t listed on the label (because they are sneaky and don’t want us to figure out how to duplicate it at home!). Believe me, I’ve tried, but I can’t make anything that tastes even remotely as wonderful as this emulsion. It doesn’t taste like lemon to me, although that’s the only essential oil listed, and it doesn’t taste like anything else I’ve ever had. Well, besides wedding and birthday cake. I have relatives that call it “that sweet flavor.” But that is not an apt description, either. You just have to try it for yourself!
Since I’m so in love with this flavoring and know it’s not a common household ingredient, I am going to give five lucky readers a 2-ounce bottle from Cake Stuff! To enter, just leave me a comment on this post and I will draw the winners using Random.org on Friday, November 5th . Simple as that. For those interested in purchasing crème bouquet, you can order by phone from Cake Stuff–just call the number on their website. It is very reasonably priced at $2.50 for a 2-ounce bottle, and they also have two larger sizes available.
You can turn any vanilla frosting into celebration frosting by adding crème bouquet to it, and I’ll share the two that I use it in. Enjoy!
White Celebration Frosting
I try to avoid this one since it’s kind of a non-food, one but sometimes, you just need a good, bright white frosting and the only way to achieve that is with shortening. And believe me, it does not taste like non-food. It is utterly delicious. I promise. The meringue powder is essential in this recipe to eliminate the greasy mouth-feel that shortening frostings usually have. It is also important to use good shortening because cheaper brands tend to be clearish, off-colored, and slimy. You want one that is an opaque white, like Crisco. Printable recipe Printable recipe with picture
2 cups Crisco vegetable shortening
2 tablespoons meringue powder
2 teaspoons crème bouquet
1 teaspoon clear vanilla extract
1 teaspoon butter flavoring
Pinch of salt
2 lbs. (8 cups) powdered sugar
1/3-1/2 cup water
Put the Crisco in the bowl of an electric mixer and beat on medium a few seconds, until creamy. Add in the meringue powder, flavorings, and salt and beat until smooth. Slowly add in the powdered sugar, alternating with water when it becomes too thick. Add more or less water to get your desired consistency. Once it is all added, beat on medium-low speed for four minutes. This frosting will keep for up to a month, tightly covered, at room temperature, or several months in the refrigerator.
Cream Cheese Celebration Frosting
This is my favored celebration frosting. This frosting on white cake, for me, makes the ultimate celebration cake. And be sure to try it on red velvet as well–divine! Printable recipe Printable recipe with picture
1 (8 oz) package cream cheese, room temperature
1/2 cup (1 stick) unsalted butter, room temperature
2 pounds powdered sugar
2 teaspoons crème bouquet
2 teaspoons clear vanilla extract*
Pinch of salt
Milk, if desired
Beat the cream cheese and butter until smooth. Add the remaining ingredients and beat on low, scraping the sides, until all the sugar is incorporated, then turn to medium/high and beat for another two minutes. I prefer not to add any extra liquid because I find it easier to get a perfectly smooth cake with thick frosting**, but you can add milk as needed to make it creamier. Refrigerate or freeze if you won’t be using it within a few days.
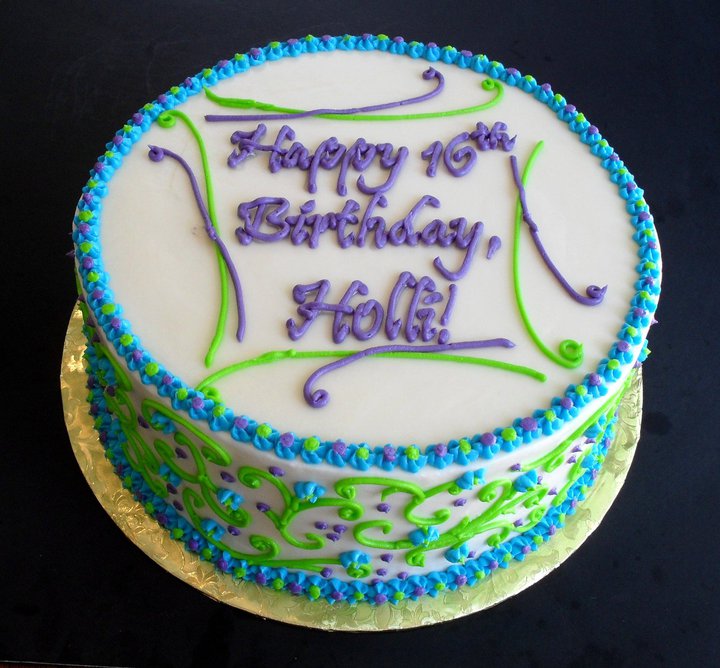
*You can use regular vanilla but the color will turn more yellowish-ivory (like Mom’s birthday cake above), which is fine unless you are aiming for a lighter color. To illustrate, I made the following two wedding cakes with the same recipe for cream cheese celebration frosting, but used clear vanilla on the first and regular on the second:
**To get my icing perfectly smooth, I use a straight-edged offset spatula and the water bottle trick: fill a clean (ideally, brand new or designated for water only) squirt bottle with water and spray the frosted cake all over. This allows the spatula to glide over the surface and smooth it easily. I recommend placing the cake, uncovered, in the refrigerator for an hour or overnight to allow the water on the surface to evaporate completely before decorating. You can see me demonstrating the “water bottle trick” in this video: How to Make a Layer Cake part 3: stacking and frosting.
~Disclaimer: I was not compensated for this blog or sponsored by Cake Stuff to promote them. That is the store where I’ve always purchased my crème bouquet and it is consistently delicious. So I decided to buy some to share with my readers so you can experience the awesomeness for yourselves!~


