RSS Feed

Tag Archives: spicy

Blackened Chicken with Roasted Garlic Alfredo

Posted on

Dennis is a huge fan of blackened meat.  And by blackened, I don’t meant burnt (that would be me that likes burnt meat), I mean meat that’s been rubbed with spicy blackening seasoning.  So when I ran across this recipe, I knew it would be perfect for Father’s Day.  It was perfectly suited for him, is impressive, but simple to prepare, which is pretty much a requirement for all the recipes I make these days.  It was incredibly delicious, and I would make it again, and again, and again.

Blackened Chicken with Roasted Garlic Alfredo

Printable recipe
Printable recipe with picture

2 boneless skinless chicken breasts
Olive oil
1 tablespoon blackening seasoning
1 (10 oz) container Buitoni Light Alfredo sauce
1 tablespoon roasted garlic
8 oz bowtie pasta, cooked to al dente & drained

Drizzle olive oil over chicken breasts to lightly coat. Sprinkle blackening seasoning liberally over both sides of the chicken. Heat skillet on medium-high and cook chicken 3 minutes on each side. While chicken is cooking, heat Alfredo sauce and roasted garlic. Add pasta and toss; divide between two dishes. Slice chicken and place on top of pasta. Sprinkle with Parmesan cheese, if desired.

Veronica’s notes: In a pinch, you can sprinkle in some garlic powder to taste instead of the roasted garlic.  Also, Bertolli’s jarred light alfredo works great for this recipe if you can’t find the fresh stuff.

Recipe source: Plain Chicken

Here’s the card I made for Dennis this year.  It may be my favorite card I’ve ever made. :) He loved it!

Advertisement

Spicy Ranch Crackers

Posted on


This is a twist on seasoned crackers for those that enjoy a spicy kick.  I make a triple batch of seasoned crackers every December to include in my goodie bags with assorted sweets, and this year I made a second spicy batch for those that like things on the spicy side.  They are great on their own as a snack, but as with the seasoned crackers, one of my favorite things to do with these crackers is to sprinkle them on soup as a garnish, especially tomato soup or chili.  And let’s not forget the Super Bowl is coming up, right?  These would be perfect for the heat-lovin’, snack-eatin’ guests at your party.

Spicy Ranch Crackers

Printable recipe
Printable recipe with picture

2 (12 oz) bags oyster crackers
1 (13.7 oz) box cheese crackers
1 (1 oz) envelope spicy ranch dressing mix
1 (1 oz) envelope ranch dressing mix
1 tablespoon red pepper flakes
1 tablespoon garlic powder
1 teaspoon dried dill weed
½ teaspoon onion powder
1 cup vegetable oil

Mix crackers in a large bowl. Sprinkle dressing mix and spices over the crackers, then pour oil over it all. Mix until the oil is absorbed. Cover and store overnight for the flavors to develop.

A Veronica’s Cornucopia Original

Blackening Seasoning

Posted on

If you’ve ever had blackened chicken, you know what this stuff will do to your chicken or fish: make it spicy, flavorful, and…well, kinda black!  This is my second favorite way to eat salmon, coating it in this before cooking it.  (This is my first favorite.)  This is perfect if you’re low-carbing it–just serve your blackened meat with veggies…or if you’re lovin’ the carbs, head on over to Suzie’s blog to get a recipe for Olive Garden’s copycat fettucine alfredo to serve with your blackened goodness!

Blackening Seasoning

Printable recipe
Printable recipe with picture

2 teaspoons black pepper
1 teaspoon salt
1 teaspoon dried basil
1 teaspoon dried thyme
1 teaspoon garlic powder
1 teaspoon onion powder
1 teaspoon cayenne pepper
1 teaspoon paprika

Stir all spices together and store in an airtight container. Rub onto chicken, salmon, or meat of choice before pan-frying or grilling.

The blackening seasoning blackens better the more batches of meat you cook in the pan. I think it helps to have it on high heat, at least to begin with.

Suzie’s Next Day Chili

Posted on

Thank you guys for sticking with me through my “no recipes” week! I had a lot of fun with it, especially reading all your comments about the pigs you’d like to make fly on Danielle’s Flying Pig. If you didn’t catch that post, you might want to check it out–there is a giveaway for one of Danielle’s kumquat bath & body sets on it, and the deadline for entry is this Thursday. (Update: this giveaway is now closed. Congrats to Ken!)

Now, let’s get back to the recipes, shall we? I’ve got enough saved up that I’m going to be sharing all OLD recipes that I’ve been saving especially for December, which means, you guessed it, LOTS of sweets. Which is why I’m starting off with a savory recipe, to stabilize your blood sugar in preparation for all the sweetness that is soon to come your way from my blog. :)

“You know I luvs you…I have never, ever shared this recipe with anyone!! I’ve been making it for about 10 years now.  :)”

This was the note at the end of the recipe my friend, Suzie, emailed me for her Next Day Chili.  She’s been holding an annual chili cook-off in her neighborhood for the last five years and her chili has won four years out of those five.  She doesn’t allow herself to win the prize since it’s her contest, but hers is almost always voted number one!  She has kept the recipe secret, telling everyone that if they could guess some of the secret ingredients she used, she would share it, but no one ever has.  Knowing all this, I still had the audacity to ask for the recipe.  And I was pleasantly surprised when she obliged me!  (I guess I’m just irresistible, right? LOL!)

I was so excited to get my hands on such a precious recipe, and promised I wouldn’t share it on my blog, thinking she’d want me to keep the secret recipe a secret.  But she surprised me again by granting me permission to share it here.  WOW!  Thank you, Suzie!  Don’t we feel special?! :)

Usually, I like my chili with lots of beans and veggies, so I was actually pretty nervous to make this since it only has one can of beans and a scant 1/2 cup of onion for veggies.  When a friend shares a recipe with you that you’ve never tried, do you get nervous that you won’t like it?  I’m probably ridiculous, but I feel almost obligated to like a recipe that comes highly recommended from a friend, and sometimes put off making it just for the fear that I won’t like it and will have to disappoint the friend when I tell them.  But not this time!  I was nervous, but I wasn’t going to wait–this recipe is special.

Well, I needn’t have worried.  This chili is spectacular!  Spicy, hearty, meaty, with a wonderful & unique flavor. Once you scan the ingredients, you’ll see why it doesn’t taste like any other chili.  I bet you’ve never seen a chili recipe with bacon, chorizo, red wine vinegar, Worcestershire, sage, or maple syrup in it!   My husband loved it and ate most of the batch by himself.  In fact, he told me this was his favorite of any chili I’ve ever made!  This is also the only chili that Suzie’s husband will eat so I’d say this is some real man-pleasin’ chili.

Thank you, Suzie, for sharing your wonderful recipe with us!  Rock on, Chili Queen. :)

Suzie’s Next Day Chili

Printable recipe
Printable recipe with picture

3 lbs. good ground beef
1 lb. chorizo
1/2 lb. bacon
1 tablespoon bacon grease
1 can Bush’s mild chili beans, undrained
1/2 cup diced white onion
2 tablespoons minced garlic
2 tablespoons ground cumin
1 tablespoon dried oregano
2 tablespoons paprika
3 tablespoons ground black pepper
1 1/2 tablespoons kosher salt (or 2 1/4 teaspoons table salt)
1 teaspoon dried sage
2 tablespoons red wine vinegar
2 tablespoons Worcestershire sauce
3-5 tablespoons hot sauce (depending on your taste)
1/2 cup chili powder (more if desired)
1 teaspoon dried cilantro (or 1 tablespoon fresh, chopped)
2 tablespoons real maple syrup
1-2 cups chicken or beef broth (or mix 1/2 and 1/2), depending on desired thickness
1 (6 oz.) can of tomato paste
1 (46 oz) can tomato juice
Red pepper flakes, to taste

Brown beef and chorizo. Drain grease, cover and set aside. Slice 1/2 lb. bacon into 1 inch pieces. Cook bacon until crisp, set aside on paper towels to drain off excess fat. Take 1 tablespoon of the bacon grease and add to the burger/chorizo mixture. Add all remaining ingredients, except bacon, to a large pot. Simmer for 3 hours, stirring occasionally and tasting to adjust salt, pepper, chili powder and red pepper flakes to taste. Let cool for an hour or so and then refrigerate overnight. Refrigerate the bacon separately.  Simmer again the next day for 2-3 hours, adding bacon the last hour. It’s now ready to serve.

Suzie recommends serving with homemade cornbread, so I served mine with Lighter Northern Cornbread.  I also have a southern-style Homestead Cornbread recipe if you like yours without sugar and flour.

Recipe source: Suzie S.

Chuncheon Chicken Wings


This is my third month participating in the Secret Recipe Club, a club started by Amanda of Amanda’s Cookin’, in which everyone is secretly assigned another participants’ blog and you choose one of their recipes to make and post. On reveal day, which is today for my group, everyone posts their recipes and gets to see who had their blog and what recipe they chose! Fun stuff!

Secret Recipe Club

This month I was assigned to Koreafornian Cooking, which consists mainly of Tammy’s excellent cooking videos.  All the recipes, whether on video or typed, are Korean fusion dishes.  The blog’s tagline, “Korean cooking with California flare,” is quite apt!

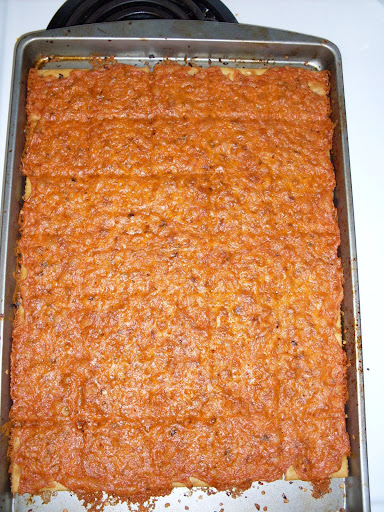
Since football season is officially upon us, and chicken wings are a popular choice for game fare, I chose to make Tammy’s Chuncheon Chicken Wings.  Chuncheon (pronounced Choon-chen, as far as I can tell by hearing Tammy pronounce it in the video) is the capital of Gangwon province in South Korea, and she was inspired by their popular dakkalbi dish to make these wings.  According to Tammy, dakkalbi is diced chicken marinated in a gochujang (chili pepper paste) based sauce, and then stir-fried with sliced Chinese cabbage, sweet potato, scallions, onions and tteok (rice cake).  So she used the sauce in this dish as a marinade for wings served with the typical blue cheese dressing and celery in America, and voila! Chuncheon Chicken Wings, a truly Koreafornian fusion recipe, was born.

Though I searched high and low, I could not find the gochujang (Korean pepper paste) anywhere!  I asked the ladies at the Asian market what I could use instead, and they said sriracha wasn’t as salty or hot (whoa, Nelly, that stuff must be smokin’!), but it could work.  I really wanted to use the gochujang, if not just to see what it tasted like, but the wings turned out really lovely even with the sriracha (a Thai chile sauce) that wasn’t intended.

I changed the recipe a bit more by replacing all the sweetener (she used sugar and honey) with honey and upping it by a couple tablespoons.  Fearing the heat, I left out the chile powder, but wish I would have kept it in because we like spicy food and while these were spicy, we could have handled the extra heat.  The heat using sriracha only is about as hot as regular buffalo wings, so if you want to make it spicier, do add the chile powder.

The last change I made was one that might not be necessary if you use the gochujang, but with the sriracha (or maybe it was the wings, which had been frozen, or maybe it was the extra honey), the sauce became watery after a few hours of marinating and didn’t stick well to the wings when I baked them.  They were looking pretty pale and sad, so I dumped the remaining marinade to a saucepan and cooked it with some cornstarch to thicken it, then brushed the wings with it, which did the trick.  They were red and pretty, just like Tammy’s Chuncheon wings!

While my spicy-sweet version probably tastes nothing like the dakkalbi served in Chuncheon that inspired Tammy’s original recipe, they still were very good.  I detest buffalo wings, but I loved the flavor of these, and they were a winner with Dennis, my wing man, too.  Meaning to only have a few before dinner, he ended up eating 14 wings and turning those into his dinner.  So yeah, I’d say they were a success.

Chuncheon Chicken Wings

Printable recipe
Printable recipe with picture

Dakkalbi Sauce
¼ cup gochujang (Korean pepper paste) or ¼ cup sriracha
2 tablespoons hot chile powder or hot paprika
4 cloves garlic, minced
1 tablespoon soy sauce
1 tablespoon sesame oil
¼ cup honey

4 lbs. chicken wings
1 bunch celery stalks
1 cup blue cheese or ranch dressing
2 tablespoons toasted sesame seeds for garnish (optional)

Put all the sauce ingredients in a gallon freezer bag, seal, and shake/knead to mix.  If you purchased your wings in a bag and defrosted them in the fridge, be sure to pat/squeeze each one between paper towels to dry them.  Add the the wings to the bag, seal, and massage to coat the wings with sauce. Refrigerate and allow to marinate for at least ½ hour (I did three hours). Preheat oven to 400 degrees. Place wings on a foil-lined & greased baking sheet with a rim (reserve extra marinade). Bake for 25 minutes.

While wings are baking, wash celery and cut the ends off, then cut into strips. Chop strips into thirds. Place them on a large plate along with a bowl of dressing.

Pour extra marinade into a saucepan and whisk in a teaspoon of cornstarch.  Bring to a boil, stirring constantly, reduce heat and simmer for a minute or two until thickened.  When the time goes off for the wings, remove from oven and turn them over using tongs.  Brush the wings with the thickened sauce and return to the oven to bake for another 10-20 minutes, or until no longer pink in the middle.

Once wings are done, arrange them with the celery on the plate and serve!

Recipe source: adapted from Koreafornia Cooking

Be sure to click the blue linky man below to see all other secret recipe club posts today!  I know it says there are 0 links, he’s a big fat liar, don’t believe him! Just click and you will see the truth. :)


Green Chile and Cream Cheese Burgers

Posted on

I’m a sucker for a grilled burger in the summer, so I broke this recipe from Debbi out as soon as it was grilling weather!  Usually I just go for a plain grilled burger with lettuce, tomato, pickle, onion, ketchup and mustard, but sometimes you want something a little different and this one really satisfies.  The chiles give the burger a kick (for more kick, you could use jalapenos) and the cream cheese is a cooling, tangy contrast.  I really love grilled onions on any burger and they are perfect with the green chiles on this one.  I served mine with Dilly Cucumber Salad, and I found the tangy sweetness really complimented this burger!

Green Chile and Cream Cheese Burgers

Printable recipe
Printable recipe with picture

1 teaspoon canola oil
1/2 of a large onion, diced (I sliced mine)
1 (4 oz.) can of green chiles (I bought canned whole chiles and cut into strips)
Salt and pepper
1 lb. ground beef or bison (click here to find out why bison is better)
4 hamburger buns
4 oz. cream cheese

Heat oil in skillet over medium-high heat. Saute onion until softened and is browned in places (it helps to only stir occasionally). Add chiles, season with salt and pepper, saute until heated through. Divide meat into four patties, salt and pepper, and cook or grill until done. Spread 1 oz. cream cheese on each bun and divide the green chile-onion mixture among the burgers. Serve hot.

Makes 4 burgers.

Per burger, using bison, light (80-calorie) buns, and neufchatel: 302 calories; 10 g fat; 24 g carbohydrates; 5 g fiber; 31 g protein; 8 Points Plus.  Using 93% lean ground beef makes the burgers 9 Points Plus.

Recipe source: adapted from Debbi Does Dinner

Muhammara (Hot Pepper Dip)

Posted on

This spicy vegan dip originates in Syria and I didn’t discover it until my friend, Pia, introduced me to it.  It’s her favorite dip and she recommended it to me when she found out I enjoy Middle Eastern cuisine.  I knew it was right up our alley simply because it’s spicy, and since I’d seen some of the pomegranate syrup the recipe calls for at a market attached to our favorite Lebanese restaurant, I snapped a bottle up next time we were there and set out to make this dip.

It is great simply as a dip, but I’m also going to include a “recipe” for a veggie wrap that I’ve incorporated it into for quick lunches.  The first time I served this to my husband, he raved, and it wasn’t until afterward that I realized he had eaten an entirely vegan meal with no complaints. Score!

Muhammara (Hot Pepper Dip)

Printable recipe
Printable recipe with picture

1 (12 oz) jar of roasted red peppers, drained and rinsed
3/4 cup walnuts, toasted and chopped
1/2 cup breadcrumbs — 1/2 cup (I turned pita bread into crumbs in the food processor)
3 cloves garlic, minced
1 tablespoon lemon juice
2 tablespoons pomegranate molasses/syrup/concentrate
1 tablespoon sriracha hot chile sauce
1 teaspoon ground cumin
Salt and pepper to taste
1/2 cup extra virgin olive oil

Chop the peppers roughly and place them, along with all the remaining ingredients, except the olive oil, into a food processor or blender. Pulse to roughly chop the ingredients, then slowly pulse in the olive oil. Try not to purée the ingredients too much. You want the dip to have a little texture.  Adjust seasoning to taste and serve as a dip or spread with pita wedges, vegetables or kebabs.

*Veronica’s notes: the original recipe calls for four fresh red peppers which you roast before processing.  Click the recipe source link below for instructions on this if you would like to do it this way.  The original recipe also calls for red pepper flakes instead of sriracha, so that can be used in place of sriracha if you desire.  As for the pomegranate syrup, my bottle is actually a pomegranate juice concentrate and I know that Pom is now selling this so you might be able to find it where Pom brand pomegranate juice is sold if you don’t have a market that sells ethnic foods in your area.

Recipe source: Inato lang Filipino Cuisine and More


Muhammara Veggie Wrap

Printable recipe
Printable recipe with picture

You will need:

  • Muhammara
  • Black beans
  • Parsley
  • Fresh baby spinach
  • Shredded carrots
  • Tortilla, flat bread, or pita bread*

Spread muhammara down the center of your tortilla or bread, then sprinkle on some beans, a little parsley, a handful of spinach and shredded carrots.  Wrap tightly and cut in half to serve.

*I used a pita “tortilla” for my wrap bread:

Recipe source: inspired by My Kitchen Adventures

***For those who wish to participate in BSI this week, don’t forget to submit your cream cheese recipes to me by Sunday night!  Details here.***

Lighter Chicken Tikka Masala

Posted on

Biz from My Bizzy Kitchen has been taunting me with her chicken tikka masala for months.  And months.  It’s my favorite Indian dish of those I’ve had the opportunity to try at restaurants, so I’ve been meaning to make it at home for quite some time.  When Biz changed her recipe to lighten it up, replacing the heavy whipping cream with Greek yogurt, I knew it was time.  And I could not believe that it was even better than what I’ve had at restaurants!  Just like with the dal makhani, it was so good I couldn’t move on and had to bring it back to our menu a second week in a row.  Except this recipe is actually better than the dal makhani, IMHO.  Thank you so much, Biz, for sharing your wonderful recipe with us.  I’m paying it forward to you, my readers, so that you can enjoy it as well.  And you will–it’s simply divine!

Lighter Chicken Tikka Masala

Printable recipe
Printable recipe with picture

1 pound boneless skinless chicken breasts, cubed
3/4 cup (6 oz) nonfat, plain Greek yogurt, divided
1 tablespoon lemon juice
4 teaspoons ground cumin, divided
1 teaspoon ground cinnamon
1 teaspoon cayenne pepper
1 teaspoon black pepper
1/2 teaspoon salt
1 tablespoon butter
1 small jalapeno, cut in half, seeded and chopped
1 teaspoon minced garlic
2 teaspoons paprika
1/2 teaspoon curry powder
6 dried red chili peppers
2 (8 oz) cans tomato sauce
1/4 teaspoon sriracha chili sauce (I use a full teaspoon for more heat)

Mix half the yogurt the chicken, lemon juice, 2 teaspoons cumin, cinnamon, cayenne, salt and pepper. Refrigerate and marinate for one hour. Melt butter in a skillet and add jalapeno pepper. Cook for about 5 minutes. Add the remaining 2 teaspoons ground cumin, garlic, paprika, curry powder, sriracha sauce and stir for 2 minutes, until nice and fragrant. Add chicken and cook for five minutes, turning pieces half way through. Add tomato sauce and dried chiles and simmer for 15 minutes until the chicken is fully cooked.  Remove from heat, stir in remaining 3 ounces of Greek yogurt. Serve over brown rice and garnish with cilantro.

Makes 4 servings. Per serving: 205 calories; 2.5 g fat; 13.7 g carb; 3 g fiber; 29 g protein

Recipe source: barely tweaked from My Bizzy Kitchen

Fire Crackers

Posted on

Didn’t I just say I was too busy to be posting recipes? Well, I am but I guess old habits are hard to break.  I’m staying up late to get this one posted, since I promised it yesterday.

I made two batches of these b/c I used mild cheddar on the first and they didn’t have enough flavor–spicy but bland, if that’s possible.  The second batch was perfect and I shipped it to my spicy-food-loving sister-in-law for her birthday, along with some of Laura’s Cherry Crumble Bars & some Nutty Toffee Popcorn.  The funny thing is that I gave the bad batch to my parents (not because I was seeking some sort of retribution, but because I don’t like to waste and know that Dad will eat anything) and they liked them so much they asked me to make them for the pig-prep night before our family’s annual Pig Roast reunion (we all just sit around–most drinking beer–while snacking and watching the men inject flavor solution into the pig, among other unappealing things).

You can adjust the spiciness to suit your tastes.  Use as little or as much red pepper as you dare!

Fire Crackers

from Bake Wise by Shirley O. Corriher

“Normally, you keep temperatures low when working with cheese so that it won’t separate, but in this case, the separation of the cheese makes the dish outstanding.  The oven is so hot that the fat in the cheese separates out and goes into the crackers, making them incredibly flakey and crunchy.”

Ingredients
Non-stick cooking spray
One 15-oz box fat-free saltines (I used regular to no ill effect)
Fresh hot red pepper flakes (I used dried)
One 10-oz package Cracker Barrel extra-sharp cheddar, grated (you should use extra-sharp, but I don’t think the recipe would suffer if you used an 8 oz package of another brand)

Directions
Preheat oven to 475.  Spray a jelly-roll pan measuring about 10×15 with nonstick spray.  Arrange the crackers (about 40) in rows so that they are touching each other.  One sleeve fits almost perfectly in this size pan and you will have abou three sleeves left in the box.

Sprinkle with pepper flakes and then top with the grated cheese.

Quickly place the pan in the oven and close the door.  Leave the heat on for no more than 10 seconds, then turn the oven off.  Leave in the closed oven for at least 2 hours.  The hot oven melts and browns the cheese, producing an even crisp brown coating.  The fat from the cheese soaks into the crackers and puffs them sligtly.  Leaving them in the oven also dries them out, so they become super crunchy.  Break apart and serve, or store for several weeks sealed in an airtight container.

Veronica’s notes:  The first time the crackers were very crisp and the second time they weren’t crisp enough after two hours.  This is due to using less cheese the first time and leaving the first batch in the oven well over two hours.  If your crackers don’t easily break apart after 2 hours, I’d recommend just putting them back in the oven until they’re super crispy.

Slow-Cooked Enchilada Casserole & Spicy Red Rice

Posted on

Two more incredible recipes from Marina!

SLOW-COOKED ENCHILADA CASSEROLE
$100 Prize Winner Pillsbury Bakeoff 2000, by Elizabeth Castle (Marina’s daughter)

1 1/2 lb. ground beef sirloin
1 small onion, chopped
1 garlic clove, minced
1 (1.25-oz.) pkg. Old El Paso Taco Seasoning Mix (or 3 tablespoons homemade)
1 teaspoon salt (I suggest omitting as the seasoning mix adds plenty of salt)
½ teaspoon pepper
9 (51/2-inch) corn tortillas
½ cup chicken broth
½ cup tomato sauce
1 (10-oz.) can Old El Paso Enchilada Sauce
6oz. (11/2 cups) finely shredded Cheddar cheese
2 (15-oz.) cans pinto, black or kidney beans, drained, rinsed
1 (11-oz.) can Green Giant Mexicorn Whole Kernel Corn, Red and Green Peppers, drained
1 (4.5-oz.) can Old El Paso Chopped Green Chiles
1 (21/4-oz.) can chopped ripe olives
Sour Cream

1. Brush inside of 3 1/2 or 4-quart slow cooker with oil or spray with nonstick cooking spray. In large skillet, brown ground beef sirloin with onions and garlic over medium-high heat for 8 to 10 minutes or until thoroughly cooked, stirring frequently. Drain. Stir in taco seasoning mix, salt and pepper.

2. Place 3 tortillas in bottom of oiled slow cooker. Top with beef mixture, broth, tomato sauce, and enchilada sauce. Sprinkle with ½ cup of the cheese. Layer 3 more tortillas. Top with beans, corn, green chiles, half of the olives and ½ cup of the cheese.

3. Top with remaining 3 tortillas. Sprinkle with remaining ½ cup cheese and olives. Cook on high setting for 21/2 to 3 hours or on low setting for 6 to 7 hours. Uncover slow cooker for last 30 minutes of cooking time. Top individual servings with sour cream.

Serves 8

Marina suggests topping the sour cream with sliced avocados and more enchilada sauce.

SPICY RED RICE
2007 Blue Ribbon Recipe courtesy of Marina Castle

2 tablespoons butter
2 cups Calrose white rice
½ cup minced onions
2 teaspoons dried parsley flakes
1 1/2 teaspoons salt
½ teaspoon black pepper
½ teaspoon paprika
2 cups chicken broth
1 (8oz) can Mexican hot tomato sauce or regular tomato sauce
1 bay leaf
1 tablespoon butter
Melt butter in a 2 quart saucepan. Add rice and onions and stir for 2-3 minutes.  Add rice and onions and stir for 2-3 minutes.  Add spices and stir until rice is lightly toasted. Slowly and carefully add liquids and bay leaf, stir and add butter.  Bring to a quick boil, then immediately lower heat to simmer. Cover pan and cook for 25 minutes or until done. Remove lid, stir and cover pan again. Keep warm.

Serves 6

This was the tomato sauce I used–I never knew this stuff existed until I looked for it for this recipe.  It made the rice plenty spicy.

%d bloggers like this: