RSS Feed

Tag Archives: special occasion

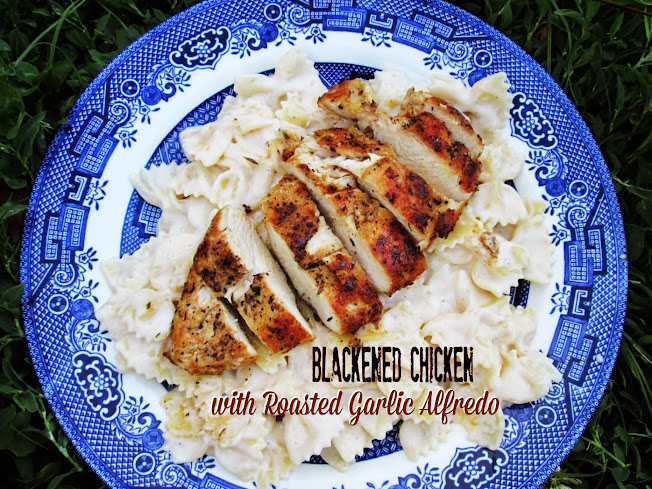
Blackened Chicken with Roasted Garlic Alfredo

Posted on

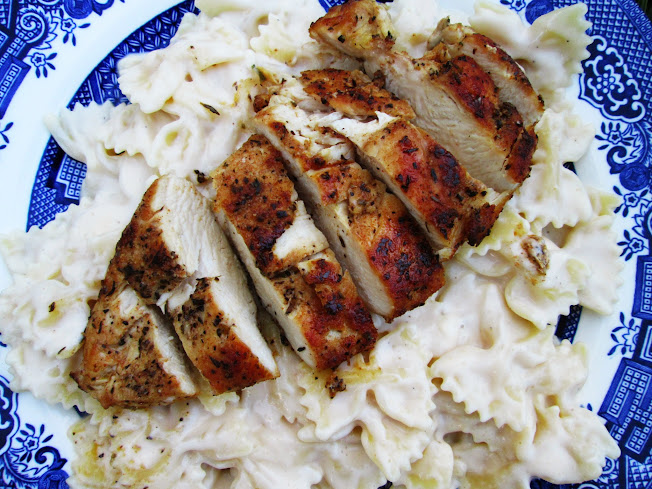
Dennis is a huge fan of blackened meat.  And by blackened, I don’t meant burnt (that would be me that likes burnt meat), I mean meat that’s been rubbed with spicy blackening seasoning.  So when I ran across this recipe, I knew it would be perfect for Father’s Day.  It was perfectly suited for him, is impressive, but simple to prepare, which is pretty much a requirement for all the recipes I make these days.  It was incredibly delicious, and I would make it again, and again, and again.

Blackened Chicken with Roasted Garlic Alfredo

Printable recipe
Printable recipe with picture

2 boneless skinless chicken breasts
Olive oil
1 tablespoon blackening seasoning
1 (10 oz) container Buitoni Light Alfredo sauce
1 tablespoon roasted garlic
8 oz bowtie pasta, cooked to al dente & drained

Drizzle olive oil over chicken breasts to lightly coat. Sprinkle blackening seasoning liberally over both sides of the chicken. Heat skillet on medium-high and cook chicken 3 minutes on each side. While chicken is cooking, heat Alfredo sauce and roasted garlic. Add pasta and toss; divide between two dishes. Slice chicken and place on top of pasta. Sprinkle with Parmesan cheese, if desired.

Veronica’s notes: In a pinch, you can sprinkle in some garlic powder to taste instead of the roasted garlic.  Also, Bertolli’s jarred light alfredo works great for this recipe if you can’t find the fresh stuff.

Recipe source: Plain Chicken

Here’s the card I made for Dennis this year.  It may be my favorite card I’ve ever made. :) He loved it!

Apple Pie Cupcakes

Posted on

The Secret Recipe Club

This month I was assigned to Cookin’ With Moxie for the Secret Recipe Club.  Jamie is a beautiful Italian girl who loves to cook, and I was tempted by many of her Italian dishes, but circumstances led me to these wonderful cupcakes instead.  I had volunteered to provide the cake for my sister’s boyfriend’s belated birthday gathering in the park, and had already decided to bring cupcakes since they don’t require forks.  And since Jimmy’s favorite pie is apple,  I just had to make these.  Aren’t they so cool?

Vanilla cupcakes filled with homemade apple pie filling, topped with vanilla buttercream that mimics the ice cream you’d use on real apple pie.  Totally delicious.  And I have to tell you, I actually ran out of filling (more on that in a minute) and used some canned filling for about 4 cupcakes and I was nervous that people would like those better than the homemade ones. I didn’t get to taste the ones with canned filling, but another lady tried both and said the homemade version was SO much better.  So there you have it.  If you want to cheat, do it with the cake (using a vanilla or yellow mix) but please do make your own filling and buttercream.

OK, about running out of filling.  This cupcake recipe makes 32 cupcakes if you fill the liners the appropriate amount–1/2-2/3 full.  I don’t know if others have overfilled their cupcakes (don’t do it, they will spread out on the sides and it will not be pretty), didn’t cut their cones as deep, or just made more filling to fill the extra cupcakes, but there was not enough filling for all 32 cupcakes for me.  So I have adapted the recipe to make more filling.  If you use a mix, which makes 24 cupcakes, refer to Jamie’s original recipe for the filling as that will be the perfect amount.

Another strange discovery I had is that the batter that was left out waiting for a pan to be freed up (I didn’t have a third pan for the extra eight cupcakes) actually baked up better than the ones I put in right away.  So weird, right?  They didn’t brown as much and domed more in the middle instead of spreading out on the sides.  They had a much better appearance.  You can do whatever you wish with that information, as the taste will be the same whether it sits or is baked right away.  Just know that if you have to let some of the batter sit and wait for a pan to be freed from the oven, the cupcakes will not suffer.

I want to thank my Group C hostess, Debbi, for all she does, and April who runs the entire club.  They both keep things running so smoothly it’s easy to overlook all their hard work.  And of course Jamie for sharing this fabulous recipe, which I otherwise never would have made. You ladies rock!  And if you’d like to find out more about The Secret Recipe Club, click the link and join sooner rather than later to get a better place on the waiting list.  It’s a popular club and it can take a long time to get in!

Apple Pie Cupcakes

Printable recipe
Printable recipe with picture

Cupcakes
3 cups (12 ¾ oz) all-purpose flour
1 tablespoon baking powder
½ teaspoon salt
1 cup (2 sticks) unsalted butter, room temperature
2 cups (14 oz) granulated sugar
4 eggs, room temperature
2 teaspoons pure vanilla extract
1 cup whole milk, room temperature

Apple Filling
2 ½ tablespoons unsalted butter
2 1/2 teaspoons cinnamon
1/3 cup granulated sugar
4 large apples, peeled, cored & diced small (I used Gala & Jonagold)

Vanilla Buttercream
1 ¼ cups (2 ½ sticks) unsalted butter, softened
2 ½ cups confectioners’ sugar, sifted
1/8 teaspoon salt
2 teaspoons vanilla extract
2 tablespoons heavy cream

Preheat oven to 350F. Line 24 cupcake tins with paper liners; set aside. Sift together the flour, baking powder, and salt. In the bowl of an electric mixer, cream the butter and sugar together on medium-high speed until light and fluffy, about 2 minutes. Beat in the eggs one at a time, mixing well and scraping down the sides of the bowl after each addition. Add the vanilla extract and mix well to combine. Add in the dry ingredients alternately with the milk, beginning and ending with the dry ingredients. Stir until just combined.

Fill the cupcake liners ½-2/3 full.  You should have several cups of extra batter–set it aside. Bake until golden and a toothpick inserted in the center comes out clean, about 18 to 22 minutes. Remove from the oven and allow to cool for 5 minutes in the pans. Transfer to wire racks to cool completely before assembling.  Fill eight cupcake tins with liners and fill with the remaining batter and bake and cool as before.

For the filling, heat butter in a medium skillet over medium-high heat. Add the cinnamon and sugar and cook for a minute, until the mixture begins to bubble. Lower the heat to medium and stir in the apples. Mix well. Cook until the apples are somewhat tender, about 10 minutes. Remove from heat and let cool.

While the apple mixture is cooling, use the cone method to remove a chunk from the center of each cupcake, making sure to leave a rim around the top of the cupcake. Fill the holes with the cooled apple mixture.

For the frosting, beat the butter at medium-high speed until smooth, about 20 seconds. Add confectioners’ sugar and salt; beat at medium-low speed until most of the sugar is moistened, about 45 seconds. Scrape down the bowl and beat at medium speed until mixture is fully combined.  Scrape bowl, add vanilla and heavy cream, and beat at medium speed until incorporated, about 10 seconds. Then increase the speed to medium-high and beat until light and fluffy, about 4 minutes, scraping down bowl once or twice.

To decorate, top each cupcake with a swirl of vanilla buttercream; careful not to hide the lovely apples.

Recipe source: adapted from Annie’s Eats, as seen on Cooking with Moxie

Couldn’t resist sharing this photo of my sister eating a cupcake…

To check out all the other great Group C SRC recipes this month, click the linky man below!

Apple Pie Cupcakes

Mocha-Frosted Kahlua Brownies


Happy Valentine’s Day!  Do you have any special plans?  Dennis and I are finishing up the first cycle in the 17 Day Diet, so our celebration is going to include some very healthy and delicious food, and NO SUGAR.  I know, right?  Yes, this is still Veronica’s Cornucopia, and yes, I just said I will not be eating sugar on Valentine’s Day, nor serving it to my Valentine.  What is the world coming to? ;)

Well, despite us not partaking of any sugar (don’t worry, I do have a stevia-sweetened chocolate treat planned, so we will not be totally deprived), I do have a fabulous sugary treat to share today.  I know I’m sharing it a bit late for you to actually make it for the holiday, but I can’t just post another soup recipe–that is just way too unromantic, right?  Nope, it’s gotta be chocolate today.

I’ve been making this recipe for years, and in fact, have posted it on my blog before along with two other brownie recipes, but despite the number of times I’ve made it, I never had a decent picture until now.  (The brownies always disappeared before I got a chance to give them a photo shoot!)  And now that I do, I’m giving these brownies the individual post they deserve.

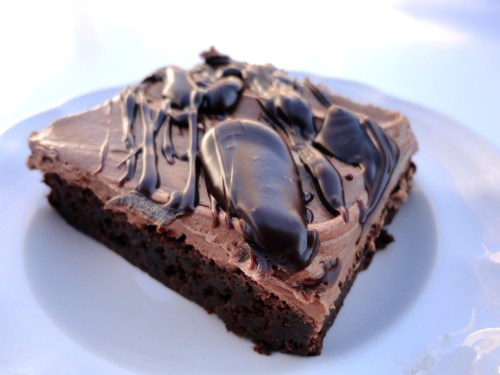
This is my own creation that I first started making when my sister opened her shop in 2008.  I used to sell my baked goods there in the beginning and these babies were best sellers.  It didn’t matter what other delicious treats I brought along with them, these always went first.  They are oh-so mocha-licious, over-the-top, decadent, rich treats.  Apparently you don’t even have to like coffee to love these, because my husband, who shivers at the mention of coffee, goes crazy for these brownies.  But if you do like coffee, and chocolate, and like them together, oh boy you gotta make these. Just do it.

Mocha-Frosted Kahlua Brownies

Printable recipe
Printable recipe with picture

Brownies
1 box fudge brownie mix
2 eggs
1 stick (1/2 cup) butter, melted
1/4 cup Kahlua (I make my own with this recipe)

Frosting
2 tablespoons Kahlua
1 tablespoon instant coffee crystals
1 cup semi-sweet chocolate chips
2 sticks (1 cup) butter, softened

Ganache
1/4 cup heavy cream
2 ounces semisweet chocolate chips

Make the brownies: mix up everything, spread in a 9×13 pan (grease the bottom only) and bake at 350 for however long the box says. Don’t overbake unless you like dry brownies. Cool COMPLETELY before frosting.

Make the frosting: Microwave the Kahlua for 30 seconds or until boiling (I use a glass 1-cup measuring cup and fill it 1/2 way to the 1/4 cup line). Stir in the instant coffee until dissolved, and place in the freezer to cool. Melt the chocolate in the microwave for 1 minute, stir and then give it another 30 seconds, stirring again. It should be melted but if not, continue this cycle in 30 second intervals.  Be careful not to overheat it.  Once smooth, set aside to cool. Cream the butter then beat in the cooled chocolate. Last, add the coffee mixture and beat it until everything is incorporated, scraping down sides of bowl. Spread over the cooled brownies.

Make the ganache: place the chocolate and heavy cream in a small microwave-safe bowl. Heat for 1 minute at 50% power and stir. The mixture should turn dark and shiny but you will probably need to return the bowl to the microwave for another 5-10 seconds or more to get it fully melted together. Be careful not to overheat, just warm it enough to get the chocolate and cream to emulsify completely.  If your mixture is warm to the touch, allow to cool to room temperature and then drizzle over the top of the brownies before cutting and serving.

Chocolate Decadence


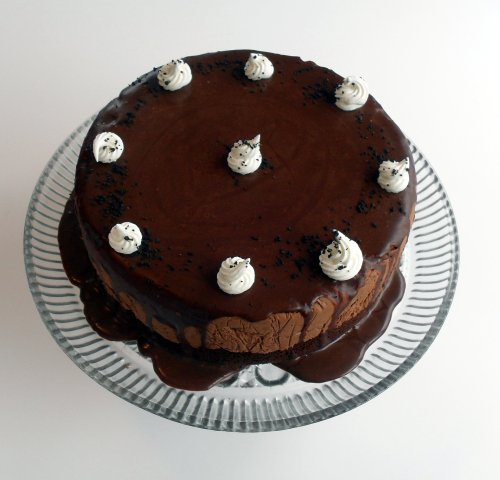
This is a dessert served on the Carnival Cruise ships (or at least it used to be in the late 90s), which I have made several times for my Mother as her birthday cake.  It is one of her favorite cakes, right up there with THE Mocha Crunch Cake, and just as rich…and decadent.  They aren’t kidding when they named this dessert, it really is chocolate decadence.  No better way to describe it.
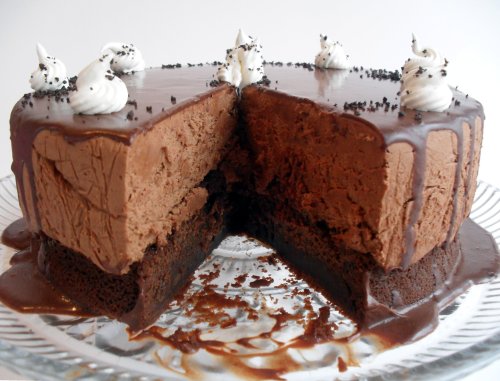
I originally made this according to their recipe, which is actually broken up into parts, referring to basic recipes in the “Chef’s Notes” in the back of the Carnival Creations cookbook for everything but the mousse layer.  The cake consists of four recipes all combined to make one dessert: the cake layer, the mousse layer, the thin ganache layer, and the strawberry sauce.  I felt that the chocolate sponge cake they used was much too dry for the dessert, and lacked in chocolate flavor since it contained only a few tablespoons of the good stuff.  So I replaced it with my own simple one-bowl deep chocolate cake layer and was pleased with the result.  It’s my first attempt at my own cake recipe and while it’s probably not perfect, it was perfect for this dessert.  Moist, rich and fudgy, nicely complementing the rich rum-infused chocolate mousse.
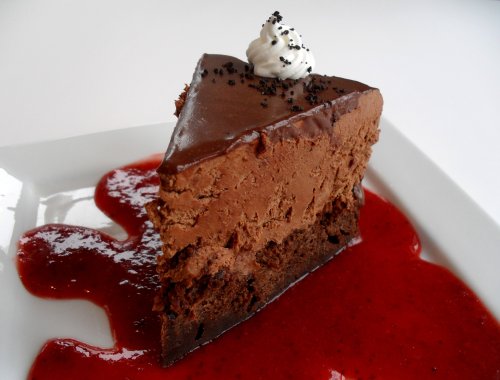
I stuck with the recipe for the mousse, as that was always lovely and really is the star of the dessert.  It firms up in the fridge and when you take a bite, it’s akin to eating a lightly textured truffle with cake underneath.  Superb.  My middle sister says it almost seems like you’re eating candy rather than cake but I say…it’s the best of both worlds!

When it came to the ganache layer, I considered making a real ganache, using heavy cream, but realized that since this dessert is served from the refrigerator and real ganache gets rock hard when chilled, it would be prudent to stick with this thinner ganache (or what I’ll now call a chocolate sauce) which thickens a little in the fridge but it still nice and soft when you cut into it.

As for the strawberry sauce, their recipe doesn’t make nearly enough (individual tastes may vary, but my family enjoyed having a large puddle of sauce on their plate beneath the small slices I served.  Although the cake is wonderful alone, every bite seems improved when accompanied by a good dose of strawberry sauce!) and I wanted to use a bag of frozen strawberries I had in the freezer rather than buy fresh out of season, so I made my own recipe.  You can use any recipe you like for the sauce, but if you want to use mine, you can click the link to it below.

This cake went over very well with my family.  Although my Mom has always liked it, even in the days when I made it with the dry sponge cake underneath, the rest of my family never got very excited about it until I replaced the cake this time.  Apparently that was the only change it needed, besides the increased amount of sauce.  My little sister usually prefers citrus cakes (preferably unfrosted), but she proclaimed this “the best chocolate cake I’ve ever had.”  I have to admit, I felt a little piqued at this since her devotion previously belonged to my beloved Mocha Crunch Cake, the cake I prize most…but I got over it because ultimately she still giving high praise to something I created.  I’ll take it. :)

The recipe is a bit time-consuming since there are so many parts, but you can pace yourself and make the sauce several days in advance, the cake the day before (wrapping it in plastic wrap and refrigerating in the mean time), and since the cake needs to sit in the fridge overnight after you make the mousse and place the cake on top (which will later be flipped over), you can wait until the next day to make the ganache if you want.  Take it little by little and it won’t seem so overwhelming.

I hope you give this one a try for a special occasion–it is worth the effort and sure to impress!

Chocolate Decadence

Printable recipe
Printable recipe with picture

Cake
1 cup all-purpose flour
1 cup sugar
½ cup cocoa powder
1 teaspoon baking powder
½ teaspoon salt
1 cup milk (I used coconut milk beverage)
¼ cup vegetable or canola oil
¼ cup warm water
1 egg
1 teaspoon vanilla

Mousse
1 lb. semisweet chocolate, chopped
2 tablespoons heavy whipping cream
6 tablespoons unsalted butter, softened
¼ cup Myers rum
6 egg yolks
½ cup granulated sugar
1 ½ cups heavy whipping cream

Chocolate Sauce
1/3 cup whole milk
3 ounces semisweet chocolate, chopped (about 1/2 cup chips)
1 teaspoon butter, softened

For serving:
Strawberry Sauce
Whipped Cream

Make the cake: Sift dry ingredients into a bowl, stir, and then add the remaining ingredients. Beat with a whisk until smooth, scraping down bowl. Pour into a greased and floured round 8” pan. Bake at 350 for 40 minutes or until tester inserted in center comes out clean or with a few moist crumbs. Cool five minutes on rack in pan, then remove from pan to cool completely, about 1-2 hours.

Make the mousse*: gently melt semisweet chocolate in a double boiler or microwave; stir in whipping cream. Cool. When cool enough that butter will not melt, beat in butter. Stir in rum. In large bowl beat egg yolks and sugar on high speed for 5 minutes or until very light; fold into chocolate mixture. In large bowl beat whipping cream until soft peaks form; fold into chocolate mixture. Line an 8” round baking pan with enough plastic wrap that it comes over the sides; spread mousse into pan. Place cake top side down on top of the mousse and press down to make sure that every part of the cake is in contact with the mousse and that the top is flat. Cover with plastic wrap and refrigerate overnight.

Make the chocolate sauce: Place the chocolate in a food processor or blender. Heat the milk until steaming hot, then turn on the food processor and, while running, pour the hot milk through the feed tube. Blend until smooth and allow to cool.

To serve: Place cake plate upside down on top of the cake, then flip over. Lift the cake pan off the cake (you may have to wiggle it or have someone hold down on the plastic wrap “handles” while you lift the pan).  Remove plastic wrap; spread chocolate sauce over the top and refrigerate for at least ten minutes. Cut into 16 slices; serve with a dollop of whipped cream and strawberry sauce.

*Veronica’s note: I only make this cake once every three or so years, so I can’t recall my previous experiences with the mousse very well, but this time I had problems with the mixture wanting to get too thick every time I let it sit so I could beat eggs or beat whipped cream. To soften it back up before adding those elements, I just rebeat it with the same hand-held mixer I had just used on the eggs or whipped cream, then folded them in. I’m not sure if this is usual or if I overheated my chocolate (which can make chocolate thicker if it doesn’t altogether seize up) so I wanted to mention it just in case others had this difficulty. It is surmountable so do not despair! :)

Per serving (without sauce or whipped cream): 473 calories; 30.5 g fat; 50.5 g carb; 3.2 g fiber; 5 g protein

2 tablespoons strawberry sauce: 42 calories; 0 g fat; 11 g carb; .6 g fiber; .1 g protein

Recipe source: cake and strawberry sauce recipes by Veronica Miller; mousse recipe, dessert concept, and chocolate sauce adapted from Carnival Creations.