RSS Feed

Tag Archives: prize winning

Award-Winning Pumpkin Bread

Posted on

I baked this bread for the first time in 2010 to enter into the state fair pumpkin bread competition.  I’d never tested it out first, I just decided I’d bake it and enter it, and it won a third place ribbon so I figured it must be good.  I never baked it again until last week so I just now, over three years later, got to taste the bread I’d won a ribbon for.  Yes, I know, I’m a wild and crazy kind of gal. :)

And it’s SO GOOD!  Sorry for yelling, but I CAN’T CONTROL THE VOLUME OF MY VOICE WHEN SOMETHING IS THIS GOOD!  It’s really good.  The flavor is great–sweet, pumpkin-y, and perfectly spiced so that it’s not overly spicy, but just enough to compliment the pumpkin flavor without overwhelming it.  But it’s more the texture that captivates me.  It’s incredibly tender and almost delicate, but not enough so that you’d mistake it for a cake.  So crazy moist!  I just am in love with the texture of this bread and wish I could replicate it in every sweet bread and muffin possible.  WHY DID THE JUDGES ONLY GIVE ME THIRD PLACE?  Because they are even more wild and crazy than I am, obviously.

Pumpkin Spice Bread

Printable recipe
Printable recipe with picture

1 cup (8 1/4 oz) canned pumpkin*
1 1/2 cups (10 1/2 oz) granulated sugar
1/2 cup (4 1/8 oz) vegetable oil
1/2 cup (4 oz) water
2 large eggs
1 3/4 cups (7 1/2 oz) all-purpose flour
1 teaspoon baking soda
1 teaspoon cinnamon
1/2 teaspoon salt
1/2 teaspoon baking powder
1/4 teaspoon nutmeg
1/4 teaspoon ground cloves

Preheat oven to 350F. In a large mixing bowl, combine pumpkin, sugar, vegetable oil, water, and eggs. Whisk until well mixed. Measure the flour, baking soda, cinnamon, salt, baking powder, nutmeg, and cloves into a separate bowl and stir until combined. Slowly add the dry ingredients to the pumpkin mixture, beating until smooth. Spray a 9×5* loaf pan and pour batter in, smoothing the top flat. Bake for 60-70 minutes or until a toothpick inserted in center comes out clean. Immediately remove from pan, cool completely on a wire rack, and wrap in plastic wrap. The bread gets better after a day so wait till the next day to cut it if you can stand it. :)

*If you’re doubling the recipe, you can use a 15 oz can of pumpkin – there’s no need to open a second can just to make up for the tiny bit it’s lacking for this recipe. It is just as good with the 15 oz can as it is with a full 2 cups or 16 1/2 oz.

**This makes a lot of batter so if you use a smaller pan, you’ll likely have to increase the baking time.

Looking for more award-winning recipes? I gotcha covered! Here are a few of my blue ribbon winners, and you can check out the rest here.

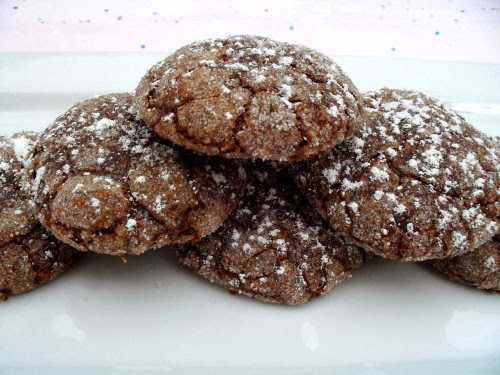
Almond Fudge Cookies (multiple blue ribbons)

Fresh Apple Cake

Red Velvet Cake

Sour Cream Pound Cake


This month my Secret Recipe Club assignment was Making Memories,  and boy did I have a lot of fun searching Erin’s blog for a recipe I wanted to make.  It wasn’t that a recipe was hard to find, it was that there were so many I wanted to make!  Hers is the kind of blog you can just keep scrolling and scrolling though because it gets more and more addictive the more you read.  She has such fun things, like Booger Pie (I want to make this just to see the reactions I get when I ask people if they want some Booger Pie-lol), Texas Chicken Brittle, Pepperoni Pizza Crescent Rolls, and Unicorn Poop Cookies (something I’ve been wanting to make for months!! I’m enthralled with these cookies!).  Needless to say, it was harder to find recipes that I didn’t want to make.

When I found the sour cream pound cake, I knew I’d hit pay dirt.  I had signed up for the pound cake competition at the fair this year and I had been tossing a few recipe ideas around, but hadn’t settled on anything yet.  I figured I’d kill two birds with one stone and choose Erin’s recipe for The Secret Recipe Club, then turn it into the state fair for judging.

558726_10151181371686480_1016180525_n

And I got 3rd place!  I made it look pretty ugly, but I guess taste trumps prettiness.  Sweet!  I did get my judging papers yesterday and the only negative thing they had to say was that I displayed it wrong, with the bottom-side-up.  Well, that’s because I didn’t think bundt pans were allowed for the pound cake category (I know now that they are) and this is the kind of cake that doesn’t dome on top so it’s not pretty to display top-side-up.  I also forgot the vanilla in the recipe so I wonder if I enter this again next year with the vanilla and put it in a bundt pan if it will get a higher score.  I might have to try it. :)

I got a white ribbon two years ago for my Condensed Milk Pound Cake, but honestly, I think this recipe trumps it.  The sour cream makes the texture so velvety soft and the flavor is just so good.  Pretty sure this is my favorite pound cake I’ve ever had so far!  Thanks for sharing the great recipe, Erin!

Sour Cream Pound Cake

Printable recipe
Printable recipe with picture

2 sticks (1/2 lb) butter
3 cups (1 lb 5 oz) sugar
1 cup (8 oz) sour cream
3 cups (12 ¾ oz) flour
1/2 tsp. baking soda
¼ tsp salt
6 large eggs
1 teaspoon vanilla

Vanilla Bean Glaze
1 cup powdered sugar
¼ cup heavy cream
1 teaspoon vanilla
1 vanilla bean

Preheat over to 325F and grease and flour a bundt or tube pan or two large 9″x5″ loaf pans (for loaf pans, preheat oven to 350F). Cream together butter and sugar. Add sour cream and mix.  Sift together flour, baking soda. and salt.  Alternately add flour mixture and eggs (beating well after each addition).  Add vanilla and beat to combine. Pour into prepared pan(s).

Bake 1 hour 20 minutes for bundt or tube pan, or 45 minutes for loaf pans, or until toothpick inserted in center comes out clean. Invert onto cooling rack(s) and cool completely.

Whisk the cream into the powdered sugar, then mix in the vanilla and the seeds from the vanilla bean (split the bean and scrape the seeds out).  Stir in additional cream as needed for desired consistency. Drizzle over the cooled cake(s).

Note: 1 tablespoon vanilla bean paste may be substituted for the vanilla and vanilla bean.

Recipe source: Paula Deen, as seen on Making Memories


*Note: I now have an index for all my state fair posts, current and past years, here.

Suzie’s Next Day Chili

Posted on

Thank you guys for sticking with me through my “no recipes” week! I had a lot of fun with it, especially reading all your comments about the pigs you’d like to make fly on Danielle’s Flying Pig. If you didn’t catch that post, you might want to check it out–there is a giveaway for one of Danielle’s kumquat bath & body sets on it, and the deadline for entry is this Thursday. (Update: this giveaway is now closed. Congrats to Ken!)

Now, let’s get back to the recipes, shall we? I’ve got enough saved up that I’m going to be sharing all OLD recipes that I’ve been saving especially for December, which means, you guessed it, LOTS of sweets. Which is why I’m starting off with a savory recipe, to stabilize your blood sugar in preparation for all the sweetness that is soon to come your way from my blog. :)

“You know I luvs you…I have never, ever shared this recipe with anyone!! I’ve been making it for about 10 years now.  :)”

This was the note at the end of the recipe my friend, Suzie, emailed me for her Next Day Chili.  She’s been holding an annual chili cook-off in her neighborhood for the last five years and her chili has won four years out of those five.  She doesn’t allow herself to win the prize since it’s her contest, but hers is almost always voted number one!  She has kept the recipe secret, telling everyone that if they could guess some of the secret ingredients she used, she would share it, but no one ever has.  Knowing all this, I still had the audacity to ask for the recipe.  And I was pleasantly surprised when she obliged me!  (I guess I’m just irresistible, right? LOL!)

I was so excited to get my hands on such a precious recipe, and promised I wouldn’t share it on my blog, thinking she’d want me to keep the secret recipe a secret.  But she surprised me again by granting me permission to share it here.  WOW!  Thank you, Suzie!  Don’t we feel special?! :)

Usually, I like my chili with lots of beans and veggies, so I was actually pretty nervous to make this since it only has one can of beans and a scant 1/2 cup of onion for veggies.  When a friend shares a recipe with you that you’ve never tried, do you get nervous that you won’t like it?  I’m probably ridiculous, but I feel almost obligated to like a recipe that comes highly recommended from a friend, and sometimes put off making it just for the fear that I won’t like it and will have to disappoint the friend when I tell them.  But not this time!  I was nervous, but I wasn’t going to wait–this recipe is special.

Well, I needn’t have worried.  This chili is spectacular!  Spicy, hearty, meaty, with a wonderful & unique flavor. Once you scan the ingredients, you’ll see why it doesn’t taste like any other chili.  I bet you’ve never seen a chili recipe with bacon, chorizo, red wine vinegar, Worcestershire, sage, or maple syrup in it!   My husband loved it and ate most of the batch by himself.  In fact, he told me this was his favorite of any chili I’ve ever made!  This is also the only chili that Suzie’s husband will eat so I’d say this is some real man-pleasin’ chili.

Thank you, Suzie, for sharing your wonderful recipe with us!  Rock on, Chili Queen. :)

Suzie’s Next Day Chili

Printable recipe
Printable recipe with picture

3 lbs. good ground beef
1 lb. chorizo
1/2 lb. bacon
1 tablespoon bacon grease
1 can Bush’s mild chili beans, undrained
1/2 cup diced white onion
2 tablespoons minced garlic
2 tablespoons ground cumin
1 tablespoon dried oregano
2 tablespoons paprika
3 tablespoons ground black pepper
1 1/2 tablespoons kosher salt (or 2 1/4 teaspoons table salt)
1 teaspoon dried sage
2 tablespoons red wine vinegar
2 tablespoons Worcestershire sauce
3-5 tablespoons hot sauce (depending on your taste)
1/2 cup chili powder (more if desired)
1 teaspoon dried cilantro (or 1 tablespoon fresh, chopped)
2 tablespoons real maple syrup
1-2 cups chicken or beef broth (or mix 1/2 and 1/2), depending on desired thickness
1 (6 oz.) can of tomato paste
1 (46 oz) can tomato juice
Red pepper flakes, to taste

Brown beef and chorizo. Drain grease, cover and set aside. Slice 1/2 lb. bacon into 1 inch pieces. Cook bacon until crisp, set aside on paper towels to drain off excess fat. Take 1 tablespoon of the bacon grease and add to the burger/chorizo mixture. Add all remaining ingredients, except bacon, to a large pot. Simmer for 3 hours, stirring occasionally and tasting to adjust salt, pepper, chili powder and red pepper flakes to taste. Let cool for an hour or so and then refrigerate overnight. Refrigerate the bacon separately.  Simmer again the next day for 2-3 hours, adding bacon the last hour. It’s now ready to serve.

Suzie recommends serving with homemade cornbread, so I served mine with Lighter Northern Cornbread.  I also have a southern-style Homestead Cornbread recipe if you like yours without sugar and flour.

Recipe source: Suzie S.