RSS Feed

Category Archives: My Favorites

Slow Cooker Moroccan Turkey Stew


Rhonda from Dining Alone has a “Best Thing I Ever Made” feature where she highlights a favorite recipe each week from her archives. In October, she shared this stew as the best soup she’s ever made. All I had to do was take one look at her totally delicious picture (please, go look, and grab a napkin to catch the drool) to know I had to make it.

My sister’s best friend, Margo, married a Moroccan man (that’s them up there with the Twinkies during a Toot and Twinkies game night…but that’s another story for a different day) and she introduced me to their cuisine after she learned to cook it from her sister-in-law. Her Moroccan Chicken Couscous is so so delicious, and this stew has very similar ingredients so I was fairly certain I would love it.

Love it? No, I’m obsessed with it. If this soup were a person, it would have filed a restraining order on me because I stalked it for three nights in a row, made inappropriate noises while eating it, and almost cried when it was gone. I might have separation anxiety. Moroccan Turkey Stew, please don’t leave me! Come back!

So anyway, you should try this stew.  And please invite me over for dinner when you do.  I promise I’ll keep the inappropriate noises to a minimum.

Slow Cooker Moroccan Turkey Stew

Printable recipe
Printable recipe with picture

1 teaspoon ground allspice
Kosher salt
4 skinless, bone-in turkey thighs (about 4 pounds)*
1/2 medium butternut squash, cut into 2-inch chunks
2 15.5-ounce cans chickpeas, drained and rinsed
1 28-ounce can whole peeled tomatoes with juices, broken up
1 cup dried apricots
1/2 cup golden raisins
8 medium carrots, cut into 11/2-inch pieces
3 medium red onions, halved and cut into wedges
2 whole dried red chiles
1/2 lemon
2 cups fresh cilantro, including leaves and some stems
1 cup fresh parsley
1 clove garlic, smashed
1/2 teaspoon ground cumin
1/2 cup extra-virgin olive oil

*You can also use bone-in chicken thighs, which is what I opted to use since I couldn’t find turkey legs.

Combine the allspice and 3 teaspoons salt in a small bowl. Season the turkey thighs with half the salt mixture in a 5-quart slow cooker.

Toss the squash, chickpeas, tomatoes, apricots, raisins, carrots, onions and chiles with the remaining spiced salt. Pour the vegetables over the turkey (the cooker will be full; arrange the mixture so the lid fits.  And don’t be like me and think you can fit extra veg in because you can’t–trust me.). Cover and cook on high for 6 hours or on low for 7 to 8 hours.

Spoon the vegetables and broth into bowls. Remove and discard the turkey bones and place the meat on top of the vegetables.

Juice the lemon; pulse with the cilantro, parsley, garlic, cumin and 1 teaspoon salt in a food processor. Add the oil and process until smooth. Serve the stew in bowls; drizzle with the cilantro sauce.

*Veronica’s note: your cilantro sauce will probably not be as green as mine (compare it with Rhonda’s picture) because I didn’t measure it and probably used twice as much as I was supposed to.  I didn’t care, it was still phenomenal.

Recipe source: Food Network, as seen on Dining Alone

***

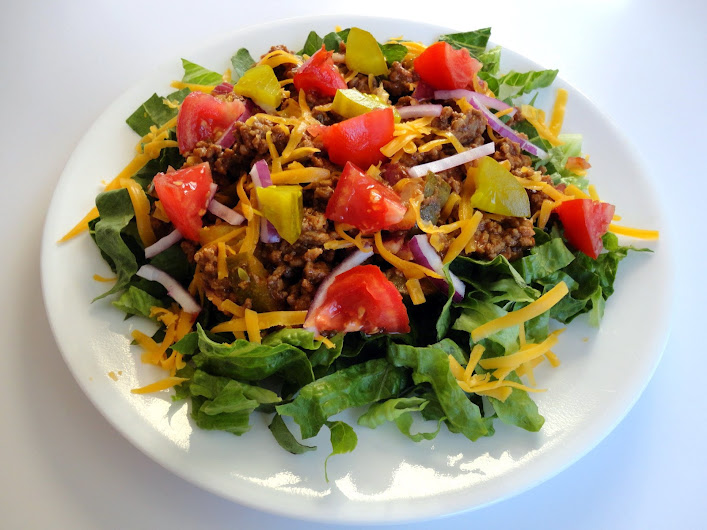
Disclaimer: I know I said I wasn’t going to apologize for my bad photos, but I do want to explain that I took these with zero natural light–all I had was the light from the light bulb overhead in the bedroom because for some reason, that is the brightest room in our house.  So I think they’re pretty good, considering.  Except for the swampy green blobs.  That’s not cool, but hey, this is real life up in my kitchen and swampy green blobs happen.

Advertisement

Southern Shrimp & Cheese Grits

Posted on

Honestly I never intended to share this recipe, not because it’s not good (it’s amazeballs), but because when I made it, I was a MySpace blogger and the friend I got it from had already posted it on her own MySpace blog.  We had the same group of foodie friends that all read each others blogs, so it seemed redundant to repost the recipe.  Now I wish I had, as I now forget exactly how I did it.  I like to give very specific measurements & instructions, but Cheryl gave measurements like, “a mess of shrimp.”  You could never tell she’s from the south, right?  :)  I kept the instructions in her voice, but did change a few things for clarity.

To give you an idea of how good this dish is, Dennis, who refuses to eat shrimp, ate an entire plate and enjoyed it.  He has only eaten shrimp in my presence on one other occasion (on this pizza, which is also amazeballs, if I do say so myself) and he told me he would never do it again unless it was these shrimp ‘n grits. I think that qualifies this as life-changing. :)

Southern Shrimp & Cheese Grits

Printable recipe
Printable recipe with picture

5 slices of bacon
1 mess of fresh shrimp (I used a bag of frozen shrimp, thawed)
4-8 oz. mushrooms, sliced
3 scallions, chopped
3 garlic gloves
1 teaspoon red pepper flakes (optional)
Fresh cracked pepper
Salt
2 tablespoons flour (for roux)
A few slices of ham

2 cups of coarse home-style grits, plus ingredients called for on box
2 cups shredded cheddar cheese, plus more for garnish

Start off by frying your bacon. While that’s going, clean and peel your fresh shrimp and set them aside.

Remove the bacon from the pan and set it aside. Drain all but 2-3 tablespoons of bacon grease from the pan, and add your mushrooms.  Saute for a few minutes until starting to soften, then add the shrimp, scallions, garlic, and red pepper flakes, if using.

While that cooks, in another pot start your grits by the directions given on the bag.  Cook until thick, stirring constantly (nobody likes lumpy grits-lol).  Stir in the cheese, and set aside.

Meanwhile lets gets back to the Shrimp! After shrimp is done  (it will turn pink), season with salt and pepper, then take it out and set it aside. Now we are starting on the roux (gravy).  In the same pan add your flour then add your water and stir till thickened.  I do this using a wire whisk or wooden spoon.  Season with salt and pepper.

Dice up your ham and break up your cooked bacon.  I guess my mixture was watery (I remember adding the mushrooms to the skillet at the same time as the shrimp, and I think that prevented the water from them evaporating) and I drained it and added the ham, cooked bacon, and red pepper flakes while it was in the colander.  If you follow these updated instructions, hopefully you won’t have to drain yours.


Add your grits to a plate, put your sautéed shrimp & mushrooms, ham, mushrooms, on top of grits then spoon gravy on top and top with shredded cheddar cheese.  Enjoy!

Recipe source: Cheryl D.

Cheeseburger Salad

Posted on

Usually when I want to enjoy a cheeseburger in salad form, I make a hamburger salad and just top it with some shredded cheddar.  But I knew I had to try this Pampered Chef version when PW featured it a while back.  So glad I did because it’s so much better than my old stand-by!  I love how the sauce is mixed into the meat so that you don’t need dressing.  Saucy, flavorful meat, crisp lettuce, pickles & onions, juicy tomatoes, cheddar cheese–this salad just can’t be beat!

OK, now Pampered Chef and PW get all crazy and actually turn hamburger buns into croutons by baking them.  So cute, right?  But grizzle, puh-lease!  I may be crazy in certain ways, like adding way too much butter and sugar to my desserts to where they are literally swimming in evil, but I’m not the kind of crazy that likes to bake my own croutons in the summer for a simple salad.  If I’m turning on my oven, it’s for something sweet, not for croutons.  If you’re not my kind of crazy, you might want to just go to the original recipe for the crouton instructions.  As for me, Texas Toast croutons suit my salad just fine.

But, truth be told, this is the way I prefer to eat my cheeseburger salad:

Sans croutons.  I mean, the reason I like to turn hamburgers and cheeseburgers into salad is to get away from the bread because it gets in my way, and I like the veggies way more than the bread.  Plus, I get enough carbs from sugar. :)

Cheeseburger Salad

Printable recipe
Printable recipe with picture

2 lbs. ground beef
1 ¼ cups ketchup
3 tablespoons prepared yellow mustard
1 tablespoon Worcestershire sauce
2 small red onions, one sliced into rings, the other diced
8 dill pickle spears, sliced
4 Roma tomatoes, quartered and sliced
8 oz. cheddar cheese, shredded
16 cups chopped Romaine lettuce (about 2 heads)
Texas Toast croutons (optional)

Cook the ground beef in a large skillet over medium heat. Remove from heat, drain the fat, and stir in the ketchup, mustard, and Worcestershire sauce. Add the diced onions and pickles (you can set some aside for garnish if you like). and stir to combine. Put 2 cups of lettuce on each plate, then divide the burger mixture between them. Top with cheese, tomato, onions and pickles if you set some aside, and croutons if desired.

Makes 8 servings.

Recipe source: adapted from The Pampered Chef

Lemon-Basil Peach Dumplings

Posted on

So this recipe is totally crazy.  Just wanted to warn you before you got too involved and the list of ingredients sent you reeling.  I’m just going to put it out there.  Right here and now.

This recipe has two whole sticks of butter in it.  And 1 1/2 cups of sugar.  Both are poured/sprinkled over only sixteen itty bitty peach “dumplings” which are really only slices of peach wrapped in crescent roll dough.  And you know what else I  poured over the top along with the butter and sugar?  Sprite.  Yup.

But here’s the deal.  These dumplings are so good and totally worth the butt dimples you will get after the little artery-cloggers work their way through your system and your body decides to skip the digesting part and just add them straight to your butt.

I made this for a cooking challenge on Facebook to make a recipe using fresh peaches, Sprite or 7-Up, and fresh basil.  So this is what I came up with, based on a cooky Midwestern recipe for apple dumplings (see it on PW’s blog here).

I still have yet to make the original version, but now I know I have to come fall because you would not believe how good this summery version is.  Sweet, yes, but not too sweet, incredibly.  And the juicy peach is the star, somehow not overpowered by the lemon & basil*, or all that sugar and butter. When I took them out of the oven, the liquid was pretty sloshy but thickened up and seemed to absorb a little more after 10-15 minutes, making the dumplings crispy with sugar on top and gooey on the bottom, but definitely not soggy, which is what I had feared.

They are best warm, but I served the leftovers (after Dennis and I had our way with a few) at room temperature to my family after a barbecue and they went crazy for them.  Even my sister, Danielle, who refuses to eat my (beloved) pumpkin gooey butter cake because it has two sticks of butter in it (light weight!), and generally only takes a few bites of my desserts, not only ate one ( a whole one!) but also took one home with her for later. Miracle!

*The fried basil does add a nice color and the mildest of flavor, which I thought was perfect, but if you’re really hoping for a huge pop of basil, I’d double (or more) what the recipe calls for.  Or just make extra to munch on–they are even crispier than potato chips!

Fried basil is so cool-it gets transparent and shatteringly crisp. Would also make a great garnish on soup!

While making these, I admit I cringed the whole time I was pouring and sprinkling sugar over the top.  I tried to stop myself several times.  How could sixteen little bitty teeny weeny dumplings need that much butter and sugar?!  But I had to go with the original measurements in the end, and I’m glad I did.  Because they are perfect.  Besides, divided between 16 servings, it’s really not too bad and actually lower in fat/sugar than most of the cakes I make.  Or at least, that’s what I was telling myself when I helped myself to seconds. >:)

Lemon-Basil Peach Dumplings

Printable recipe
Printable recipe with picture

3 medium fresh peaches
2 (8 oz) cans refrigerated crescent roll dough
1 lemon
2 sticks unsalted butter
1 ½ cups granulated sugar
1 cup Sprite
½ cup fresh basil leaves (not packed)
Coconut or vegetable oil for frying

Fill a pot that is big enough to fit three peaches with water high enough to cover them. Bring to a boil. Meanwhile, fill a large bowl with ice and water to have ready to cool the peaches. When the water is boiling, add the peaches and boil for 1-2 minutes, until the skin is easy to remove. Remove with a slotted spoon and add to ice water. Once they are cool to the touch, take them out to peel off the skins. If the skins don’t peel easily, boil again for a minute.

Preheat oven to 350F. Slice the peeled peaches in half around the pit, separate the halves and remove the pit. Slice each half into thirds. You will only need 16 of the slices so feel free to nibble on two of them as you continue with the recipe.

Butter a 9×13 baking dish. Wrap each peach slice in a crescent roll and place in prepared dish. Grate the zest from the lemon and sprinkle over the dumplings (reserve the lemon), then sprinkle 1 cup of the sugar over the top. Melt the butter and pour over the top, then sprinkle the remaining sugar over. Juice the reserved lemon, then add the juice into the Sprite.  Pour over everything, then bake for 40 minutes.

Meanwhile, heat ½ inch of coconut or vegetable oil in a small skillet or saucepan to 360F. If you don’t have a thermometer, you can test it by throwing a basil leaf in.  If it is ready it will pop and spatter big time so be ready to cover it with a splatter screen or jump away. When the oil is ready, throw the basil in the hot oil, then IMMEDIATELY cover with the splatter screen. Fry until crisp, then remove to a thick layer of paper towels to drain. Once cool to the touch, about a minute or two, crumble up with your fingers and set aside. The oil makes the basil stick to your fingers so just get as much off as you can.

Remove the dumplings from oven and sprinkle the fried, crushed basil over the top. Serve the dumplings warm with ice cream, spooning the sweet sauce from the pan over the top.

Tostada Pizzas

Posted on

These are an insanely quick & easy lunch, coming together in less than 5 minutes start to finish.  And so delicious, you will be amazed!

I was craving pizza but didn’t want to deal with rising dough or a hot oven on a sweaty summer day, so I came up with these when I spied the tostada shells on my counter.  You only need your broiler on in the oven for a couple minutes and you’ve got hot, melty, crispy pepperoni pizzas.  I bet these would be a huge hit with the kiddos, too.  Bonus for those with gluten sensitivity: they’re gluten-free! Score.

Tostada Pizzas

Printable recipe
Printable recipe with picture

You will need:
Tostada shells
Pizza sauce (here‘s a quick and easy recipe that requires no cooking)
Mozzarella cheese, shredded
Pepperoni
Other toppings of choice*

Line a baking sheet with foil and set aside. Spread a tablespoon of pizza sauce over each tostada shell, then sprinkle with cheese and toppings. Broil on high for 1-2 minutes, keeping the oven light on so you can remove them before they burn. They cook quickly so do keep an eye on them-mine took just a little over a minute to get melty and hot. Serve immediately.

*Be careful with adding too many veggies as they could water out and make the crispy tostada shells soggy.

A Veronica’s Cornucopia original

Zucchini Spaghetti

Posted on

**I apologize to subscribers for the weird “password protected” post that came to your inbox or feed early this morning!  It was me just being a spaz, but I’ve got this “top secret” recipe now set to public visibility instead of password protected.  Sorry to disappoint if you thought my zucchini spaghetti recipe must contain codes to reveal a huge conspiracy theory, but I hope you’ll find the delicious recipe is quite enough to get excited about in and of itself.  :) **

Have you been wondering what ever happened to the weight loss contract and the 17 Day Diet?  Join the club–I’m wondering too! :D  We did save a good amount of money with the contract, though we only actually stuck to the agreements made in it for like a week.  And we ended up with a bunch of emergencies (car stuff, etc.) that most of the money went toward.  We did much better with the 17 Day Diet and stuck with it for over a month, but soon after got to the third 17-day cycle, which allows for a wider range of foods, we cheated our way into widening the range to all foods, and in great abundance.  Soooo, I think I lost 15 pounds and gained most of it back.  Story of my adult life.  I pretty much diet half the year so I can eat like a pig the other half.  It kind of works for me.

Anyway, this “spaghetti” was the romantic Valentine’s Day dinner I made while we were on the first cycle of the 17 Day Diet, which allows for no starches except for fruit.  The lean meats allowed are minimal as well (turkey, chicken, and fish) and I was challenged to come up with a 17 Day Diet-friendly recipe that would be really delicious and impressive.  Debbi posted her version of Kalyn’s zucchini spaghetti and I knew I had a winner.  And wow, I was right!  This was the most delicious thing we ate during the entire diet, and I would even say it’s one of the most delicious meals I’ve eaten in my entire life.  The sauce is just spectacular (it would be great on real spaghetti, too) and the zucchini is perfect here.  I always have thought zucchini was a vegetable best suited to Italian seasonings and this recipe further proves it.   I can’t even tell you how much I love this dish!

A funny thing about the “spaghetti” strands.  The only julienne slicer I could find was this one, which also has three other cutting blades.  For some reason, I didn’t look at the owners manual and thought that the crinkle cutter was the julienne blade.  I was so frustrated with the slicer, thinking that it was just a poor product, because every time I “julienned” a zucchini, I had to go back and cut the strands apart because the stupid julienning blade was just cutting crinkle-cut slabs.  DUH!  Seriously, I didn’t figure out my mistake until just this week when I finally opened the owners manual and saw that there was another blade that I had missed.  The one for julienning veggies.  DOY.

If you don’t have a julienne cutter, The Pampered Chef has a julienne peeler for $10.50 that I’d recommend–it won’t take up a lot of space and does a fabulous job of julienning your veggies.  I got one and gave the other cutter to Goodwill because, well, you guys know I don’t even have room for my cake pans in this house, so I’m  not about to give up good space for a bulky cutting tool when I could just use Pampered Chef’s fabulous peeler!  Thanks, Tracy (my Pampered Chef consultant)!

Zucchini Spaghetti

Printable recipe
Printable recipe with picture

3 links low-fat turkey Italian sausage, hot or mild
2 tablespoons olive oil, divided
3 large cloves of garlic, minced + 4 more to season the oil
pinch hot pepper flakes (optional)
1 (14.5 oz.) can roasted diced tomatoes with juice
1 (8 oz) can tomato sauce
1 tablespoon dried basil
1 teaspoon dried oregano
¼ teaspoon fennel seeds
2 medium sized zucchini (9-10 inches long)
salt and fresh ground black pepper to taste (for seasoning zucchini)
freshly grated Parmesan cheese for serving, if desired

Heat about 1 tablespoon olive oil in a heavy frying pan, then add turkey sausage, squeezed out of the links, and use a spatula to break the sausage apart and cook until it’s lightly browned, about 5 minutes. When the sausage is browned, add 3 cloves of minced garlic, and hot pepper flakes, if using. Stir together and let cook with the sausage about a minute, then add the tomatoes, tomato sauce, fennel, basil, and oregano. Turn heat down to low and let the sauce simmer while you prep the zucchini.

Use a julienne cutter to cut the zucchini into long spaghetti-like strands. (Cut off the ends, wash and dry the zucchini, and then cut into julienne strands. You can also do this with a knife if you’re patient.)

Heat about 1 tablespoon olive oil over high heat in a very large frying pan, add 3 whole garlic cloves and sauté until you can start to smell garlic, then remove garlic to another dish (you can discard it, but fried garlic cloves are delicious and you can add them to salad or even eat them straight!) Immediately add the zucchini strands to the hot pan and cook stirring a few times just until the zucchini is heated through, about 2 minutes. Season the cooked zucchini with salt and fresh ground black pepper to taste. Divide between 2-4 plates, then ladle sauce over the top. Serve hot, with freshly grated Parmesan cheese if desired.

Recipe source: adapted from Kalyn’s Kitchen, as seen on Debbi Does Dinner

Italian Roast Beef {crockpot recipe}

Posted on

This Italian roast beef was inspired by Tami’s comment on my banana pepper roast, telling me she did the same thing but added a packet of dry Italian dressing mix, and that it made great sandwiches.  Well, I’m all about making great things better, and all about sandwiches, so I decided to try it out.  And it is even better than the banana pepper roast. And it does make killer sandwiches. Thanks, Tami!

Just as with the banana pepper roast, there is a pleasant piquant flavor from the peppers and the acid in the brine and the slow cooking makes the roast ultra-tender.  The difference is that there’s even more flavor–garlic & onion and whatever else they put in those dressing mixes.  I have tried making my own Italian dressing mix but I really want it to be exactly like the store-bought ones and so far, no luck.  If you have one that’s close please let me know! I buy at least four of those packs a month (I make our Italian dressing with them, and things like parmesan garlic chicken) and I know it would be cheaper and probably healthier to make my own.

We ate the roast straight the first day (it’s so good with mashed or baked potatoes!), then made sandwiches with the leftovers.  I’ll include my idea for sandwiches too, because it was so good!  Can you tell I thought this roast was so good? ;)

Italian Roast Beef

Printable recipe
Printable recipe with picture

1 (5 lb) beef roast
1 (.7 oz) envelope dry Italian dressing mix
½ cup dehydrated red & green bell pepper (optional)
¼ cup dehydrated minced onion
1 (12 oz) jar banana pepper rings

Place beef roast in the bottom of a 6-quart crockpot. Sprinkle the dressing mix, red & green pepper (if using), and minced onion over it, then pour the jar of banana pepper rings over the top, juice and all. Cover and set to cook on low for 8 hours or on high for 4 hours.

Remove the roast onto a platter and shred with two forks. Return to the juices and mix well, then serve with mashed potatoes.

To make sandwiches, you’ll need:

Sandwich buns or rolls
Ranch dressing
Dried basil*
Italian roast beef, warmed
Fresh mozzarella or provolone cheese, thinly sliced
Tomatoes, thinly sliced
Other toppings of choice, such as shredded lettuce, sliced olives, chopped onion, etc.

To make sandwiches, split the buns and cover the insides with a generous smear of ranch dressing. Sprinkle with basil.*

*If you use fresh basil, add it along with the tomato at the end.

Doncha love those sweet Italian buns? ;)

Draining off as much juice as possible, put some roast beef on the bottom buns, then place a slice of mozzarella on top. Please slice your cheese thinner than this or you’ll have to practically burn the buns before it’s melted.  Learn from my mistakes.

Broil open-faced on high, the top buns ranch-side up, until cheese is melted, 1-2 minutes. If your cheese is thicker *ahem*, it may take up to five minutes and you will want to remove the top buns before the bottom so that they don’t burn.

Even after five minutes, the cheese was barely melted.  I have to show off the one I made when Dennis requested seconds.  I got the cheese much thinner, so it only took about a minute for it to melt and I didn’t have to remove the top bun before the bottom was done.  Look at this beautiful deliciousness!

Much better!  OK, once it’s melted, top it with a slice of tomato, another sprinkle of basil, and any other toppings you’d like.

Cover with the top bun and enjoy warm.

It’s 3 AM as I finish this blog, and I nearly forgot to do the drawing for the cookbook.  So without further ado….

Congratulations to Brandee Lake, you won P-Dub’s signed cookbook!

P.S. Some people were asking me why she’s called P-Dub.  Dude, it’s because she’s a straight up gangsta!  lol.  P is for Pioneer and Dub is short for the “double u” that Woman starts with.  And in my cousin Andrea’s comment, she gave me a gangster name so I can be hip like the Pioneer Woman.  You can now call me “V-Dawg.” My little sister gave me the name “Throwback Vrak,” which I LOVE, but that would require too much explaining in order for it to make sense.  So V-Dawg it is.  Until further notice.  Peace out, yo.

Black Bean & Butternut Squash Burritos

Posted on

Really, I don’t know what to tell you about these burritos.  They are fabulous.  And that sums it up.  Really, truly, seriously the best burritos I’ve ever made or eaten.  I have nothing else to tell you except that Dennis is losing his job.

WHAT?

Yeah, I know.  What a way to drop a bomb.  I guess I’m not good at breaking things gently.  Or very good at segues, apparently.  It’s something we’ve known about for several weeks and it’s something I’ve wanted to share, but how do you fit in personal information like that on a blog that usually only features recipes and reasons for thanksgiving?  So I figured I’d just fit it in where I could.

Burritos and unemployment.  Sure, it fits. :)

They no longer need him in the position he fills at his current job, and rather than move to a different department and take a pay cut and a position that would make him miserable, he accepted the soon-to-come lay-off.  He applied for a job with the state as a 911 emergency call-taker, which would be a pay raise for him, and something he would find fulfilling and rewarding.  He passed both his tests for the position with flying colors, and is scheduled for a “job information” session next week.  We’re not sure what that exactly means, but we think it’s a good sign that they’ve asked him to come back.

When our preacher says a prayer, many times he has thanked God for the doors he opens, and the doors he closes.  It is a good reminder to stay thankful not only for the good that God provides, but for things we perceive as bad as well.  In this case, the closed door may very well lead to a better future for us.

It is easy to become complacent when you can make ends meet, so it can be good to be forced out of your comfort zone to reach a little higher for  something that will allow you to provide better for your family.  In addition to some house repairs, I could really use a new car, because I’m not sure Baby will last much longer. (You can witness Baby in all her hooptie glory, and me in my Valley-girl glory, in this video.)  So this 911 job would be a step in a better direction for us!  We are hopeful, but we know that whatever may come, God will provide.

As for the burritos, really, there’s nothing else for me to say.  Best burritos ever.  I really hope you try them!

Black Bean & Butternut Squash Burritos

Roasting the squash and cooking the rice makes this a long process for a lunch. I recommend preparing these two things in advance, so that when you’re ready for lunch, you only have to proceed as the recipe directs: heat and eat!

Printable recipe
Printable recipe with picture

1 tablespoon canola oil
1 cup chopped onion
2 garlic cloves, minced
1 red pepper, chopped
1/2 teaspoon salt, or to taste
2 teaspoons ground cumin, or to taste
1/4 teaspoon cayenne pepper, or to taste
1 (15 oz) can black beans (about 1.5-2 cups cooked), drained and rinsed
1 1/2 cups cooked brown rice
1/2 of a medium butternut squash, peeled, cubed, & roasted*
1 cup (4 oz) shredded cheddar cheese
4 large/extra-large flour tortillas

Toppings of choice: avocado, salsa, sour cream, spinach/lettuce, cilantro, etc

In a large skillet over medium-low heat, add oil, onion, and minced garlic. Sauté for about 5 minutes, stirring frequently. Add the salt and seasonings and stir well. Add chopped red pepper, black beans, and cooked rice and sauté for another 10 minutes on low. Add the roasted butternut squash to the skillet and stir well.  You can mash the squash with a fork if some pieces are too large. Add the cheese and heat another couple minutes.

Scoop bean filling onto tortillas along with desired toppings. Wrap and serve. Leftover filling can be reheated the next day for lunch in a wrap or as a salad topper.

*To roast the squash, preheat oven to 425F and line a rimmed baking sheet with tinfoil. Drizzle olive oil on squash and give a shake of salt and pepper. Coat with hands. Roast chopped butternut squash for 30-45 minutes (depending on the size of your cubes), or until tender.  I highly recommend using the second half of your butternut squash in Jenna’s Split Pea Soup. It is fantastic!

Recipe source: tweaked from Oh She Glows

Low-Carb Eggplant Parmesan with Fire-Roasted Tomato Sauce & Fried Garlic {gluten-free}

Posted on

Growing up, my Mom made an eggplant dish about once a year that was basically chopped up eggplant mixed with homemade marinara sauce, garnished with Parmesan cheese.  The only way I could swallow the evil stuff was to absolutely drown it in Parmesan–I’m pretty sure I used half a bottle of the grated cheese every time she made it.  It’s not that the taste was terrible, the marinara was always good, as was the Parmesan, but the eggplant itself was spongy and a bit bitter, so I had to distract myself by making it super cheesy in order eat it.

Despite never fully enjoying this dish, I was convinced that I would enjoy eggplant if prepared differently.  I really wanted to try making eggplant Parmesan, sensing that frying eggplant and making it crispy could be the key.  But for some reason, I just never got around to it.  Probably because I had been tainted by a long history of a dish with similar elements that was always abhorrent to me.  I finally tried eggplant on a pizza (click here for the recipe: Eggplant & Olive Pizza) and then in baba ghanoush (a Middle Eastern roasted eggplant dip) and discovered I was right, I did like eggplant!

Well, finally, in a lower-carbohydrate phase of our diet last month, I decided to try my hand at eggplant parmesan, using only cheese for “breading” before frying it.  It. was. fabulous.  I’m sure I’d love it with the breading as well, but this was truly delicious and in my opinion, need not be changed.  I seriously can not wait to make this again. I’m now a full-fledged eggplant convert.  They key, it seems, is not so much in the frying, which obviously doesn’t hurt, but in the salting and draining prior to cooking.  This takes away the bitterness and makes the eggplant flavor much more enjoyable.

I also want to take a moment to mention the tomato sauce, which I snagged from Jenna’s blog and kicked up a notch with fire-roasted tomatoes, and a touch of fennel seeds and red pepper flakes.  This is my most favorite marinara sauce I’ve made to date, very flavorful and a great compliment to the eggplant.  It makes a large batch, so you’ll have enough leftover to freeze for future eggplant Parmesan meals, or to ladle over pasta. It gives me such a heady feeling to know this delicious sauce is waiting for me in pre-portioned bags in the freezer, and all I have to do is defrost it in order to enjoy it again. Thanks for the wonderful recipe, Jenna!

One last note: the fried garlic is totally optional but I highly recommend you throw some cloves into the oil while you’re frying your eggplant.  I discovered that frying garlic gives the same flavor as roasting it, sweetening it and making it so delicious you can just pop the whole thing into your mouth without any of the sulphurous burning that usually accompanies such an act with raw garlic.  It is so delicious, I’ve found it to be addictive!  I ended up keeping this part of the recipe secret from my husband, who arrived after I’d eaten an entire bulb of fried garlic because I couldn’t keep my hands off of it after I popped the first clove into my mouth.  What he doesn’t know won’t hurt him. :)

I’m submitting this recipe to Renee for this week’s BSI (Blogger Secret Ingredient contest): Parmesan.

Low-Carb Eggplant Parmesan with Fried Garlic

Printable recipe
Printable recipe with picture

1 medium eggplant, peeled
Salt
2 eggs
¼ cup water
1 cup shredded or grated Parmesan cheese, plus more for garnish
Garlic powder
½ cup olive or canola oil
1 bulb of garlic, peeled
1 ½ cups Fire-Roasted Tomato Sauce, warmed
Fresh parsley, chopped, for garnish

Peel and slice eggplant into ¼” thick slices. Sprinkle both sides liberally with salt and place in a colander set over a bowl. Allow the eggplant to drain for 30-45 minutes or until 2 tablespoons of water have been drawn out from the eggplant. Tear off three sets of two sheets of paper towels (each set of two still connected), stack together, then lay out eggplant slices on top of it. Tear off another three sets of two paper towels, lay on top of the eggplant, and press down firmly on each slice to draw out excess moisture.

In a flat-bottomed bowl large enough in diameter to fit the largest eggplant slices, whisk the eggs and water together until foamy. Put the Parmesan cheese on a plate and have your garlic powder nearby. Line a baking sheet with foil, sprinkle evenly with garlic powder, and set nearby.

Dip each eggplant slice in the egg mixture, shake off, then sprinkle both sides with Parmesan. Lay the slices on the prepared baking sheet as you finish them. Once all slices are coated, sprinkle garlic powder on top.

Heat a cast iron or other heavy-duty skillet over medium-high heat. Add enough oil to cover the bottom well and come up about 1/8”. Place as many eggplant slices in the skillet as will fit, and tuck as many of the cloves of garlic in between them as you can. Fry the eggplant until the first side is golden brown, about 2 minutes, then flip. Flip the garlic cloves when then skin is golden brown and bubbled. Once the second side is golden brown, remove to a cooling rack lined with paper towels to drain. Remove the garlic as it is finished cooking as well. Continue cooking eggplant in batches until all is fried. If the first batch of eggplant has cooled too much by the time you are finished frying it all, pour out the oil in the skillet and add them back in to reheat for a minute. Alternately, as the eggplant is drained, you can add them to a foil-lined baking sheet and keep them in a warm oven until ready to serve.

To serve, arrange eggplant slices on plates with fried garlic scattered around. Scoop tomato sauce over the top and garnish with Parmesan and parsley, if desired. Serve hot.

Fire-Roasted Tomato Sauce

Printable recipe
Printable recipe with picture

1/3 cup olive oil
1 large onion, diced
5 cloves garlic, minced
1 stalk celery, diced
1 carrot, diced
Kosher salt and black pepper, to taste
1 (28 oz) can crushed tomatoes
2 (14.5 oz) cans fire roasted tomatoes, undrained
2 dried bay leaves
1 tablespoon dried basil
1 teaspoon dried oregano
¼ teaspoon fennel seeds
¼ teaspoon red pepper flakes

In a large pot or Dutch oven, heat the olive oil over medium high heat. Add the onion and garlic, and cook for about 2 minutes, until soft and translucent. Add the celery, carrot, and some salt and pepper. Cook for about 5 minutes, until softened. Add the tomatoes, bay leaves, basil, oregano, fennel seeds, and red pepper flakes, and cover the pot with a splatter screen. Turn down the heat to low, and simmer gently for 1 hour.

Remove the bay leaves and taste for seasoning, adding salt and pepper as needed. Using an immersion blender, blend the sauce until smooth. Allow the sauce to cool completely and, if not using immediately, pour it into freezer bags in 1-2 cup portions. It will keep frozen for about 6 months.

Balsamic Vinegar & Garlic Glazed Flat Iron Steak

Posted on

I have a significant backlog of recipes waiting to be blogged, but I made this one yesterday and two things prevailed upon me to post it immediately:

1) This week’s BSI (blogger secret ingredient) is beef so this is perfect timing to submit it for the contest, and

2) It’s so delicious, I couldn’t wait!

Fish aside, I’m not much for meat.  I’ll put a bite on my plate, then fill the rest with dessert vegetables and potatoes, etc.  Then I usually share what little meat is on my plate with Jessie.  But this steak was so delicious I was sneaking bites of it from the platter before Dennis came home and almost couldn’t stop myself.  Between us, we ate an entire 1-lb flat iron steak in one sitting.  It was just incredible.

Dennis was beside himself.  “How did you get it so juicy?  What did you do to this?  This is so good.  What did you put on it?  THIS is the best steak I’ve ever eaten.”  “Even over the steak au poivre?” I asked.  “Yes, even over that one.”  An hour after eating, Dennis looked over at me and said, “That steak was really, really good.”

This recipe was inspired by my friend, Suzie*, who shared a recipe for Balsamic & Garlic Glazed Strip Steaks with me last summer.  At the time, I knew my hubby would love it but I didn’t think I’d ever use it.  Then I happened to pick up a flat iron steak because it was on sale and because I’d never heard of it before.  I had NO idea what I was going to do with it so I searched all the recipes I had for steak to get some ideas, and found Suzie’s.  The marinade was just PERFECT for this steak.

*Suzie just started her own food blog this week!  If you’ve been reading long, you’ve seen many recipes on my blog from her.  She’s a great cook with a great sense of humor.  Check her out here!

Flat iron steak is the second most tender cut of meat, next to the tenderloin, and that obviously helped with the resulting steak.  The acid from the balsamic vinegar also tenderizes it a bit during the marination process, so you’re left with an incredibly juicy and tender piece of meat.  The marinade is simple but just perfect.  I couldn’t believe how delicious it made the meat!

Balsamic Vinegar & Garlic Glazed Flat Iron Steak

Printable recipe
Printable recipe with picture

½ cup balsamic vinegar
1/3 cup olive oil
3 large garlic cloves, minced
1 (1 lb) flat iron steak
Kosher salt
Fresh ground black pepper

In a small bowl, whisk together balsamic vinegar, olive oil and garlic. Reserve ¼ cup marinade and pour the rest in a large Ziploc bag. Put the steak in, press out the air and zip it up. Let rest at room temperature for 30 minutes to 1 hour before grilling.

Meanwhile, light your charcoal mound in the grill (yes, I was grilling yesterday-the weather was so nice!) and then spread the coals out once the fire dies and they get ashy around the sides. Remove steak from bag, discard marinade. Salt and pepper steaks. Grill covered for ten minutes on each side for medium-well, brushing with extra marinade while it cooks.

Set grilled steak on a platter, tent with foil, and let rest for 5 minutes so juices can recirculate throughout the meat. Enjoy!

Recipe source: adapted from Suzie S.

%d bloggers like this: