RSS Feed

Tag Archives: spring

Low Country Boil {Northern Stovetop Version}

Posted on

I got this recipe from my friend, Suzie, who ironically lives up North, so I don’t know how authentic this is to the “low country” but it’s really good!  I actually ate this whole recipe by myself over the course of several days while pregnant because Den hates shrimp. Usually I avoid shrimp dishes because I don’t like to prepare myself a separate dish, but this is so worth the minimal effort.  So flavorful! The second best part is, this is an indoor version you can make on your stovetop any time of year.

Low Country Boil

Printable recipe
Printable recipe with picture

4 cups red potatoes, quartered
4 ears corn on the cob, cut in half
1 (14-16 oz) package polish sausage or kielbasa, cut into bite-size pieces
2 lbs. of uncooked large shrimp

For the stock:

12 cups water
1 package Zatarain’s crab boil
1/4 cup Old Bay Seasoning
1 lemon, quartered
1 large onion, quartered
9 whole cloves of garlic (or to taste)
3 tablespoons kosher salt (or 1 1/2 tablespoons table salt)

Add all stock ingredients to a large stock pot or Dutch oven and bring to a boil. Once boiling, add potatoes and corn and boil for 15 minutes. Add kielbasa or polish sausage and cook for 5 more minutes. Turn down heat to medium and add the uncooked shrimp. Cook for 3-5 minutes, until shrimp turns orange, and drain into a serving dish. Serve with butter and old bay seasoning mixed together and/or cocktail sauce. Enjoy and have plenty of napkins ready!

Veronica’s note: you can use frozen “mini” corn on the cob, and add along with the shrimp at the end.

Advertisement

Sweet Salsa Slow Cooker Meatballs

Posted on

I hope everyone had a wonderful and safe Independence Day!  It was the best 4th of July of my whole life, and hands-down the best day Joshua’s ever had period. I want to share some photos but will be doing that tomorrow.

Today I have a simple crockpot meal that is great any time of year, because in summer, it doesn’t heat the kitchen, and in winter, it’s just nice to have something hot and ready at the end of a cold day.  I got this recipe from my friend, Holly, who actually had posted it in response to a mutual friend’s request for crockpot recipes on Facebook. I nabbed it and made it soon after because I’d just made my own apricot jam.  These were very satisfying and tasty.  Hope you enjoy, and stay cool!

Sweet Salsa Slow Cooker Meatballs

Printable recipe
Printable recipe with picture

1 (26 oz) bag frozen meatballs
3 bell peppers in different colors, sliced (optional)
1 (24 oz) jar salsa
1 (18 oz) jar apricot preserves

Place the meatballs in the bottom of your slow cooker and layer the bell peppers over, if you’re using them.  Whisk the salsa and apricot preserves together in a bowl, and pour over the top.  Cover and cook on low until heated through, 6-8 hours. Holly suggests serving over rice or with mashed potatoes and green beans.

Recipe source: adapted from Holly W.

Lemon Cream Whoopie Pies

Posted on

It’s been a year since I left the Secret Recipe Club but I’m finally back, baby! So excited! If you haven’t been around here long enough to know what the heck the Secret Recipe Club is, lemme break it down for ya. Once you’re in the club (click the link to sign up), each month that you participate, you’re assigned to another participating blog. Nobody knows who has whose blog, and everyone in the group picks a recipe from their assigned blog and makes it, then everyone posts on the same day and it’s all fun and exciting looking through the posts to figure out who had your blog and to see which recipe they picked. It’s a really fun way to visit new blogs and make recipes you might not usually try.

This month I was assigned to Chris and Amy’s blog, A Couple In The Kitchen. Aww! So sweet – a couple that cooks and blogs together! Their motto is, “The couple that sautes together, stays together.” I just love it.  The coolest thing is that they had my blog back in October of 2011 and made my Apple Cider Doughnuts, so it’s neat to finally get assigned to them in return.

I went crazy perusing their blog and pinning the recipes I wanted to try to one of my secret boards.  I’ve never made a risotto and really want to try it, so I was very close to picking their Springtime Risotto.  Their Corn and Black Bean Salsa Nachos were also calling my name, along with their Seared Scallops with Blood Orange Gastrique and Chicken Piccata.  However, my sweet tooth and curiosity drew me to their Flour Frosting and I thought I could use it as a filling in some springtime-y whoopie pies.

I’ve heard of flour frosting before and have wanted to try it for a long time, much longer than I’ve wanted to make a risotto, and I was glad to have the extra motivation to finally make it.  But let me tell you, I nearly had as much trouble with this frosting as I did with another SRC post on the whole wheat bread that would never turn out for me, even after 9 loaves. I don’t know what my problem is, but I just could not get the flour mixture right – it was always lumpy and made my frosting lumpy no matter how much I beat it (we’re talking 20 minutes people!).  Through trial and error, I devised a fool-proof way to create the smooth and fluffy frosting it’s meant to be, and while it’s a little more tedious because it involves an extra step, it’s worth the effort if you have lumpy thickened milk issues like me.  This lightly sweet frosting is incredibly light and fluffy, perfect for sandwiching between sweet, lemony cake-cookies.  Get your whoopie on!

Lemon Cream Whoopie Pies

Printable recipe
Printable recipe with picture

Cookies:
1 (15.25 oz) lemon cake mix
1/2 cup unsalted butter, melted
1/2 cup water
3 eggs

Filling:
¼ cup (1 1/8 oz) all-purpose flour
1 cup whole milk
1 teaspoon vanilla extract
1 cup (7 oz) granulated sugar
pinch of salt
1/2 cup (3 ¼ oz) vegetable shortening
1/2 cup (4 oz) unsalted butter, softened

Preheat oven to 350F. Line cookie sheet(s) with parchment paper and set aside.

Before starting the cookies, do the first step for the filling: whisk the flour and milk together in a small saucepan and continue to whisk constantly while cooking it over medium heat until it forms a thick paste, about five minutes. Set aside to cool completely.

Combine cookie ingredients in large bowl and beat on low until combined, about 30 seconds, scraping sides of bowl to incorporate. Increase speed to medium and beat for an additional minute. Drop 1 1/2 – 2 tablespoons of dough (preferably from a cookie scoop to make them nicely round) onto prepared baking sheet, 2 inches apart, and bake for about ten minutes or until lightly golden brown on edges and set in the center. Remove onto a wire rack to cool and repeat with remaining batter.

To make the filling, add the cooled milk and flour mixture to the bowl of a food processor fitted with the blade attachment. Add the vanilla and process until completely smooth and no lumps remain, a minute or two. (You can also beat it with a mixer but if there are any lumps, it will ruin your frosting. I couldn’t get the lumps out of mine without using the food processor.) In a large mixing bowl, add remaining filling ingredients and beat on medium-high for four minutes, then add in the flour mixture and beat together until nice and fluffy and no grit from the sugar remains, 3-4 minutes.

To make the pies, turn half the cookies over and spread about 2 tablespoons of filling over the flat side. Top with another cookie, flat side down and press lightly together.

Recipe source: a Veronica’s Cornucopia original, with the filling recipe adapted from A Couple in the Kitchen

Lemon Meringue Pie

Posted on

I don’t know about you but once spring arrives (even if the weather doesn’t quite agree), I’m in the mood for lemon!  Lemon bars, lemon cake, lemon cookies…just bring on the lemon.

I thought the week of Easter would be a great time to share a recipe for lemon meringue pie, which I just started making a few months ago.  My SIL, Joan, loves lemon meringue pie and I made her one for Christmas (everyone got a home made pie for Christmas last year since we were too po for many store-bought ones).  It was my first ever lemon meringue pie, and as firsts sometimes go, it was bad.  I didn’t read the instructions close enough and the filling never set up.  It was lemon soup pie.  Thankfully, I had enough time to make a second, which turned out well.

My beautiful sister-in-law with her pie.

To my surprise, after licking the spoon which I used to scrape the filling into the crust, I found I really liked lemon meringue pie, or at least the filling.  You’d think a person who enjoys lemon desserts would assume that lemon meringue pie was the bomb-diggity, but no, I never had tasted a single bite because I was somehow sure it wasn’t worth eating.  I know, right?  I suddenly found myself dying to have a slice of lemon meringue pie, to taste it in its full glory, so I made it to bring to a dinner party in January.  That single small slice was so good, I needed more, and made a whole pie just for Dennis and I.  And together, we managed to eat the entire thing in a shamefully small period of time.

Personally, I would prefer this pie with a whipped cream topping.  However, using the egg whites works so perfectly since you have them leftover after using the yolks in the filling.  If you don’t mind using your egg whites for another purpose, feel free to use whipped cream here.  I think that would be the magics.

Lemon Meringue Pie

Printable recipe
Printable recipe with picture

4 egg yolks, room temperature (reserve whites for meringue)
1 1/3 cups granulated sugar
1/3 cup cornstarch
¼ teaspoon salt
1 ½ cups water
1 tablespoon lemon zest (1-2 lemons)
½ cup freshly squeezed lemon juice (2-3 lemons)
2 tablespoons unsalted butter
1 prebaked pie shell in a 9″ plate (deep dish if using a frozen crust)

Meringue
4 egg whites, room temperature
1/4 teaspoon cream of tartar
1/4 cup sugar

Preheat oven to 350F. Stir the egg yolks together in a heatproof bowl and set aside. In a medium saucepan, whisk together the sugar, cornstarch, and salt. Whisk in the water and turn on the heat to medium. Bring the mixture to a boil while stirring, boiling until it is quite thick, at least one minute. Remove from heat.

Add a spoonful of the hot mixture to the egg yolks at a time, stirring in between additions, until 1/3-1/2 of the hot mixture has been added. Scrape the egg yolk mixture into the pan and whisk it all together. Return to the heat and cook for another minute while stirring. Remove from heat and stir in the butter until melted. Add the lemon zest and lemon juice, stirring until combined. Scrape into the baked pie crust; set aside.

For the meringue, combine the egg whites and cream of tartar in a stainless steel or glass bowl that is completely grease free and beat with completely grease-free beaters on medium speed for about a minute, or until soft peaks form. Increase speed to high and beat in sugar gradually until glossy stiff peaks form and sugar is dissolved. Spread over hot filling all the way to the edge, making sure the meringue touches the pie crust all the way around, to prevent shrinkage.

Bake in preheated oven 12-15 minutes or until meringue is light golden brown. Cool completely before slicing, about 4 hours.

Recipe source: adapted from the recipe on the back of a Pillsbury Pet-Ritz frozen pie crust package.

If you’re in a lemon mood, check the other lemon sweets on my blog:

Blueberry-Lemon Upside Down Cake

Blueberry-Lemon Pound Cake

Blueberry-Lemon Trifle

Easy Lemon Cookies

Lemon-Basil Peach Dumplings
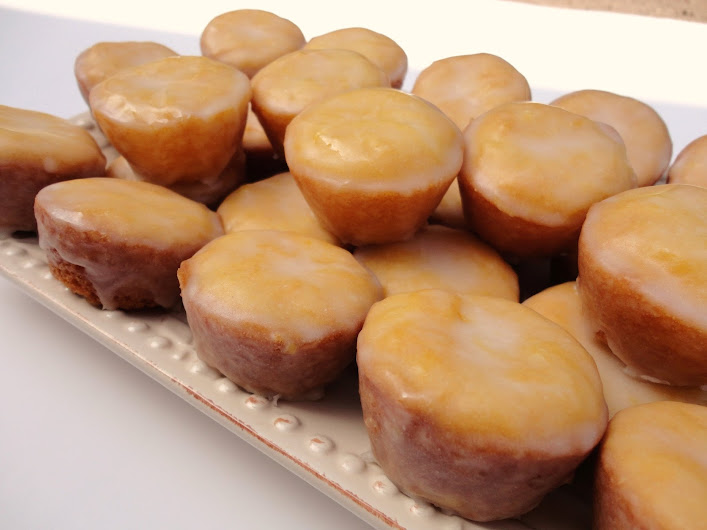
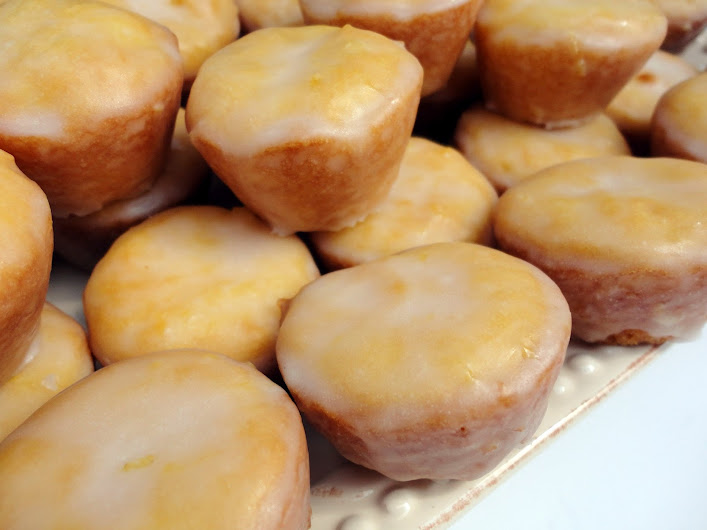
Lemon Blossoms

Lemon Curd

Lemony Orange Cake

Lemon Squares

Strawberry Lemonade Layer Cake

Sunshine Bars

Triple Lemon Cake

Zesty Lemon Pound Cakes

Cheeseburger Salad

Posted on

Usually when I want to enjoy a cheeseburger in salad form, I make a hamburger salad and just top it with some shredded cheddar.  But I knew I had to try this Pampered Chef version when PW featured it a while back.  So glad I did because it’s so much better than my old stand-by!  I love how the sauce is mixed into the meat so that you don’t need dressing.  Saucy, flavorful meat, crisp lettuce, pickles & onions, juicy tomatoes, cheddar cheese–this salad just can’t be beat!

OK, now Pampered Chef and PW get all crazy and actually turn hamburger buns into croutons by baking them.  So cute, right?  But grizzle, puh-lease!  I may be crazy in certain ways, like adding way too much butter and sugar to my desserts to where they are literally swimming in evil, but I’m not the kind of crazy that likes to bake my own croutons in the summer for a simple salad.  If I’m turning on my oven, it’s for something sweet, not for croutons.  If you’re not my kind of crazy, you might want to just go to the original recipe for the crouton instructions.  As for me, Texas Toast croutons suit my salad just fine.

But, truth be told, this is the way I prefer to eat my cheeseburger salad:

Sans croutons.  I mean, the reason I like to turn hamburgers and cheeseburgers into salad is to get away from the bread because it gets in my way, and I like the veggies way more than the bread.  Plus, I get enough carbs from sugar. :)

Cheeseburger Salad

Printable recipe
Printable recipe with picture

2 lbs. ground beef
1 ¼ cups ketchup
3 tablespoons prepared yellow mustard
1 tablespoon Worcestershire sauce
2 small red onions, one sliced into rings, the other diced
8 dill pickle spears, sliced
4 Roma tomatoes, quartered and sliced
8 oz. cheddar cheese, shredded
16 cups chopped Romaine lettuce (about 2 heads)
Texas Toast croutons (optional)

Cook the ground beef in a large skillet over medium heat. Remove from heat, drain the fat, and stir in the ketchup, mustard, and Worcestershire sauce. Add the diced onions and pickles (you can set some aside for garnish if you like). and stir to combine. Put 2 cups of lettuce on each plate, then divide the burger mixture between them. Top with cheese, tomato, onions and pickles if you set some aside, and croutons if desired.

Makes 8 servings.

Recipe source: adapted from The Pampered Chef

Lemon Blossoms

Posted on

I made these for Mother’s Day, intending to give pretty little baggies of them as gifts to all the mothers at the annual Mother’s Day picnic on Dennis’ side of the family.  It didn’t quite work out that way.  The first pan, which was half the batch, I didn’t grease well enough and they all stuck horribly so guess where those ended up?  Yup, in our bellies.  Can’t say we were too sad that only half the batch was pretty enough to share.  But then we couldn’t keep our hands off those either, and in the end, there were only enough to give to two mothers: his and mine.

Our mothers loved these little beauties, and we loved them.  Way too much.  They are really delicious, but most of the lemon flavor comes from the glaze, and I would suggest trying this with a lemon cake mix instead of a yellow if you can find one.  That would really intensify the lemon flavor.  They are wonderful as is, but can you get enough lemon flavor in the summer?  I think not.

Lemon Blossoms

Printable recipe
Printable recipe with picture

1 (18.5 oz) box yellow or lemon cake mix
1 (3.5 oz) box instant lemon pudding mix
4 large eggs
3/4 cup vegetable oil

Glaze:
4 cups confectioners sugar, sifted
1/3 cup fresh lemon juice
Lemon zest from 1 lemon
3 tablespoons vegetable oil
3 tablespoons water

Preheat oven to 350 degrees. Spray miniature muffin tins thoroughly with cooking spray.

Combine cake mix, pudding mix, eggs and oil and blend well with an electric mixer until smooth, about 2 minutes. Batter will be quite thick. Using a cookie scoop, divide the batter between the muffin wells, filling each halfway. Bake for 12 minutes.

While the blossoms are baking, make the glaze. In a mixing bowl, whisk together the sugar, lemon juice, zest, oil, and 3 tablespoons water. Whisk until smooth.

Remove the blossoms from the oven when they are done and turn out onto a tea towel. You might have to run a butter knife around the edges of the cupcake wells to loosen them before turning out. While they are still warm, dip the blossoms into the glaze, covering as much of the cake as possible, or spoon the glaze over the warm cupcakes, turning them to completely coat. Place on wire racks with waxed paper underneath to catch any drips. (I did this over the sink.) Let the glaze set, about 1 hour, before storing in airtight containers or covering with plastic wrap on a platter.

Makes 48 mini-cakes

Recipe source: Paula Deen, as seen on Minda’s Cooking

Sunshine Bars {Citrus Gooey Butter Cake}

Posted on

Food blogging can be rough on a girl’s diet.  I told you that I didn’t have any Easter-ish recipes and gave you what I could, and yet I still felt the pressure of posting one before the holiday.  And so I got to work in the kitchen and came up with something so delicious that sampling it when it came out of the oven at 1 AM, and having more for breakfast this morning (the breakfast of champions!) has completely depleted all my Weight Watchers Points Plus for the day.  And then some.  Oi.  But a dedicated food blogger owes it to her readers to sacrifice valuable points for the sake of their holiday enjoyment, right?  Yeah, that’s right.  I did it all for you.  Because I so wouldn’t have eaten all that tart-sweet gooey butter cake without my readers as motivation.

What?  You don’t believe me?  OK, fine.  I so totally would have made and eaten this regardless, but I’m rushing to post this recipe before work so you can make it for Easter and that’s all for you.  You’re welcome.  :)

I really love gooey butter cake, and in fact I was already planning to do a few posts on the basic recipe and the chocolate version since I made both almost two years ago and never got around to blogging them.  It reminds me of a different form of cheesecake, sort of like cheesecake bars, but muuuuuch more buttery.  The crust layer is soft, yet firm enough to hold the bars together, somewhere between cookie and cake, while the filling is creamy & gooey.  In this springtime version, I used an orange cake mix for the base (though lemon or even yellow would be great), and used up the rest of my lemon curd in the filling.  I had no idea how it would turn out and was greatly relieved to be rewarded with something I can proudly share with my husband’s family this weekend.  Well.  I mean.  What’s left of it.

Sunshine Bars 

Printable recipe
Printable recipe with picture

Crust:
1 (18.25 oz) orange or lemon cake mix
1 stick (1/2 cup) unsalted butter, melted
1 egg

Filling:
1 (8 oz) package cream cheese, room temperature
2/3 cup lemon curd
1/3 cup lemon juice
2 eggs
1 stick (1/2 cup) unsalted butter, melted
1 lb (4 cups) powdered sugar

Preheat oven to 350 degrees F with rack in center of oven. Spray a 9×13 baking dish with oil and set aside. In a large bowl, mix the cake mix, egg, and butter with an electric mixer until well combined. Press the dough into the prepared pan and set aside. Wipe out the bowl and clean off the beaters, then cream together the cream cheese and lemon curd until well combined. Mix in the lemon juice, then the eggs until incorporated. Add the butter and powdered sugar and mix until well combined. Spread over the crust layer and smooth the top with spatula. Bake in preheated oven for 45-47 minutes, or until browned on top but still jiggly in the middle. Cool on wire rack until completely cool, about two hours, before cutting and serving. Can also be served cold, depending on your preference.

Recipe source: adapted from Paula Deen’s Gooey Butter Cake recipe.

%d bloggers like this: