Being raised in a whole-foods home, it only makes sense that my mother also chose all-natural hair and body products. I started breaking into her stash of henna hair color when I was in middle school, so I have more than 15 years experience with it by now.

You may have heard of henna tattoos, popularized by the Indian culture, which are temporary and slowly fade over time. You may not have been aware that you can use henna to color your hair as well, but it has been done since at least 400 AD.

Henna is a tall bush or small tree, and the leaves, once dried, are powdered and can be mixed with hot water or an acidic liquid to dye skin, hair, and nails. The benefit of using henna on hair is that it seals in oils and tightens the cuticle, resulting in a rich, healthy shine. It contains no ammonia, peroxide, or other chemicals that are damaging to hair. Unlike other hair dyes, it fades slowly over time (usually it lasts 4-6 weeks) so there are no tell-tale roots as your hair grows out.
Things you should know about henna:
1) It can only make your hair darker. It bonds with the protein in your hair, adding color to it (unless you use the neutral henna, which only conditions without adding color); you can’t use it to lighten your hair.
2) If you get any color besides “neutral” or “black,” you will get red highlights in your hair. In my case, I buy “light brown” and I get a medium brunette color with pretty red highlights. You can get many tones of red, such as strawberry blonde, auburn, copper, etc, but all of these will only add color to what you already have so don’t expect your black hair to turn strawberry blonde if you choose that color. It may give some warmth to your color, but will not lighten.
3) In my experience, henna will not take your hair too far from the color you start with, so if you buy black and have light brown hair, you will become a darker brunette.
4) It is quite goopy and messy and can stain anything it touches.
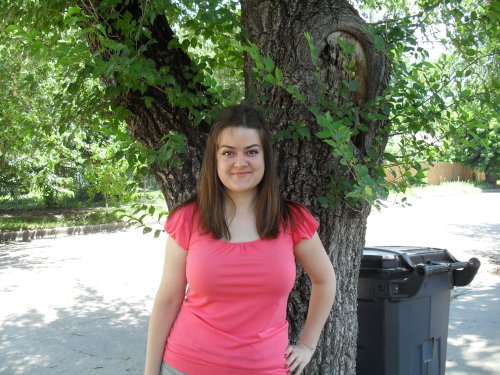
5) It can react with chemicals in your hair, such as chlorine, or those used in coloring or perming. In the picture below, taken before a homecoming dance my freshman year of high school, you can see I turned the ends of my hair green when I tried using black henna after an entire summer of swimming daily in a public pool. The photo was taken two months after the application, so you can see that green really hung on! If you want to use henna after your hair has been exposed to chemicals, I highly recommend doing a strand test first.

6) You can add things to the henna mixture to enhance the conditioning and coloring properties, and adjust the amount of water used accordingly. For deeper conditioning, add an egg or two tablespoons of yogurt. To bring out golden highlights in already light hair, replace heated water with half warm water and half warm lemon juice or chamomile tea brewed with three tea bags. To create rich golden or copper highlights add three tablespoons vinegar or fresh lemon juice. To enrich browns or reds, add one teaspoon ginger, allspice, nutmeg or paprika. To enhance brown tones, replaced heated water with day-old, black, very warm coffee (not instant).
7) Henna has a distinct herbal smell, which is quite pleasant compared to some of the harsh chemical dyes, but it can be off-putting to some. It reminds me of a blend of powdered algae, herbal tea, and marijuana. I sort of feel like a hippie when I’m applying it. :)
8) You can not use any metal during henna preparation or application, as it will react to it and make your hair a funky color. Which could be fun, but if you’re hoping for a natural color, steer clear of the metal and use a glass, ceramic, or plastic bowl and stir with a wooden or plastic spoon. I used a small silicone scraper this time. They also recommend you use distilled water, but I just use purified water and this has never been a problem for me.
There are many henna products for hair and I have tried a few brands, but the one my Mom used is Light Mountain Natural, and after trying other brands, it continues to be my preferred henna product to this day. Light Mountain Natural is a pure, natural product made from 100% organic powdered botanicals of three species of herbs: Red (Lawsonia inermis), Neutral (Cassia auriculata), and Black (Indigoferae tinctoria). These powdered botanicals are blended for a rich medly of color. Botanical color may vary from crop to crop and season to season, but their blending process helps compensate for these variations.
The instructions I’m giving are according to my experience with the Light Mountain Natural henna, and may not work with other henna products. I use light brown, which I buy at a local health food store that has nothing to do with the Whole Foods chain. In the box, you will get a bag of henna, instructions, plastic gloves, and a plastic cap.

The day before, please do an allergy and strand test according to the package directions. I never do, but it is in your best interest, especially if you’ve never used henna before.
To start, empty your henna into a glass or plastic bowl. Add enough water, stirring with a non-metal utensil, that you get a consistency similar to yogurt. I like to go a little thin, using two or more cups of water, because it thickens a bit upon standing, and it’s easier to apply if it’s not too thick.
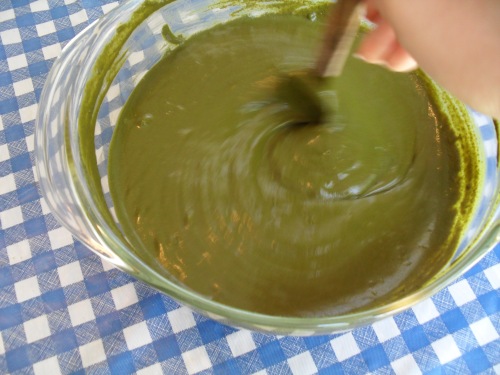
Let mixture sit for 1-3 hours to cure. I usually just wait an hour. Curing cuts down on the time you will have to leave it on your hair, but you can use it as soon as ten minutes after mixing if you like. The mixture will thicken and get darker on top. Stir to check the consistency and add more hot water if necessary.

They tell you to get your hair wet, and I went ahead and did it this time, but usually I apply the henna to my dry hair and I noticed no difference in the final outcome, except my grays didn’t seem to be covered as well. Whether you get it wet or not, it’s now time to don your “henna shirt,” i.e. any shirt that you don’t mind ruining. I have a shirt designated for henna application and it has been used many times.

Apply a cream or Vaseline around your hairline to protect your skin from getting stained. I used a sunscreen stick. Whatever works. :)
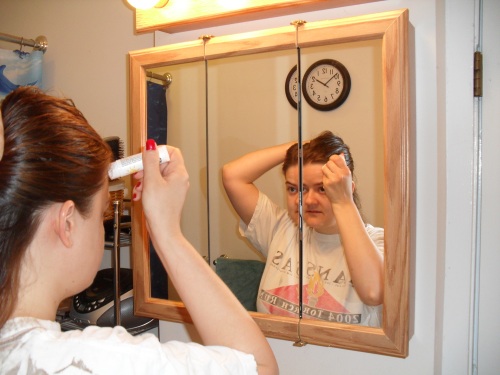
It helps to pretend you have no teeth while you apply it.
 “Back in my day, we didn’t have these fanshy schmancy sunshreen shticks, but they sure are handy!”
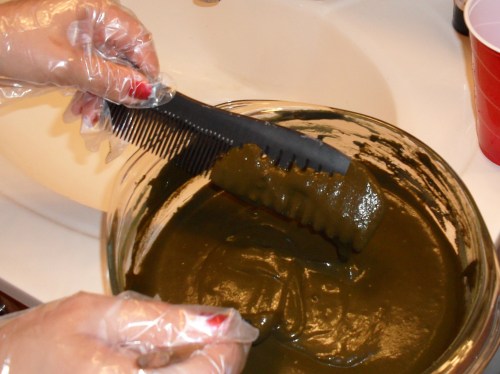
Apply the henna from roots to tips whichever way you please. With a comb…
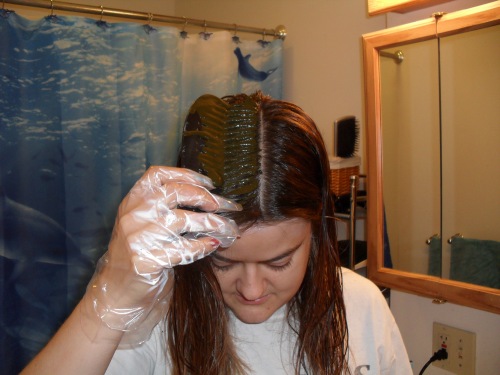
Or my preferred barbarian method–slapping it on and rubbing it in with my hands.


 I think I make this same face when I apply mascara. Perhaps the synapses in my brain were misfiring and telling my face that doing any beauty regimen requires wide eyes and an open mouth. Apparently I channel the elderly quite a lot during this process as well…
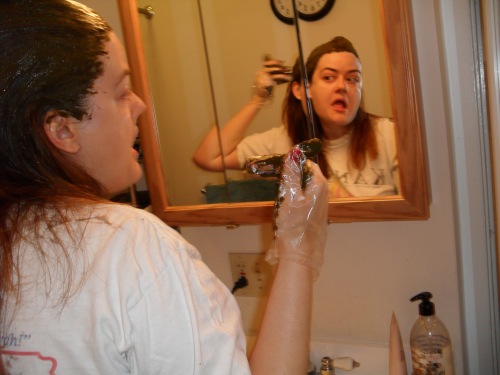 “What’s that, shonny? I can’t hear you, shpeak up!”
As I apply the henna downward, I like to pile my hair up on top of my head to keep it out of the way. You can see what I meant when I said it gets messy. I always put cream or Vaseline on my ears and all the way around my hairline because it never fails to get on my skin.

I just keep applying it until the entire bowl is on my head. My hair is fine and I don’t really need that much, but at least I know every inch is covered. If you have very long or thick hair, you might need two boxes of henna, but as you saw, one bag makes quite a bit. If you’re spreading it further, be sure to massage it into your hair before covering with a cap.

When you’re finished applying the henna, the first thing you should do is clean up. Discard your gloves and clean up all the henna that dropped on your sink and floor. Use damp paper towels or a damp washcloth to wipe away any henna that is on your face, ears, and neck. Next, don your plastic cap.
 The one that comes with the kit (right) is square and after fitting it to your head, you have to close the gap at your nape with a hair tie, so I usually use a handy-dandy shower cap instead (left).
It is now time to apply heat, which activates the henna and bonds it to your hair. My Mom used to have a retro hair dryer that came down over her head, which was uber fabulous for this part, but at my house, I apply heat with a handheld blow dryer.
 Move the dryer around constantly so you don’t melt the cap, and maybe take this time to practice your lip curls and strengthen your forehead with eyebrow lifts. I also like to use my other hand to press down on the cap while I’m heating my hair, so that the henna disperses even better while the color is setting. The directions say to heat intermittently to maintain constant warmth, but I use the blow dryer for fifteen minutes straight, then, depending on my mood, I will either go online until my hair gets cold, or go straight into the shower. This time I went straight into the shower, which could be why my grays weren’t covered as well as they usually are–not enough time with the henna on. Depending on your hair type (mine is super thin), the process usually takes 45-minutes of off-and-on heat application.
 Get thee to the shower and rinse the henna out of your hair with warm water. It is gritty, so it will take some time. Once you get as much of the henna out as you can, fill your hand with a huge pile of conditioner and work it through your hair from roots to tips. Use a wide-tooth comb or your fingers to comb through it so that your hair is saturated with conditioner and tangle-free. This will help get the remaining henna out as you rinse it again. Do not use shampoo. Ideally, you shouldn’t use shampoo on your henna’ed hair for 24 hours, but I usually do my first shampoo after 12 or so.
Style your hair as usual. I usually just comb my hair and let it air dry, but after applying henna, I usually at least blow dry it because I’m eager to see what color it is. Plus, I imagine that the heat helps set the color even more.
Here’s my hair about 6 weeks after the last henna treatment, and the day before this one:

And here it is after this henna treatment:

Another note: there is a specific Light Mountain Natural henna treatment for gray hair, but I haven’t tried it yet, as it is a two-step system and I’m not terribly patient, plus buying it would confirm my suspicion that I’m getting old. The gray hairs are bad enough without having to buy a special gray hair treatment for them, you know what I mean?
Disclaimer: Light Mountain Natural doesn’t know I exist and did not compensate me in any way for this tutorial or for my opinion of their products. I just included it here because it is the best henna product I know of and wanted to share the best with you. Check out their website here.
I gathered my information about henna and the henna hair color process from knowledge passed on to me from my mother, from Wikipedia, and from the Light Mountain Natural instructions. I nabbed the first two pictures off the sites given on the actual pictures themselves.


