RSS Feed

Tag Archives: pops

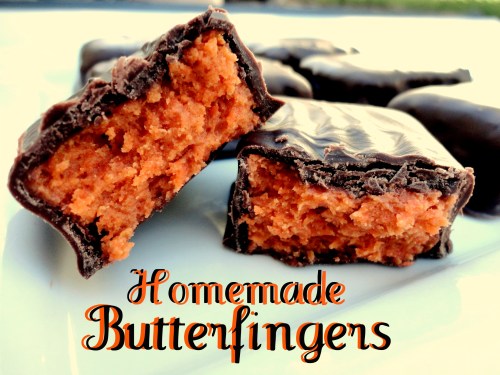
Homemade Butterfingers & Butterfinger Pops

Posted on

This super-easy recipe with only three ingredients is making it’s way around Pinterest, and since I’ve had pops on the brain lately (you can find all my pop creations here), I immediately thought this would be a great idea to turn into pops!  It’s much easier to make them into the traditional bars, but for the adventurous, I’ll include the instructions for the pops in the recipe.

*Update: this is TOO funny! I did not read the blog that I found the recipe on until I already made the pops, and I see she had a similar idea as me to turn this into suckers using molds.  Great minds! Except hers is greater because this would be MUCH easier to make using molds.

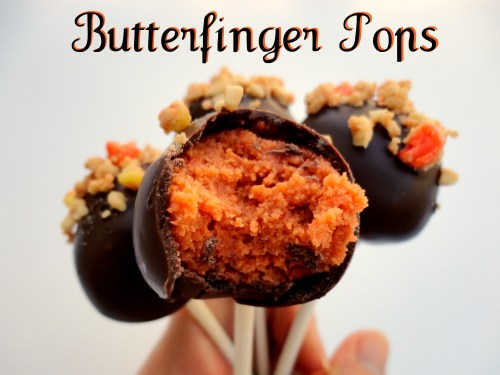
I was skeptical that the combination of melted candy corn and peanut butter would taste like a Butterfinger, but, amazingly, it really does.  It even has that same crispy crunch in your mouth, though the texture is softer and not as dry & flaky as a real Butterfinger–more moist.  One of my friends liked it more than a real Butterfinger for that reason, and I think I have to agree.  Very delicious and fun!

Homemade Butterfingers

Printable recipe
Printable recipe with picture
Printable Pops recipe with picture

1 lb. candy corn
16 oz. peanut butter
16 oz. chocolate candy melts or chocolate candy coating/bark

Spray an 8×8 baking dish with oil, then line with wax or parchment paper.  Place the candy corn in a large glass bowl and microwave for one minute.  Stir, then continue to microwave in 15-second intervals, stirring in between, until melted and smooth.  Stir in the peanut butter.  My mixture was very chunky because the candy corn did not want to combine with the peanut butter so I nuked the mixture for another 15 seconds.  At that point it was grainy, and I wanted to leave it that way since it reminded me of Butterfingers since they don’t have a smooth texture.  If you want yours completely homogeneous, continue melting in 15-second intervals until you get the mixture perfectly smooth (disclaimer: it is only my assumption that eventually it would get smooth, since I have not tried it myself).  Spread into the prepared pan and allow to cool completely, 1-2 hours.  Remove from the pan by grasping the wax paper and lifting out.  Cut into small bars.  Melt the chocolate coating according to the package directions and dip each bar into it using a fork,tapping  off the excess before setting on wax paper to dry.

To make Butterfinger Pops, let the mixture cool completely, then use a cookie scoop to portion it out.  Roll each scoop into a ball and set on waxed paper.  Freeze until firm, about 15 minutes.  Take lollipop sticks and dip the tip of each one into melted candy coating and then stick into the balls.  After all the balls have sticks in them, put them back in the freezer to firm up again.   Place your styrofoam block in the refrigerator.  (Since the balls will be very cold when you dip them, the chocolate will be more prone to crack and placing the pops in the refrigerator after dipping will reduce the amount of cracked pops*.)  Once they are firm enough to dip, remove five at a time from the freezer, dip them one at a time in the chocolate coating, tapping off the excess, and push the sticks down into the styrofoam block to set.  Check on them each time you add another to see if they are cracking and if so, remove and apply extra melted chocolate onto the crack so that no oil leaks out.  If you want to add sprinkles, do it as soon as you tap off the excess chocolate, while it is still wet.  I put some peanuts and candy corn together in my food processor and chopped them up for my topping.  To get a better idea of the process involved for pops, refer to my Cake Pops tutorial.

Recipe source: Plain Chicken

*LOL, “cracked pops” for some reason reminded me of my husband’s favorite quote from a movie.  Can you name the movie this is from?

Father say, “Hurry is waste. Waste is cracked bowl which never know rice.”
Cake Pops

Posted on

**Update 5/12/11: If you are here looking for answers to cake pop questions, please check my Cake Pops FAQ and Troubleshooting Guide before leaving a comment.  I also have a recipe for making cake pops or balls with leftover or broken cake here, a recipe for Vegan Dark Chocolate Cake Pops, and a recipe for Cupcake Bites (cake balls that look like little cupcakes–the easier version of cake balls).  For my full pops index, click here.**

These pops are essentially cake truffles on a stick and are very simple to prepare: Bake a cake, mush it up with frosting, roll it into balls, insert a stick, and dip it in chocolate! These things really are a hit with kids because they are so fun, but adults seem to enjoy the delicious truffle-like confections equally well.

Want to make some? Here are step-by-step instructions, complete with videos.

Cake Pops
Makes 40-50 pops
Printable Recipe

What you will need:
1 (14.25 oz) box cake mix, any flavor
1 (16 oz) tub frosting, any flavor (you will not need all of it)
or 1/3-3/4 cup homemade frosting (I use my Cream Cheese Wedding Frosting)
1 (24 oz) package of almond bark/candy coating (white or chocolate)
Sprinkles
Lollipop sticks
3″x4″ cello bags
Curling ribbon

Bake the cake mix according to package directions. Once it’s cool, crumble the cake into a large bowl. I prefer to process mine in the food processor to fine crumbs. Place in a large bowl and stir in half of the frosting container or 1/3 cup of your homemade frosting. Mix with your hands until thoroughly combined and thick like a truffle center. Mix in additional frosting if necessary.  You just want enough to get the crumbs to stick together when you roll them into balls.  Do not add so much that the mixture becomes soft and mushy!

Roll mixture into 1″ balls and place on a cookie sheet. Cover with plastic wrap and refrigerate for an hour or overnight. I usually do this step the day before and then dip them the following day.  Do not freeze them before dipping or it may cause the chocolate to crack after they are dipped.

Melt chocolate in the microwave per directions on package. Dip the tip of your lollipop stick in a little of the melted candy coating and insert into the flat end of the cake balls. (Bakerella says to insert a little less than halfway, but I go more than halfway b/c I imagine they stay put a little better when dipping.)

The cake balls will have a flat bottom from resting on the cookie sheet. Insert the stick into this end so the top will be round.

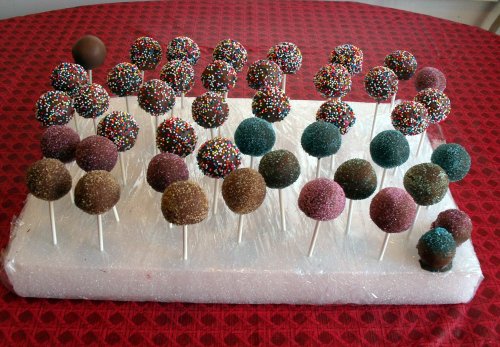
Carefully insert the cake ball into the candy coating by holding the lollipop stick and rotating until covered. Once covered, remove and softly tap and rotate until the excess chocolate falls off. Don’t tap too hard or the cake ball will fall off, too. Immediately cover with sprinkles before the chocolate has a chance to set, then insert in a styrofoam block to harden.

You want the chocolate to come over the platform you created when inserting the chocolate-dipped stick, but you don’t have to cover it all the way to the stick.

Tap off the excess chocolate.

Add sprinkles before the chocolate has a chance to set.

I wrap my styrofoam board in plastic wrap to keep it clean so I can reuse it.

See the two hiding in the corner?

I ran out of sticks so I just made these two into cake truffles. To do this, drop one ball at a time into the chocolate and lift out with a fork, tapping off the excess chocolate. Place on wax paper to set.

This video illustrates the dipping process. Forgive my PJ’s–I made these first thing in the morning. OK, it was afternoon. I’m lazy on Saturdays. And every other day. Once the chocolate has set, put a cello bag over the top and tie the neck with some curling string and tie into a bow or curl.

I found these at Wal-Mart in the cake decorating section near the wedding supplies

Recipe Source: based on Bakerella’s recipe & instructions

*Update 1/19/12: I have disabled comments on this post, since there are over 400 and many of them are the same questions asked and answered over and over again. If you have a question, please refer to the FAQ. Thank you!*