RSS Feed

Category Archives: Tips & Tricks

A Brony Birthday Party

Posted on

My little sister (that’s her with the black ponytail) threw a My Little Pony birthday party for her boyfriend last week.  That’s right, he’s a Brony.  A brother who likes My Little Pony.  I love that he’s secure enough in his masculinity not to have any shame about it!  He was so excited about the party and while she was taking millions of pictures of him posing with ponies, he declared it to be the best birthday party of his life.

Although I’ve sworn off decorated cakes (multiple times), she talked me into making the cake for his party.  (What convinced me was her offering a really strange amount of money – not like $20 or $30, but $32.73.  It was so weird and funny I had to say yes! lol)  It was a super-simple cake and I thought I’d share how to make one if you ever have need of a rainbow or MLP cake.

You only need a round single layer of cake.  If you make it in a 10″ pan, a cake mix will fit in it and the finished cake will serve up to 16 people, although it will be pretty difficult to serve.  I made mine in an 8″ pan and baked the rest of the batter into cupcakes, so this cake only served 8 but with the cupcakes it would have served 20.  You will also need red, orange, yellow, green, blue, purple, and sky blue frosting for the rainbow.  Pack the frosting into disposable pastry bags, preferably fitted with couplers, though you can just slice the tip off the bag to pipe the frosting directly onto the cake out of the bag if you don’t own a lot of couplers or don’t want to buy them. If you are going to make this into a My Little Pony cake, you will also need extra green for the grass (I used a lighter green than in the rainbow). You’ll need some flower sprinkles (I used these) and a grass tip (Wilton #233, and ignore all the other tips – I didn’t end up using them).  If you want to make a pond, you’ll need some clear piping gel and sky blue gel coloring (available at Walmart by the cake decorating supplies in the arts & crafts section).

Slice your cake in half and squeeze/spread frosting onto one side. I made too much red so that’s the color I chose to use.

Sandwich the halves together.

Place the cake cut-side down to your platter or cake board.

Squeeze frosting onto the cake, starting at the middle with the red (I had to build it up a little to make it higher since it dipped down), making stripes in this order: red, orange, yellow, green, blue, and purple.  I just squeezed it out from my coupler without a tip and I thought this made the perfect width of frosting for each stripe.

Repeat down the other side and fill in the bottom of both sides with sky blue frosting to make it look like you’re looking through to the sky underneath the rainbow.

If you’re going to make a MLP cake, figure out where you’re going to put the ponies, then pipe a blue border to outline where your pond(s) will be.  Using your (clean) finger, spread a thin layer of blue frosting over the platter or cake board so that the silver (or other color of the board) doesn’t show through the piping gel.  Tint enough piping gel to fill the pond(s) with sky blue gel color and spread into the pond, creating some ripple effects with your spoon.

Pipe grass onto the rest of the platter and when you run out of light green, use up the rest of your darker green, then panic and use up your yellow.  Then realize there is no other color left that is suitable for grass so be really strange and spread some orange over the rest of the platter, hoping it won’t look too weird if you write a birthday message across it.  Sprinkle your flower sprinkles all over the grass.

Realize the orange is just wrong, and scrape it all off, rejoicing that you found some extra blue you had set aside in a bowl.  Use it to pipe a border for another lake and repeat the steps to create a second lake.  Rejoice that you saved a little bit of white frosting and tint it green to go around the lake, then steal some of the flower sprinkles to put on the new grass.  Much better.

To serve, cut it in half down the middle, then cut each half in half, angling toward the center.  Essentially, you are cutting it the way you would if it was right-side up, but from the side instead of the top.  Cut each thick slice in half and use a spatula or cake server to draw out one of the bottom pieces (most likely two pieces will come out and you’ll have to pull the top piece off onto another plate.  Once the first piece is out, serving the others is pretty easy as they just start falling onto your spatula.

TASTE THE RAINBOW!

Whoa. It’s like a rainbow…IN MAH MOUTH.


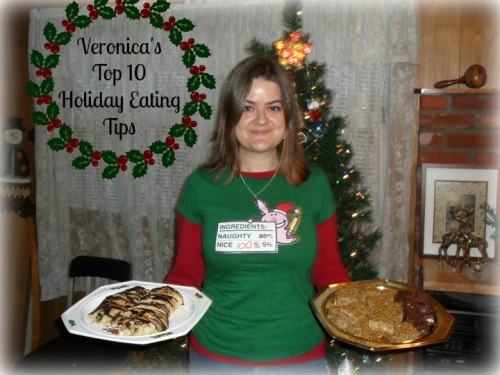
Holiday Eating Tips


Pinned Image

I just got an email from Joy Bauer with the subject line, “12 Ways to Avoid Holiday Weight Gain.”

Say whaaaaat?  Weren’t the holidays invented to give me an excuse to gain weight?  If not, I guess I’ve been doing it wrong all these years.  But it’s so much more fun my way!

(tips snagged from an email)

1. Avoid carrot sticks. Anyone who puts carrots on a holiday buffet table knows nothing of the Christmas Spirit. In fact, if you see carrots, leave immediately. Go next door, where they’re serving rum balls.

2. Drink as much eggnog as you can. And quickly.  Who cares that it has 10,000 calories in every sip? It’s not as if you’re going to turn into an eggnogaholic or something. It’s a treat. Enjoy it. Have one for me. Have two. It’s later than you think. It’s almost Christmas!

3. If something comes with gravy, use it. That’s the whole point of gravy. Gravy does not stand alone. Pour it on. Make a volcano out of your mashed potatoes. Fill it with gravy. Eat the volcano. Repeat.

4. As for mashed potatoes, always ask if they’re made with skim milk or whole milk. If it’s skim, pass. Why bother? It’s like buying a sports car with an automatic transmission.

5. Do not have a snack before going to a party in an effort to control your eating. The whole point of going to a Christmas party is to eat other people’s food for free.

6. Under no circumstances should you exercise between now and New Year’s. You can do that in January when you have nothing else to do. This is the time for long naps, which you’ll need after circling the buffet table while carrying a 10 lb. plate of food and that vat of eggnog.

7. If you come across something really good at a buffet table, like frosted Christmas cookies in the shape and size of Santa, position yourself near them and don’t budge. Have as many as you can before becoming the center of attention. They’re like a beautiful pair of shoes. If you leave them behind,you’re never going to see them again.

8. Same for pies. Apple. Pumpkin. Mincemeat. Have a slice of each. Or if you don’t like mincemeat, have two apples and one pumpkin. Always have three. When else do you get to have more than one dessert?  Labor Day?

9. Did someone mention fruitcake? Granted, it’s loaded with the mandatory celebratory calories, but avoid it at all costs. I mean, have some standards.  (The one exception: Friendship Fruit Cake.  If you receive one, hide it from the family and eat it quickly before they have a chance to impinge on your fruit cake joy.)

10. One final tip: If you don’t feel terrible when you leave the party or get up from the table, you haven’t been paying attention. Re-read tips; start over, but hurry, January is just around the corner.

Now that’s the holiday spirit I’m talkin’ bout!

Tracy’s Top Choices of Cookbooks to ROCK Your Socks OFF!!!

Posted on

So, are you sick of my husband’s craziness yet?  I’m sure he has more in store for us, but this week I wanted to feature my girl, Tracy, from Tracy’s Treasury.  I don’t get to see her often since she lives in OKC, but we keep up with each other online and I adore her site, which features tutorials and instructions for sewing projects, crafting, revamping, repurposing, home brews, and photography.  Some of my favorite posts are how to turn rain gutters into bookshelves,  how to make fleece hats with ear flaps, how to etch glass, and her recipe for snow ice cream, which reminds me of my childhood when Dad would make a big batch on the second snowfall of every winter (he said the first snowfall carried down all the pollutants in the atmosphere, so the second snowfall was a better choice).  Tracy has a great food philosophy and great taste, so please welcome her with open arms as she supplies the very first cookbook recommendation/review on my site!

Tasty AND Healthy Foods For the Family…

tracyscookbooksv

Being the first of the year, I imagine a lot of us have resolved to make healthier decisions. To do that, I have FOUR FABULOUS cookbook recommendations for you. But first, let me just tell you a little about how I roll. I have a nutrition page on my site, which includes both HOW and WHY to change the way you cook & eat… so as you’d probably guess, I do care about making food that’s reasonably healthy and not complete junk. I’m not into all the packaged, processed, hydrogenated junk that turns us into chunky monkeys. But, my family likes regular food like pizza and enchiladas and I will forever be a mac & cheese lover. So where does that leave me as the main meal preparer?

Well, I can tell you one thing… if I’m going to the trouble of MAKING food for my family to eat instead of getting take-out, it better TASTE GOOD or else it’s not worth my effort! I’m not the kind of gal who eats rice cakes. I like real food with fresh ingredients. I don’t want to diet or weigh out serving sizes. I just want a collection of do-able recipes that are yummy and nourishing too.

If you’re interested in changing the way you cook and eat, you’re ready to wean yourself from excessive processed junk that makes you gain weight and feel sluggish, but you don’t really know where to go from here… then perhaps my cookbook recommendations will help. I’ve kind of bumbled around a bit in this area for a while, trying to find that happy balance between “healthy” food and “yummy” food… finding a recipe here and there that was fabulous, simple, and healthy. Now I finally feel like I have a couple of good GO-TO sources for recipes that fit my nutrition approach AND taste great.

So… Without further adieu…

Here are my top three choices. I can’t really rank them as #1 #2 #3 because they all tie for first place, for different reasons. You’ll also notice that these cookbooks have EXCELLENT reviews on Amazon so I am evidently not alone in thinking they’re great. In no particular order here they are….. (cue drum roll….)

My first #1 choice: “America’s Test Kitchen Healthy Family Cookbook:
A New, Healthier Way to Cook Everything From America’s Most Trusted Test Kitchen

I’m so excited about this cookbook! This is my most recent cookbook purchase, and I think it’ll be a looong time before I buy another one. It’s got over 800 All-American homestyle recipes that they made over to be healthier without sacrificing taste. The recipes are great, reasonably healthy choices the whole family will love.

It is NOT a diet cookbook. Their bottom line factor is taste, so you won’t find them plugging in bland cardboard-like ingredients just to reach a certain calorie count. They don’t play games with the serving sizes or nix all the tasty foods that contain fat (nuts, eggs, avocados, cheese, salmon); they “just use them judiciously.”

Here’s their recipe for Baked Chicken Fingers

Pasted Graphic 9

And Creamy Chicken and Spinach Casserole

Pasted Graphic 7

We’ve loved the recipes we’ve tried and are mainly eating from this cookbook right now as I continue to try more of them. I also love all the helpful hints and preparation tips sprinkled through with the recipes. It comes in a nice binder with tab dividers for all the sections- including dessert! We all need some brownies now and then, don’t we? Their desserts reduce fat and still taste deliciously dessert-y. If you don’t believe me, check out their fudgy-brownies, which are nice and fudgy WITHOUT using a cup of butter and a pound of chocolate. What are you waiting for????

My second and third #1 choices:
Whole Foods for the Whole Family
& “Whole Foods From the Whole World

These two cookbooks are fab-u-loso! They have loads of healthy, tasty meals as well as really helpful kitchen tips. I’ve found lots of great dinner recipes, and “Whole Foods for the Whole Family” is my go-to source for baked goods (pancakes, waffles, breads, muffins, etc.) made with mixed flour (I use half whole-wheat, half white/all-purpose). Their cooking philosophy is right in line with mine, and they give recipes for flavorful, nutritious meals made from non-processed foods.

They don’t have impressive covers. OK, one of them REALLY looks like it belongs in the 80’s. Aaaaaand they don’t have dazzling photos inside. Let’s face it- we ARE a little spoiled, aren’t we? We expect glamorous, color photos with each recipe (especially those of us following Veronica’s blog!)… but getting these two cookbooks is quite like gaining your great grandma’s collection of favorite recipes that have been tried and tweaked to perfection over many years. You don’t think your grandma was snapping pictures of her famous world-famous dish before she put it on the table, do you? No. She was probably snapping a rooster’s neck so she could throw him in the oven. You don’t see a great photo before you start cooking… so what? Just trust your grandma on this one- it’ll be yumm-O! And healthy to boot!

Here’s their recipe for yummy Carrot Spice Muffins, which are made with no butter, oil, OR processed sugar…

Pasted Graphic 2
I’d recommend “Whole Foods for the Whole Family” to anyone with a mouth. And I’d recommend “Whole Foods from the Whole World to those who are curious to taste family favorites from around the globe. I got a great recipe for Do Yuk Sahn Juhk from it. I may not pronounce it properly, but it tastes GREAT! :)

And my #2 choice…
Pampered Chef’s “Make it Fresh Make it Healthy

I am a Pampered Chef consultant (only in the most technical sense, I’ve never done a “home party” I just keep up my consultant status to reap the benefits since I LOVE their products) and I have SEVERAL Pampered Chef cookbooks. I will tell you this about PC cookbooks… their recipes are good. Really good. But a decent amount of them rely on packaged foods, which is what I’m trying to scale back on. This one doesn’t. The title says it all.

Coming from Pampered Chef, you KNOW the recipes will be rockin’. The only reason this book is slightly ranked below the first three, instead of having a FOURTH tie for first place is not because the recipes are less fabulous, it’s just because the cookbook isn’t extensive by any means, whereas the first three are.

It’s an assortment of deliciously fresh, healthy recipes you’ll be glad to add to your collection. One of our favorites from this book is Creamy Saffron & Asparagus Risotto. It is seriously SO good that if I had to pick only 5 meals to be served the remainder of my life over and over again, this would make the cut.

Pasted Graphic 3(Disclaimer: I don’t use wine, I substituted in slightly watered-down grape juice.)

The same gal posting the Risotto recipe also featured their Cracker-Crusted Chicken, which takes 15 minutes from start to finish. That’s a winner in my book.

WAVYLINE_brn

Well… That concludes my top choices of cookbooks to rock your socks off. Buy them, love them, and thank me later ;)

But, while I have your attention, I wanted to mention three more “honorable mentions….” which are each geared to more specific cooking needs…

For Babies & Toddlers…

Mommy Made and Daddy Too! Home Cooking for a Healthy Baby & Toddler,” by Martha & David Kimmel. This is a FABULOUS cookbook for making your own fresh baby food!!! It also has some nice transitional recipes for toddlers (& the rest of the family). I Love it. I bought it for my sister-in-law, who wanted to make her own baby food. She received a couple different baby food books as gifts, and this was her favorite as well. If you’re considering making your own baby food, be sure to check out my Mommy-Made Baby Food page!

For Sneaky Moms of Picky Kiddos…

Deceptively Delicious,” by Jessica Seinfeld. She has yummy, easy to make recipes that sneak in pureed veggies and improve store-bought foods. Here‘s her website for it. I have tried a couple of these recipes, and they were tasty. Luckily we don’t have picky kids (yet) so I don’t have to sneak stuff in. I do find this handy though when we’re making baby food purees and have them on hand anyway. If you like this sort of thing, she also has a sequel called Double Delicious!: Good, Simple Food for Busy, Complicated Lives.

For Those More Aggressively Trying to Lose Weight…

Cook Yourself Thin: Skinny Meals You Can Make in Minutes” cookbook by Lifetime Television.  This is a must if you’re wanting to hit it hard going healthy… Although it’s not considered a diet cookbook, I’d say it’s the closest thing to it that I’d use happily. They revamp your favorite recipes, keeping or improving flavor while increasing nutrients and cutting calories.  Their introduction is really good too, giving lots of helpful hints.  Click here for the show’s website, and here to read and print recipes they used on the show.

Well, that’s it! I hope my cookbook recommendations are helpful, and here’s wishing you a happy, healthy new year!

Miracle Pan Release


I bake a lot of cakes.  It’s kind of my thing.  I even have a T-shirt that says, “Real Girls Eat Cake.”  Because I want people to know that the reason I eat so much cake is that I’m real, and not because I have a problem.  Although I may not be fooling anyone but myself with that shirt.

Anyway, because of all the cake-baking happening in my kitchen, I usually also have a can of Baker’s Joy or a bottle of Wilton’s Cake Release in my pantry because they make such an easy one-step job of greasing and flouring my cake pans, which nearly every cake requires.  With a push of a spray nozzle or a swirl of a pastry brush, my pans are covered in seconds and there is never a pile of flour laying around my trashcan.

However, I can be kind of a tightwad, so when my friend, Suzie, sent me the link for a miraculous recipe to make my own “Cake Release”-type product, I was overjoyed.  And let me tell you, it works SO much better than Baker’s Joy.  And just as good as Wilton’s product at a fraction of the price.  I’ve never had a cake slide out so easily, except when using Wilton’s Cake Release!  It is very shelf-stable and easy to make, so I encourage you to whip up a batch to keep on hand for your own baking projects.

Miracle Pan Release

Printable recipe
Printable recipe with picture

1/2 cup vegetable shortening
1/2 cup vegetable oil
1/2 cup all-purpose flour

Whisk thoroughly until everything is incorporated and smooth. Store in airtight container at room temperature. To use, dip a pastry brush or impeccably clean fingers into the mixture and spread a thin layer over the bottom and sides of pan(s) for any recipe that calls for “greasing and flouring” your pans.

*Note: you can make any size batch you’d like, just make sure all amounts of each ingredient are equal to each other.

Recipe source: Apron of Grace

How To Henna Your Hair

Posted on

Being raised in a whole-foods home, it only makes sense that my mother also chose all-natural hair and body products.  I started breaking into her stash of henna hair color when I was in middle school, so I have more than 15 years experience with it by now.

You may have heard of henna tattoos, popularized by the Indian culture, which are temporary and slowly fade over time.  You may not have been aware that you can use henna to color your hair as well, but it has been done since at least 400 AD.


Henna is a tall bush or small tree, and the leaves, once dried, are powdered and can be mixed with hot water or an acidic liquid to dye skin, hair, and nails.  The benefit of using henna on hair is that it  seals in oils and tightens the cuticle, resulting in a rich, healthy shine.  It contains no ammonia, peroxide, or other chemicals that are damaging to hair.  Unlike other hair dyes, it fades slowly over time (usually it lasts 4-6 weeks) so there are no tell-tale roots as your hair grows out.

Things you should know about henna:

1) It can only make your hair darker.  It bonds with the protein in your hair, adding color to it (unless you use the neutral henna, which only conditions without adding color); you can’t use it to lighten your hair.

2) If you get any color besides “neutral” or “black,” you will get red highlights in your hair.  In my case, I buy “light brown” and I get a medium brunette color with pretty red highlights.  You can get many tones of red, such as strawberry blonde, auburn, copper, etc, but all of these will only add color to what you already have so don’t expect your black hair to turn strawberry blonde if you choose that color.  It may give some warmth to your color, but will not lighten.

3)  In my experience, henna will not take your hair too far from the color you start with, so if you buy black and have light brown hair, you will become a darker brunette.

4) It is quite goopy and messy and can stain anything it touches.

5) It can react with chemicals in your hair, such as chlorine, or those used in coloring or perming.  In the picture below, taken before a homecoming dance my freshman year of high school,  you can see I turned the ends of my hair green when I tried using black henna after an entire summer of swimming daily in a public pool.  The photo was taken two months after the application, so you can see that green really hung on!  If you want to use henna after your hair has been exposed to chemicals, I highly recommend doing a strand test first.

 photo scan0031.jpg

6) You can add things to the henna mixture to enhance the conditioning and coloring properties, and adjust the amount of water used accordingly.  For deeper conditioning, add an egg or two tablespoons of yogurt.  To bring out golden highlights in already light hair, replace heated water with half warm water and half warm lemon juice or chamomile tea brewed with three tea bags.  To create rich golden or copper highlights add three tablespoons vinegar or fresh lemon juice.  To enrich browns or reds, add one teaspoon ginger, allspice, nutmeg or paprika.  To enhance brown tones, replaced heated water with day-old, black, very warm coffee (not instant).

7) Henna has a distinct herbal smell, which is quite pleasant compared to some of the harsh chemical dyes, but it can be off-putting to some.  It reminds me of a blend of powdered algae, herbal tea, and marijuana.  I sort of feel like a hippie when I’m applying it. :)

8) You can not use any metal during henna preparation or application, as it will react to it and make your hair a funky color.  Which could be fun, but if you’re hoping for a natural color, steer clear of the metal and use a glass, ceramic, or plastic bowl and stir with a wooden or plastic spoon.  I used a small silicone scraper this time.  They also recommend you use distilled water, but I just use purified water and this has never been a problem for me.

There are many henna products for hair and I have tried a few brands, but the one my Mom used is Light Mountain Natural, and after trying other brands, it continues to be my preferred henna product to this day.  Light Mountain Natural is a pure, natural product made from 100% organic powdered botanicals of three species of herbs: Red (Lawsonia inermis), Neutral (Cassia auriculata), and Black (Indigoferae tinctoria).  These powdered botanicals are blended for a rich medly of color.   Botanical color may vary from crop to crop and season to season, but their blending process helps compensate for these variations.

The instructions I’m giving are according to my experience with the Light Mountain Natural henna, and may not work with other henna products.  I use light brown, which I buy at a local health food store that has nothing to do with the Whole Foods chain.  In the box, you will get a bag of henna, instructions, plastic gloves, and a plastic cap.

The day before, please do an allergy and strand test according to the package directions.  I never do, but it is in your best interest, especially if you’ve never used henna before.

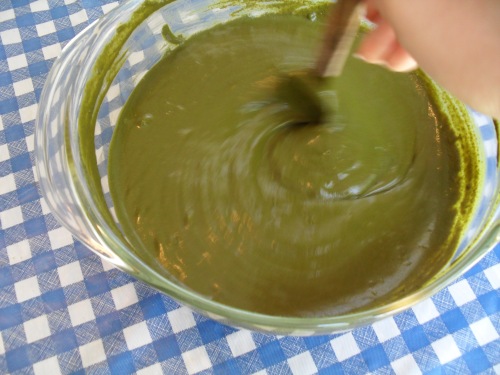
To start, empty your henna into a glass or plastic bowl. Add enough water, stirring with a non-metal utensil, that you get a consistency similar to yogurt.  I like to go a little thin, using two or more cups of water, because it thickens a bit upon standing, and it’s easier to apply if it’s not too thick.

Let mixture sit for 1-3 hours to cure.  I usually just wait an hour.  Curing cuts down on the time you will have to leave it on your hair, but you can use it as soon as ten minutes after mixing if you like.  The mixture will thicken and get darker on top. Stir to check the consistency and add more hot water if necessary.

They tell you to get your hair wet, and I went ahead and did it this time, but usually I apply the henna to my dry hair and I noticed no difference in the final outcome, except my grays didn’t seem to be covered as well.  Whether you get it wet or not, it’s now time to don your “henna shirt,” i.e. any shirt that you don’t mind ruining.  I have a shirt designated for henna application and it has been used many times.

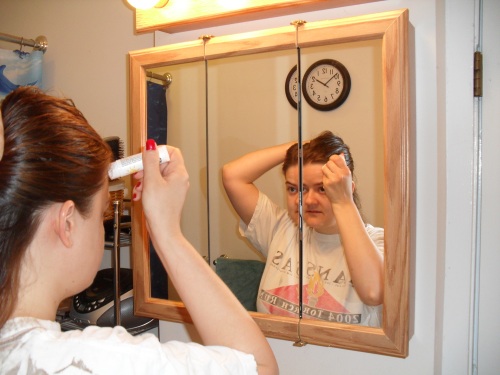
Apply a cream or Vaseline around your hairline to protect your skin from getting stained.  I used a sunscreen stick.  Whatever works. :)

It helps to pretend you have no teeth while you apply it.

“Back in my day, we didn’t have these fanshy schmancy sunshreen shticks, but they sure are handy!”

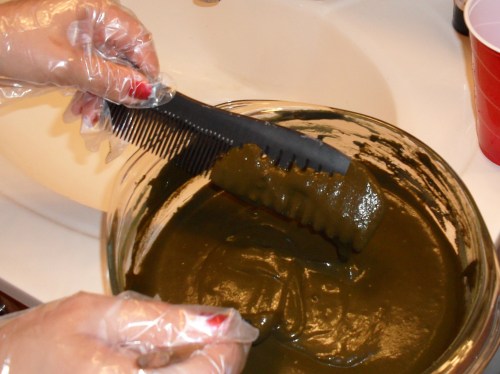
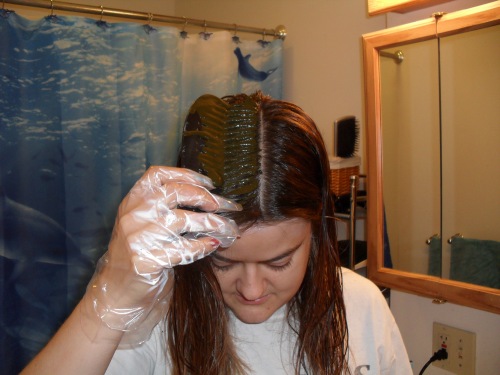
Apply the henna from roots to tips whichever way you please.  With a comb…

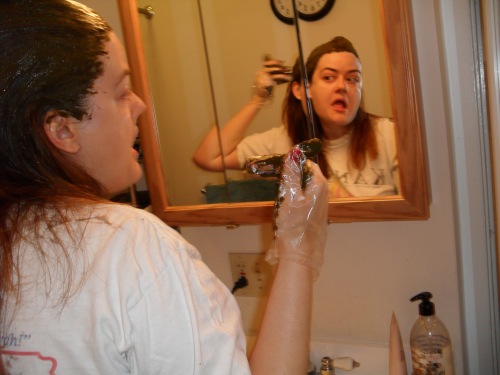
Or my preferred barbarian method–slapping it on and rubbing it in with my hands.

I think I make this same face when I apply mascara.  Perhaps the synapses in my brain were misfiring and telling my face that doing any beauty regimen requires wide eyes and an open mouth.  Apparently I channel the elderly quite a lot during this process as well…

“What’s that, shonny?  I can’t hear you, shpeak up!”

As I apply the henna downward, I like to pile my hair up on top of my head to keep it out of the way.  You can see what I meant when I said it gets messy.  I always put cream or Vaseline on my ears and all the way around my hairline because it never fails to get on my skin.

I just keep applying it until the entire bowl is on my head.  My hair is fine and I don’t really need that much, but at least I know every inch is covered.  If you have very long or thick hair, you might need two boxes of henna, but as you saw, one bag makes quite a bit.  If you’re spreading it further, be sure to massage it into your hair before covering with a cap.

When you’re finished applying the henna, the first thing you should do is clean up.  Discard your gloves and clean up all the henna that dropped on your sink and floor.  Use damp paper towels or a damp washcloth to wipe away any henna that is on your face, ears, and neck.  Next, don your plastic cap.

The one that comes with the kit (right) is square and after fitting it to your head, you have to close the gap at your nape with a hair tie, so I usually use a handy-dandy shower cap instead (left).

It is now time to apply heat, which activates the henna and bonds it to your hair.  My Mom used to have a retro hair dryer that came down over her head, which was uber fabulous for this part, but at my house, I apply heat with a handheld blow dryer.

Move the dryer around constantly so you don’t melt the cap, and maybe take this time to practice your lip curls and strengthen your forehead with eyebrow lifts.   I also like to use my other hand to press down on the cap while I’m heating my hair, so that the henna disperses even better while the color is setting.  The directions say to heat intermittently to maintain constant warmth, but I use the blow dryer for fifteen minutes straight, then, depending on  my mood, I will either go online until my hair gets cold, or go straight into the shower.  This time I went straight into the shower, which could be why my grays weren’t covered as well as they usually are–not enough time with the henna on.  Depending on your hair type (mine is super thin), the process usually takes 45-minutes of off-and-on heat application.

Get thee to the shower and rinse the henna out of your hair with warm water.  It is gritty, so it will take some time. Once you get as much of the henna out as you can, fill your hand with a huge pile of conditioner and work it through your hair from roots to tips.  Use a wide-tooth comb or your fingers to comb through it so that your hair is saturated with conditioner and tangle-free.  This will help get the remaining henna out as you rinse it again.  Do not use shampoo.  Ideally, you shouldn’t use shampoo on your henna’ed hair for 24 hours, but I usually do my first shampoo after 12 or so.

Style your hair as usual.  I usually just comb my hair and let it air dry, but after applying henna, I usually at least blow dry it because I’m eager to see what color it is.  Plus, I imagine that the heat helps set the color even more.

Here’s my hair about 6 weeks after the last henna treatment, and the day before this one:

And here it is after this henna treatment:

Another note: there is a specific Light Mountain Natural henna treatment for gray hair, but I haven’t tried it yet, as it is a two-step system and I’m not terribly patient, plus buying it would confirm my suspicion that I’m getting old.  The gray hairs are bad enough without having to buy a special gray hair treatment for them, you know what I mean?

Disclaimer: Light Mountain Natural doesn’t know I exist and did not compensate me in any way for this tutorial or for my opinion of their products.  I just included it here because it is the best henna product I know of and wanted to share the best with you. Check out their website here.

I gathered my information about henna and the henna hair color process from knowledge passed on to me from my mother, from Wikipedia, and from the Light Mountain Natural instructions.  I nabbed the first two pictures off the sites given on the actual pictures themselves.

Grandma’s Pie Crust Cookies

Posted on

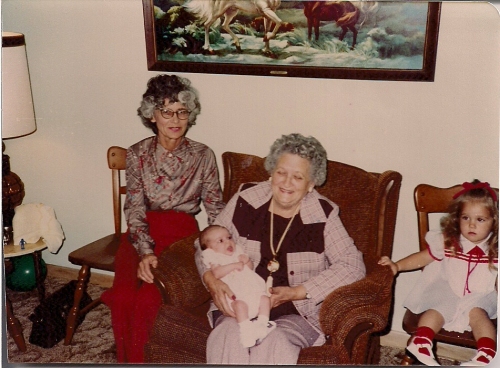
Lacey, Mom, Me, Dad, and Grandma Davis, 1997

We all had a special someone or someone’s on our minds and hearts on Memorial Day and for me, that was my Grandma Davis, my paternal Grandmother.

Grandma and Grandpa Davis with their eight children. My Dad (front middle) was the surprise, born when Grandma was 45 and most of the other children were grown.

As a kid, I remember being annoyed when she telephoned because she would talk our ears off and at that age, I didn’t have the patience for it.  I remember listening to stories from her childhood while visiting her, often wishing I was outdoors playing instead.  I now wish I could do those years over and spend the time with her that she craved and that I long for now that it is too late.

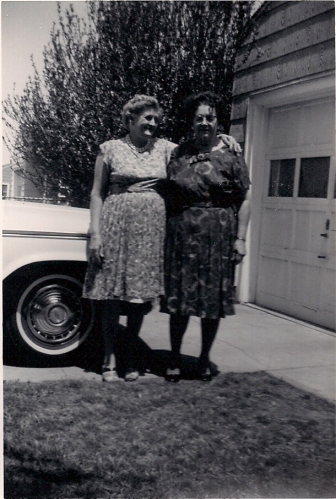
Grandma (left) and a friend in 1961

I want to ask her what life was like during her childhood, during the Depression, and how she felt the first time she rode in a car.  (She was born in 1904.)  I want to hear more about the years when they had a farm and ranch in Nebraska and she cooked for all the ranch hands.  I vaguely recall a story she told me about stuffing mattresses with human hair, and now I burn with curiosity about it.  Was it hair from concentration camp victims during World War II?  Why was she stuffing mattresses with it?  I think I remember her saying that the government was letting poor people do it for free so they had something to sleep on.  Could this really be true?  At the time, all that really made an impression was the way she pronounced mattresses.  How sad, when obviously there was quite a compelling story there if I’d just had the interest to ask.

In Grandma Davis's arms the week of my birth, with Grandma Millner on my left and cousin Tammy on my right.

There were a few stories she told that did pique my interest, and they were usually the ones in which she was being ornery or rebellious.  I guess I held her up as a hero for these instances, like when she set her mother’s kitchen on fire as a child because she didn’t like the new curtains.  I thought that was brilliant, because I would have loved to take revenge on my mother for all manner of wrongs (mostly imagined) that she committed against me.  I also loved the story of how she punched her future husband when he tried to be a gentleman and pick her up and carry her over a puddle.  She was indignant because she was a self-sufficient woman that could walk over the puddle on her own two feet and didn’t need a man to show off for her in such a silly manner.  That really tickled me!  Or the story about when she punched him years later when she thought he was asleep, (apparently she had waited for this moment to punch him because he had made her mad!) and he bit her thumb when the punch landed.  Or the time when she found him gambling with his friends and started throwing rocks at them in a fury.

Meeting my Great-Grandma Gailey. Looks like we don't quite know what to make of each other! Grandma Davis, her daughter, is behind her and my Mom is holding me.

I guess my Grandma was a feisty lady!  But she also was incredibly loving.  She cried every time it was time for me and my sisters to go home and she loved having us stay with her.  Although I had no patience for her stories, I loved staying with her too because she let us watch all the TV we wanted, she always had tins of cookies and peanut butter crackers that I liked to sneak into, and I loved her cooking!  She made us things like pigs in blankets, macaroni and cheese, fried chicken, and let us have angel food cake with whipped cream for dessert.  This was AMAZING food to a child that frequently dined on baked fish, plain salads (dressing was a no-no), lentils, and tofu sandwiches on Ezekiel 7-grain bread.

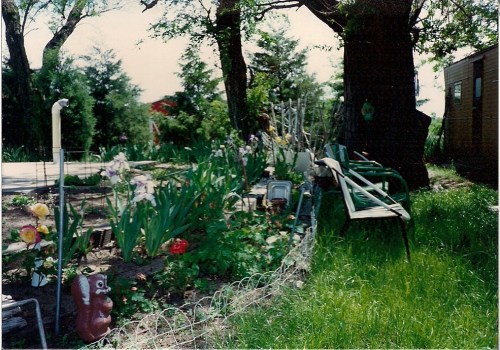
Grandma's yard in the 80s. Can you find the wind catcher she made out of a 7-up bottle?

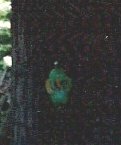
Here it is, as clear as I can get it. She used to make a lot of these.

One of the things Grandma Davis taught me was not to waste anything, and that almost everything can be put to use.  She made rugs out of empty plastic bread sacks.  She made quilts out of old jeans.  She took empty 2-liter pop bottles and turned them into hanging ornaments that caught the wind and turned on her front porch. She also taught me to make little cinnamon roll cookies with leftover pie dough, rather than throwing it away.

Photograph courtesy of Upscale Downhome. This is exactly how my grandma’s bread sack rugs looked!

Grandma made this blanket for us with old jeans. As for the identity of the naked child, I plead the fifth.

RE: Plastic Soda Bottle Wind Chimes

Photo source. My Grandma’s wind spinners were always made with 7-Up bottles and looked very similar to this, though she made smooth cuts instead of wavy.

I’m thankful for every story that I can still remember, and for this lesson in waste that she passed on.  Sure, it can get me into trouble, because I tend to hoard things (for starters, I have a sack full of clean, empty food jars in my basement, waiting for an opportunity to be useful), but when it comes to these cookies, I feel the lesson is a blessing!

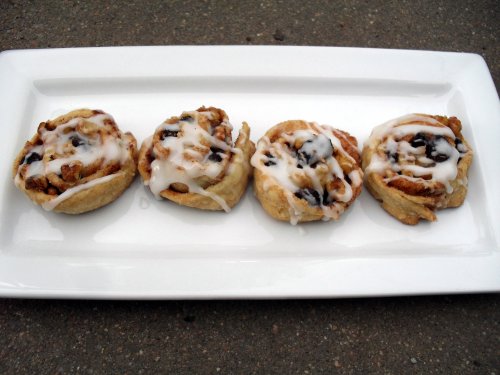
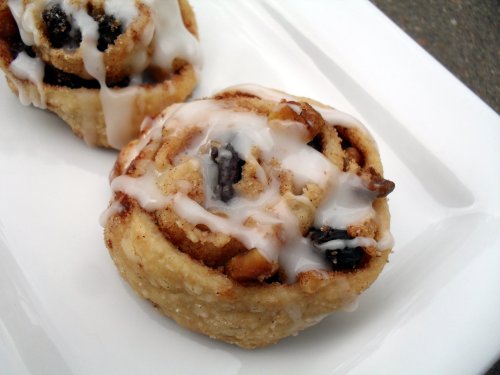
These cookies are delicious and so simple to make.  Flaky, buttery pie pastry layered with cinnamon, sugar, raisins, and nuts makes for something nearly akin to a kicked up cinnamon roll, and I like to go ahead and drizzle a simple glaze over the top of mine since I keep the sugar on the inside pretty low.  It makes them even more like a cinnamon roll in appearance, which I like.

I think many Grandmas taught their grandchildren to make these cookies, though my Grandma’s way seems to be a little different from the other recipes I’ve seen online.  Those call for cinnamon and sugar only, but that’s not the way Grandma Davis rolled (if you’ll pardon the pun).  She sprinkled on the raisins and nuts too!  Maybe it’s only because it’s the way my Grandma made them, but it’s the way I like them best.

Cinnamon Roll Pie Crust Cookies

Printable recipe
Printable recipe with picture

Leftover pie pastry (I recommend this recipe–it stays tender and flaky, even after gathering up the scraps, pressing together and re-rolling)
Sugar
Cinnamon
Raisins
Nuts
Powdered sugar & milk for optional glaze

Gather up your pie dough scraps and press together to form a new ball and flatten into a disc.  Wrap in plastic wrap and place in refrigerator until ready to use. If you aren’t making the cookies for a day or two, you’ll want to remove the pie dough from the refrigerator and leave at room temperature for half an hour to an hour so that it is soft enough to roll out.

Preheat oven to 375. Line a cookie sheet with parchment paper, a silpat mat, or spray with cooking oil.

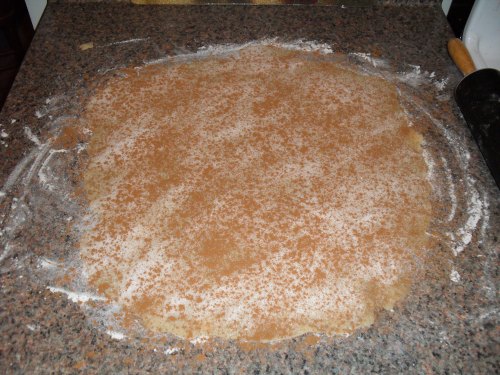
Roll out the leftover pie pastry on a floured surface.

Sprinkle sugar over the top.  This amount won’t make the cookies very sweet, but that’s OK if you plan on using a glaze.  If you’re skipping the glaze, you’ll probably want more sugar.

Sprinkle on the cinnamon!

You could stop there, but I like to add some raisins and nuts, because Grandma said so.  And Grandma knows best.

Roll into a tight log, like so:

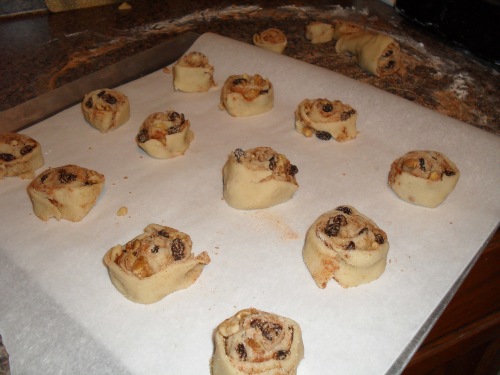
I didn’t get any pictures of this because my hands were busy doing this step, but use a piece of waxed floss to cut 1/2″ cookies from the log. To do this, run the floss under the log, then cross the ends of the string over the top, and pull the ends in opposite directions until the string passes through and makes a cut. This will be messy and you’ll have nuts and raisins popping out which you can then pop back in before placing on prepared baking sheet. Some of the cookies will have to be rewrapped completely, especially those on the end that are smaller. Place all the cut cookies on the baking sheet.  I like to use parchment paper, but would like to get a silpat mat soon since it’s reusable.

Bake for 15-20 minutes, depending on the size of your cookies. Cool on a wire rack. I just slid the entire sheet of parchment paper off the cookie sheet and onto a cooling rack.  Handy dandy.

Once cool, you can make a glaze by mixing powdered sugar with a little milk until it is a drizzling consistency. I think I used like 1/2 a cup of powdered sugar and a teaspoon or two of milk. Use a spoon to drizzle the glaze over the top.

If you aren’t serving these right away, let them sit out until the glaze hardens, then you can store them in an airtight container or Ziploc bag. Will keep for at least a week but they won’t last that long!

In loving memory of Alta Davis.  1904-2001

Making a Lattice Top Crust {Step-by-Step Tutorial}

Posted on

Today is my 11th wedding anniversary and Dennis and I are gallavanting around Wichita during the annual River Festival to celebrate, but thanks to the magic of prescheduled blogging, I am able to instruct you on how to make a lattice top crust for a pie despite my absence!  This would be even cooler if I could preschedule my hair to get cut and dyed at the same time, but I’ll take what I can get.

OK, I know I promised a pie recipe next, but since the recipe instructs you to make a lattice top crust, I thought it was high time I broke out my ancient step-by-step lattice top crust photos to explain how to do it.

Making the nifty woven lattice top crust only seems complicated but the process is quite simple.  See for yourself!

Step 1: Lay 5-7 strips of pie dough on top of pie in one direction.

Step 2: Lift every other strip and pull back half-way.

Step 3: Lay a strip down across the middle in the opposite direction.

Step 4: pull folded strips back down over the horizontal strip.

Step 5: pull back the strips that weren’t folded back the first time.

Step 6: lay down another horizontal strip.

Step 7: lay the folded strips back down over the horizontal piece.

Repeat, repeat, repeat, alternating the strips you lift, and then spinning the pie plate around when you finish the first side to do the other.

Looking dandy!  Time to give her a spin and repeat on the other side.

Like so.

Until…

Voilà! Your lattice top crust is complete.

‘Tis a thing of beauty, my friend.

Now.  I must tell you, I do not have pictures of how to properly do the fluted edge for a pie with a lattice top crust.  On this particular one, which happens to be a Razzcherry Pie, I didn’t leave an overhang on the bottom crust so I chose to simply tuck the lattice pieces underneath the scant edge that remained.  Which is perfectly fine and much easier than making a fluted edge.  However, if you want a fluted edge, such as I have here on this cherry pie:

…this is what you do: leave a 3/4″ overhang on the bottom crust.  After finishing the lattice strips, trim them just beyond the inner edge of the pie, then fold the overhang over the strips and press to seal.  Then you can flute the edges using the technique I demonstrated in this video, and you’ll have a gorgeous pie!  I will update this post with pictures to accompany these instructions on finishing the edge when I make my next lattice top crust, but for now, I hope the instructions alone will suffice.

Happy pie making, my lovlies!

Working with Pie Dough {Video Tutorial}

Posted on

Photos by me, made into a collage by Laura Flowers.

Although pies certainly have their place in the fall and winter, I find myself making more of them during the warmer months, when fruit is plentiful, and my family begins to favor it over cake.  I’m getting ready to post another summer pie recipe, but thought I’d first share a video tutorial on working with pie dough that I made last summer for The Cooking Photographer and never got around to sharing on my own blog.

I  can hardly claim to be a pie master, but with as many pies as my family demands, I do feel pretty comfortable by now when working with pie dough.  I realize pie dough scares some people the way yeast bread used to scare me, and I hope that this video might help you with whatever difficulty you have had in the past.  This is just the way I do it, and it works for me, but once you try it you will realize in time what works for you.  If at first you don’t succeed, try, try again!

I used this recipe for the pie dough in this video.  It is my favorite and the one I use if I have time to make my dough from scratch, otherwise I go for Pillsbury!

Cake Pops, Balls, & Truffles: Troubleshooting & FAQ

Posted on

I posted a cake pops tutorial last January and have gotten so many questions in the comments section, usually the same few repeatedly, that I’m having trouble locating them to reply when a new one is posted anywhere other than at the very end.  An FAQ is long overdue, and I hope to address all the concerns and questions I have received over the last year and a half so that my readers have somewhere to go to resolve their problems and get their questions answered.

I have made many batches of cake pops, balls/truffles, and cupcake bites, but I have NEVER done anything creative like Bakerella so if you’re looking for inspiration, check out her site.  This post is solely meant to help you with the basics.  If you have a question that isn’t answered here, leave it in a comment or email me at vraklis@yahoo.com and I’ll add it to this post.  Thanks!

Frequently Asked Questions

Q: Why is my chocolate cracking?

A: I have found mine cracks if I overheat the chocolate before dipping, or if I freeze the cake balls/pops very long before dipping.  Make sure you very gently heat your chocolate–you never want it to get hot but just barely warm enough to melt.

The surest way to keep your chocolate from cracking is to place your styrofoam block in the refrigerator, or even better, the freezer, and place each pop on it after dipping.  This is a pain, but if you have a lot of issues with cracking, this will prevent it.  However, don’t leave your pops in the freezer too long.  Just let them sit long enough to get hard, then remove.  If they get too cold, they will sweat when you remove them from the freezer.

The fix: if your chocolate does crack, just spoon some melted chocolate over the crack, making sure to cover it well.  It won’t be pretty, but it will keep the cake ball contained and will still be delicious.  If you are using sprinkles, that will help disguise it.
Q: My chocolate is too thick to dip.  What’s going on?

A: You most likely overheated your chocolate.  Chocolate is temperamental and needs to be heated very gently.  I’m extremely careful when microwaving chocolate, stirring it very well every 15 seconds (after the initial 30 seconds-1 minute, or whatever your package says) so that the residual heat does the melting instead of doing it all with the heat of the microwave, which will overheat it.

The fix: stir in some vegetable or canola oil until thinned to the desired consistency.  Your chocolate will dry softer than it would have, but it will still be firm enough to hold the cake ball inside.
Q: What chocolate melter are you using in your video?  Could I use a crockpot instead?

A: It’s a Wilton Chocolate Melter Deluxe, which is no longer for sale.  Wilton has upgraded the pot to a “Chocolate Pro,” available for purchase here.  I don’t actually use mine for melting the chocolate as it takes a long time and I’m impatient, but after melting it in the microwave, I like to pour it into the melter and set it on “warm” to keep the chocolate from solidifying during dipping.  I do find I need to shut it off every so often to keep the chocolate from getting too hot.

I have not tried using a crockpot to melt chocolate, but a reader, Sherry, says that she always melts her chocolate in the microwave and then puts it in the crockpot on the lowest setting to keep it warm while she dips.

Q: Why are my cake balls falling off the sticks?

A: This could be due to many things.  Most likely, you added too much frosting.  Start with less and add more as needed.  Depending on the moistness of the cake you are using, you may not need any at all to get the crumbs to hold together.  I usually use 1/3 to 1/2 cup, even with moist cakes, because I prefer the sweeter flavor to those without any frosting, and that isn’t so much that they are mushy.  Second, make sure the cake balls are cold before you start dipping.  I’ve noticed if I leave my tray of balls out while I’m dipping, by the time I get to to the last ten or so they are starting to slide off the sticks because they aren’t as cold.  Third, make sure you dip the sticks in chocolate before inserting them into the balls (is it just me, or does that sound kinky?).  This will ensure that the balls adhere to the stick.

Q: What is almond bark?  And can I use regular chocolate instead?

A: That is just what we call candy coating around here.  It’s also called “chocolate flavored bark” and “vanilla flavored bark.”  It’s basically chocolate, white or regular, that has palm kernel oil added so that it dries to a nice, hard finish without having to temper it.  You can use any type of chocolate you wish, whether it’s the real stuff, the white stuff, chocolate melting wafers, or candy melts like Wilton has.  If you use real chocolate, add a tablespoon of vegetable shortening or oil per pound or bag of chips (12 oz) and melt them together.

White Cake Balls 1-28-10 in Candy by Veronica Miller

Q: How can I color my white candy coating?

A: I have used powdered icing color with success, but regular icing gel color makes it seize up.  You can do it this way, and just add oil to thin the chocolate back out (I have done this), but the best thing to use is oil-based colors made specifically for candy, such as these.  Check out your craft stores, like Michael’s or Hobby Lobby, or if you have a local cake supply store, they might have them as well.  These same stores usually offer colored candy melts  as well, so that you don’t have to color them yourself.
Q: I find cake balls too sweet. Is there something I can use besides frosting?

A: Certainly!  All you needs is a binder to keep the cake crumbs stuck together when you roll them into balls.  I have a co-worker that uses peanut butter in her chocolate cake balls and lemon pie filling in her lemon cake balls.  Other ideas would be pudding, cream cheese, softened butter, bittersweet or semisweet ganache, sour cream, mayonnaise, jams & jellies.  Just be careful and add a little at a time, as many of these would go further than frosting and you probably wouldn’t need very much.

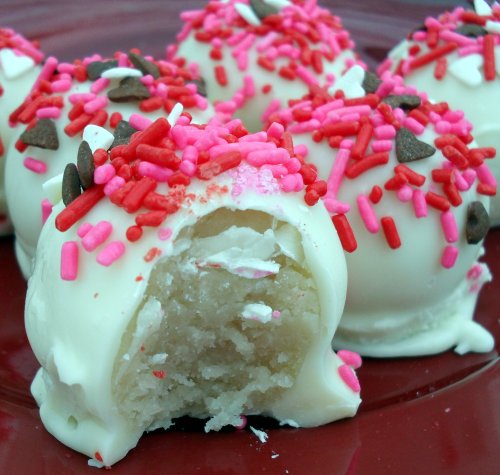
If you don’t want to add anything, here’s what you do: make my favorite chocolate cake, process it to crumbs in the food processor and then wad up balls of the crumbs and roll!  This particular recipe sticks together with nothing added!  The pops end up tasting more like cake than candy, although the texture is still more dense since the crumbs are compacted.  Here is the picture of the inside of a cake pop made this way:

Q: Do I have to use a cake mix?

A: No, make a scratch cake if you wish!  I prefer the taste of pops made with a cake mix, and since it takes so much time to make the pops themselves, making the cake from a mix is just a shortcut, but not required.

Q: How should they be stored? 

A: Store them covered in the refrigerator.  I prefer to remove mine at least a couple hours before serving to serve at room temperature, but they can be served cold and really should be if your climate is very hot or humid.  Here in Kansas, I don’t have to refrigerate them and if I’m making them the day before serving, I won’t put them in the fridge at all.

These are “Cupcake Bites,” which you can learn how to make here.

Q: How far in advance can I make them?  Can I freeze them? 

A:  You can make them a month in advance, if you like, because yes you can freeze them!  Once the chocolate is hard, there is no risk of the chocolate cracking from freezing the pops/balls and removing them.  If you freeze them, be sure to defrost them in the refrigerator 24 hours before servings so that they won’t sweat when you serve them.  They sweat like crazy if you take them straight from the freezer, especially in the summer.  If you don’t wish to freeze them, I’d recommend making them no more than a week in advance and keeping them in the refrigerator.

Q: Why are my sticks getting yellow and oily?

A: I have had this happen only once, when I used a real buttercream (made with mostly butter and eggs) instead of American (powdered sugar-based) buttercream.  I think if there is too much fat in your cake ball mixture, it will seep into the sticks over time and turn them yellow.  Try using less frosting next time.  Lately I’m using only about 1/3 cup per batch.

Q: Can I use something besides chocolate or candy coating for dipping?

A: I have not personally tried anything else, but one reader had success using a chocolate glaze, and another (thanks, Praveena!) had the brilliant idea of using royal icing for her friends that do not like chocolate.  (Royal icing dries hard so you’d want a very thin layer.)  If you wish to try the aforementioned glaze, here is the recipe Michelle used and shared with me:

1/2 cup heavy cream
2 tablespoons light corn syrup
1 1/2 cups chocolate chips

Put cream and corn syrup into pot and heat until it just starts to boil. Then remove from heat add chocolate chips, cover and let stand for 5 minutes. Then stir until combined. A note from me: this is basically ganache with corn syrup added and will get quite firm when cold.  I’d recommend keeping the finished pops in the fridge to keep them intact.

Q:  What is your most popular flavor, and are there other recipes you can share?

A: I found a slew of recipes on Wilton.com but have no special ones of my own.  I’ve only tried three flavors myself: chocolate, white, and red velvet.  Chocolate is the best and red velvet is the most popular (because of Christmas and Independence Day).  White isn’t bad, but just not as good as chocolate, but I did like it a lot when I filled the centers of some white cake balls with a bit of  wedding cake frosting–it was for snowball cake truffles at a Christmas eve party but the taste was like wedding cake truffles–pretty cool!  I almost always mix my cake crumbs with homemade cream cheese frosting, but have also used mocha buttercream, white celebration frosting, and ganache.  It really doesn’t matter what frosting you use–it’s all good.

Q: What size sticks to you use, and where can I find them?

A: The ones I usually get are about 4″ long, but you can use any length you wish.  I get mine at Walmart in the cake decorating supplies section, but you can also find them at craft stores like Michael’s and Hobby Lobby, or cake & candy supply stores.

Q: Do I have to use a food processor to crumble the cake?

A: This is my preferred method, especially when your cake has some dry edges, because it gives you uniform crumbs that easily mix with the frosting, but I’ve also used my hands and it gets the job done.

Q: I’ve noticed that some of my cake pops start leaking oil once the chocolate is set.  Why is this happening?

A: I usually have 1 or 2 pops or balls per batch that leak oil, and for me it is always because 1) a miniscule spot on the ball didn’t get covered with chocolate or 2) I left an air bubble in the chocolate before it set, which creates a weak point that can’t contain the pressure of the filling so that it eventually starts to squirt out.  If there is any spot not covered, the oil will separate from the cake mixture and start leaking out (I’ve even had the cake ball mixture itself squirt out!), so be thorough when you’re dipping.  Also, make sure you poke any air bubbles you see before the chocolate hardens so that the liquid chocolate will fill in the space before it sets.  I usually use the ones that spring leaks for “taste testing” since I always like to enjoy one or two of them from each batch, but if you want to fix it, you can: dab off the oil and spoon on a little bit of chocolate onto, around, and a little beyond the area where the oil has touched.  If you don’t spread the chocolate further than where the oil was, the oil will follow the same path out and will leak again, despite having been recovered.  You need a tight seal and that means chocolate on chocolate with no oil on the surface.  Also, if you use sprinkles that have sharp edges, be careful and don’t use a lot of force because if they poke through to the cake beneath the chocolate, oil will start to leak out from the area once the chocolate is set.

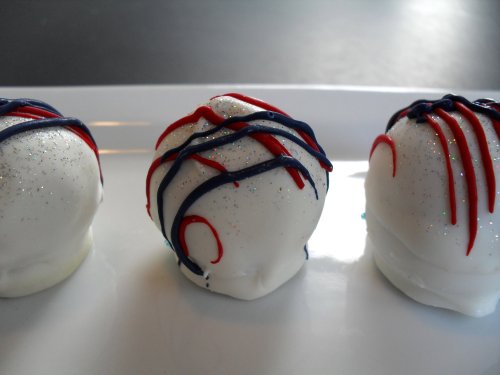
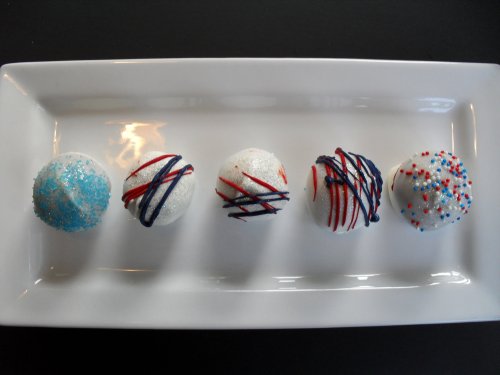
Additional info: the glitter you see on the snowball (or wedding) cake truffles and on the July 4 cake balls is edible and is called “Disco Dust.”  I used “rainbow” on the snowballs and hologram silver (mixed with rainbow) on the July 4 balls, and it is available in a wide range of colors.  I recommend rainbow, as it goes well with any color.  I purchase mine at Cake Stuff! in Wichita, KS, but you can find it online as well.

Related posts: Step-by-step cake pop tutorial, instructions for making cake pops with leftover cake, Cupcake Bites recipe.

Favorite Chocolate Cake, plus tiered cake tips

Posted on

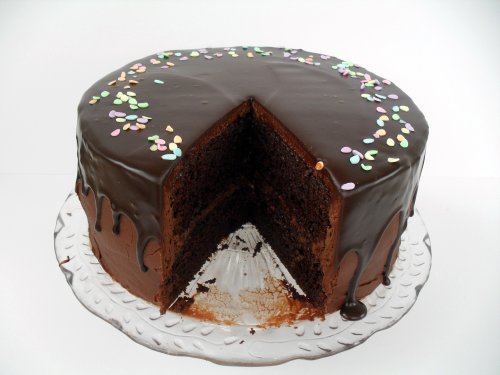
I’ve made several tiered cakes over the last few years (you can see them all here), but a friend’s surprise 40th birthday party last November was my first opportunity to do a really decadent chocolate one.  Needless to say, I was extremely excited to try something new!

With my husband, left, and the birthday boy at his party

If I had to pick a single type of cake to eat for the rest of my life, it would be white with cream cheese wedding frosting, but if you are a chocolate lover, this is the cake for you.  I know I tend to be quite effusive over most of my cake recipes (I’m effusive by nature, and I can’t help it–my cakes are the bomb!  I kid, but really.  They are.  :) ), but I can tell you that this is the cake that I have gotten the most positive feedback for.  That may be in part due to the number of people I served it to, since most of my cakes are only made for groups of about 10 people, but I do think this is probably the best chocolate cake I have in my repertoire, and I have made it several times since the birthday party to great reviews as well.  It is my husband’s all-time favorite cake, and although it isn’t my favorite cake, it is my favorite chocolate cake.

If you are thinking about making a tiered cake in the future, but are intimidated, I highly recommend the method I used for this particular cake.  If you frost each cake on top of a thick, foil covered cake board that is at least 2″ larger in diameter than the cake itself, then insert four hidden pillars into the bottom two tiers, all you have to do is transport the cake in three tiers to the location where the cake will be set up, and plop each cake on top of the pillars.  And you’re done!  With the usual way I do it (you can read about that process here), the stress level is considerably higher and there is more chance of messing up the cake.  It is almost impossible to mess it up using hidden pillars.

*Hidden pillars aren’t actually invisible, as you can see, but since they are tall you can insert them down into the cake so that each tier is supported from the base of the cake below it.  It is the part of the pillar inserted to the cake that is hidden.

Another tip is that once the cakes have been removed from the refrigerator to come to room temperature, make sure they have a way to breathe.  After inserting the pillars in the bottom two, you don’t have to worry about them.  But you should insert a hole with a skewer through the top of the top tier as well, or choose a place on the least attractive side of the cake (the one you’ll face to the back of the room) to poke a hole into each layer of the cake.  This is to prevent air pockets from forming underneath the icing.  This is a problem that cake decorators face across the world, and according to the professionals I have consulted, no one knows why it happens.  When I make real buttercream with eggs and no powdered sugar, this never happens.  So I suspect it has something to do with a reaction between the cake and the powdered sugar frosting on the surface.  So if you are using a powdered sugar frosting (aka American buttercream), please make sure there is a place for air to escape so that your frosting job will not be ruined. (I used to be concerned this would make the cake dry out, but an entire day with a hole poked in the cake does not seem to affect it at all.  If I’m making the cake 2 or more days in advance, I keep  it in the refrigerator to keep it fresh and to keep air bubbles from forming beneath the frosting, and then poke it before I take it out to come to room temperature.)

UPDATE: It has now been explained to me that when you frost a cake cold and refrigerate it, once you bring it to room temperature the air inside the cake expands, causing the icing bulge, aka “icing budge.”  While this is the most likely explanation, I have actually had the bulge happen when frosting room temperature cakes and never refrigerating them. So weird!

Here are some pictures of icing eruptions that have happened to my cakes before I figured out I needed to poke them so they could breathe:

You can see the bump on the left side where air or gas is trying to escape.

And this is the view straight on. The bottom two tiers of this cake never gave me any trouble, but the top tier didn’t have dowel rods in it so there was no way for it to breathe and I had to fix probably 10 of these eruptions!

This has been such a pain for me, that I even caught one of the incidents on video! This was before I figured out I needed to poke the cake to prevent the air pockets.

A tip for getting your frosting perfectly smooth is to spray the cake with water after smoothing it out as much as you can with an offset spatula, then going over it again with a clean spatula.  The water helps your spatula to glide over the surface and make it very smooth.  You can also dip your spatula in water, but I find using a squirt bottle to apply it makes the job much faster.

OK, let’s get to my favorite chocolate cake recipe!  I took a bunch of photos of my latest one so I included a few extra for you at the end of the post.  You’re welcome. :)

Favorite Chocolate Cake

This recipe makes one 9″ two-layer cake. To make a tiered cake the size pictured above, you’ll need to make about 7 batches of the cake recipe (2 batches for each 14″ layer, 1 batch for each 10″ layer and less than 1 recipe for both 6″ layers combined), 5 batches of the frosting, and 5 batches of the glaze.
Printable recipe
Printable recipe with picture
Printable recipe for cake only

Favorite Chocolate Cake
1 ¼ cups unsweetened cocoa powder
2 ½ cups all purpose flour
2 ½ cups sugar
2 ½ teaspoons baking soda
1 ¼ teaspoons baking powder
1 ¼ teaspoons salt

2 large eggs plus 1 large egg yolk
1 ¼ cups warm water
1 ¼ cups buttermilk
½ cup plus 2 tablespoons vegetable oil
1 ½ teaspoons pure vanilla extract

Favorite Chocolate Frosting
2 sticks unsalted butter, room temperature
½ cup vegetable shortening
2 oz semisweet chocolate, melted and cooled
1 cup unsweetened cocoa powder
¼ cup dutch-process cocoa powder
¼ teaspoon salt
2 lbs (8 cups) powdered sugar
¾ cup milk
2 teaspoons vanilla

Favorite Chocolate Glaze
½ cup heavy cream
4 oz semisweet chocolate, chopped
2 teaspoons corn syrup
½  teaspoon vanilla

Make the cake: Preheat the oven to 350 degrees, making sure the baking rack is in the middle of the oven. Prepare two 9” round cake pans by cutting out a piece of parchment or wax paper to line the bottom of them. Grease the pans, place the parchment or wax paper in the bottoms and lightly grease again. Dust the pans with flour (or cocoa powder if you don’t want the white dusting on the finished cakes). Set the pans aside.

Sift together the cocoa, flour, sugar, baking soda, baking powder, and salt into a large bowl. Add the eggs, yolk, warm water, buttermilk, oil and vanilla. Mix on low speed until smooth, about 3 minutes.
Divide the batter evenly between the prepared pans. Bake the cakes for about 35 minutes, until a toothpick inserted into the middle comes out clean or with moist crumbs. Do not overbake! Remove the pans from the oven and set the pans on a wire rack to cool for 15 minutes. Gently run a thin knife around the edges of the pans and unmold the cakes, removing the parchment paper liners from the bottom of the cakes. Let them cool completely, top sides ups, on a wire rack. Trim the tops of the cake layers with a long serrated knife to make them level.

*Veronica’s notes: Although I have never had a problem with this cake recipe overflowing in my pans, many people have left comments on Melanie’s blog (and once on mine when I used it before for THE Mocha Crunch Cake) that they did, so I recommend either making sure the batter is no more than 2/3 full in your pans or placing a baking sheet below the pans to catch any overflow, just in case. If you have extra batter, make a few cupcakes!  Also, please do not skip lining the pans with parchment or waxed paper.  This cake is sticky and I learned the hard way that it will stick to the pan even if you grease and flour it.

Make the frosting: Cream butter and shortening together until smooth. Beat in melted chocolate until smooth. Add the cocoa powders, salt, sugar and milk to the bowl and turn the mixer to a very low setting until it’s combined enough to increase the speed. Continue increasing the speed and scraping the sides of the bowl until everything is incorporated, then add the vanilla and continue beating until fluffy. Frost cooled cake and freeze leftovers. This makes a large batch so unless you lay the frosting on super thick, you should have enough leftover to frost a dozen cupcakes, but the batch isn’t quite large enough to cut in half. I know, I make things difficult, but you won’t regret having some extra on hand.

Make the glaze: Gently heat the cream and chocolate together in the microwave or in a double boiler, stirring often until smooth and shiny.  Stir in the corn syrup and vanilla.  Allow to come to room temperature before pouring over the top of the cake and spreading to the edge with a spatula so that it drips over the sides. If the glaze gets too thick, heat it again for a few seconds (it won’t take long) and stir before pouring over the cake. Serve the cake at room temperature.

Recipe source: cake recipe from My Kitchen Cafe, frosting and glaze by Veronica Miller.