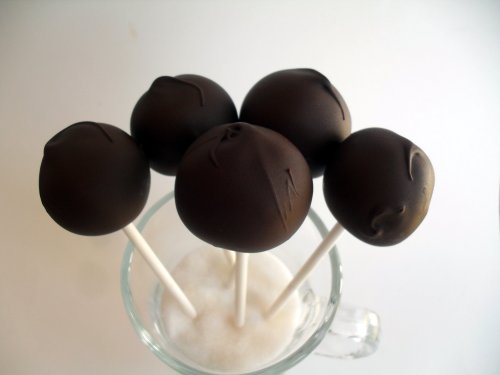
RSS Feed

Tag Archives: cake pops

Operaton Postcard for Beverly, and Dark Chocolate-Raspberry Cupcake Bites


Remember The Postcard Project?  Yeah, I sort of lost steam on it and forgot about it myself!

However, I received this message from my friend, Margaret, that revived my sense of purpose.

***********

I have a cousin that has a postcard project going for a lady that will be 90 years old her birthday. I think this would be a great project for the postcard group. She will let us know how many postcards she received and I will let you know. Thanks whether yes or no.

This is how I received it:

“You are invited to join Operation Postcard! The Regency Manor, where my Mother-in-law, Mrs. Beverly Harris, lives, has a map of the US and they mark each state a postcard comes from. Sadly, the map is not very full. Will you help me flood the map and Beverly’s mailbox with a postcard from your state? Please have your postcard sent by March 15, 2012. Also send an email to me (purpleisland@sio.midco.net) so I can keep a running total of postcards being sent.

Mrs Beverly Harris
3425 Dakota Ave, #32
South Sioux City NE 68776

Thank you in advance for helping in this very special display of appreciation for one great lady…Charlene Harris”

************

OK, this makes me SUPER excited.  I’m so on this!  I already sent my postcard, and I told Margaret I’d spread the word  I hope many you will join me and that Mrs. Beverly will be able to mark every single state (and maybe even a few overseas countries) on that map!  I can just imagine her anticipation as the cards roll in each day and seeing her marking the map and later making a scrapbook with the cards.  I confirmed her address is a nursing home through a Google search, so just imagine the happiness all these cards will bring to this lady on her 90th birthday!

If you would like to get a card to her, please do it as soon as you can (by March 15th) and email her daughter, Charlene, at the email address she gave above.  Also, please put a return address label at the top if you don’t send a postcard featuring your state, that way she will know where it came from.  Thank you so much!

In the spirit of celebration, I thought I’d share this cupcake bite creation I made using leftovers from a Dark Chocolate Raspberry Cake (the cake domes I sliced off, plus the leftover frosting).  If you like the combination of chocolate and raspberries, you’re going to love these!

To make them, just use the original cupcake bites instructions, using the cake and frosting recipe from my Dark Chocolate Raspberry Cake.  Or, if you make the cake and want to use the leftovers for these, here is the “recipe.”

Dark Chocolate-Raspberry Cupcake Bites

Printable recipe
Printable recipe with picture

Cake domes leftover from a Dark Chocolate Cake
1-2 tablespoons leftover Raspberry Buttercream
4 ounces (2 rectangles) chocolate candy coating/almond bark
4 ounces pink candy melts
sprinkles for decoration

Crumble up the cake tops in a bowl with your hands, or in a food processor. Using your hands, mush in the frosting until well mixed. Roll the mixture into balls (I got ten but you might get more if you had really high domes on your cake) and place on a plate. Cover with plastic wrap and refrigerate for two hours or overnight.

Melt the chocolate candy coating according to package directions, being careful not to overheat it. Spoon the melted coating into miniature peanut butter cup molds, filling about 1/3 full. As you fill each one, press a cake ball down into the chocolate until it comes up the sides to the top of the mold. Once the mold is full or you’ve done all the balls, place in the freezer while you melt the pink candy coating.

Melt the pink candy coating according to package directions. Add a little oil or shortening if your chocolate becomes too thick (Wilton is especially prone to this). Pop the cupcake bites out of the mold onto foil or waxed paper. Pick up one at a time by the chocolate bottoms and dip upside down into the pink candy coating, making sure it covers the whole cake ball. Gently shake off excess and set right-side-up on the foil/waxed paper. Immediately sprinkle with sprinkles and continue to dip and sprinkle until all cupcake bites are finished. Serve at room temperature. You don’t need to refrigerate unless they will be outside the fridge for more than three days.

Peppermint Pops

Posted on

I have several pops posts, and am ready to change things up a bit with a completely new type of pop filling that doesn’t involve cake at all.  As I mentioned in my cream cheese mints post, I got bored just cutting the dough into squares, and decided to combine it with chocolate in pop form.

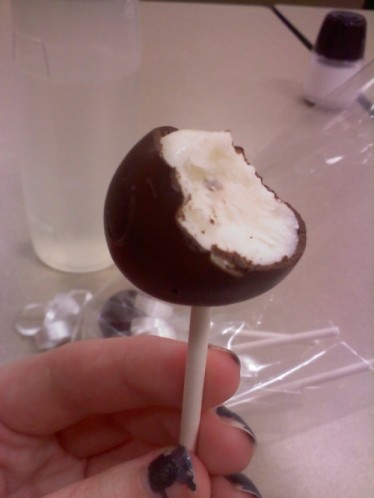
This photo was taken by Jen in the break room at work after I handed her a bag of Peppermint Pops in exchange for some delicious chocolate sheet cake that she made.  I had to use it because it’s a much more attractive photo of the insides than the atrocity below.  Thanks, Jen!

The method for these is the same as making cake pops, just with a different filling.  Take a batch of cream cheese mints, roll it into balls, insert sticks, dip in chocolate.  And voila, peppermint pops!  It’s simple and even easier than cake pops because it doesn’t require any baking.  And the taste?  Well, if you like mint chocolate, you’re going to love these.  The mint center is soft and creamy and the dark chocolate coating is classic.  Think York peppermint patties with a softer, creamier center and slight tang.  Bonus: it’s on a stick! Wheeeeeeeee!

Peppermint Pops

Printable recipe
Printable recipe with picture

1 (8-oz) package cream cheese, room temperature
1/2 teaspoon peppermint extract
2 lbs. powdered sugar
2 (12 oz) bags semisweet chocolate chips
2 teaspoons oil or shortening
50 lollipop sticks
50 (3″x4″) clear treat bags (optional)
curling ribbon (optional)

Beat the cream cheese until creamy, then beat in the extract. Beat in the powdered sugar until well blended.  Depending on your mixer, you may have to use your hands to fully incorporate the sugar.  The mixture will be smooth and like a stiff dough.  Pinch off pieces of the mixture and roll into 1″ balls; place on rimmed baking sheet. You will get 40-50 balls. Cover and refrigerate two hours or overnight.

I had several mint projects going at once-classic party mints (left), peppermint pops, and peppermint patties (not pictured).

Gently melt chocolate with oil in double boiler or microwave. Dip ends of sticks in chocolate, then insert into the flat end (the end that has been resting on the baking sheet) of the mint balls. As you insert sticks, place the pops upside down on the baking sheet until all the balls have sticks. Refrigerate until chocolate around stick is set.

Now you can see evidence of the peppermint patties!  The square mints are long gone…in mah bellah.

Dip each pop in chocolate and gently shake off excess while holding upside down. Don’t tap, as you would a cake pop, because the mint balls are more prone to fall off the sticks. Insert pops right-side-up into a large foam block. Once all pops are dipped, place foam block in refrigerator and let sit until chocolate is hardened, about half an hour. If you would like to package them, slip a treat bag over each pop, and tie curling ribbon around the base.

After writing this, I just can’t resist saying, “on a steeeeek.”  :)

Cake Pops, Balls, & Truffles: Troubleshooting & FAQ

Posted on

I posted a cake pops tutorial last January and have gotten so many questions in the comments section, usually the same few repeatedly, that I’m having trouble locating them to reply when a new one is posted anywhere other than at the very end.  An FAQ is long overdue, and I hope to address all the concerns and questions I have received over the last year and a half so that my readers have somewhere to go to resolve their problems and get their questions answered.

I have made many batches of cake pops, balls/truffles, and cupcake bites, but I have NEVER done anything creative like Bakerella so if you’re looking for inspiration, check out her site.  This post is solely meant to help you with the basics.  If you have a question that isn’t answered here, leave it in a comment or email me at vraklis@yahoo.com and I’ll add it to this post.  Thanks!

Frequently Asked Questions

Q: Why is my chocolate cracking?

A: I have found mine cracks if I overheat the chocolate before dipping, or if I freeze the cake balls/pops very long before dipping.  Make sure you very gently heat your chocolate–you never want it to get hot but just barely warm enough to melt.

The surest way to keep your chocolate from cracking is to place your styrofoam block in the refrigerator, or even better, the freezer, and place each pop on it after dipping.  This is a pain, but if you have a lot of issues with cracking, this will prevent it.  However, don’t leave your pops in the freezer too long.  Just let them sit long enough to get hard, then remove.  If they get too cold, they will sweat when you remove them from the freezer.

The fix: if your chocolate does crack, just spoon some melted chocolate over the crack, making sure to cover it well.  It won’t be pretty, but it will keep the cake ball contained and will still be delicious.  If you are using sprinkles, that will help disguise it.
Q: My chocolate is too thick to dip.  What’s going on?

A: You most likely overheated your chocolate.  Chocolate is temperamental and needs to be heated very gently.  I’m extremely careful when microwaving chocolate, stirring it very well every 15 seconds (after the initial 30 seconds-1 minute, or whatever your package says) so that the residual heat does the melting instead of doing it all with the heat of the microwave, which will overheat it.

The fix: stir in some vegetable or canola oil until thinned to the desired consistency.  Your chocolate will dry softer than it would have, but it will still be firm enough to hold the cake ball inside.
Q: What chocolate melter are you using in your video?  Could I use a crockpot instead?

A: It’s a Wilton Chocolate Melter Deluxe, which is no longer for sale.  Wilton has upgraded the pot to a “Chocolate Pro,” available for purchase here.  I don’t actually use mine for melting the chocolate as it takes a long time and I’m impatient, but after melting it in the microwave, I like to pour it into the melter and set it on “warm” to keep the chocolate from solidifying during dipping.  I do find I need to shut it off every so often to keep the chocolate from getting too hot.

I have not tried using a crockpot to melt chocolate, but a reader, Sherry, says that she always melts her chocolate in the microwave and then puts it in the crockpot on the lowest setting to keep it warm while she dips.

Q: Why are my cake balls falling off the sticks?

A: This could be due to many things.  Most likely, you added too much frosting.  Start with less and add more as needed.  Depending on the moistness of the cake you are using, you may not need any at all to get the crumbs to hold together.  I usually use 1/3 to 1/2 cup, even with moist cakes, because I prefer the sweeter flavor to those without any frosting, and that isn’t so much that they are mushy.  Second, make sure the cake balls are cold before you start dipping.  I’ve noticed if I leave my tray of balls out while I’m dipping, by the time I get to to the last ten or so they are starting to slide off the sticks because they aren’t as cold.  Third, make sure you dip the sticks in chocolate before inserting them into the balls (is it just me, or does that sound kinky?).  This will ensure that the balls adhere to the stick.

Q: What is almond bark?  And can I use regular chocolate instead?

A: That is just what we call candy coating around here.  It’s also called “chocolate flavored bark” and “vanilla flavored bark.”  It’s basically chocolate, white or regular, that has palm kernel oil added so that it dries to a nice, hard finish without having to temper it.  You can use any type of chocolate you wish, whether it’s the real stuff, the white stuff, chocolate melting wafers, or candy melts like Wilton has.  If you use real chocolate, add a tablespoon of vegetable shortening or oil per pound or bag of chips (12 oz) and melt them together.

White Cake Balls 1-28-10 in Candy by Veronica Miller

Q: How can I color my white candy coating?

A: I have used powdered icing color with success, but regular icing gel color makes it seize up.  You can do it this way, and just add oil to thin the chocolate back out (I have done this), but the best thing to use is oil-based colors made specifically for candy, such as these.  Check out your craft stores, like Michael’s or Hobby Lobby, or if you have a local cake supply store, they might have them as well.  These same stores usually offer colored candy melts  as well, so that you don’t have to color them yourself.
Q: I find cake balls too sweet. Is there something I can use besides frosting?

A: Certainly!  All you needs is a binder to keep the cake crumbs stuck together when you roll them into balls.  I have a co-worker that uses peanut butter in her chocolate cake balls and lemon pie filling in her lemon cake balls.  Other ideas would be pudding, cream cheese, softened butter, bittersweet or semisweet ganache, sour cream, mayonnaise, jams & jellies.  Just be careful and add a little at a time, as many of these would go further than frosting and you probably wouldn’t need very much.

If you don’t want to add anything, here’s what you do: make my favorite chocolate cake, process it to crumbs in the food processor and then wad up balls of the crumbs and roll!  This particular recipe sticks together with nothing added!  The pops end up tasting more like cake than candy, although the texture is still more dense since the crumbs are compacted.  Here is the picture of the inside of a cake pop made this way:

Q: Do I have to use a cake mix?

A: No, make a scratch cake if you wish!  I prefer the taste of pops made with a cake mix, and since it takes so much time to make the pops themselves, making the cake from a mix is just a shortcut, but not required.

Q: How should they be stored? 

A: Store them covered in the refrigerator.  I prefer to remove mine at least a couple hours before serving to serve at room temperature, but they can be served cold and really should be if your climate is very hot or humid.  Here in Kansas, I don’t have to refrigerate them and if I’m making them the day before serving, I won’t put them in the fridge at all.

These are “Cupcake Bites,” which you can learn how to make here.

Q: How far in advance can I make them?  Can I freeze them? 

A:  You can make them a month in advance, if you like, because yes you can freeze them!  Once the chocolate is hard, there is no risk of the chocolate cracking from freezing the pops/balls and removing them.  If you freeze them, be sure to defrost them in the refrigerator 24 hours before servings so that they won’t sweat when you serve them.  They sweat like crazy if you take them straight from the freezer, especially in the summer.  If you don’t wish to freeze them, I’d recommend making them no more than a week in advance and keeping them in the refrigerator.

Q: Why are my sticks getting yellow and oily?

A: I have had this happen only once, when I used a real buttercream (made with mostly butter and eggs) instead of American (powdered sugar-based) buttercream.  I think if there is too much fat in your cake ball mixture, it will seep into the sticks over time and turn them yellow.  Try using less frosting next time.  Lately I’m using only about 1/3 cup per batch.

Q: Can I use something besides chocolate or candy coating for dipping?

A: I have not personally tried anything else, but one reader had success using a chocolate glaze, and another (thanks, Praveena!) had the brilliant idea of using royal icing for her friends that do not like chocolate.  (Royal icing dries hard so you’d want a very thin layer.)  If you wish to try the aforementioned glaze, here is the recipe Michelle used and shared with me:

1/2 cup heavy cream
2 tablespoons light corn syrup
1 1/2 cups chocolate chips

Put cream and corn syrup into pot and heat until it just starts to boil. Then remove from heat add chocolate chips, cover and let stand for 5 minutes. Then stir until combined. A note from me: this is basically ganache with corn syrup added and will get quite firm when cold.  I’d recommend keeping the finished pops in the fridge to keep them intact.

Q:  What is your most popular flavor, and are there other recipes you can share?

A: I found a slew of recipes on Wilton.com but have no special ones of my own.  I’ve only tried three flavors myself: chocolate, white, and red velvet.  Chocolate is the best and red velvet is the most popular (because of Christmas and Independence Day).  White isn’t bad, but just not as good as chocolate, but I did like it a lot when I filled the centers of some white cake balls with a bit of  wedding cake frosting–it was for snowball cake truffles at a Christmas eve party but the taste was like wedding cake truffles–pretty cool!  I almost always mix my cake crumbs with homemade cream cheese frosting, but have also used mocha buttercream, white celebration frosting, and ganache.  It really doesn’t matter what frosting you use–it’s all good.

Q: What size sticks to you use, and where can I find them?

A: The ones I usually get are about 4″ long, but you can use any length you wish.  I get mine at Walmart in the cake decorating supplies section, but you can also find them at craft stores like Michael’s and Hobby Lobby, or cake & candy supply stores.

Q: Do I have to use a food processor to crumble the cake?

A: This is my preferred method, especially when your cake has some dry edges, because it gives you uniform crumbs that easily mix with the frosting, but I’ve also used my hands and it gets the job done.

Q: I’ve noticed that some of my cake pops start leaking oil once the chocolate is set.  Why is this happening?

A: I usually have 1 or 2 pops or balls per batch that leak oil, and for me it is always because 1) a miniscule spot on the ball didn’t get covered with chocolate or 2) I left an air bubble in the chocolate before it set, which creates a weak point that can’t contain the pressure of the filling so that it eventually starts to squirt out.  If there is any spot not covered, the oil will separate from the cake mixture and start leaking out (I’ve even had the cake ball mixture itself squirt out!), so be thorough when you’re dipping.  Also, make sure you poke any air bubbles you see before the chocolate hardens so that the liquid chocolate will fill in the space before it sets.  I usually use the ones that spring leaks for “taste testing” since I always like to enjoy one or two of them from each batch, but if you want to fix it, you can: dab off the oil and spoon on a little bit of chocolate onto, around, and a little beyond the area where the oil has touched.  If you don’t spread the chocolate further than where the oil was, the oil will follow the same path out and will leak again, despite having been recovered.  You need a tight seal and that means chocolate on chocolate with no oil on the surface.  Also, if you use sprinkles that have sharp edges, be careful and don’t use a lot of force because if they poke through to the cake beneath the chocolate, oil will start to leak out from the area once the chocolate is set.

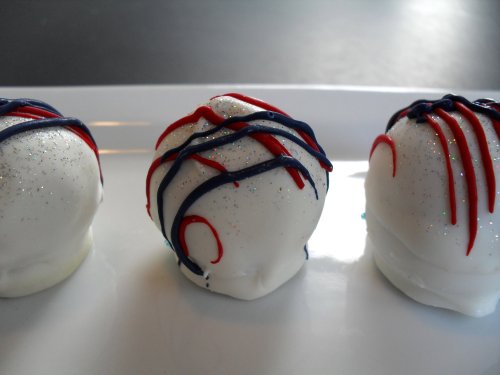
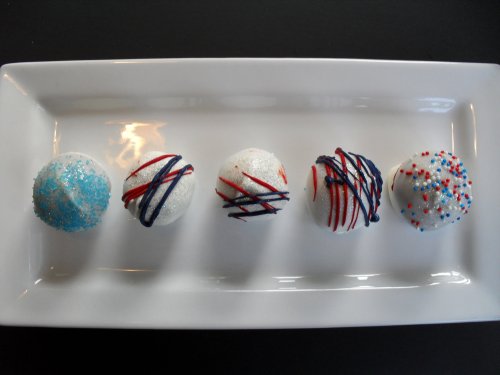
Additional info: the glitter you see on the snowball (or wedding) cake truffles and on the July 4 cake balls is edible and is called “Disco Dust.”  I used “rainbow” on the snowballs and hologram silver (mixed with rainbow) on the July 4 balls, and it is available in a wide range of colors.  I recommend rainbow, as it goes well with any color.  I purchase mine at Cake Stuff! in Wichita, KS, but you can find it online as well.

Related posts: Step-by-step cake pop tutorial, instructions for making cake pops with leftover cake, Cupcake Bites recipe.

Cupcake Bites

Posted on

Although this is a Bakerella original, I actually got the idea from a friend who learned about cake pops from me and has never even heard of Bakerella.  She was going to make cake balls for her sister’s wedding, discovered that they are a pain to dip (I AGREE!!  I WOULD LOVE MAKING CANDY IF IT DIDN’T EVER INVOLVE DIPPING THINGS IN CHOCOLATE! ARRRRG!), and then came up with this idea all on her own.  I didn’t discover until after I’d copied her idea that she’s not the first to have it but it just goes to show, great minds think alike.  And I’m not just saying that in hopes that Tina will share some of her famous peanut butter blossoms with me soon.  Although I certainly wouldn’t object to a few.  Ahem.

Anyway, cupcake bites are basically cake balls made to look like little cupcakes.  They are easier to make and there is almost no chance of messing them up the way there is with cake balls and cake pops.  And they are even cuter than cake balls and cake pops!  I’m so in love with them, it’s ridiculous.

What is a cake ball/pop you ask?  Why, only the most brilliant dessert invention ever!  It’s cake crumbled up and mixed with frosting until it’s a truffle-like consistency, rolled into balls and dipped in chocolate with or without sticks on one end.  And they are so. good.  Please make these in any form–you will be hooked!  (If you want the original cake pops/balls/truffles recipe, I have it posted here and have a modified version for using extra cake here.)

OK, so to make these babies, just mix crumbled cake with frosting to make your cake ball centers.

I'm recycling my old photo, which shows more frosting (probably 1/2-2/3 cup) than what I use now. This is OK, but not necessary.

Melt up a whole package of chocolate candy coating (chocolate flavored almond bark).  Or melt real chocolate with a tablespoon of oil or shortening.  Spoon some into a peanut butter cup candy mold about 1/3 full (I overfilled mine in these pics).

Place the cake balls on top of the chocolate and press down gently until the chocolate comes up to the edge.  Place filled mold(s) in freezer until the chocolate is set, about a minute or two, then pop out.

They really shouldn’t be this high, but like I said I overfilled the chocolate.  But they’ll still be cute regardless of how much chocolate you use.  No worries!

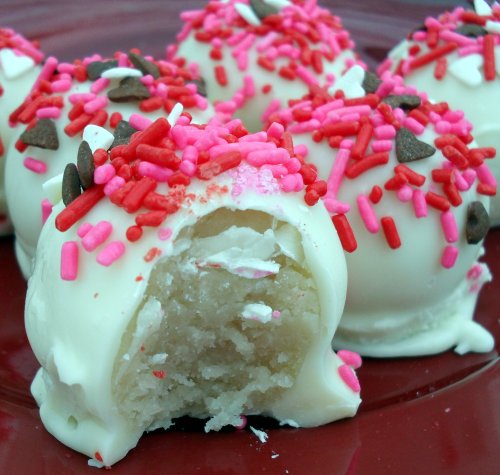
Melt white (or whatever color you please) candy coating and turn the cupcake bites over to dip the tops.  Shake off excess and shake on sprinkles, if desired, while the chocolate is still wet.

That’s it!  It still does take some time, but when it’s all said and done, there is like 100% less stress-related heart attacks and spontaneous combustion associated with making cupcake bites, versus cake balls and pops.  Or so I would imagine, based on my own zen state afterward, versus my usual crazed, eye-twitching state after making cake pops.  There is no cracking (the number one complaint of people making cake pops and balls), and there is no tap, tap, tapping foreeeeeeeeeever to get the excess chocolate off while wishing upon a star that the cake ball doesn’t fall off the stick before you finish tapping.  It’s made in a mold so it’s got a perfect shape, so you don’t have to bite your lower lip off while trying to get your chocolate to look completely smooth on the cake ball.  So.  I would highly recommend buying one of these molds and getting your own cupcake bites groove on!

Cupcake Bites

Printable recipe
Printable recipe with picture

1 baked cake (I used a devil’s food cake mix)
1/3-1/2 cup frosting (I used my cream cheese celebration frosting, because I always have it in the freezer and it’s the diggity)
1 (24 oz) package chocolate candy coating
1 (24 oz) package vanilla candy coating
sprinkles or nonpareils (optional)
peanut butter cup mold

Crumble the cake into a large bowl, preferably using a food processor to get fine, even crumbs.  Mix in 1/3 cup of frosting with your hands, mixing well.  This will probably be enough–you just need enough so that the crumbs stick together when you pinch off some and roll it into a ball–but if not, add a little more and mix well.  Roll into balls a little smaller in diameter than your peanut butter cup mold and place on a rimmed baking sheet.  A small cookie scoop works well for this.  Refrigerate a few hours (or overnight) or place sheet in the freezer for a few minutes until chilled but not frozen.  Melt the chocolate candy coating and spoon into mold until each cup is about 1/3 full.  Place a cake ball in each mold, pressing down just until the chocolate comes up to the edge.  One the mold is filled, place in freezer for a minute or two, until chocolate is set, then remove and pop the molded cake balls out onto a second baking sheet.  Repeat this process and while the second set is chilling, melt the white coating and dip the tops of the cupcake bites with bottoms, shaking to remove  excess before placing back on the baking sheet and sprinkle on some sprinkles or nonpareils while the chocolate is still wet.  Store finished bites in the refrigerator if you are making more than a day in advance.  Will last a week in the fridge.

Recipe source: too convoluted to be fully ascertained. Bakerella posted them first.  Tina thought of the idea without help.  I stole her idea and made up my own recipe and instructions without help from her or Bakerella.  So you figure it out.

Don’t Waste That Cake!

Posted on

I bake a lot of cakes, which means I throw away lots of cake.  Not because I ruin them, but because I have to level off the dome on top in order to layer them without trouble.  That extra cake, if I’m being a good girl and not stuffing it in my mouth, gets tossed most of the time.

Not any more!  Cake Balls/Pops to the rescue!

I just posted the recipe and step-by-step tutorial for cake pops and you can use the same concept to save a cake that stuck to your pan, came out too dry or heavy, or to use on the extra cake that you levelled off.

If using an entire cake, go ahead and follow the recipe as instructed.  If the cake is very very dry, you will probably have to add the entire can of frosting to it.  For cake tops, I use just about a spoonful of frosting and then mush it all up with my hands, just like with cake pops.

I ran out of lollipop sticks, so I just made cake balls (also called “cake truffles”) this time.  Roll them up into quarter-size balls and put on a plate; refrigerate until very cold (I always do this 24 hours or more in advance of the dipping but a couple hours should be enough).  You’ll need about 3-4 squares of white or chocolate candy coating.  Melt it and dip the balls using a spoon, tapping off the excess chocolate before placing on wax paper to set.  If adding sprinkles, do it quickly before the chocolate hardens.  You can also drizzle any leftover candy coating over the tops or melt another color to drizzle over the tops.

This works with any flavor cake mix.  So far I have tried red velvet , chocolate and white.  Have fun with it!

By the way, I lied when I said I don’t ruin cakes.  Though I haven’t in a while, it’s been known to happen.

This was the 14" base of a wedding cake. It was the biggest cake I'd ever made and I didn't realize you had to freeze the layers before trying to lift and stack them. I'm surprised it didn't crack completely in half when I hefted that huge layer on top of the other one!

This was the middle 10" tier of the same wedding cake, which I ruined when I applied the fondant that the bride had insisted upon, despite my insistence that I couldn't do it. I guess I showed her!

There was no hope for this cake. I ended up baking and frosting two whole wedding cakes and barely got the second one done in time for the wedding. Had I known about cake balls & pops back then, I would have saved back some of the cake for that.

Though I've had other cake tragedies, this is the only other one I photographed. This is Orange Chocolate Chunk Cake.

To end this on a happy note, here’s some pics of the wedding cake after I completely redid it.  I didn’t even attempt the fondant because I didn’t want to risk ruining a second cake when I had absolutely no more time to spare.  Thankfully, the bride was very pleased with the cake (though nothing like the one she originally wanted) and had no complaints!

Brenda's Wedding Cake 8-8-08


Me with the cake.