RSS Feed

Category Archives: Pie

French Silk Pie with Stabilized Whipped Cream


Every time my husband sees a French Silk Pie, or a picture of one, or even the name of it listed on a menu, he says, “oooooh, French Silk.”  After ten years of this, I finally decided it was time to make him one–and what better day than Valentine’s Day?  It is, after all, considered the most romantic pie to share by 27% of Americans.  (I acquired this tidbit of trivia from Village Inn restaurant, where it was noted in a bubble beside a picture of the pie…which I noticed after Dennis said “oooooooh, French Silk.”)

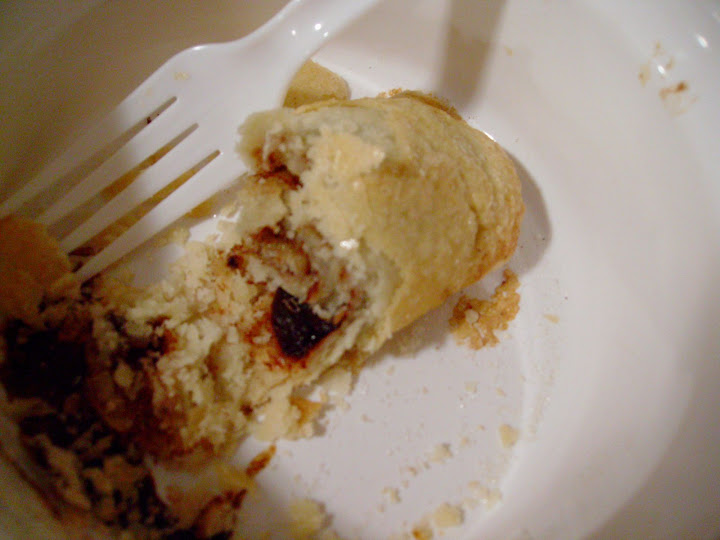
Both Dennis and I agree that this one was the best French Silk either of us has ever had.  Some I’ve had in the past had fillings that were thicker, more like pudding, but this one, although rich, is light and velvety and very chocolatey. The crunchy crust is nutty and a bit salty, which really complimented the sweet filling & whipped cream perfectly! My husband doesn’t like crust but actually enjoyed it for the first time in his life with this pie. I chose to top the pie with stabilized whipped cream since I needed to make it in advance and didn’t want the whipped cream to water out before we dug in.  This particular whipped cream can be made 24 hours in advance without watering out, so it is a nice recipe to keep handy if you need to make your whipped cream the day before serving your dessert.

Jean Webster’s French Silk Pie
from marthastewart.com
Makes 1 nine-inch pie

FOR THE CRUST
8 tablespoons (1 stick) chilled salted butter, cut into pieces, plus more for pan *
1/3 cup pecan halves
1 1/3 cups all-purpose flour
1/4 cup firmly packed light-brown sugar
1/4 teaspoon salt

FOR THE FILLING
12 tablespoons (1 1/2 sticks) salted butter, room temperature
1 cup granulated sugar
3 ounces unsweetened chocolate, melted and cooled
1 1/2 teaspoons pure vanilla extract
3 large eggs
Whipped cream, for serving (Stabilized Whipped Cream recipe follows)
Chocolate curls, for serving

Make the crust: Preheat oven to 325 degrees. Butter a 9-inch pie plate; set aside. (I recommend using a deep dish plate–I used a regular one and had enough leftover crust & filling to make a second miniature pie.) Grind pecans in a food processor, or chop very finely with a knife. In a medium bowl, combine flour, pecans, sugar, and salt. Cut in cold butter with a pastry cutter until mixture resembles coarse meal. Press firmly into prepared pie plate. Bake until golden, 20 to 25 minutes. Transfer to a wire rack to cool. (Mine took 25 minutes to cool completely.)

Make the filling: In the bowl of an electric mixer fitted with the paddle attachment, cream butter and sugar until light and fluffy, about 2 minutes. With machine running, gradually add melted chocolate and the vanilla. Add eggs, one at a time, beating at medium speed for five minutes after each addition. Pour filling into cooled pie crust. Cover with plastic wrap, and transfer to the refrigerator to cool for at least 4 hours and up to overnight.

Just before serving, top pie with whipped cream, and decorate with chocolate curls.

*I only had unsalted butter, so I added 1/4 teaspoon salt to the recipe, for a total of 1/2 teaspoon.

Stabilized Whipped Cream
from THE CAKE BIBLE by Rose Levy Beranbaum

2 T powdered sugar
1 t cornstarch
1 cup heavy cream
1/2 t vanilla

Refrigerate your mixing bowl and beaters for at least 15 minutes. (I always place mine in the freezer.)

In a small saucepan place powdered sugar and cornstarch and gradually stir in 1/4 c of the cream. Bring to a boil, stirring constantly, and simmer for just a few seconds (until liquid is thickened). (Mine thickened before it ever came to a boil.) Scrape into a small bowl and cool to room temperature. (I placed mine in the freezer, stirring every few minutes, to speed the process.) Add vanilla.

Beat the remaining 3/4 cup cream just until traces of beater marks begin to show distinctly. Add the cornstarch mixture in a steady stream, beating constantly. Beat just until stiff peaks form when the beater is raised.

Store in the refrigerator until ready to serve.

Pumpkin Pie Spice


I have been baking a lot of pumpkin desserts this fall, and nearly every one calls for pumpkin pie spice.  I’ve never bought pumpkin pie spice in my life because I keep all the separate spices on hand.  If this is your situation as well, here’s a quick recipe for mixing a small batch of your own pumpkin pie spice blend. If you want to make a larger batch, just double/triple/quadruple the measurements accordingly.

Pumpkin Pie Spice
Makes about 2 tablespoons

1 tablespoon cinnamon
1 teaspoon nutmeg
1 teaspoon ginger
3/4 teaspoon allspice

Mix all spices and store in an air-tight container.

Dulce de Leche Apple Pie


On average, I save about five recipes a day.  Each is saved with full intention of making it ASAP, but most are forgotten by the following day when I’ve found five or twenty more recipes that I just HAVE to try right away.  It’s a never-ending cycle.
This one, however, has been stuck in my head ever since I read it on Laura’s blog two months ago.  It is not one I forgot, but continued thinking, imagining, and fantasizing about.  So when I unexpectedly got the day off on Thursday, I immediately knew how I would spend some of my free time.  Making. This. Pie.
 
It was worth the wait and all the anticipation.  Honestly, it’s the best apple pie I’ve ever had–even better than the apple pie that has won me local acclaim and an order for 15 of them to serve as the groom’s “cake” at a wedding.  Grandma Ople’s Apple Pie is killer, but this one tops it.  And it’s easier to put together, so that makes it a definite winner. 
 
Personally, I don’t taste the dulce de leche in the pie itself so I like to drizzle dulce de leche over the top to enhance the flavor.


Dulce de Leche Apple Pie

from The Cooking Photographer, with some modifications
 
Double crust for 9” pie (I always use this recipe)
Egg white for brushing dough (reserve the yolk in a separate dish)
5 cups peeled and sliced mixed apples (I used 2 small Jonathan, 1 large Rome and 1 Granny Smith)
¼ cup
dulce de leche
2 Tablespoons apple cider
½ cup brown sugar
1/3 cup granulated sugar
1/3 cup cornstarch
½ teaspoon vanilla extract
1/4 teaspoon cinnamon
1/8 teaspoon freshly grated nutmeg
Pinch of salt
1 Tablespoon of butter for dotting pie
Additional dulce de leche for drizzling (optional)
9” Pyrex pie dish, not the 9 1/2″ deep dish
1. Place the oven rack on the lower 3rd of the oven and preheat to 400 degrees.

2. Mix together sugars, cornstarch, cinnamon, nutmeg, and salt. Make sure the cornstarch is well mixed in so you don’t get cornstarch lumps in your pie.

3. In a large bowl toss together the apples with dulce de leche, apple cider, and vanilla extract. Add the dry mixture and toss to combine. Set aside.

4. Roll out one of the discs of pie dough and line a 9” Pyrex pie dish with the bottom crust, then brush with the egg white. (Keep the remaining egg white for later use.) Add the filling and spread out evenly. Dot the mixture with little bits of butter here and there.

6. Roll out the other dough disc & cover with the top crust. Cut it slightly wider than the edge of the bottom crust, then tuck the edges under before fluting.

7. Mix the egg yolk with the remaining egg white & brush over the crust. Poke a few holes in the crust for venting or cut out decorations.

8. Bake for 30 minutes. Then turn the temperature to 375 degrees, cover crust edges with a pie shield*, and bake for another 30 minutes or until crust is golden on the bottom and no longer wet and raw looking.

9. Remove the pie from the oven and set on a cooling rack for several hours to set up the filling.

10. If desired, you may drizzle dulce de leche over the top of the pie shortly before serving. Don’t do it too far in advance or the dulce de leche will dry out and get hard. To drizzle it, warm the dulce de leche and either put it in a pastry bag or a ziploc bag and snip a small hole from the tip. Then just sweep the bag back and forth over the pie while you squeeze the bag.

*There is no need for a pie shield if using the recipe for crust in the link above. It doesn’t burn easily. Also, I only needed to cook my pie 45 minutes before the crust looked done, so I removed it and the apples were soft & perfect.

Turtle Pumpkin Pie


https://i0.wp.com/a4.ec-images.myspacecdn.com/images02/57/dcfb12f2f4b145f4aa61ca12e38a8252/l.jpg

I don’t like pumpkin pie.  But I do like turtles.  And now that I’ve made this, I know that I love turtles enough to make me like pumpkin pie if their elements are a part of it.

As for all normal humans (you know, the ones who already like pumpkin pie), they will like this pie too.  It was a huge hit at my husband’s potluck at work.  It is sweet & creamy–more like a cream pie than your usual custard filling, but still with the pumpkin flavor (made more palatable enhanced by the caramel & pecans).

This is a very simple recipe, so of course I had to make it difficult and fussy by making my own caramel sauce and graham cracker crust.  I wouldn’t make my own breadcrumbs for a meatloaf , but I’ve spent up to an hour making huge amounts of frosting that requires boiling sugar & corn syrup, beating egg yolks to death…etc, etc, ad nausium.

I think I have a problem.

If you have similar problems, you can watch my step-by-step video at the end and prepare your own caramel sauce as well.


Turtle Pumpkin Pie
 
1 graham cracker pie crust
1/4 cup plus 2 Tbsp. caramel syrup, divided
1/2 cup plus 2 Tbsp. chopped pecans, divided
2 pkg.  (3.4 oz. each) vanilla instant pudding
1 cup cold milk (I used egg nog, which worked well)
1 cup  canned pumpkin
1 tsp. ground cinnamon
1/2 tsp.  ground nutmeg
1 tub (8 oz.) whipped topping, thawed, divided
Pour 1/4 cup caramel topping into crust; sprinkle with 1/2 cup nuts.
Beat dry pudding mixes, milk, pumpkin and spices with whisk until well blended. Stir in 1-1/2 cups COOL WHIP; spoon into crust.
Refrigerate 1 hour. Top with remaining COOL WHIP, caramel topping and nuts just before serving.

Perfect Pie Crust


https://i0.wp.com/a3.ec-images.myspacecdn.com/images02/100/b5963b3cbcd14857a4007feb95448b8d/l.jpg

Before I had much experience with pie, I tried a recipe called “perfect pie crust,” which employed butter instead of shortening for the fat.  At the time, I’d only ever made shortening crusts and the butter one had a much better flavor, so I thought the name apt, although it wasn’t as flaky as I desired. Although I balk at the word “perfect,” I have now found my own favorite pie crust that for me is very close to it, and although I’ve included the recipe before on a previous blog for apple pie, I think it’s good enough to warrant a blog of its own.

This one has the best of both worlds–the butter adding flavor and the shortening, flakiness. It turns out well even when I over-process it, which I almost always do (I don’t like to see big globs of fat in my crust so I tend to over-mix the fat into the flour). I don’t think there’s a way to ruin this crust besides burning it, which would be really hard to do. It puffs as it bakes and is so flaky that you can see it with the naked eye.

Like I said, it’s perfect!

Perfect Pie Crust

Printable Recipe

*Makes enough for two pies or one double-crust pie

2 1/2 cups flour
1/2 tsp. salt
2 sticks butter, cold and cut into 16 pieces
1/4 cup shortening, chilled in freezer
6-10 T ice-cold water (I use a scant 1/3 cup every time)

Mix flour and salt.  Cut the butter and shortening in with a pastry blender or food processor until pieces are the size of small peas (I usually make them half that size at least or smaller, but the crust will be more flaky if you can resist following my example).  Add ice water and mix until it starts to form a ball.  Divide dough in half, gather in your hands and gently shape each into a ball, flatten them into discs, cover with plastic wrap and refrigerate until ready to use.  If they get too hard, I leave them on the counter until pliable enough to roll out.

When ready to make your pie, roll out one disk and fit into a pie plate, trimming off the excess. Fill, cover with the top crust, pinch and flute the edges. Brush beaten egg over the top crust (that’s how you get that golden shine), cut a few vents holes and then bake according to pie recipe directions. If you are making a one-crust pie, you can either halve the recipe or freeze the second disc for later use.

Recipe Source: The Dessert Lover’s Cookbook by Marlene Sorosky

PMS Pie

Posted on

When you start screaming at the pot of water because it hasn’t boiled yet, then start slamming drawers while searching for your pasta server, and eventually start throwing utensils on the kitchen floor and then start grabbing things off the counter with intent to break as many of them as possible…you know it’s time to make this pie.  You can tell your friends that it’s Five-Layer Toffee Pie but you and I both know it’s just a cure for PMS.

*Warning: this sucker is RICH so cut into small slivers if you are not actually suffering from PMS.  Otherwise, this pie serves one.

PMS Pie (AKA Five-Layer Toffee Pie)

1 store-bought Oreo cookie crust (or make your own)
2 cups dulce de leche*, room temperature
1 (8-oz) container Cool Whip, thawed
1 (8-oz) bag toffee bits (you won’t use the whole bag but you’ll need something to sustain you until the pie is assembled)

Sprinkle some toffee bits over the bottom of the crust, spread the dulce de leche over it, sprinkle on some more toffee, spread on the Cool Whip,  and then top it off with more toffee.

It’s best to refrigerate it overnight so that the dulce de leche firms up but if you’re thinking about taking a meat cleaver to the back of your neighbor’s head for parking in front of your driveway again, by all means–dig in immediately!

*You can find dulce de leche on the Mexican foods aisle at your supermarket in a can the size of sweetened condensed milk.  If you can not find any, click here for my favorite method for preparing it at home..

Razzcherry Pie

Posted on

I am a cake lover, born to a family of pie lovers.  Making pie does not thrill me the way making and decorating a cake can, but in most cases, my family would prefer I bring pie to our get-togethers.  I’m making them so often now that I seem to have earned an unwanted reputation and have become, somewhat grudgingly, the designated pie maker amongst my friends and family.

This is how my Razzcherry Pie was born. Dad wanted pie for his birthday celebration last year, so I did an experiment to come up with a cherry & raspberry filling.  Though delicious, it turned out pretty runny so I tweaked it a bit and tried it again for our belated Mother’s Day barbecue this year (because, of course, Mom wanted pie instead of cake).  It came out perfect so I thought I’d share the recipe now that I’ve worked out the kinks.

Veronica’s Razzcherry Pie

Prepare to be razzle dazzled!

Almond Crust
1/2 cup slivered almonds
2 cups all-purpose flour, plus extra for rolling
1 teaspoon salt
1 heaping teaspoon brown sugar
1 cup (2 sticks) unsalted butter, very-cold, cut into 16 pieces
4 to 6 Tbsp ice water, very cold

Raspberry-Cherry Filling
1 (10-oz) package frozen raspberries
2 (14.5-oz) cans sour pitted cherries, drained well (juice reserved)
1 cup sugar
4 tbsp. cornstarch
2 tbsp butter
¼ tsp salt
½ tsp. almond extract
½ tsp red food coloring (optional)

Additional
milk & coarse sugar for top crust

Directions


This slideshow is meant as an accompaniment to the directions and has step-by-step photos & instruction for making a lattice top crust.

The night before you make the pie, put the raspberries into a colander and set it over a bowl.  Put the whole thing in the refrigerator and by the time you use them, they’ll be thawed and drained.  Save the juice.

For the crust (which can be made up to two days ahead), I recommend using a food processor.  Process the almonds until very finely ground—about the texture of cornmeal.  Add the flour, salt & brown sugar, then pulse a couple times to combine.  Cut in the butter until the mixture resembles coarse meal & pieces are no larger than peas.  Sprinkle 4 tbsp ice water over the top and pulse until it starts to clump together & holds together when you pinch it with your fingers.  Add additional water if necessary (I personally use 5 tbsp).  Form the dough into 2 disks, dust with flour, cover with plastic wrap and refrigerate at least one hour.  Roll out one of the disks on a floured surface and fit it into a 9 inch deep dish pie plate, trimming off the excess (leave a ½” overhang if you will be using a lattice top crust).  Set in the fridge until ready to use.

Preheat oven to 400 degrees & place one oven rack in the lowest position and one in the middle. If you only have one rack, put it in the lowest position.

Pour the collected raspberry juice into a 1-cup measuring cup (you’ll probably only have a few tablespoons).  Add the reserved cherry juice until you have ¾ cup of liquid. In a saucepan mix the sugar, cornstarch, and salt. Stir in the juice and simmer over medium heat until filling is thick and clear (by clear I don’t mean the red will disappear, but that the cloudy appearance from the cornstarch will go away), about 4 to 5 minutes. Since you’ll be adding more liquid after it’s done cooking and the berries will break down and make the glaze juicier, you want to get it pretty thick.  If it isn’t gel-like after 5 minutes, whisk in more cornstarch (1 tsp at a time) and cook for another few minutes after each addition until it’s very thick.

Remove from heat and stir in the butter, almond extract & food coloring until the butter is melted and incorporated. Gently fold in the cherries & very gently fold in the raspberries.  Yes, the raspberries will fall apart but the more careful you are, the less likely it is they’ll turn to unrecognizable mush. Pour into pastry-lined pie dish and set aside. Roll out second dough disk and cut into 1/2-3/4″ strips.  Arrange the strips on top to make a lattice, trim them to the edge of the plate (slightly shorter than the overhanging edge), fold the edge over & seal.  Pour some milk (I used cream) into a dish and use your clean fingertips to moisten the strips.  Sprinkle the strips with coarse sugar (try to get it on the strips but it’s OK if some falls into the filling).

If you are just using a full top crust, seal & flute the edges, brush with milk/cream, sprinkle with sugar and cut steam vents so you don’t have a royal pie explosion in your oven. Place pie on the bottom shelf of the oven. Bake for 10 minutes, and then move to the middle shelf & reduce the heat to 350 degrees F.  At this point, you MUST put an oven liner on the rack below the pie, or cover a rimmed baking sheet with foil and place it below, because the pie will most likely bubble over and make a mess.  Continue to bake until bubbling & the crust is a golden brown, about 30 to 35 minutes more. Cool completely (best if made the day before serving) before cutting & serve with vanilla ice cream.

Will last several days on the counter & longer in the fridge.

Fun with Pie Dough

Posted on

OK, you know you cook too much when you’re posting a blog called “Fun with Pie Dough.” No trips to Disneyworld or front row seats at the Super Bowl for me, thank you, I’m staying at home so I can have some fun with my pie dough!Well, I thought (hoped) I was done baking pie for the next century but when I was invited to a dinner a couple nights ago, a lady listening to the invitation (it was at Church and we’re all invited) asked “and why don’t you bring one of those delicious apple pies?”  Well, I could never deny someone who compliments my baking, even if she is asking me for the last thing on earth I really want to make.

I made the pies yesterday and as always, I had enough leftover dough that I could have used it as a bottom crust for another pie.  Which I would have done if I felt like making a pie that only called for one crust.  But I’m really sick of making pie, people.

Since I embarked on the apple pie project last month, I’ve been faced with an extraordinary amount of leftover pie dough that’s forced me to be creative with the extras since I abhor waste–especially when it comes to anything edible.

I used some of it to make more apple pie.  And here’s what I did with the rest.

The first thing I always do with leftover dough is roll it out, then layer on butter, sugar, cinnamon and raisins (and pecans if I have them), then roll it up, slice it and bake it.  This is what my grandmother did with her extra dough and I do it because it reminds me of her.  And because it’s delicious.  If you have kids, this one will definitely be a winner with them.  Kind of like cinnamon roll pies, I guess. (Update: I now have a recipe for Grandma’s cinnamon roll pie crust cookies here.)

I also made three batches of shortbread cookies.  If you’re using my Rich All-Purpose Pastry or another recipe that uses mostly butter for the fat, then you can use the leftover dough to do the same (shortbread is basically pie crust in cookie form, after all!).  Just knead in powdered sugar until it tastes sweet enough to you (yes, you’ll have to taste raw dough but it really isn’t bad), add flour or water as needed if it’s too wet or dry, then refrigerate it at least half an hour to firm it up.  You can either pat it into a pan and score it with a knife or roll it out, leaving it about 1/2 inch thick and cutting it with cookie cutters.   Bake it 350 until it’s done.  My cookies were small and took about 10 minutes and the dough in the ramekin I think was like 20 minutes.  The less you cook them, the more tender they’ll be.  If you brown them, they’ll be crispy. 

To add even more excitement to this pie dough shortbread fun, you can mix in lemon or orange zest (I did the orange zest twice–it was fabulous!)…and then dip them halfway into some melted chocolate!  I didn’t make it that far–the cookies were always gone before I got the chance.  I also made a batch with pecans and walnuts mixed in and they were very good too–a better version of the boxed “Sandies” you can get at the store.  I did sandwich some of those with chocolate. And then ate them.  All.

I’ve also made a couple month’s worth of communion bread for my Church. To do this, just knead in some sugar or powdered sugar (I’ve used both with equally good results), chill it, roll it out, cut it, prick it with a fork (or cut it with a knife as pictured), and bake it.  I’ve used a recipe for communion bread in the past, but using my leftover all-purpose pastry works much better. (Update: I now use this recipe for communion bread.)

OK, on to homemade Pop Tarts!!!  Actually, these little lovelies are more like handpies but we won’t tell our mothers we’re eating pie for breakfast.  Just roll out the extra dough, slice it into rectangles, put your preserves/jam of choice in the middle, dab some beaten egg around the edge, lay another piece of dough on top, press the edges to seal, then crimp the edges with a fork.  At this point you can bake them and ice them when they come out of the oven, or do like I did and brush them with some of the remaining beaten egg, sprinkle them with coarse sugar, and then pop them in the oven for about 20 minutes.  I like that way better b/c there’s less work involved and I don’t waste as much of the egg.  Oh, and I must give credit where credit is due: thank you, Laura (The Cooking Photographer), for posting a photo of your own homemade pop-tarts and inspiring me to do the same!


Let me know if you have any other ideas for leftover dough–at the rate I’m going, I’m going to need a new idea every week!


Making Grandma Ople’s Apple Pie

Posted on

My husband shot this video while I made the last two of fifteen pies for a wedding.

Vodpod videos no longer available.

more about “Making Grandma Ople’s Apple Pie“, posted with vodpod


Grandma Ople’s Apple Pie

Posted on

A couple ordered an apple pie from me last month b/c they were searching for someone who could make their son’s groom’s cake, which he chose to be apple pie.  They liked it so much they ordered 15 for the wedding and at first I regretted agreeing since it takes me about 3 hours to make a pie from scratch and I don’t have the heart to charge more than $10 a pie, which pretty much barely covers the cost of the ingredients (3 sticks of butter per pie, 8 apples, sugars, etc.) and supplies (pie tin & holder).  But now that I’ve made all but 3 of the apple pies, I feel under less pressure and I have no regrets.  I love to bake, so if someone is willing to pay for the ingredients, it gives me a good excuse to do it and I don’t even have to eat it which make my waistline happy!  I guess this is just my weird way of looking on the positive side of slaving away in a hot kitchen on a warm spring day, my heart pounding with anxiety as I glance at the clock, thinking how little time I have left, and burn my fingers on the oven rack for the thirteenth time.

Anyway, all this to introduce my favorite recipe for apple pie.  I know I caught your attention with the three sticks of butter comment, but I think the crazy amount of it just might be the secret to the deliciousness!!  That, and the unconventional recipe for the filling.  It’ll rock your friggin’ socks off.

Rich All-Purpose Pastry
This is my favorite basic pie crust.  It is buttery, flaky, tender, extremely versatile and always reliable.  The combination of butter and shortening is a good one–the butter adds flavor, the shortening, flakiness.
*Makes enough for two pies or one double-crust pie

2 1/2 cups flour
1/2 tsp. salt
2 sticks butter, cold and cut into 16 pieces
1/4 cup shortening, chilled in freezer
6-10 tbsp. ice cold water (I use a scant 1/3 cup every time)

Mix flour and salt.  Cut the butter and shortening in with a pastry blender or food processor until pieces are the size of small peas.  Add ice water and mix until it starts to form a ball.  Divide dough in half, gather in your hands and gently shape each into a ball, flatten them into discs, cover with plastic wrap and refrigerate until ready to use.  If it gets too hard I leave it on the counter until it’s pliable enough to roll out.

Grandma Ople’s Apple Pie
No, I don’t have a Grandma named Ople. I got the recipe off allrecipes.com so if you want the original version you can look it up there.  This is mine, and I have a good reason for every change I made but I won’t bore you with all that!

1 recipe Rich All-Purpose Pastry
8 granny smith apples, peeled, cored and sliced thin
1 tsp. cinnamon + 1 tbsp. all-purpose flour, mixed together in a small bowl
1/2 cup unsalted butter
3 tbsp. all-purpose flour
1/2 cup white sugar
1/2 cup packed brown sugar
1/4 cup water
1 egg, beaten

Preheat oven to 425 degrees.

Roll out one disc of pie dough on a lightly floured surface and arrange in a pie plate, trimming off the edges.  Place plate in refrigerator until ready to use it.

Sprinkle the cinnamon mixture over the apple slices and mix well.  Arrange apples in your prepared pie plate and set back in the fridge.

Melt butter in a saucepan.  Whisk in flour until no lumps remain.  Add white sugar, brown sugar and water and whisk until combined, then bring to a boil.  Once it reaches a boil, leave it boiling over medium heat for five minutes.

Meanwhile, roll out your top pie crust.

Once caramel sauce has boiled for five minutes, pour slowly over the apples so that it can seep down into the cracks and not over the sides.  Be careful–it’s really hot!  (I’ve burned myself a lot on this stuff, trying to push a bit of overflow back into the crust with my bare fingers–owie!) Arrange the top crust over the apples, trim the edges, fold the edges under the edge of the bottom crust and flute with your fingers.  For my tutorial on working with pie dough, including how I flute a crust, you can click here.

Brush the entire surface with the beaten egg, using a pastry brush.  I suggest using a silicone brush–it doesn’t mar the surface of the crust and that’s important with this particular pie since the hot caramel softens the dough and makes it susceptible to damage.

Pop it into the oven for 20 minutes.  Reduce heat to 350 and continue baking for about 40 minutes, or until bubbly & crust is browned.  Oh, and be sure to use an oven liner or place a baking sheet below the pie b/c it almost always leaks!

Allow to cool overnight on a cooling rack.