RSS Feed

Tag Archives: summer

Thankful Thursdays #77: summah!

Posted on

Every summer, I become a broken record: “It’s soooo hot,” I moan.  Me and the heat-we don’t really get along.  Especially since I love baking, and summer heat makes it very uncomfortable to turn on the oven.  I really hate sweating.  Which may explain why I don’t exercise very much. ;)

But lately I’ve been thinking about all the great things about summer and it’s actually really changed my attitude a lot.  I’m still miserably hot, but at least I’m having a great time while sweating my butt off!

Why I’m thankful for summer:

*You can hover over the photos to get a description for each.

Summer is when our crops are grown and harvested and without summer, we’d all starve to death!  Thank you God, for giving us summer, which is the perfect climate for producing delicious corn, berries, wheat for our bread, gorgeous tomatoes, potatoes, carrots, and the enormous cornucopia of colorful delicious vegetables and fruits.

Which brings me to…

The farmer’s market! I rejoice every summer when it opens up for the season.

I enjoy the vibrant, happy colors of bountiful green on the earth and blue of the sky.  Every season owns a unique beauty and summer is no exception.  God is the ultimate artist.

Babies!  Baby bunnies, ducklings, and goslings are everywhere in early summer and they are just so cute you have to stop in your tracks when you spot one to “oooh and awwww” for a while.  Unfortunately, I missed any photos of them when they were really small and only caught them once they were already half-grown, but they’re still pretty cute. :)

Ever since I was a baby, I’ve spent my summers swimming in lakes and pools and I continue to enjoy it as an adult.  One of the most delicious feelings is soaking up the shimmering hot heat of the sun and then running into water that is hot at the edge and gets cooler and cooler the deeper you go.  Swimming is my favorite exercise, next to biking, and there’s no other time of year I can do it since I don’t have access to an indoor pool.  It is also one of the best exercises since it is low-impact and a whole-body exercise, so I’m thankful for summer for helping me get more active by enjoying one of my favorite things.

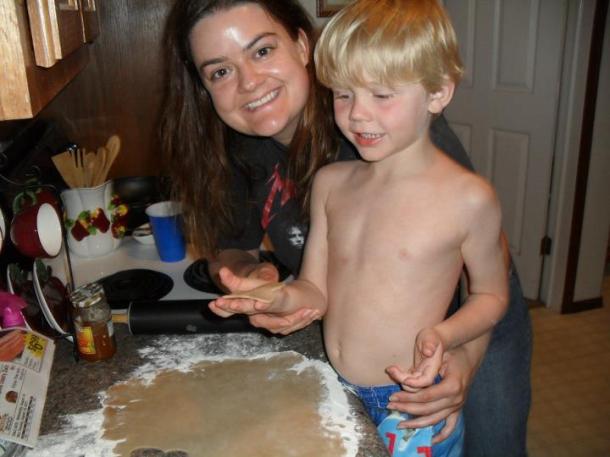
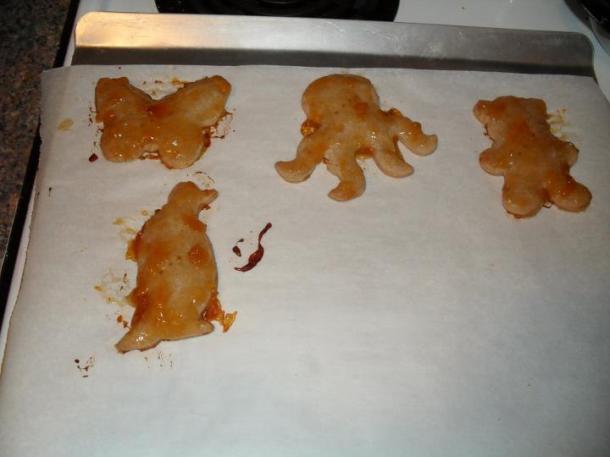
Summer time means extra time with the nephew, which is always a reason to be thankful.

Danielle’s eyes were closed and she asked if I could Photoshop her eyes open. Aren’t you jealous of my Photoshopping skillz? And aren’t you glad you’re not my sister? lol

The Wichita River Festival, where there are myriad outdoor activities to enjoy like paddle boating, kayaking, outdoor concerts, miniature golf, an ice cream social…

Last year Dennis went overboard in his kayak and he had to be rescued out of the river.  Not that I was thankful for that, but it was a pretty good laugh. ;)

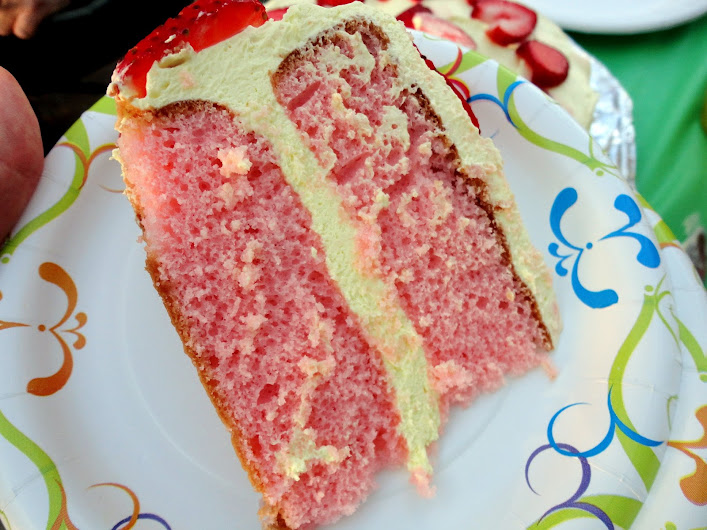
Picnics and barbecues!  It may be hotter than Hades, but that’s OK when there’s good company and good food to enjoy.

What do you love about summer?

Corn Salad with Queso Fresco

Posted on

It’s been a while! And I’ve noticed I’m not the only one blogging less–it seems summer time is a busy time for everyone and I’m no exception.  Except I haven’t been busy with obligations–I’ve been busy having fun!  That’s the best kind of busy, right? :)

I’ve been enjoying my nephew’s baseball games, we celebrated my PIL’s 50th anniversary, we’ve been biking and walking, I’ve been baking for bake sales, birthdays, and banana bread experiments, and we’re going to Lake Afton every chance we get.  When it’s this hot, the only thing I want to do is soak in the sun’s heat on the beach (with SPF 1,000 sunscreen, of course) and then cool off in the water.  Love it so so much!

I haven’t been cooking very much, but this corn salad is one of the dishes we’ve enjoyed lately.  I love eating cool foods on hot days and fresh corn in the summer is so yummy in any form!  This salad has a a Mexican vibe to it and the flavors are great.  You can make it as is for a side dish, or turn it into a meal by adding some leftover grilled or rotisserie chicken.  Fabulous!

I added so much chicken and tomato to my salad that the corn was hardly the main feature any more!

Corn Salad with Queso Fresco

Printable recipe
Printable recipe with picture

4 cups fresh or frozen corn kernels
8 ounces queso fresco or cotija cheese
1 large red bell pepper, seeded and chopped
1 small red onion, finely chopped
1 jalapeno pepper, chopped (and seeded if desired-the seeds will add more heat)
1/2 recipe (about 6 ounces) Cilantro-Lime Vinaigrette (recipe follows)
1 large avocado, pitted, peeled, and cubed
Kosher salt and freshly ground pepper to taste
Optional: chopped tomato and leftover rotisserie chicken

Bring about 1 inch of water to a boil in a large stock pot. When the water boils, add the corn and cook for 2-3 minutes. Drain and rinse and then add to a large bowl. Toss together the corn, red bell pepper, red onion, jalapeno pepper, and crumbled cheese. Toss with Cilantro-Lime Vinaigrette. Chill until ready to serve. Right before serving, gently toss in the avocado and season with salt and pepper. Serves 10-12.

Recipe source: Our Best Bites

Cilantro-Lime Vinaigrette

Printable recipe
Printable recipe with picture

1/4 cup fresh lime juice (about 2-3 juicy limes)
1/4 cup white wine vinegar or rice vinegar*
4-5 cloves garlic
1/2 teaspoon Kosher or sea salt
1 tablespoon sugar
1 cup canola oil
1/2 cup roughly chopped cilantro, stems removed

In the jar of your blender, combine lime juice, vinegar, garlic, salt, and sugar. Blend until ingredients are completely combined. With the blender running, add the oil in a steady stream. Add cilantro and blend until the cilantro has broken down but still maintains some of its texture. Serve with greens, on any type of Mexican salad, or use as a marinade.

*Reduce sugar to 2 teaspoons if using seasoned rice vinegar, which contains sugar.

Recipe source: Our Best Bites

Lemon Blossoms

Posted on

I made these for Mother’s Day, intending to give pretty little baggies of them as gifts to all the mothers at the annual Mother’s Day picnic on Dennis’ side of the family.  It didn’t quite work out that way.  The first pan, which was half the batch, I didn’t grease well enough and they all stuck horribly so guess where those ended up?  Yup, in our bellies.  Can’t say we were too sad that only half the batch was pretty enough to share.  But then we couldn’t keep our hands off those either, and in the end, there were only enough to give to two mothers: his and mine.

Our mothers loved these little beauties, and we loved them.  Way too much.  They are really delicious, but most of the lemon flavor comes from the glaze, and I would suggest trying this with a lemon cake mix instead of a yellow if you can find one.  That would really intensify the lemon flavor.  They are wonderful as is, but can you get enough lemon flavor in the summer?  I think not.

Lemon Blossoms

Printable recipe
Printable recipe with picture

1 (18.5 oz) box yellow or lemon cake mix
1 (3.5 oz) box instant lemon pudding mix
4 large eggs
3/4 cup vegetable oil

Glaze:
4 cups confectioners sugar, sifted
1/3 cup fresh lemon juice
Lemon zest from 1 lemon
3 tablespoons vegetable oil
3 tablespoons water

Preheat oven to 350 degrees. Spray miniature muffin tins thoroughly with cooking spray.

Combine cake mix, pudding mix, eggs and oil and blend well with an electric mixer until smooth, about 2 minutes. Batter will be quite thick. Using a cookie scoop, divide the batter between the muffin wells, filling each halfway. Bake for 12 minutes.

While the blossoms are baking, make the glaze. In a mixing bowl, whisk together the sugar, lemon juice, zest, oil, and 3 tablespoons water. Whisk until smooth.

Remove the blossoms from the oven when they are done and turn out onto a tea towel. You might have to run a butter knife around the edges of the cupcake wells to loosen them before turning out. While they are still warm, dip the blossoms into the glaze, covering as much of the cake as possible, or spoon the glaze over the warm cupcakes, turning them to completely coat. Place on wire racks with waxed paper underneath to catch any drips. (I did this over the sink.) Let the glaze set, about 1 hour, before storing in airtight containers or covering with plastic wrap on a platter.

Makes 48 mini-cakes

Recipe source: Paula Deen, as seen on Minda’s Cooking

Blueberry-Lemon Upside Down Cake

Posted on

Secret Recipe Club

Whoop whoop!  I took a month off from the Secret Recipe Club and am so excited to be back with this recipe! My assignment this month was Evelyne’s blog, Cheap Ethnic Eatz.  As the title implies,her recipes are from around the world and affordable to make.  I nearly made her beautiful Peach Salsa since I’ve been on a salsa kick lately, but in the end, this beautiful cake won out.  When I read the titles of the recipes I was considering to my husband, including Strawberry Puff Pastry Pizza, Lazy Chocolate Raspberry Cake, Self-Saucing Chocolate Pudding, Afghan Cardamom Pudding, and Peanut Butter Daifukumochi Balls (apparently I was really craving sweets when searching Evelyne’s archives-big surprise!), he absolutely insisted that I make this one.  I aim to please.

Well, thank you very much dear Evelyne, because this cake surely did please us both.  I’m almost embarrassed to admit how much.  Between the two of us, it only took us two days to polish off the entire cake.  While we do enjoy our sweets, this was ridiculous even for us, and a testament to how wonderful (and addictive) the cake is.

I did change it up by adding lemon flavor to the cake, because I really enjoy the combination of lemon and blueberry flavors .  It was amazeballs, as my friend, Jennifer, would say.  I think I also changed the texture of the cake as well by switching the baking powder for baking soda (the only science I’m any good at is baking science, and I knew the acid in the lemon juice was a perfect catalyst for baking soda, so I pulled the old switcharoo on my leaveners) and the cake was crazy moist to the nth degree.

I would probably try making this cake with the baking powder next time because although I did love the moist texture, with the juicy, dripping blueberry topping it wasn’t really necessary.  Another benefit of using the baking powder (which is baking soda with an acid mixed in (cream of tartar) to activate it) is that it wouldn’t take away the tartness from the lemon juice like the baking soda does (baking soda reacts with acids, which causes the bubbles and rising, and it neutralizes the acid in the process), so it might balance the sweet topping a little better.  But unless you hate sweet sweets, you will love this cake as is.  You know we did!

Blueberry-Lemon Upside Down Cake

Printable recipe
Printable recipe with picture

1 lemon
1/4 cup melted butter
1/2 cup brown sugar
1 (12 oz) bag frozen blueberries OR 2 cups fresh blueberries
2/3 cup milk
1 1/3 cups all-purpose flour
1 teaspoon baking soda
1/4 teaspoon salt
1/2 cup butter, softened
3/4 cup granulated sugar
1 egg
1 teaspoon vanilla

Preheat oven to 350 degrees. Zest the lemon and set the zest aside. Squeeze the lemon and set the juice aside. In an 8 or 9 inch square cake pan, combine melted butter and brown sugar; spread evenly on bottom. Spread blueberries evenly over top. Sprinkle with 1 tablespoon of the lemon juice. If you are using frozen blueberries, put the dish in the oven for 10 minutes or until the blueberries are mostly defrosted. Remove from oven and allow to cool while preparing the cake batter. *It is OK if the dish is still warm when you add the batter.

Pour the milk into a 1-cup glass measure. Add enough of the leftover lemon juice to equal ¾ cups liquid. If you don’t have enough lemon juice, just add a bit more milk. Set this aside to curdle while you prepare the batter.

Whisk together flour, baking soda, and salt in a small mixing bowl. In a separate larger mixing bowl, cream the butter and sugar together with an electric mixer, beating for about five minutes, until light and fluffy. Beat in egg and vanilla. Add dry ingredients alternately with milk to creamed mixture, beating well after each addition, beginning and ending with the flour mixture (flour, milk, flour, milk, flour). Spread batter evenly over blueberry layer.

Bake for 45 to 50 minutes or until toothpick inserted in center comes out clean. Let cool 10 minutes in pan, then turn out on to a large flat plate. Serve warm or at room temperature.

Recipe source: adapted from Cheap Ethnic Eatz


P.S. Happy 12th anniversary, sweetheart! I’m testing him to see if he’ll read this without me telling him he should.  :)  And happy birthday to my itty bitty sweetie who turns eight today!

Strawberry Lemonade Layer Cake

Posted on

Wheee!  We’re back and boy did we have a blast in good old Abilene.  I think my blues have been cured by some good old Kansas sunshine and fun times.  We did so many things I don’t know if I can even blog about it because it would either be one long blog, or a million short ones, but I’ll see what I can do later on.

While we were there, we had a cookout with the whole family and I surprised my father-in-law, Al, with an early birthday cake since we were leaving the day before his actual birthday.  Since I was making it in a kitchen that wasn’t my own, and it was hot, I wanted it to be super easy, and cool and refreshing.  This one fit the bill since it’s made with convenience products and is refrigerated and served cold.  Plus, there’s no butter in the frosting so maybe it’s even a little lighter than my usual decadent cakes.  Perfect for summer.  Except for that whole turning on the oven thing, but I baked it at night so that made the hot kitchen not quite as unbearable.

Jessie’s trying to do a sneak attack on the grill!

Everyone loved the cake, but I have to be honest and tell you it’s not even close to my favorite cake.  The frosting is very tart, like lemonade, and I tend to like my cake super duper sweet.  If I made it again, I’d use less of the lemonade mix.  But I did like it, and judging by the reviews I got, it’s totally worth sharing.  It does have a nice strawberry lemonade flavor going on.  Like I said, it’s a great cake for summer because it’s served cold.  The frosting doesn’t get hard when cold like all the butter-laden ones I usually make, so that is nice.  And don’t forget my water bottle trick to make sure your cake is super moist! I taught it to my Mother-in-law while I was there, using her tap water, and she was so excited about it that she didn’t notice I was using her undrinkable tap water until I was done.  So yeah, I tried to poison everyone with not quite crystal-clean well water, but we all survived. lol

(Oh no, I hope Janice isn’t reading this!  She’s a reader in Abilene that I got to meet and I brought her a piece of this cake when I stopped by her office.  It was so cool to meet her, except for the trying to poison her part.  If you’re reading, Janice, I was just joking about the poisonous well water.  *ahem*  But you might want to get checked for fingernail cancer during your next doctor visit.)

OK, enough madness.  Here’s the recipe.

Strawberry Lemonade Layer Cake

Printable recipe
Printable recipe with picture

1 (18.25 oz) box strawberry cake mix (plus oil, water and eggs as directed on box)
1 (8oz) package cream cheese, room temperature
1 (0.23 oz) packet of Kool-Aid lemonade
Yellow food coloring gel (as desired for color)
1 (7 oz) container marshmallow creme or fluff
1 (8 oz) container frozen whipped topping, thawed
Fresh strawberries to garnish

Make cake according to box instructions and bake in 2- 8 inch round cake pans as directed. Turn finished cakes out onto cake racks and allow to cool completely.

Once cake is cool, cream together cream cheese, lemonade and yellow food coloring until smooth. Mix in marshmallow creme and then mix in whipped topping until completely smooth. Level the cakes, and place one layer on a platter, cut side up. Spread about a third of the frosting over the top, then place the second cake layer cut side down on top. Spread the remaining frosting over the top and sides. Slice strawberries and place on the top and sides of the cake for decoration. Refrigerate until ready to serve and serve cold, straight from the fridge.

Recipe source: Easy Baked

Disclaimer: No humans or animals were harmed during the eating of this cake.  I believe the reason they don’t drink their water is because it’s hard water, which isn’t really poisonous.

More photos from our evening…

My plate: burger, dilly cucumber salad, 7 layer dip, and jalapeno chips.

A closer look at the 7 layer dip. I did it a little different this time, putting the tomato layer on top and mixing some goodies into it (I made the tomato layer from this recipe).  I also mixed in a packet of Fiesta Ranch dip mix into the sour cream instead of taco seasoning and it was even better than the original!  I’ve been looking for that dip mix ever since my girl Jaci made a dip with us while we were visiting last year because it is just wonderful and miracle of miracles, I finally found it in Abilene:

I loaded up, so if you’ve never tried this and would like to, just let me know in a comment below, and I’ll draw among the interested parties for a winner of a packet.  It’s so good mixed with sour cream!

Maybe you can tell he likes Coke?

Dennis and his nephew, Carson, played catch after dinner.


Look how studly my man is.  He’s not much for sports but I think the sporty look is good on him. :)

When I met this boy, he was a toddler.  And now he towers 6 inches over me.  Kids are great at making adults feel old! lol

Love country sunsets!  Such a pretty ending to the day.

Balsamic Vinegar & Garlic Glazed Flat Iron Steak

Posted on

I have a significant backlog of recipes waiting to be blogged, but I made this one yesterday and two things prevailed upon me to post it immediately:

1) This week’s BSI (blogger secret ingredient) is beef so this is perfect timing to submit it for the contest, and

2) It’s so delicious, I couldn’t wait!

Fish aside, I’m not much for meat.  I’ll put a bite on my plate, then fill the rest with dessert vegetables and potatoes, etc.  Then I usually share what little meat is on my plate with Jessie.  But this steak was so delicious I was sneaking bites of it from the platter before Dennis came home and almost couldn’t stop myself.  Between us, we ate an entire 1-lb flat iron steak in one sitting.  It was just incredible.

Dennis was beside himself.  “How did you get it so juicy?  What did you do to this?  This is so good.  What did you put on it?  THIS is the best steak I’ve ever eaten.”  “Even over the steak au poivre?” I asked.  “Yes, even over that one.”  An hour after eating, Dennis looked over at me and said, “That steak was really, really good.”

This recipe was inspired by my friend, Suzie*, who shared a recipe for Balsamic & Garlic Glazed Strip Steaks with me last summer.  At the time, I knew my hubby would love it but I didn’t think I’d ever use it.  Then I happened to pick up a flat iron steak because it was on sale and because I’d never heard of it before.  I had NO idea what I was going to do with it so I searched all the recipes I had for steak to get some ideas, and found Suzie’s.  The marinade was just PERFECT for this steak.

*Suzie just started her own food blog this week!  If you’ve been reading long, you’ve seen many recipes on my blog from her.  She’s a great cook with a great sense of humor.  Check her out here!

Flat iron steak is the second most tender cut of meat, next to the tenderloin, and that obviously helped with the resulting steak.  The acid from the balsamic vinegar also tenderizes it a bit during the marination process, so you’re left with an incredibly juicy and tender piece of meat.  The marinade is simple but just perfect.  I couldn’t believe how delicious it made the meat!

Balsamic Vinegar & Garlic Glazed Flat Iron Steak

Printable recipe
Printable recipe with picture

½ cup balsamic vinegar
1/3 cup olive oil
3 large garlic cloves, minced
1 (1 lb) flat iron steak
Kosher salt
Fresh ground black pepper

In a small bowl, whisk together balsamic vinegar, olive oil and garlic. Reserve ¼ cup marinade and pour the rest in a large Ziploc bag. Put the steak in, press out the air and zip it up. Let rest at room temperature for 30 minutes to 1 hour before grilling.

Meanwhile, light your charcoal mound in the grill (yes, I was grilling yesterday-the weather was so nice!) and then spread the coals out once the fire dies and they get ashy around the sides. Remove steak from bag, discard marinade. Salt and pepper steaks. Grill covered for ten minutes on each side for medium-well, brushing with extra marinade while it cooks.

Set grilled steak on a platter, tent with foil, and let rest for 5 minutes so juices can recirculate throughout the meat. Enjoy!

Recipe source: adapted from Suzie S.

No-Bake Granola Cookie Bars

Posted on

In Tupperware’s July specials brochure, there was a recipe for Peanut Butter Granola Bites that caught my eye because it was easy and the photo was very appealing.  The best part is that it contained no granola, which I never have on hand, just ingredients contained in granola, which I always have on hand.

However, I just so happened to be running low on peanut butter when I decided it was time to make them (we are always running low on peanut butter because we eat it like crazy), so I adapted the recipe and made my own walnut butter for it.  I have the original printer-friendly recipe here if you want to try that one instead.  I can’t vouch for it since I haven’t tried it yet, but my similar version was very good and I’m sure it is too.  I mine for snacks and even had some for breakfast since they are fairly healthy.

No-Bake Granola Cookie Bars

Printable recipe
Printable recipe with picture

2 cups raw nuts (I used walnuts)
½ teaspoons salt
½ cup (1 stick) unsalted butter
½ cup honey
2 cups rice cereal
2 cups rolled oats
1 cup dried fruit, roughly chopped (I used half cherries, half cranberries)

Spread nuts out on microwave-safe plate. Microwave one minute; stir with fingers. Microwave for 1-2 minutes more, stirring every thirty seconds, until toasted and fragrant. Place nuts in food processor bowl with blade attachment in place, and process until nuts go from a meal, to a paste, to liquid. You will have to stop the food processor several times to scrape the sides down. Once it it liquid, add salt (use ¼ teaspoon if you’re using salted butter) and let it run another minute.

While you’re toasting and processing the nuts, start your oats to toasting. Place them in a skillet over medium heat and stir every minute or two until golden and fragrant, about five minutes. Set aside until you’re ready for them.

Melt butter in a microwave-safe bowl, microwaving one minute or until melted. Add to the nut butter in the food processor, then pour in the honey. Process until mixture is blended.

Place cereal, oats, cherries, and cranberries in large bowl. Pour the butter mixture over the top and mix until combined. Spray a 13″ x 9” baking dish with oil and spread mixture into the pan. Cover with plastic wrap and refrigerate for two hours, or until firm. Slice into squares and devour.

Recipe source: adapted from Tupperware

Brown Sugar Peach Pie

Posted on

This was another of the pies Teri and I made during the great pie making adventure several weeks ago.  I’ll let the photos speak for themselves, but will add that yes, it’s every bit as good as it looks.  And the crust recipe makes a lot, so you will have some leftover for pie crust cookies.  Or do what my nephew and I did: cut animal shapes out of it, fill with jelly, press another shape on top and bake!

Brown Sugar Peach Pie

Printable recipe
Printable recipe with picture

Crust
2 2/3 cups flour
1/4 cup brown sugar, packed
1 teaspoon salt
1 teaspoon cinnamon
1 cup vegetable shortening, chilled in freezer
6-8 tablespoons ice cold water
1 egg, beaten, for brushing on the crust
1 teaspoon white sugar, for sprinkling on top

Filling
7-8 large fresh ripe peaches
1 tablespoon lemon juice
1/2 cup brown sugar, packed
3 tablespoons flour
1 teaspoon vanilla
3 teaspoons butter

In bowl of food processor, combine flour, brown sugar, salt, and cinnamon; pulse until combined.  Scoop out the shortening and add it to the flour mixture; pulse until mixture resembles large peas.  Add water, one tablespoon at a time, until the dough comes together.  Form into two discs, wrap in plastic wrap and refrigerate until ready to use.

Preheat oven to 425.   Peel*, pit and slice peaches; place in a large bowl.  Add lemon juice, brown sugar, flour, and vanilla, and mix well; set aside.  Roll out one pie dough disc on a floured counter and fit into pie plate.  Brush with egg to create a barrier between it and the filling and keep it from becoming soggy.  Pour peach mixture into crust and dot with butter. Roll out second disk for the top of pie and place on top. You can make a lattice design or just make slits in top crust. Brush with egg & sprinkle with sugar.

Bake for 10 minutes. Turn temperature down to 350 and bake approximately 40 minutes longer, or until filling is bubbling and crust is golden brown.  Halfway through, or when it starts browning on the edges, cover edges with aluminum foil or a pie shield to keep it from burning.

*To easily peel peaches, score an X into the bottoms, drop them 2-3 at a time into boiling water, let boil for 30 seconds – 1 minute, then remove and place in a bowl of ice water.  The skins will just slip off when you rub it away from the cut.

Recipe source: Foodin Life in New England

Owen with his butterfly pie crust cut out.

285531_10150332893336480_2129814_n

After the filled cookies were baked, I spread more jam on top instead of making a glaze because it was easier. :)

285083_10150332893431480_1999788_n

Cool Strawberry Pie

Posted on

A couple weeks ago, my friend, Teri, came over to learn how to make pretty pies.  Being the organized (except when I’m not) person I am, I developed a pie lesson that included pies that required all four types of crust: single crust, single pre-baked, double crust, and double crust with a lattice top.

I saved a recipe for cool strawberry pie from a myspace friend, Kim D., in 2009, and was so ecstatic to finally have an excuse to make it!  It’s the pie I chose for the single pre-baked pie crust.  Instead of making a regular-sized pie, we made two smaller pies for most of the recipes so that we could each have one for ourselves to take (or keep) home.

The recipe, like many pie recipes, is very simple with only a few ingredients.  But it’s utter magic!  This was my favorite pie of all four that we made.  It is just perfect for summer–cold, sweet, and refreshing.  It even seems light, though I don’t dare calculate the calories.  :)

I want to note that making your own pie crust does take the recipe from simple to time-consuming, so if you’d rather stick with simple, buy Pillsbury refrigerated pie crusts or a frozen pie crust in a tin and follow the directions on the package for a pre-baked crust. My favorite pie crust recipe does not work well for a pre-baked crust, as there is a large ratio of butter and shortening to flour, which causes it to shrink substantially if baked without filling. I modified a shortening pie crust recipe from the back of a Kroger flour sack to include butter, and it worked much better.

Cool Strawberry Pie

Printable recipe
Printable recipe with picture

2 cups all-purpose flour
1 teaspoon salt
1/3 cup butter, cold
1/3 cup shortening, chilled in freezer
5-6 tablespoons ice-cold water
1 egg white, beaten

6 cups strawberries (about 2 containers), sliced
1 cup sugar
3 tablespoons cornstarch
1/2 cup water

1 cup heavy whipping cream
2 tablespoons powdered sugar

Preheat oven to 400 degrees F. Combine flour and salt in bowl of food processor fitted with blade attachment. Pulse a couple times to combine. Cut butter into cubes and add to flour along with the shortening. Pulse until until mixture resembles a coarse meal. Add water, a tablespoon at a time, pulsing until all the flour is moistened. Form dough into ball; divide in half, shape into two discs, and wrap one in plastic wrap to freeze for later use. Sprinkle counter with flour and roll pie dough out toto 1/8 inch thickness. Fit pastry into pie plate, leaving a 1/2″ overhang. Tuck overhand under until edge is even with plate, then flute the edges. Prick bottom and sides with fork and place a sheet of parchment or wax paper over the bottom, cut so that it sticks up well above the sides. Fill with dry beans and bake 10 minutes. Gather the corners of the parchment and pull out the beans. Return crust to oven to bake for another 5-10 minutes, or until golden brown. Allow to cool for a minute, then lightly brush beaten egg white over the bottom and sides of the crust to create a seal. The residual heat will bake the egg white. Allow to cool while you prepare the filling.

Mash enough berries to measure 1 cup. Mix sugar and cornstarch in 2-quart saucepan. Stir in the water and mashed berries. Cook over medium heat, stirring constantly, until mixture thickens and boils. Boil and stir 1 minute; cool.

Fill shell with remaining berries; pour cooked strawberry mixture over top. Refrigerate until set, at least 3 hours.

Just before serving, beat cream in a chilled metal or glass bowl with chilled beaters on high speed until soft peaks form. Add powdered sugar and continue beating until stiff peaks. Pipe or spread onto pie.

Recipe source: Kim D.

Since I’ve already shared the recipe for Triple Berry Pie and won’t need this picture for a post on it, I thought I’d just share it with you anyway!  The Triple Berry is the pie I chose to teach the lattice-top crust.  As you can see below, Teri did a fabulous job on hers!  We had so much fun.

Warm Chorizo & New Potato Salad

Posted on

This is a very simple summer-friendly recipe that is also, shockingly, husband-friendly. My poor man just does not get the amount of meat and potatoes he believes he requires, so when I served him this salad, he was so ecstatic to be eating meat and potatoes, that he didn’t even care there was a bed of lettuce underneath.

The meat and potato mixture is substantial and satisfying, but I really think you need the egg on top to complete the salad. Jenna said it was optional, but I’m not going to tell you that. You need the warm yolk to run out over the salad and serve as a dressing. It really pulls the whole thing together quite nicely.

Warm Chorizo & Potato Salad

Printable recipe
Printable recipe with picture

1.5 lbs new, red, or gold potatoes (I used gold)
Salt and pepper to taste
15 oz chorizo sausage
16 oz mixed salad greens or shredded lettuce
1 lemon
4 poached or over-easy eggs

Bring a pot of salted water to a boil. Meanwhile, cut the potatoes into bite-size chunks; add to the water and once boiling, reduce heat a bit and continue to boil until fork-tender, but not mushy. Meanwhile, start your sausage to cooking. Add to a skillet and cook over medium heat, breaking it and crumbling with a spatula as you go. Remove from heat if it gets done before your potatoes are ready. Once the potatoes are tender, drain and add to the sausage. Stir well and cook another minute or two. Season with salt and pepper. Divide salad greens among four plates, then divide sausage and potatoes on top of each. Top with a poached or fried egg and serve immediately.

Recipe source: slightly modified from Jenna’s Everything Blog