RSS Feed

Tag Archives: baking

Chocolate-Filled Orange Buns

Posted on

As you know, I’m a member of the Secret Recipe Club.  On September 14, one of our members, Daniel of The Haggis and The Herring, passed away suddenly and expectantly.  He had just made dinner for his family and bam.  He was gone.  I don’t know the details, but what a shock.  His wife was expecting their third child, and just thirty minute before he died he was telling his wife how much he loved her and how everything was going to be OK.  There are so many stories like this that make us realize how fleeting and precious life is, that you never know what to expect, and yet we are never fully prepared when caught by surprise.  Not even half-prepared.  It can turn your world upside down.  My heart breaks for his family.

Despite being in this club with Daniel, I was never in the same group and him and I don’t believe I ever visited his blog until he was gone.  I debated whether I should join the special tribute reveal with other members of the club, to remember him by posting a recipe from his blog.  I felt strange about it since we never once communicated while he was alive that I know of, but being in the same club, both being food bloggers, and now having read some of his blog, including the beautiful eulogy his wife shared when she announced his passing, I felt his life deserved to be commemorated this way, and I couldn’t not join the tribute.

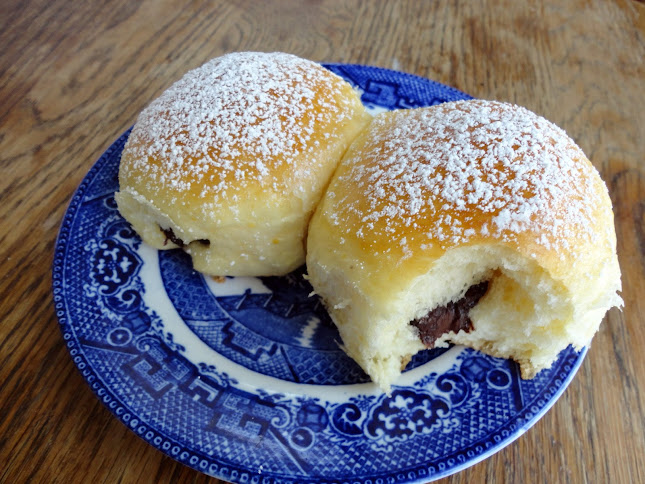
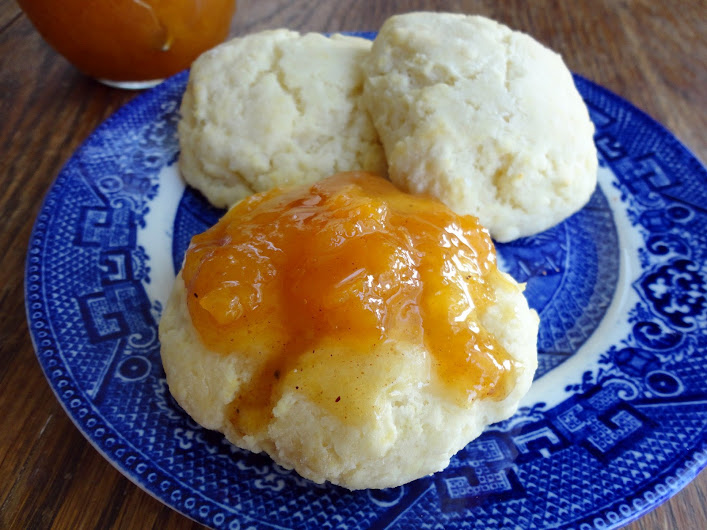
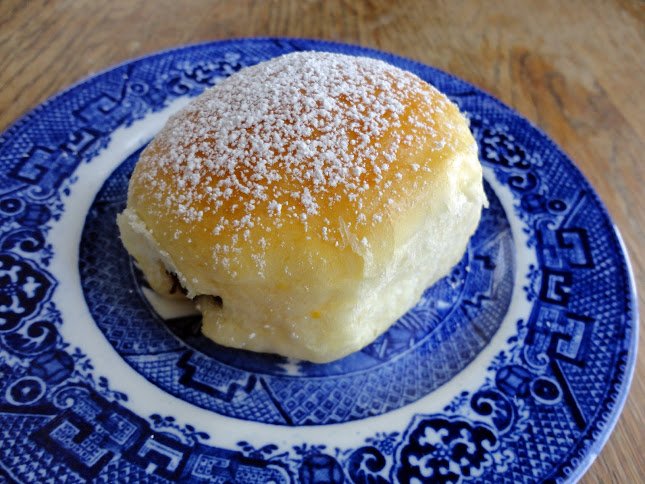
I chose this recipe because these buns were very special to Daniel.  His grandmother made them while he was growing up and were his favorite sweet, but for a long time, he couldn’t’ find her recipe to duplicate them after she had passed away.  His aunt finally found a copy his grandmother had written in Spanish and she translated it for Daniel to make and share on his blog.  He was so happy to be able to finally enjoy them again.

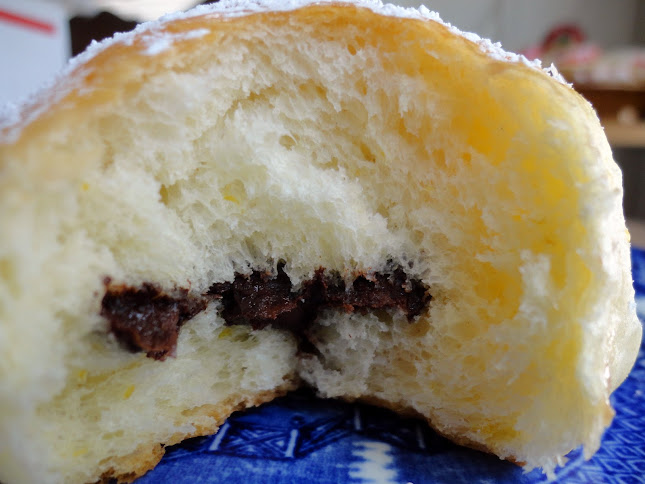
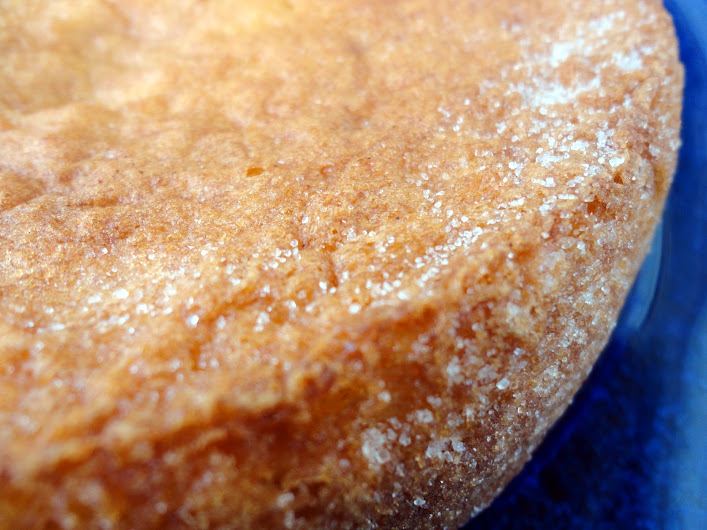
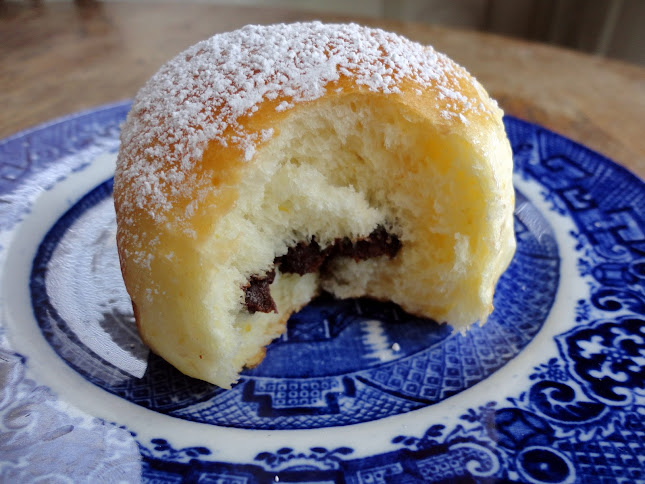
I didn’t have orange blossom water, so I upped the amount of orange zest in the recipe to make sure the orange flavor still came through and I thought the orange and chocolate flavors were very nice.  I didn’t make these small like they should have been, so the amount of chocolate to bread was off, but they were still tasty. I loved how light the bread was, even when at room temperature. I took these pictures with room temperature buns so you can imagine how melty the chocolate and how light the bread is when warm. These aren’t very sweet, so I thought they were very nice as a breakfast treat with coffee. I brought them to work and they were gone in an hour-I couldn’t believe it. Either that means they are good, or people at work are starved for homemade goodies! I need to feed them more often, I think. :)

I hope that Daniel would be honored by this tribute to his life, and that his favorite buns have found their way into the hearts of others through his willingness to share his family heirloom recipe.

Chocolate-Filled Orange Buns

Printable recipe
Printable recipe with picture

4 eggs
½ cup oil
¾ cup sugar
½ cup milk
½ cup orange juice
2 tablespoons orange zest (from about two oranges)
1 packet (2 ¼ teaspoons) instant yeast (aka bread machine yeast)
6-7 cups all-purpose flour
1 (12 oz) bag semisweet chocolate
1 egg for egg wash
Confectioners sugar for dusting (optional)

In a large mixing bowl, combine eggs, oil, sugar, milk, orange juice, orange blossom water and rind. Whisk together. Mix the yeast with 4 cups of the flour and stir into the liquid mixture with a large spoon.  Continue stirring in flour until it is too stiff to stir, then turn it out onto a floured surface and begin kneading more flour in until the dough becomes smooth and elastic.  Roll into a ball and place in a greased bowl, turning once to coat in oil.  Cover bowl with a cloth and allow to rest in a warm draft-free place until doubled in size, about one hour.

To make the rolls, press a small handful of dough into a 3 x 3 square. place some chocolate at one end and roll it up. Place rolls on a non-stick baking sheet. (I put mine into two greased 9×13 baking dishes.) Cover rolls with plastic and let rise for 30 minutes or until doubled in size.

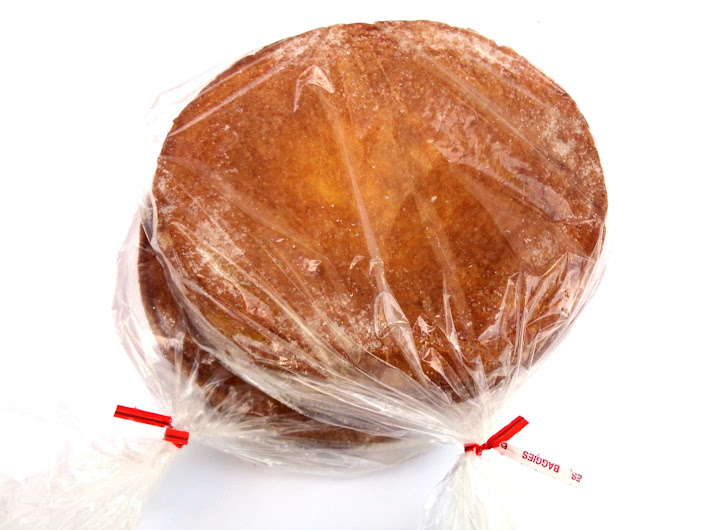
Preheat oven to 350F. Beat egg for wash and brush onto buns with pastry brush. Bake for 20 minutes or until buns are slightly golden-brown on top. Sprinkle buns with confectioners sugar when done. Buns can be frozen for later use.

Makes 24 large rolls, or 48 small.


Favorite Cornbread


With three different cornbread recipes on my blog already, you might think I was cornbread crazed since I’m adding another.  Well, I guess maybe I am.  Growing up, we practically lived off of beans and cornbread during the winter months.  Plain pinto beans with no spices save salt, and whole wheat cornbread that was dry, not sweet at all, and was perfect for absorbing copious amounts of salty butter.  It might not sound particularly tasty, but we loved it.  I think it was the magic of butter, which we surprisingly were allowed to consume without limits since Grandpa deemed it a healthy fat and Mom learned all her health-nut ways from  him.  So we loved our beans and butter, er, cornbread.

This cornbread is the antithesis of the cornbread I was raised on, and truth be told, the first time I made it I was completely aghast that Mel dared to call it cornbread.  This wasn’t cornbread, this was cake.  And her whipped honey butter? The frosting!

But everyone (I brought it for a chili day at work) loooved it.  I didn’t bring the honey butter the first year and at first, some were disappointed, but after tasting it said, “This doesn’t even need butter!”  It really doesn’t.  It practically melts in your mouth, it is so soft and moist.  I noticed when I brought the honey butter last year they barely touched it.  The cornbread is perfect on its own but if you really think you need some sweet butter, go to Mel’s blog for her unique recipe, which includes marshmallow fluff and is very good.

Anyway, after making this for others for two years and taking little tastes, I finally made it just for us for the first time last week when the temps were cooler and I wanted something to go with some ham & bean soup.  I have to say, I’m a convert.  Sorry, Mom.  This is definitely my new favorite and I have to tell you, Dennis is gaga for this stuff and he would never eat any of my cornbread before, not even Jiffy mix, which is similar to this, just not as soft.  The Lighter Northern Cornbread recipe on my blog is also crazy good, but it’s lower in fat and sugar so it’s not quite as melt-in-your mouth.  If you’re looking for some full fat goodness, I gotcha covered.

Favorite Cornbread

Printable recipe
Printable recipe with picture

1 ½ cups (6 ¼ oz) all-purpose flour
½ cup (3 oz) corn meal
2/3 cup (5 oz) granulated sugar
1 tablespoon baking powder
½ teaspoon salt
1/3 cup vegetable oil
3 tablespoons butter, melted
2 eggs, beaten
1 ¼ cups milk

Preheat oven to 350F.  Spray an 8×8 baking dish with oil; set aside.  Whisk together dry ingredients in a medium mixing bowl, make a well and add oil, butter, eggs, and milk into the center. Stir well until mixed (batter will be runny – don’t be alarmed!). Pour into prepared pan and bake for 35 minutes. This doubles perfectly for a 9X13-inch pan, but will have to be baked longer (start checking after 45 minutes-I can’t remember how long it took when I doubled it in previous years).

Recipe source: Mel’s Kitchen Cafe

Basic Buttermilk Biscuits & Sausage Gravy


Happy Monday, my Cornicopi-cats! :)  Today I was just going to share my basic recipe for buttermilk biscuits, but I figured you can’t have biscuits without sausage gravy. OK, so you can, you can have them plain, with butter, with jam, with honey, but once in a while you gotta get your sausage gravy on.  Is it a custom where you live to eat biscuits smothered in sausage or country gravy?  If not, you must try it, at least once.  This is straight up comfort food for me.

I make my biscuits two ways, depending on how much time I want to spend on them.  The first way includes a little bit of folding the dough over and then cutting into rounds. This yields a taller, layered biscuit.  The second way is just dropping the dough onto a baking sheet, then patting it into place with floured hands.  Either way, they are soft and so tender–some seriously good eatin’.

Basic Buttermilk Biscuits

Makes 8-10 biscuits
Printable recipe
Printable recipe with picture

1 ½ cups all-purpose flour
½ tablespoon baking powder
½ teaspoon baking soda
½ teaspoon salt
4 tablespoons cold unsalted butter
2 tablespoons vegetable shortening
¾ cup cold buttermilk

Preheat oven to 425 degrees and line a cookie sheet with parchment.

Measure the dry ingredients into a food processor or bowl and pulse once to combine. Pulse or cut in the butter and shortening until fats are the size of peas. Dump the contents into a bowl and stir in the buttermilk until dough is moistened.  You can pulse to combine in the food processor, but it is too easy to overwork the dough so I like to stir it in by hand.  At this point you can either 1) drop the dough in mounds the size of your choice onto prepared baking sheet. With floured hands, pat the tops and sides of the dough until they take on more of a shaped appearance.

Or 2) dump dough onto a floured surface and lightly flour the top.  Knead a few times (careful, don’t knead more than ten turns) and roll out to 1” thick.  Using a 2 ½” biscuit cutter or glass, cut out rounds going straight up and down without twisting the cutter, place on baking sheet, and brush tops with beaten egg if desired (this will make the tops golden but doesn’t change the flavor).  Bake for 10-12 minutes.  Serve warm with butter, jelly, or…

Suzie’s Sausage Gravy

Printable recipe
Printable recipe with picture

1 lb. good quality sausage roll, like Bob Evans
¼ cup all-purpose flour
2 cups milk
salt and black pepper to taste
Prepared biscuits

Crumble and cook sausage in large skillet over medium heat until browned. Stir in flour until dissolved. Gradually stir in milk. Cook gravy until thick and bubbly. Season with salt and pepper. Serve hot over biscuits. Refrigerate leftovers.

Secret Recipe Club

Sour Cream Pound Cake


This month my Secret Recipe Club assignment was Making Memories,  and boy did I have a lot of fun searching Erin’s blog for a recipe I wanted to make.  It wasn’t that a recipe was hard to find, it was that there were so many I wanted to make!  Hers is the kind of blog you can just keep scrolling and scrolling though because it gets more and more addictive the more you read.  She has such fun things, like Booger Pie (I want to make this just to see the reactions I get when I ask people if they want some Booger Pie-lol), Texas Chicken Brittle, Pepperoni Pizza Crescent Rolls, and Unicorn Poop Cookies (something I’ve been wanting to make for months!! I’m enthralled with these cookies!).  Needless to say, it was harder to find recipes that I didn’t want to make.

When I found the sour cream pound cake, I knew I’d hit pay dirt.  I had signed up for the pound cake competition at the fair this year and I had been tossing a few recipe ideas around, but hadn’t settled on anything yet.  I figured I’d kill two birds with one stone and choose Erin’s recipe for The Secret Recipe Club, then turn it into the state fair for judging.

558726_10151181371686480_1016180525_n

And I got 3rd place!  I made it look pretty ugly, but I guess taste trumps prettiness.  Sweet!  I did get my judging papers yesterday and the only negative thing they had to say was that I displayed it wrong, with the bottom-side-up.  Well, that’s because I didn’t think bundt pans were allowed for the pound cake category (I know now that they are) and this is the kind of cake that doesn’t dome on top so it’s not pretty to display top-side-up.  I also forgot the vanilla in the recipe so I wonder if I enter this again next year with the vanilla and put it in a bundt pan if it will get a higher score.  I might have to try it. :)

I got a white ribbon two years ago for my Condensed Milk Pound Cake, but honestly, I think this recipe trumps it.  The sour cream makes the texture so velvety soft and the flavor is just so good.  Pretty sure this is my favorite pound cake I’ve ever had so far!  Thanks for sharing the great recipe, Erin!

Sour Cream Pound Cake

Printable recipe
Printable recipe with picture

2 sticks (1/2 lb) butter
3 cups (1 lb 5 oz) sugar
1 cup (8 oz) sour cream
3 cups (12 ¾ oz) flour
1/2 tsp. baking soda
¼ tsp salt
6 large eggs
1 teaspoon vanilla

Vanilla Bean Glaze
1 cup powdered sugar
¼ cup heavy cream
1 teaspoon vanilla
1 vanilla bean

Preheat over to 325F and grease and flour a bundt or tube pan or two large 9″x5″ loaf pans (for loaf pans, preheat oven to 350F). Cream together butter and sugar. Add sour cream and mix.  Sift together flour, baking soda. and salt.  Alternately add flour mixture and eggs (beating well after each addition).  Add vanilla and beat to combine. Pour into prepared pan(s).

Bake 1 hour 20 minutes for bundt or tube pan, or 45 minutes for loaf pans, or until toothpick inserted in center comes out clean. Invert onto cooling rack(s) and cool completely.

Whisk the cream into the powdered sugar, then mix in the vanilla and the seeds from the vanilla bean (split the bean and scrape the seeds out).  Stir in additional cream as needed for desired consistency. Drizzle over the cooled cake(s).

Note: 1 tablespoon vanilla bean paste may be substituted for the vanilla and vanilla bean.

Recipe source: Paula Deen, as seen on Making Memories


*Note: I now have an index for all my state fair posts, current and past years, here.

Kansas State Fair 2012 part 5: The Banana Bread Journey


If you’ve been reading my blog for any length of time, you know about my quest to beat my baking nemesis* this year in the banana bread competition.  Well, as you may also know, I didn’t place in the banana bread category at all this year!  But I wasn’t very disappointed.

*I don’t want to share the name of my nemesis here b/c she is actually a very nice woman (I met her the first year I entered the fair, 2009) and don’t want anyone to connect a negative feeling with her name, but I will tell you her initials are CW.  How funny is that?!

How could I not be disappointed, right?  I mean, I baked twenty-four different banana bread recipes.  You can see them all here if you don’t believe me–complete with every recipe I used.

I froze a piece of bread from each loaf.

And at the end of the baking, Haus and I tasted each bread to see which one was the best.

We used grading papers and agreed on one.

Then I couldn’t resist, and baked three more loaves.  With the last loaf, the recipe for which not coincidentally came from my Foodie Mama who has won multiple blue ribbons for it (yes, I was kicking myself for not making this recipe FIRST since I had it all along (hello, obliviox here!) and could have had a much shorter journey to find the best recipe), we decided we had finally found the best banana bread recipe.  And I made it for the fair.

Well, guess who else didn’t place?  Yup, CW.  So that is a big consolation.  If the woman who has won multiple blue ribbons and even BEST IN SHOW for her banana bread didn’t even place this year, could my banana bread really be so unworthy?

While I won’t get my grading papers until Sunday (which means there might be a part 6 to this series next week, if the comments written on the grading papers are degrading enough…because really, only the mean comments are fun enough to share! lol), I have a few insights into why my banana bread didn’t place.

First, I put a lot of butter on top prior to baking.  This created a lighter stripe down the middle where the solids settled, and made it looked like it might be under-baked.  Judges won’t even taste something if it isn’t fully baked, so this could be a possibility.  I know it was fully baked as I stuck a toothpick in it, but they might have judged otherwise based on appearance.

Just some of the banana breads. Mine is third row back, second from the right (it’s kind of dark colored). CW’s entry is right in front of mine, a little to the left.

Second, and you might not believe this since I took so much time to find the perfect bread, but I didn’t buy my bananas early enough! I usually let my bananas ripen for at least a week, preferably two, before making them into bread because the more ripe they are, the more banana flavor you get.  I bought mine only five days before I had to bake the bread so I put them in a paper sack along with a tomato so the gas would make them ripen faster, and they were just barely speckled after five days.

Third, the judges might have been thoroughly fed up with me for refusing to listen to their advice of greasing the bottom only of the bread pan.  The first year they wrote the advice kindly, saying that the crust would be more tender if I greased the bottom only of the pan.  The second year they put it in caps with an exclamation point…or at least I remember it that way but I tend to exaggerate things, even in memory.  In any case, the advise seemed to have turned into a command.  But dude, I did try and my bread stuck and looked totally terrible and mangled by the time it finally came out.  Plus, the crust was totally hard and definitely NOT more tender.  Maybe I need a better pan?

Fourth, I think the judges might have contracted too-much-banana-bread-itis.  There were a lot of banana bread entries this year, possibly more in this category than any other.  And I know from experience that after tasting more than 15 different banana breads, they all start to taste terrible.  I nearly puked while doing my own taste test and started grading all the banana breads with C’s and D’s after a while.  This year no one got a blue ribbon in the banana bread category.  The judges only awarded a 2nd and 3rd place ribbon.  So I think my assumption is a fair one–they got the itis.

So there you go.  There’s probably a lesson to be learned here.  Like maybe don’t work so hard to accomplish a goal that doesn’t really matter?  Don’t lose sleep over something that isn’t going to improve your life because in the end, you might not actually accomplish your goal?  But hey, I had a lot of fun with it, and it’s a story I love to share because people always get a kick out of hearing I made 28 banana breads to find the perfect one.  Now I can add…”and then I didn’t place at all!” which kind of makes the story even better.  :)  I don’t have any regrets.  Well, except that I have definitely lost my taste for banana bread and may never bake another loaf again.  lol

Here’s to celebrating life’s victories…and it’s failures.  Sometimes they are just as fun.

I know you’re ready for the winning recipes and those will start next week!  Thanks for sharing in my happiness for this year’s successes and laughter over  the epic failures.

XOXO, V

Triple Lemon Cake

Posted on

This is my youngest sister, Lacey, blowing out a tealight candle on her birthday in 2009.  We never remember birthday candles for some reason.  My poor nephew (her son, Owen) had to blow out a lighter on his birthday over the weekend-lol.  Also, you can see how old this pic is from the caramels in the corner–they are from one of the batches I made during my caramel-extravaganza.

Anyway, this cake is another oldie but goodie!  I also made this back in my MySpace days and never got around to posting it because I made it in the winter and wanted to wait until summer to share it.  I’m seasonal like that. (?)  Anyway, three years later and with summer about to fizzle out, I figured I’d better get on it!

I made this for Lacey’s birthday, who is a December baby along with Danielle & Dennis.  December is quite the month for celebration in my family.  Anyway, Lacey loved the Lemony Orange Cake I made for my Dad’s birthday that year, and asked for a lemon cake for her birthday too.  Everyone loved it!  This is a seriously moist, lemony cake and for our lemon-loving family, it was perfect.

Triple Lemon Cake

Printable recipe
Printable recipe with picture

Cake:
1 box lemon cake mix
1 pkg. lemon jello
3/4 cup vegetable oil
3/4 cup water
4 eggs
Glaze:
2 1/2 cups powdered sugar
juice of 2 lemons

Preheat oven to 325F. Mix all ingredients together until well blended. Bake in greased and floured 9×13 pan for 45 minutes.

As soon as the cake is out of the oven, whisk together the glaze ingredients. While the cake is still hot, prick top of cake all over with fork and spread with the glaze. Cool completely.

Recipe source: Barbara J., a MySpace friend

Since this blog relates to Lacey, I just had to share these two photos of her that I took at Owen’s party (she is his mama, that’s why he’s so cute :)). She’s so purty. :)

She cuts her own hair and did a funky style this time, making it short on one side and long on the other.  She makes it work.  I also love her earrings–it’s hard to tell but nails and skeleton keys are hanging off them.

Lemon-Basil Peach Dumplings

Posted on

So this recipe is totally crazy.  Just wanted to warn you before you got too involved and the list of ingredients sent you reeling.  I’m just going to put it out there.  Right here and now.

This recipe has two whole sticks of butter in it.  And 1 1/2 cups of sugar.  Both are poured/sprinkled over only sixteen itty bitty peach “dumplings” which are really only slices of peach wrapped in crescent roll dough.  And you know what else I  poured over the top along with the butter and sugar?  Sprite.  Yup.

But here’s the deal.  These dumplings are so good and totally worth the butt dimples you will get after the little artery-cloggers work their way through your system and your body decides to skip the digesting part and just add them straight to your butt.

I made this for a cooking challenge on Facebook to make a recipe using fresh peaches, Sprite or 7-Up, and fresh basil.  So this is what I came up with, based on a cooky Midwestern recipe for apple dumplings (see it on PW’s blog here).

I still have yet to make the original version, but now I know I have to come fall because you would not believe how good this summery version is.  Sweet, yes, but not too sweet, incredibly.  And the juicy peach is the star, somehow not overpowered by the lemon & basil*, or all that sugar and butter. When I took them out of the oven, the liquid was pretty sloshy but thickened up and seemed to absorb a little more after 10-15 minutes, making the dumplings crispy with sugar on top and gooey on the bottom, but definitely not soggy, which is what I had feared.

They are best warm, but I served the leftovers (after Dennis and I had our way with a few) at room temperature to my family after a barbecue and they went crazy for them.  Even my sister, Danielle, who refuses to eat my (beloved) pumpkin gooey butter cake because it has two sticks of butter in it (light weight!), and generally only takes a few bites of my desserts, not only ate one ( a whole one!) but also took one home with her for later. Miracle!

*The fried basil does add a nice color and the mildest of flavor, which I thought was perfect, but if you’re really hoping for a huge pop of basil, I’d double (or more) what the recipe calls for.  Or just make extra to munch on–they are even crispier than potato chips!

Fried basil is so cool-it gets transparent and shatteringly crisp. Would also make a great garnish on soup!

While making these, I admit I cringed the whole time I was pouring and sprinkling sugar over the top.  I tried to stop myself several times.  How could sixteen little bitty teeny weeny dumplings need that much butter and sugar?!  But I had to go with the original measurements in the end, and I’m glad I did.  Because they are perfect.  Besides, divided between 16 servings, it’s really not too bad and actually lower in fat/sugar than most of the cakes I make.  Or at least, that’s what I was telling myself when I helped myself to seconds. >:)

Lemon-Basil Peach Dumplings

Printable recipe
Printable recipe with picture

3 medium fresh peaches
2 (8 oz) cans refrigerated crescent roll dough
1 lemon
2 sticks unsalted butter
1 ½ cups granulated sugar
1 cup Sprite
½ cup fresh basil leaves (not packed)
Coconut or vegetable oil for frying

Fill a pot that is big enough to fit three peaches with water high enough to cover them. Bring to a boil. Meanwhile, fill a large bowl with ice and water to have ready to cool the peaches. When the water is boiling, add the peaches and boil for 1-2 minutes, until the skin is easy to remove. Remove with a slotted spoon and add to ice water. Once they are cool to the touch, take them out to peel off the skins. If the skins don’t peel easily, boil again for a minute.

Preheat oven to 350F. Slice the peeled peaches in half around the pit, separate the halves and remove the pit. Slice each half into thirds. You will only need 16 of the slices so feel free to nibble on two of them as you continue with the recipe.

Butter a 9×13 baking dish. Wrap each peach slice in a crescent roll and place in prepared dish. Grate the zest from the lemon and sprinkle over the dumplings (reserve the lemon), then sprinkle 1 cup of the sugar over the top. Melt the butter and pour over the top, then sprinkle the remaining sugar over. Juice the reserved lemon, then add the juice into the Sprite.  Pour over everything, then bake for 40 minutes.

Meanwhile, heat ½ inch of coconut or vegetable oil in a small skillet or saucepan to 360F. If you don’t have a thermometer, you can test it by throwing a basil leaf in.  If it is ready it will pop and spatter big time so be ready to cover it with a splatter screen or jump away. When the oil is ready, throw the basil in the hot oil, then IMMEDIATELY cover with the splatter screen. Fry until crisp, then remove to a thick layer of paper towels to drain. Once cool to the touch, about a minute or two, crumble up with your fingers and set aside. The oil makes the basil stick to your fingers so just get as much off as you can.

Remove the dumplings from oven and sprinkle the fried, crushed basil over the top. Serve the dumplings warm with ice cream, spooning the sweet sauce from the pan over the top.

Lemon Zucchini Loaf

Posted on

I’m not a huge fan of typical zucchini bread that is scented with fall spices.  Don’t get me wrong, I’ll gobble it up if it’s nearby, I mean it does have sugar in it, but I’m the kind of gal that doesn’t (usually) enjoy soup or cinnamon/nutmeg/cloves/allspice-laced treats in hot weather.  Maybe I had soup for lunch yesterday, and made a big pot of Suzie’s soup last week, and some mouth-watering gingersnaps that same day.  But still, I (usually) prefer summery foods in the summer and fall-ish foods in the fall.

This zucchini bread?  100% summer!  Nice and tart and sweet and you can’t even taste the zucchini, it just adds moisture and some pretty green flecks.  If you peeled them first, I bet you picky eaters wouldn’t even guess there were any veggies in it.  Not that the zucchini makes this health food by any means, but it is a very summery, tasty way to use up this proliferous summer squash.  It’s so soft and tender, it’s pretty much like eating lemon loaf cake!  Thank you, NancyCreative, for this wonderful recipe!

Lemon-Zucchini Loaf with Lemon Glaze

Printable recipe
Printable recipe with picture

2 cups all-purpose flour
2 teaspoons baking powder
1/2 teaspoon salt
2 eggs
1/2 cup vegetable oil
2/3 cup granulated sugar
1/2 cup buttermilk
Zest of 1 lemon
Juice of 1 lemon (or 2 Tablespoons lemon juice)
1 ½ cups shredded zucchini

Preheat oven to 35o degrees. Grease and flour a 9×5″ loaf pan; set aside. In large bowl, blend flour, baking powder, and salt; set aside. In medium bowl, beat 2 eggs well, then add oil and sugar, blending well. Add the buttermilk, lemon zest & juice, and blend everything well. Fold in zucchini and stir until evenly distributed in mixture. Add this mixture to the dry ingredients in the large bowl and blend everything together, but don’t over-mix. Pour batter into prepared loaf pan and bake for 45 minutes, or until toothpick inserted in center comes out clean (if your oven tends to run hot, check the loaf after 40 minutes). Cool in pan 10 minutes, then remove to a wire rack and cool completely. Once the loaf is cool, make the glaze…

Lemon Glaze

1 cup powdered sugar
Juice of 1 lemon (or 2 tablespoons lemon juice)

In small bowl, mix powdered sugar and lemon juice until well blended. Spoon glaze over cooled loaf. Let glaze set, then serve.

Recipe source: very slightly tweaked from NancyCreative

CW’s Strawberry Shortcake

Posted on

If you don’t know about and who CW is, check out Monday’s post: Meet CW.

Growing up, Mom would make a very particular kind of strawberry shortcake at least once every summer.  She would buy a “Family Style Shortcake” from Dillons, like this:

Then she mixed the tar out of sliced strawberries with honey (to help the strawberry juice come out to play with the honey) and poured that on top, put Dream Whip over that, and served it up once a year in summer after picnics in the park.  Don’t know why, but that’s always when we had strawberry shortcake–after picnics in the park.  Anyway, since we very rarely had anything sweet, this was such a lovely treat and I particularly loved the flavor of the ripe berries with the local, raw honey.

Mom’s simple strawberry shortcake was so delicious, and just the idea of it brings back fond and mouth-watering memories.  But I wanted to be able to create it at home because, although we can still find the exact same shortcake at Dillons that Mom bought twenty years ago, who knows how long they’ll continue to make these and when they stop, I still want to be able to enjoy CW’s shortcake.  And I want my grandchildren, or great nephews and nieces at the very least, to be able to enjoy this shortcake.  And their grandchildren after that.  CW’s shortcake must live on!

Since my youngest sister, Lacey, manages a Dillons deli, I first checked with her to see if she could possibly snag the recipe for me.  In a way, I was happy to hear they weren’t baked in house but shipped in.  That meant it was experimentation time!  I’m not always in the mood to create a recipe from scratch, but I was definitely up for this challenge since the shortcake holds a special place in my heart.

So here’s what I had to go off of to recreate the recipe (yes, I totally stood two inches from the ingredients list to take this picture and yes, I might have gotten some strange looks):

Based on the cake’s texture, flavor, and the ingredients, I decided this cake was pretty much a low-fat sponge cake so I Googled a lot of recipes to create my own that reflected these ingredients as closely as possible.  I did omit the buttermilk since it seemed too fussy to have two different kinds of milk, but did add in some vinegar to replace the acidity lost.  I also didn’t mess with any ingredients cooks normally wouldn’t have in their kitchens, like whey and dextrin.  What is dextrin anyway?

I’m happy to report that while I don’t think I got it spot on, it was close enough that when Lacey tasted it, although she claimed to not remember eating CW’s strawberry shortcake growing up, she looked up with big eyes and said, “I totally remember this taste.  I don’t remember eating it, but I remember this taste!”

The cake from Dillons is crusted with sugar so I did that with mine, though it’s not necessary.  It’s just kinda pretty. :)  The cake I created is very spongy and dry, perfect for absorbing the delicious honeyed strawberry juice.  Because of its texture, I really wouldn’t recommend using it in any recipe that doesn’t have a juicy topping–that juice is really needed to soften the cake.  While the cake is very soft and bouncy to the touch, the texture is tough to cut because it’s so spongy, and it’s hard to cut with a fork until the juices have flowed down into the nooks and crannies of the cake.  Once that happens though, you have tender, strawberry cake magic.

I was pretty impressed with the response I got from this cake.  I shared it with my family twice, serving one cake at our Independence Day barbecue, then froze the second cake (the recipe makes two) and broke it out a week and a half later for our dessert after a barbecue at the lake.  I usually have to ask my family what they think to get any feedback but all I had to do this time was sit back and let the accolades rain down.  Adjectives such as amazing, best ever, and incredible were used liberally.  Honestly, I’m pretty sure this cake now beats out THE Mocha Crunch Cake for favorite family cake.  Check out my nephew gobbling it up at the lake (unless you’re averse to messy kid eaters, then you might want to steer clear):

I stuck with CW’s recipe for the strawberry topping, only using the berries and honey, and it’s just so stinkin’ good.  Please try this topping, even if you buy your cake.  Just make sure your honey is local and raw to get the best flavor.  Also, local raw honey can help with allergies!  Bonus!

For the whipped cream, you can use whatever you prefer–Cool Whip, Dream Whip, real whipped cream, or you can use the recipe for stabilized whipped cream I shared yesterday.  I first made it with the stabilized whipped cream and the second time with Cool Whip and it was loved both ways.  The strawberry topping is the star of this cake and I don’t think you can go wrong as long as you’ve got that.  Who would have thought that honey and strawberries could create such magic?

CW’s Strawberry Shortcake

This cake is perfect for making ahead. Prepare each component in advance, then assemble right before serving.
Printable recipe
Printable recipe with picture

Cake
½ cup whole milk
1 cup sifted all-purpose flour
1 tablespoon cornstarch
1 teaspoon baking powder
½ teaspoon baking soda
1/8 teaspoon salt
3 eggs
½ teaspoon cream of tartar
1 ¼ cups granulated sugar, divided
1 teaspoon vanilla extract
1 teaspoon white vinegar

Berry Topping
1 lb. fresh strawberries
¼ cup local raw honey
Optional: for a patriotic dessert, add 1 cup fresh blueberries

Garnish
1 recipe stabilized whipped cream or whipped topping of choice

Directions:

For the cake, in small saucepan, heat milk until bubbles form around edge of pan. Remove from heat; set aside.

Preheat oven to 350 F. Grease and flour two 8” round cake pans; set aside.

Sift flour with cornstarch, baking powder, baking soda, and salt; set aside. In small bowl of electric mixer, at high speed, beat eggs and cream of tartar together five minutes on high speed, until light and foamy. Gradually add 1 cup of the sugar, beating for an additional five minutes, or until ribbons form. Add vanilla and vinegar and mix just until combined. Blend in flour mixture on low just until smooth. Add warm milk and beat just until combined.

Immediately pour batter into prepared pans. Bake 25-30 minutes, or until cake tester inserted in center comes out clean. Turn the cakes out onto cooling racks. Place the racks over the sink and while they are still hot, using the remaining ¼ cup sugar, sprinkle sugar over the tops and rub it along the sides of the cakes. Allow to cool completely before wrapping in plastic wrap or putting in gallon-sized Ziploc bags until ready to use. You will only need one cake for this recipe so you can either freeze one for later, or double the berry topping and whipped cream and serve both cakes at once.

For the berry topping, combine the strawberries and honey in a medium bowl and stir for about 2-5 minutes, until the strawberries start to release their juices and the sauce gets thinner and takes on a red color. Cover and refrigerate until ready to use. If adding blueberries, stir them in before refrigerating or right before topping the cake.

To assemble the cake for serving, place cake on a plate, then cover with the berry mixture, including the juices so they can seep down into the cake. Allow to sit for at least 5 minutes so the juices can soak in, then top with whipped cream, slice, and serve.

Veronica’s note: I originally used nonfat milk since that’s what is used in the Dillon’s cake. The last time I made it, I only had whole milk and it made the cake so much better for it to have a little fat, so I updated the recipe. You can still use nonfat, it’s good that way, but better, more tender, with the whole milk.

Whole Wheat Potato Bread

Posted on

You can thank The Secret Recipe Club for bringing me out of hiding this week! If it weren’t for being in the club, I’m sure I’d have gone to bed early last night (long day) instead of scheduling this to post.  So hopefully you’re more thankful about that than I am-LOL! ;)

This month I was assigned to The Vanderbilt Wife.  Yay, another blog that starts with “V” (you might not be aware, but we are an endangered blog species, though not as bad off as blogs beginning with  “X” and “Z”)!  Jessie is also a sister in Christ, so let’s give a little HOO-WAH for that too.  Or maybe you could just wait while I do it.  HOO-WAH!  So lovely to meet you, Jessie!

Anyway, my assignment came right after a failed attempt at 100% whole wheat bread.  It was supposed to be the best whole wheat bread ever…but it was not.  So when I saw Jessie’s beautiful Fluffy 100% Whole Wheat Bread, I freaked.

“Dennis, guess what she has on her blog?” I shrieked.

“Light and fluffy whole wheat bread?” he guessed without even glancing over at my computer screen.

(From that you can assume correctly that I had made it very obvious how deeply disappointed I was with the dense and yucky-tasting loaves I’d just made.)

“YES!” I screamed.

And I proceeded to make the recipe.  Three times.  It makes three loaves per recipe, so I made nine loaves of whole wheat bread within the span of two weeks.  Unfortunately, I never got the bread to stay risen once it started baking so those nine loaves weren’t as light and fluffy as I’d have liked.  Each batch started out so high and promising…

only to let me down half way through baking.

*sob*

Since I couldn’t consult Jessie to see if she had any suggestions (in the SRC, you don’t alert the blog you’re assigned to because it’s meant to be a surprise on reveal day, and I couldn’t ruin the surprise by asking her for help), I never got the recipe to turn out for me,  but it did work for her so please visit her blog to see how light and fluffy her loaves are.  I’m bound and determined to get the same result and will post the recipe on my own blog once I’ve got it figured out.

Since I started out with a yeast bread recipe from Jessie’s blog that I couldn’t get to turn out right, I went with another yeast bread recipe of hers that included some white flour (white flour helps because the gluten develops better and easier than with whole wheat).  I’ve been wanting to try making potato bread for years, interested in how the potato would affect the texture, so I was excited to see she had a whole wheat potato bread recipe on her blog.

Let me tell you, making those nine failed loaves was totally worth it since they eventually led me to this recipe.  (Also, those nine loaves, though deflated, were delicious and still fairly light, and all were eaten by my family who praised it highly.)  This is the lightest, softest bread I have ever made that has whole wheat in it!  It is so soft, in fact, that it’s hard to hold on to it while slicing without smashing it (I used an electric knife after the first slice, and highly suggest it if you have one–it makes the slices nice and even without crushing the bread.)

It is delicious and is perfect for making sandwiches, with a little more nutrition than plain white bread.  Jessie said it made killer grilled cheese sandwiches, so I put it to the test with some pepper jack cheese.  And I concur, KILLER!  I really hope you try this!

Whole Wheat Potato Bread

Printable recipe
Printable recipe with picture

1 medium potato
1/3 cup butter, softened
1/3 cup sugar
1 teaspoon salt
1 egg, beaten
2 ¼ teaspoons (1 envelope) active dry yeast
½ cup warm water
3 cups whole wheat flour
1 ½ to 2 cups unbleached all-purpose flour

Peel the potato, cut into cubes, and boil in a small saucepan until very soft. Drain, reserving 1 cup cooking liquid. Mash the potato in a small bowl and let cool slightly.

Cream butter, sugar, salt, and egg with an electric mixer. Add potato and mix well.

In a small bowl, put the ½ cup warm water and sprinkle the yeast over it. Let is sit for 10 minutes, then add to the potato mixture and beat until combined.

Change beaters to dough hooks and set mixer to 2. If you don’t have dough hooks, you will use your hands from this point forward. Add 2 cups whole wheat flour alternately with the 1 cup cooking liquid*, mixing/kneading well after each addition. Gradually add in the remaining flour until the dough starts to clean the side of the bowl. When that happens, let mixer go an additional 2 minutes. If kneading by hand, knead it in the bowl for about five minutes, or turn out onto a floured surface to knead. My dough was still a bit sticky when I stopped adding flour, but if I picked a ball off and rolled it in my hands, it did not stick to my hands. That is my test to know when I can stop adding flour, even though I really wanted to add more to keep it from sticking as I kneaded. I dealt with it and just scraped my hands off afterward. :)

Once your dough looks a little shiny, you’re done. If it doesn’t look shiny, just let it mix or knead it by hand until it does.
Place the dough in a greased bowl, cover with a towel and place somewhere warm. I like to preheat my oven to 350F for one minute, then turn it off and place my bowl in the oven. Let rise for an hour or until dough is doubled.

Punch dough down; divide in half. Shape into loaves by pushing each half into a rectangle, rolling it up, pinching the seam, and tucking the ends under. Place in two greased loaf pans (I slathered mine generously with softened butter). Cover with the towel again and let rise another 30-45 minutes or until doubled again.

Bake at 350 for 25 minutes or until golden brown. Remove from pans and rub the tops with a stick of cold butter. Set on a wire rack to cool

*Notes: Make sure your cooking liquid has cooled to about 115F before adding to the bread dough. If it is too hot, it will kill the yeast.

Recipe source: The Vanderbilt Wife

If you’d like to check out the other Secret Recipe Club submissions, click the link below!