RSS Feed

Category Archives: Sweets

Lemon-Basil Peach Dumplings

Posted on

So this recipe is totally crazy.  Just wanted to warn you before you got too involved and the list of ingredients sent you reeling.  I’m just going to put it out there.  Right here and now.

This recipe has two whole sticks of butter in it.  And 1 1/2 cups of sugar.  Both are poured/sprinkled over only sixteen itty bitty peach “dumplings” which are really only slices of peach wrapped in crescent roll dough.  And you know what else I  poured over the top along with the butter and sugar?  Sprite.  Yup.

But here’s the deal.  These dumplings are so good and totally worth the butt dimples you will get after the little artery-cloggers work their way through your system and your body decides to skip the digesting part and just add them straight to your butt.

I made this for a cooking challenge on Facebook to make a recipe using fresh peaches, Sprite or 7-Up, and fresh basil.  So this is what I came up with, based on a cooky Midwestern recipe for apple dumplings (see it on PW’s blog here).

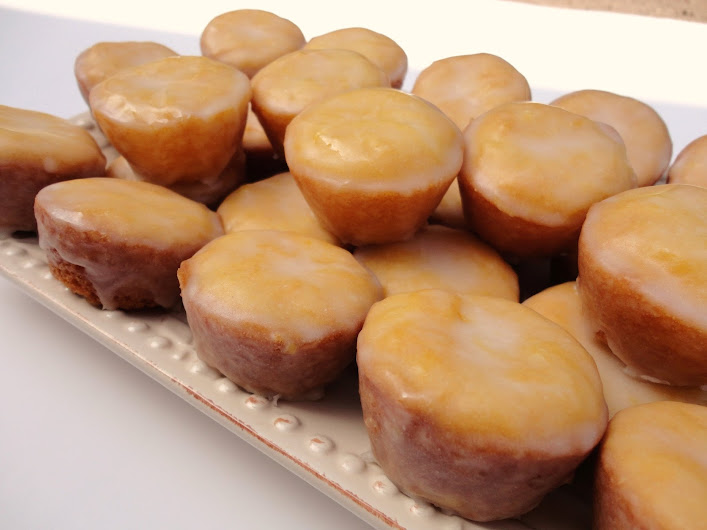
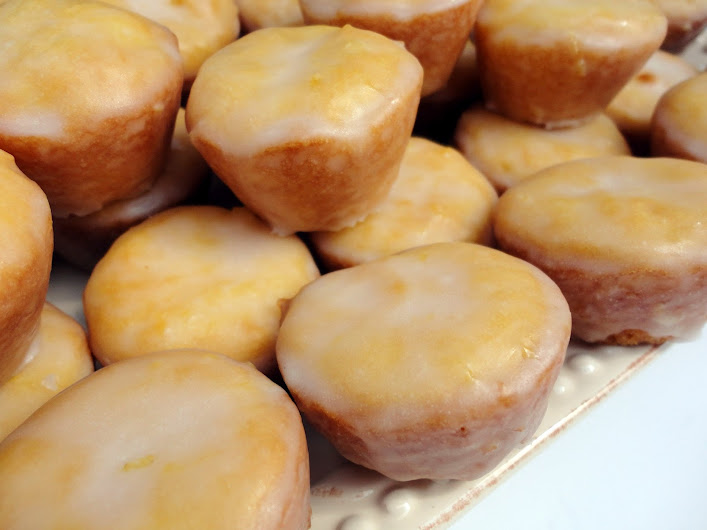
I still have yet to make the original version, but now I know I have to come fall because you would not believe how good this summery version is.  Sweet, yes, but not too sweet, incredibly.  And the juicy peach is the star, somehow not overpowered by the lemon & basil*, or all that sugar and butter. When I took them out of the oven, the liquid was pretty sloshy but thickened up and seemed to absorb a little more after 10-15 minutes, making the dumplings crispy with sugar on top and gooey on the bottom, but definitely not soggy, which is what I had feared.

They are best warm, but I served the leftovers (after Dennis and I had our way with a few) at room temperature to my family after a barbecue and they went crazy for them.  Even my sister, Danielle, who refuses to eat my (beloved) pumpkin gooey butter cake because it has two sticks of butter in it (light weight!), and generally only takes a few bites of my desserts, not only ate one ( a whole one!) but also took one home with her for later. Miracle!

*The fried basil does add a nice color and the mildest of flavor, which I thought was perfect, but if you’re really hoping for a huge pop of basil, I’d double (or more) what the recipe calls for.  Or just make extra to munch on–they are even crispier than potato chips!

Fried basil is so cool-it gets transparent and shatteringly crisp. Would also make a great garnish on soup!

While making these, I admit I cringed the whole time I was pouring and sprinkling sugar over the top.  I tried to stop myself several times.  How could sixteen little bitty teeny weeny dumplings need that much butter and sugar?!  But I had to go with the original measurements in the end, and I’m glad I did.  Because they are perfect.  Besides, divided between 16 servings, it’s really not too bad and actually lower in fat/sugar than most of the cakes I make.  Or at least, that’s what I was telling myself when I helped myself to seconds. >:)

Lemon-Basil Peach Dumplings

Printable recipe
Printable recipe with picture

3 medium fresh peaches
2 (8 oz) cans refrigerated crescent roll dough
1 lemon
2 sticks unsalted butter
1 ½ cups granulated sugar
1 cup Sprite
½ cup fresh basil leaves (not packed)
Coconut or vegetable oil for frying

Fill a pot that is big enough to fit three peaches with water high enough to cover them. Bring to a boil. Meanwhile, fill a large bowl with ice and water to have ready to cool the peaches. When the water is boiling, add the peaches and boil for 1-2 minutes, until the skin is easy to remove. Remove with a slotted spoon and add to ice water. Once they are cool to the touch, take them out to peel off the skins. If the skins don’t peel easily, boil again for a minute.

Preheat oven to 350F. Slice the peeled peaches in half around the pit, separate the halves and remove the pit. Slice each half into thirds. You will only need 16 of the slices so feel free to nibble on two of them as you continue with the recipe.

Butter a 9×13 baking dish. Wrap each peach slice in a crescent roll and place in prepared dish. Grate the zest from the lemon and sprinkle over the dumplings (reserve the lemon), then sprinkle 1 cup of the sugar over the top. Melt the butter and pour over the top, then sprinkle the remaining sugar over. Juice the reserved lemon, then add the juice into the Sprite.  Pour over everything, then bake for 40 minutes.

Meanwhile, heat ½ inch of coconut or vegetable oil in a small skillet or saucepan to 360F. If you don’t have a thermometer, you can test it by throwing a basil leaf in.  If it is ready it will pop and spatter big time so be ready to cover it with a splatter screen or jump away. When the oil is ready, throw the basil in the hot oil, then IMMEDIATELY cover with the splatter screen. Fry until crisp, then remove to a thick layer of paper towels to drain. Once cool to the touch, about a minute or two, crumble up with your fingers and set aside. The oil makes the basil stick to your fingers so just get as much off as you can.

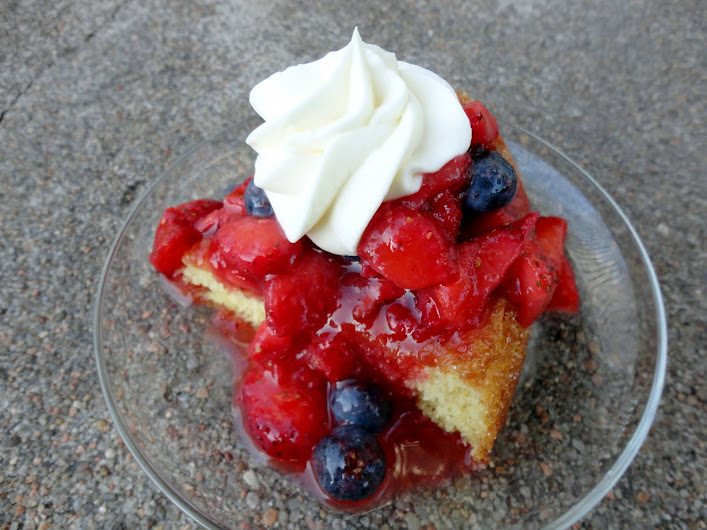
Remove the dumplings from oven and sprinkle the fried, crushed basil over the top. Serve the dumplings warm with ice cream, spooning the sweet sauce from the pan over the top.

Lemon Zucchini Loaf

Posted on

I’m not a huge fan of typical zucchini bread that is scented with fall spices.  Don’t get me wrong, I’ll gobble it up if it’s nearby, I mean it does have sugar in it, but I’m the kind of gal that doesn’t (usually) enjoy soup or cinnamon/nutmeg/cloves/allspice-laced treats in hot weather.  Maybe I had soup for lunch yesterday, and made a big pot of Suzie’s soup last week, and some mouth-watering gingersnaps that same day.  But still, I (usually) prefer summery foods in the summer and fall-ish foods in the fall.

This zucchini bread?  100% summer!  Nice and tart and sweet and you can’t even taste the zucchini, it just adds moisture and some pretty green flecks.  If you peeled them first, I bet you picky eaters wouldn’t even guess there were any veggies in it.  Not that the zucchini makes this health food by any means, but it is a very summery, tasty way to use up this proliferous summer squash.  It’s so soft and tender, it’s pretty much like eating lemon loaf cake!  Thank you, NancyCreative, for this wonderful recipe!

Lemon-Zucchini Loaf with Lemon Glaze

Printable recipe
Printable recipe with picture

2 cups all-purpose flour
2 teaspoons baking powder
1/2 teaspoon salt
2 eggs
1/2 cup vegetable oil
2/3 cup granulated sugar
1/2 cup buttermilk
Zest of 1 lemon
Juice of 1 lemon (or 2 Tablespoons lemon juice)
1 ½ cups shredded zucchini

Preheat oven to 35o degrees. Grease and flour a 9×5″ loaf pan; set aside. In large bowl, blend flour, baking powder, and salt; set aside. In medium bowl, beat 2 eggs well, then add oil and sugar, blending well. Add the buttermilk, lemon zest & juice, and blend everything well. Fold in zucchini and stir until evenly distributed in mixture. Add this mixture to the dry ingredients in the large bowl and blend everything together, but don’t over-mix. Pour batter into prepared loaf pan and bake for 45 minutes, or until toothpick inserted in center comes out clean (if your oven tends to run hot, check the loaf after 40 minutes). Cool in pan 10 minutes, then remove to a wire rack and cool completely. Once the loaf is cool, make the glaze…

Lemon Glaze

1 cup powdered sugar
Juice of 1 lemon (or 2 tablespoons lemon juice)

In small bowl, mix powdered sugar and lemon juice until well blended. Spoon glaze over cooled loaf. Let glaze set, then serve.

Recipe source: very slightly tweaked from NancyCreative

CW’s Strawberry Shortcake

Posted on

If you don’t know about and who CW is, check out Monday’s post: Meet CW.

Growing up, Mom would make a very particular kind of strawberry shortcake at least once every summer.  She would buy a “Family Style Shortcake” from Dillons, like this:

Then she mixed the tar out of sliced strawberries with honey (to help the strawberry juice come out to play with the honey) and poured that on top, put Dream Whip over that, and served it up once a year in summer after picnics in the park.  Don’t know why, but that’s always when we had strawberry shortcake–after picnics in the park.  Anyway, since we very rarely had anything sweet, this was such a lovely treat and I particularly loved the flavor of the ripe berries with the local, raw honey.

Mom’s simple strawberry shortcake was so delicious, and just the idea of it brings back fond and mouth-watering memories.  But I wanted to be able to create it at home because, although we can still find the exact same shortcake at Dillons that Mom bought twenty years ago, who knows how long they’ll continue to make these and when they stop, I still want to be able to enjoy CW’s shortcake.  And I want my grandchildren, or great nephews and nieces at the very least, to be able to enjoy this shortcake.  And their grandchildren after that.  CW’s shortcake must live on!

Since my youngest sister, Lacey, manages a Dillons deli, I first checked with her to see if she could possibly snag the recipe for me.  In a way, I was happy to hear they weren’t baked in house but shipped in.  That meant it was experimentation time!  I’m not always in the mood to create a recipe from scratch, but I was definitely up for this challenge since the shortcake holds a special place in my heart.

So here’s what I had to go off of to recreate the recipe (yes, I totally stood two inches from the ingredients list to take this picture and yes, I might have gotten some strange looks):

Based on the cake’s texture, flavor, and the ingredients, I decided this cake was pretty much a low-fat sponge cake so I Googled a lot of recipes to create my own that reflected these ingredients as closely as possible.  I did omit the buttermilk since it seemed too fussy to have two different kinds of milk, but did add in some vinegar to replace the acidity lost.  I also didn’t mess with any ingredients cooks normally wouldn’t have in their kitchens, like whey and dextrin.  What is dextrin anyway?

I’m happy to report that while I don’t think I got it spot on, it was close enough that when Lacey tasted it, although she claimed to not remember eating CW’s strawberry shortcake growing up, she looked up with big eyes and said, “I totally remember this taste.  I don’t remember eating it, but I remember this taste!”

The cake from Dillons is crusted with sugar so I did that with mine, though it’s not necessary.  It’s just kinda pretty. :)  The cake I created is very spongy and dry, perfect for absorbing the delicious honeyed strawberry juice.  Because of its texture, I really wouldn’t recommend using it in any recipe that doesn’t have a juicy topping–that juice is really needed to soften the cake.  While the cake is very soft and bouncy to the touch, the texture is tough to cut because it’s so spongy, and it’s hard to cut with a fork until the juices have flowed down into the nooks and crannies of the cake.  Once that happens though, you have tender, strawberry cake magic.

I was pretty impressed with the response I got from this cake.  I shared it with my family twice, serving one cake at our Independence Day barbecue, then froze the second cake (the recipe makes two) and broke it out a week and a half later for our dessert after a barbecue at the lake.  I usually have to ask my family what they think to get any feedback but all I had to do this time was sit back and let the accolades rain down.  Adjectives such as amazing, best ever, and incredible were used liberally.  Honestly, I’m pretty sure this cake now beats out THE Mocha Crunch Cake for favorite family cake.  Check out my nephew gobbling it up at the lake (unless you’re averse to messy kid eaters, then you might want to steer clear):

I stuck with CW’s recipe for the strawberry topping, only using the berries and honey, and it’s just so stinkin’ good.  Please try this topping, even if you buy your cake.  Just make sure your honey is local and raw to get the best flavor.  Also, local raw honey can help with allergies!  Bonus!

For the whipped cream, you can use whatever you prefer–Cool Whip, Dream Whip, real whipped cream, or you can use the recipe for stabilized whipped cream I shared yesterday.  I first made it with the stabilized whipped cream and the second time with Cool Whip and it was loved both ways.  The strawberry topping is the star of this cake and I don’t think you can go wrong as long as you’ve got that.  Who would have thought that honey and strawberries could create such magic?

CW’s Strawberry Shortcake

This cake is perfect for making ahead. Prepare each component in advance, then assemble right before serving.
Printable recipe
Printable recipe with picture

Cake
½ cup whole milk
1 cup sifted all-purpose flour
1 tablespoon cornstarch
1 teaspoon baking powder
½ teaspoon baking soda
1/8 teaspoon salt
3 eggs
½ teaspoon cream of tartar
1 ¼ cups granulated sugar, divided
1 teaspoon vanilla extract
1 teaspoon white vinegar

Berry Topping
1 lb. fresh strawberries
¼ cup local raw honey
Optional: for a patriotic dessert, add 1 cup fresh blueberries

Garnish
1 recipe stabilized whipped cream or whipped topping of choice

Directions:

For the cake, in small saucepan, heat milk until bubbles form around edge of pan. Remove from heat; set aside.

Preheat oven to 350 F. Grease and flour two 8” round cake pans; set aside.

Sift flour with cornstarch, baking powder, baking soda, and salt; set aside. In small bowl of electric mixer, at high speed, beat eggs and cream of tartar together five minutes on high speed, until light and foamy. Gradually add 1 cup of the sugar, beating for an additional five minutes, or until ribbons form. Add vanilla and vinegar and mix just until combined. Blend in flour mixture on low just until smooth. Add warm milk and beat just until combined.

Immediately pour batter into prepared pans. Bake 25-30 minutes, or until cake tester inserted in center comes out clean. Turn the cakes out onto cooling racks. Place the racks over the sink and while they are still hot, using the remaining ¼ cup sugar, sprinkle sugar over the tops and rub it along the sides of the cakes. Allow to cool completely before wrapping in plastic wrap or putting in gallon-sized Ziploc bags until ready to use. You will only need one cake for this recipe so you can either freeze one for later, or double the berry topping and whipped cream and serve both cakes at once.

For the berry topping, combine the strawberries and honey in a medium bowl and stir for about 2-5 minutes, until the strawberries start to release their juices and the sauce gets thinner and takes on a red color. Cover and refrigerate until ready to use. If adding blueberries, stir them in before refrigerating or right before topping the cake.

To assemble the cake for serving, place cake on a plate, then cover with the berry mixture, including the juices so they can seep down into the cake. Allow to sit for at least 5 minutes so the juices can soak in, then top with whipped cream, slice, and serve.

Veronica’s note: I originally used nonfat milk since that’s what is used in the Dillon’s cake. The last time I made it, I only had whole milk and it made the cake so much better for it to have a little fat, so I updated the recipe. You can still use nonfat, it’s good that way, but better, more tender, with the whole milk.

Stabilized Whipped Cream

Posted on

OK, I’m almost ready to share CW‘s recipe for strawberry shortcake, but the draft started out so long that I’m trying to break up the longer parts into separate blogs, and this stabilized whipped cream recipe certainly deserves its own post.

Dollops of whipped cream top so many summer-time desserts and a recipe for a stabilized version comes in quite handy for me throughout the year.  Since I need it so often, but very rarely have the time to whip it up right before serving dessert, and can’t make it much in advance since it waters out over time, I usually make the other recipe for stabilized whipped cream that I have on my blog.  But then a reader (shout out to Miss Sandi Rose!) shared her own recipe for stabilized whipped cream with me back in March and I tried it out the first chance I got because it was so interesting!  I can tell you that not only was I pleased with the results, but my family was as well.  I left the leftover whipped cream at my parents’ house and when Mom gave me my piping tip back next time I was over, I asked if they ate the leftovers.  She answered, “We ate the h#@& out of it!”  LOL!  I can totally see her squirting the whipped cream straight into her mouth and laughing like a lunatic while dodging Dad as he tries to get it away from her to hog it for himself.  That’s totally Crazy Man and CW.

Anyway, while you can’t tell the other recipe apart from regular whipped cream, this one doesn’t increase in volume very much, if at all, so it’s very thick and creamy and has just a little bit of tang to it, which I happen to love.  The texture reminds me of mousse and it really could be a dessert in and of itself.

I used it to top a strawberry shortcake (bet you figured that out already since you’re smart like that) that I added blueberries to for our Independence Day barbecue.  Check back tomorrow for the shortcake recipe-it was a huge hit and this whipped cream put it over the top!

Stabilized Whipped Cream

Printable recipe
Printable recipe with picture

3 oz. cream cheese, softened
1 cup heavy cream
24 miniature marshmallows
1/4 cup granulated sugar

Mash cream cheese with a fork in a medium metal mixing bowl. Slowly add the whipping cream and stir until blended. Stir in marshmallows and sugar. Chill 4 hours or overnight. (Do not cover the bowl.) Place beaters in freezer to chill while the mixture is in the fridge.  Whip mixture with the chilled beaters until the marshmallows are completely dissolved and mixed in and the mixture is thick and hold stiff peaks.  Cover and keep refrigerated until ready to use.

Recipe source: Sandi Rose

Coffee & Cream Cupcakes

Posted on

I’m terrible about using recipes from cookbooks.  I own quite a few but hardly ever go to them when I need a recipe, instead I go to blogs and Pinterest and Google searches.  But I vowed I would make at least one recipe from the Pioneer Woman’s Food From My Frontier cookbook.  It’s the only cookbook I own that I paid more than $15 for (I get them used or as gifts) and even though it’s cool to have as a memento since she signed it, it still felt like wasting money if I never used it.

Being a coffee and cake lover, the first thing that called to me was her Coffee Cream Cake.  Two layers of coffee-flavored cake with a cream filling and a coffee frosting.  Yum.  I decided to turn it into cupcakes, putting the cream filling in the center of each.  Her recipe has a drippy frosting that is more like a glaze that thickens as it cools, but I wanted a fluffy buttercream frosting on the cupcakes so I made up my own coffee buttercream recipe for these.

The cupcakes are great, mostly because of the cream filling and frosting.  I could tell from how thin the cake batter was that it would make sturdy cupcakes, not the light and fluffy ones that a thicker batter will make.  While the cake part isn’t my favorite (I’m pretty picky when it comes to cake), it does work well overall.  I always state my honest opinion on recipes so that you’re fully informed, but I want to assure you that you will like these cupcakes as is.  I doubt any one besides a cake connoisseur would notice the crumb.  There isn’t anything really wrong with it because it is nice and moist, but it’s just not as light and tender as I like my cake to be.  The taste is fabulous, so fabulous that my coffee-hating husband couldn’t get enough of them.

So make these, you will love them if you love coffee, and perhaps even if you don’t.  Or, if you’re like me and prefer a lighter cake, you might try a different recipe for the cupcakes.  Personally, I’m either going to use chocolate cake next time, making them into mocha cream cupcakes, or sub really strong coffee for the water in a white or yellow cake mix recipe to get the texture I like.

To get this white streak effect, I used the same piping bag for the frosting that I used for the filling.  The residual white filling lined the bag and made a streaky look when I piped the buttercream onto the cupcakes.

Coffee & Cream Cupcakes

Printable recipe
Printable recipe with picture

Cupcakes
1 cup (2 sticks) unsalted butter
3 tablespoons instant coffee crystals
1 cup boiling water
2 cups all-purpose flour
2 cups granulated sugar
½ teaspoon salt
½ cup buttermilk
2 eggs
1 teaspoon baking soda
2 teaspoons vanilla extract

Cream filling
4 oz. cream cheese, room temperature
½ cup powdered sugar
½ cup heavy cream

Coffee Buttercream
¼ cup Kahlua (here is a recipe to make your own)
1 tablespoon instant coffee crystals
1 cup (2 sticks) unsalted butter, softened
1 lb. powdered sugar
Dash of salt

For the cupcakes, preheat the oven to 350F. Line 24 cupcake tins with paper liners; set aside.

Melt the butter in a saucepan, then stir in the instant coffee and boiling water. Let the mixture bubble up for a few seconds, then turn off the heat. In a large bowl, combine the flour, sugar, and salt. Pour the hot butter/coffee mixture over the top and stir to combine. Mix together the buttermilk, eggs, baking soda, and vanilla and add it to the bowl. Whisk until smooth (batter will be very thin). Using a levered ice cream scoop, fill the cupcake tins half full. You will have extra batter, which you can bake more cupcakes with or a small cake if you have a 6” cake pan. Bake for about 15 minutes, or until a toothpick inserted in the center of a cupcake comes out clean. Allow cupcakes to cool for a few minutes in the tins, then remove to a cooling rack to cool completely.

While the cupcakes cool, prepare the filling. Beat the cream cheese until smooth, then add the powdered sugar and heavy cream and beat on low until sugar is moistened, then on high until light and fluffy. Fill a pastry bag fitted with a round tip (or a squeeze bottle) with the filling. Push the tip or nozzle into each cupcake and squeeze filling into the center, pulling back once the top starts to rise, and stopping when the filling bursts through the top of the cupcake. Repeat with remaining cupcakes.

For the buttercream, bring the Kahlua to a boil and stir in the coffee crystals. Set aside to cool completely. Once cooled, beat the butter in a large bowl until creamy, then add the sugar, Kahlua mixture, and salt. Beat on low until sugar is moistened, then beat on high until smooth and creamy

To complete cupcakes, pipe swirls of coffee buttercream on top of the filled cupcakes. Serve at room temperature.

Adapted from the Coffee Cream Cake in Food From My Frontier by Ree Drummond

Lemon Blossoms

Posted on

I made these for Mother’s Day, intending to give pretty little baggies of them as gifts to all the mothers at the annual Mother’s Day picnic on Dennis’ side of the family.  It didn’t quite work out that way.  The first pan, which was half the batch, I didn’t grease well enough and they all stuck horribly so guess where those ended up?  Yup, in our bellies.  Can’t say we were too sad that only half the batch was pretty enough to share.  But then we couldn’t keep our hands off those either, and in the end, there were only enough to give to two mothers: his and mine.

Our mothers loved these little beauties, and we loved them.  Way too much.  They are really delicious, but most of the lemon flavor comes from the glaze, and I would suggest trying this with a lemon cake mix instead of a yellow if you can find one.  That would really intensify the lemon flavor.  They are wonderful as is, but can you get enough lemon flavor in the summer?  I think not.

Lemon Blossoms

Printable recipe
Printable recipe with picture

1 (18.5 oz) box yellow or lemon cake mix
1 (3.5 oz) box instant lemon pudding mix
4 large eggs
3/4 cup vegetable oil

Glaze:
4 cups confectioners sugar, sifted
1/3 cup fresh lemon juice
Lemon zest from 1 lemon
3 tablespoons vegetable oil
3 tablespoons water

Preheat oven to 350 degrees. Spray miniature muffin tins thoroughly with cooking spray.

Combine cake mix, pudding mix, eggs and oil and blend well with an electric mixer until smooth, about 2 minutes. Batter will be quite thick. Using a cookie scoop, divide the batter between the muffin wells, filling each halfway. Bake for 12 minutes.

While the blossoms are baking, make the glaze. In a mixing bowl, whisk together the sugar, lemon juice, zest, oil, and 3 tablespoons water. Whisk until smooth.

Remove the blossoms from the oven when they are done and turn out onto a tea towel. You might have to run a butter knife around the edges of the cupcake wells to loosen them before turning out. While they are still warm, dip the blossoms into the glaze, covering as much of the cake as possible, or spoon the glaze over the warm cupcakes, turning them to completely coat. Place on wire racks with waxed paper underneath to catch any drips. (I did this over the sink.) Let the glaze set, about 1 hour, before storing in airtight containers or covering with plastic wrap on a platter.

Makes 48 mini-cakes

Recipe source: Paula Deen, as seen on Minda’s Cooking

Blueberry-Lemon Upside Down Cake

Posted on

Secret Recipe Club

Whoop whoop!  I took a month off from the Secret Recipe Club and am so excited to be back with this recipe! My assignment this month was Evelyne’s blog, Cheap Ethnic Eatz.  As the title implies,her recipes are from around the world and affordable to make.  I nearly made her beautiful Peach Salsa since I’ve been on a salsa kick lately, but in the end, this beautiful cake won out.  When I read the titles of the recipes I was considering to my husband, including Strawberry Puff Pastry Pizza, Lazy Chocolate Raspberry Cake, Self-Saucing Chocolate Pudding, Afghan Cardamom Pudding, and Peanut Butter Daifukumochi Balls (apparently I was really craving sweets when searching Evelyne’s archives-big surprise!), he absolutely insisted that I make this one.  I aim to please.

Well, thank you very much dear Evelyne, because this cake surely did please us both.  I’m almost embarrassed to admit how much.  Between the two of us, it only took us two days to polish off the entire cake.  While we do enjoy our sweets, this was ridiculous even for us, and a testament to how wonderful (and addictive) the cake is.

I did change it up by adding lemon flavor to the cake, because I really enjoy the combination of lemon and blueberry flavors .  It was amazeballs, as my friend, Jennifer, would say.  I think I also changed the texture of the cake as well by switching the baking powder for baking soda (the only science I’m any good at is baking science, and I knew the acid in the lemon juice was a perfect catalyst for baking soda, so I pulled the old switcharoo on my leaveners) and the cake was crazy moist to the nth degree.

I would probably try making this cake with the baking powder next time because although I did love the moist texture, with the juicy, dripping blueberry topping it wasn’t really necessary.  Another benefit of using the baking powder (which is baking soda with an acid mixed in (cream of tartar) to activate it) is that it wouldn’t take away the tartness from the lemon juice like the baking soda does (baking soda reacts with acids, which causes the bubbles and rising, and it neutralizes the acid in the process), so it might balance the sweet topping a little better.  But unless you hate sweet sweets, you will love this cake as is.  You know we did!

Blueberry-Lemon Upside Down Cake

Printable recipe
Printable recipe with picture

1 lemon
1/4 cup melted butter
1/2 cup brown sugar
1 (12 oz) bag frozen blueberries OR 2 cups fresh blueberries
2/3 cup milk
1 1/3 cups all-purpose flour
1 teaspoon baking soda
1/4 teaspoon salt
1/2 cup butter, softened
3/4 cup granulated sugar
1 egg
1 teaspoon vanilla

Preheat oven to 350 degrees. Zest the lemon and set the zest aside. Squeeze the lemon and set the juice aside. In an 8 or 9 inch square cake pan, combine melted butter and brown sugar; spread evenly on bottom. Spread blueberries evenly over top. Sprinkle with 1 tablespoon of the lemon juice. If you are using frozen blueberries, put the dish in the oven for 10 minutes or until the blueberries are mostly defrosted. Remove from oven and allow to cool while preparing the cake batter. *It is OK if the dish is still warm when you add the batter.

Pour the milk into a 1-cup glass measure. Add enough of the leftover lemon juice to equal ¾ cups liquid. If you don’t have enough lemon juice, just add a bit more milk. Set this aside to curdle while you prepare the batter.

Whisk together flour, baking soda, and salt in a small mixing bowl. In a separate larger mixing bowl, cream the butter and sugar together with an electric mixer, beating for about five minutes, until light and fluffy. Beat in egg and vanilla. Add dry ingredients alternately with milk to creamed mixture, beating well after each addition, beginning and ending with the flour mixture (flour, milk, flour, milk, flour). Spread batter evenly over blueberry layer.

Bake for 45 to 50 minutes or until toothpick inserted in center comes out clean. Let cool 10 minutes in pan, then turn out on to a large flat plate. Serve warm or at room temperature.

Recipe source: adapted from Cheap Ethnic Eatz


P.S. Happy 12th anniversary, sweetheart! I’m testing him to see if he’ll read this without me telling him he should.  :)  And happy birthday to my itty bitty sweetie who turns eight today!

Strawberry Lemonade Layer Cake

Posted on

Wheee!  We’re back and boy did we have a blast in good old Abilene.  I think my blues have been cured by some good old Kansas sunshine and fun times.  We did so many things I don’t know if I can even blog about it because it would either be one long blog, or a million short ones, but I’ll see what I can do later on.

While we were there, we had a cookout with the whole family and I surprised my father-in-law, Al, with an early birthday cake since we were leaving the day before his actual birthday.  Since I was making it in a kitchen that wasn’t my own, and it was hot, I wanted it to be super easy, and cool and refreshing.  This one fit the bill since it’s made with convenience products and is refrigerated and served cold.  Plus, there’s no butter in the frosting so maybe it’s even a little lighter than my usual decadent cakes.  Perfect for summer.  Except for that whole turning on the oven thing, but I baked it at night so that made the hot kitchen not quite as unbearable.

Jessie’s trying to do a sneak attack on the grill!

Everyone loved the cake, but I have to be honest and tell you it’s not even close to my favorite cake.  The frosting is very tart, like lemonade, and I tend to like my cake super duper sweet.  If I made it again, I’d use less of the lemonade mix.  But I did like it, and judging by the reviews I got, it’s totally worth sharing.  It does have a nice strawberry lemonade flavor going on.  Like I said, it’s a great cake for summer because it’s served cold.  The frosting doesn’t get hard when cold like all the butter-laden ones I usually make, so that is nice.  And don’t forget my water bottle trick to make sure your cake is super moist! I taught it to my Mother-in-law while I was there, using her tap water, and she was so excited about it that she didn’t notice I was using her undrinkable tap water until I was done.  So yeah, I tried to poison everyone with not quite crystal-clean well water, but we all survived. lol

(Oh no, I hope Janice isn’t reading this!  She’s a reader in Abilene that I got to meet and I brought her a piece of this cake when I stopped by her office.  It was so cool to meet her, except for the trying to poison her part.  If you’re reading, Janice, I was just joking about the poisonous well water.  *ahem*  But you might want to get checked for fingernail cancer during your next doctor visit.)

OK, enough madness.  Here’s the recipe.

Strawberry Lemonade Layer Cake

Printable recipe
Printable recipe with picture

1 (18.25 oz) box strawberry cake mix (plus oil, water and eggs as directed on box)
1 (8oz) package cream cheese, room temperature
1 (0.23 oz) packet of Kool-Aid lemonade
Yellow food coloring gel (as desired for color)
1 (7 oz) container marshmallow creme or fluff
1 (8 oz) container frozen whipped topping, thawed
Fresh strawberries to garnish

Make cake according to box instructions and bake in 2- 8 inch round cake pans as directed. Turn finished cakes out onto cake racks and allow to cool completely.

Once cake is cool, cream together cream cheese, lemonade and yellow food coloring until smooth. Mix in marshmallow creme and then mix in whipped topping until completely smooth. Level the cakes, and place one layer on a platter, cut side up. Spread about a third of the frosting over the top, then place the second cake layer cut side down on top. Spread the remaining frosting over the top and sides. Slice strawberries and place on the top and sides of the cake for decoration. Refrigerate until ready to serve and serve cold, straight from the fridge.

Recipe source: Easy Baked

Disclaimer: No humans or animals were harmed during the eating of this cake.  I believe the reason they don’t drink their water is because it’s hard water, which isn’t really poisonous.

More photos from our evening…

My plate: burger, dilly cucumber salad, 7 layer dip, and jalapeno chips.

A closer look at the 7 layer dip. I did it a little different this time, putting the tomato layer on top and mixing some goodies into it (I made the tomato layer from this recipe).  I also mixed in a packet of Fiesta Ranch dip mix into the sour cream instead of taco seasoning and it was even better than the original!  I’ve been looking for that dip mix ever since my girl Jaci made a dip with us while we were visiting last year because it is just wonderful and miracle of miracles, I finally found it in Abilene:

I loaded up, so if you’ve never tried this and would like to, just let me know in a comment below, and I’ll draw among the interested parties for a winner of a packet.  It’s so good mixed with sour cream!

Maybe you can tell he likes Coke?

Dennis and his nephew, Carson, played catch after dinner.


Look how studly my man is.  He’s not much for sports but I think the sporty look is good on him. :)

When I met this boy, he was a toddler.  And now he towers 6 inches over me.  Kids are great at making adults feel old! lol

Love country sunsets!  Such a pretty ending to the day.

Creamy Chocolate-Mint Pie

Posted on

I know, I know.  I’m supposed to be on vacation.  What am I doing blogging, right?  Thanks to the miracle of scheduled posting, I wrote this blog last week and scheduled it to publish today.  I’m so tech-savvy!  (And I’m a big liar because I can barely even text, but I’m glad I at least have this one thing figured out.  It helps me a lot!)

So last month our friend, Joe, came over with a tractor to help us level out our back yard so the water wouldn’t collect in the middle and run up against our house and under the back door, flooding the basement.  Yay for no more basement flooding!!!

Like my husband, Joe loves mint desserts, and as part of my thanks for his help, I made him a creamy chocolate-mint pie.  Actually, I made two, because my husband deserved a “thank you” too. :)  Also, you deserved the recipe, and how could I share it without cutting up a pie to show you the inside?  And how could I do that to Joe’s pie?  I could not.  So I made Dennis a pie and butchered his pie up for you.  And for me, because I ate this piece.

This pie is creamy, fudgy, smooth, and minty.  I don’t know why, but mint desserts just aren’t my number one choice, and I’d probably never make them if it weren’t for Dennis and Joe (Joe is also responsible for these peppermint patties I posted a while back), but I thoroughly enjoyed my half of this pie.  Yes, my husband let me have half the pie!  I will not overshare how fast I ate that half, however.  That would be my version of TMI. Hey, a girl has to have some secrets.

Creamy Chocolate-Mint Pie

Printable recipe
Printable recipe with picture

1 1/4 cups milk
1 package (4-serving size) chocolate pudding and pie filling mix (not instant)
1 cup semisweet chocolate chips
4 oz cream cheese, softened
1/2 cup powdered sugar
1/4 teaspoon peppermint extract
1-2 drops green food color
2 cups frozen (thawed) whipped topping, divided
1 Oreo cookie crust
2-4 thin rectangular chocolate and green mints, unwrapped

In 2-quart saucepan, stir together milk and pudding mix; cook as directed on package. Continue cooking over low heat while adding chocolate chips, stirring until melted. Set aside.

In medium bowl, beat cream cheese, powdered sugar, peppermint extract and green food color until smooth. Gently fold in 1 cup of the whipped topping.  Spread cream cheese mixture in the Oreo crust, then top with chocolate mixture, spreading it smooth. Spread remaining 1 cup whipped topping over the top, then either chop mints or use a vegetable peeler to shave off curls, and sprinkle over whipped topping. Cover and refrigerate at least two hours before serving.

Recipe source: tweaked from Pillsbury.com

Avocado Chocolate Pudding

Posted on

You may have noticed I’m no longer posting regularly.  I have a feeling that’s how VC will be from now on, with periodic posts when I have the time.  While I hope my sporadic posting doesn’t bother any of my readers, I likely wouldn’t begin to post regularly for your sake at the expense of my own, so it would help my conscience out a lot if you would just be OK with it.  Thanks. :)

Onto the pudding.  I know it sounds weird, but you just have to try this to believe it how good it is.  Even my avocado-hating husband loves this pudding!  Basically it’s just avocado blended up with cocoa powder and agave nectar to create a sweet, silky, perfectly chocolate-y pudding.  No dairy, no refined sugar, no gluten, no cooking, just blending and eating of the most delicious & wholesome dessert ever…refrigeration totally optional.  We couldn’t wait and ate ours as soon as it was blended and it was fabulous.  But I bet it would be even better cold.

Chovocado Pudding

Printable recipe
Printable recipe with picture

1 ripe avocado
1/4 cup cocoa powder
1/4 cup raw agave nectar
1/4 cup almond milk
1 teaspoon vanilla extract

Peel and quarter the avocado. Put all the ingredients in a Magic Bullet or food processor and blend until smooth. Serve and enjoy!

Recipe source: Forgiving Martha