![]()
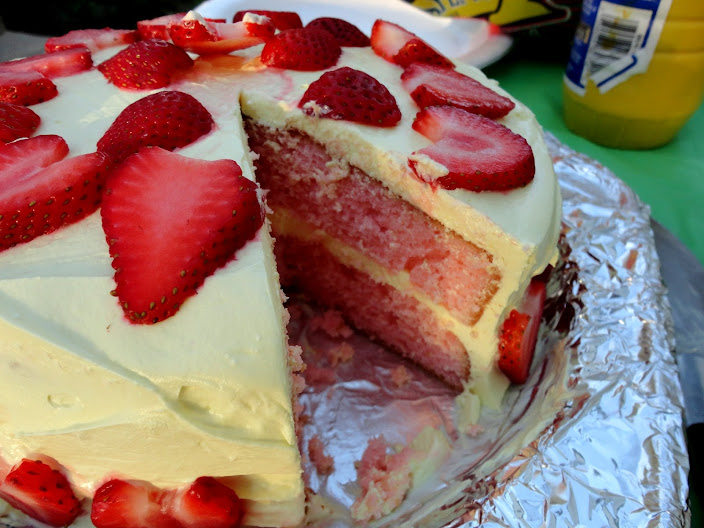
Whoop whoop! I took a month off from the Secret Recipe Club and am so excited to be back with this recipe! My assignment this month was Evelyne’s blog, Cheap Ethnic Eatz. As the title implies,her recipes are from around the world and affordable to make. I nearly made her beautiful Peach Salsa since I’ve been on a salsa kick lately, but in the end, this beautiful cake won out. When I read the titles of the recipes I was considering to my husband, including Strawberry Puff Pastry Pizza, Lazy Chocolate Raspberry Cake, Self-Saucing Chocolate Pudding, Afghan Cardamom Pudding, and Peanut Butter Daifukumochi Balls (apparently I was really craving sweets when searching Evelyne’s archives-big surprise!), he absolutely insisted that I make this one. I aim to please.
Well, thank you very much dear Evelyne, because this cake surely did please us both. I’m almost embarrassed to admit how much. Between the two of us, it only took us two days to polish off the entire cake. While we do enjoy our sweets, this was ridiculous even for us, and a testament to how wonderful (and addictive) the cake is.
I did change it up by adding lemon flavor to the cake, because I really enjoy the combination of lemon and blueberry flavors . It was amazeballs, as my friend, Jennifer, would say. I think I also changed the texture of the cake as well by switching the baking powder for baking soda (the only science I’m any good at is baking science, and I knew the acid in the lemon juice was a perfect catalyst for baking soda, so I pulled the old switcharoo on my leaveners) and the cake was crazy moist to the nth degree.
I would probably try making this cake with the baking powder next time because although I did love the moist texture, with the juicy, dripping blueberry topping it wasn’t really necessary. Another benefit of using the baking powder (which is baking soda with an acid mixed in (cream of tartar) to activate it) is that it wouldn’t take away the tartness from the lemon juice like the baking soda does (baking soda reacts with acids, which causes the bubbles and rising, and it neutralizes the acid in the process), so it might balance the sweet topping a little better. But unless you hate sweet sweets, you will love this cake as is. You know we did!

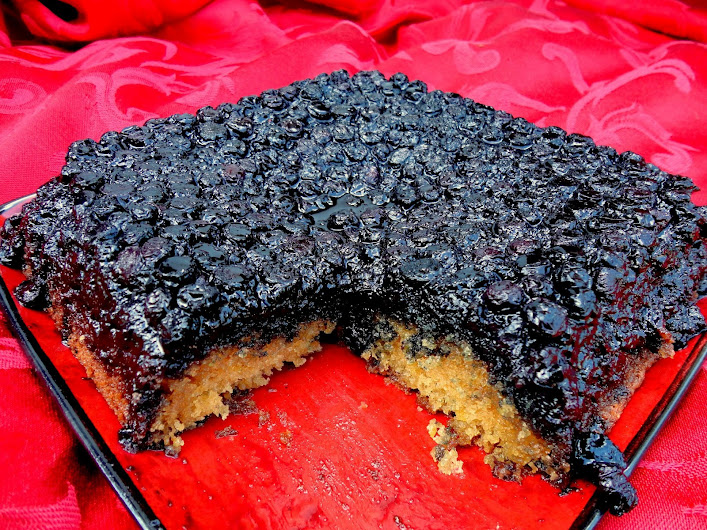
Blueberry-Lemon Upside Down Cake
Printable recipe
Printable recipe with picture
1 lemon
1/4 cup melted butter
1/2 cup brown sugar
1 (12 oz) bag frozen blueberries OR 2 cups fresh blueberries
2/3 cup milk
1 1/3 cups all-purpose flour
1 teaspoon baking soda
1/4 teaspoon salt
1/2 cup butter, softened
3/4 cup granulated sugar
1 egg
1 teaspoon vanilla
Preheat oven to 350 degrees. Zest the lemon and set the zest aside. Squeeze the lemon and set the juice aside. In an 8 or 9 inch square cake pan, combine melted butter and brown sugar; spread evenly on bottom. Spread blueberries evenly over top. Sprinkle with 1 tablespoon of the lemon juice. If you are using frozen blueberries, put the dish in the oven for 10 minutes or until the blueberries are mostly defrosted. Remove from oven and allow to cool while preparing the cake batter. *It is OK if the dish is still warm when you add the batter.
Pour the milk into a 1-cup glass measure. Add enough of the leftover lemon juice to equal ¾ cups liquid. If you don’t have enough lemon juice, just add a bit more milk. Set this aside to curdle while you prepare the batter.
Whisk together flour, baking soda, and salt in a small mixing bowl. In a separate larger mixing bowl, cream the butter and sugar together with an electric mixer, beating for about five minutes, until light and fluffy. Beat in egg and vanilla. Add dry ingredients alternately with milk to creamed mixture, beating well after each addition, beginning and ending with the flour mixture (flour, milk, flour, milk, flour). Spread batter evenly over blueberry layer.
Bake for 45 to 50 minutes or until toothpick inserted in center comes out clean. Let cool 10 minutes in pan, then turn out on to a large flat plate. Serve warm or at room temperature.
Recipe source: adapted from Cheap Ethnic Eatz

P.S. Happy 12th anniversary, sweetheart! I’m testing him to see if he’ll read this without me telling him he should. :) And happy birthday to my itty bitty sweetie who turns eight today!