Before I had much experience with pie, I tried a recipe called “perfect pie crust,” which employed butter instead of shortening for the fat. At the time, I’d only ever made shortening crusts and the butter one had a much better flavor, so I thought the name apt, although it wasn’t as flaky as I desired. Although I balk at the word “perfect,” I have now found my own favorite pie crust that for me is very close to it, and although I’ve included the recipe before on a previous blog for apple pie, I think it’s good enough to warrant a blog of its own.
This one has the best of both worlds–the butter adding flavor and the shortening, flakiness. It turns out well even when I over-process it, which I almost always do (I don’t like to see big globs of fat in my crust so I tend to over-mix the fat into the flour). I don’t think there’s a way to ruin this crust besides burning it, which would be really hard to do. It puffs as it bakes and is so flaky that you can see it with the naked eye.
*Makes enough for two pies or one double-crust pie
2 1/2 cups flour
1/2 tsp. salt
2 sticks butter, cold and cut into 16 pieces
1/4 cup shortening, chilled in freezer
6-10 T ice-cold water (I use a scant 1/3 cup every time)
Mix flour and salt. Cut the butter and shortening in with a pastry blender or food processor until pieces are the size of small peas (I usually make them half that size at least or smaller, but the crust will be more flaky if you can resist following my example). Add ice water and mix until it starts to form a ball. Divide dough in half, gather in your hands and gently shape each into a ball, flatten them into discs, cover with plastic wrap and refrigerate until ready to use. If they get too hard, I leave them on the counter until pliable enough to roll out.
When ready to make your pie, roll out one disk and fit into a pie plate, trimming off the excess. Fill, cover with the top crust, pinch and flute the edges. Brush beaten egg over the top crust (that’s how you get that golden shine), cut a few vents holes and then bake according to pie recipe directions. If you are making a one-crust pie, you can either halve the recipe or freeze the second disc for later use.
Recipe Source:The Dessert Lover’s Cookbook by Marlene Sorosky
**Note: This post is an eyesore but I don’t want to change the content because I’m keepin’ it real. This is how the original post looked and read, and I want to be able to read it again ten years from now and cringe as much as I’m cringing now. :) (Although I am adding a new photo of this in rolls-form, and plan to add more next time I make this into bread again.)
I will let you in on the people I’m identifying here. This was back in my MySpace days, where I originally posted this, when I was friends with a couple gals who went by Red (Kim) and Kitchen Bitch (Krista). Red’s white bread was the first yeast bread that required kneading that I’d ever made. This was the second one and it is still my favorite after three years of baking with yeast. It has the best, softest, texture and an incredible taste. I hope you overlook the bad photos and delirious writing and make it!**
Well I’ve made Red’s bread which got me over my fear of making it, so I decided to tackle the Bitch’s bread…Kitchen Bitch, that is! :) Kim can have “Red’s Bread” and Krista can have “Bitchin’ Bread”–am I a great marketing schemer or what? If you guys ever do open bread shops, I want 10% of your profits. Ha!
(It’s after 1 AM and I’m sleep-deprived. In case you didn’t notice.)
OK, so Krista sent me this recipe quite a while back, but since the directions called for a stand mixer with dough hooks (which I don’t have) and I was scared to make bread in the first place, let alone try to modify a recipe to suit my lack of kitchen apparatus, I saved it for a later date.
The date came today. Emboldened by my most recent success with the white bread, I decided I was going to go for the Honey Oatmeal Bread, despite my lack of dough hooks and despite the fact that it was nearly 11 PM. It was a huge success and totally worth staying up for–even better than my first bread attempt! The taste is unbelievable and the texture is crazy soft. I’m in love. I wish I had a good camera to show off the beauty of these loaves, but you can get a general idea from the back-up camera that I’m using.
Honey Oatmeal Bread from KitchenAid
1 1/2 c water
1/2 c honey
1/3 c butter or margarine
5 1/2 to 6 1/2 c all-purpose flour
1 c quick cooking oats (Krista says rolled oats work fine too)
2 t salt
2 pkgs active dry yeast or 4 1/2 tsp jarred yeast
2 eggs
1 egg white
1 T water
Additional oatmeal for decoration (optional)
Place water, honey, and butter in small saucepan. Heat over low heat until mixture is very warm. (120-130 F)
First place oats, then 5 c flour, salt, and yeast in mixer bowl. Attach bowl and dough hook to mixer. Turn to Speed 2 and mix about 15 seconds.
Continuing on Speed 2, gradually add warm mixture to flour mixture and mix about 1 minute. Add whole eggs and mix about 1 minute longer.
Continuing on Speed 2, add remaining flour, 1/2 c at a time, and mix about 2 minutes or until dough starts to clean the sides of bowl. Knead on Speed 2 about 2 minutes longer.
Place dough in greased bowl, turning to grease top. Cover (I use plastic wrap) and let rise in a warm, non-drafty place (I use my oven with the light on) about 1 hour or until doubled in bulk. Sometimes this takes longer than 1 hour. Let it go until it has doubled.
Punch dough down and divide in half. Shape each half into a loaf and place in greased bread baking pans. Cover (I use a clean dish cloth for this) and let rise again in a warm, draft free place (oven again) until doubled in bulk…usually an hour, sometimes a bit more.
Beat the egg white and water and brush the tops of loaves GENTLY. Sprinkle with oatmeal if desired. Bake at 375 F (preheat the oven so it is up to temp) for 30-40 minutes. Remove from pans immediately and cool on wire racks.
Krista recommends brushing the crust with butter or margarine after removing from pans and so do I.
Yields 32 servings (16 slices per loaf). Nutritional info per slice: 134 cal, 4 g pro, 24 g carb, 3 g fat, 13 mg chol, 162 mg sod
Veronica’s Notes: To make this by hand, mix the dry ingredients together in a large bowl. Beat the eggs in a small bowl. Pour in warm liquid and mix with a spoon until blended, then dump in the beaten eggs and fold the dough over and over until all the egg is incorporated and you’ve got a ridiculously sticky mass attached to your hand. Add the remaining flour 1/2 cup at a time, kneading it in. I just knead my bread dough in the bowl to keep from dirtying another surface. Once you have kneaded in all the flour and continued to knead for a few minutes, follow the instructions on the recipe. I used instant yeast so I was able to skip the first rising and go straight to shaping the halves into loaves and sticking them in the pans. Krista wouldn’t recommend this and she’s probably right that using regular yeast and allowing the bread to rise longer develops a fuller flavor, but I seriously can’t imagine bread getting any better than this. If it’s better her way, the taste would probably give me a heart attack so it’s partly in the interest of my own health that I’m sticking to my own method.
This is a wonderful & nutritious chowder that strangely reminds me of clam chowder, even though it’s salmon instead of clams! I used grilled salmon, which I would recommend in place of the canned. I also recommend using a tablespoon of cornstarch in addition to the flour to thicken the soup. This goes great with the honey whole wheat cornbread, too!
*Please forgive the magazine photo–my camera is broken and the ones I took with my .0000000001 mp back-up camera make it look like the stew was partially digested. Not appealing at all!
2 medium Russet or Idaho potatoes, peeled
2 carrots, peeled
Olive oil cooking spray
1 stalk celery, diced
1 medium yellow or white onion, diced
1 tsp extra-virgin olive oil
3 T whole-wheat flour
1 c skim milk
1 32-oz container low-sodium chicken broth
2 6-oz cans salmon packed in water, without bones or skin
2 c corn, freshly shucked or frozen
1-2 tsp paprika
Sea salt and fresh ground black pepper, to taste
1 T dill, finely minced
Place potatoes and carrots in a medium saucepan; cover with water. Boil over medium-high heat for 8-10 minutes. Drain potatoes and carrots in a colander and pour cold water over. Let cool for 5 minutes. Remove potatoes and carrots and dice.
Meanwhile, preheat large stockpot over medium-high heat for 2 minutes. Mist with cooking spray. Add celery & onion and sauté for 2 minutes or until onions become translucent.
Add oil and flour, whisking briskly. Add milk, whisking in a ¼ cup at a time. (This will create a roux, or thickener, for your soup.)
Add broth and cook for at least 5 minutes. If soup seems a little thin, add more flour (no more then 1 T), a ½ tsp at a time, and whisk briskly. Add salmon, diced potatoes and carrots, corn and paprika. Reduce heat to medium-low and let simmer for at least 10 minutes. Season with salt and pepper.
My friend Kim, aka Red, shred this recipe with me. I keep calling this “Red’s Bread,” because even though it’s an old recipe, she’s the one that introduced it to me! (Besides, I love the way it rolls off my tongue–I think Kim should have her own bread company and name it “Red’s Bread”, don’t you? ) I love trying old recipes, and this one was not only easy, but delicious. I never thought I could turn out a decent loaf of bread that I actually kneaded myself, but I did it! Woo-hoo! My husband is in heaven right now (he’s already eaten half a loaf!) and keeps staring at me with these gushy lovey eyes like I’m some sort of goddess. I wonder if fresh bread does this to all men or if it’s just a quirk of his? In any case, I think I’ll be making this bread a LOT! :)
White Bread From 1963 Good Housekeeping Cookbook
1/2 cup milk
3 tablespoons sugar
2 teaspoon salt
3 tablespoons margarine or butter
1 1/2 cups warm water
1 pkg. (2 1/4 t) active dry yeast
About 6 1/4 cups sifted all-purpose flour
Scald milk; stir in sugar, salt and margarine. Cool to lukewarm. Measure warm water into large bowl; sprinkle in yeast; stir until dissolved. Add lukewarm milk mixture and 3 cups flour; beat until smooth. Add enough additional flour to make ta soft dough. Turn out onto lightly floured board. Knead until smooth and elastic, about 8-10 min. Form into smooth ball. Place in greased bowl, turning to grease top. Cover; let rise in warm place, free from draft, until doubled in bulk, about 1 hr.
Punch down dough. Let rest 15 min. Then divide dough in half and shape each half into a loaf. Place each loaf in a greased 9x5x3 bread pan. Cover; let rise in warm place, free from draft, until doubled in bulk, about 1 hr.
Bake at 400 degrees F, about 30 min, or until done. Makes 2 loaves.
*Veronica’s Notes:
Many older recipes instruct you to scald milk. That is, to bring it nearly to a boil (185°F, 85°C, or more), preferably in a thick-bottomed pan, and stirring actively, to keep a protein skin from forming on the surface and keep the proteins and sugar from sticking to the bottom. Scalding served two purposes, to kill potentially harmful bacteria in the milk, and to destroy enzymes that keep the milk from thickening in recipes. Pasteurization, however, accomplishes both of those goals, and since almost all store-bought milk in Western countries is pasteurized these days, scalding is essentially an unnecessary step. Therefore, I merely heated the milk with the butter, sugar & salt until the butter was melted and then I cooled it until it was just warm but not hot.
Also, I used rapid rise/instant yeast. If you are also using instant yeast, here is my method for this bread that you can follow–it cuts down on the prep time by a full hour.
Mix 3 cups flour with the yeast in a large bowl, then pour in the warm water and cooled milk mixture until blended. Follow the rest of the directions up until the point when you have kneaded the bread for 8-10 minutes. You will skip the first rising since instant yeast makes this step unnecessary. Divide the dough in half, form into loaves, and put it into the greased loaf pans. Follow the second rising and baking directions. I turned my loaves out of the pan as soon as they were done and brushed them with melted butter. Divine!
Sometimes it’s the simplest recipes that are the best! I made mine with blueberries and they were so good, I didn’t even need any syrup!
Best Buttermilk Pancakes from smittenkitchen.com
2 cups all-purpose flour
2 teaspoons baking powder
1 teaspoon baking soda
1/2 teaspoon kosher salt, or slightly less table salt
3 tablespoons sugar
2 large eggs, lightly beaten
3 cups buttermilk
4 tablespoons unsalted butter, melted, plus 1 tablespoon extra for brushing griddle (I’ve made these pancakes with and without the butter mixed in, and can say with confidence they work either way. They’re just richer with it, of course.)
1 cup blueberries, fresh or frozen and thawed (optional)
1. Preheat an electric griddle to 375°F, or place a griddle pan or cast-iron skillet over medium-high heat. Whisk together the flour, baking powder, baking soda, salt, and sugar in a medium bowl. Add the eggs, buttermilk, and 4 tablespoons melted butter, and whisk to combine. The batter should have small to medium lumps.
2. Test the griddle by sprinkling a few drops of water on it. If the water bounces and spatters, the griddle is hot enough. Using a pastry brush, brush the remaining 1/2 teaspoon butter onto the griddle. Wipe off the excess with a folded paper towel.
3. Using a 4-oz. ladle, about 1/2 cup (for a 6-inch pancake), pour the batter in pools 2 inches apart. If you wish to make blueberry pancakes, arrange a handful over the cooking pancake, pressing them in slightly. When the pancakes have bubbles on top and are slightly dry around the edges, about 2 1/2 minutes, flip over. If any batter oozes or blueberries roll out, push them back under with your spatula. Cook until golden on bottom, about 1 minute.
4. Repeat with the remaining batter. You can keep the finished pancakes on a heat-proof plate in the oven at 175°F. Serve warm.
This is my favorite cornbread and I make it more often than any other kind. Hearty and rustic, it is excellent smeared with butter and paired with chili or stew.
Honey Whole Wheat Cornbread
Makes one 9×13″ pan or 24 muffins
2 cups whole wheat flour
2 cups corn meal
4 teaspoons baking powder*
1 1/2 teaspoons salt
2 eggs
1/4 cup vegetable oil
1/2 cup honey
2 cups milk (I usually use skim)
Combine the corn meal, flour, baking powder, and salt in a large bowl. In a medium bowl, whisk together the eggs, oil, honey & milk. Stir into the flour mixture just enough to moisten the batter. Pour into a greased 9 by 13 inch baking pan or 24 greased muffin cups. Bake in a 375 degree oven for 20-35 minutes or until golden brown.
*Due to the large quantity of baking powder in this recipe, I recommend using an aluminum-free baking powder, such as Rumford, to avoid a funny after-taste. (If you weren’t aware, most brands have aluminum in them.) If you bake often, I’d recommend investing in an aluminum-free baking powder to ensure the best taste in your quick breads and cakes.
Didn’t I just say I was too busy to be posting recipes? Well, I am but I guess old habits are hard to break. I’m staying up late to get this one posted, since I promised it yesterday.
I made two batches of these b/c I used mild cheddar on the first and they didn’t have enough flavor–spicy but bland, if that’s possible. The second batch was perfect and I shipped it to my spicy-food-loving sister-in-law for her birthday, along with some of Laura’s Cherry Crumble Bars & some Nutty Toffee Popcorn. The funny thing is that I gave the bad batch to my parents (not because I was seeking some sort of retribution, but because I don’t like to waste and know that Dad will eat anything) and they liked them so much they asked me to make them for the pig-prep night before our family’s annual Pig Roast reunion (we all just sit around–most drinking beer–while snacking and watching the men inject flavor solution into the pig, among other unappealing things).
You can adjust the spiciness to suit your tastes. Use as little or as much red pepper as you dare!
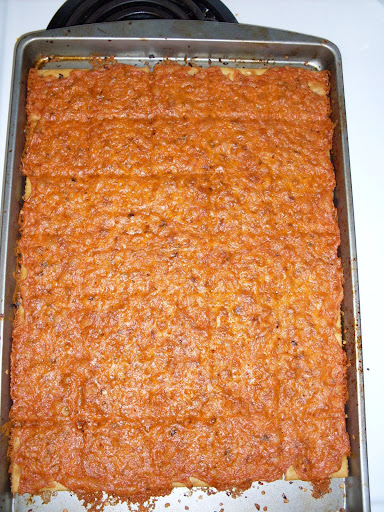
Fire Crackers
from Bake Wise by Shirley O. Corriher
“Normally, you keep temperatures low when working with cheese so that it won’t separate, but in this case, the separation of the cheese makes the dish outstanding. The oven is so hot that the fat in the cheese separates out and goes into the crackers, making them incredibly flakey and crunchy.”
Ingredients Non-stick cooking spray
One 15-oz box fat-free saltines (I used regular to no ill effect)
Fresh hot red pepper flakes (I used dried)
One 10-oz package Cracker Barrel extra-sharp cheddar, grated (you should use extra-sharp, but I don’t think the recipe would suffer if you used an 8 oz package of another brand)
Directions
Preheat oven to 475. Spray a jelly-roll pan measuring about 10×15 with nonstick spray. Arrange the crackers (about 40) in rows so that they are touching each other. One sleeve fits almost perfectly in this size pan and you will have abou three sleeves left in the box.
Sprinkle with pepper flakes and then top with the grated cheese.
Quickly place the pan in the oven and close the door. Leave the heat on for no more than 10 seconds, then turn the oven off. Leave in the closed oven for at least 2 hours. The hot oven melts and browns the cheese, producing an even crisp brown coating. The fat from the cheese soaks into the crackers and puffs them sligtly. Leaving them in the oven also dries them out, so they become super crunchy. Break apart and serve, or store for several weeks sealed in an airtight container.
Veronica’s notes: The first time the crackers were very crisp and the second time they weren’t crisp enough after two hours. This is due to using less cheese the first time and leaving the first batch in the oven well over two hours. If your crackers don’t easily break apart after 2 hours, I’d recommend just putting them back in the oven until they’re super crispy.
This is my favorite recipe of Laura’s. The chocolate chip cookies are my favorite cookie but this is my favorite recipe of hers….so far. I have a lot left to try. The buttery cherry-almond combo here is very good. I’m being very reserved because if I unleashed my enthusiasm for this recipe, I’d probably be put in a straight jacket in a padded cell.
Cookie base and topping 1 ½ cups all-purpose flour
½ cup sugar
½ teaspoon salt
½ teaspoon baking powder
1/3 cup almond paste (not marzipan)
1/4th teaspoon almond extract
1 stick (1/2 cup) cold unsalted butter, cut into pieces
½ cup sliced almonds (Reserve for topping)
Filling 2 cups frozen cherries
3/4th cups sugar
3 Tablespoons water
2 tablespoons cornstarch
1 Tablespoon fresh lemon juice
1 Tablespoon unsalted butter
Pinch of salt Icing 1/3 cup powdered sugar or more if needed, whisked or sifted
2 Tablespoons heavy cream
1/4th teaspoon almond extract
Pinch of salt
Heat oven to 350 degrees. Line a 9 inch square pan with foil and grease lightly with vegetable or olive oil.
In a food processor add flour, sugar, salt and baking powder and process to fluff and combine. Add almond paste and almond extract and pulse to combine. Add cold butter pieces and pulse until crumbly. Remove 1 cup of the mixture and set aside for topping.
Put the rest of the mixture into the pan, spread out evenly, and press with the bottom of a measuring cup to make a crust. Bake for 15-17 minutes until crust starts to brown slightly around the edges. Remove and leave the oven on.
Meanwhile dump all the filling ingredients into a saucepan and cook on medium high heat until thickened and translucent. About 8 to 10 minutes. Spread the filling over the crust.
Sprinkle the top with the reserved crumb mixture and top with the sliced almonds. Bake for about 28 to 30 minutes or until the filling bubbles and the top is golden. Let cool completely in the pan on a cooling rack.
Whisk or beat the icing ingredients together, drizzle over bars.
Hint: To easily remove bars from the pan freeze for 30 minutes and lift out by the foil edges. Peel off foil and cut into squares or diamonds.
Veronica’s Notes: I’ve also made this successfully with a can of tart cherries. To do this, put a (14.5 oz) can red tart cherries packed in water in the saucepan, water and all, along with the other filling ingredients but omit the water & lemon juice. It won’t have the same deep red color as the frozen cherries give, so you can add some red food coloring if you wish.
I got this idea off a picture I saw on another blog but since I didn’t save the recipe, I had to make it up. I’m pleased with the results! It’s obviously a bit different than a fried corndog–healthier too, since it’s baked–but it’s close enough and so much easier. I imagine this would go over pretty well with the kiddos.
Corn(bread) Dogs Serves 6
1 ¼ c stone-ground yellow cornmeal
¾ c all-purpose flour
2 ½ t baking powder
3 T sugar
¾ t salt
2 large eggs, beaten
2 T vegetable oil
1 c milk (I used skim)
6 hot dogs
Preheat oven to 400 degrees F. Spray a 9×13 baking dish with cooking spray & set aside.
Whisk the dry ingredients together in a medium-sized mixing bowl, then make a well in the center. Add the eggs, oil & milk to the middle of the flour mixture and whisk it up in a few rapid strokes—leave it slightly lumpy.
Pour batter into the prepared baking dish and spread evenly. Place the hotdogs 3 x 3 on top so that they’re evenly space and will be surrounded by cornbread when cut. Place in preheated oven and bake for 10-15 minutes or until cornbread is cooked through.
Allow to cool for a few minutes, then cut around the hotdogs with a sharp knife, leaving an even amount of cornbread surrounding each hotdog.
Update: I won a blue ribbon for these cookies at the 2011 Kansas State Fair!
Cookies are my favorite food group and I’ve never met a cookie I didn’t like, but never had a favorite until fairly recently.
And the winner is… [drumroll]
chocolate chip cookies {insert sheepish grin here}
But these aren’t just any chocolate chip cookies, people. These are chocolate chip cookies made with brown butter, toasted & ground-up oatmeal, toasted nuts and just enough vinegar to make an extremely tender cookie without adding any flavor.
I suppose I always knew that chocolate chip cookies would eventually beat out all the rest for me, because I have made countless batches of them in an effort to find the perfect recipe. I’ve never done this with anything else. All were good, but none left me with the feeling that I’d found the best. Until I found this one.
Allow me to introduce you to the creator of this recipe, Laura Flowers: culinary genius and food blogger extraordinaire. (If you use that to title your autobiography, Laura, I want 10% of your profits!) Every week she posts new recipes–most of them her own–for everything from cookies to pizza (those are my favorite) to salads & pasta dishes. I have tried several and have yet to be disappointed. And I’m eternally grateful to her for bringing the torture of my endless search for the perfect chocolate chip cookie to an end!
Today I made them for Laura’s “Project Cookie” and mailed them to her friend Ted & his platoon in Iraq. Well, I mailed most of them (minus the usual dozen I can’t keep from eating every time I make them!)
1/2 cup old-fashioned oatmeal
1 cup (2 sticks) softened butter
3/4 cup packed light brown sugar
3/4 cup granulated sugar
1 teaspoon salt
1 Tablespoon real vanilla extract
1/2 teaspoon white vinegar (You won’t taste it, I promise.)
2 large eggs
1 1/2 teaspoons baking soda
2 cups all-purpose flour
1 cup chopped walnuts or pecans (optional, but add 1/4 cup more flour if omitting)
1 (12-oz) bag semi-sweet chocolate chips
1. Preheat oven to 350 degrees. Line baking sheets with parchment paper.
2. In a nonstick skillet, melt 1 stick of the butter over medium heat until foamy and golden brown. You’ll know it’s ready when the solids have separated and the bottom has lots of brown specks and it starts to smell so wonderful that you get light-headed when you catch a whiff. Pour into a bowl to cool and wipe out the skillet.
3. In the skillet over medium heat, toast the oatmeal, stirring often, until fragrant and some of the oatmeal is light golden in color. About 3 minutes. Transfer the oatmeal to a food processer and grind until fine and powdery. I usually just turn it on and leave it alone for a full minute. Set aside.
4. If using, spread the nuts onto a plate and microwave in 30 second increments 2 or 3 times until toasted, stirring in-between. Set aside to cool.
5. In a stand mixer, beat the softened butter, browned butter, brown sugar, granulated sugar, salt, vanilla extract, and vinegar low to combine, and then on high speed until fluffy and lighter in color. I beat mine about five minutes so that there’s plenty of time for all those sugar crystals to force air into the butter. (Alton Brown has convinced me this is crucial to making good cookies and since I do this and my cookies are always good, you should believe us both.)
6. Add the eggs and mix until combined. Add the oatmeal and baking soda and beat for another minute. Next, add the flour half at a time and mix on low speed just until incorporated.
7. Add the chocolate chips and toasted nuts. Mix on low until incorporated.
8. With a size 50 cookie scoop or a generous tablespoon, drop the dough onto parchment paper 3 inches apart.
9. Bake for 11 minutes or until golden around the edges. I use an airbake pan and usually bake mine about 10 minutes, but oven temps vary so just keep an eye on the first pan to judge the time yours needs. Remove from oven and let set on the cookie sheet for 3 minutes before moving to a cooling rack. *I prefer to take my cookies out of the oven when they are puffy & still a little raw looking because the residual heat from the pan continues to bake them and this yields a cookie that is slightly crisp on the outside and very soft & chewy on the inside.
Makes about 45 cookies.
Note: These cookies are best baked shortly after mixing the batter together. There is no need to refrigerate the dough.
Now it’s time for some fun! If your favorite cookie isn’t listed below, feel free to leave it in a comment. You can also leave links–I can never have enough cookie recipes. Like I said, cookies are my favorite food group. :)


 ) I love trying old recipes, and this one was not only easy, but delicious. I never thought I could turn out a decent loaf of bread that I actually kneaded myself, but I did it! Woo-hoo! My husband is in heaven right now (he’s already eaten half a loaf!) and keeps staring at me with these gushy lovey eyes like I’m some sort of goddess. I wonder if fresh bread does this to all men or if it’s just a quirk of his? In any case, I think I’ll be making this bread a LOT! :)