RSS Feed

Chocolate Chip Banana Bread (Low-Fat, Low-Sugar)

Posted on

Although I’ve been eating healthier for the better part of eight months, you might not have been able to tell that by the recipes I’ve been posting.  I figured it was about time I get to it and share some more of the low-calorie love.  We all need balance, and I’d say after my last brownie post, you’re due something a little on the lighter side.

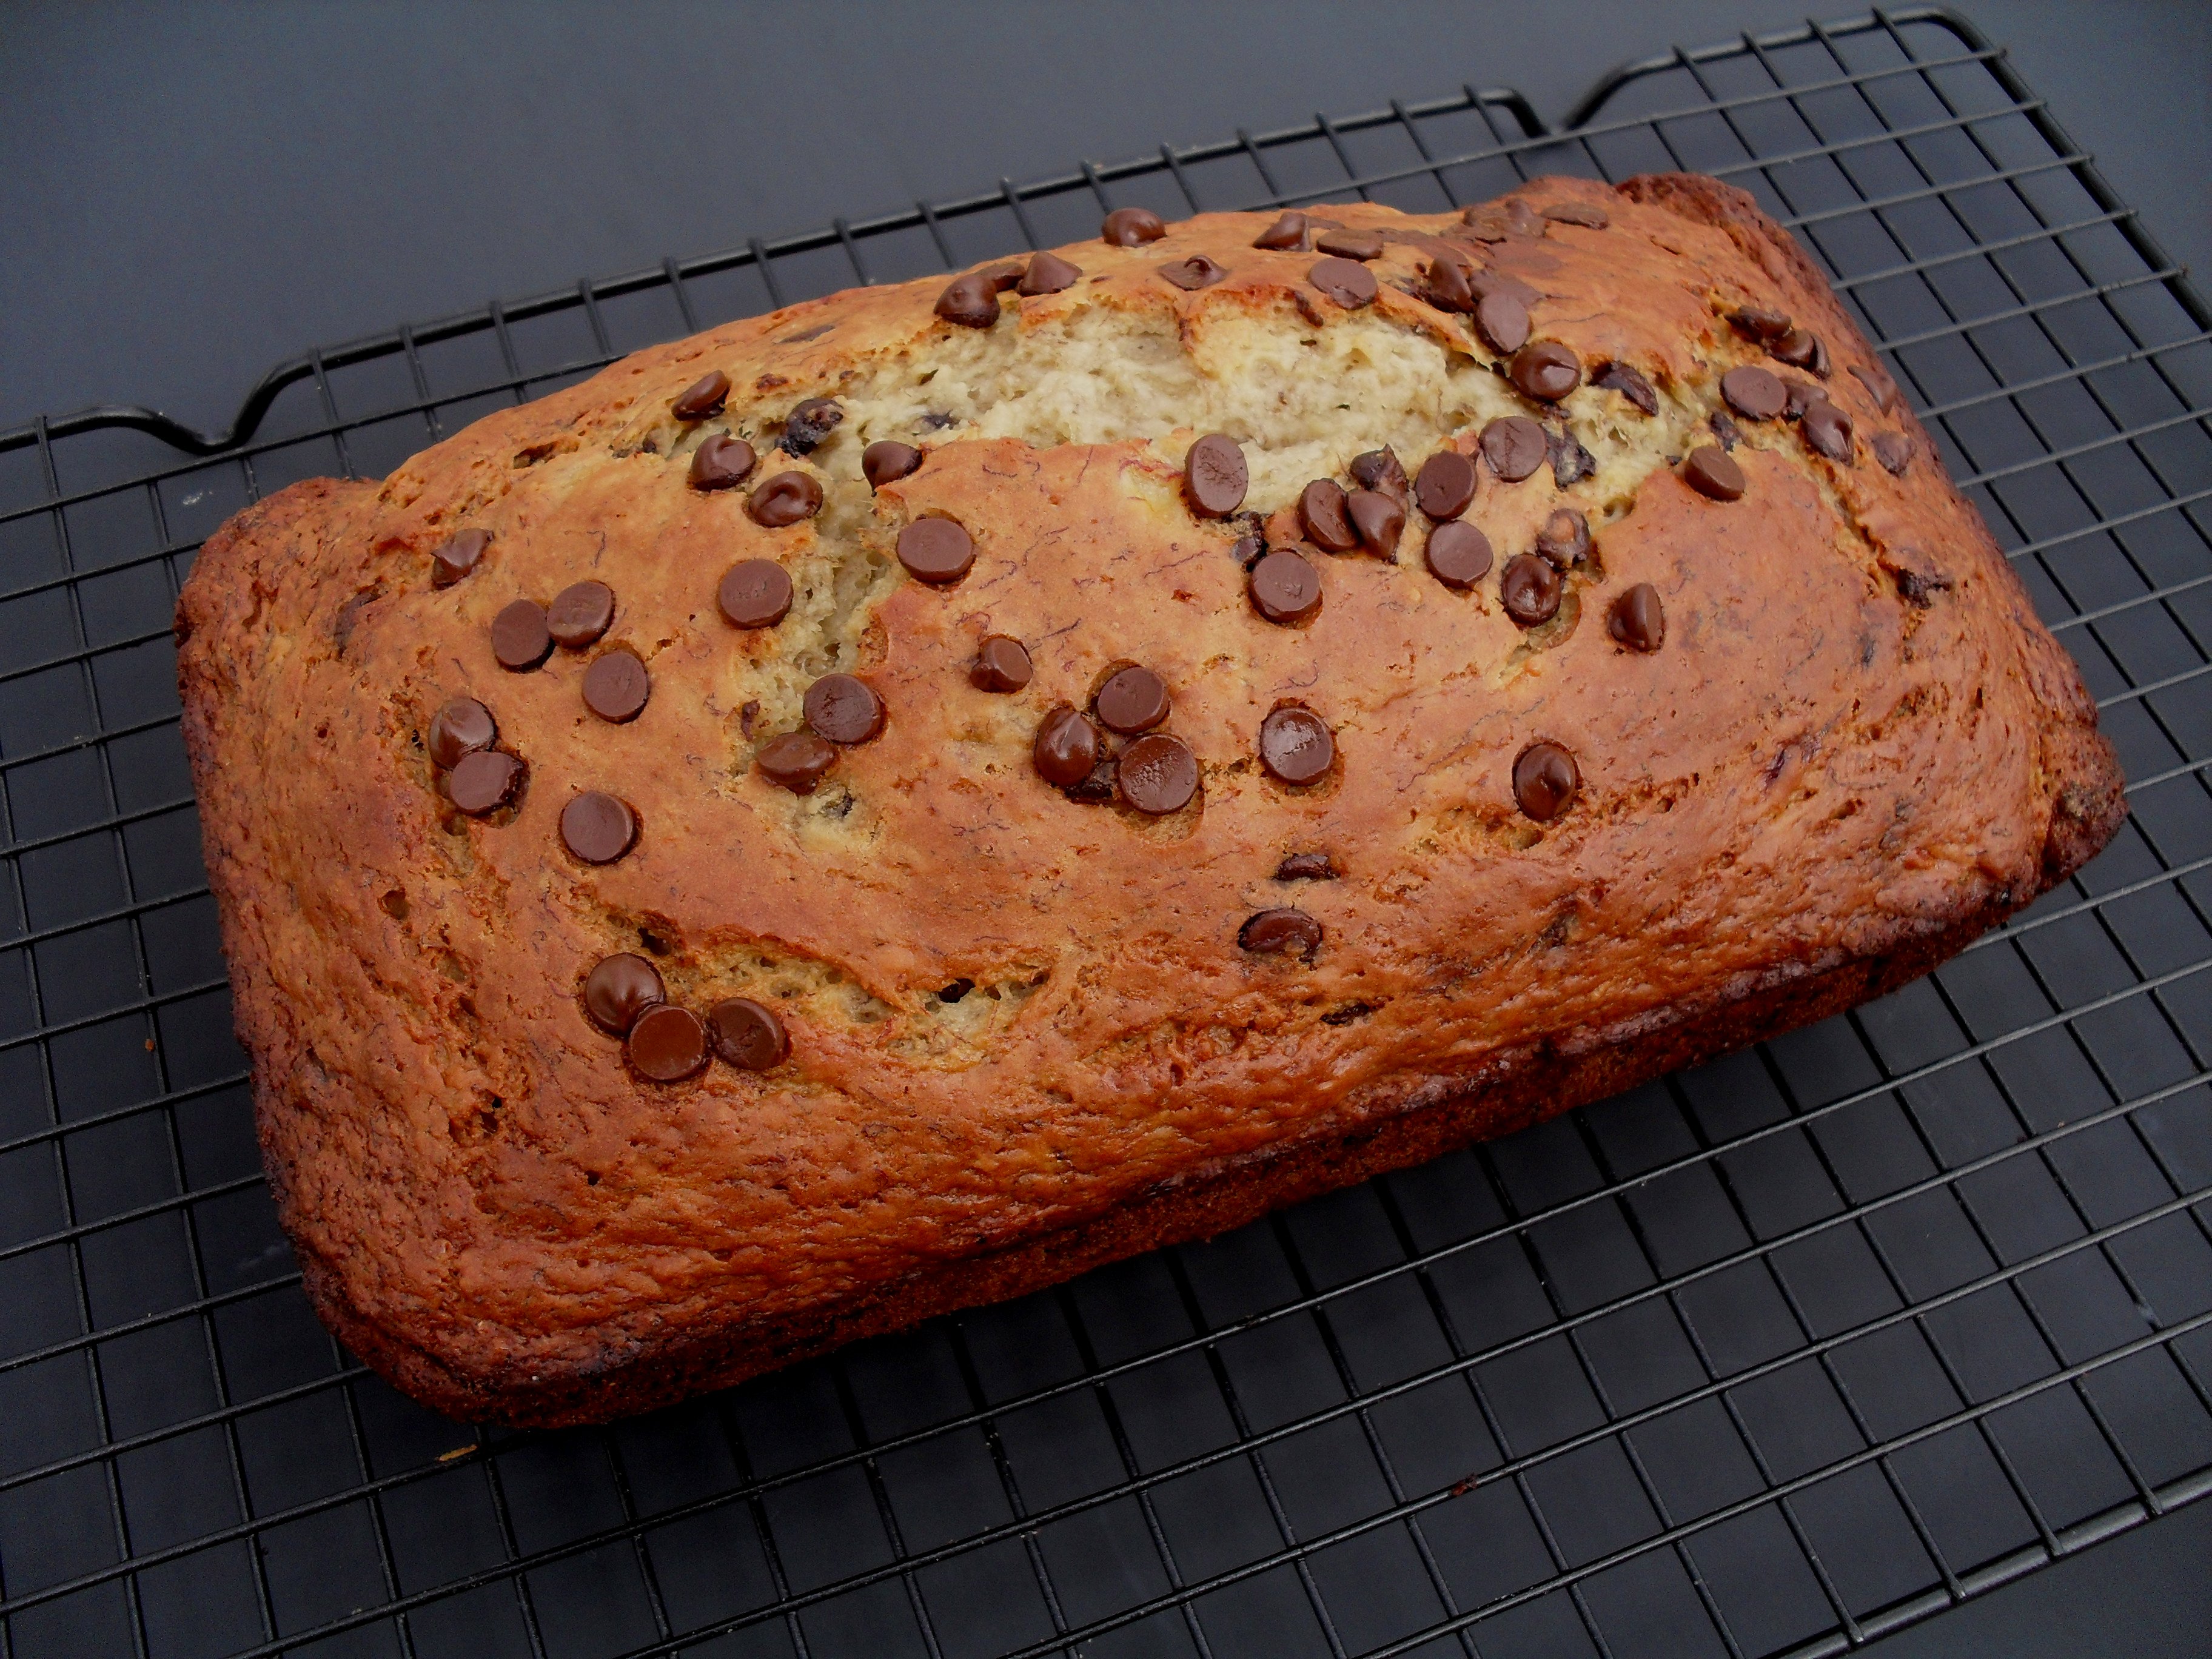
I wanted to participate in this week’s BSI (blogger secret ingredient) contest, this week’s ingredient being yogurt, so I dug my container out of the fridge and decided to whip something up with the bananas that were rotting on the counter.  (Bananas that are nearly rotten give the best flavor for banana bread!)  I’ve also been experimenting with baking with Truvia and have had good results when combining it with a little sugar in recipes, so I decided to do that here too.  Thus this delightful bread was born!

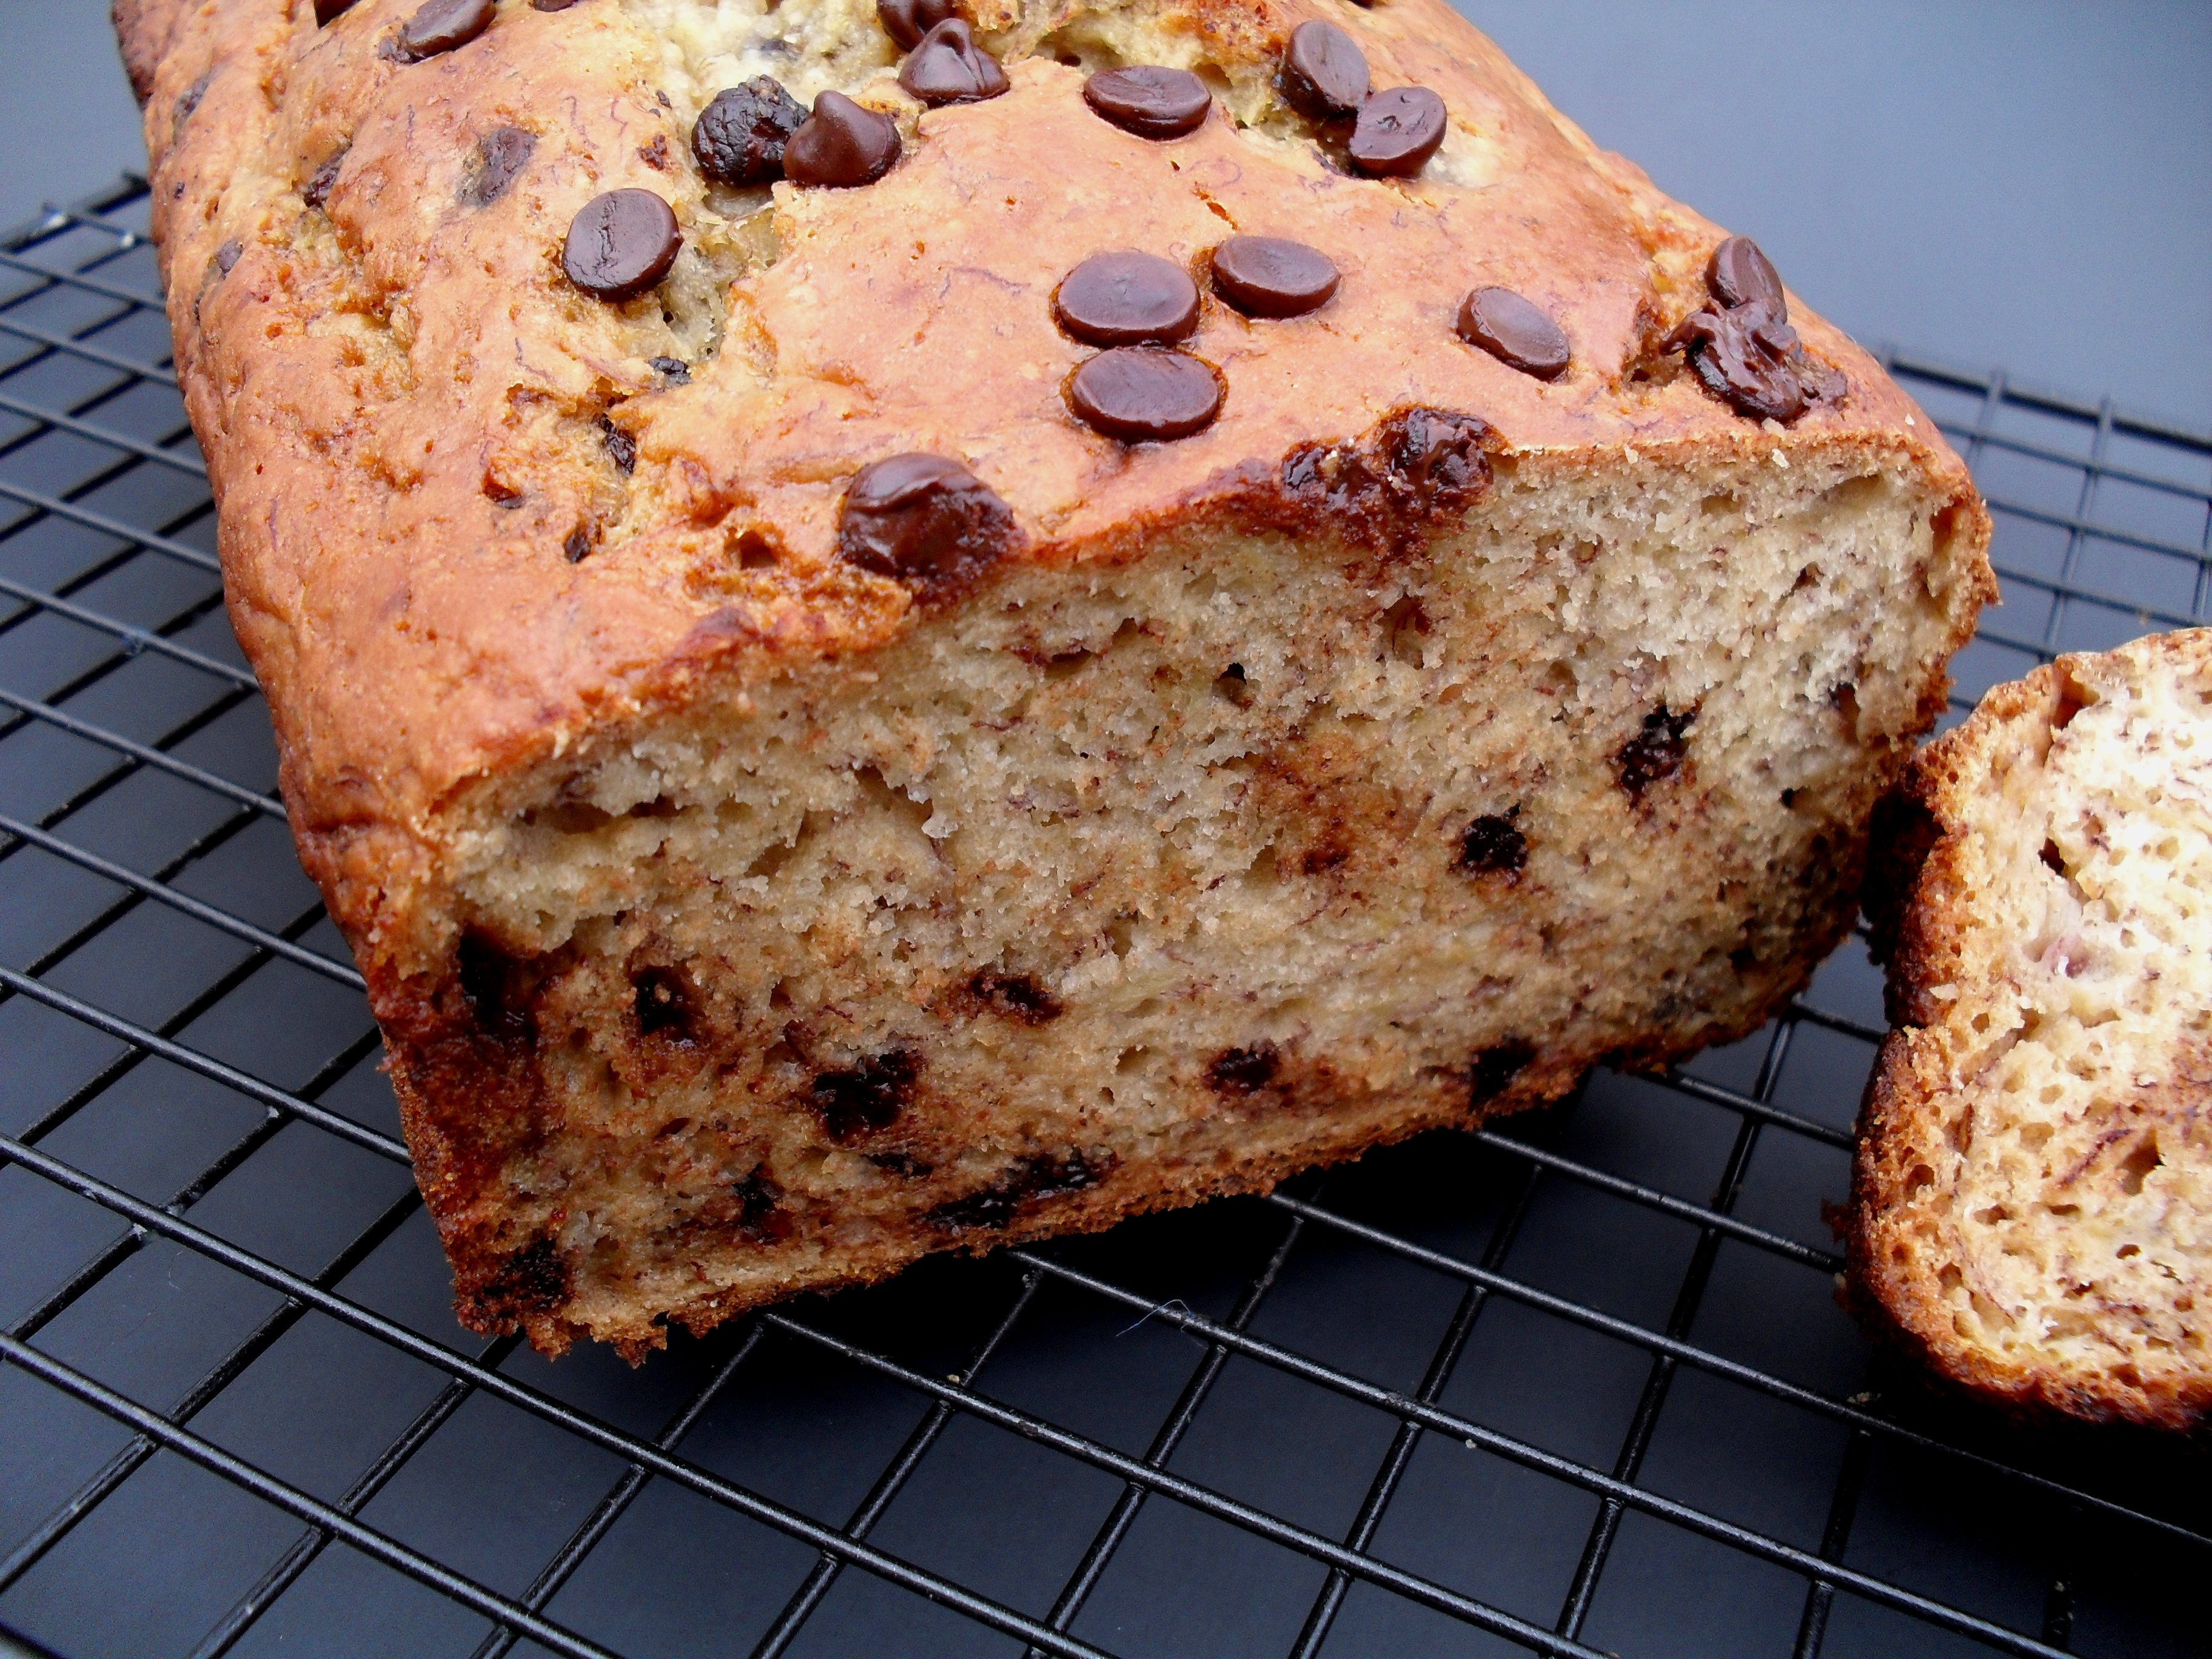
This is a moist loaf with a wonderfully sweet banana flavor.  The chocolate chips are a nice little bonus.  Though it doesn’t quite compare to my favorite banana bread, it is still really delicious and I didn’t feel the least bit guilty about having two slices for lunch, spread with a thin schmear of peanut butter (my favorite way to eat this bread)!

This would be a good recipe to turn into muffins, and it would be easier to get even portion sizes that way too.  Plus, you wouldn’t have to bake them as long, which translates to a center that’s even more moist!

V’s Chocolate Chip Banana Bread

Printable recipe
Printable recipe with picture

2 cups all-purpose flour
¼ cup granulated sugar
¼ cup Truvia
1 teaspoon baking soda
½ teaspoon salt

1 ¼ cups mashed overripe banana (about 3-4 bananas)
½ cup plain fat-free yogurt
2 eggs
1 teaspoon vanilla

1/3 cup mini semisweet chocolate chips

Preheat oven to 350 degrees. Spray a 9” loaf pan with cooking oil and set aside. In a large mixing bowl, combine dry ingredients and whisk to combine. In another bowl, mix wet ingredients. Add wet to dry, stirring until nearly mixed, then fold in the chocolate chips. Bake 50-55 minutes, or until a toothpick inserted in center comes out clean.

Makes 1 loaf, 12 slices. Per slice: 155 calories; 2.6 g fat; 35.6 mg cholesterol; 113 mg sodium; 32 g carbohydrates; 1.4 g fiber; 4 g protein

Recipe by Veronica Miller

Mocha Toffee Brownies

Posted on

I’ve signed up to participate in an online bake sale to help fellow food blogger, Stephanie of Bite by Bite, raise money for The Leukemia and Lymphoma Society while she trains with Team in Training to complete a marathon on June 5th.  I ran a half marathon with Team in Training in 2008 and I love to bake, so there was no question I was joining the effort!

My submission to the sale will be a batch of these Mocha Toffee Brownies.  In case you can’t tell from the photo, they are delicious! Imagine a thick, Kahlua-infused brownie with a layer of toffee & almond-studded milk chocolate in the middle, and a heavy sprinkling of crunchy English toffee baked into the top.  It’s an incredibly decadent treat.  The second best part?  They are incredibly easy to make!

If you would like to bid on these brownies, or any other treats (there are even healthy ones!) that will be in the auction from over 30 other bloggers, or would like to donate some of your own baked goods, click here for more information.  The bake sale is January 31st!

Mocha Toffee Brownies

Printable recipe
Printable recipe with picture

1 (19.9 oz) box fudge brownie mix
1 stick (1/2 cup) real butter, melted
1/4 cup coffee liqueur, such as Kahlua*
2 large eggs
2 large (4.25 oz) Symphony candy bars with almonds and toffee chips
1/3 cup toffee bits

Preheat oven to 350 degrees.  Grease the bottom of an 8×8 baking dish.  Mix together brownie mix, butter, coffee liqueur, and eggs until well mixed.  Spread half into prepared pan and place the candy bars side by side on top.  Cover with remaining batter, smoothing with a spatula.  Sprinkle toffee bits evenly over the top and bake for 40-45 minutes.  Cool completely in pan on wire rack before cutting.

*For Toffee Brownies, which are just as fabulous, omit the coffee liqueur and replace with 1/4 cup water.

Recipe by Veronica Miller, with inspiration from Paula Deen

Banana Oatmeal Bake

Posted on

It has been months since I made this and I can still remember how creamy and delicious it was! I just bought some more agave nectar after using the last bottle up on Double Chocolate Banana Muffins, so I’m ready for another round of this hearty and warming breakfast.  I think you will like this one.  It’s both  nutritious and delicious!

Banana Oatmeal Bake

Printable recipe
Printable recipe with picture

2 cups old-fashioned oats
1/4 cup Bob’s Red Mill 10 Grain Hot Cereal (or Bob’s Red Mill 7 Grain Hot Cereal, another 1/4 cup oats, flax meal, wheat germ or bran)
1 teaspoon baking powder
1/4 teaspoon salt
1/4 cup agave nectar (or brown sugar, sugar or honey)
1-1/2 cups fat free milk (or any milk)
2 small bananas, mashed
1 large egg, lightly beaten
1 teaspoon vanilla extract
1/4 cup chopped walnuts or pecans

Combine oats, 10 Grain cereal, baking powder and salt.  Set aside. In another bowl, combine agave nectar, milk, egg, vanilla extract and bananas.  Combine the wet with the dry ingredients. Lightly spray an 8 x 8 inch pan with cooking spray and pour in banana-oats mixture.  Bake at 375 degrees for 15 minutes.  Add walnuts to the top and bake for another 5 minutes to toast them. Serve warm.

Recipe source: The Noble Pig

White Chili (Crockpot recipe)

Posted on

My friend, Ashley, shared this recipe with me recently and I had to make it ASAP because although I’ve saved countless recipes for it, I’ve never actually made it or even tried it!  I have to say it’s very tasty, especially made her way with corn chips on the bottom and cheese on top (usually around here this is called a Frito pie).  You just can’t go wrong with salty corn chips and cheese in your chili!  Sooo good!  Unless of course you’re watching your calories, then you’d be better off sprinkling a bit of cheese on top with just a few corn chips for garnish, as I did above.  However, the chili is so good it can totally stand on it’s own. Any way you serve it would be great!

So here’s the recipe Ashley’s sister gave her when she got married (awww, those recipes are the best!) and that she has graciously permitted me to share with you!  Enjoy!

White Chili (crockpot recipe)

Printable recipe
Printable recipe with picture

2 large white onions, chopped
2 garlic cloves, minced
1 tablespoon olive oil

4 cups cubed (raw) chicken
2 cans white kidney (great northern) beans, drained & rinsed
1 can garbanzo (chick peas) beans, drained & rinsed
2 cups chicken broth
1 (4 oz) can chopped green chilis (I used 7 ounces)
2 teaspoons cumin
1/2 teaspoon oregano
1/4 teaspoon salt
1/4 teaspoon cayenne

1/4 cup cilantro, chopped
corn chips
shredded cheese

Saute onions and garlic in olive oil until tender. Transfer to slow cooker.  Add all other ingredients; except cilantro, corn chips and cheese.  Cook on low 6-7 hours (high for 4 hrs).  Stir in cilantro and serve over corn chips with cheese on top!

Recipe source: slightly tweaked from Ashley Allen

Jimmy Fallon’s Crock-Pot Chili

Posted on

Funny man Jimmy Fallon can cook?  Apparently so!  This is his recipe for chili in the crockpot (OK, slightly, very slightly tweaked by me) and honestly it’s the best chili to ever come out of my kitchen!  I bought a 12-pack of beer two years ago (does beer ever go bad??) so I’d have it on hand whenever I felt like making my favorite buttery beer bread (seriously the best bread evar!), so I was super excited to finally get rid of the last two cans of it when I made this chili, one for the chili and one for the bread to go with it.  Win-win!


Jimmy Fallon’s Crock-Pot Chili

Printable recipe
Printable recipe with picture

3 1/2 pounds ground beef
Coarse salt and freshly ground pepper
1 tablespoon olive oil
1 large white onion, chopped
3 cloves garlic, finely chopped
1/2 habanero chile, seeded and very finely chopped
1/4 cup chile powder
1 tablespoon dried oregano
1 1/2 teaspoons ground cumin
1/4 teaspoon cayenne pepper
2 (28-ounce) cans whole tomatoes, coarsely chopped with their juices
1/3 cup chopped fresh cilantro, plus more for serving
1 (12-ounce) bottle amber beer
2 (15-ounce) cans kidney beans, drained and rinsed
Tortilla chips, for serving
Shredded cheddar cheese, for serving
Chopped tomatoes, for serving
Sour cream, for serving
Lime wedges, for serving

In a large skillet, working in batches if necessary, brown beef over medium heat. Season with salt and pepper; drain in a colander, discarding fat, and set aside. Add olive oil, onions, garlic, and habanero to skillet; season with salt. Cook until translucent, about 5 minutes. In a 6-quart Crock-Pot, combine beef, onion mixture, chile powder, oregano, cumin, and cayenne pepper; stir to combine. Add tomatoes, cilantro, and beer; cover and cook on high, stirring occasionally, for 5 hours, or on low for 8 hours. Add kidney beans and season with salt and pepper. Continue to cook, uncovered, until thickened, about 30 minutes. Garnish with cilantro and serve with desired toppings.

Creamy Parmesan Spinach Dip


I’ve got a great dip to add to your New Year’s spread!  I saw this over at Gina’s Skinny Recipes and although I added a lot more sour cream, cheese, and mayonnaise to the dip, it still ends up being much lighter than regular creamy dips.  But who really cares about that, anyway?  If it goes on a cracker, my calorie concerns fly out the window and I eat half the batch.  I love dip!  And this one is no exception.

Creamy Parmesan Spinach Dip

Printable recipe
Printable recipe with picture

12 oz chopped frozen spinach, thawed
1 bunch scallions, chopped
½ cup Parmigiano Reggiano
1 (16 z) tub light sour cream
½ cup light mayonnaise
2 teaspoons sugar
½ teaspoon garlic powder
Fresh cracked pepper, to taste

Squeeze out as much water from the spinach as you can. Combine all ingredients in large bowl and stir until well mixed. If not serving immediately, remove from refrigerator 2 hours before serving.

*Veronica’s notes: all I could find is a 12 oz bag of spinach but I know most of you will only be able to find the 10 oz container.  No worries, just use that and leave everything else the same.  This dip will not suffer from being more creamy. :)

Recipe source: adapted from Gina’s Skinny Recipes.

Seasoned Crackers


It’s been several years since I’ve made seasoned crackers, and I decided I wanted to add them to our holiday spread again this year, which always includes lots of random and fun snacks and appetizers.  But I lost my recipe!  I knew my friend, Sandy, had her recipe for them posted on Facebook, so I went there in a frenzy when I was whipping these up the night before we were set to travel.  (Thank you for saving me, Sandy!)  Realizing I only had a single bag of oyster crackers, I subbed in a bag of Goldfish crackers and decided to double the ranch dressing mix and the end result was some of the best seasoned crackers I’ve ever had.  In this case, losing my recipe was a lucky thing because this new version is even better than my old favorite!

These would be perfect for New Years, Super Bowl, tailgating–basically any party in any season!  During the winter months, the leftovers make a great garnish for soups.

Seasoned Crackers

Printable recipe
Printable recipe with picture

1 (12 oz) bag oyster crackers
1 (6.6 oz) bag Goldfish crackers
1 (1 oz) envelope ranch dressing mix
2 teaspoons garlic powder
1 teaspoon dried dill weed
½ teaspoon onion powder
½ cup vegetable oil

Mix crackers in a large bowl. Sprinkle dressing mix and spices over the crackers, then pour oil over it all. Mix until the oil is absorbed. Cover and store overnight for the flavors to develop.

*Veronica’s note: Cheez-its would make a great substitute for the Goldfish crackers! Use about three cups, or 7 ounces.

Recipe source: adapted from Sandy S.

Gingerbread Rice Crispy Treats


I’m getting ready to skidaddle and head north to spend the holiday with my husband’s family, but I wanted to take a minute to wish all my readers a very merry Christmas!  I appreciate your interest in my baking adventures and your support so much, and as my thanks to you, I have a super easy dessert if you need something quick to add to your holiday spread.  I’m bringing this one to Abilene!  I’m not a huge fan of gingerbread, but these are delicious.   If you don’t have the gingerbread mallows handy, just use regular ones and double all the  spices.  I think you’ll like these a lot!

Gingerbread Rice Crispy Treats

Printable recipe
Printable recipe with picture

1 stick unsalted butter, plus extra for the pan
1 10-ounce bag gingerbread mallows
1 teaspoon molasses
¼ teaspoon each: cinnamon, ginger, nutmeg, cloves
several dashes of salt
6 cups Rice Krispies cereal (about half a 12-ounce box)

Butter (or coat with non-stick spray) an 8-inch square cake pan with 2-inch sides.  In a large pot, melt butter over medium-low heat. Stir in the spices, molasses and salt.  Stir in the marshmallows until melted and smooth.  Remove the pot from the stove and stir in the cereal. Quickly spread into prepared pan and press down using a silicone spatula or a piece of waxed paper that has been sprayed with oil.   Let cool, cut into squares and serve or store in an airtight container.

Recipe and photos by Veronica Miller


Sugar-Free Candied Nuts (low carb)


If you look on my side bar or in my recipe index, you will see I have a category for sugar-free desserts.  And in that category, there are only eight recipes.  Considering I have posted over 200 dessert recipes, the sugar-free ones make up a very small percentage.  There is a reason for this.

Sugar-free desserts are just not as good as sugar-filled ones.  There are exceptions, but in my humble opinion, that is the rule.

I may not be a brilliant chef, but I do pride myself on my desserts and I simply refuse to let any sweets come out of my kitchen that taste like a chemical explosion.  Which means I usually refuse to make anything sugar-free, but there are certain occasions when I have no choice but to give in and find something that is sugar-free and also tastes delicious.

Such an occasion has arisen, with the birthday of a brother in Christ who is a type 2 diabetic.  Since I am a member of a small Church, I am able to give food gifts to everyone for their birthday, but I always flounder when it comes to the birthdays of those with diabetes.  I am a diabetic myself, but I’m insulin-dependent so I can eat dessert if I choose to, since I can give myself the insulin required for my body to process it.  Bob doesn’t have this luxury and controls his diabetes through food and exercise.  Which means no (or very little) sugar!!  My worst nightmare.  But what sort of Dessert Queen would I be if I couldn’t rise to this challenge and come out victorious?

I prefer to use fruit to naturally sweeten sugar-free desserts, such as in this rugelach, but since that still has a lot of carbohydrates that would send Bob’s blood sugar soaring, I knew I had to do the unthinkable and reach for the Splenda.  I decided to go for a very low-carb treat that would have minimal impact on his blood sugar and created a candied nut that is surprisingly delicious!  Granted, you can tell the difference between these and the real thing, but even my husband, who can’t take a sip of my Diet Dr. Pepper (one of the few sugar-free things I love) without shuddering, thought these nuts were superb.

If you are making these for a person accustomed to sugar-free sweets, it will likely be a welcome reprieve from all the awful chemical explosions that have been happening in their mouths over the years.  They are crispy and cinnamon-sweet on the outside and toasty and crunchy on the inside.  They truly are addictive!

Sugar-Free Candied Nuts

Printable recipe
Printable recipe with picture

2 ½ cups nuts of choice
1 egg white
½ cup Splenda granular
1 1/2 teaspoons cinnamon
1/8 teaspoon salt

Preheat oven to 300 degrees. Line a 15x10x1 inch pan with foil and spray with cooking oil. Place nuts in a bowl and stir if not already mixed. Beat egg white in a separate bowl until foamy and stir into the nuts until evenly coated. In another bowl, mix the Splenda, cinnamon, and salt and pour over the nuts. Stir until evenly coated, then scoop onto the baking sheet, using a spoon or fingers to get the nuts in a single layer. Bake for thirty minutes, stirring every ten minutes, until toasted. Allow to cool on wax paper and store in an airtight container.

Aunt Ruby’s Party Mix


Every year when I was growing up, my Aunt Ruby would make up baskets of goodies for all her extended family and I eagerly anticipated her visit each year to dig into all the delicious treats she slaved away in her kitchen to make.  Sometimes there would be cookies, sometimes her homemade summer sausage, and always  her famous party mix.

I never knew until recently why it was so much better than other party mixes until I finally asked her for the recipe and discovered her secret ingredient.  Life Cereal!!  It looks so much like Chex Cereal that it’s camouflaged and you don’t really notice it visually, but it gives a hint of sweetness to every bite that makes this buttery, salty concoction utterly addictive.

If you already have a favorite party mix recipe, try substituting in some Life cereal for part of the Chex–I think you’ll like it!

Aunt Ruby’s Party Mix

I’ve scaled down and altered the recipe a bit since her original recipe makes enough to feed an army.  If you’d like to feed an army, click here for her original recipe.

Printable recipe
Printable recipe with picture

In a large roaster pan, mix together:
4 cups Rice Chex Cereal
4 cups Corn Chex Cereal
4 cups Wheat Chex Cereal
4 cups Life cereal
3 cups pretzel sticks
2 cups Spanish peanuts (roasted & salted)

In a saucepan, melt together:
2 sticks (1 cup) butter or margarine
¼ cup Worcestershire sauce
1 tablespoon seasoned salt
2 teaspoons garlic powder
1 teaspoon onion powder

Pour the mixture over the cereal and mix well. Bake uncovered in preheated oven at 250 degrees for 2 hours, stirring every 15 minutes. Spread on waxed paper to cool and store in an airtight container or Ziploc bags.