RSS Feed

Operaton Postcard for Beverly, and Dark Chocolate-Raspberry Cupcake Bites


Remember The Postcard Project?  Yeah, I sort of lost steam on it and forgot about it myself!

However, I received this message from my friend, Margaret, that revived my sense of purpose.

***********

I have a cousin that has a postcard project going for a lady that will be 90 years old her birthday. I think this would be a great project for the postcard group. She will let us know how many postcards she received and I will let you know. Thanks whether yes or no.

This is how I received it:

“You are invited to join Operation Postcard! The Regency Manor, where my Mother-in-law, Mrs. Beverly Harris, lives, has a map of the US and they mark each state a postcard comes from. Sadly, the map is not very full. Will you help me flood the map and Beverly’s mailbox with a postcard from your state? Please have your postcard sent by March 15, 2012. Also send an email to me (purpleisland@sio.midco.net) so I can keep a running total of postcards being sent.

Mrs Beverly Harris
3425 Dakota Ave, #32
South Sioux City NE 68776

Thank you in advance for helping in this very special display of appreciation for one great lady…Charlene Harris”

************

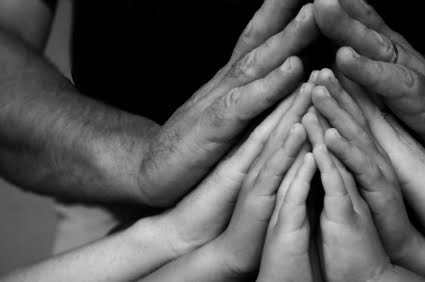
OK, this makes me SUPER excited.  I’m so on this!  I already sent my postcard, and I told Margaret I’d spread the word  I hope many you will join me and that Mrs. Beverly will be able to mark every single state (and maybe even a few overseas countries) on that map!  I can just imagine her anticipation as the cards roll in each day and seeing her marking the map and later making a scrapbook with the cards.  I confirmed her address is a nursing home through a Google search, so just imagine the happiness all these cards will bring to this lady on her 90th birthday!

If you would like to get a card to her, please do it as soon as you can (by March 15th) and email her daughter, Charlene, at the email address she gave above.  Also, please put a return address label at the top if you don’t send a postcard featuring your state, that way she will know where it came from.  Thank you so much!

In the spirit of celebration, I thought I’d share this cupcake bite creation I made using leftovers from a Dark Chocolate Raspberry Cake (the cake domes I sliced off, plus the leftover frosting).  If you like the combination of chocolate and raspberries, you’re going to love these!

To make them, just use the original cupcake bites instructions, using the cake and frosting recipe from my Dark Chocolate Raspberry Cake.  Or, if you make the cake and want to use the leftovers for these, here is the “recipe.”

Dark Chocolate-Raspberry Cupcake Bites

Printable recipe
Printable recipe with picture

Cake domes leftover from a Dark Chocolate Cake
1-2 tablespoons leftover Raspberry Buttercream
4 ounces (2 rectangles) chocolate candy coating/almond bark
4 ounces pink candy melts
sprinkles for decoration

Crumble up the cake tops in a bowl with your hands, or in a food processor. Using your hands, mush in the frosting until well mixed. Roll the mixture into balls (I got ten but you might get more if you had really high domes on your cake) and place on a plate. Cover with plastic wrap and refrigerate for two hours or overnight.

Melt the chocolate candy coating according to package directions, being careful not to overheat it. Spoon the melted coating into miniature peanut butter cup molds, filling about 1/3 full. As you fill each one, press a cake ball down into the chocolate until it comes up the sides to the top of the mold. Once the mold is full or you’ve done all the balls, place in the freezer while you melt the pink candy coating.

Melt the pink candy coating according to package directions. Add a little oil or shortening if your chocolate becomes too thick (Wilton is especially prone to this). Pop the cupcake bites out of the mold onto foil or waxed paper. Pick up one at a time by the chocolate bottoms and dip upside down into the pink candy coating, making sure it covers the whole cake ball. Gently shake off excess and set right-side-up on the foil/waxed paper. Immediately sprinkle with sprinkles and continue to dip and sprinkle until all cupcake bites are finished. Serve at room temperature. You don’t need to refrigerate unless they will be outside the fridge for more than three days.

Thankful Thursdays #65: Meet Baby-my first thankful vlog!


My car is one of my top ten thanksgivings and although I hadn’t planned on expanding any of that list beyond the top five, I thought it would be fun to show you guys how many issues Baby has (I know, what an original car name, right?) and still manages to get her basic job done *almost* every day.

Baby takes me to and from work five days a week, takes me to the grocery store, post office, and library every week, takes us to and from Abilene to visit Den’s family every holiday, totes us and bretheren who don’t have vehicles of their own to church and Bible studies, gives my other baby, Jessie, so much joy when we let her ride in the back seat (especially if we’re going through the drive-thru, her favorite ride), allows me to whisk my Dad off to his doctor appointments and stop by his house each week to divvy up his medicines and pay the bills, takes me off to my own doctor appointments for that matter, to vet appointments (though I can tell you Jessie is NOT thankful for that), takes my nephew and I off on various and sundry adventures (though last time that resulted in us being stranded an hour away from home when she wouldn’t start!), and takes us on most of our stay-cations to places in the surrounding area.  She has pretty great gas mileage (*supposedly* 36 mpg highway, though I’m sure it’s not that good any more), which is why we take her everywhere instead of Den’s truck.  (The truck’s name is Henry.  He’s a Ford.  :))  She’s a survivor–takes a lickin’ and keeps on kickin’. She’s had a hard life, but she’s a determined car.  And I appreciate her so much!  She is a very necessary part of my life.

So here’s my video, presenting my car in all her abused glory with eye bags and wet hair.  You know I never have a problem keepin’ it real.  Enjoy!

In case you’re wondering, no, my car won’t start if I don’t push the unlock button at the same time.  It doesn’t even act like I turned the key unless I push the unlock button simultaneously.  And because I’ve been starting it this way for four years, the unlock button now sticks and I have to very gently press the lock button after the car starts (you can see me do this if you watch closely) so that it doesn’t start spazzing out and making unlocking and grinding noises.  Craziness!

Brown Sugar & Balsamic Glazed Pork Loin {Slow Cooker}


The crockpot is my cold-weather friend.  I turn it on before work, and come home to a delicious-smelling house and a hot dinner ready and waiting.  Usually I use it for soups & chili, but once in a while I get a little crazy and turn a big hunk of meat into something falling-apart tender and succulent.  This is one of those rare times, and of course the husband rejoiced.

I wish I could have gotten a picture of this as soon as we took it out of the crock, but due to the early sunset in winter, there was no light left to take a photo by.  So you get a picture of the leftovers, which were also delicious, but this doesn’t quite represent how beautiful the meat was after it finished cooking.  But I figure a photo taken of leftovers by daylight is better than a grainy, dark photo of perfect meat.

What makes this dish remarkable isn’t so much the tender, juicy pork (that always happens to meat in the crockpot, right?), but the sauce.  It reminds me of barbecue sauce, but it is more like barbecue sauce’s wealthy cousin that travels abroad 3 months out of the year and has great taste in hats.  Or something like that.

Anyway, the sauce is amazing.  The meat is amazing.  Together, well, duh, they are amazing.  Make it and feel the amazement in your own kitchen.

Brown Sugar & Balsamic Glazed Pork Loin

Printable recipe
Printable recipe with picture

1 (2 pound) boneless pork tenderloin (or regular pork loin)
1 teaspoon ground sage
1/2 teaspoon salt
1/4 teaspoon pepper
1 clove garlic, crushed
1/2 cup water

Glaze
1/2 cup brown sugar
1 tablespoon cornstarch
1/4 cup balsamic vinegar
1/2 cup water
2 tablespoons soy sauce

Combine sage, salt, pepper and garlic. Rub over roast. Place in slow cooker with 1/2 cup water. Cook on low for 6-8 hours. About 1 hour before roast is done, combine ingredients for glaze in small sauce pan. Heat and stir until mixture thickens. Brush roast with glaze 2 or 3 times during the last hour of cooking. Serve with remaining glaze on the side.

Recipe source: C & C Marriage Factory

Secret Recipe Club

White Wheat Bread


I’ve been posting a lot of soup recipes lately, so I figured a good bread recipe was in order.  After all, that’s why we make soup in the first place, right?  To go with our bread?

Dennis and I actually haven’t had any bread for the last 22 days, and won’t have any again for the next twelve.  We started the 17 Day Diet at the end of January, and this bread was the last thing I made as a temporary farewell to high-carbohydrate foods, knowing our mouths would not enjoy it for another month or so.  This diet cycles in 17-day increments and during the first two, there is no bread.  We are eating so good that I don’t miss it, but perhaps this spectacular recipe helped with the separation anxiety.  It was so delicious that recalling it makes me smile even a month later!  It also helps that I got the original recipe, which I adapted to the one I’m sharing here, from a friend (thank you, Tracy!), so it gives me the warm fuzzies all around.  You just can’t beat the combination of friendship and warm bread.

While this bread still does not beat out my number one favorite to date, Honey Oatmeal Bread, it is a very close second.  I was very impressed with how soft and tender the bread is, and the flavor, as with all homemade bread, is of course incredible.  It goes very well with soup, or just slathered with butter as a meal.  Not that I speak from experience or anything.

White Wheat Bread

To ensure success, make sure all your ingredients are at room temperature before you start. Cold will inhibit the yeast’s growth.  If you’re in a hurry, you can quickly bring the egg to room temperature by placing in a bowl of hot tap water for five minutes before cracking, and can warm the milk by zapping it in the microwave, stirring every 30 seconds until lukewarm.

Printable recipe
Printable recipe with picture

1 package (2 1/4 teaspoons) dry yeast
2 tablespoons sugar
1/2 cup warm water (105-115 degrees)
1 cup milk, room temperature
1/4 cup vegetable or canola oil
2 tablespoons honey
1 egg, beaten, room temperature
1 3/4 cup white whole wheat flour
1 teaspoon salt
2 1/4 – 2 3/4 cups all-purpose flour

Combine yeast, sugar, and water in a large bowl; let stand five minutes. Add milk, oil, honey & egg; stir well. Stir white whole wheat flour and salt into yeast mixture. Gradually stir in enough all-purpose flour to make a soft dough.

Turn dough out onto a floured surface & knead until smooth & elastic (about 8-10 minutes.) (Tracy says it will only take a few minutes to do this if you use a bread hook on your Kitchenaid.) Place in a well-greased bowl, turning to grease top. Cover and let rise in a warm place (85 degrees), free from drafts, for 1 hour or until doubled in bulk.

Punch dough down, and divide in half; shape each half into a loaf. Place in 2 greased 8 1/2 by 4 1/2 by 3 inch loaf pans (I used 9×5 which seemed to work well, but they’ll probably be higher with the smaller pans). Cover and let rise in a warm place (85 degrees), free from drafts, 45 minutes or until doubled in bulk. Bake at 350 degrees for 25 minutes or until loaves sound hollow when tapped. Remove from pans and cool on wire racks.

Makes 2 loaves.

Recipe source: adapted from a 1986 Southern Living Magazine, shared with my by Tracy R.

Thankful Thursday #64: hands


Hands.  Like many parts of our body, we take them for granted…but what would we do without them? Have you ever thought about how many times you use them a day?

I have been pondering this because Jessie bit my hand today, making it semi-useless, when I tried to take something from her forcefully that she didn’t want to give me, and her animal instincts kicked in.  I knew better, but I was mad.  Note to self: don’t get mad and scare your dog by yelling at her, then try to take something forcefully from her  possessive mouth–the combination of your anger and quick forward motion will make her animal instincts kick in and she will attack.  Duh.

So now I have a swollen and bruised hand that is painful to use.  I have it bandaged where her teeth punctured (that part isn’t too bad), and am thinking about how many times I’m going to have to change my bandages a day since I wash my hands often.  I’m thankful that it isn’t painful to type (after all, my job depends on that ability!), but it seems I can’t use it for anything else: grasping a knife, lifting, even using it to push up my sleeves.  I really miss my hand.

We often don’t consider our blessings until we don’t have them any more.  Thankfully this is an injury and not a permanent setback.  But it was enough to make  me consider something as “minor” as my hands and how useful they are, and how thankful I am to have both of mine.

God gave us an incredible ability to adapt to our situations as humans, and I know there are people without hands that learn to use their feet for everything…there are even artists who use their feet for painting!  But I bet they would tell you they wish they still had their hands.  Just like I wish I still had a working pancreas, though I’ve learned to manage my blood sugar well without it.

Today, let’s not wait until we’ve lost something to appreciate it.  What can you think of that you usually take for granted that you are thankful for today?

Atlantic Records doesn’t allow embedding of this video, but please watch it on Youtube (push play and a link will appear that you can click to do so)! It is powerful.

Creamy Chicken Tortilla Soup


I don’t think there is anything else to say.  Although this is the first chicken tortilla soup I’ve ever made, I’ve had many versions in restaurants and deli’s, and this is so much better than any of them.  If you couldn’t tell from the above exchange, I kinda get excited about food, and I’m pretty sure I moaned and squealed simultaneously when I took my first bite of this soup.  It is so bangin’ with flavor.  I just love it.

Now, I know my pictures aren’t portraying a creamy-type soup.  The day I made it, it looked super creamy like I had poured real cream into the soup, but then the leftovers betrayed me when I reheated them the next day for lunch and a photo, and it just looked like regular chicken tortilla soup.  Well, my pictures may be misleading, but I promise you this is one soup worth trying.

Creamy Chicken Tortilla Soup Recipe

Printable recipe
Printable recipe with picture

1 1/2 lbs. boneless skinless chicken breasts
1 (16 oz) carton chicken broth
1 (15 oz) can diced tomatoes (I used roasted)
1 (7 oz) can green chiles, or 2 (4 oz) cans
1 large onion, chopped
1 green pepper, seeded and chopped
1 tablespoon minced garlic
1 bay leaf
2 teaspoons chili powder
1 teaspoon dried oregano
1 teaspoon ground cumin
1 teaspoon salt
¼ teaspoon pepper
6 corn tortilla, cut into thin strips
1 (15.25 oz ) can corn, drained
½ cup plain Greek yogurt
1/4 cup cilantro, chopped
Optional toppings: Tortilla strips*, sour cream or Greek yogurt, cheddar cheese or avocado

Add chicken breasts, broth, tomatoes, green chiles, onion, green pepper, garlic, bay leaf, and spices to a large stock pot.  Bring to a boil, then reduce heat and simmer for 1 ½-2 hours, or until the chicken is very tender.  Add the tortillas during the last fifteen minutes of cooking.  Remove chicken to a cutting board and let rest ten minutes, or until it is cool enough to touch without burning your fingers.  If your tortillas haven’t completely broken down yet, continue simmering the soup while the chicken rests.  Shred or chop the chicken and return to the pot, along with the corn, Greek yogurt, and cilantro.  Heat through and serve with optional toppings.

Crockpot directions: Add everything but the Greek yogurt and cilantro to the crockpot and cook on high for 4 hours or low for 6 – 8 hours, until chicken is tender.  Shred chicken, return to crock.  Add yogurt and cilantro.  Cook an additional half hour.  Garnish as desired.

*Tortilla Strips:  Preheat oven to 400 degrees. Line a rimmed baking sheet with foil and pour 1-2 teaspoons of vegetable oil on it.  Cut 3 corn tortillas into strips, then put on the baking sheet and use your hands to toss them with the oil until coated.  Spread out, sprinkle with salt and pepper, and bake until crispy, about 10 minutes.I made my tortilla strips super thin and burnt most of them, so if yours are thin, keep an eye on them–they may only need five minutes.

Recipe source: Debbi Does Dinner Healthy

Mocha-Frosted Kahlua Brownies


Happy Valentine’s Day!  Do you have any special plans?  Dennis and I are finishing up the first cycle in the 17 Day Diet, so our celebration is going to include some very healthy and delicious food, and NO SUGAR.  I know, right?  Yes, this is still Veronica’s Cornucopia, and yes, I just said I will not be eating sugar on Valentine’s Day, nor serving it to my Valentine.  What is the world coming to? ;)

Well, despite us not partaking of any sugar (don’t worry, I do have a stevia-sweetened chocolate treat planned, so we will not be totally deprived), I do have a fabulous sugary treat to share today.  I know I’m sharing it a bit late for you to actually make it for the holiday, but I can’t just post another soup recipe–that is just way too unromantic, right?  Nope, it’s gotta be chocolate today.

I’ve been making this recipe for years, and in fact, have posted it on my blog before along with two other brownie recipes, but despite the number of times I’ve made it, I never had a decent picture until now.  (The brownies always disappeared before I got a chance to give them a photo shoot!)  And now that I do, I’m giving these brownies the individual post they deserve.

This is my own creation that I first started making when my sister opened her shop in 2008.  I used to sell my baked goods there in the beginning and these babies were best sellers.  It didn’t matter what other delicious treats I brought along with them, these always went first.  They are oh-so mocha-licious, over-the-top, decadent, rich treats.  Apparently you don’t even have to like coffee to love these, because my husband, who shivers at the mention of coffee, goes crazy for these brownies.  But if you do like coffee, and chocolate, and like them together, oh boy you gotta make these. Just do it.

Mocha-Frosted Kahlua Brownies

Printable recipe
Printable recipe with picture

Brownies
1 box fudge brownie mix
2 eggs
1 stick (1/2 cup) butter, melted
1/4 cup Kahlua (I make my own with this recipe)

Frosting
2 tablespoons Kahlua
1 tablespoon instant coffee crystals
1 cup semi-sweet chocolate chips
2 sticks (1 cup) butter, softened

Ganache
1/4 cup heavy cream
2 ounces semisweet chocolate chips

Make the brownies: mix up everything, spread in a 9×13 pan (grease the bottom only) and bake at 350 for however long the box says. Don’t overbake unless you like dry brownies. Cool COMPLETELY before frosting.

Make the frosting: Microwave the Kahlua for 30 seconds or until boiling (I use a glass 1-cup measuring cup and fill it 1/2 way to the 1/4 cup line). Stir in the instant coffee until dissolved, and place in the freezer to cool. Melt the chocolate in the microwave for 1 minute, stir and then give it another 30 seconds, stirring again. It should be melted but if not, continue this cycle in 30 second intervals.  Be careful not to overheat it.  Once smooth, set aside to cool. Cream the butter then beat in the cooled chocolate. Last, add the coffee mixture and beat it until everything is incorporated, scraping down sides of bowl. Spread over the cooled brownies.

Make the ganache: place the chocolate and heavy cream in a small microwave-safe bowl. Heat for 1 minute at 50% power and stir. The mixture should turn dark and shiny but you will probably need to return the bowl to the microwave for another 5-10 seconds or more to get it fully melted together. Be careful not to overheat, just warm it enough to get the chocolate and cream to emulsify completely.  If your mixture is warm to the touch, allow to cool to room temperature and then drizzle over the top of the brownies before cutting and serving.

Classic Chili


First of all, I apologize to those of you who have me in a reader.  I’ve started updated my posts from 2009 because the photos went missing from most of them, and I’m afraid I’ll be junking up your readers with all these old “new” posts for the next week or so.  Thank you for bearing with me.

Second, remember that snow I mentioned last week? Well, it didn’t stick but it’s snowing like cuh-razy as I type this on Sunday night.  And it’s sticking!  We took a long walk in the middle of it and Jessie was in HEAVEN.  Snow walks are her absolute favorite.  She’s definitely got some husky in her blood.  Thank goodness she’s past her “pulling” phase where she’d pretend Dennis was her sled and try to drag him by the leash! lol

Anyway, I’m hoping it’s arctic where you live too, not because I wish you ill, but if there is one good thing about cold weather days, it’s the hot and delicious foods you can fill them with.  Like this classic chili.  I grew up eating plain beans and cornbread every winter and now I don’t feel right unless I make chili or beans and cornbread at least once every winter.  I’ve made many recipes, and never the same one twice, but I wanted to track down a recipe that had a classic flavor that would please kids and adults alike (for family gatherings) and that I could rely on as my go-to recipe.  I knew that Mel would probably have one for me (she has a whole collection of best recipes and she’s never let me down), and I was right!  I knew when I found her momma’s chili recipe this would probably be the one I was looking for.

We all have our different preferences when it comes to chili.  I love a lot of veggies–bring on the celery, tomatoes, onion, green pepper (and red, yellow, and orange pepper, for that matter) and lots of beans.  I do like some ground beef and spiciness, but it’s not essential.  But I think this is a chili that anyone would like, which is exactly what I was looking for.  I do believe this is my favorite chili now, even without an over-abundance of veg!  So delicious.

The original recipe doesn’t have any veggies save the onions in it, but I’m a big Wendy’s chili fan, so I went ahead and added some celery and green pepper to mine to give it a similar feel.  Though I thought the taste was excellent with them in, I’m sure it’s just as excellent without so leave them out if veggies in chili isn’t your thing.  I also adapted the recipe for the crockpot (less liquid so it doesn’t get too runny), but if you want the stovetop directions you can get them from Mel’s site here.

Oh, and by the way, guess what I did with the leftovers?  I added some more cans of stuff to bulk up the amount (canned chili, salsa-style roasted tomatoes) and stirred in some chopped all-beef hot dogs, then sent it with Dennis to the family Christmas party along with shredded cheddar cheese to garnish it.  I didn’t get to attend due to my work schedule, but Dennis brought home an empty crock so I guess the “chili dog chili” went over well! :)

Classic Chili

Printable recipe
Printable recipe with picture

2 medium onions, diced
2 teaspoons salt
2 to 2 1/2 pounds ground beef
1 green pepper, seeded and chopped
3 stalks celery, chopped
3 large cans (29 ounces each) pinto beans, drained
46 oz. (one large can) tomato juice
1 cup ketchup
2 bay leaves
3/4 teaspoon garlic salt
1/2 teaspoon pepper
1 tablespoon chili powder
1/4 teaspoon cayenne pepper
2 teaspoons cumin
1 1/2 tablespoons brown sugar

Brown the hamburger and onion in a large skillet with the salt. Drain grease.  Add to a large 6-quart crockpot, then stir in the remaining ingredients until well combined.  Cook on low for 6-8 hours, or on high for 3-4.

Recipe source: adapted from Mel’s Kitchen Cafe

Thankful Thursdays #63: Friends part 2, Memories

Posted on

https://i0.wp.com/partneryahoo.photobucket.com/albums/ff120/girly-girl-graphics/friend_quotes/0085-03-02-2009.png

I hid behind the refrigerator with my friends at a neighbor’s house, waiting to scare the neighbor’s Mom, who was coming through the door.  Unable to hold in my giggles, I ruined it by drawing the others to giggles and soon I was laughing so hard that I peed my pants, causing the others to laugh even harder while the Mom stared at us in bewilderment.

My third grade crush insulted me in front of the whole class, but I held in my tears until it was recess time. My friends surrounded me and hid me from view, ready and willing with hugs that soon mended my broken little heart.

My best friend and I stayed up late, playing MASH, and giggling.  We were so afraid of anyone finding out our secret desires of who we wanted to marry that we tore each paper up after it was filled, and flushed them down the toilet.

It was our first middle school dance and we were so excited.  I met my friends at the dance and not long after I arrived, wearing my tiny mother’s dress that was way too adult for me, I proceeded to rip the seam up the back almost to my butt while doing the running man (as a joke).  My friends stayed around me in a circle the whole night so no one would see.

It was the night before a big test.  I met my best friend at her house and we quizzed one another relentlessly and every time I missed a question, she thought of a way to help me remember the answer.

We sat on the kitchen floor of a friend’s house in a circle, eating cookies and telling each other funny stories.  “OK, don’t make me laugh,” I warned them.  “I’m going to get up because I have to pee.  Don’t. Make. Me. Laugh.”  As soon as I stood up, one burst into giggles and the rest followed suit.  I crossed my legs as tight as I could while I squealed with laughter, but it was no use.  I peed all over the floor and my friend’s Dad came running just in time to witness the glorious event.

Swimming at El Dorado Lake, the wind caught my inner tube and, wanting to show off to the surrounding boys, I quickly took off after the float.  Not realizing how far I might have to swim, I started to panic as I reached the halfway point, trying to float on my back to avoid drowning as I sputtered and gasped for air.  Suddenly, my best friend was beside me and gave me her float before swimming after the runaway float.  She probably saved my life!

We walked in the procession to pomp and circumstance, eager, excited, and sad.  Would this be the end of our friendship?  Would our separate journeys as adults divide us?  What did the future hold?

It was my big day, and I’d just gotten married.  I hugged person after person who went through the reception line, and I kept looking to see where my best friend was.  She waited until the very last to join the line and when she hugged me, she burst into tears.  “What’s wrong?” I cried.  “I just feel like, you’re leaving me behind.  That you’ve found a new best friend.”  “No, we’ll always be friends,” I promised.

We were painting addresses on curbs to make some extra money, and my best friend and I came across a freshly paved square of sidewalk.  Looking at each other with juvenile orneriness dancing in our eyes, we conspired together and wrote on it: “Let me out! I’m underneath this square of pavement!” before jumping in the car and taking off in a fit of girlish giggles.

We got a job together at the same place and sometimes I’d find a note underneath my windshield wiper after work that would make me bust out in laughter.

Scloomp, scloomp, scloomp. You've officially been scloomptified!

She brought me to Christ, is my long distance pen pal, makes recipes she finds on my blog and uploads pictures and pimps me out on Facebook, which always makes me smile.

We walked to the park with her kids and my other bestie, and when the latter joined the children in playing on the playground, we gave in and joined her, realizing how fun it is to let loose and not let the expectations of adulthood inhibit us.

We take vacations and weekend retreats together.  We call and text each other with good and bad news.  We mail each other packages and letters, share our favorite music by sending CDs.  We email frequently.  We buy things impulsively that reminds us of one another.  We rejoice in each others’ triumphs, and console each other when tragedy strikes.  Through the years, I can say that I made it through them joyfully because of my friends.  Friendship is one of God’s greatest blessings to us because when we call on Him for comfort, it seems like that is how it is delivered, through a smile, kind words, a hug from a friend.

And then there are my online friends, who are just as important to me as my real-life face-to-face friends.  Our connections vary in depth, but every one is a blessing to me, bringing me joy daily, and comfort in times of distress.  Some I confide in, baring my soul to them, including some readers who I know through no other medium than my blog.  Some have become so close to me that I do consider them real-life friends, even if I’ve never seen their face other than in pictures.  You know who you are. :)

Thank God for my friends.  You are my “quiet angels,” and I dedicate this song to you.

“Friendship is unnecessary, like philosophy, like art… It has no survival value; rather it is one of those things that give value to survival.” C.S. Lewis

Chunky Chicken Soup

Posted on

It was snowing here in Kansas yesterday, and what better way to chase away the chill than with a big bowl of soup?  This is from The Pioneer Woman‘s recipe collection, and it is fantastic.  Although I adore noodles in my chicken soup, the chicken and vegetables are the stars here and I found that I didn’t even miss the noodles.  This soup is so delicious and flavorful, the health factor was an afterthought, but realizing how healthy it is makes it a win-win in my book.  Happy mouth, happy body.

Chunky Chicken Soup

Printable recipe
Printable recipe with picture

1 whole chicken
2 (32 oz) cartons chicken broth
1 whole bay leaf
2 large onions, chopped
8 ribs of celery, trimmed & chopped
8 carrots, peeled and chopped
5 parsnips, peeled and chopped
Freshly ground black pepper, for serving

Place chicken in large stock pot and pour broth over it. Add the bay leaf and chopped vegetables. Bring to a boil, then reduce heat and simmer for 1 ½ to 2 hours, or until meat is cooked through. Remove chicken to a cutting board and allow to cool until you can touch it without burning your fingers, about ten minutes. Pull the chicken from the bone, discarding the skin, and shred or chop the meat before returning it to the pot. Taste and add salt if desired. Serve hot with freshly ground black pepper over the top.

Recipe source: adapted from The Pioneer Woman