RSS Feed

Tag Archives: recipe

Healthy Slow Cooker Meat Sauce


Dennis and I have been eating out a lot now that I work through the dinner hour.  I finally got fed up with the unhealthy food and the weight gain we’re both experiencing, and decided to cook up enough real homemade food on my days off to last us for the week.  This meat sauce was the first thing I threw together, and Dennis was in heaven!

https://i0.wp.com/a4.l3-images.myspacecdn.com/images02/106/e4b697be95db4cacb0b570413a915d69/l.jpg

This is an old picture from 2009 but I had to include it. Dennis eats everything with chopsticks-he's obsessed!

I’m not completely back on the healthy bandwagon, but this meal is a good start. The sauce is hearty, flavorful & robust, and very low in fat. I chose to sweeten the sauce mainly with carrots, and you may find this balances the acidity of the tomatoes enough for your taste, but I decided to add some agave nectar to mine to sweeten it a little more. You could also try upping the carrots to 2 cups.

Serve this over whole wheat pasta along with a salad and you’ve got a nutritious, delicious meal!

Healthy Slow Cooker Meat Sauce

Printable recipe
Printable recipe with picture

1 pound bison, venison, or lean ground beef
2 links mild Italian turkey sausage, casings removed
1 onion, chopped
4 cloves garlic, minced
3 (14.5 ounce) cans fire-roasted diced tomatoes
1 ½ cups finely shredded carrots (about 4 medium carrots)
2 (8 ounce) cans tomato paste
2 tablespoons agave nectar or sugar
1 tablespoon oregano
1 tablespoon basil
1 tablespoon garlic salt
3 bay leaves
1 teaspoon garlic powder
¼ teaspoon red pepper flakes
¼ teaspoon fresh ground black pepper
Salt to taste

In a large skillet, cook the meat and onions until the meat is brown and the onions are tender. Add the minced garlic and cook another minute. Do not drain unless you used meat with a higher fat content. If you used the suggested meat, you will have a little broth in the pan with only a tiny amount of fat, which I like to leave for flavor.

Meanwhile, add the undrained tomatoes and carrots to a 4-quart (or larger) slow-cooker and puree using an immersion blender (if you don’t have an immersion blender, do this with your regular blender). Stir in the tomato paste, agave nectar, oregano, basil, garlic salt, bay leaves, garlic powder, red pepper flakes, and pepper. Stir in the meat mixture and cover.

Cook on high for 5-6 hours, or low for 10-12 hours, stirring caramelized sides back into the sauce. When complete, stir well, fishing out the bay leaves, and add salt to taste. Serve on top of your favorite pasta.

Recipe source: inspired by The Cooking Photographer

Garlic Chicken & Bacon Spaghetti Squash Alfredo


I made this recipe in the spring and thought it would be nice to share in the fall when it was starting to get chilly.  Not so chilly that you are ready to dig into the really heavy foods, but are just starting to think about it.  That day has come a lot sooner than I expected!  Does it seem like an early fall is coming on in your neck of the woods as well?

If so, here’s a fantastic meal that seems pretty hearty and is totally comforting while still managing to be quite healthy and diet-friendly.  Debbi, the creator of this recipe, calculated it as only about 200 calories per serving (1/8th of the recipe) so even if you ate half of the whole casserole (which would be quite a feat!), you’d probably still be eating less calories than a restaurant alfredo dish would have, and it’s so much healthier!

I thought this dish was absolutely positively scrumptious and although it takes some time to prepare because you have to pre-roast the spaghetti squash, it’s very simple.  I eat a lot of spaghetti squash, but this is only one of two dishes I’ve ever eaten it in with such gusto.  I don’t even like alfredo sauce, especially jarred, and I L-O-V-E-D this meal.  I really felt like I was indulging because meals this delicious usually have a ton of fat and calories.  Not true in this case–it really is like having your cake and eating it too!

Garlic Chicken and Bacon Spaghetti Squash Alfredo

Printable recipe
Printable recipe with picture

1 large spaghetti squash, about 2 1/2 lbs.
1 (15 oz.) jar Classico Garlic Alfredo Sauce
8 oz. mozzarella cheese, shredded
9 oz. chicken, cooked & chopped
6 slices turkey bacon
1 onion, sliced
Salt and pepper

Split spaghetti squash in half lengthwise and scoop out the seeds. Line a baking sheet with foil and spray with cooking oil. Place the squash face-down on the sheet and roast in oven at 375 for about 45 min – 1 hour or until tender when poked with a fork on the underside.  Let cool until you can handle the squash without burning your hands, and scrape the squash out with a fork into a 9 x 13 pan sprayed with cooking spray. Leave the oven on.

While the squash is cooling enough to handle, cook bacon until crispy and remove to a plate to cool.  Grill onions in the small amount of bacon grease in pan, using additional oil or cooking spray if needed. If you want your onions to get crispy dark edges, let them sit for a minute or two before stirring each time. Season with salt and pepper and set aside.  Crumble the cooled bacon.

Spread alfredo sauce over the spaghetti squash in the pan, sprinkle on half the cheese, top with chopped chicken, bacon and sauteed onions, then top with remaining cheese.  Bake, uncovered, for about 25 minutes until heated through and cheese is melted.

Recipe source: Debbi Does Dinner Healthy

Miracle Pan Release


I bake a lot of cakes.  It’s kind of my thing.  I even have a T-shirt that says, “Real Girls Eat Cake.”  Because I want people to know that the reason I eat so much cake is that I’m real, and not because I have a problem.  Although I may not be fooling anyone but myself with that shirt.

Anyway, because of all the cake-baking happening in my kitchen, I usually also have a can of Baker’s Joy or a bottle of Wilton’s Cake Release in my pantry because they make such an easy one-step job of greasing and flouring my cake pans, which nearly every cake requires.  With a push of a spray nozzle or a swirl of a pastry brush, my pans are covered in seconds and there is never a pile of flour laying around my trashcan.

However, I can be kind of a tightwad, so when my friend, Suzie, sent me the link for a miraculous recipe to make my own “Cake Release”-type product, I was overjoyed.  And let me tell you, it works SO much better than Baker’s Joy.  And just as good as Wilton’s product at a fraction of the price.  I’ve never had a cake slide out so easily, except when using Wilton’s Cake Release!  It is very shelf-stable and easy to make, so I encourage you to whip up a batch to keep on hand for your own baking projects.

Miracle Pan Release

Printable recipe
Printable recipe with picture

1/2 cup vegetable shortening
1/2 cup vegetable oil
1/2 cup all-purpose flour

Whisk thoroughly until everything is incorporated and smooth. Store in airtight container at room temperature. To use, dip a pastry brush or impeccably clean fingers into the mixture and spread a thin layer over the bottom and sides of pan(s) for any recipe that calls for “greasing and flouring” your pans.

*Note: you can make any size batch you’d like, just make sure all amounts of each ingredient are equal to each other.

Recipe source: Apron of Grace

Amish Friendship Creamed Cornbread

Posted on

I don’t enjoy eating hot, hearty meals in the summer.  It makes me feel icky.  And yet I’ve been eating them like crazy.  Enchiladas, chicken noodles, meatloaf and creamed corn, chicken and rice, pot roast.  Today?  Pinto beans and cornbread. All foods I associate with cold winter months, and that have no business being in my belly this time of year.

OK, so I have some excuses.  The enchiladas?  I had all the ingredients without even planning for it.  The chicken noodles, meatloaf, chicken and rice, and pot roast I made all in a single day with Teri because she was teaching me to cook more homestyle-type foods.  So that’s a pretty good excuse.  And today, with the winter beans and cornbread? Four words.

AMISH FRIENDSHIP BREAD STARTER.

(Click here if you want to make your own starter.  But you might want to read the rest of this blog first.  As a warning.)

It’s taking over my life.  Sparking creative neurons in my brain and making me want to bake things with it that I’d rather not eat this time of year.  But I just couldn’t resist the idea of turning this round of starter into cornbread, despite having no desire to actually eat it.  (Until I baked it of course, and then I couldn’t stop eating it!) I was inspired by the Miller-family’s creamed corn to incorporate the same ingredients into this recipe, which made the most moist cornbread I’ve ever had.  It almost melts in your mouth!

Debbie left a comment yesterday on the creamed corn recipe that made me LOL: “Oh sure, stick a brick of cream cheese and a whole stick of butter on it and you could make your shoes taste awesome!!”  Can’t argue with that, or with what the magic of excessive cream cheese and butter do to this cornbread.  There is not a dry crumb to be found on this bread.  It is so moist, it’s almost a cross between cornbread and corn pudding.  The starter has enough sugar to give it a very nice, sweet, Northern-cornbread feel, and I love the sharp and salty edge the cheddar on top imparts.

If you decide to make this during the winter months, particularly for a holiday gathering, I’m going to tell you right now to go ahead and shred the whole block of cheese and add the other half to the batter.  But if you’re making it right now…well, I hope you’ve at least packed away your swimsuit for good until next summer.  Just sayin’.

Amish Friendship Creamed Cornbread

Printable recipe
Printable recipe with picture

Remaining starter after you’ve divied up three bags for friends
1 (8 oz) package cream cheese, room temperature
1 stick butter, room temperature
2 eggs
1 ½ cups cornmeal (I used stone ground)
1 ½ teaspoons baking powder
½ teaspoon baking soda
½ teaspoons salt
1 can corn, drained
4 oz sharp cheddar cheese, shredded

Preheat oven to 350 degrees F. Spray a 9×13 dish with cooking oil and set aside.

Add the cream cheese and butter to the starter in a large bowl and beat until fairly smooth. Beat in eggs until combined. Stir in cornmeal, baking powder, baking soda, and salt just until combined. Stir in corn and mix until well combined. Spread into prepared dish and bake for 30 minutes or until tester inserted in center comes out clean. Sprinkle cheese on top and allow to cool for ten to fifteen minutes before serving. Cheese will melt while the cornbread cools.

Choco-Cherry Cheesecake Cookie Bars

Posted on

*Update 10/4/11: I won the editor’s choice award for these bars. Whee!

Editor's Choice: Choco-Cherry Cheesecake Cookie Bars

It’s Secret Recipe Club time again!  Members of the club are assigned a secret food blog each month and they can pick any recipe(s) they want to make from the blog.  On reveal day, nobody knows what other blogger was assigned their blog so I find it really fun.

This month I was super stoked to get assigned to Big Bear’s Wife, because Angie (who also happened to be my group’s host this month) has plenty of dessert recipes to choose from.  I think you all know by now that dessert is both my strength and my weakness!

I thought of Dennis when I saw these bars because he loves cherries and chocolate.  Chocolate-covered cherries (aka cherry cordials), black forest ice cream sundaes, cherry mudslides (layers of ice cream, cherry pie filling, and hot fudge), black forest cake.  He loves it all.  And I think I’ve mentioned my little cheesecake problem.  So yeah, I pretty much had to make these.  And then I pretty much had to get them out of the house as soon as possible so I didn’t eat the whole pan.  I managed to inhale two rows before he got them out the door to bring to work.  Doh!

I never buy packaged cookie dough (perhaps it’s hypocritical to be for cake mixes but against premade cookie dough-lol), so I adapted the recipe with homemade, but you can use a package of store-bought to save time.

Be sure to check out all the other secret recipe club blogs at the bottom of this post! ***Something is up with the linky thing so there may be no links at the bottom. While it is getting figured out, you can go to Big Bear’s Wife at the bottom of her post to see all the links.***

Choco-Cherry Cheesecake Cookie Bars

Printable recipe
Printable recipe with picture

Sugar Cookie layer:
½ cup (1 stick) butter, softened to cool room temperature
½ cup granulated sugar
3 tablespoons powdered sugar
1 large egg
½ teaspoon vanilla extract
¼ teaspoon almond extract
1 ½ cups all-purpose flour
1 teaspoon baking powder
¼ teaspoon salt

Filling & topping:
1 egg, separated
1 package (8 oz) cream cheese, softened
2 eggs
1 can (14 oz) sweetened condensed milk (not evaporated)
¼ teaspoon almond extract
3 drops red food color
1 jar (10 oz) maraschino cherries, finely chopped, drained on paper towels
1 (12 oz) bag semisweet chocolate chips (2 cups)
½ cup butter or margarine
½ cup whipping cream

Preheat oven to 350°F. In a large bowl, cream together the butter and sugars for 3-4 minutes, until the mixture is light and fluffy. Add the egg and extracts and mix until blended. Add half the flour, baking powder and salt. Mix. Add remaining flour and mix just until flour is incorporated and the dough is smooth and soft. Spread and press dough into the bottom of a 9”x13” baking dish. Bake 15 to 20 minutes or until light golden brown. Meanwhile, in small bowl, beat 1 egg white until frothy. Brush egg white over crust. Bake 3 minutes longer or until egg white is set.

Meanwhile, in large bowl, beat cream cheese with electric mixer on medium speed until smooth. Add egg yolk, 2 eggs, the condensed milk, almond extract and food color; beat until well blended. Stir in chopped cherries. Pour cherry mixture evenly over crust. Bake 20-25 minutes longer or until set. Cool completely, about 45 minutes.

Meanwhile, in medium saucepan, heat chocolate chips and butter over low heat, stirring frequently, until melted and smooth. Remove from heat. Cool 20 minutes. Stir whipping cream into chocolate mixture until well blended. Spread over cooled bars. Refrigerate about 30 minutes or until chocolate is set. For bars, cut into 8 rows by 6 rows. Store in refrigerator.

Recipe source: adapted from Big Bear’s Wife


Brown Sugar Peach Pie

Posted on

This was another of the pies Teri and I made during the great pie making adventure several weeks ago.  I’ll let the photos speak for themselves, but will add that yes, it’s every bit as good as it looks.  And the crust recipe makes a lot, so you will have some leftover for pie crust cookies.  Or do what my nephew and I did: cut animal shapes out of it, fill with jelly, press another shape on top and bake!

Brown Sugar Peach Pie

Printable recipe
Printable recipe with picture

Crust
2 2/3 cups flour
1/4 cup brown sugar, packed
1 teaspoon salt
1 teaspoon cinnamon
1 cup vegetable shortening, chilled in freezer
6-8 tablespoons ice cold water
1 egg, beaten, for brushing on the crust
1 teaspoon white sugar, for sprinkling on top

Filling
7-8 large fresh ripe peaches
1 tablespoon lemon juice
1/2 cup brown sugar, packed
3 tablespoons flour
1 teaspoon vanilla
3 teaspoons butter

In bowl of food processor, combine flour, brown sugar, salt, and cinnamon; pulse until combined.  Scoop out the shortening and add it to the flour mixture; pulse until mixture resembles large peas.  Add water, one tablespoon at a time, until the dough comes together.  Form into two discs, wrap in plastic wrap and refrigerate until ready to use.

Preheat oven to 425.   Peel*, pit and slice peaches; place in a large bowl.  Add lemon juice, brown sugar, flour, and vanilla, and mix well; set aside.  Roll out one pie dough disc on a floured counter and fit into pie plate.  Brush with egg to create a barrier between it and the filling and keep it from becoming soggy.  Pour peach mixture into crust and dot with butter. Roll out second disk for the top of pie and place on top. You can make a lattice design or just make slits in top crust. Brush with egg & sprinkle with sugar.

Bake for 10 minutes. Turn temperature down to 350 and bake approximately 40 minutes longer, or until filling is bubbling and crust is golden brown.  Halfway through, or when it starts browning on the edges, cover edges with aluminum foil or a pie shield to keep it from burning.

*To easily peel peaches, score an X into the bottoms, drop them 2-3 at a time into boiling water, let boil for 30 seconds – 1 minute, then remove and place in a bowl of ice water.  The skins will just slip off when you rub it away from the cut.

Recipe source: Foodin Life in New England

Owen with his butterfly pie crust cut out.

285531_10150332893336480_2129814_n

After the filled cookies were baked, I spread more jam on top instead of making a glaze because it was easier. :)

285083_10150332893431480_1999788_n

Caramel Banana Amish Friendship Bread

Posted on

Have you ever heard of Amish Friendship Bread?  This is how it works.  A friend gives you a bag of starter and instructions with a recipe, and over the next ten days you knead the bag and add more flour, sugar and milk to it.  On the tenth day, you take out three cups of the starter and put one cup each into three bags to give to friends along with instructions and recipes.  Then you add stuff to your leftover starter to bake two loaves of Amish Friendship Bread.  It’s the bread that never dies!

Back in 2000, I got burnt out on Amish Friendship Bread because it spread like the plague among my friends.  We couldn’t seem to get rid of it.  I finally had to stop accepting bags of the starter because I couldn’t bear to eat one more piece of the bread.  Eleven years later, I was finally ready to make another go of it, although the thought of it made me feel a little ill.  When I eat something until it makes me sick, I can hardly ever enjoy it again.

Thankfully, Amish Friendship Bread is proving to be an exception.  Perhaps because I flaunted the usual recipe instructions that comes with the starter, which always includes a pudding mix, or perhaps because I gave myself enough time to recover from the AFB overload, but my love for the bread has been fully restored.

This variation was inspired by the circumstances that inspire me most frequently in the kitchen: what I had on hand.  In this case, homemade caramel sauce and overripe bananas.  The bread is very moist, almost like a pound cake, with plenty of banana and caramel flavor.  OK, so mine was heavier on the banana flavor because I happened to add some banana extract to it, believing that 1 1/2 cups of caramel sauce in the recipe would surely overpower the flavor of banana, but the extract was completely unnecessary, so I omitted it from the recipe below.

I chose to dust my pans and the tops of the loaves with cinnamon sugar, which I thought was nice, but you could simply grease and flour your pan and maybe swirl some dulce de leche on top before baking.  Mmmmm.  Or serve with extra caramel sauce.  Double mmmm.  No wonder I kept a starter for myself from the batch I made!  I can’t wait to make this again.

Caramel-Banana Amish Friendship Bread

Printable recipe
Printable recipe with picture

¼ cup granulated sugar
1 tablespoon cinnamon
Remaining Friendship Bread starter
1 ½ cups caramel sauce, room temperature
1 1/3 cups mashed banana (3 medium)
3 eggs
1 teaspoon vanilla
2 cups flour
1 ½ teaspoons baking powder
½ teaspoon baking soda
½ teaspoon salt

Preheat oven to 325 degrees. Combine sugar and cinnamon in small bowl. Butter two loaf pans and dust with cinnamon sugar. Shake excess out onto a sheet of wax paper, or a large dish, and reserve extra for topping.

Put the friendship bread starter in a large bowl and beat in the caramel sauce, banana, eggs, and vanilla. Add the flour, baking powder, baking soda, and salt; stir until blended. Pour into prepared loaf pans and sprinkle remaining cinnamon sugar over the top. Bake for 1 hour or until toothpick inserted in center comes out clean.

Warm Chorizo & New Potato Salad

Posted on

This is a very simple summer-friendly recipe that is also, shockingly, husband-friendly. My poor man just does not get the amount of meat and potatoes he believes he requires, so when I served him this salad, he was so ecstatic to be eating meat and potatoes, that he didn’t even care there was a bed of lettuce underneath.

The meat and potato mixture is substantial and satisfying, but I really think you need the egg on top to complete the salad. Jenna said it was optional, but I’m not going to tell you that. You need the warm yolk to run out over the salad and serve as a dressing. It really pulls the whole thing together quite nicely.

Warm Chorizo & Potato Salad

Printable recipe
Printable recipe with picture

1.5 lbs new, red, or gold potatoes (I used gold)
Salt and pepper to taste
15 oz chorizo sausage
16 oz mixed salad greens or shredded lettuce
1 lemon
4 poached or over-easy eggs

Bring a pot of salted water to a boil. Meanwhile, cut the potatoes into bite-size chunks; add to the water and once boiling, reduce heat a bit and continue to boil until fork-tender, but not mushy. Meanwhile, start your sausage to cooking. Add to a skillet and cook over medium heat, breaking it and crumbling with a spatula as you go. Remove from heat if it gets done before your potatoes are ready. Once the potatoes are tender, drain and add to the sausage. Stir well and cook another minute or two. Season with salt and pepper. Divide salad greens among four plates, then divide sausage and potatoes on top of each. Top with a poached or fried egg and serve immediately.

Recipe source: slightly modified from Jenna’s Everything Blog

Beef and Cheese Enchiladas & How to shred lettuce or cabbage

Posted on

I often say that I was raised in a “health food only home,” but that isn’t completely true.  If it were, I would have starved to death before I ever started kindergarten.  The sad fact is that as a child, I hated everything healthy and loved everything else.  My Mom still has a note from me, written in third grade, in which I thanked her for being a wonderful Mommy but asked if we could please have pizza sometimes.  LOL!  Needless to say, I went hungry most nights and gorged myself when we were allowed to have spaghetti (this was junk food to us), cheese sandwiches, or Mom made enchiladas.  She didn’t do it often, but it was one of my favorite meals that she made. To this day, enchiladas are my favorite meal.

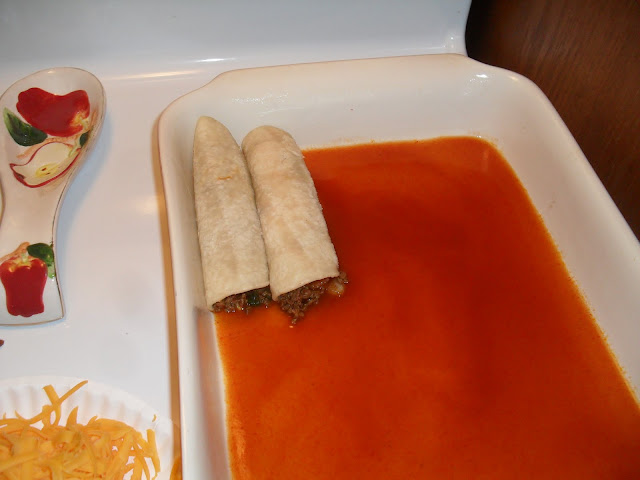
Mom made them very simply.  She made taco meat and rolled it up with cheddar cheese in corn tortillas.  She made red enchilada sauce from a mix and always stirred in a liberal amount of cilantro.  She dipped each tortilla in the hot sauce before filling them, which made it a very messy procedure.  She poured the leftover sauce over the top, topped with more cheese, and that was it.

I updated the recipe to simplify things, using canned sauce and stirring the cilantro into the beef mixture instead, and decided to top them with lettuce because my husband has always insisted this is the proper way to serve enchiladas.  I fought this for a long time, because Mom knows best and she never served hers with lettuce, but I finally saw the light.  Lettuce really freshens up this cheesy dish.  Even with the changes, these are still very much like my Mom’s enchiladas, which makes me happy.  Don’t we all love foods that remind us of our childhood homes?

Beef and Cheese Enchiladas

Printable recipe
Printable recipe with picture

1 lb. lean ground beef
1 medium onion, diced
2 tablespoons homemade taco seasoning (or a packet of store-bought)
½ cup cilantro
2 (8 oz) packages sharp cheddar cheese
16 corn tortillas
2 cans red enchilada sauce
½ head lettuce, shredded
Sour cream to garnish (optional)

Preheat oven to 350 degrees. Spray a large baking dish with cooking spray, then cover the bottom with a thin layer of enchilada sauce, about half a can. Set aside.

Cook beef and onion together in skillet over medium-high heat until meat is browned. Do not drain. Stir in taco seasoning and cook another minute, until liquid is absorbed. Remove from heat and stir in cilantro. Shred both packages of cheese and set half aside in the refrigerator. Dampen a paper towel and squeeze out water; wrap around a stack of five tortillas and microwave one minute or until hot and pliable. Place stack on a plate. Now you have everything you need to put the enchiladas together.

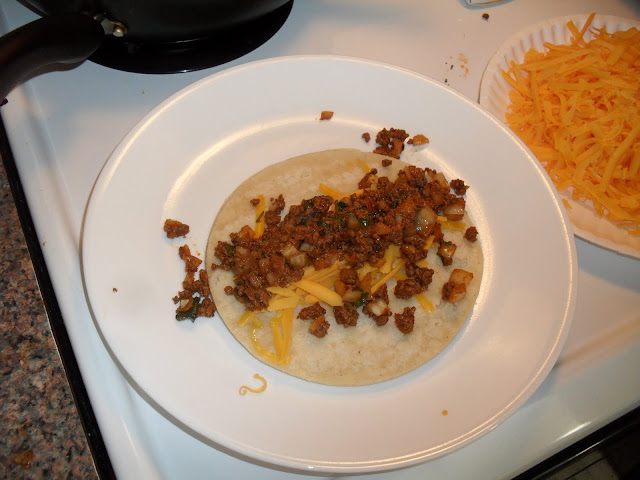
Place about two tablespoons of cheese down the middle of a tortilla, then top with 3 tablespoons of the beef mixture.  The temptation is always to overfill them, but you must resist.  Overfilled enchiladas means unsightly enchiladas that won’t close, and we want to keep things nice, tidy, and appealing.

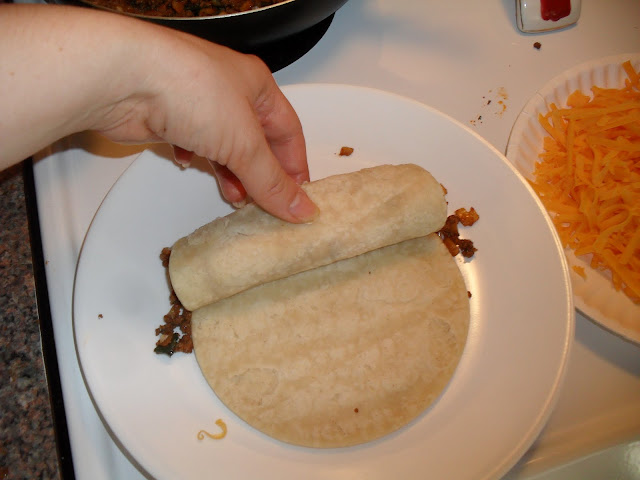
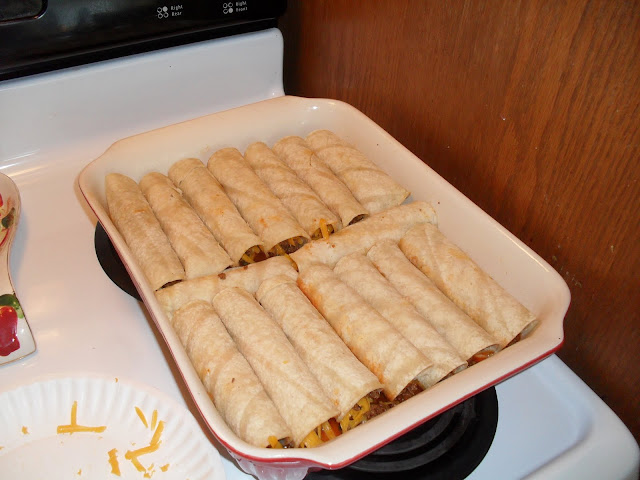
Roll tightly and place in prepared dish.

Repeat, heating fresh stacks of tortillas as necessary, until all ingredients are used and dish is full of enchiladas.  I always have to scooch my enchiladas to make them fit, but scooch they will. :)

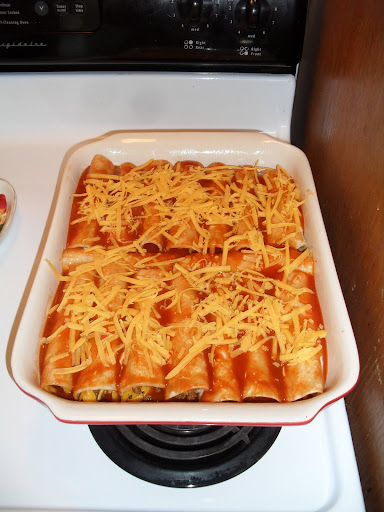
Pour remaining sauce over the top, then sprinkle on reserved cheese. I was short on cheese but if you follow the recipe, yours will be fairly smothered with cheese.  Which is proper.  This sad amount of cheese is sacrilege.

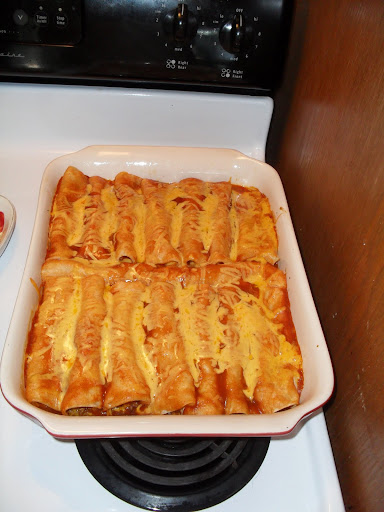
Cover with foil and bake 30 minutes. Remove foil and bake another 5-10 minutes, until cheese is melted.

After plating, sprinkle with lettuce and add sour cream, if desired.
Devour.

**********************************************

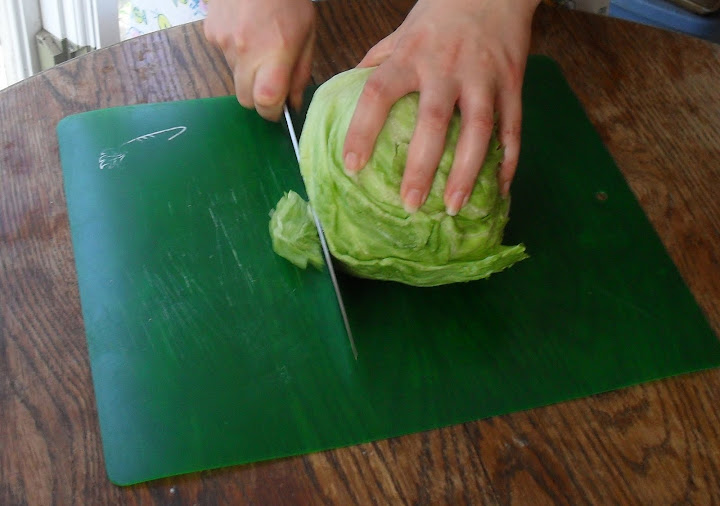
I’m sure many of you know how to shred lettuce, but I get very basic questions about cooking from time to time, including how to prep veggies, and thought I’d give a quick tutorial on this for those who don’t.  You can also use this method to shred cabbage for coleslaw.

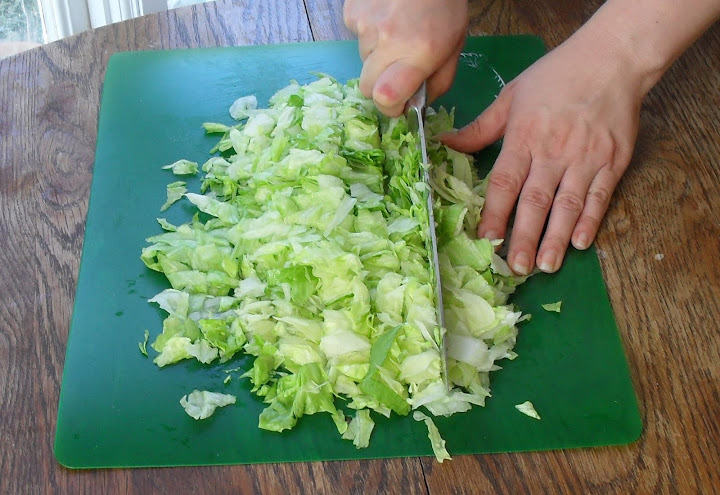
Cut thin slices of lettuce starting from the outside edge, working your way towards the center.  Do not go all the way to the core.

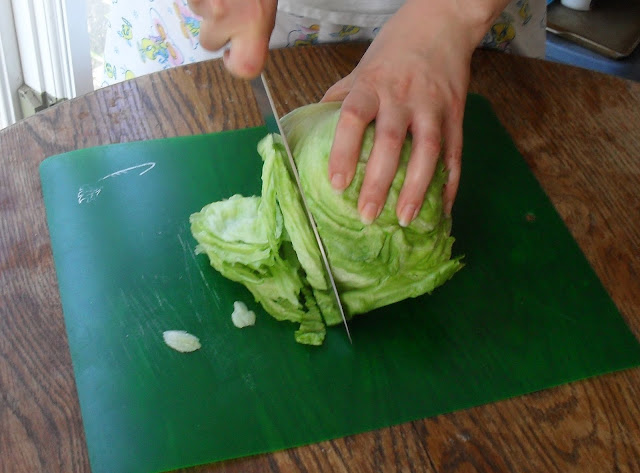
Once you are getting close, turn the lettuce and start from the opposite side.

It is very important that you wear your Tweety bird pajama shorts during this process.  Arg!  I changed my shirt so you guys wouldn’t know I wore my PJ’s all day (it was my day off and I spent it cleaning), and didn’t think that my shorts would show above the table.  On the plus side, I guess I’m taller than I thought I was. :)

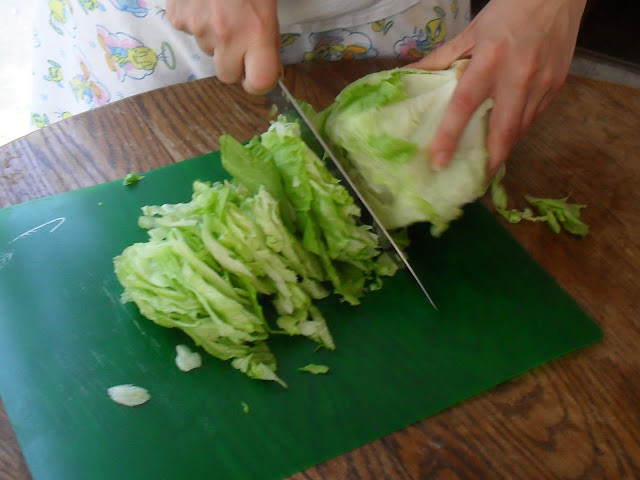
Continue until you have sliced away on all sides, then do the top.  Discard the core.

I didn’t cut very much off the core because I didn’t need a ton of lettuce.  Usually I would cut down a lot more.

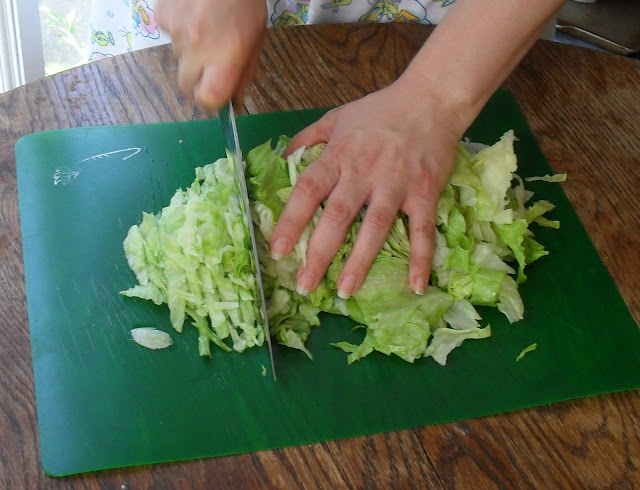
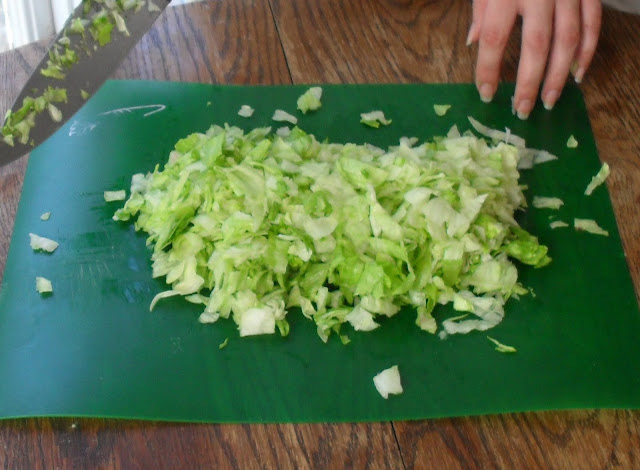
You should have a row of sliced lettuce.  Chop along the row in 1/2″ increments, or smaller.

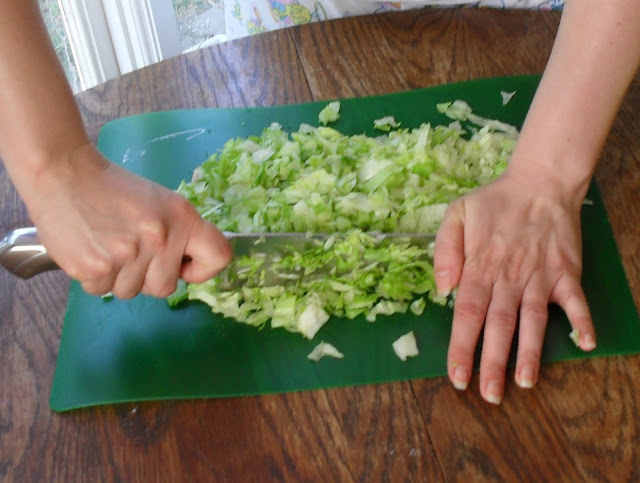
Turn your cutting board/sheet and repeat in the perpendicular direction, slicing every 1/2″ or so.

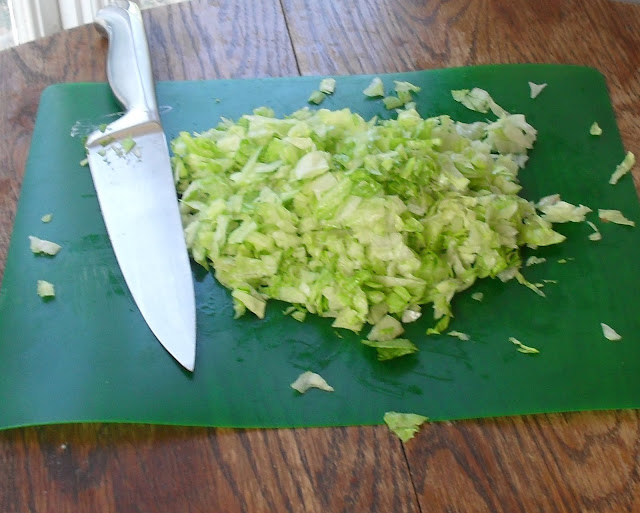
If you want your lettuce shredded even more finely, mix the lettuce with your hands, spread out in a line again, and repeat the cutting in both directions.

Voila!  Shredded lettuce.

Peppermint Pops

Posted on

I have several pops posts, and am ready to change things up a bit with a completely new type of pop filling that doesn’t involve cake at all.  As I mentioned in my cream cheese mints post, I got bored just cutting the dough into squares, and decided to combine it with chocolate in pop form.

This photo was taken by Jen in the break room at work after I handed her a bag of Peppermint Pops in exchange for some delicious chocolate sheet cake that she made.  I had to use it because it’s a much more attractive photo of the insides than the atrocity below.  Thanks, Jen!

The method for these is the same as making cake pops, just with a different filling.  Take a batch of cream cheese mints, roll it into balls, insert sticks, dip in chocolate.  And voila, peppermint pops!  It’s simple and even easier than cake pops because it doesn’t require any baking.  And the taste?  Well, if you like mint chocolate, you’re going to love these.  The mint center is soft and creamy and the dark chocolate coating is classic.  Think York peppermint patties with a softer, creamier center and slight tang.  Bonus: it’s on a stick! Wheeeeeeeee!

Peppermint Pops

Printable recipe
Printable recipe with picture

1 (8-oz) package cream cheese, room temperature
1/2 teaspoon peppermint extract
2 lbs. powdered sugar
2 (12 oz) bags semisweet chocolate chips
2 teaspoons oil or shortening
50 lollipop sticks
50 (3″x4″) clear treat bags (optional)
curling ribbon (optional)

Beat the cream cheese until creamy, then beat in the extract. Beat in the powdered sugar until well blended.  Depending on your mixer, you may have to use your hands to fully incorporate the sugar.  The mixture will be smooth and like a stiff dough.  Pinch off pieces of the mixture and roll into 1″ balls; place on rimmed baking sheet. You will get 40-50 balls. Cover and refrigerate two hours or overnight.

I had several mint projects going at once-classic party mints (left), peppermint pops, and peppermint patties (not pictured).

Gently melt chocolate with oil in double boiler or microwave. Dip ends of sticks in chocolate, then insert into the flat end (the end that has been resting on the baking sheet) of the mint balls. As you insert sticks, place the pops upside down on the baking sheet until all the balls have sticks. Refrigerate until chocolate around stick is set.

Now you can see evidence of the peppermint patties!  The square mints are long gone…in mah bellah.

Dip each pop in chocolate and gently shake off excess while holding upside down. Don’t tap, as you would a cake pop, because the mint balls are more prone to fall off the sticks. Insert pops right-side-up into a large foam block. Once all pops are dipped, place foam block in refrigerator and let sit until chocolate is hardened, about half an hour. If you would like to package them, slip a treat bag over each pop, and tie curling ribbon around the base.

After writing this, I just can’t resist saying, “on a steeeeek.”  :)