RSS Feed

Dulce de Leche

Posted on

My method of making dulce de leche is probably the most commonly used.  It is the cheater’s way of making it so go elsewhere if you want the stuff with real cream and vanilla bean seeds. This blog is for the non-food snobs. Me? I can be both but I prefer to cheat when it comes to dulce de leche.

Dulce de Leche

1. Remove the label from a can of sweetened condensed milk. (This is the only ingredient, by the way.) I use Eagle brand and recommend you do not buy generic. Generic cans have a tendency to let water in and make the dulce de leche form sugar crystals, which ruins it.

2. Place it in the bottom of a pot on its side and cover with water at least an inch above the top of the can.

3. Put it on the stove, put the lid on, and turn the burner to high. You will let it boil on high for 2 hours. Alternately, you can simmer it on medium for four hours but it turns out exactly the same so I do it on high to save time.

4. Check the water level every half hour or so and add more water to keep it above the top of the can. DO NOT LET THE WATER LINE FALL BENEATH THE TOP OF THE CAN, OR THE CAN COULD EXPLODE, RESULTING IN SERIOUS INJURY.

5. Have I scared you into never trying my method yet?

6. Once it has boiled for two hours, turn off the heat and carefully remove the can with tongs.

7. Allow to cool completely, then open and use as you wish. Some just wait until the can is warm but not hot before opening, but I’m not so brave. The fear of the can exploding in my face keeps me from attempting anything of the sort. I usually let it sit overnight or just stash it in the cupboard if I won’t be using it for a while. It has a long shelf life, even after cooking. I’m not sure how long, because the longest it’s ever lasted on my cupboard shelf is one month. I’d say you’ve got until the expiration date on the can, but I’m not making any promises.

I opened this can today, one month after making it–still perfect!

When it’s done, you’ll have some lovely thick, caramelly stuff like this. Dip apples in it, heat it and swirl it over ice cream, or use it in PMS Pie or put it on top of some banana slices in a pie crust with whipped cream over that to make a Banoffee Pie. Heaven!

Veronica’s tip: I use a stock pot and cook several at once so I have them on hand. Also, I recently found prepared dulce de leche in a can at the grocery store on the Mexican food aisle so if preparing dulce de leche yourself doesn’t appeal to you, check to see if your grocer sells them. The kind I found looks like this (and it it tastes almost as good as homemade):

Coconut Poke Cake

Posted on

I love recipes that start with a cake mix.  I guess that’s because I love cake, love the ease of using a cake mix, and love adding anything to it that makes it seem more home made.  This one really is over-the-top indulgent but sooooo good.  Dennis is taking the leftovers (1 slice…) to work tomorrow so I’m not tempted to polish it off!

I only had an 8 oz tub of Cool Whip on hand this time, that’s why the “frosting” layer is so thin.

Coconut Poke Cake

1 (18.25 oz.) package white cake mix
1 (14 oz.) can cream of coconut (NOT coconut milk)
1 (14 oz.) can sweetened condensed milk
1 (16 oz.) package frozen whipped topping, thawed
1 (8 oz.) package flaked coconut

Prepare and bake white cake mix in a 9″x13″ pan according to package directions.

While it is baking, toast the coconut in a skillet over medium heat, stirring frequently, until browned.  Set aside. Mix the cream of coconut and sweetened condensed milk together in a bowl and set aside.

Remove cake from oven and immediately (yes, while it’s still hot–very important!) poke holes all over the top of the cake.  Pour the cream of coconut mixture over the hot cake–it will soak in through the holes.

Let cake cool completely,then frost with the whipped topping and top with the toasted coconut. Keep cake refrigerated.

Veronica’s notes: The only cream of coconut I’ve found has enough to make two recipes.  Instead of saving half for later (I saved the last half for a couple months in the fridge–it apparently lasts forever), next time I will just omit the sweetened condensed milk and use all the cream of coconut. Cream of coconut is the same consistency & is just as sweet as sweetened condensed milk but has a coconut flavor, so I think this would have the same result except with a slightly more coconutty flavor!

Carrot, Dill & White Bean Salad

Posted on

You don’t have to sacrifice flavor in order to eat healthy.  This salad is a wonderful blend of flavors with a nice dose of heart-healthy fat & good-for-you fiber.  It is so good I could eat the entire recipe in one sitting, but since I’m on Weight Watchers, I measured out my portion like a good girl and managed to stick to it by eating fresh tomatoes (zero points!) on the side.  Next time I’ll serve it on a lettuce leaf or even a bed of lettuce to make it even prettier.

Carrot, Dill & White Bean Salad

adapted from 101 Cookbooks

Dressing
1/4 cup extra-virgin olive oil
1/4 cup fresh lemon juice
1/4 teaspoon fine grain salt
1/2 cup finely diced red onion

Salad
1 teaspoon vegetable oil for cooking
2 cups sliced carrots, cut 1/4-inch thick on deep bias
3 cups cooked white beans (I used 1 can Great Northern & 1 can Chickpeas, which equaled 2 3/4 cups)
scant 1/4 cup chopped fresh dill or 1 T dried
2 tablespoons packed brown sugar
1/3 cup sliced almonds, toasted (optional–I omitted to save calories)

Combine the olive oil, lemon juice, salt and onion in a small bowl. Stir and set aside.

In your largest skillet over medium high heat, toss the carrots with the oil. Let them cook in a single layer – they’ll give off a bit of water at first. Keep cooking, tossing gently every three or four minutes until the carrots are deeply browned. All told, about twelve minutes.

Add the beans and dill to the skillet and cook for a few more minutes, or until the beans are heated through.

Place the contents of the skillet in a large mixing bowl, sprinkle with the brown sugar and pour the lemon-olive oil mixture over the top. Toss gently. Let sit for ten minutes. Toss gently once again, taste and adjust with more salt or sugar or lemon juice if needed to balance the flavors. Serve warm or at room temperature and finish by sprinkling with the almonds just before serving.

Serves 6 – 8 as a side.

Veronica’s Notes: I didn’t have fresh dill and was only able to scrounge up 1 1/2 tsp of dried dill–it was still really good but I could tell it would have been even better with more dill so I left the original amount in the recipe.  Also, for the few of you actually interested, I calculated that this dish (without the almonds) is 9 points if divided into 4 main-dish servings, and 4 points if divided into 8 side-dish servings.

Secret Recipe Club

Soba Noodles in Peanut Sauce

Posted on

I checked out a cookbook from the library called You Won’t Believe It’s Vegan, by Lacey Sher and Gail Doherty, and I knew as soon as I saw the recipe for the “Soba Noodles in Peanut Sauce” that I had to try it. It seems that all my foodie friends are cooking up Asian fare lately and I don’t want to be the only one left in the dust, even if my past attempts have somewhat disappointing.

Well, I now have ONE successful Asian dish under my belt! I’m so proud, it’s ridiculous!

I asked my friend, Pia, what she would call this type of dish and she said “fusion” b/c the noodles are Japanese, but peanut sauce is usually used in Thai and Vietnamese cooking. Whatever it is, the combo here is delicious! I rounded out the meal with some bright vegetable spring rolls, which was kind of like eating a hand-held salad. How fun is that?!

Soba Noodles in Peanut Sauce 
Serves 4
 Savory & simple, these soba noodles are tossed in spicy peanut sauce and served with fresh carrots and scallions. Top with snow pea shoots and sesame seeds for a gourmet touch.

8 oz soba noodles
1/2 c Peanut Sauce (recipe follows)
1/4 c matchstick-cut carrots
1/4 c thinly sliced scallions
1 T toasted sesame oil
Pinch of sea salt
Sesame seeds, for garnish
Bean sprouts, for garnish

Fill a 6-quart stock pot with water and bring to a boil. Add the soba noodles to the boiling water and cook for 7 minutes. Drain the noodles into a colander and run under cool water until slightly cool to the touch. Using a medium-size bowl, toss together the noodles, peanut sauce, carrot, scallion, sesame oil, and a pinch of salt. Serve family style or divide into individual servings, garnished with sesame seeds and sprouts.

Peanut Sauce
Yield: 2 cups

1 c peanut butter
3 cloves garlic
3/4 c water
1/4 c plus 1 T tamari
Pinch of cayenne
1 (2.1 oz) package Eden Pickled Ginger with Shiso, with liquid, leaf removed*

Place all ingredients in a blender or food processor and blend well. Will keep for 4-5 days refrigerated.

*Variation: Instead of using pickled ginger, you can add 1 T of finely grated fresh ginger, 2 T of agave syrup, and 1 T of rice vinegar.

Veronica’s Notes: I cheated and used a prepared peanut sauce (House of Tsang Bangkok Padang Peanut Sauce), which was spicy and delicious. This made the recipe super easy and only took 10 minutes to prepare from start to finish. Also, I would imagine that sugar would work fine in place of the agave nectar (in the variation on the peanut sauce) if you don’t have any and don’t want to buy it.

1955 Almond Burnt Sugar Cake

Posted on


  I found a 1955 copy of Household magazine at my parents’ house recently, and the beauituful coconut cake gracing the cover compelled me to flip through the pages.  Once I found the section of cake recipes that the cover promised, I scanned them over and came to an “Almond Burnt Sugar Cake” that caught my interest because I remembered reading that the use of burnt sugar began during the Great Depression.   Indeed, this burnt sugar cake is a perfect example of the resourcefulness and creativity that was stimulated during those lean times.  Expensive ingredients were nearly unattainable and to keep things from getting redundant, housewives invented new ways to flavor desserts without actually having to purchase anything extra, such as burning sugar & turning it into a syrup before adding it to a cake.   Sadly, we have nearly forgotten this inexpsensive and tasty flavoring because many of us rely on mixes and fast fixes in this age of convenience & cheap substitutes.  Before stumbling upon this magazine in my Dad’s abundant collection of old books, I’d never in my life tasted burnt sugar and when I found the recipe for the burnt sugar cake, I knew it was high time I bring this tiny piece of history back to life.

The cake I made is in the lower left corner, and I obviously had more trouble with mine than whatever chef whipped that beauty up.

The funny thing about burnt sugar is that it doesn’t particularly smell or taste good in its syrup state, but once added to cake or turned into frosting, the slight bitterness subsides and what remains is a flavor very similar to caramel and brown sugar, but different enough that I wanted to keep tasting it to try to ascribe it some elusive adjective.  It was a pointless endeavor because burnt sugar is its own flavor & the only way to describe it is, “burnt sugar.”  And it is wonderful.   I have to admit that the cake as a whole was somewhat disappointing.  The velvety light batter, so silky I wanted to lie in a bed made with it, held such promise!  Alas, though I pulled off a series of time-learned stunts to ensure a glorious result, I still ended up with a cake that was slightly dry & crumbly, and with icing that was more like a grainy liquid caramel (seriously, half of it ran off the cake and I had to keep scraping off the growing pool around the bottom) than the fluffy/creamy stuff most cakes are frosted with.  Don’t get me wrong, the flavor was divine, but the textures weren’t.  If you are a baking pro, perhaps you can pull it off with greater success than I, but even if your result is similar to mine, I think you’ll appreciate the flavor & your loved ones most likely will not be complaining (mine aren’t).  In fact, it’s probably just the cake snob in me that finds anything wrong with this recipe at all.    As for me, I won’t be trying this recipe again (I plan to incorporate the burnt sugar syrup into another cake recipe to see if I can enhance the crumb) but I feel I should share the original with you, to fulfill my objective of keeping this piece of history alive.    *Pictures of ads from the magazine follow the recipe.

 My cake is pictured on a reproduction of the Depression-era Madrid-pattern crystal glass cake plate, a gift from my father.

Almond Burnt Sugar Cake

From Household Magazine, March 1955

3 cups sifted cake flour
1 ½ tsp baking powder
½ tsp baking soda
¾ tsp salt
¾ cup (1 ½ sticks) butter
1 ¼ cups sugar
3 eggs, unbeaten
1/3 cup burnt sugar syrup
1 tsp vanilla
1 cup buttermilk

Prepare burnt sugar syrup as directed in recipe below. Sift cake flour with baking  powder, soda and salt.  Cream butter until fluffy.  Add sugar gradually, beating until smooth.  Add eggs, one at a time, beating thoroughly after each addition.  Stir in 1/3 cup of burn sugar syrup and the vanilla, blending well.  Add sifted dry ingredients alternately with the buttermilk, stirring until smooth after each addition.  Pour into 2 oiled and wax-paper-lined, round 9-inch layer cake pans 1 ½ inches deep.  Bake in moderate oven (350 F) about 35 minutes. Remove to cooling rack and cool in pan about 10 minutes.  Remove from pans, peel off wax paper carefully, and complete cooling.  Frost with Burnt Sugar Frosting.

Burnt Sugar Syrup: Place 1 cup sugar in heavy saucepan.  Stir over medium heat until sugar melts and turns golden brown.  Lower heat and gradually add ½ cup boiling water.  Stir until sugar dissolves and syrup is slightly thickened.  Cool.  Blend in water, if necessary, to make 2/3 cup syrup.

Burnt Sugar Frosting

1/3 cup burnt sugar syrup
½ cup almonds, blanched and halved
2 ¼ cups sugar
¼ cup butter
½ tsp soda
¼ tsp salt
1 cup milk
1 tsp vanilla

Place 1/3 cup burnt sugar in 4-quart, heavy saucepan.  Add almonds and stir over low heat for one minute.  Remove almonds from syrup to cookie sheet, separating them with fork.  Add sugar, butter, soda, salt and milk to syrup in saucepan.  Cook to soft ball stage (234 F).  Cool.  Sir in vanilla.  Beat until creamy.  Spread on top and sides of layers.  If frosting gets too stiff, add few drops hot water.  Decorate with the caramel-coated almonds.

*Veronica’s notes: be sure ALL your cake ingredients are at room temperature (including the syrup).  When cooking the frosting, I recommend using a dutch oven or stock pot as the mixture boils up 2-3 times it’s uncooked volume.  It boiled over in my 3-quart saucepan and probably would in a 4-quart as well.

Household Magazine’s 10 Tips for Better Cakes

1. Begin with high quality ingredients.
2. Have all ingredients at room temperature.
3. Be sure baking temperature is correct.
4. Use the pan size specified in the recipe.
5. Measure ingredients exactly, using standard measuring cups and spoons.
6. Always sift flour before measuring.
7. When using an electric mixer, scrape sides of bowl and beaters often during mixing.
8. Use low speed to blend and medium speed for beating.
9.  Cool butter cakes in pan (upright) on cake rack for 10 minutes; then remove from pan.
10.  Before frosting, cool cake thoroughly and remove excess crumbs from surface.


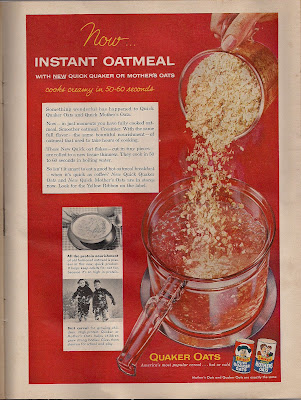
Now you know when instant oatmeal was invented–1955! Also, the picture is too small to see it (darned Picassa), but Quaker Oats used to also make “Mother’s Oats” which had a picture of a mother with her son on the canister, pictured to the right of the Quaker Oats container we still see today.


I wonder when Kellogg’s got the idea that putting the word CONSTIPATED in bold black letters at the top of their Allbran ad wasn’t the best way to appeal to someone’s appetite?


Karo makes it “extra good?”  Well, isn’t that swell!


This is one part of history I’ll happily leave behind!

Overripe Bananas

Posted on

Whenever I buy a bunch of bananas, I rarely get through half the bunch before they start turning brown.  If I’m not ready to make a loaf of banana bread or another banana concoction (smoothie, muffins, cupcakes, pancakes, pie), I pop the suckers in the freezer whole with the peel still on–no bagging, wrapping or sealing–and leave them there until I’m ready to use them. 

When you do this, the skin on the bananas will turn completely black and when you thaw them out, they will get extremely limp and will leak water so set them on a plate or in a bowl (I don’t use the water but you could stir it back into the bananas if you like).  You only have to peel a little and the insides will fall out like wet goop and you barely have to stir them to mash them.  It is quite unappetizing, but the flavor is wonderful!


To make a banana cake today, I just used three bananas I’ve had frozen (with no protection save their skins) for over six months and there was no freezer taste, just a very strong banana flavor due to me freezing them after letting their skins get super spotty.

Don’t be scared of over-ripe bananas!  Their powerful flavor might not appeal when eaten fresh, but once mixed into a smoothie or into some sort of baked good, it lends loads more banana taste than a fresh banana ever could.

Butterscotch-Toffee Chocolate Cake

Posted on

Kim, Krista, & Pillsbury inspired this recipe.  Kim posted a “Butterfinger Cake” recipe on her MySpace blogrecently, which reminded me of the cake my friend, Krista, made for her birthday last year (she used toffee instead, along with a different kind of cake).  Then I found a recipe on the side of my German Chocolate Cake mix that was basically Kim’s Butterfinger cake but with caramel instead of butterscotch.  I figured all these similar recipes was a sign that meant I was to make the cake and FAST.  So I did.

And it was good.

I will post the recipe I made up, then put the Pillsbury recipe below it since that one is probably better.  Guess it depends on what kind of flavors you prefer!  If you love butterscotch, you will love this cake.

Butterscotch-Toffee Chocolate Cake

1 German Chocolate cake mix (I used Pillsbury)
1 (20-oz) bottle butterscotch ice cream syrup (I used Smuckers)
1 8-oz container Cool Whip
1/2-3/4 of a bag Heath bits (or you can chop up several candy bars)
Chocolate ganache or chocolate fudge ice cream topping to drizzle on top
Reserve ½ cup of butterscotch syrup & set aside.

Prepare cake according to package directions in a 13×9 pan (my picture shows a small pan b/c I chose to make two small cakes so I could give one away).  Squirt 1/2 cup of the butterscotch syrup out and set aside.  As soon as the cake’s out of the oven, poke it all over with a fork and squirt what remains of the bottle of butterscotch syrup over the top, spreading with a spatula so it can absorb while the cake cools.

Fold the ½ cup reserved syrup into the cool whip and spread over the cake once it is COMPLETELY cooled.  Sprinkle Heath bits over the top and drizzle with ganache or fudge topping.  Keep refrigerated until serving.

*Veronica’s notes: the reason I left out the sweetened condensed milk is that I used syrup instead of the thick ice cream topping and figured it was thin enough to soak into the cake without adding the milk.  I would recommend using the thicker butterscotch topping in a jar & mixing it with sweetened condensed milk (like in the recipe below) b/c it only soaked in partially and there’s a thin layer of syrup resting on top of the cake still, a day later.  Of course, that could be b/c I poked it with a fork instead of making big unsightly holes with a wooden spoon as directed below, but I couldn’t bring myself to uglify the cake that way, even if it was going to be covered up.  I’m weird.  Either way, you’re probably better off following Pillsbury’s instructions vs. mine.  The cake is still REALLY good (so good my gut is about to burst from overeating it), but if you want all that gooey butterscotch really soaked in well, don’t follow my directions.

PILLSBURY® CHOCOLATE CARAMEL WOW

1 18.5 Pillsbury® German Chocolate Cake Mix
1 12-ounce can sweetened condensed milk
1 jar Smucker’s® Caramel Topping
1 8-ounce tub Cool Whip®
2 to 4 chopped Butterfinger® candy bars

Bake cake in 13×9-inch pan as directed.
Cool for 5 minutes.

Using the handle of a wooden spoon, poke holes in the cake.
In a small bowl, mix condensed milk and caramel topping, reserving 1/2 a cup.
Pour remaining caramel mixture over cake; cool completely.
Place whipped topping in medium bowl and fold in remaining caramel mixture.

Spread evenly over cake.
Sprinkle with chopped candy.
Cover loosely and refrigerate until served.
Store leftovers in refrigerator.

Egg White Chocolate Buttercream

Posted on

Rose Levy Beranbaum’s The Cake Bible is literally my cake bible.  It contains recipes for the only from-scratch cakes that ever turned out any good in my kitchen, and her buttercreams & fillings are all superb.  I have yet to try a recipe in it that has failed, not only because they are excellent, but because she is very specific in her directions and gives plenty of tips for beginners.

This chocolate egg white buttercream is one of my favorites because it’s relatively simple (believe me, she’s got some majorly complicated ones in that book) but extremely delicious.  I’d compare it to a light mousse.  It’s firm but airy and kind of dissolves on your tongue…sometimes it’s like I’m eating rich chocolate air…but it does have substance so that’s not exactly right.  How about I let Rose do the talking…

“This special version of chocolate buttercream is the color of rich milk chocolate and has a more assertive chocolate flavor than the traditional one made with egg yolks.  In fact, it is just as smooth and even easier and faster to prepare than Classic or Neoclassic Buttercream because a sugar syrup is not needed.

“This buttercream is airy yet, because of the whites’ structure, has more body than a buttercream made with all yolks.  It is an excellent texture and flavor for both chocolate butter cakes and chocolate genoise.”

Thanks Rose, that about sums it up.  Except I like it on any chocolate cake, any yellow cake, or white cake.  I just like it period.  It is NOT your typical frosting and I’ve found that frosting haters (the women in my family) usually enjoy this one, along with everyone else that is normal (frosting lovers).

Classic Egg White Chocolate Buttercream
Printable recipe

10 oz bittersweet chocolate (I always use semi-sweet chocolate chips)
2 cups (4 sticks) unsalted butter (must be room temperature)
4 large egg whites (must be room temperature)
1 cup granulated sugar

Melt the chocolate using a double boiler or in the microwave.  I use the microwave & stir every 15 seconds (after an initial 30 seconds).  This time I accidentally did 45 seconds initially and that caused enough heat for the chips to completely melt as I stirred them.  Do not overheat or the chocolate will seize up & you’ll have to start over.  Once melted, set aside to cool completely. (Update: do not wait until the chocolate has re-solidified, you just want there to be no heat left to the chocolate mixture, but it should still be liquid when you add it.)

Beat the butter until smooth & creamy & set aside. In another mixing bowl, beat the egg whites until soft peaks form when the beater is raised.  (Veronica’s note: if you’re using the same beaters you used to beat the butter, wash them thoroughly before using them on the egg whites or they won’t ever fluff up or get stiff. Fat is the enemy when it comes to beating egg whites!)  Gradually beat in the sugar until stiff peaks form when the beater is raised slowly.  Beat in the butter by the tablespoon.  If the mixture looks slightly curdled, increase the speed a little and beat until smooth before continuing to add more butter (In my experience, sometimes the curdled look won’t go away until all the butter has been added).  Add the melted and cooled chocolate all at once and beat until smooth and uniform in color.  Use immediately or place in an airtight bowl.  Rebeat to restore texture.

You can store it 3 days at room temp, 2 weeks refrigerated, or six months frozen.

Makes 4 3/4 Cups, enough to fill & frost a two layer cake

*Note : While it is necessary to cook egg yolks for a buttercream to prevent bacterial growth, raw egg whites are far less prone to this problem.
*Veronica’s note: I know people are seriously paranoid about raw eggs, but I’ve made this a lot and can promise you that no one has gotten sick off of it yet–even after more than three days at room temp.  I know, I live on the edge.

Recipe source: Rose Levy Beranbaum’s The Cake Bible

Bison

Posted on

Many of you know that I prefer bison to beef and thought you might be wondering why.  Here’s my answer, taken from http://www.bigbendbison.com/health.htm.

Health Benefits


TASTE
People are rapidly discovering the deliciously healthy taste of bison / buffalo. Buffalo meat tastes similar to fine beef, with just a slightly sweeter and richer flavor. Bison is naturally flavorful and tender and can be prepared much the same as beef. Publications ranging from Gourmet Magazine to the Old Farmers Almanac are heralding bison as the meat of the future.

VALUE
Bison falls into the gourmet or specialty meat category at your supermarket or meat market. Click here to find a local retailer. The value of buffalo is not what you pay, but what you get in return. Nutritionally you are getting more protein and nutrients with fewer calories and less fat. Buffalo is a dense meat that tends to satisfy you more while eating less.

HEALTH
Bison are handled as little as possible. They spend their lives on grass, much as they always have, with very little time in the feedlot. They are not subjected to questionable drugs, chemicals or hormones. The members of the NBA feel so strongly about this that they have a resolution opposing the use of these substances in the production of Bison for meat.

WE STAND BEHIND OUR PRODUCT
The members of the National Bison Association are proud to introduce Certified American Buffalo as a new seal that offers customers an extra degree of confidence in the quality of bison meat products. Every package containing the new Certified American Buffalo seal comes from producers who adhere to a USDA-audited program to assure that the products can be traced to the ranches of origin, and that animals are never given growth hormones or fed low-levels of antibiotics or animal byproducts.

NUTRITION
Research by Dr. M. Marchello at North Dakota State University has shown that the meat from Bison is a highly nutrient dense food because of the proportion of protein, fat, mineral, and fatty acids to its caloric value. Comparisons to other meat sources have also shown that Bison has a greater concentration of iron as well as some of the essential fatty acids necessary for human well being. Readers’ Digest magazine has even listed bison as one of the five foods women should eat because of the high iron content.

Read Dr. Marchello’s Study

Premium Natural Bison

With changing health needs, growing concern about fat and cholesterol combined with an aging population,

preventative maintenance has become a growing part of our health plans.  Food products that address these needs have seen and continue to see increased attention from consumers.  Among these food products, is a product very much North American, which meets the dietary needs of many.  The bison, once driven to the verge of extinction has slowly been making a comeback in prestigious restaurants and food service outlets all over North America.  Until now, supply has limited the availability of the product.  More and more consumers of fine food are finding the exquisite tenderness, sweet, and full bodied nature of bison to their taste.  In addition to the flavour profile that bison delivers, it is densely composed of nutritional elements as well as reduced fat and cholesterol. Discover why bison meat is becoming a leading culinary trend, treat yourself to the finest food available, treat yourself to bison.

Old-Fashioned Carrot Cake

Posted on

Dennis’ Grandma Joy turned 90 this month, and when I found out there was going to be a family celebration, I immediately volunteered to make the cake.  I jump at any opportunity to aid in a celebration, especially if baking is involved!

She requested carrot, and I was tempted to make The Best Carrot Cake, since it’s my favorite, but I opted to make a more old-fashioned cake because I thought Joy might appreciate a cake that brought back memories. This is my own recipe, adjusted from several I found in cookbooks.

*Update 9-22-09: I received many compliments on the cake at the party, but Grandma Joy recently told me that people at her Church are still talking about that cake and how good it was.  So please take their word for it and not my awful, hastily-taken picture’s representation!

Veronica’s Old-Fashioned Carrot Cake

Printable recipe

2 cups all-purpose flour
2 cups sugar
2 teaspoons baking powder
½ teaspoon baking soda
1 tablespoon cinnamon
4 eggs
2 ½ cups finely shredded carrots
¾ cup vegetable oil
½ teaspoon freshly grated ginger
½ cup crushed pineapple, well drained & juice reserved
1 cup raisins
1 cup chopped walnuts
Cream Cheese Icing (recipe follows)

Add enough water or rum to the reserved pineapple juice to equal 1 cup. If you already have a cup of juice, you can add as much rum as you want—you just want at least one cup of liquid. Heat to boiling, remove from heat, and stir the raisins into the hot liquid. Leave to soak.

Preheat oven to 350 degrees. Grease and flour two 8 or 9-inch round cake pans & set aside.

Stir dry ingredients together in a large bowl: flour, sugar, baking powder, baking soda & cinnamon.

Strain the liquid off of the raisins. Whisk eggs in a medium bowl & stir in remaining ingredients: oil, ginger, carrots, pineapple, raisins (but not the soaking liquid) & walnuts.

Stir the wet mixture into the dry and stir until combined. Divide the batter between the two round pans and bake for 25-35 minutes, or until a toothpick inserted in center comes out clean.

Cool completely on wire rack, then frost with cream cheese icing.

Cream Cheese Icing
1 cup (2 sticks) butter, softened
2 packages (8 oz. each) cream cheese, softened
8 cups (2 lbs.) sifted confectioners’ sugar
1 tsp. vanilla

Cream butter and cream cheese, then add the sugar and vanilla. Use milk or additional sugar to change the consistency to thinner or thicker as needed.  (Most people would use half this amount of sugar, which makes a more creamy frosting, but I make it thick for decorating.)

Makes: About 5 1/2 cups of icing.