RSS Feed

Announcing the Third Annual Postcard Project Cookie Swap

Posted on

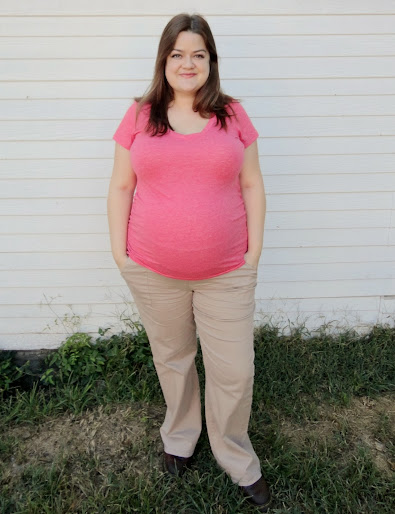
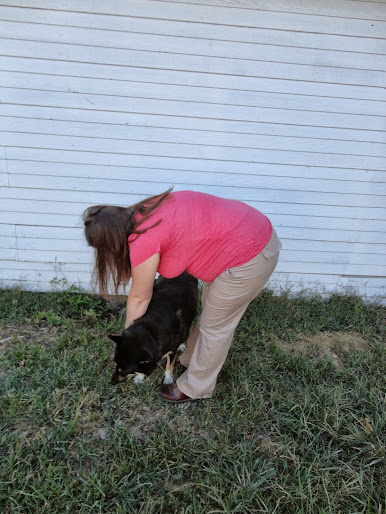
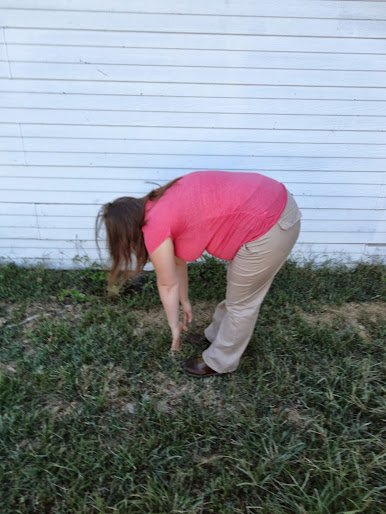
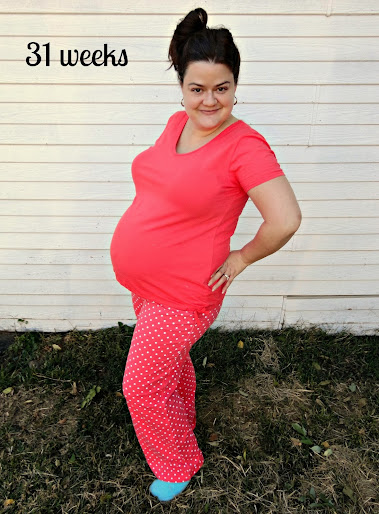
I just found out that your brain shrinks in the third trimester.  Like, literally.  I have a shrunken brain right now.  Now I’m not saying that’s why I’m going through with the this year’s cookie swap (I’m pretty sure my love of cookies and the Postal Service are the main culprits), but it might have a little to do with why I’d be hosting a swap during the time when I’m supposed to be giving birth.  Pregnant women be all crazy.  Lucky you! :)

 If you’ve never heard of the Postcard Project, it’s something I started in 2011 to inspire people to send more mail in order to support the US Postal Service and also spread love and cheer.  The Great Food Blogger Cookie Swap coincided with the beginnings of my project, and it was perfect timing for me to jump in and organize one for non-bloggers, thus creating even more packages being sent through the mail…and spreading joy and cheer! Both goals of the project attained, thanks to the ingenuity of the bloggers (Lindsay & Julie) who created the original, highly popular, Food Blogger Cookie Swap.

This will be our third year for the non-blogger swap and I’m really looking forward to it!  The first year we had 52 participants and we shipped 162 packages of cookies.  The following year we had 72 participants and shipped 216 packages of cookies while also raising $3,574 for children’s cancer through the Cookies for Kids Cancer cookie swap matching program.  We also enjoyed getting to know each other, and sharing photos of the cookies we mailed and received on our group’s Facebook page (you will receive a link to the private page when you sign up).

Here’s how the cookie swap works.  1) You sign up.  2)  You get matched to three other participants.  3) You bake cookies and mail a dozen to each of your matches, and in return you receive a dozen from each. 4) You gobble up the deliciousness (sharing not required).  Fun, right?

Ready to sign up?

If this is sounding as good to you as it does to me, you can click here to get all the nitty gritty and sign up.  Let’s get this cookie swap party started!

Note: I’ll be back tomorrow with my pregnancy update, I had to delay it in favor of cookies today.  :)

Sweet Buttermilk Cornbread

Posted on

I’m a newly established fan of sweet cornbread, and although I have some good recipes for sweet cornbread in my arsenal, I was lacking one that called for buttermilk.  I do have one with buttermilk for the hard-core Southern cornbread fans, but since I like sweet cornbread, I had to make one for the folks like me who’d like to have a sweet cornbread recipe that calls for buttermilk when that’s the only kind of milk they have on hand.

As was the case a last week when I made a big pot of spicy chili and wanted some sweet cornbread to go with it.  This is perhaps the most tender cornbread I’ve ever made, and when fresh from the oven, is so close to the texture of a cake.  The next day it’s more sturdy, but still the crumb is quite delicate compared to regular cornbread.  I loved it!  Balanced our spicy chili perfectly. :)

Sweet Buttermilk Cornbread

Printable recipe
Printable recipe with picture

1 cup (4 1/4 oz) all-purpose flour
1 cup (4 7/8 oz) cornmeal
2/3 cup (4 3/4 oz) granulated sugar
1/2 teaspoon baking soda
1/2 teaspoon salt
2 eggs
1 1/4 cups buttermilk
1/2 cup vegetable oil

Preheat oven to 350 degrees. Grease an 8×8 square pan (I used bacon grease) or a 10 inch cast iron skillet; set aside.

In a medium mixing bowl, whisk together flour, cornmeal, sugar, baking soda, and salt until combined. In a separate smaller mixing bowl, beat the eggs, then whisk in the buttermilk and oil. Pour into the cornmeal mixture and stir together until mostly blended but a few lumps remain. Let the batter rest for five minutes, then pour into prepared pan and bake for 30 minutes (start checking at 20 minutes for a cast iron skillet) or until a toothpick inserted in the center comes out clean. Serve warm with butter.

Recipe source: a marriage of my Favorite Cornbread and Grandmother’s Buttermilk Cornbread from allrecipes.com

Soup & chili weather is upon us, and cornbread is the perfect accompaniment!

Favorite Cornbread – my pictures don’t do this cornbread justice.  It is my favorite and probably will always be my favorite.

Homestead Cornbread – no flour, no sugar! Naturally gluten-free.

Lighter Northern Cornbread – great cornbread doesn’t have to cost the calorie bank an arm and a leg.


Thankful Thursday #116: birthday cake

Posted on

I was blessed to celebrate another birthday this week – my 33rd! So thankful to celebrate another birthday.  It may mean I’m older, but hopefully it means I’m wiser too.  And it also means I’ve almost lived long enough to see my life-long dream of having a baby fulfilled, so there was no sting at all affiliated with turning another year older.  :)

Every year, my only birthday plan is to eat a piece of cake.  If I can have a piece of cake on my birthday, I’m a happy girl.  I’ve only posted maybe 200 recipes for cake on my blog, so you might have noticed I’m a fan.  But my sister, Danielle, thought I needed an actual celebration, so she decided to throw a little pizza party for me at her shop.  Imagine my surprise to get gifts to boot!  I didn’t celebrate my birthday growing up, but I felt like a kid again, or what one probably feels like that celebrates their birthday. :)

Danielle is crackin’ me up how she is holding little Mariam to feed her! I was feeding her but needed a cake break, then I got schooled on how to feed babies, Danielle style. Dad, Dennis, Owen, and Margo’s middle daughter, Norah, are in the other room.

And I got my piece of cake too.  It’s a new tradition for Dennis to make my birthday cake because for me, that’s the ultimate gift and thankfully, while baking (or cooking) isn’t really his thing, he’s willing to do it for me every year that I ask (this year makes three cakes he’s made for me).  I picked out an easy one this year since he went a tad overboard last year (lol – see below the recipe).  He rocked it!

Coconut Orange Cake

Printable recipe
Printable recipe with picture

Cake:
1 (18.25 oz) Duncan Hines Orange Supreme cake mix, plus ingredients called for on box
1 cup (3.5 oz) flaked, sweetened coconut

Frosting:
1 (15 oz) can mandarin oranges, plus more for garnish if desired
1 (5.1 oz)large instant vanilla pudding mix (not prepared)
1 cup (3.5 oz) flaked, sweetened coconut
1 (8 oz) container frozen whipped topping, thawed

Preheat oven to 350F degrees. Brush Miracle Pan Release on the bottom and sides of two 8″ or 9″ cake pans, or grease and flour them; set aside.

Prepare the cake mix according to the package directions. After you’ve finished mixing the cake, stir in 1 cup of coconut. Bake according to cake mix instructions for the size of pans you’re using. After cooked through, remove from oven and turn out onto wire racks to cool completely.

Prepare frosting: In a large mixing bowl, mix the mandarin oranges with their juices with an electric mixer until crushed. Mix in the instant pudding mix and coconut and mix well. Fold in the whipped topping until combined.

Using a cake leveler or a long serrated knife, cut the tops off both of the cakes to get a flat surface. Take one of the cakes and place the cut side up on the cake plate. Add a layer of frosting. Place the 2nd layer cut side down on top of the frosting layer. Frost the top and sides of the cake. Garnish with mandarin orange slices if desired.  Chill in the fridge for several hours before serving.

Recipe source: Sweet Tea and Cornbread, as seen on Jam Hands

Love cake as much as I do?  Check out some of my past birthday cakes:

2010: Easy Coconut Layer Cake

2011: Chocolate Oblivion Truffle Torte

2012: Den’s Birthday Cake-tastrophy

31 weeks: I’m too sexy for my PJ’s

Posted on

I was taking my Sunday nap and just couldn’t get motivated to pretty myself up for the mandatory photos, so I rolled out of bed in my PJ’s and fluffy blue socks, and went straight into photo shoot mode so I could go back to bed as quickly as possible.  Sleep trumps trying to look good!

OK, so maybe I was trying to look even worse than I had to – lol.

So I got my first weird craving.  We’ve all heard of pickles and ice cream (does anyone ever really crave that combo?), but since I don’t really like ice cream and haven’t liked sweet stuff, period, for most of my pregnancy, that never happened.  But last week I suddenly had to have slices of cheddar cheese dipped in salsa.  It was so good! lol  OK, I guess another weird thing I really like is potato chunks boiled in salted water, then tossed with some vinegar (I discovered this from making American Potato Salad – the first and second time I made it I could hardly resist eating all the potato chunks before finishing the recipe).  Oh man.

Last week we toured Wesley’s birthing center, which is separate from the hospital, and also the birthing floor inside the hospital since I’m high risk and will likely be delivering there instead.  A slow anxiety has been growing in me about the upcoming D-day (delivery day, lol), but touring the place I will be delivering helped a lot.  Being familiar with my surroundings will help put me at ease more than going into this with everything being new.  They also do everything they can to accommodate your wishes during the birthing experience, and it was relieving to know that, despite not really knowing what I want yet.

Click to enlarge

Remember the cards we get from our “son” each month?  I don’t want to say who really sends them because she reads this blog and I’m playing along, but I just got month 7 and get choked up every time I read it.  Favorite so far, though others have made me cry too. :)  I just can’t believe after so many years of waiting, we only have two more months to go before we can hold our baby.  It’s getting so real now.  I’m excited, nervous, anxious, terrified.  I don’t want D-day to come too soon, but man it’s going to be awesome when it does. :)

Banana Bread Bars

Posted on

This year I only had a couple hours to prepare the food I was going to take to the Pig Roast so I didn’t have time to make some really razzlin’ dazzlin’ cupcakes like I had planned.  I went to the recipes I had saved on Pinterest and decided on these bars because they were pretty quick to make, could feed a crowd, and I had some overripe bananas ready to be used.  While many were disappointed I didn’t bring cake or cupcakes (I guess by now I’m kind of known for them), most of the pan was eaten by the time the meal was over (and there were tons of desserts) so apparently they weren’t too disappointed. :)

I got the best reaction from the teenage girls, for some reason – they flipped for them.  There were two short rows left when we were cleaning up after the meal, and I asked one of them if she wanted any more before I put them in my trunk and she took another three, saying she’d already eaten five.  I’d say that’s a pretty good endorsement.

The bars have a nice, moist crumb, and really good classic banana bread flavor, but the thing that makes them stand out is the browned butter icing.  I knew brown butter and bananas was a good match, and that’s why I worked so hard to perfect my recipe for Brown Butter Banana Bread.  But I think that the flavor comes through so much better when used in an icing on top of the bread.  Oh soooo delicious!

Banana Bread Bars

Printable recipe
Printable recipe with picture

Bars:
1 ½ cups (10 ½ oz) granulated sugar
1 cup (8 oz) sour cream
½ cup (4 oz / 1 stick) butter, softened
2 eggs
1 ¾ cups (15.25 oz, peeled) over-ripe bananas, mashed (about 3 or 4)
2 teaspoons vanilla extract
2 cups (8 ½ oz) all-purpose flour
1 teaspoon baking soda
¾ teaspoon salt
½ cup (2 oz) chopped walnuts or pecans (optional)

Frosting:
½ cup (4 oz / 1 stick) butter
4 cups (1 lb) powdered sugar
1 ½ teaspoons vanilla
about 3 tablespoons milk or half and half

Heat oven to 375F. Grease and flour a 10×15 jelly roll pan or line with parchment paper (for thicker bars use a 9×13 pan and bake longer). Beat first four ingredients until creamy. Blend in bananas and vanilla for one minute. Add dry ingredients and blend for one minute. Stir in nuts if desired and spread in pan. The pan will be very full but it’s OK, it won’t rise over the edge during baking. Bake 20 to 25 minutes until golden brown. Allow to cool on a wire rack while you make the frosting.

For the browned butter frosting: Heat butter in saucepan over medium heat past the melting point until it is boiling and a delicate brown, stirring constantly. The solids will separate and turn into chocolate brown flecks at the bottom of the pan.  Remove from the heat and immediately add the remaining ingredients. This should be thicker than a glaze and thinner than frosting. Using a spatula, smooth over the top of the Banana Bread Bars immediately. The frosting will be easier to spread once it’s on the warm bread.

If not serving the same day, let the pan sit out until cool and the frosting is dry to the touch, then cover with foil until ready to serve.  These will last several days at room temperature, but I found them even more delicious when served cold from the fridge!

Recipe source: The Girl Who Ate Everything

Nutty for banana bread? You might go ape for these…

Chocolate Chip Banana Bread {Low Fat, Low Sugar}

Buttermilk Banana Bread (my favoritest favorite!)

Virginia Street Banana Nut Bread (multiple blue ribbons winner!)

*You may have noticed I’ve started to include links to older recipes at the bottom of each recipe post.  Since I’ve built up quite a collection of recipes on my blog that many new readers have never seen, I’d been thinking about sharing recipes from my archives on a certain day each week like my girl Marsha.  But I’m having so much fun rehashing them this way, because I get to search my own archives like a treasure hunter and see if I can come up with three similar recipes to the one I’m posting.  So far I’ve been able to do it fairly easily, and I hope you guys enjoy these oldies along with the newbies! :)

Skillet Cheeseburger Macaroni

Posted on

You may be thinking I forgot it’s Thursday and I’m supposed to be thankful today, but you’re wrong!  I wrote this post  Tuesday night to be published Wednesday, but when I went to add the photos, I realized my memory card that had them on it was missing.  One minute it was in my laptop, the next it was just gone.  It took me almost twenty four hours to find it, and I’m super thankful I did, otherwise I couldn’t have shared this recipe, and many others, with you.  Hopefully you are thankful I found it too. :D

I came across this recipe in the latest Cook’s Country magazine and made it almost immediately since I had all the ingredients on hand.  It is a super simple and quick recipe to make, and unlike a lot of my fast & easy go-to dinners, does not include any boxed mixes or canned soups.  I don’t mind prepackaged stuff too much, but I do appreciate a quick & delicious dinner that is made from scratch!

I really enjoyed this, and Dennis liked it even more than I did.  I missed the sweetness from ketchup that is on a regular burger (this recipe has no added sweetener at all) so I actually dotted my plate with a little ketchup and enjoyed it much more that way.  Try it if you miss that hint of sweetness too.

Skillet Cheeseburger Macaroni

Printable recipe
Printable recipe with picture

1 lb. 85% lean ground beef (I used 93% lean)
1 cup finely chopped onion, divided
12 oz (3 cups) elbow macaroni
2 1/2 cups chicken broth
1 (15 oz) can tomato sauce
1 tablespoon Worcestershire sauce
1 tablespoon dry mustard
Salt and pepper
6 oz. chopped deli American cheese (I used cheddar)
1/2 cup chopped dill pickles

Cook beef and 1/2 cup of the onion in a large 12-inch nonstick skillet over medium-high heat until beef is no longer pink, about 7 minutes. Add macaroni, chicken broth, tomato sauce, Worcestershire, mustard, 1/2 teaspoon salt, and 1/4 teaspoon pepper and bring to a boil. Cover, reduce heat to low, and simmer, stirring occasionally, until macaroni is tender, 8-10 minutes. Stir in cheese, pickles, and remaining 1/2 cup onion. Season with salt and pepper to taste. Serve hot.

Recipe source: Cook’s Country October/November 2013

Hungry for noodles? You might enjoy these simple recipes…

Simple Goulash

Penne alla Boscaiola

Soba Noodles in Peanut Sauce {Vegan}

30 weeks: earning my stripes


30 weeks as of yesterday!  And I made it all this time without stretch marks.  Until yesterday.

I’ve been using Palmer’s products (this oil from 3-5 months, and this massage cream to the present) in hopes they would help my skin stretch and I could avoid the stretch marks that run in my family (both my Mom and sister got them really bad with their pregnancies).  All the books and websites I’ve seen say there’s no avoiding them if they’re in your genetics, but I was hoping to prove those mean old books and websites wrong.

About a month ago, I noticed the old stretch marks on my hips were turning red at the tips (they are vertical lines that extend upward toward my stomach) and I knew that these weak points were starting to stretch further as my tummy grew. I started putting extra lotion on those and they haven’t really done anything but stay red at the tips.  But yesterday I noticed several red spots on my lower tummy that don’t look like stretch marks yet, but I can tell they’re the tiny beginnings of them.  So it’s happening.  I still have 10 weeks to go so it could get really bad, especially considering how big I am already, and that Joshua is going to be doubling his weight during this time, and I’m trying to be OK with that.

A cousin shared this on Facebook before I got pregnant, and this is what I think of every time I think about the stretch marks coming my way.  I can’t forget how much I would have given at that time to have a baby that caused these marks, or “badges of honor,” as I’ve started to think of them.  Having known the pain of infertility and the fear that I would die without children, I should wear these marks with a happy heart, because not every woman who wants a baby gets one.  These marks are just another proof of the blessing, even if they’re not as appealing as the baby itself.  :)

It’s this thought, that Joshua is worth these “flaws,” that helps me most.  He really is worth it, and so much more.

You know it.

Thankful Thursday #115: living a romance novel


I married a good man.  I thank God every day for him because I know there are a lot of bad ones out there that I could have ended up with, but instead I got one of the best, IMHO.

I’ve dedicated many Thankful Thursdays to him, and have mentioned how he is perfect to me, even in his imperfection, like how he isn’t really a romantic, but I consider our love to be true romance.  Real.  It wouldn’t work in a romance novel, but it works for us.

Well, now that I’m pregnant, I’m seeing another side of this good man.  A side that would totally fit in with the men in romance novels!  And I’m so loving it.  Truthfully, it’s one of the reasons that I’m enjoying being pregnant so much and am in no rush for Joshua to come.

From the beginning, he has been doing more to make sure that I don’t overexert myself.  He watches out for me in a protective way that I find so sweet, but don’t dare tell him I think so for fear of messing it up. LOL!  I’m weird like that.  I thank him for his kindness, but don’t tell him how he’s turned into a romance-novel character because then he might freak out and stop being all sweet and concerned.  OK, probably not, but I’m not going to push it by embarrassing him.

So here’s my new romance-novel husband.  He rubs my feet and back whenever I ask.  If I say I’m hungry when we’re out, his #1 mission in life becomes feeding me.  And not because I get all crazy, I really don’t go into the “I NEED FOOD NOW!” mode, he’s just awesome like that.  He makes sure I don’t carry anything too heavy and strains himself to carry the bulk of the weight of furniture and other things we’ve moved, so that I don’t have to. The bigger my tummy gets, the nicer he gets.  Maybe he is just grateful that he doesn’t have to grow the baby? lol!

One night I went to Walmart late to refill our 5 gallon water jugs and he was so tired I told him to stay home and go to bed.  He didn’t like to, but he was just totally depleted and told me to wake him up when I got home so he could carry the jugs inside.  I told him not to be silly, that I could do it, but he insisted, saying he didn’t like me lifting the jugs even long enough to put them in the cart after refilling.  Because I knew he was worried, I accepted help from the sacker to bring my groceries to the car for the first time in my life.  I didn’t let him put the sacks of groceries in the trunk since I could do that myself, but told him my husband would appreciate if he put the water jugs in for me.  I was kind of proud of myself for stepping down where I knew I should, but wouldn’t have done it if I hadn’t known how much Dennis wanted me to do it.  I guess we make a good team. :)

So my good man is spoiling me even more than he did before and I don’t know how I’m going to recover once things are back to normal and he doesn’t have a reason to be all super concerned about me any more!  LOL!  But I’m sure at that point, our new baby will distract me enough to make the transition easier.  For now, I really am enjoying living in my own little romance novel, and am always, always grateful for my man.

Fully Loaded Vegetarian Salsa Chili


Though my tastes have changed during pregnancy, mainly from loving sweets, to abhorring them, to loving them again, one thing has remained pretty consistent. My zeal for soup. It started early on, I think before I even announced I was pregnant, and continues now, though not as strong. I enjoyed and made many soups during the heat of summer, which was previously against my food religion (ewwww, hot soup in summer?!), but pregnancy knows no restrictions on seasonal meals.  I enjoyed winter meals all summer!

I created this chili during one of the weeks a month or so back when we had to eat mainly out of our cupboards because we were stretching our budget to include things like baby bedding, a 3D sonogram and bigger bras.  :D  And what a blessing that necessity became, because we had some of our best meals during those weeks, including the Tilapia with Chile Lime Butter (I found like 2 tons of tilapia in our freezer).

It’s hard to believe I actually had all these ingredients on hand (even the peppers – I barely saved them before they went bad), but I’m so glad I did because the flavor was just incredible and I can’t imagine leaving any of them out.  I usually enjoy meat in my chili, but I never missed it here because it’s so hearty and flavorful.  I ate leftovers for lunch for several days and was sad to eat the last bowl.  It is so, so very good, and for the record I never once ate it with the additional toppings pictured.  I just didn’t need anything else – it was so good all on its own.

Fully Loaded Vegetarian Salsa Chili

Printable recipe
Printable recipe with picture

3 carrots, peeled and roughly chopped
3 cloves garlic, peeled
1 red pepper, seeded and diced
1 green pepper, seeded and diced
1 orange or yellow pepper, seeded and diced
2 stalks celery, chopped
1 large onion, diced
1 ½ cups salsa
1 (14.5 oz) can diced tomatoes (roasted, if you have them)
2 (15.5 oz) cans white beans (great Northern or navy) , drained and rinsed
1 (15.5 oz) can black beans, drained and rinsed
1 (15.5 oz) can kidney beans, drained and rinsed
1 (15.25 oz) can corn, drained
1 (10 oz) can diced tomatoes and green chiles (such as Rotel)
1 (8 oz) can tomato sauce
1 serrano pepper, finely chopped, seeds included (optional for a spicy kick)
2 tablespoons chili powder
2 tablespoons ground cumin
2 tablespoons real maple syrup
½ teaspoon rubbed sage
Salt to taste
1 bunch cilantro, leaves only, chopped
Optional garnishments: shredded cheddar, sour cream, limes for squeezing over individual bowls

Add the carrots and garlic to a food processor and process until very fine and wet, about a minute, stopping to scrape down the sides often. Add to a stock pot along with the remaining ingredients, except for the cilantro. Bring to a boil, reduce heat to medium, cover, and simmer for an hour or until veggies are tender, stirring occasionally. You can simmer as long as you want but I recommend at least an hour. Stir in the cilantro and serve hot with optional garnishments and cornbread (this chili is especially good with some sweet cornbread to contrast the heat if you made it hot like I did). I have several recipes to choose from below, if you’re looking for a new one to try.

Favorite Cornbread (this one is a sweet Northern cornbread and it is the best. ever.)
Lighter Northern Cornbread
Homestead Cornbread (a flourless, sugarless, Southern-style cornbread)
Amish Friendship Creamed Cornbread
Honey Whole Wheat Cornbread
Sweet Corn Muffins (two ingredients!)

A Veronica’s Cornucopia original, with help from Biz’s Beef & Bean Salsa Chili, and Suzie’s award-winning Next Day Chili.

Secret Recipe Club

Interested in other delicious meatless meals? You might enjoy…

Chickpea Salad Wraps {Mock Tuna Salad}

Corn, Avocado & Black Bean Tostadas

Bean Curry

29 weeks: PANTS!


Maybe I don’t look excited, having just woken from a two hour nap, but look at what I’m wearing. Those are long pants!  Long pants that I could wear without sweating because the weather is so much cooler. Hallelujah!

Before that two hour nap commenced, I felt Joshua’s hiccups for the first time.  It was a steady throb that was slower than my heartbeat, so I knew it wasn’t a pulsing artery, even though that’s what it reminded me of.  Dennis was lying beside me (we are always tired on Sundays since we have to get up earlier than usual, and have taken to napping in the afternoon) and I put his hand on the spot I where I felt it, and he felt it too.  Pretty neat!  I was waiting for it and thought maybe I just had a baby that didn’t get the hiccups, but it finally happened.

I officially feel pregnant.  I felt pregnant before, but I feel really pregnant now.  I look back on my second trimester pictures and miss that little manageable belly, so I should probably try to appreciate the bigger one I have now because I’ll be doing the same thing with these pictures in another month when I’m the size of a manatee. To see week-by-week progression photos, you can click here. My belly was so cute during the second trimester. What happened? LOL!

Someone else is happy with the cooler weather.  Little Miss Priss! (One of her many nicknames.)  She loves winter and hates summer so we’re totally on the same wavelength right now.  Anyway, since the weather is cooler, she joined in on the outdoor photos for the first time.  Usually if she dared to go into the hot backyard at all previously, she would immediately dig a hole in the shade to lay in (click the link to watch a short video of her doing just that – so cute).  I decided to try and touch my toes (cue laughter) and here she came to join in the fun.

I was laughing, telling Dennis this was as far as I could go, and Jessie was itching.  Her allergies will soon let up as the grass dies, which is another reason to be happy for fall.

Jessie’s serious face.

I tried to touch my toes for real this time, and Jessie sneaked in between my arms and my legs! So funny!

There you go.  No more toe touching, at least not in this position.  I can still cross my legs but that’s getting harder too.  I don’t care.  I don’t really like having a big belly in the way, not being able to reach things or bend over very well, the swollen feet and hands, heartburn, or achy back, but I want it all to last forever anyway.  I love being pregnant, and thank God that I am, remembering how much I would have given seven months ago to experience any of the awfulness that accompanies pregnancy so that ultimately I would have a child of my own.  Sometimes I can hardly believe this is really happening and that in less than three months, Lord willing, we’ll get to meet our baby.  Totally unreal.  Totally amazing. Praise the Lord for this blessing!

Isaiah 66:9