Banana Cupcakes with Cream Cheese Frosting The black walnuts are optional, but I really think they add a wonderful depth of flavor to the cakes.
Cake 1 yellow cake mix
1 cup mashed ripe bananas (about 2 large)
1 T sour cream
1/3 c oil
3 eggs
¾ c water
1 c black walnuts (optional)
Frosting
1 (8-oz) package cream cheese, softened
1 stick (1/2 c) unsalted butter, softened
2 lbs powdered sugar
Pinch salt
1 t vanilla
Milk, as necessary
Preheat oven to 350 degrees. Line 24 muffin cups with liners.
Put all the cake ingredients, except for the black walnuts, in a mixing bowl and beat on low until moistened, then beat on medium speed for 2 minutes. Stir in the black walnuts and fill muffin cups 2/3 full. Bake in preheated oven for 16-18 minutes, or until a toothpick inserted in the center of one comes out clean. Cool on wire rack in the pans for 10 minutes, then take out of the pans and cool completely on rack.
For frosting, beat the cream cheese and butter together until creamy. Beat in everything but the milk until well blended and fluffy. If it is too thick, you can add milk 1 teaspoon at a time until you get your desired consistency. Frost the cooled cupcakes.
This year I told Dennis and everyone else that the only thing I wanted for my birthday was a cake made by him. He took on the challenge enthusiastically. Keeping his skill level in mind (the first and last cake he baked was ten years ago), I came up with this cake for him to prepare which uses a box mix and Cool Whip for the frosting. Watch the video to see what we all thought of it!
Vodpod videos no longer available.
If the video doesn’t play for you, you can click here to watch it on Myspace.
Easy Coconut Layer Cake This cake has a filling that soaks in while it chills in the refrigerator for three days, making it super moist! Printable recipe Printable recipe with picture
Cake 1 white cake mix 1 cup coconut milk 1/3 cup vegetable ¼ cup water 4 egg whites
Filling ¾ cup sugar 1 cup sour cream ¼ cup coconut milk ½ cup shredded, sweetened coconut
Beat cake ingredients on low for two minutes, scraping sides of bowl. Pour into two 8 inch round cake pans that have been greased and floured and bake at 350 for 30 minutes. Remove from oven and sit pans on wire racks for ten minutes, then invert and allow to cool completely, about an hour.
Prepare filling while cake cools. Stir together sugar, sour cream, milk, and coconut in a bowl until well blended.
Cut each cake layer in half to make four layers total. Place one layer on a cake plate and spread ¼ of the filling (about ½ cup) over it. Repeat with additional layers, putting the last ¼ of the filling on the very top. (At this point, Dennis poked straws, cut to the height of the cake, through the layers to keep them from shifting). The filling will leak out between the layers so once you’ve got them all stacked and the filling in place, spread the extra that leaked out all around the edges of the layers so that the filling will keep the sides moist and soak in there as well.
Place in a cake box or container and refrigerate for 24 hours to let the filling soak in somewhat.. Frost with Cool whip on day two and on day three, sprinkle with the toasted coconut just prior to serving.
My friend Rhonda’s grandmother, who is a full blooded Czech, learned how to make kolaches from her own grandmother and she passed the recipe onto Rhonda, who in turn passed it on to me after I begged and pleaded for it. As you may already know, I was born in the wrong century and am constantly longing for a butter churn and a kitchen the size of our toilet that barely fits the wood burning stove. Since I unfortunately have a decent-sized kitchen and an electric oven, I try to keep history alive through the food I make by using old recipes. I don’t do it often, but I enjoy cooking and baking so much more when I’m using a recipe like this one.
Kolaches are a Czech dessert and are hard to describe. They’re not really like a doughnut, not really like a danish, definitely not a cookie. I guess the closest I can describe them is “pastry-ish.” The dough is sweet and buttery and they are quite delicious. I changed the method so that the preparation time was cut by half, but they didn’t seem to suffer for it. I still spoiled my dinner by gorging on them.
Kolaches
Adapted from Rhonda’s recipe that was passed down from her Grandmother
1 stick of unsalted butter
3/4 cup of milk
1 egg, room temperature
1/4 cup warm water
4+ cups of flour, divided
1/4 cup of granulated sugar
1 tsp. salt
2 ¼ tsp (1 packet) rapid acting yeast
Melt butter in a small saucepan. Add milk and heat just until warm—about 110 degrees. Set aside.
Beat egg in a medium bowl, then add a small amount of the warm milk & butter mixture to temper it, mixing it in. Add a little more and continue beating, adding all the rest of the liquid in a steady stream. Mix well, then stir in the water and set aside.
In a large bowl, combine 1 cup of the flour and the remaining ingredients. Whisk in the liquid mixture until smooth. Slowly add the remaining flour, stirring with a spoon until it gets too stiff and then using your hands. When you have enough flour, the dough should be soft, but stiff enough to clean the sides of bowl.
Knead dough in the bowl or on a lightly floured surface until smooth and elastic, about five minutes. Lightly spray three baking sheets with Pam. Pull off 1-ounce pieces of dough, about the size of a walnut, and roll into balls. Place a dozen on each cookie sheet in rows of 4×3, evenly spaced. Spray the tops with Pam and allow to rise in a warm place for one hour or until doubled in size.
While the balls are rising, prepare filling(s). Recipes follow.
Make a dent in each ball by pressing finger through to the cooking sheet. Leave about 1/2″ edge around outside of circle. Spoon filling into center. Brush sides of rolls with melted butter.
Bake at 400 degrees until golden brown, 10 to 15 minutes. Remove from baking sheet and cool on racks. Makes 3 dozen.
Apple Filling (my recipe)
1 t cornstarch
2 T sugar
2 T brown sugar
1 T butter
1 t vanilla, lemon juice, apple juice or water
1 ½ cups chopped apples
Cinnamon
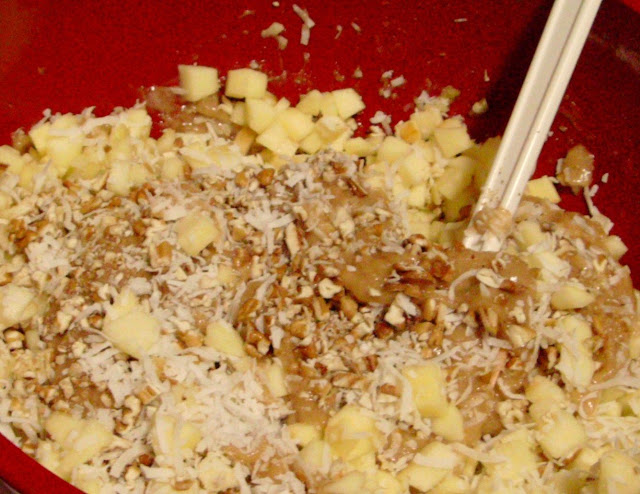
Stir the cornstarch & sugar together in a small bowl, then add the brown sugar and stir until well blended. Set aside. Melt the butter in a medium saucepan, then stir in the sugar mixture & liquid. Stir in the apples and cook over medium heat until apples are as tender as you desire and liquid is thick. Sprinkle on as much cinnamon as you wish and stir it in well. You can sprinkle your choice of nuts over the kolaches with this filling if you desire. I used pecans.
Sour Cream Coconut Filling (my recipe)
½ cup sweetened, shredded coconut
2 T sugar
2 T sour cream
Mash all ingredients together with a fork until well blended. Mixture should be thick and creamy.
Coconut Filling (Rhonda’s recipe)
3 T butter
½ cup coconut
½ cup brown sugar
Melt butter and stir in the coconut and brown sugar until well blended.
Other fillings–all from Rhonda:
Prune & Apricot Filling
1 cup dried prunes
1 cup dried apricots
1/2 cup granulated sugar
1/4 tsp. ground cinnamon
1 TBSP. lemon juice
Cover dried fruits with enough water to cover them. Cook on med. heat for about 20 to 30 minutes. Drain. Add remaining ingredients.
Poppy Seed Filling
1 cup ground poppy seed
1/4 cup butter
1/4 cup milk (probably whole)
1 & 1/2 tsp. lemon juice or 1/2 tsp. vanilla
1/4 tsp. cinnamon
1 & 1/2 cup granulated sugar
Blend all ingredients and simmer for 5 minutes. Let cool before filling kolache. Will fill one dozen or more.
Prune Filling
Cook 1 pound of dried prunes until very tender, remove seeds and sweeten to taste with sugar. Add 1/8 tsp. full cloves and grated rind of 1/2 lemon, if the flavor is desired. Cook until quite thich. You may add a little vanilla if desired.
I came up with this recipe for the “mix it up” contest at the fair. You could either use a mix for something it wasn’t intended for or make a cake with a mix and put a twist on it. I went for the former and used a cake mix for the base of these indulgent treats. Although they didn’t place, the judges wrote “Very good–wonderful flavor!” in the notes on my eval sheet and everyone I’ve served them to agrees. My favorite thing about them is that you can whip them up and have them in the oven in less than 10 minutes. Perfect for us busy people!
Dulce de Leche Bars
1 (18.25 oz) Golden Butter Recipe cake mix
1 egg
1 stick unsalted butter, melted
1 (13.4 oz) can Nestle Dulce de Leche (or 1 cup homemade)
1 cup pecan pieces
½ cup sweetened shredded coconut
1cup semi-sweet chocolate chips
½ cup Heath candy baking bits
Preheat oven to 350 degrees and grease the bottom and sides of a 9×13 pan.
In a large bowl, combine the cake mix, egg & butter. Beat on medium speed until well mixed. Shape the dough into a ball and, using your hands, press it out into the bottom of the prepared pan until it is in an even layer & reaches the edges.
Spread the dulce de leche over the cake mix layer, all the way to the edges. Sprinkle the remaining ingredients over the top, layering half of each and then repeating, and bake for 35 minutes. Remove from oven and give it a few hard taps against a heat resistant surface to settle any puffiness. Allow to cool completely on a wire rack before cutting.
I made this cake as an experiment to see what a caramel frosting that didn’t require cooking would taste like. The only way I’d ever prepared it before was to heat a brown sugar/butter/cream mixture and then let it cool, which produced a very rich, albeit delicious, frosting. This one doesn’t require heating and produces a much lighter & fluffier frosting and I prefer it to the other.
I got the original recipe from my friend Cheryl, but I changed the yellow cake to a banana and used black walnuts b/c I absolutely love the combination of the two and thought they would pair well with a caramel frosting. My neighbor, who I gave a piece to, is still raving about it two months later. I think she just wants more cake. :)
Caramel Banana Cake with Black Walnuts Adapted from Cheryl’s Caramel Yellow Cake recipe
Banana Cake
1 (18.25 oz) Pillsbury yellow cake mix
3 eggs
1/3 cup oil
¾ cup water
1 tsp pure vanilla extract
1 cup mashed bananas (3 medium)
Filling
1 stick of butter
1 teaspoon pure vanilla
2 cup brown sugar
1/4 cup milk (I used evaporated)
Caramel Frosting
1 stick of butter (room temp)
1 cup brown sugar
1/3 cup milk (I used evaporated)
16 oz. box of confectioner sugar
1 teaspoon pure vanilla
Embellishments
Black Walnuts
Caramel ice cream syrup
Preheat oven to 350 degrees. Grease and flour two 8 or 9-inch round pans and set aside.
In a large mixing bowl, combine all cake ingredients and beat on low until moistened, then two minutes on medium speed (or two minutes by hand), occasionally scraping down sides of bowl with a spatula. Divide batter between prepared pans and bake for 34-38 minutes, or until a tester comes out either clean or with a few moist crumbs. Top will be golden brown, especially around edges. Turn cakes out onto wire racks to cool completely, about an hour.
Meanwhile, put the filling ingredients (except for the vanilla) into a saucepan and heat over medium until melted. Remove from heat and stir in the vanilla. Pour into a metal or glass bowl and allow to cool to room temperature.
Prepare the frosting. Cream the butter with the brown sugar, then add the remaining ingredients & beat a few minutes, scraping bowl with a spatula, until creamy and well combined. If not using immediately , place plastic wrap directly on top of frosting and smooth flat with your hand all the way to the sides of the bowl, completely sealing it off from the air (otherwise it will develop a crust).
Once cake & filling are completely cool, level the cakes if they are domed on top. Put the first layer on a cake plate and spread the top with the filling. Put the second layer on top and frost the entire cake with the caramel frosting.
Press black walnuts into the sides and drizzle caramel syrup over the top.
This cake originally started out as the base for my dulce de leche bars (I use a cake mix in the crust) but I added too many eggs and instead of throwing out the mixture, I turned it into a rum cake, froze it to use later, and finally removed it and frosted it today. What began as an “oops” has now officially turned into a “yum!”
Butter Rum Caramel Cake
Cake
1 pkg Golden Butter Recipe cake mix
1/3 cup butter, softened
3 eggs
1 cup rum (I used Meyers)
Frosting
1 stick (1/2 cup) butter, softened
1 cup brown sugar
1/3 cup milk
1 lb. powdered sugar
1 tsp. vanilla
Garnish
Black Walnuts
Mix cake ingredients & bake according to package directions. Cool completely.
Cream and butter and brown sugar, add the remaining ingredients and beat until creamy & fluffy.
Spread 3/4 of the dulce de leche on one cake layer, top with the second, then frost the top and sides. Sprinkle black walnuts over the top and embellish with the remaining dulce de leche and frosting. I put mine in a pastry bag, cut the tip off and squeezed it all over the edges. You could also use a ziploc bag and cut the corner out.
The cake was still frozen when I cut this slice, but that didn’t keep me from gobbling it in under a minute!
Update: I won first place for this cake at the 2012 state fair!
This is my most requested recipe and the only one I’ve ever purposely not blogged. It has always been raved over to such a degree that I felt it was the best weapon in my dessert arsenal and, just like I used to keep the name of the perfume I wore secret so I could be special and no one else would smell like me, I wanted to keep this to myself as well so I could be the only person supplying the joy it induced. (OK so it’s available on Paula Deen’s website, but no one had to know that! Teehee!) I’ve now come to my senses and realized joy should be shared on a much wider plane. I think if everyone made and shared this recipe, the world would be a happier place. And who am I to keep us from achieving world peace?!
Cake
3 cups all-purpose flour
2 cups sugar
1 teaspoon baking soda
1/4 teaspoon salt
1 tablespoon ground cinnamon
3 eggs, beaten
1 1/2 cups vegetable oil
1/4 cup orange juice
1 tablespoon vanilla extract
3 cups peeled and finely chopped apples
1 cup shredded coconut
1 cup chopped pecans
Glaze
1/2 cup (1 stick) butter
1 cup sugar
1/2 cup buttermilk
1/2 teaspoon baking soda
Preheat the oven to 325 degrees F. Grease and flour a 10” bundt cake pan. Set aside.
For the cake: in a large bowl, whisk together the flour, sugar, baking soda, salt & cinnamon. Add the eggs, oil, orange juice, flour, baking soda, salt, cinnamon and vanilla extract and mix well with a whisk. Fold apples, coconut, and pecans into batter.
Pour the batter into the prepared pan and bake until a tester comes out clean, about 1 1/2 hours.
Shortly before the cake is done, make the glaze: Melt the butter in a large saucepan, stir in the sugar, buttermilk, and baking soda, and bring to a good rolling boil, stirring constantly. Boil for 1 minute. Pour the sauce over the hot cake in the pan as soon as you remove it from the oven, making sure that it runs down the sides & middle to soak. Let stand 1 hour, then turn out onto a rack to cool completely.
This cake will stay fresh in the fridge up to a week–the glaze really helps it retain its moisture perfectly. It also freezes extremely well. Wrap the cake in several layers of plastic wrap before freezing. If you plan to keep it in the freezer longer than a week or two, I would put a couple layers of foil over the plastic wrap. To thaw, remove all wrapping and let sit at room temperature overnight in a container.
It’s very important that you don’t let all the sauce sit on top. Spread it around, making sure it goes down the sides and down the middle of the pan so that it is all covered and soaks in evenly. (Your pan will not be this full unless you’re like me and can’t resist putting in some extra apples.)
This was a best seller at the Flying Pig last fall and I just got another order today from someone who just couldn’t wait until October to get another!
*Update: I won 3rd place for this cookie in the chocolate cookies category at the fair!
I invented this cookie shortly after my first Chunky experience. I think those candy bars were most popular during the 1980s, but as we weren’t allowed candy growing up, my first taste came as an adult. I was surprised by how tasty the odd combination of milk chocolate, peanuts & raisins was and one day decided to put those same elements into a cookie. I thought using regular cocoa powder made them look too bland so I used dark cocoa instead, and I think that not only helps the visual appeal, but gives the cookies a deeper chocolate flavor as well.
I suppose it’s up to personal tastes as to how much you will like this cookie, but they are my second favorite cookie of all time. I like them more than the candy bar!
Dark Chocolate Chunkies
Kansas State Fair 3rd Place Winner, Chocolate Cookies division
1 stick unsalted butter, softened
½ cup light brown sugar
¼ cup sugar
1 large egg
1 tsp. vanilla extract
1 cup all purpose flour
¼ cup Hershey’s Special Dark cocoa powder
½ tsp. baking soda
¼ tsp. salt
1 cup milk chocolate chips
1 cup dry-roasted, salted peanuts
½ cup raisins
Preheat oven to 350 degrees.
Cream the butter and sugars together until blended and fluffy, about five minutes. Add the egg and vanilla and mix well. Sift in the flour, cocoa and baking soda and mix just until combined. Stir in the remaining ingredients.
Mound large spoonfuls, about ¼ cup per cookie, onto an ungreased, parchment-lined, cookie sheet about 2″ apart. Flatten with a spatula until each cookie is almost 2 inches in diameter. Bake for 10-15 minutes or until the edges have just begun to firm. Remove from oven and allow to cool on the cookie sheet for one minute, then transfer to a wire rack.* Repeat with remaining dough.
Makes about 16 giant cookies.
*I always underbake cookies to ensure that they are soft and chewy after cooling. Depending on how soft they are when I remove them from the oven, sometimes I have to leave them to cool completely on the cookie sheet so they can continue baking while they cool and set them up a little more without over-baking. If you try to remove a cookie to a cooling rack and it’s too doughy, just leave them to cool completely on the sheet. If you can remove it easily, do it or they will not be as soft after cooling.
Before I had much experience with pie, I tried a recipe called “perfect pie crust,” which employed butter instead of shortening for the fat. At the time, I’d only ever made shortening crusts and the butter one had a much better flavor, so I thought the name apt, although it wasn’t as flaky as I desired. Although I balk at the word “perfect,” I have now found my own favorite pie crust that for me is very close to it, and although I’ve included the recipe before on a previous blog for apple pie, I think it’s good enough to warrant a blog of its own.
This one has the best of both worlds–the butter adding flavor and the shortening, flakiness. It turns out well even when I over-process it, which I almost always do (I don’t like to see big globs of fat in my crust so I tend to over-mix the fat into the flour). I don’t think there’s a way to ruin this crust besides burning it, which would be really hard to do. It puffs as it bakes and is so flaky that you can see it with the naked eye.
*Makes enough for two pies or one double-crust pie
2 1/2 cups flour
1/2 tsp. salt
2 sticks butter, cold and cut into 16 pieces
1/4 cup shortening, chilled in freezer
6-10 T ice-cold water (I use a scant 1/3 cup every time)
Mix flour and salt. Cut the butter and shortening in with a pastry blender or food processor until pieces are the size of small peas (I usually make them half that size at least or smaller, but the crust will be more flaky if you can resist following my example). Add ice water and mix until it starts to form a ball. Divide dough in half, gather in your hands and gently shape each into a ball, flatten them into discs, cover with plastic wrap and refrigerate until ready to use. If they get too hard, I leave them on the counter until pliable enough to roll out.
When ready to make your pie, roll out one disk and fit into a pie plate, trimming off the excess. Fill, cover with the top crust, pinch and flute the edges. Brush beaten egg over the top crust (that’s how you get that golden shine), cut a few vents holes and then bake according to pie recipe directions. If you are making a one-crust pie, you can either halve the recipe or freeze the second disc for later use.
Recipe Source:The Dessert Lover’s Cookbook by Marlene Sorosky
This is my favorite recipe of Laura’s. The chocolate chip cookies are my favorite cookie but this is my favorite recipe of hers….so far. I have a lot left to try. The buttery cherry-almond combo here is very good. I’m being very reserved because if I unleashed my enthusiasm for this recipe, I’d probably be put in a straight jacket in a padded cell.
Cookie base and topping 1 ½ cups all-purpose flour
½ cup sugar
½ teaspoon salt
½ teaspoon baking powder
1/3 cup almond paste (not marzipan)
1/4th teaspoon almond extract
1 stick (1/2 cup) cold unsalted butter, cut into pieces
½ cup sliced almonds (Reserve for topping)
Filling 2 cups frozen cherries
3/4th cups sugar
3 Tablespoons water
2 tablespoons cornstarch
1 Tablespoon fresh lemon juice
1 Tablespoon unsalted butter
Pinch of salt Icing 1/3 cup powdered sugar or more if needed, whisked or sifted
2 Tablespoons heavy cream
1/4th teaspoon almond extract
Pinch of salt
Heat oven to 350 degrees. Line a 9 inch square pan with foil and grease lightly with vegetable or olive oil.
In a food processor add flour, sugar, salt and baking powder and process to fluff and combine. Add almond paste and almond extract and pulse to combine. Add cold butter pieces and pulse until crumbly. Remove 1 cup of the mixture and set aside for topping.
Put the rest of the mixture into the pan, spread out evenly, and press with the bottom of a measuring cup to make a crust. Bake for 15-17 minutes until crust starts to brown slightly around the edges. Remove and leave the oven on.
Meanwhile dump all the filling ingredients into a saucepan and cook on medium high heat until thickened and translucent. About 8 to 10 minutes. Spread the filling over the crust.
Sprinkle the top with the reserved crumb mixture and top with the sliced almonds. Bake for about 28 to 30 minutes or until the filling bubbles and the top is golden. Let cool completely in the pan on a cooling rack.
Whisk or beat the icing ingredients together, drizzle over bars.
Hint: To easily remove bars from the pan freeze for 30 minutes and lift out by the foil edges. Peel off foil and cut into squares or diamonds.
Veronica’s Notes: I’ve also made this successfully with a can of tart cherries. To do this, put a (14.5 oz) can red tart cherries packed in water in the saucepan, water and all, along with the other filling ingredients but omit the water & lemon juice. It won’t have the same deep red color as the frozen cherries give, so you can add some red food coloring if you wish.