RSS Feed

Rosemary Peasant Bread

Posted on

My friend Krista shared her recipe for Rosemary Peasant Bread with me and I couldn’t resist making it immediately.  Both loaves were gone the following day, and after making another two loaves today, only half of the second loaf remains (exactly two hours after removing them from the oven).  This is becoming a problem, albeit a delicious one.

Feel free to blame Krista if you find yourself in a similar predicament.  I do.

Rosemary Peasant Bread

• 2 1/2 tsp dry yeast
• 2 c. warm water
• 1 T. sugar
• 2 tsp salt
• 4 c. flour
• 2 tsp. dried rosemary, plus more for topping
• olive oil, corn meal, & coarse salt

Dissolve yeast and sugar in the warm water.  Add flour, salt, and rosemary & stir until blended.  Do not knead!! Cover and let rise for 1 hour or until doubled in size (no need to grease the bowl, just leave it be).

Dump half of dough each into a greased round 8 or 9″ cake pans that have been lightly sprinkled with corn meal. Cover loosely with greased plastic wrap. Then let it rise another hour.

Lightly sprinkle with more rosemary and coarse salt.

Bake @ 425 for 10 minutes, then reduce temp to 375 for 15 minutes more.

As Krista says, “Cool on wire racks if you can stand it. We eat it almost right away.”

Consider yourself forewarned.

Makes 16 wedges.
Per wedge:
116 calories
293 mg sodium
21 g carbs
1 g fiber
3.3 g protein

Veronica’s Notes: I used 1 packet of quick-rise (also called instant, highly active, etc) yeast and did 30 minutes on the first rise and another 30 on the second–saves some time.  I let the dough rise in a 200 degree oven and turned it off as soon as the (metal) bowl was in there. And I used foil to cover the bowl and the pans (sprayed with oil) just to prevent any plastic melt-age.  I had problems with my bread sticking to the pans when I used olive oil so I greased them generously with shortening the second time.  They still stuck a little, but not nearly as bad.  Krista never has a problem with this so hopefully it’s just me.  And if you’re wondering why my salt looks so weird, I didn’t have any coarse salt so I used some leftover pretzel salt which is white instead of clearish.  Shut up and leave me alone.

Secret Recipe Club

Razzcherry Pie

Posted on

I am a cake lover, born to a family of pie lovers.  Making pie does not thrill me the way making and decorating a cake can, but in most cases, my family would prefer I bring pie to our get-togethers.  I’m making them so often now that I seem to have earned an unwanted reputation and have become, somewhat grudgingly, the designated pie maker amongst my friends and family.

This is how my Razzcherry Pie was born. Dad wanted pie for his birthday celebration last year, so I did an experiment to come up with a cherry & raspberry filling.  Though delicious, it turned out pretty runny so I tweaked it a bit and tried it again for our belated Mother’s Day barbecue this year (because, of course, Mom wanted pie instead of cake).  It came out perfect so I thought I’d share the recipe now that I’ve worked out the kinks.

Veronica’s Razzcherry Pie

Prepare to be razzle dazzled!

Almond Crust
1/2 cup slivered almonds
2 cups all-purpose flour, plus extra for rolling
1 teaspoon salt
1 heaping teaspoon brown sugar
1 cup (2 sticks) unsalted butter, very-cold, cut into 16 pieces
4 to 6 Tbsp ice water, very cold

Raspberry-Cherry Filling
1 (10-oz) package frozen raspberries
2 (14.5-oz) cans sour pitted cherries, drained well (juice reserved)
1 cup sugar
4 tbsp. cornstarch
2 tbsp butter
¼ tsp salt
½ tsp. almond extract
½ tsp red food coloring (optional)

Additional
milk & coarse sugar for top crust

Directions


This slideshow is meant as an accompaniment to the directions and has step-by-step photos & instruction for making a lattice top crust.

The night before you make the pie, put the raspberries into a colander and set it over a bowl.  Put the whole thing in the refrigerator and by the time you use them, they’ll be thawed and drained.  Save the juice.

For the crust (which can be made up to two days ahead), I recommend using a food processor.  Process the almonds until very finely ground—about the texture of cornmeal.  Add the flour, salt & brown sugar, then pulse a couple times to combine.  Cut in the butter until the mixture resembles coarse meal & pieces are no larger than peas.  Sprinkle 4 tbsp ice water over the top and pulse until it starts to clump together & holds together when you pinch it with your fingers.  Add additional water if necessary (I personally use 5 tbsp).  Form the dough into 2 disks, dust with flour, cover with plastic wrap and refrigerate at least one hour.  Roll out one of the disks on a floured surface and fit it into a 9 inch deep dish pie plate, trimming off the excess (leave a ½” overhang if you will be using a lattice top crust).  Set in the fridge until ready to use.

Preheat oven to 400 degrees & place one oven rack in the lowest position and one in the middle. If you only have one rack, put it in the lowest position.

Pour the collected raspberry juice into a 1-cup measuring cup (you’ll probably only have a few tablespoons).  Add the reserved cherry juice until you have ¾ cup of liquid. In a saucepan mix the sugar, cornstarch, and salt. Stir in the juice and simmer over medium heat until filling is thick and clear (by clear I don’t mean the red will disappear, but that the cloudy appearance from the cornstarch will go away), about 4 to 5 minutes. Since you’ll be adding more liquid after it’s done cooking and the berries will break down and make the glaze juicier, you want to get it pretty thick.  If it isn’t gel-like after 5 minutes, whisk in more cornstarch (1 tsp at a time) and cook for another few minutes after each addition until it’s very thick.

Remove from heat and stir in the butter, almond extract & food coloring until the butter is melted and incorporated. Gently fold in the cherries & very gently fold in the raspberries.  Yes, the raspberries will fall apart but the more careful you are, the less likely it is they’ll turn to unrecognizable mush. Pour into pastry-lined pie dish and set aside. Roll out second dough disk and cut into 1/2-3/4″ strips.  Arrange the strips on top to make a lattice, trim them to the edge of the plate (slightly shorter than the overhanging edge), fold the edge over & seal.  Pour some milk (I used cream) into a dish and use your clean fingertips to moisten the strips.  Sprinkle the strips with coarse sugar (try to get it on the strips but it’s OK if some falls into the filling).

If you are just using a full top crust, seal & flute the edges, brush with milk/cream, sprinkle with sugar and cut steam vents so you don’t have a royal pie explosion in your oven. Place pie on the bottom shelf of the oven. Bake for 10 minutes, and then move to the middle shelf & reduce the heat to 350 degrees F.  At this point, you MUST put an oven liner on the rack below the pie, or cover a rimmed baking sheet with foil and place it below, because the pie will most likely bubble over and make a mess.  Continue to bake until bubbling & the crust is a golden brown, about 30 to 35 minutes more. Cool completely (best if made the day before serving) before cutting & serve with vanilla ice cream.

Will last several days on the counter & longer in the fridge.

Shrimp Tacos

Posted on

This is a wonderfully light summer meal that has the feel of gourmet without the fuss.

Shrimp Tacos with Spicy Corn on the Cob
Printable recipe

Salsa
1 1/2 cups seeded, chopped tomato
1 cups seeded, chopped cucumber
1/3 cup thinly sliced scallions
1/4 cup chopped cilantro
3 tbsp fresh lime juice
1/4 tsp salt

Filling
8 oz green beans, trimmed
1 tsp fajita seasoning, divided
1 lb medium to large shrimp, peeled & deveined
1 tbsp olive oil

8 6-inch corn tortillas

Corn
4 corn on the cob in the husk
few spritzes of fat-free butter spray
few dashes ancho chile pepper

Directions
1. Combine salsa ingredients & set aside.
2. Heat oil in a large skillet on medium-high.  Toss rinsed green beans with 1/2 tsp of the fajita seasoning in a bowl and add to the skillet.  Cook, stirring occasionally, for five minutes.
3.  Meanwhile, toss the shrimp with the remaining 1/2 tsp seasoning  and put the corn on the cob in the microwave with the husks still.  Cook them on high for eight minutes.
4. Add to the shrimp to the skillet after the green beans have cooked for 5 minutes and cook another five minutes or until the shrimp are no longer opaque.
5. Shuck the corn, leaving the husk on the end to use as a handle.  Spray with butter & sprinkle with a light dusting of ancho chile pepper (adjust to suit your heat preference).
6. Heat the tortillas: Wrap the stack in a fairly damp paper towel and microwave on high for 80 seconds (a good rule of thumb when heating tortillas in the microwave is 10 seconds per tortilla).
7.  Assemble the tacos: Divide shrimp-and-bean-mixture between warm tortillas and serve with salsa & an ear of corn on the side.

Serves 4


For those of you without a kitchen scale, this is what 8 ounces of green beans (and me with a hormonal lip zit) looks like.

Raw Swimps


Happy Swimps

I hate cucumbers so I didn’t expect to like this salsa, but it blew me away!  I couldn’t believe something so simple could be so good.  I plan to use it in many a dish to come!

Recipe source: Adapted from Ladies’ Home Journal May 09

Linked with Life in the Slow Lane for BSI: Salsa.

Blueberry Lemon Trifle

Posted on

We have several diabetics in our church group, with whom we joined last Saturday for a barbecue in the countryside.  To accommodate their sugar abstinence, I brought two sugar-free desserts: rugelach & blueberry lemon trifle.  Both desserts were enjoyed by diabetics & non-diabetics alike, but this is the one I will continue making for myself (Den can fend for himself–the trifle is mine!) because it’s low in calories and it tastes FABULOUS!

If you prefer to make this with full-fat and full-sugar (oooooh, I bet that would be even better!), follow the suggestions in parentheses.


Blueberry Lemon Trifle

1 sugar-free angel food cake (or 1 pound cake)
1 lemon, juiced
1 1/2 cups skim milk (or whole milk)
1 (8-oz) tub fat-free sour cream (or regular sour cream)
1 (8-oz) tub sugar-free cool-whip, divided (or regular Cool Whip/real whipped cream)
2 packages fat-free/sugar-free instant lemon pudding (or regular instant lemon pudding)
3 pints blueberries, rinsed & dried

Cut the cake into cubes and lay them out on a cookie sheet, then sprinkle the lemon juice evenly over them (I actually dipped my clean fingers into the juice & dabbed the juice on–you could use a pastry brush too) & carefully toss.  Don’t mash the cake–keep it as pretty as possible. This won’t be as difficult with pound cake b/c it’s not as delicate so you don’t have to be as careful.  Set aside.

In a medium bowl, whisk the milk, sour cream & half of the cool whip until smooth, then beat in the pudding mixes until it starts to thicken.

Set a few blueberries aside for garnish.  Put 1/3 of the cake cubes in the bottom of a trifle bowl, sprinkle on 1/3 of the blueberries (1 pint), then spread 1/3 of the pudding mixture over it.  Repeat two more times, then spread the remaining Cool Whip over the top & garnish with the reserved blueberries.  Chill until ready to serve–can be made up to two days in advance–or just sit it down on the table and dig in.

Sunny Vegetable Salad

Posted on

This is the type of dish I never make for my own family but always bring to (or find at) a potluck and can never get enough of.  I brought it to a Church potluck last weekend only to find that Teri, our preacher’s wife, brought the same exact thing! Great minds think alike. :)

Sunny Vegetable Salad
Recipe from Char Holm, Taste of Home Magazine
“A terrific mixture of crisp, chewy, fresh and sweet ingredients makes this salad taste as good as it looks. A nutritious vegetable like broccoli is a lot more palatable ‘dressed up’ this way. -Char Holm, Goodhue, Minnesota”

Ingredients

5 cups broccoli florets
5 cups cauliflowerets
2 cups shredded Cheddar cheese
2/3 cup chopped onion
1/2 cup raisins
1 cup mayonnaise
1/2 cup sugar
2 tablespoons cider or red wine vinegar
6 bacon strips, cooked and crumbled
1/4 cup sunflower kernels

Directions
In a large salad bowl, toss broccoli, cauliflower, cheese, onion and raisins. In a small bowl, combine mayonnaise, sugar and vinegar. Pour over salad; toss to coat. Cover and refrigerate for 1 hour.  Sprinkle with the bacon and sunflower seeds before serving.

Brownie Mania: Mocha-Frosted Kahlua, Peanut Butter Truffle & Chocolate Caramel Walnut

Posted on

I went a bit brownie crazy early in the week and baked five 9×13-sized pans (5 pans but only three kinds) of them.  I mailed two pans to a friend serving in Iraq (this required some mad packing skills & ingenuity on my part) for his birthday and the rest were frozen* until ready to use for two potlucks we were attending this weekend.

Here are the brownies I made (I dare you not to get a toothache after reading them): Mocha-Frosted Kahlua Brownies, Peanut Butter Truffle Brownies and Chocolate Caramel Walnut Brownies.

Although I’m partial to the Kahlua Brownies b/c they are my own recipe, I have to say that the Peanut Butter Truffle Brownies are my new favorite (yes, of all time!).  The Chocolate Caramel Walnut Brownies are very decadent, but somehow not as refined (if a brownie can be called refined) as the former two–they remind me more of a juvenile treat but this doesn’t keep them from being outstanding.  Brownies with thick, gooey caramel and dripping with chocolate chips and walnuts?  What could be wrong with that?

I have to apologize to all the people who are going to be aghast that I dared to use brownie mix instead of measuring out flour & sugar, but I just prefer the mix, people!  I’ve made scratch brownies and I just don’t like them as much. I guess I should try some more recipes before I set my mind against from-scratch brownies but why mess with perfection when it’s this easy?  If you’re passionate about this subject and have a great recipe that you think would change my mind, please share!

Kahlua Brownies
These brownies are best-sellers at the Flying Pig Gift Boutique.  It doesn’t matter what kind of outlandish treats I bring in to sell, if the brownies are sitting there alongside them, the other stuff only goes after the brownies are sold out.  Which never takes very long.

Brownies
1 box fudge brownie mix
2 eggs
1 stick (1/2 cup) butter, melted
1/4 cup Kahlua

Frosting
2 Tbsp. Kahlua
1 tablespoon instant coffee crystals
1 cup semi-sweet chocolate chips
2 sticks (1 cup) butter, softened

Make the brownies: mix up everything, spread in a 9×13 pan (grease the bottom only) and bake at 350 for however long the box says.  Don’t overbake unless you like dry brownies.  Cool COMPLETELY before frosting.

Make the frosting: Microwave the Kahlua for 30 seconds or until boiling (I use a glass 1-cup measuring cup and fill it 1/2 way to the 1/4 cup line).  Stir in the instant coffee and place in the freezer to cool.  Melt the chocolate in the microwave for 1 minute, stir and then give it another 30 seconds, stirring again.  It should be melted but if not, continue this cycle in 30 second intervals.  Once smooth, set aside to cool.  Cream the butter then beat in the cooled chocolate.  Last, add the coffee mixture and beat it until everything is incorporated, scraping down sides of bowl.  Spread over the cooled brownies.

Peanut Butter Truffle Brownies
Recipe from Betty Crocker with instructions modifed by me.

1 9×13 pan of brownies, cooled (if using a mix, be sure to substitute melted butter for the oil)

Filling
1/2 cup butter, softened
1/2 cup peanut butter
2 cups powdered sugar
2 tsp. milk

Topping
1 cup semi-sweet chocolate chips
1/4 cup butter

Directions:
Beat filling ingredients until smooth and spread evenly over the cooled brownies.  An offset spatula is almost required for this task as the filling is thick and hard to spread.

Microwave the topping ingredients in 30-second intervals, stirring between, until smooth (should only take a couple times).  Cool 10 minutes, then spread over the filling layer. Again, I would never try this without an offset spatula.  The layer has to be spread very very thin and I can’t imagine doing it without one.  Refrigerate at least 30 minutes before cutting–you want the chocolate on top to be hardened so that the brownies cut easily.  I cut mine frozen and that worked fine.

Chocolate Caramel Walnut Brownies
Recipe from the back of a generic sweetened condensed milk label

2 boxes of fudge brownie mix

Caramel Topping
1/2 cup butter
2 cups packed brown sugar
1 cup light corn syrup
dash of salt
1 (14 oz) can sweetened condensed milk
1 tsp vanilla
2 cups walnuts
2 cups chocolate chips

Prepare the brownies according to package directions (except substituting melted butter for the oil) and stick them in the oven to bake according to the package directions.  As soon as they’re in, start the caramel topping.

Melt the butter in a heavy 3 quart saucepan.  Stir in sugar, corn syrup and salt.  Bring to a boil over medium heat, stirring constantly.  Blend in sweetened condensed milk, continue stirring, and heat to 245 degrees (approximately 10 minutes). I heated mine to 250 degrees to no ill result.  Remove from heat and add vanilla.  Let caramel cool while brownies finish baking.

Pour the caramel over the brownies when they come out of the oven.  Scatter the walnuts & chocolate chips over the top and let cool completely before attempting to cut into bars.

*Brownies freeze extremely well!  They retain their moisture and texture perfectly and are never any worse for wear after defrosting.  They are a perfect make-ahead treat in any instance when you need to make-ahead or just want to make something to keep on hand in case of emergency.

Black & White Truffles

Posted on


Today I tried to make a white chocolate buttercream based on my own recipe for chocolate buttercream which is just equal amounts of chocolate and butter and nothing else.  I have no idea whether this would actually work, because I made so many mistakes in making this simple buttercream (one I’ve made a hundred times with regular chocolate) that to actually describe them would be tedious.  Let’s just suffice it to say that I tried to fix it by microwaving the mixture after blending it and when the white chocolate and butter separated and refused to go back together, I tried to fix it again by adding powdered sugar.  I ended up with a thick sort of dough that obviously would not work for my purposes.

Feeling the velvety texture with my spatula as I mixed it, I thought the soft dough might make a nice truffle center.  So I tasted it.  That settled the matter.  What was once the beginnings of a white chocolate buttercream had suddenly transformed into the beginnings of white chocolate truffles.

I rolled the dough into small balls and froze them to harden them up for easier handling. 

I went the easy route and dipped them in almond bark.  (Dark chocolate would contrast nicely with the sweet center, but I didn’t want to go out and buy it.)  Then I melted some white almond bark in a disposable pastry bag* and drizzled it over the top of the truffles to pretty them up.

While I was zigging and zagging, I thought, “Hmmmm….these would make great gifts!” And I haven’t bought anything for mother’s day yet.  So I boxed them up and now they’re in the fridge, ready to give to my Mom and mother-in-law on Sunday.  They don’t have to know that their gifts started out as a disaster!

Black & White Truffles
1 cup white chocolate chips
1/2 cup butter
1 cup powdered sugar
dark & white chocolate for dipping & decorating

Melt the chocolate chips and butter together in the microwave in 30 second intervals, stirring in between.  Beat in the powdered sugar.  Roll the dough into balls and freeze until hard, about 10 minutes.  Dip in dark chocolate (you can mix a little shortening, butter or parafin with it to make it shiny) and then decorate with white chocolate.

*You can buy disposable plastic pastry bags at Walmart on the cake decorating aisle.  I get a pack of 50 and I think it’s less than $10.  They’re awesome b/c you can stick chocolate in the bag, microwave it, then snip the end and squirt the chocolate out to decorate with.  You can also use them for drizzling anything, like frosting or glaze.


Sugar-Free Rugelach

Posted on

I needed a good sugar-free dessert to provide the diabetics in our Church group with something sweet for an upcoming potluck so they aren’t left out when it comes time for dessert.  I found this one on allrecipes.com and chose it not only because it was one of the highest rated s/f recipes, but because it relies on natural sweetness in the raisins & fruit spread instead of artificial sweetener.  I love Splenda, but it almost always ruins desserts.

This is one of the best sugar-free desserts I’ve tried and once again, I think it’s due to the natural sweetness and no added chemicals.  To make this a completely natural cookie, swap the margarine for butter.

Sugar-Free Rugelach

1 cup margarine, softened
8 ounces cream cheese, softened
2 3/4 cups all-purpose flour
2 teaspoons vanilla extract
1 cup chopped raisins
1 cup chopped walnuts
2 tablespoons ground cinnamon
1 cup apricot spreadable fruit, warmed until slightly liquid

Directions
1. Cream together the margarine and cream cheese in the bowl of an electric mixer. Blend in the vanilla. Mix in the flour. Chill the dough.
2. To make the Filling: Mix together the chopped raisins, chopped walnuts, and cinnamon. If you have a food processor, here is the easiest and best method: place the whole walnuts and raisins into the bowl, sprinkle with the cinnamon, and chop them together by processing in short pulses.
3. Divide the dough into 4 equal portions. Roll out each portion into a 10 – 12 inch circle 1/8 inch thick on a lightly floured board or between two sheets of waxed paper.
4. Spread a light layer of preserves (approximately 2-4 tablespoons) onto each dough circle. Sprinkle each circle with approximately 1/3 cup of the chopped nut-raisin-cinnamon mixture.
5. Cut each circle into 16 wedges using a pastry cutter or a pizza cutter. Roll each wedge from base to point. Place point down on a lightly greased or parchment lined baking sheets.
6. Bake for 15-17 minutes at 375 degrees F (or until golden). Remove to racks to cool.

Fun with Pie Dough

Posted on

OK, you know you cook too much when you’re posting a blog called “Fun with Pie Dough.” No trips to Disneyworld or front row seats at the Super Bowl for me, thank you, I’m staying at home so I can have some fun with my pie dough!Well, I thought (hoped) I was done baking pie for the next century but when I was invited to a dinner a couple nights ago, a lady listening to the invitation (it was at Church and we’re all invited) asked “and why don’t you bring one of those delicious apple pies?”  Well, I could never deny someone who compliments my baking, even if she is asking me for the last thing on earth I really want to make.

I made the pies yesterday and as always, I had enough leftover dough that I could have used it as a bottom crust for another pie.  Which I would have done if I felt like making a pie that only called for one crust.  But I’m really sick of making pie, people.

Since I embarked on the apple pie project last month, I’ve been faced with an extraordinary amount of leftover pie dough that’s forced me to be creative with the extras since I abhor waste–especially when it comes to anything edible.

I used some of it to make more apple pie.  And here’s what I did with the rest.

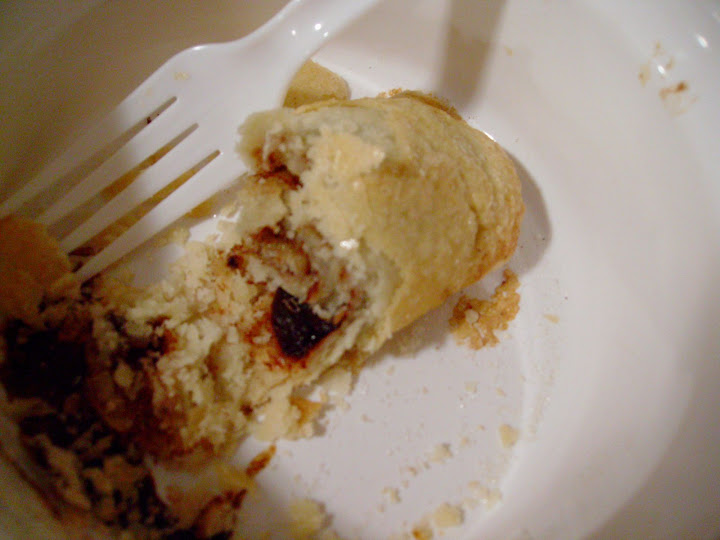
The first thing I always do with leftover dough is roll it out, then layer on butter, sugar, cinnamon and raisins (and pecans if I have them), then roll it up, slice it and bake it.  This is what my grandmother did with her extra dough and I do it because it reminds me of her.  And because it’s delicious.  If you have kids, this one will definitely be a winner with them.  Kind of like cinnamon roll pies, I guess. (Update: I now have a recipe for Grandma’s cinnamon roll pie crust cookies here.)

I also made three batches of shortbread cookies.  If you’re using my Rich All-Purpose Pastry or another recipe that uses mostly butter for the fat, then you can use the leftover dough to do the same (shortbread is basically pie crust in cookie form, after all!).  Just knead in powdered sugar until it tastes sweet enough to you (yes, you’ll have to taste raw dough but it really isn’t bad), add flour or water as needed if it’s too wet or dry, then refrigerate it at least half an hour to firm it up.  You can either pat it into a pan and score it with a knife or roll it out, leaving it about 1/2 inch thick and cutting it with cookie cutters.   Bake it 350 until it’s done.  My cookies were small and took about 10 minutes and the dough in the ramekin I think was like 20 minutes.  The less you cook them, the more tender they’ll be.  If you brown them, they’ll be crispy. 

To add even more excitement to this pie dough shortbread fun, you can mix in lemon or orange zest (I did the orange zest twice–it was fabulous!)…and then dip them halfway into some melted chocolate!  I didn’t make it that far–the cookies were always gone before I got the chance.  I also made a batch with pecans and walnuts mixed in and they were very good too–a better version of the boxed “Sandies” you can get at the store.  I did sandwich some of those with chocolate. And then ate them.  All.

I’ve also made a couple month’s worth of communion bread for my Church. To do this, just knead in some sugar or powdered sugar (I’ve used both with equally good results), chill it, roll it out, cut it, prick it with a fork (or cut it with a knife as pictured), and bake it.  I’ve used a recipe for communion bread in the past, but using my leftover all-purpose pastry works much better. (Update: I now use this recipe for communion bread.)

OK, on to homemade Pop Tarts!!!  Actually, these little lovelies are more like handpies but we won’t tell our mothers we’re eating pie for breakfast.  Just roll out the extra dough, slice it into rectangles, put your preserves/jam of choice in the middle, dab some beaten egg around the edge, lay another piece of dough on top, press the edges to seal, then crimp the edges with a fork.  At this point you can bake them and ice them when they come out of the oven, or do like I did and brush them with some of the remaining beaten egg, sprinkle them with coarse sugar, and then pop them in the oven for about 20 minutes.  I like that way better b/c there’s less work involved and I don’t waste as much of the egg.  Oh, and I must give credit where credit is due: thank you, Laura (The Cooking Photographer), for posting a photo of your own homemade pop-tarts and inspiring me to do the same!


Let me know if you have any other ideas for leftover dough–at the rate I’m going, I’m going to need a new idea every week!


The Happy Cake Maker

Posted on

It took me a while to get around to it, but I finally finished editing all the footage of me making that baby shower cake last month.  It’s more entertaining than educational, but you might pick up a few tricks!