RSS Feed

Category Archives: Cookies

Black Gold Cookies

Posted on

These cookies don’t need a long introduction.  They are uber-chocolatey and sort of like a truffle in cookie form.  My husband describes them like this, “Chocolate-chocolate chip with chocolate and added chocolate.” Yeah, that pretty much sums it up! They are so moist, soft, and melty on the inside, unlike any cookie I’ve ever had before.  Definitely will win over any chocolate-lover!

Black Gold Cookies
From Death By Chocolate Cookies by Marcel Desaulniers

6 tablespoons all-purpose flour
1/2 teaspoon baking powder
1/2 teaspoon salt
10 ounces semisweet chocolate, chopped into 1/4-inch pieces, divided
2 ounces unsweetened chocolate, chopped into 1/4-inch pieces
6 tablespoons unsalted butter
2 large eggs
1/2 cup granulated sugar
2 teaspoons vanilla

Preheat the oven to 325°F and line 3 baking sheets with parchment.

In a sifter combine the flour, baking powder and salt. Sift onto a large piece of wax paper and set aside until needed.

Heat 1 inch of water in the bottom half of a double boiler over medium heat. With the heat on, place 6 ounces semisweet chocolate, the unsweetened chocolate, and butter in the top half of the double boiler. Use a rubber spatula to stir the chocolate and butter until completely melted and smooth, about 6 minutes. Transfer the melted chocolate mixture to a 1-quart bowl and set aside until needed.

Place the eggs, sugar and vanilla extract in the bowl of an electric mixer fitted with a paddle. Beat on medium 4 minutes until soft. Use a rubber spatula to scrape down the sides of the bowl, then continue to beat on medium for 2 more minutes. Stop the mixer, then add the melted chocolate and beat on medium for 1 minute until incorporated. Scrape down the bowl. Add the sifted dry ingredients and the remaining 4 ounces semisweet chocolate and mix on low speed until just incorporated, about 30 seconds. Remove the bowl from the mixer and use a rubber spatula to finish mixing the dough until thoroughly combined.

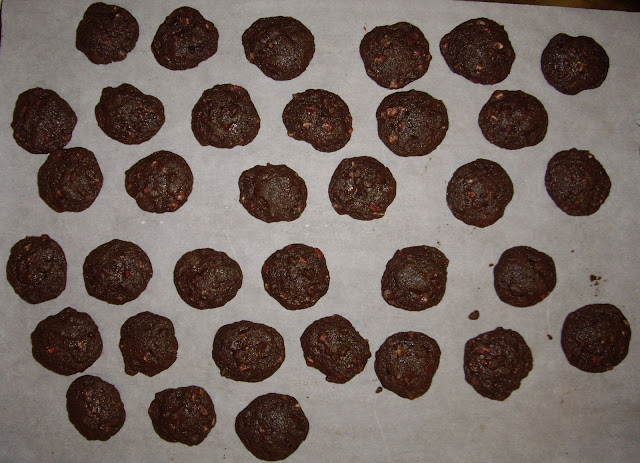
Using a heaping tablespoon of dough for each cookie (approximately 3/4 oz.), portion 12 cookies, evenly spaced, onto each of the prepared baking sheets. Place the baking sheets on the top and center racks of the preheated oven and bake for 9 to 10 minutes, rotating the sheets from top to center about halfway through the baking time (at this time also turn each sheet 180°F.).

Remove the cookies from the oven and allow to cool to room temperature on the baking sheets, about 30 minutes. Store the cooled cookies in a tightly sealed plastic container until ready to serve.

Makes 36 2 3/4-inch cookies.

Veronica’s Notes: I chose to melt 6 oz (half a bag) of semi-sweet chocolate chips with the unsweetened chocolate and then stirred in 4 oz of mini-chocolate chips into the batter at the end, b/c I found it easier than chopping chocolate.

Cinnamon Roll Sugar Cookies


Today’s “Cookie Monday” yields a special treat–Cinnamon Roll Sugar Cookies!!!!!  Wait, I think I need one more–! 

As soon as this recipe from Picky Palate hit my inbox, my heart started pounding.  As I scrolled through and the idea settled in, I knew I was a goner.  Photo by photo, I watched as Jenny started with a fabulous sugar cookie dough, spread butter over it (!), sprinkled brown sugar & cinnamon over that (!), rolled it up, sliced and baked it, then drizzled the cookies with cream cheese icing (!).  This is such a creative use of sugar cookie dough and I couldn’t resist the combination of cookies and cinnamon rolls. 

Seriously, I’m having trouble keeping my cool here.  The excitement that these cookies evoke in me makes me want to record a video of me screaming to convey it.   It’s not only the concept but the taste!!!  I’ve eaten over a dozen and if there were any left after Dennis took them to work, I’d be eating them right now.  It’s taking a serious effort not to just write 100 lines of “wheeeeee!” as the entire content of this post prior to the recipe.  Wheeeeeeeeeeeeee!  Sorry, I couldn’t contain that one. 

You could use any sugar cookie dough to make these cookies, including store-bought, but I do recommend that you try Jenny’s recipe.  The dough makes a really excellent sugar cookie–my favorite so far.  I intend to use it for all my sugar cookie needs from now on, including, of course, cinnamon roll sugar cookies. :)

Cinnamon Roll Sugar Cookies
recipe  by Jenny at Picky Palate

2 Cups sugar
1 Cup butter, softened
3 eggs
1 teaspoon vanilla
(I added 1/2 teaspoon almond extract)
1 Cup sour cream
6 Cups flour
2 teaspoons baking soda
2 teaspoons baking powder
1/4 teaspoon salt

12 tablespoons softened butter, (slice 2 Tablespoons 6 times totaling 12 tablespoons)
1 1/2 Cups packed light brown sugar, divided into 1/4 Cups
1 1/2 Tablespoons ground cinnamon, divided

Frosting
8 oz softened cream cheese
1/2 Cup powdered sugar
2-4 Tablespoons milk, to thin icing

1. In an electric or stand mixer, cream the sugar and butter. Add eggs, vanilla and sour cream until well combined. Slowly add in the flour, baking soda, baking powder and salt until well combined.

2. In 2 batches, place in plastic wrap in a disc shape and chill for at least 2 hours for best results.

3. Once chilled, cut each disc into thirds and roll into a 1/8 inch thick oval, about 12 inches X 5 inches on a floured surface. Spread each rolled pieces of dough with 2 Tablespoons softened butter, 1/4 Cup packed brown sugar and 1/4 teaspoon cinnamon.  (I forgot to soften my butter beforehand so I just slightly melted it in the microwave and mixed in the brown sugar and cinnamon, then spread it over the dough in a thin layer.)  Start rolling from the long end closest to you, rolling into a log shape. (I wrapped the logs in wax paper and refrigerated for another 2 hours at this point because they were too soft to cut and got all smooshed.) Using a sharp knife, cut 1/2 inch pieces of dough then placing onto a silpat or parchment lined baking sheet. Bake at 350 degrees for 9-11 minutes. Remove and let cool for 5 minutes before removing from baking sheet.

4. To prepare frosting, beat the cream cheese until softened and smooth, slowly add powdered sugar and milk until desired consistency. Frost cookies then place in refrigerator until ready to serve. These are 100 times better chilled, trust me!!

Makes at least 6 dozen

Cookie Mondays: Peanut Butter Blossoms


I can’t help it–every time I go to choose a cookie recipe, I go for something unusual that I’ve never tried before. Same thing with most recipes, actually. I’ve never been even slightly tempted to make this classic cookie, simply because everybody and their mother makes them and they seem so common.  That, and I hate Hershey’s Kisses because I ate an entire bag before Church as a child and threw them up all over my sister and I in the front pew.  We had to walk to the bathrooms in the back, dripping puke, and left Church naked, wrapped in blankets that had been left in the lost and found.  I never liked them after that.

Well, remember that nasty little habit of mine of not being able to resist a sale? Despite my aversion to Hershey’s Kisses, I couldn’t resist buying a bag after Christmas because they were on sale for less than $1. In fact, I had to forcefully push my cart away from them after grabbing a single bag so that I didn’t just scoop the whole pile into my cart.

And of course they sat in the cupboard for two months, despairing that some unappreciative soul had purchased them. Thankfully, however, there exists a wonderful, if common, thing called a peanut butter blossom (so named because it looks kind of like a flower) and I was able to use the forlorn bag for this week’s Cookie Monday. Yipee!

Despite my aversion to Hershey’s Kisses, and therefore these cookies, I found them irresistable once they had cooled but while the chocolate was still soft. That oozing chocolate combined with the soft peanut butter cookie was just heaven. I even had one after the kisses had hardened completely and miraculously enjoyed it as well. Perhaps these peanut butter blossoms have finally cured me of my 22-year aversion to Hershey’s Kisses.

Nope. I still hate them. Unless they’re in peanut butter blossoms.

Peanut Butter Blossoms
recipe from Hershey’s Kitchens

Ingredients:
48 HERSHEY’S KISSES Brand Milk Chocolates
1/2 cup shortening
3/4 cup REESE’S Creamy Peanut Butter (I used generic)
1/3 cup granulated sugar
1/3 cup packed light brown sugar
1 egg
2 tablespoons milk
1 teaspoon vanilla extract
1-1/2 cups all-purpose flour
1 teaspoon baking soda
1/2 teaspoon salt
Granulated sugar

Directions:

1. Heat oven to 375°F. Remove wrappers from chocolates.

2. Beat shortening and peanut butter in large bowl until well blended. Add 1/3 cup granulated sugar and brown sugar; beat until fluffy. Add egg, milk and vanilla; beat well. Stir together flour, baking soda and salt; gradually beat into peanut butter mixture.

3. Shape dough into 1-inch balls. Roll in granulated sugar; place on ungreased cookie sheet.

4. Bake 8 to 10 minutes or until lightly browned. Immediately press a chocolate into center of each cookie; cookie will crack around edges. Remove from cookie sheet to wire rack. Cool completely. About 4 dozen cookies.

Serving Size: 1 cookie
Total Calories: 100

Cookie Mondays: Chocolate Gooey Butter Cookies

Posted on

A MySpace friend posted this recipe on her blog last week and I knew as soon as I read it that I had to use it for the following Cookie Monday.

Recognize anything about the title?  You would if you’re half as obsessed with Gooey Butter Cake (my favorite is pumpkin) as I am.  This is Paula Deen’s spin-off of her famous cake, turned into a cookie.  The cake mix makes it simple and the butter and cream cheese helps to create a very moist, almost brownie-like center.  These were another big hit at the office–Den came home with an empty platter and lots of compliments from his co-workers.  Another cookie success. :)

CHOCOLATE GOOEY BUTTER COOKIES
Recipe by Paula Deen

Ingredients
1 (8-ounce) brick cream cheese, room temperature
1 stick butter, at room temperature
1 egg
1 teaspoon vanilla extract
1 (18-ounce) box moist chocolate cake mix
Confectioners’ sugar, for dusting

Directions
Preheat oven to 350 degrees F
In a large bowl with an electric mixer, cream the cream cheese and butter until smooth. Beat in the egg. Then beat in the vanilla extract. Beat in the cake mix. Cover and refrigerate for 2 hours to firm up so that you can roll the batter into balls. Roll the chilled batter into tablespoon sized balls and then roll them in confectioner’s sugar. Place on an ungreased cookie sheet, 2 inches apart. Bake 12 minutes. The cookies will remain soft and “gooey.” Cool completely and sprinkle with more confectioners’ sugar, if desired.

Makes 2 Dozen

Cookie Mondays: Peanut Butter Sandwich Cookies

Posted on

As part of my New Year’s Resolution to lose a significant amount of weight by the end of the year, I’ve cut my baking back to just once per week.  Not only have I cut down the amount of time I spend baking, but I’m baking for my husband’s co-workers instead of myself and my family.  Inspired by my friend, Laura, who sends cookies to work with her husband every Monday, I’ve begun doing the same thing.  This keeps me from going through baking withdrawal, and allows me to have a treat once a week before sending the bulk of them out of the house for others to enjoy (thus freeing me from the constant temptation that having them in the kitchen would present).

For “Cookie Monday” this week, I whipped up some absolutely delicious peanut butter sandwich cookies.  And then proceeded to eat 13 of them (that’s over 1,000 calories, in case you were wondering) in under five minutes.  And then I squirted the leftover peanut butter filling from the pastry bag directly into my mouth.  So much for keeping to my calorie limit for the day! 

These cookies are too addictive to eat just one…or twelve.  Well, they are for me, anyway. They are a Girl Scout’s “Do-Si-Dos” knock-off and while I don’t love the Girl Scout’s version, I could practically live off these cookies if I had no concern for my health or waistline.  They are wonderful.

Next week I will work on my self-control and see if I can keep it to just 1 or 2 cookies.  Considering how many sweets I was consuming before the new year, however, I have to admit that even 13 cookies in a week is an improvement.  So at least I’m moving in the right direction.

Peanut Butter Oatmeal Cookies
Recipe modified from All Recipes

Cookies
1/2 cup butter, softened
1/2 cup peanut butter
1/2 cup white sugar
1/2 cup packed light brown sugar
1 teaspoon vanilla extract
1 egg
3/4 cup all-purpose flour
1/2 teaspoon baking soda
1/4 teaspoon baking powder
1/2 teaspoon salt
1 cup quick cooking oats

Filling
3 tablespoons butter, softened
1 cup confectioners’ sugar
1/2 cup smooth peanut butter
2 1/2 tablespoons heavy whipping cream

Preheat oven to 350 degrees.  Line a baking sheet with parchment paper or grease it.  Set aside.

In a large bowl, cream together the butter, peanut butter, sugars, and vanilla. Add egg and beat well.

In another bowl, whisk together the flour, baking soda, baking powder, and salt. Add these dry ingredients to the creamed mixture and beat until combined, then add the oatmeal and continue beating until incorporated.

Roll teaspoonfuls of dough into balls and place on prepared baking sheet.  Press each mound down with your fingers or a fork, depending on the appearance you’d like, to form 1/4 inch-thick cookies. Bake 5 minutes, or until cookies have just begun to set around the edges.  (My cookies were exactly 1 tsp each, so if yours are larger, they will obviously require more baking time.) Remove and allow to cool 3 minutes on the baking sheet before removing them to a wire rack.  Repeat with the remaining dough.

To Make Filling: Cream the filling ingredients until well blended. Spread or pipe filling on to half of the cooled cookies, then top with the other half to form sandwiches.  Don’t be stingy with the filling like I was at first–there is quite enough for all the cookies.  Of course, the benefit of being stingy with it is that you’ll have some left to squirt into your mouth when you have finished. Heaven.

Makes 60 sandwich cookies, if you can keep from eating a single speck of dough, scrape every last speck of it from the bowl to form the cookie balls, and you measure each ball of dough to be exactly 1 teaspoon.  I actually managed to do this and then went wild once the beautiful completed cookies were in front of me.  Oh yeah, and in case you’re counting your calories, each cookie clocks in at 80 calories.  Not too bad if you can keep from eating more than one or two! :)

I used my fingers to press these cookies down, so they weren't quite as flat and made a smaller, chubbier cookie. I had no preference as to which I liked better because they both tasted equally delicious!


My husband modeling the latest cookie fashion in the Miller household.


I had used Dennis for the former picture after taking this one b/c I realized how disgusting my nail polish was. But now I'm posting it anyway b/c I remembered seeing Lindsay Lohan with similar-looking nails. I'm not lazy, I'm just impersonating the stars! OK, fine. I'm just lazy. And apparently I need some lotion, too.

Easy Lemon Cookies

Posted on

5 reasons why you need to make these cookies ASAP:

5. They’re insanely easy to make.
4.They’re bright and pretty!
3. They have superb texture–firm on the outside, chewy on the inside.
2. They taste like sunshine.
1. You can have two whole cookies for just 102 calories!

What, you need more reasons? What are you waiting for?!

I like to really douse the cookies with powdered sugar so they take on the "crinkle" look.

Easy Lemon Cookies

Printable recipe
Printable recipe with picture

1 (18.25 oz) package lemon cake mix
2 eggs
1/3 cup vegetable oil
1 Tablespoon lemon juice
grated zest from 1 lemon
powdered sugar for decoration

Preheat oven to 375 degrees F. Pour cake mix into a large bowl. Stir in eggs, oil, lemon juice & lemon zest until well blended. Refrigerate at least 15 minutes, and up to overnight to make the dough easier to handle. Roll teaspoonfuls of dough into balls and then drop into a small bowl of powdered sugar. Roll around until lightly or heavily covered, depending on how much you want. Once sugared, place on an ungreased or parchment-lined cookie sheet.  Bake for 6-9 minutes in the preheated oven. The bottoms will be light brown, and the insides chewy.

Makes 60 cookies
Per cookie: 51 calories, 2 g fat, 7.8 g carbohydrate

This recipe is linked with GirliChef for BSI: Lemons!

Chocolate Peppermint Chip Cookies


I absolutely do not have time to be posting this, but I absolutely can not wait another year to do it so I’m squeezing it in for your benefit (don’t you feel special?), and also to participate in the Christmas recipe roundup for All Through The Year Cheer.

https://i0.wp.com/a3.ec-images.myspacecdn.com/images02/41/6ba30c5b05514b1c9b7f93be208b674e/l.jpg

Every winter, these Andes Peppermint Crunch Baking Chips make an appearance on the baking aisle by the chocolate chips. Until last year, I ignored them because I’d never seen a recipe that used them and I’m not a huge mint enthusiast except when it comes to Girl Scout Thin Mints. After last Christmas, however, they were deeply discounted and, being unable to resist a bargain, I decided to buy a few bags and come up with some recipes for them.

*Note: despite the name, the baking chips are not crunchy like peppermint candy, but more like the consistency of white chocolate chips with tiny little pieces of peppermint candy in them…thus the “crunch” in the name.

Lucky for me, the first recipe I tried ending up tasting just like my cherished Thin Mints, except very soft and buttery with a homemade taste.   The red flecks peeking through the dark chocolate gives them a festive appearance, and peppermint is probably the flavor most associated with Christmas, and it’s even better when paired with chocolate!

If you see the chips on sale after Christmas, stock up on them so you can make these cookies throughout the year. (I actually used year-old chips on this batch of cookies and they tasted perfect, so you can even stock up a year in advance in preparation for next Christmas!)  They may have a festive look, but the taste is classic and can be enjoyed in any season.

Chocolate Peppermint Chip Cookies
If you can not find dark cocoa powder, regular may be substituted.

2 sticks unsalted butter, softened
1 cup packed light brown sugar

½ cup granulated sugar
2 large eggs
2 tsp. vanilla extract
2 cups all-purpose flour
½ cup Hershey’s Special Dark cocoa powder
1 tsp. baking soda

½ tsp. salt
1 (12-oz) bag Andes Peppermint Crunch Baking Chips
1 cup mini semi-sweet chocolate chips*

Preheat oven to 350 degrees and line cookie sheets with parchment paper.

Cream the butter and sugars together on medium-high speed until light and fluffy, a few minut

es. Add the eggs, one at a time, mixing well after each. Add the vanilla and mix well. Sift in the flour, cocoa, baking soda & salt and mix just until combined. Mix in the mint & chocolate chips last.

Drop dough by teaspoonfuls onto prepared baking sheets. Bake for 6 minutes (10-12 for larger cookies), or until just starting to set around the edges. Remove from oven and let cool on the baking sheet (sitting atop a cooling rack) for sev

eral minutes before removing to the cooling rack to cool completely.  Repeat with the remaining dough.

Once cool, store the cookies in an airtight container.  If you’re making them in advance, they freeze well for months on end.  My method for freezing cookies is putting them in rows inside a gallon-sized Ziploc bag and sticking them in the freezer until needed.

*You can use regular chocolate chips if you will be making larger cookies with a tablespoon like those pictured first.  I usually make them small, the size of thin mints, like in the pictures below.

https://lh3.googleusercontent.com/-yWNCdTG30l8/Sy0rSjeHy1I/AAAAAAAAElA/Pib8VkmKOIQ/s640/012.JPG

Recipe & photos by Veronica Miller

Dark Chocolate Chunkies


https://i0.wp.com/a4.ec-images.myspacecdn.com/images02/63/6f52134c19984885997e760bee4a2c8b/l.jpg

*Update: I won 3rd place for this cookie in the chocolate cookies category at the fair!

https://i0.wp.com/a1.ec-images.myspacecdn.com/images02/86/5ee83875b9284e808dd05e1615dfa78d/l.jpg
I invented this cookie shortly after my first Chunky experience.  I think those candy bars were most popular during the 1980s, but as we weren’t allowed candy growing up, my first taste came as an adult.  I was surprised by how tasty the odd combination of milk chocolate, peanuts & raisins was and one day decided to put those same elements into a cookie.  I thought using regular cocoa powder made them look too bland so I used dark cocoa instead, and I think that not only helps the visual appeal, but gives the cookies a deeper chocolate flavor as well. 
 
I suppose it’s up to personal tastes as to how much you will like this cookie, but they are my second favorite cookie of all time.  I like them more than the candy bar!
Dark Chocolate Chunkies

Kansas State Fair 3rd Place Winner, Chocolate Cookies division

1 stick unsalted butter, softened

½ cup light brown sugar

¼ cup sugar

1 large egg

1 tsp. vanilla extract

1 cup all purpose flour

¼ cup Hershey’s Special Dark cocoa powder

½ tsp. baking soda

 ¼ tsp. salt

1 cup milk chocolate chips

1 cup dry-roasted, salted peanuts

½ cup raisins


Preheat oven to 350 degrees.


Cream the butter and sugars together until blended and fluffy, about five minutes.  Add the egg and vanilla and mix well.  Sift in the flour, cocoa and baking soda and mix just until combined.  Stir in the remaining ingredients.

Mound large spoonfuls, about ¼ cup per cookie, onto an ungreased, parchment-lined, cookie sheet about 2″ apart.  Flatten with a spatula until each cookie is almost 2 inches in diameter.  Bake for 10-15 minutes or until the edges have just begun to firm.  Remove from oven and allow to cool on the cookie sheet for one minute, then transfer to a wire rack.*  Repeat with remaining dough.

Makes about 16 giant cookies.

*I always underbake cookies to ensure that they are soft and chewy after cooling.  Depending on how soft they are when I remove them from the oven, sometimes I have to leave them to cool completely on the cookie sheet so they can continue baking while they cool and set them up a little more without over-baking.  If you try to remove a cookie to a cooling rack and it’s too doughy, just leave them to cool completely on the sheet.  If you can remove it easily, do it or they will not be as soft after cooling.

Brown Butter Chocolate Chip Cookies

Posted on

Update: I won a blue ribbon for these cookies at the 2011 Kansas State Fair!

Cookies are my favorite food group and I’ve never met a cookie I didn’t like, but never had a favorite until fairly recently.

And the winner is… [drumroll]

chocolate chip cookies {insert sheepish grin here}

But these aren’t just any chocolate chip cookies, people.  These are chocolate chip cookies made with brown butter, toasted & ground-up oatmeal, toasted nuts and just enough vinegar to make an extremely tender cookie without adding any flavor.

I suppose I always knew that chocolate chip cookies would eventually beat out all the rest for me, because I have made countless batches of them in an effort to find the perfect recipe.  I’ve never done this with anything else. All were good, but none left me with the feeling that I’d found the best.  Until I found this one.

Allow me to introduce you to the creator of this recipe, Laura Flowers: culinary genius and food blogger extraordinaire.  (If you use that to title your autobiography, Laura, I want 10% of your profits!)  Every week she posts new recipes–most of them her own–for everything from cookies to pizza (those are my favorite) to salads & pasta dishes.  I have tried several and have yet to be disappointed.  And I’m eternally grateful to her for bringing the torture of my endless search for the perfect chocolate chip cookie to an end!

Today I made them for Laura’s “Project Cookie” and mailed them to her friend Ted & his platoon in Iraq.  Well, I mailed most of them (minus the usual dozen I can’t keep from eating every time I make them!)

Brown Butter Chocolate Chip Cookies

Printable recipe
Printable recipe with picture

1/2 cup old-fashioned oatmeal
1 cup (2 sticks) softened butter
3/4 cup packed light brown sugar
3/4 cup granulated sugar
1 teaspoon salt
1 Tablespoon real vanilla extract
1/2 teaspoon white vinegar (You won’t taste it, I promise.)
2 large eggs
1 1/2 teaspoons baking soda
2 cups all-purpose flour
1 cup chopped walnuts or pecans (optional, but add 1/4 cup more flour if omitting)
1 (12-oz) bag semi-sweet chocolate chips

1. Preheat oven to 350 degrees. Line baking sheets with parchment paper.

2. In a nonstick skillet, melt 1 stick of the butter over medium heat until foamy and golden brown. You’ll know it’s ready when the solids have separated and the bottom has lots of brown specks and it starts to smell so wonderful that you get light-headed when you catch a whiff. Pour into a bowl to cool and wipe out the skillet.

3. In the skillet over medium heat, toast the oatmeal, stirring often, until fragrant and some of the oatmeal is light golden in color. About 3 minutes. Transfer the oatmeal to a food processer and grind until fine and powdery. I usually just turn it on and leave it alone for a full minute. Set aside.

4. If using, spread the nuts onto a plate and microwave in 30 second increments 2 or 3 times until toasted, stirring in-between. Set aside to cool.

5. In a stand mixer, beat the softened butter, browned butter, brown sugar, granulated sugar, salt, vanilla extract, and vinegar low to combine, and then on high speed until fluffy and lighter in color. I beat mine about five minutes so that there’s plenty of time for all those sugar crystals to force air into the butter. (Alton Brown has convinced me this is crucial to making good cookies and since I do this and my cookies are always good, you should believe us both.)

6. Add the eggs and mix until combined. Add the oatmeal and baking soda and beat for another minute. Next, add the flour half at a time and mix on low speed just until incorporated.

7. Add the chocolate chips and toasted nuts. Mix on low until incorporated.

8. With a size 50 cookie scoop or a generous tablespoon, drop the dough onto parchment paper 3 inches apart.

9. Bake for 11 minutes or until golden around the edges. I use an airbake pan and usually bake mine about 10 minutes, but oven temps vary so just keep an eye on the first pan to judge the time yours needs. Remove from oven and let set on the cookie sheet for 3 minutes before moving to a cooling rack. *I prefer to take my cookies out of the oven when they are puffy & still a little raw looking because the residual heat from the pan continues to bake them and this yields a cookie that is slightly crisp on the outside and very soft & chewy on the inside.

Makes about 45 cookies.

Note:   These cookies are best baked shortly after mixing the batter together. There is no need to refrigerate the dough.

Recipe source: The Cooking Photographer, with some slight modifications by me

Now it’s time for some fun! If your favorite cookie isn’t listed below, feel free to leave it in a comment.  You can also leave links–I can never have enough cookie recipes.  Like I said, cookies are my favorite food group. :)

Secret Recipe Club

Sugar-Free Rugelach

Posted on

I needed a good sugar-free dessert to provide the diabetics in our Church group with something sweet for an upcoming potluck so they aren’t left out when it comes time for dessert.  I found this one on allrecipes.com and chose it not only because it was one of the highest rated s/f recipes, but because it relies on natural sweetness in the raisins & fruit spread instead of artificial sweetener.  I love Splenda, but it almost always ruins desserts.

This is one of the best sugar-free desserts I’ve tried and once again, I think it’s due to the natural sweetness and no added chemicals.  To make this a completely natural cookie, swap the margarine for butter.

Sugar-Free Rugelach

1 cup margarine, softened
8 ounces cream cheese, softened
2 3/4 cups all-purpose flour
2 teaspoons vanilla extract
1 cup chopped raisins
1 cup chopped walnuts
2 tablespoons ground cinnamon
1 cup apricot spreadable fruit, warmed until slightly liquid

Directions
1. Cream together the margarine and cream cheese in the bowl of an electric mixer. Blend in the vanilla. Mix in the flour. Chill the dough.
2. To make the Filling: Mix together the chopped raisins, chopped walnuts, and cinnamon. If you have a food processor, here is the easiest and best method: place the whole walnuts and raisins into the bowl, sprinkle with the cinnamon, and chop them together by processing in short pulses.
3. Divide the dough into 4 equal portions. Roll out each portion into a 10 – 12 inch circle 1/8 inch thick on a lightly floured board or between two sheets of waxed paper.
4. Spread a light layer of preserves (approximately 2-4 tablespoons) onto each dough circle. Sprinkle each circle with approximately 1/3 cup of the chopped nut-raisin-cinnamon mixture.
5. Cut each circle into 16 wedges using a pastry cutter or a pizza cutter. Roll each wedge from base to point. Place point down on a lightly greased or parchment lined baking sheets.
6. Bake for 15-17 minutes at 375 degrees F (or until golden). Remove to racks to cool.