This is my youngest sister, Lacey, blowing out a tealight candle on her birthday in 2009. We never remember birthday candles for some reason. My poor nephew (her son, Owen) had to blow out a lighter on his birthday over the weekend-lol. Also, you can see how old this pic is from the caramels in the corner–they are from one of the batches I made during my caramel-extravaganza.
Anyway, this cake is another oldie but goodie! I also made this back in my MySpace days and never got around to posting it because I made it in the winter and wanted to wait until summer to share it. I’m seasonal like that. (?) Anyway, three years later and with summer about to fizzle out, I figured I’d better get on it!
I made this for Lacey’s birthday, who is a December baby along with Danielle & Dennis. December is quite the month for celebration in my family. Anyway, Lacey loved the Lemony Orange Cake I made for my Dad’s birthday that year, and asked for a lemon cake for her birthday too. Everyone loved it! This is a seriously moist, lemony cake and for our lemon-loving family, it was perfect.
Cake:
1 box lemon cake mix
1 pkg. lemon jello
3/4 cup vegetable oil
3/4 cup water
4 eggs Glaze:
2 1/2 cups powdered sugar
juice of 2 lemons
Preheat oven to 325F. Mix all ingredients together until well blended. Bake in greased and floured 9×13 pan for 45 minutes.
As soon as the cake is out of the oven, whisk together the glaze ingredients. While the cake is still hot, prick top of cake all over with fork and spread with the glaze. Cool completely.
Recipe source: Barbara J., a MySpace friend
Since this blog relates to Lacey, I just had to share these two photos of her that I took at Owen’s party (she is his mama, that’s why he’s so cute :)). She’s so purty. :)
She cuts her own hair and did a funky style this time, making it short on one side and long on the other. She makes it work. I also love her earrings–it’s hard to tell but nails and skeleton keys are hanging off them.
If you don’t know about and who CW is, check out Monday’s post: Meet CW.
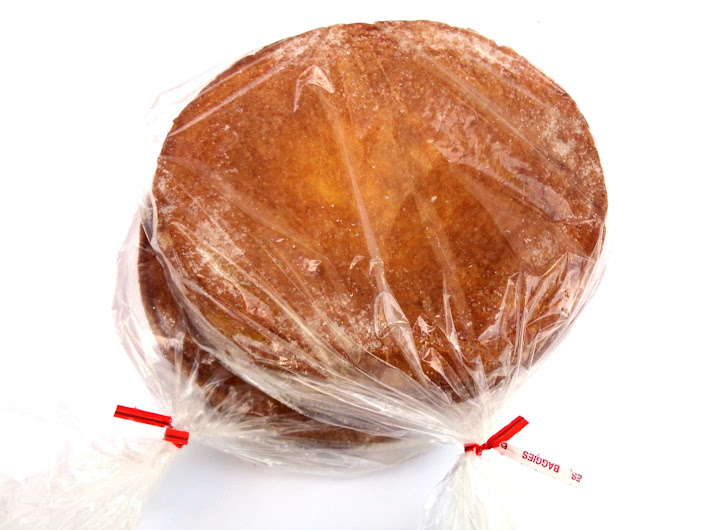
Growing up, Mom would make a very particular kind of strawberry shortcake at least once every summer. She would buy a “Family Style Shortcake” from Dillons, like this:
Then she mixed the tar out of sliced strawberries with honey (to help the strawberry juice come out to play with the honey) and poured that on top, put Dream Whip over that, and served it up once a year in summer after picnics in the park. Don’t know why, but that’s always when we had strawberry shortcake–after picnics in the park. Anyway, since we very rarely had anything sweet, this was such a lovely treat and I particularly loved the flavor of the ripe berries with the local, raw honey.
Mom’s simple strawberry shortcake was so delicious, and just the idea of it brings back fond and mouth-watering memories. But I wanted to be able to create it at home because, although we can still find the exact same shortcake at Dillons that Mom bought twenty years ago, who knows how long they’ll continue to make these and when they stop, I still want to be able to enjoy CW’s shortcake. And I want my grandchildren, or great nephews and nieces at the very least, to be able to enjoy this shortcake. And their grandchildren after that. CW’s shortcake must live on!
Since my youngest sister, Lacey, manages a Dillons deli, I first checked with her to see if she could possibly snag the recipe for me. In a way, I was happy to hear they weren’t baked in house but shipped in. That meant it was experimentation time! I’m not always in the mood to create a recipe from scratch, but I was definitely up for this challenge since the shortcake holds a special place in my heart.
So here’s what I had to go off of to recreate the recipe (yes, I totally stood two inches from the ingredients list to take this picture and yes, I might have gotten some strange looks):
Based on the cake’s texture, flavor, and the ingredients, I decided this cake was pretty much a low-fat sponge cake so I Googled a lot of recipes to create my own that reflected these ingredients as closely as possible. I did omit the buttermilk since it seemed too fussy to have two different kinds of milk, but did add in some vinegar to replace the acidity lost. I also didn’t mess with any ingredients cooks normally wouldn’t have in their kitchens, like whey and dextrin. What is dextrin anyway?
I’m happy to report that while I don’t think I got it spot on, it was close enough that when Lacey tasted it, although she claimed to not remember eating CW’s strawberry shortcake growing up, she looked up with big eyes and said, “I totally remember this taste. I don’t remember eating it, but I remember this taste!”
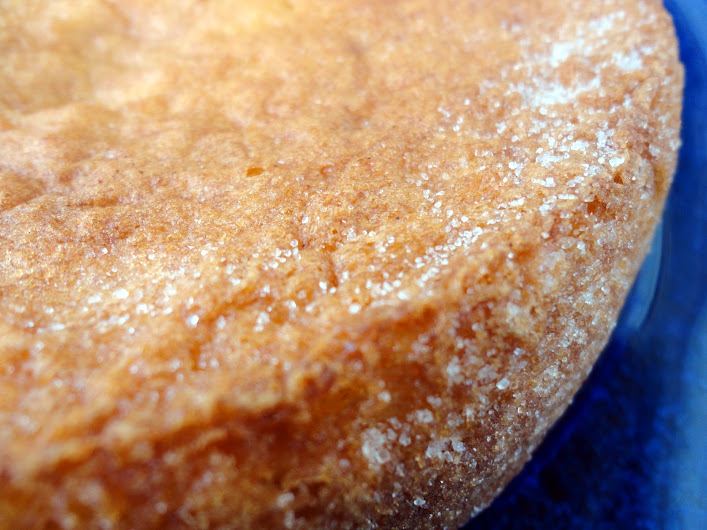
The cake from Dillons is crusted with sugar so I did that with mine, though it’s not necessary. It’s just kinda pretty. :) The cake I created is very spongy and dry, perfect for absorbing the delicious honeyed strawberry juice. Because of its texture, I really wouldn’t recommend using it in any recipe that doesn’t have a juicy topping–that juice is really needed to soften the cake. While the cake is very soft and bouncy to the touch, the texture is tough to cut because it’s so spongy, and it’s hard to cut with a fork until the juices have flowed down into the nooks and crannies of the cake. Once that happens though, you have tender, strawberry cake magic.
I was pretty impressed with the response I got from this cake. I shared it with my family twice, serving one cake at our Independence Day barbecue, then froze the second cake (the recipe makes two) and broke it out a week and a half later for our dessert after a barbecue at the lake. I usually have to ask my family what they think to get any feedback but all I had to do this time was sit back and let the accolades rain down. Adjectives such as amazing, best ever, and incredible were used liberally. Honestly, I’m pretty sure this cake now beats out THE Mocha Crunch Cake for favorite family cake. Check out my nephew gobbling it up at the lake (unless you’re averse to messy kid eaters, then you might want to steer clear):
I stuck with CW’s recipe for the strawberry topping, only using the berries and honey, and it’s just so stinkin’ good. Please try this topping, even if you buy your cake. Just make sure your honey is local and raw to get the best flavor. Also, local raw honey can help with allergies! Bonus!
For the whipped cream, you can use whatever you prefer–Cool Whip, Dream Whip, real whipped cream, or you can use the recipe for stabilized whipped cream I shared yesterday. I first made it with the stabilized whipped cream and the second time with Cool Whip and it was loved both ways. The strawberry topping is the star of this cake and I don’t think you can go wrong as long as you’ve got that. Who would have thought that honey and strawberries could create such magic?
Cake
½ cup whole milk
1 cup sifted all-purpose flour
1 tablespoon cornstarch
1 teaspoon baking powder
½ teaspoon baking soda
1/8 teaspoon salt
3 eggs
½ teaspoon cream of tartar
1 ¼ cups granulated sugar, divided
1 teaspoon vanilla extract
1 teaspoon white vinegar
Berry Topping
1 lb. fresh strawberries
¼ cup local raw honey
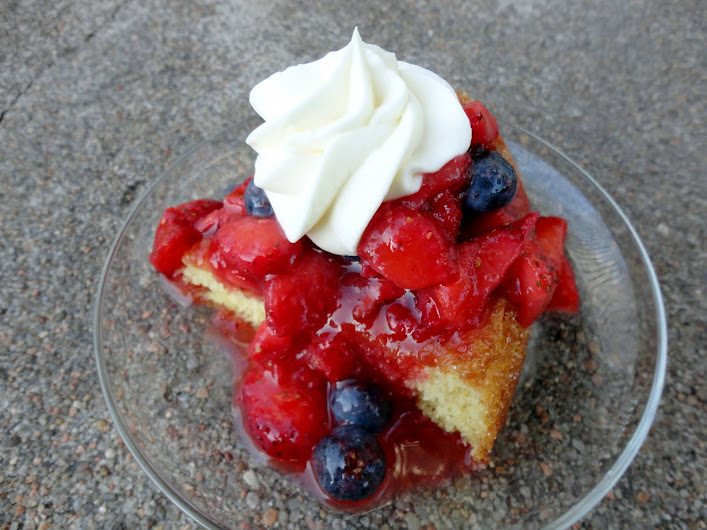
Optional: for a patriotic dessert, add 1 cup fresh blueberries
For the cake, in small saucepan, heat milk until bubbles form around edge of pan. Remove from heat; set aside.
Preheat oven to 350 F. Grease and flour two 8” round cake pans; set aside.
Sift flour with cornstarch, baking powder, baking soda, and salt; set aside. In small bowl of electric mixer, at high speed, beat eggs and cream of tartar together five minutes on high speed, until light and foamy. Gradually add 1 cup of the sugar, beating for an additional five minutes, or until ribbons form. Add vanilla and vinegar and mix just until combined. Blend in flour mixture on low just until smooth. Add warm milk and beat just until combined.
Immediately pour batter into prepared pans. Bake 25-30 minutes, or until cake tester inserted in center comes out clean. Turn the cakes out onto cooling racks. Place the racks over the sink and while they are still hot, using the remaining ¼ cup sugar, sprinkle sugar over the tops and rub it along the sides of the cakes. Allow to cool completely before wrapping in plastic wrap or putting in gallon-sized Ziploc bags until ready to use. You will only need one cake for this recipe so you can either freeze one for later, or double the berry topping and whipped cream and serve both cakes at once.
For the berry topping, combine the strawberries and honey in a medium bowl and stir for about 2-5 minutes, until the strawberries start to release their juices and the sauce gets thinner and takes on a red color. Cover and refrigerate until ready to use. If adding blueberries, stir them in before refrigerating or right before topping the cake.
To assemble the cake for serving, place cake on a plate, then cover with the berry mixture, including the juices so they can seep down into the cake. Allow to sit for at least 5 minutes so the juices can soak in, then top with whipped cream, slice, and serve.
Veronica’s note: I originally used nonfat milk since that’s what is used in the Dillon’s cake. The last time I made it, I only had whole milk and it made the cake so much better for it to have a little fat, so I updated the recipe. You can still use nonfat, it’s good that way, but better, more tender, with the whole milk.
OK, I’m almost ready to share CW‘s recipe for strawberry shortcake, but the draft started out so long that I’m trying to break up the longer parts into separate blogs, and this stabilized whipped cream recipe certainly deserves its own post.
Dollops of whipped cream top so many summer-time desserts and a recipe for a stabilized version comes in quite handy for me throughout the year. Since I need it so often, but very rarely have the time to whip it up right before serving dessert, and can’t make it much in advance since it waters out over time, I usually make the other recipe for stabilized whipped cream that I have on my blog. But then a reader (shout out to Miss Sandi Rose!) shared her own recipe for stabilized whipped cream with me back in March and I tried it out the first chance I got because it was so interesting! I can tell you that not only was I pleased with the results, but my family was as well. I left the leftover whipped cream at my parents’ house and when Mom gave me my piping tip back next time I was over, I asked if they ate the leftovers. She answered, “We ate the h#@& out of it!” LOL! I can totally see her squirting the whipped cream straight into her mouth and laughing like a lunatic while dodging Dad as he tries to get it away from her to hog it for himself. That’s totally Crazy Man and CW.
Anyway, while you can’t tell the other recipe apart from regular whipped cream, this one doesn’t increase in volume very much, if at all, so it’s very thick and creamy and has just a little bit of tang to it, which I happen to love. The texture reminds me of mousse and it really could be a dessert in and of itself.
I used it to top a strawberry shortcake (bet you figured that out already since you’re smart like that) that I added blueberries to for our Independence Day barbecue. Check back tomorrow for the shortcake recipe-it was a huge hit and this whipped cream put it over the top!
3 oz. cream cheese, softened
1 cup heavy cream
24 miniature marshmallows
1/4 cup granulated sugar
Mash cream cheese with a fork in a medium metal mixing bowl. Slowly add the whipping cream and stir until blended. Stir in marshmallows and sugar. Chill 4 hours or overnight. (Do not cover the bowl.) Place beaters in freezer to chill while the mixture is in the fridge. Whip mixture with the chilled beaters until the marshmallows are completely dissolved and mixed in and the mixture is thick and hold stiff peaks. Cover and keep refrigerated until ready to use.
I’m terrible about using recipes from cookbooks. I own quite a few but hardly ever go to them when I need a recipe, instead I go to blogs and Pinterest and Google searches. But I vowed I would make at least one recipe from the Pioneer Woman’s Food From My Frontier cookbook. It’s the only cookbook I own that I paid more than $15 for (I get them used or as gifts) and even though it’s cool to have as a memento since she signed it, it still felt like wasting money if I never used it.
Being a coffee and cake lover, the first thing that called to me was her Coffee Cream Cake. Two layers of coffee-flavored cake with a cream filling and a coffee frosting. Yum. I decided to turn it into cupcakes, putting the cream filling in the center of each. Her recipe has a drippy frosting that is more like a glaze that thickens as it cools, but I wanted a fluffy buttercream frosting on the cupcakes so I made up my own coffee buttercream recipe for these.
The cupcakes are great, mostly because of the cream filling and frosting. I could tell from how thin the cake batter was that it would make sturdy cupcakes, not the light and fluffy ones that a thicker batter will make. While the cake part isn’t my favorite (I’m pretty picky when it comes to cake), it does work well overall. I always state my honest opinion on recipes so that you’re fully informed, but I want to assure you that you will like these cupcakes as is. I doubt any one besides a cake connoisseur would notice the crumb. There isn’t anything really wrong with it because it is nice and moist, but it’s just not as light and tender as I like my cake to be. The taste is fabulous, so fabulous that my coffee-hating husband couldn’t get enough of them.
So make these, you will love them if you love coffee, and perhaps even if you don’t. Or, if you’re like me and prefer a lighter cake, you might try a different recipe for the cupcakes. Personally, I’m either going to use chocolate cake next time, making them into mocha cream cupcakes, or sub really strong coffee for the water in a white or yellow cake mix recipe to get the texture I like.
To get this white streak effect, I used the same piping bag for the frosting that I used for the filling. The residual white filling lined the bag and made a streaky look when I piped the buttercream onto the cupcakes.
Cupcakes
1 cup (2 sticks) unsalted butter
3 tablespoons instant coffee crystals
1 cup boiling water
2 cups all-purpose flour
2 cups granulated sugar
½ teaspoon salt
½ cup buttermilk
2 eggs
1 teaspoon baking soda
2 teaspoons vanilla extract
Cream filling
4 oz. cream cheese, room temperature
½ cup powdered sugar
½ cup heavy cream
Coffee Buttercream
¼ cup Kahlua (here is a recipe to make your own)
1 tablespoon instant coffee crystals
1 cup (2 sticks) unsalted butter, softened
1 lb. powdered sugar
Dash of salt
For the cupcakes, preheat the oven to 350F. Line 24 cupcake tins with paper liners; set aside.
Melt the butter in a saucepan, then stir in the instant coffee and boiling water. Let the mixture bubble up for a few seconds, then turn off the heat. In a large bowl, combine the flour, sugar, and salt. Pour the hot butter/coffee mixture over the top and stir to combine. Mix together the buttermilk, eggs, baking soda, and vanilla and add it to the bowl. Whisk until smooth (batter will be very thin). Using a levered ice cream scoop, fill the cupcake tins half full. You will have extra batter, which you can bake more cupcakes with or a small cake if you have a 6” cake pan. Bake for about 15 minutes, or until a toothpick inserted in the center of a cupcake comes out clean. Allow cupcakes to cool for a few minutes in the tins, then remove to a cooling rack to cool completely.
While the cupcakes cool, prepare the filling. Beat the cream cheese until smooth, then add the powdered sugar and heavy cream and beat on low until sugar is moistened, then on high until light and fluffy. Fill a pastry bag fitted with a round tip (or a squeeze bottle) with the filling. Push the tip or nozzle into each cupcake and squeeze filling into the center, pulling back once the top starts to rise, and stopping when the filling bursts through the top of the cupcake. Repeat with remaining cupcakes.
For the buttercream, bring the Kahlua to a boil and stir in the coffee crystals. Set aside to cool completely. Once cooled, beat the butter in a large bowl until creamy, then add the sugar, Kahlua mixture, and salt. Beat on low until sugar is moistened, then beat on high until smooth and creamy
To complete cupcakes, pipe swirls of coffee buttercream on top of the filled cupcakes. Serve at room temperature.
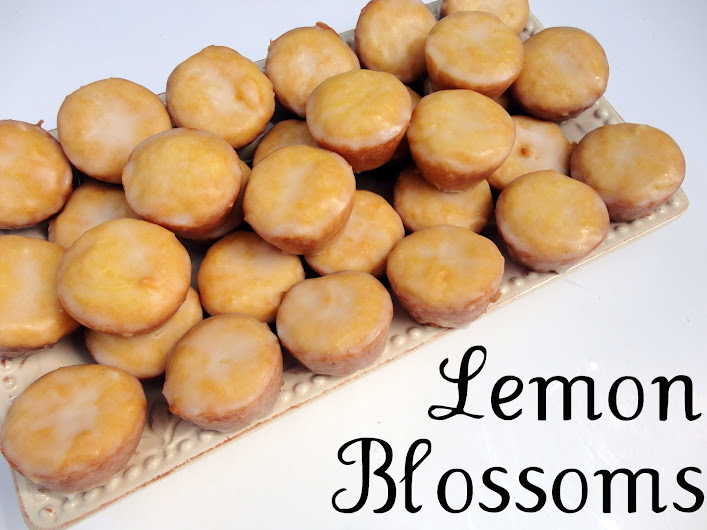
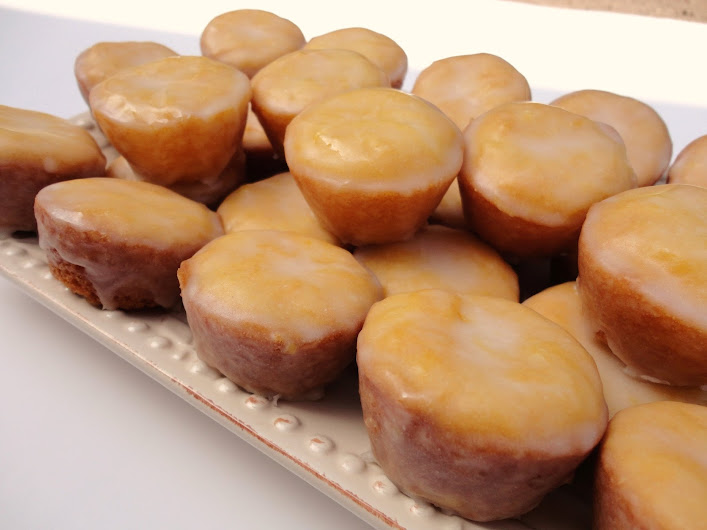
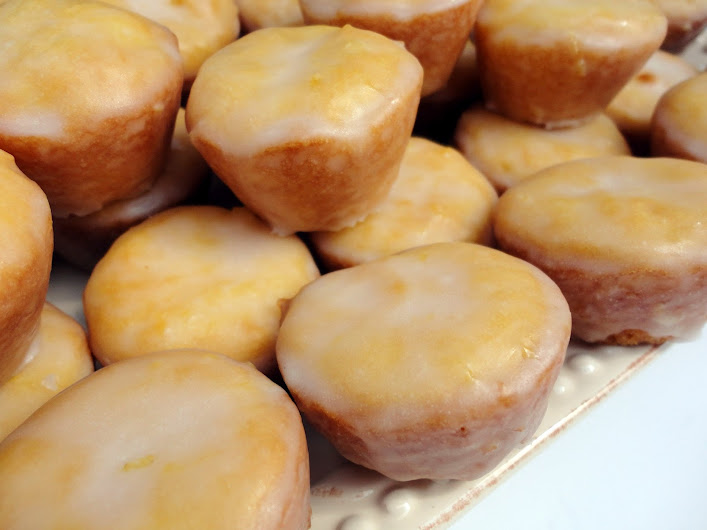
I made these for Mother’s Day, intending to give pretty little baggies of them as gifts to all the mothers at the annual Mother’s Day picnic on Dennis’ side of the family. It didn’t quite work out that way. The first pan, which was half the batch, I didn’t grease well enough and they all stuck horribly so guess where those ended up? Yup, in our bellies. Can’t say we were too sad that only half the batch was pretty enough to share. But then we couldn’t keep our hands off those either, and in the end, there were only enough to give to two mothers: his and mine.
Our mothers loved these little beauties, and we loved them. Way too much. They are really delicious, but most of the lemon flavor comes from the glaze, and I would suggest trying this with a lemon cake mix instead of a yellow if you can find one. That would really intensify the lemon flavor. They are wonderful as is, but can you get enough lemon flavor in the summer? I think not.
1 (18.5 oz) box yellow or lemon cake mix
1 (3.5 oz) box instant lemon pudding mix
4 large eggs
3/4 cup vegetable oil
Glaze:
4 cups confectioners sugar, sifted
1/3 cup fresh lemon juice
Lemon zest from 1 lemon
3 tablespoons vegetable oil
3 tablespoons water
Preheat oven to 350 degrees. Spray miniature muffin tins thoroughly with cooking spray.
Combine cake mix, pudding mix, eggs and oil and blend well with an electric mixer until smooth, about 2 minutes. Batter will be quite thick. Using a cookie scoop, divide the batter between the muffin wells, filling each halfway. Bake for 12 minutes.
While the blossoms are baking, make the glaze. In a mixing bowl, whisk together the sugar, lemon juice, zest, oil, and 3 tablespoons water. Whisk until smooth.
Remove the blossoms from the oven when they are done and turn out onto a tea towel. You might have to run a butter knife around the edges of the cupcake wells to loosen them before turning out. While they are still warm, dip the blossoms into the glaze, covering as much of the cake as possible, or spoon the glaze over the warm cupcakes, turning them to completely coat. Place on wire racks with waxed paper underneath to catch any drips. (I did this over the sink.) Let the glaze set, about 1 hour, before storing in airtight containers or covering with plastic wrap on a platter.
Whoop whoop! I took a month off from the Secret Recipe Club and am so excited to be back with this recipe! My assignment this month was Evelyne’s blog, Cheap Ethnic Eatz. As the title implies,her recipes are from around the world and affordable to make. I nearly made her beautiful Peach Salsa since I’ve been on a salsa kick lately, but in the end, this beautiful cake won out. When I read the titles of the recipes I was considering to my husband, including Strawberry Puff Pastry Pizza, Lazy Chocolate Raspberry Cake, Self-Saucing Chocolate Pudding, Afghan Cardamom Pudding, and Peanut Butter Daifukumochi Balls (apparently I was really craving sweets when searching Evelyne’s archives-big surprise!), he absolutely insisted that I make this one. I aim to please.
Well, thank you very much dear Evelyne, because this cake surely did please us both. I’m almost embarrassed to admit how much. Between the two of us, it only took us two days to polish off the entire cake. While we do enjoy our sweets, this was ridiculous even for us, and a testament to how wonderful (and addictive) the cake is.
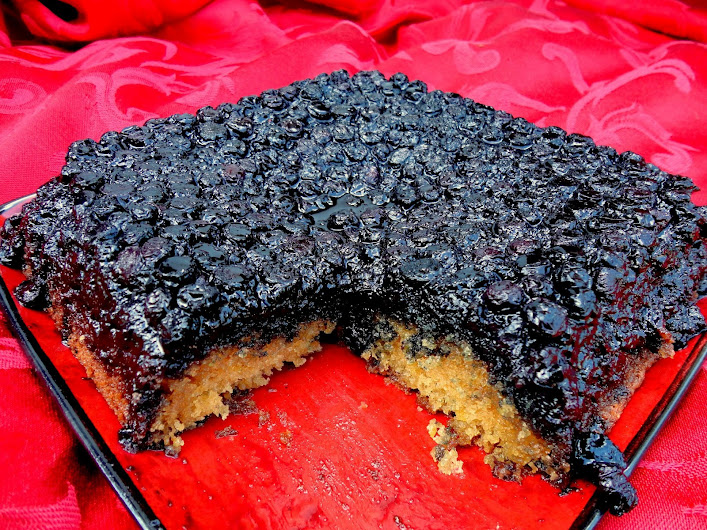
I did change it up by adding lemon flavor to the cake, because I really enjoy the combination of lemon and blueberry flavors . It was amazeballs, as my friend, Jennifer, would say. I think I also changed the texture of the cake as well by switching the baking powder for baking soda (the only science I’m any good at is baking science, and I knew the acid in the lemon juice was a perfect catalyst for baking soda, so I pulled the old switcharoo on my leaveners) and the cake was crazy moist to the nth degree.
I would probably try making this cake with the baking powder next time because although I did love the moist texture, with the juicy, dripping blueberry topping it wasn’t really necessary. Another benefit of using the baking powder (which is baking soda with an acid mixed in (cream of tartar) to activate it) is that it wouldn’t take away the tartness from the lemon juice like the baking soda does (baking soda reacts with acids, which causes the bubbles and rising, and it neutralizes the acid in the process), so it might balance the sweet topping a little better. But unless you hate sweet sweets, you will love this cake as is. You know we did!
1 lemon
1/4 cup melted butter
1/2 cup brown sugar
1 (12 oz) bag frozen blueberries OR 2 cups fresh blueberries
2/3 cup milk
1 1/3 cups all-purpose flour
1 teaspoon baking soda
1/4 teaspoon salt
1/2 cup butter, softened
3/4 cup granulated sugar
1 egg
1 teaspoon vanilla
Preheat oven to 350 degrees. Zest the lemon and set the zest aside. Squeeze the lemon and set the juice aside. In an 8 or 9 inch square cake pan, combine melted butter and brown sugar; spread evenly on bottom. Spread blueberries evenly over top. Sprinkle with 1 tablespoon of the lemon juice. If you are using frozen blueberries, put the dish in the oven for 10 minutes or until the blueberries are mostly defrosted. Remove from oven and allow to cool while preparing the cake batter. *It is OK if the dish is still warm when you add the batter.
Pour the milk into a 1-cup glass measure. Add enough of the leftover lemon juice to equal ¾ cups liquid. If you don’t have enough lemon juice, just add a bit more milk. Set this aside to curdle while you prepare the batter.
Whisk together flour, baking soda, and salt in a small mixing bowl. In a separate larger mixing bowl, cream the butter and sugar together with an electric mixer, beating for about five minutes, until light and fluffy. Beat in egg and vanilla. Add dry ingredients alternately with milk to creamed mixture, beating well after each addition, beginning and ending with the flour mixture (flour, milk, flour, milk, flour). Spread batter evenly over blueberry layer.
Bake for 45 to 50 minutes or until toothpick inserted in center comes out clean. Let cool 10 minutes in pan, then turn out on to a large flat plate. Serve warm or at room temperature.
P.S. Happy 12th anniversary, sweetheart! I’m testing him to see if he’ll read this without me telling him he should. :) And happy birthday to my itty bitty sweetie who turns eight today!
Wheee! We’re back and boy did we have a blast in good old Abilene. I think my blues have been cured by some good old Kansas sunshine and fun times. We did so many things I don’t know if I can even blog about it because it would either be one long blog, or a million short ones, but I’ll see what I can do later on.
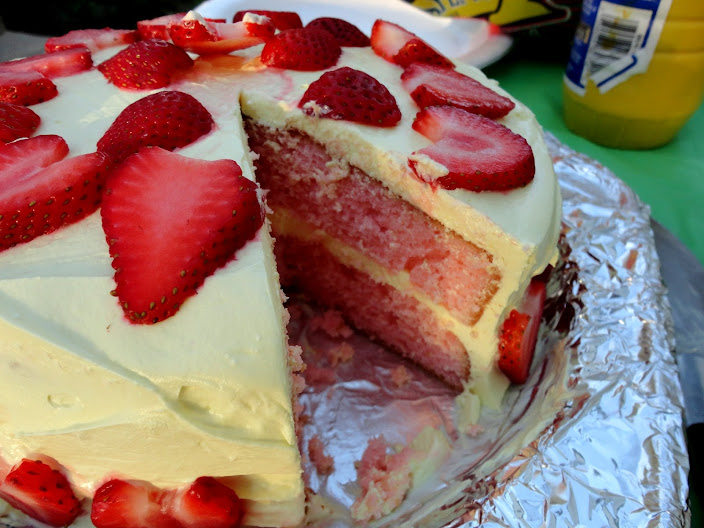
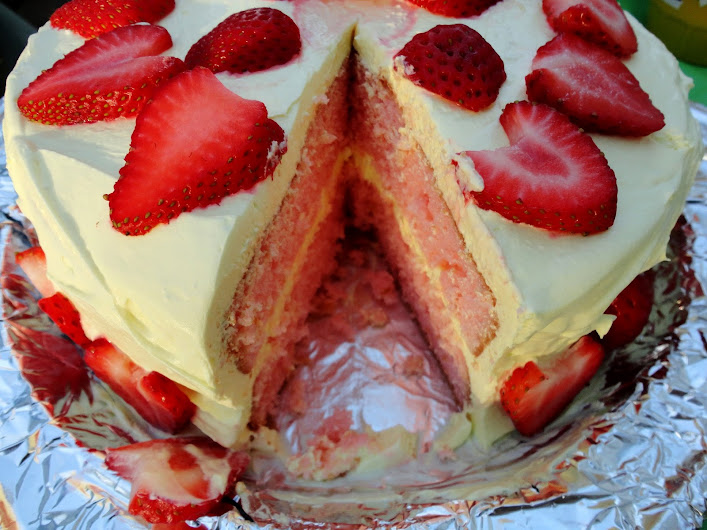
While we were there, we had a cookout with the whole family and I surprised my father-in-law, Al, with an early birthday cake since we were leaving the day before his actual birthday. Since I was making it in a kitchen that wasn’t my own, and it was hot, I wanted it to be super easy, and cool and refreshing. This one fit the bill since it’s made with convenience products and is refrigerated and served cold. Plus, there’s no butter in the frosting so maybe it’s even a little lighter than my usual decadent cakes. Perfect for summer. Except for that whole turning on the oven thing, but I baked it at night so that made the hot kitchen not quite as unbearable.
Jessie’s trying to do a sneak attack on the grill!
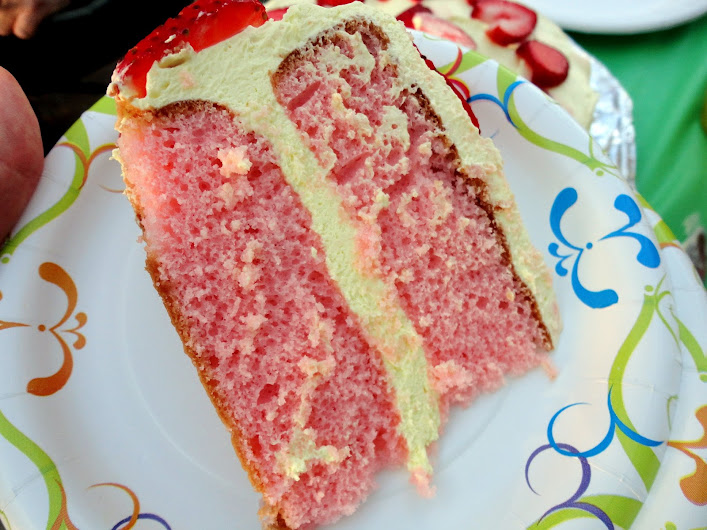
Everyone loved the cake, but I have to be honest and tell you it’s not even close to my favorite cake. The frosting is very tart, like lemonade, and I tend to like my cake super duper sweet. If I made it again, I’d use less of the lemonade mix. But I did like it, and judging by the reviews I got, it’s totally worth sharing. It does have a nice strawberry lemonade flavor going on. Like I said, it’s a great cake for summer because it’s served cold. The frosting doesn’t get hard when cold like all the butter-laden ones I usually make, so that is nice. And don’t forget my water bottle trick to make sure your cake is super moist! I taught it to my Mother-in-law while I was there, using her tap water, and she was so excited about it that she didn’t notice I was using her undrinkable tap water until I was done. So yeah, I tried to poison everyone with not quite crystal-clean well water, but we all survived. lol
(Oh no, I hope Janice isn’t reading this! She’s a reader in Abilene that I got to meet and I brought her a piece of this cake when I stopped by her office. It was so cool to meet her, except for the trying to poison her part. If you’re reading, Janice, I was just joking about the poisonous well water. *ahem* But you might want to get checked for fingernail cancer during your next doctor visit.)
1 (18.25 oz) box strawberry cake mix (plus oil, water and eggs as directed on box)
1 (8oz) package cream cheese, room temperature
1 (0.23 oz) packet of Kool-Aid lemonade
Yellow food coloring gel (as desired for color)
1 (7 oz) container marshmallow creme or fluff
1 (8 oz) container frozen whipped topping, thawed
Fresh strawberries to garnish
Make cake according to box instructions and bake in 2- 8 inch round cake pans as directed. Turn finished cakes out onto cake racks and allow to cool completely.
Once cake is cool, cream together cream cheese, lemonade and yellow food coloring until smooth. Mix in marshmallow creme and then mix in whipped topping until completely smooth. Level the cakes, and place one layer on a platter, cut side up. Spread about a third of the frosting over the top, then place the second cake layer cut side down on top. Spread the remaining frosting over the top and sides. Slice strawberries and place on the top and sides of the cake for decoration. Refrigerate until ready to serve and serve cold, straight from the fridge.
Disclaimer: No humans or animals were harmed during the eating of this cake. I believe the reason they don’t drink their water is because it’s hard water, which isn’t really poisonous.
A closer look at the 7 layer dip. I did it a little different this time, putting the tomato layer on top and mixing some goodies into it (I made the tomato layer from this recipe). I also mixed in a packet of Fiesta Ranch dip mix into the sour cream instead of taco seasoning and it was even better than the original! I’ve been looking for that dip mix ever since my girl Jaci made a dip with us while we were visiting last year because it is just wonderful and miracle of miracles, I finally found it in Abilene:
I loaded up, so if you’ve never tried this and would like to, just let me know in a comment below, and I’ll draw among the interested parties for a winner of a packet. It’s so good mixed with sour cream!
Maybe you can tell he likes Coke?
Dennis and his nephew, Carson, played catch after dinner.
Look how studly my man is. He’s not much for sports but I think the sporty look is good on him. :)
When I met this boy, he was a toddler. And now he towers 6 inches over me. Kids are great at making adults feel old! lol
Love country sunsets! Such a pretty ending to the day.
As you may recall, I’ve been working on perfecting my banana bread recipe for next year’s state fair competition. I’m on a personal mission to beat a certain lady whose banana bread has won first place for the last three years I’ve participated. I’m not sure if it’s even possible, because she seems to have magical baking powers, judging by how many ribbons she wins each year. But if I lose this year, it’s not because I didn’t try.
So far I’ve made seven recipes and have frozen a piece from each loaf so that by the time I feel that I’ve got a winner, I can do a taste-test comparison to make sure. My husband and his co-workers (they’re my judges) all told me to stop after loaf number three, and they keep telling me that none of the loaves since that one have been as good, but I have to make sure I’ve really got the BEST one. So I soldier on.
So what does my banana bread quest have to do with this coffee cake? Well, it was actually inspired by the most recent banana bread I made. The bread version did not turn out as I had hoped, but this cake is utterly perfect. The winning loaf of banana bread was one that I added cardamom to on a whim, and I figured that adding all the chai spices to it would make it even better. I keep trying it in different ways, the latest with a chai streusel, but for some reason it’s never as good as the cardamom alone. It’s giving me a twitch. I really don’t want to submit a bread called “cardamom banana bread,” when I could submit “chai banana bread,” which sounds so much cooler!
Anyway, after making the chai streusel banana bread, which was good but not knock-your-socks-off, I still had three over-ripe bananas waiting to be used and I was just tired of reinventing my banana bread. I had to do something else with those bananas. I happened to get an email notification for a contest for new Amish Friendship Bread recipes at the same time my bananas were screaming to be used, so I defrosted one of the Amish Friendship Bread starters I saved months ago, and created this coffee cake with it. I’m really hoping to get that $75 Amazon gift card with this one! :)
This is one delicious coffee cake, people. I really love the flavor of the banana cake and the vanilla chai streusel with the crunchy toasted walnuts. Match made in heaven. This is my favorite Amish Friendship Bread recipe I’ve made to date!
If you want to make this but don’t have any Amish Friendship Bread Starter, click here to learn how to make the starter, or if you’re local, I might be able to hook you up if you request it quick enough–I still have one to spare.
Amish Friendship Banana Coffee Cake with Vanilla Chai Streusel
Vanilla Chai Streusel:
¼ cup brown sugar
¼ cup granulated sugar
1 vanilla bean, split & seeds scraped out
1 ½ teaspoons cinnamon
1 ½ teaspoons cardamom
¼ teaspoon ginger
¼ teaspoon cloves
¼ teaspoon nutmeg
Pinch of salt
¾ cup toasted walnuts, finely chopped
½ cup unsalted butter, melted
1 cup all-purpose flour
Banana Coffee Cake:
3 large over-ripe bananas
½ cup (1 stick) unsalted butter, melted
3 large eggs
¼ cup sour cream or Greek yogurt
1 cup Amish Friendship Bread Starter
1 teaspoon vanilla extract
2 cups all-purpose flour
1 cup granulated sugar
1 ½ teaspoons baking powder
½ teaspoon baking soda
½ teaspoon salt
Preheat oven to 350F. Generously butter a 13”x9” cake pan and set aside.
To make the chai streusel, combine the sugars, vanilla bean seeds, cinnamon, cardamom, ginger, cloves, nutmeg, and salt in a small mixing bowl; stirring with a fork until well combined. Stir in the walnuts, then pour the butter over the top and mix until combined. Add the flour and mix until incorporated. Set aside.
To make the coffee cake, mash the bananas in a large mixing bowl. Whisk in the melted butter until completely incorporated. Add the eggs and whisk them in until fully incorporated. Add the sour cream and whisk until well combined, then whisk in the starter and vanilla until combined. Add the remaining ingredients and beat until well mixed.
Pour batter into the prepared cake pan and sprinkle the streusel over the top. Bake for 40 minutes or until a tester inserted in the center comes out clean. Cool completely before serving or covering with plastic wrap. Serve at room temperature.
This seems to be happening to me more and more, the longer I blog: I either create a recipe out of my own head, or I see a blog with a recipe and I immediately think of a new direction I want to take it in. I type out the recipe, including the measurements and steps. Then, after I’ve made my new and improved recipe, I discover that someone else already did it. Kinda takes the wind out of my sails!
This has happened twice just this week. I typed up a recipe for banana bread (I always type up baking recipes before I actually go to town, since they require more precision than just throwing things in a pot and tasting as you go along) that I thought was pretty stinking original, but before I’d even made it, I found that same recipe, almost exactly with the same ingredients and measurements except for just a few things, on Steak & Potato Kinda Girl’s blog (it was a Joy the Baker recipe, though, from her new cookbook). I kinda had a freak-out and changed my recipe just so I wouldn’t be a copycat, even if I did come up with it on my own. (I really want the banana bread recipe I win with at the fair this year *knock on wood* to be my own creation. I’m in the process of creating the BEST recipe (or discovering, if I must) so I can beat my baking nemesis–more about that here.)
Then I decided I was going to make some Guiness chocolate cupcakes for St. Patrick’s Day and came up with my own decadent recipe, using this cake recipe, and using inspiration from this cake to add in some caramel to compliment the Guiness, chocolate, & Bailey’s Irish Cream flavors. Then I happened to stumble upon Annie’s Eats, who has a spookily similar recipe. She’s got the Guinness cupcake, the Bailey’s ganache filling (sans caramel), and Bailey’s Irish Cream frosting.
How is this even possible? Is this some weird phenomenon among food bloggers that we’ve read so many of each others blogs that we start thinking the same? Or am I just a freak of nature? (Don’t answer that.) Well, whatever it is, I’m considering myself flattered to have come up with similar recipes as the likes of Joy & Annie, who I respect greatly. Who knows, maybe I’m becoming one of these “great minds” that “think alike.” :)
Well, despite these cupcakes having doppelgangers in who-knows-what corners of the blogosphere, I’m pretty proud of them because, besides the cake recipe, they are my own creation. They are very decadent, as I intended, and are tremendously delicious.
Now, I need to tell you that I absolutely detest beer (except in beer bread, of course), and Guinness is at the top of my hate list *shudder*, but it somehow works in the chocolate cupcakes. Although I would definitely prefer a Guiness-free cupcake, the stout flavor does add depth to the chocolate, making it deeper and more sultry, with a slightly bitter edge. The rich caramel ganache is thick and sweet, and the frosting is like a fluffy silken dream-both elements a perfectly sweet compliment to the dark chocolate cake, and in my opinion, absolutely required to balance the cupcake. You get quite a heady feeling when taking a bite of these–although low in alcohol*, they are very “boozy” tasting (at least to my virgin palate), but not in an offensive way. Still, I wouldn’t recommend you try serving these to your toddler.
*A last note to those worried about the alcohol content. It bakes off from the cupcakes, leaving only the flavor behind, and the amount in the filling and frosting is not much more than you’d get from using vanilla. So never fear, you will not get intoxicated from eating one of these, though I still consider them to be an adult treat. To nix the alcohol completely, I believe you could use Irish Cream coffee creamer in place of the real Irish Cream in this recipe. I hope you enjoy!
Note: I didn’t edit my photos, but this one is pretty washed out so I did try to darken it, but just couldn’t capture the true color so I apologize it does not represent the cupcakes accurately. The cake is much darker than this. The other photos are pretty spot-on, even without editing.
Guiness Chocolate Cupcakes:
1 ½ sticks unsalted butter (cold is fine)
¾ cup unsweetened cocoa
1 cup Guinness Extra Stout (cold is fine)
1 tablespoon vanilla extract
1 ½ cups granulated sugar
1 ¼ cups all-purpose flour
1 teaspoon baking soda
½ teaspoon salt
2 eggs
Bailey’s Chocolate-Caramel Filling:
½ cup semisweet chocolate chips
¼ cup caramel sauce, plus more for garnish (I used homemade)
1 tablespoon Bailey’s Irish Cream
½ cup powdered sugar, as needed
Preheat oven to 350 degrees. Line two dozen cupcake tins with papers.
In a small saucepan, melt butter and whisk in the cocoa powder until smooth. Stir in the Guinness and vanilla extract and remove from heat.
While the Guinness mixture is cooling, whisk together the sugar, flour, baking soda, and salt. Pour the Guinness mixture onto the dry ingredients, then add the eggs and whisk until the batter is shiny and smooth, about a minute. Divide batter between cupcake tins, filling half full. Bake for 17-20 minutes, or until a tester comes out clean. Remove from pans to cool completely on a wire rack.
Meanwhile, make the filling. Combine the chocolate and caramel sauce in a microwave-safe bowl and heat on 50% power for 1 minute. Stir until the mixture is smooth and glossy, then stir in the Bailey’s Irish Cream. Set aside to cool and thicken.
Lastly, make the buttercream. Beat the butter until creamy, then add the sugar and Bailey’s. Beat on low until mixed, then increase speed to medium and beat until fluffy, light, and silky, about five minutes. Set aside.
Return to the filling, which should be room temperature by now. (If not, refrigerate for five minutes and stir, repeating until cooled completely.) Remove two tablespoons to a small bowl, then stir in powdered sugar ¼ cup at a time into the remaining filling, until the filling is your desired thickness.
Put the filling into a pastry bag fitted with a round tip or a squeeze bottle with a nozzle. Insert the tip into the top of each cupcake and squeeze briefly to fill, stopping once the top starts to rise. Once all are filled, pipe or spread the buttercream on top. Drizzle with the reserved filling and caramel sauce. Serve at room temperature. If making more than two days in advance, you can keep the cupcakes in the refrigerator and remove them two hours prior to serving.
Guess what??? It’s Monday and I have the day off with my husband. I’m SO excited! Before I became permanent and my schedule changed, we had the weekends off together, but now we only get one day off together once every five weeks so it’s cause for celebration. I’m going to relish it.
Speaking of my husband and celebrations, I made these cupcakes for his birthday in December, and everyone at the party fell in love. Mel calls these “over-the-top” and I’d have to agree. It starts with a moist, deep chocolate cupcake. Then there’s the cool & creamy mint frosting. Garnished with peppermint ganache and an Andes mint. But there’s more to these cupcakes than what meets the eye, and my only regret is that I did not have the chance to snap a photo of the inside to show you they are also filled with the same peppermint ganache that is drizzled over the top. Making them, you might say, over the top. :)
These would be great for your St. Patrick’s Day festivities!
1 recipe of your favorite chocolate cake*, baked into 24 cupcakes and cooled completely
Chocolate Mint Filling:
1 cup semisweet chocolate chips
6 tablespoons heavy cream
2 teaspoons peppermint extract
2/3 cup powdered sugar
Mint Buttercream:
1 cup (2 sticks, 16 tablespoons) butter, softened to room temperature
8 ounces cream cheese, softened to room temperature
2 lbs. powdered sugar
1/2 cup heavy cream
1 teaspoons pure vanilla extract
2 teaspoons peppermint extract
Green food coloring
24 Andes mints for garnish
For the mint filling, place the chocolate chips and heavy cream in a small microwave-safe bowl and heat for 1 minute at 50% power. Stir. Repeat the process until the mixture is smooth. Stir in the peppermint extract and powdered sugar, whisking until smooth. Let the mixture cool to room temperature (but don’t let it get too stiff) and pour it into a disposable pastry bag fitted with a small round tip, or a squeeze bottle with a tip.
Insert the decorating tip or tip of the squeeze bottle into the center of the cupcake and press gently to fill the middle of the cupcake with the mint ganache. You can be pretty generous, squeezing until you see the top of the cupcake start to rise a little. Repeat with the remaining cupcakes.
For the frosting, in a large bowl, beat the cream cheese and butter until light and fluffy. Add the powdered sugar and mix until smooth. Add the heavy cream and peppermint and vanilla extracts. Beat until light and fluffy. Add green food coloring until the color you like is achieved.
Frost the cooled, filled cupcakes with frosting (using a large star tip, I used Wilton # 1M) or simply spread the frosting in a large dollop (again, you can be generous-there is plenty) with a butter knife or flat spatula. Garnish with a drizzle of leftover ganache (make sure the ganache is completely cool or it will melt the frosting when you drizzle it on top of the cupcake), and an unwrapped Andes mint. Serve at room temperature.
*I used a devil’s food cake mix, but this is my favorite from-scratch chocolate cake recipe.
I had to share a few more photos from his party, which was actually only half for his birthday (our preacher and his wife had a holiday dinner/birthday party combo). One of the games we played was holding paper plates on top of our heads and trying to draw a picture of Dennis playing his guitar without looking. You have no idea how difficult this is until you try to do it! This is what I ended up with:
However, this is what his best friend, Jack, came up with:
Highly suspicious.
Here’s Dennis and Jack trying to look natural after I urged them to try embracing each other for a photo. I don’t think this is natural for most men, but they pulled it off better than I expected. :)
And here’s Dennis practicing his Kung Fu moves with our preacher’s bat’leth (a Klingon weapon…as in something a Trekkie would totally recognize but me, not so much) shortly before we left (and yes, this thing is super sharp and dangerous! Yet he was swinging it like the pro he is.):
Your Klingon Kung Fu is strong, honey.
***
Reminder: this is the last week to get your postcards out to Beverly! You can get the deets here if you missed the announcement: Operation Postcard for Beverly.